OCI App Connection is a paid feature.If you’re using Infisical Cloud, then it is available under the Enterprise Tier. If you’re self-hosting Infisical,
then you should contact sales@infisical.com to purchase an enterprise license to use it.
Create OCI User
1
Search for 'Domains' and click as shown
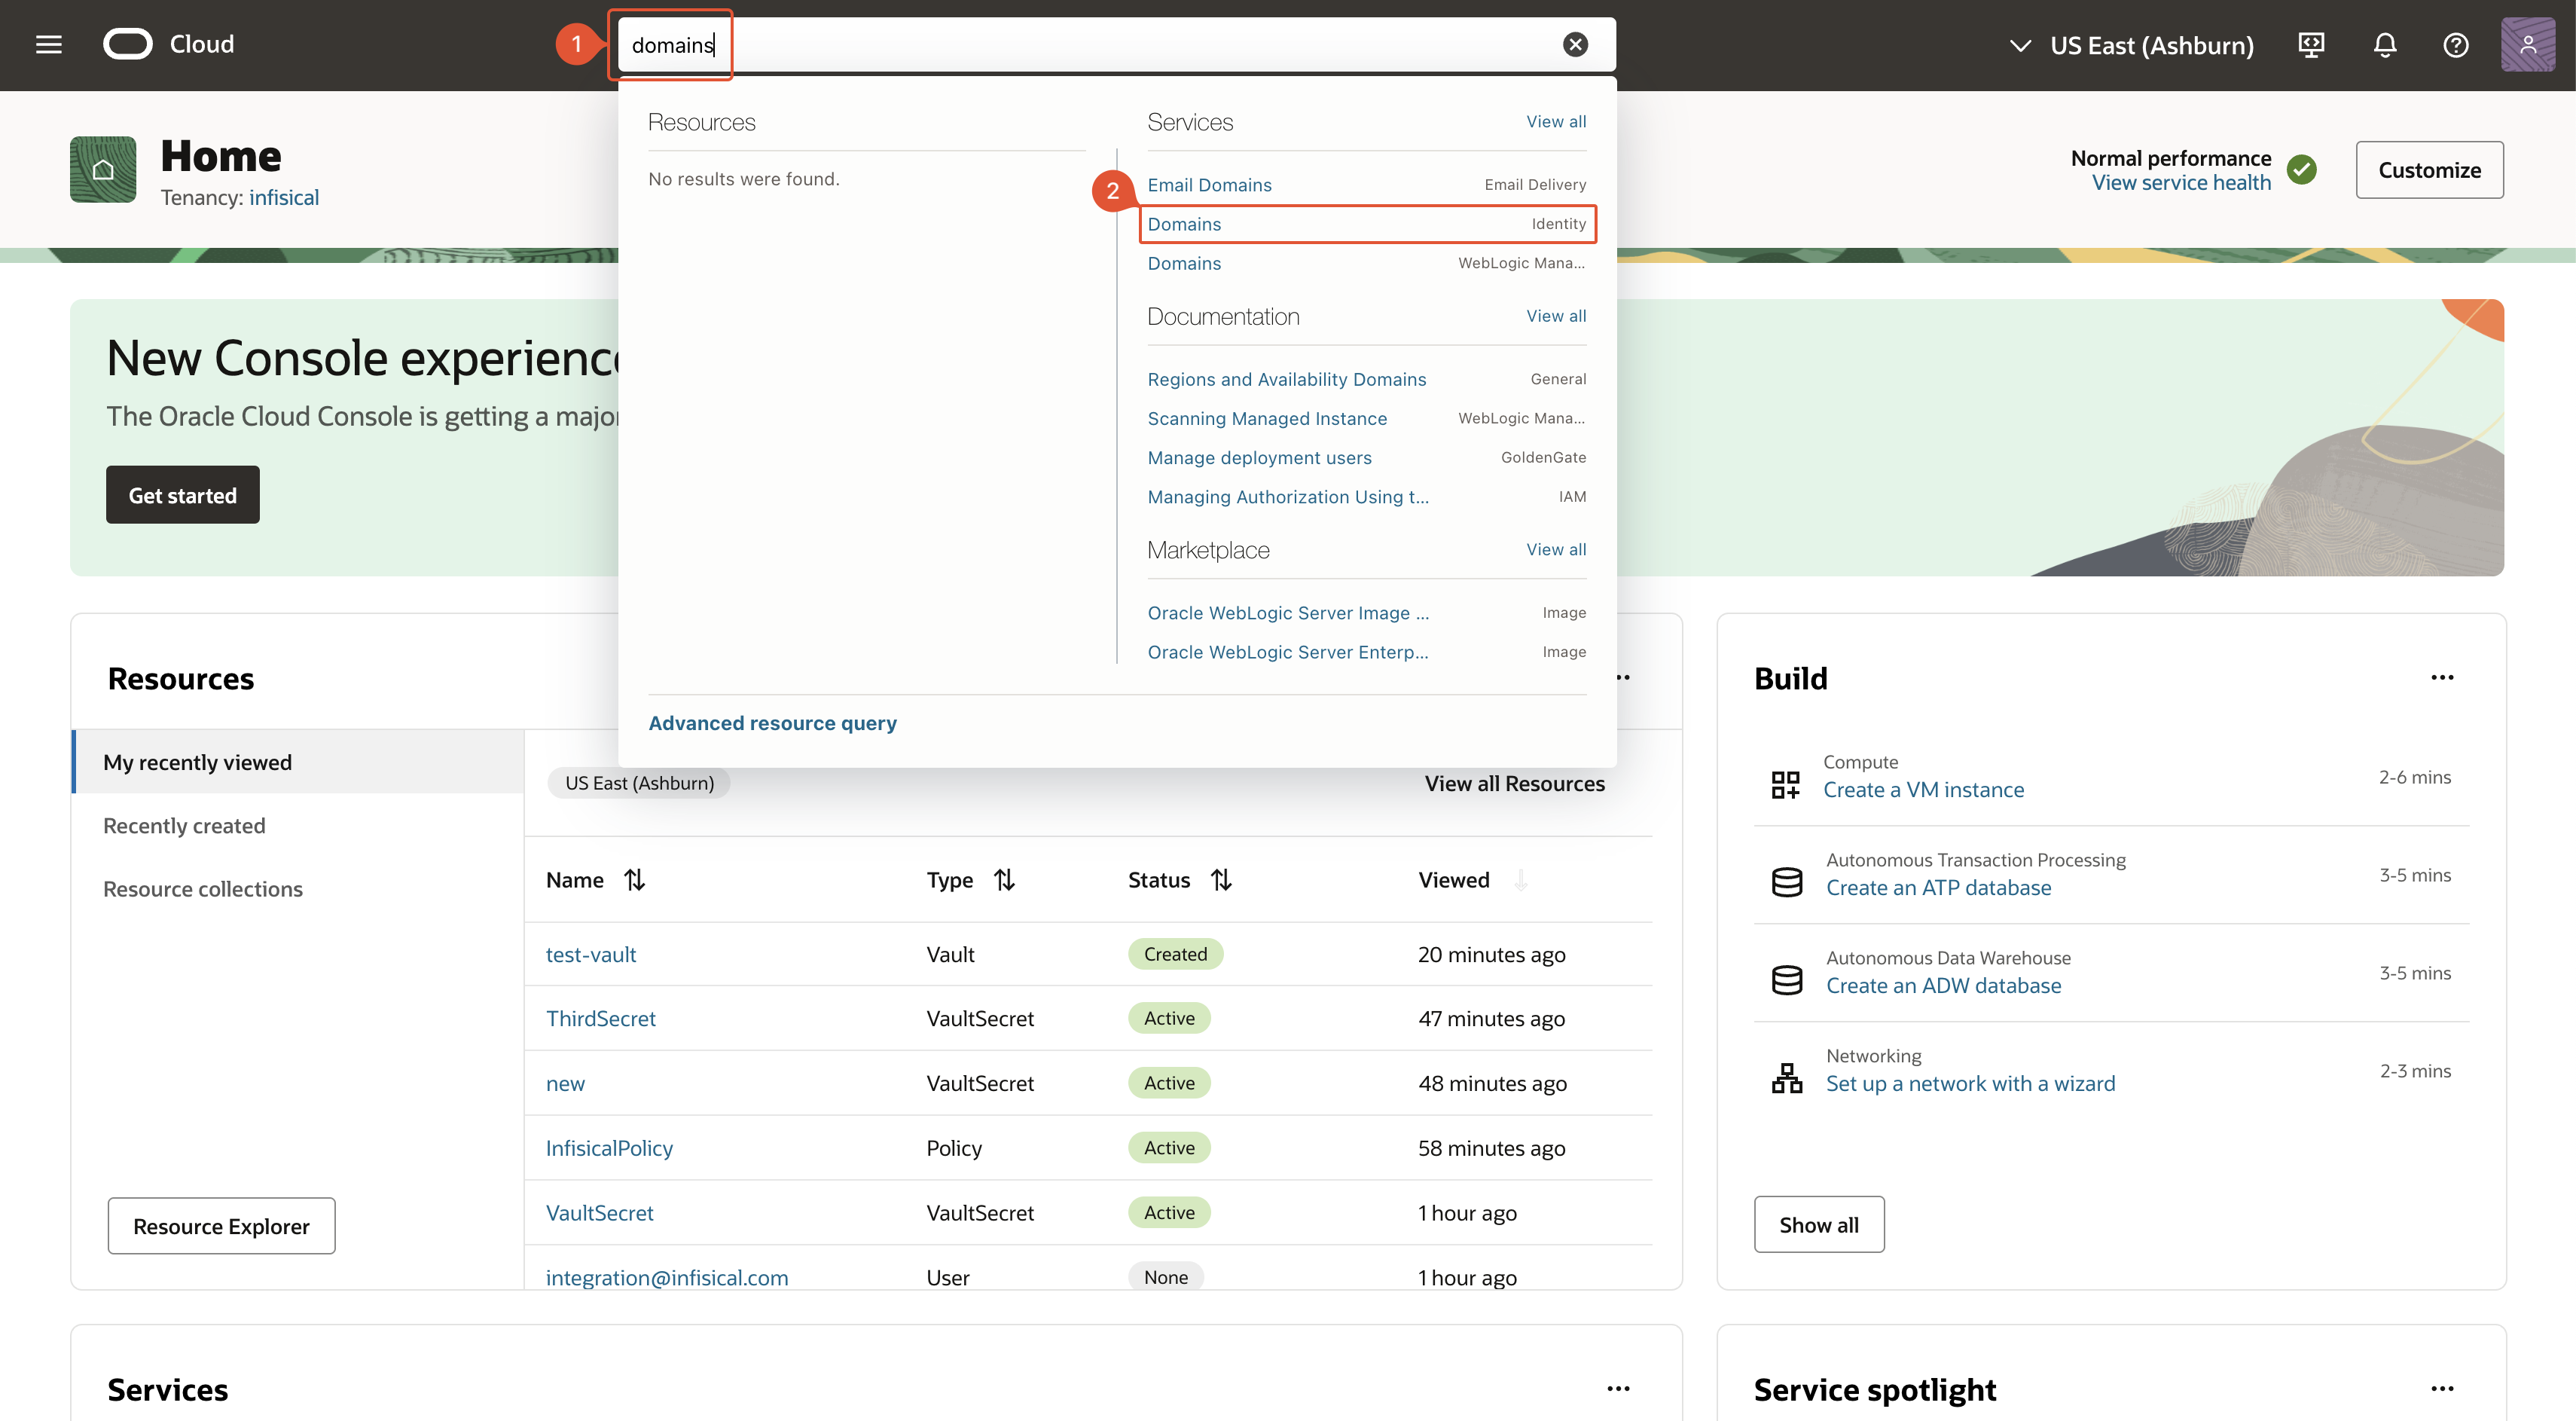
2
Select domain
Select the domain in which you want to create the Infisical user account.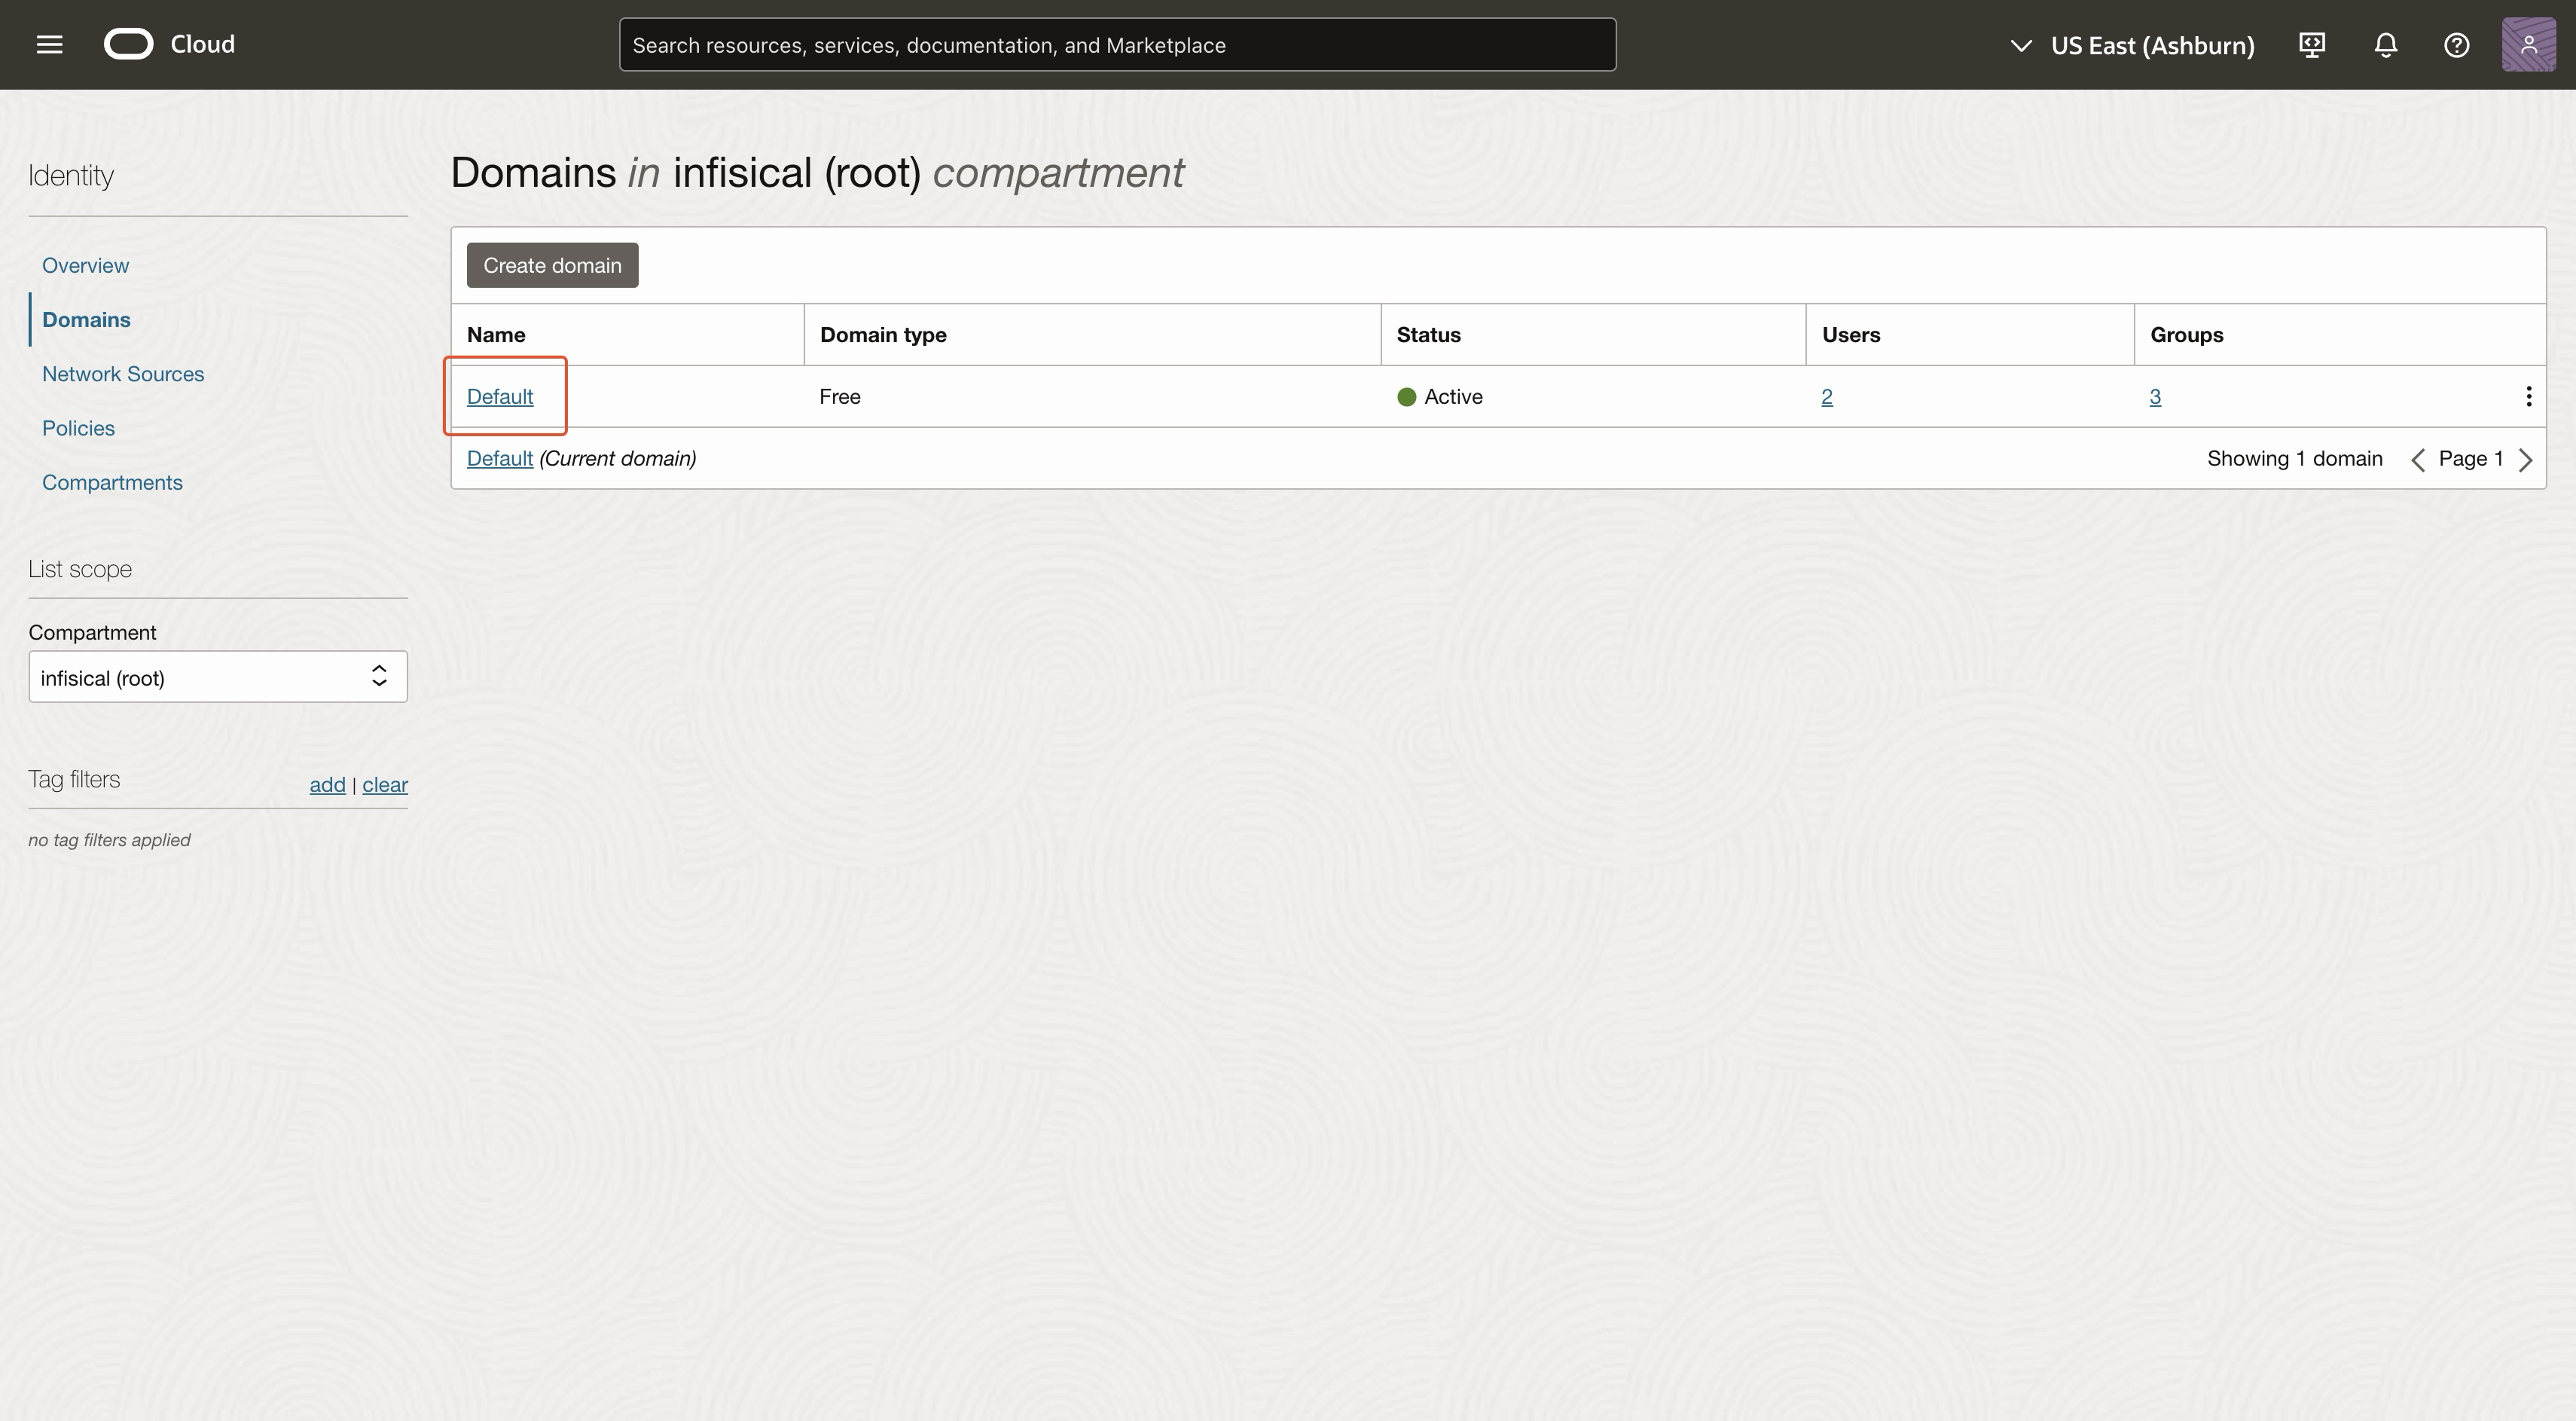
3
Navigate to 'Users'
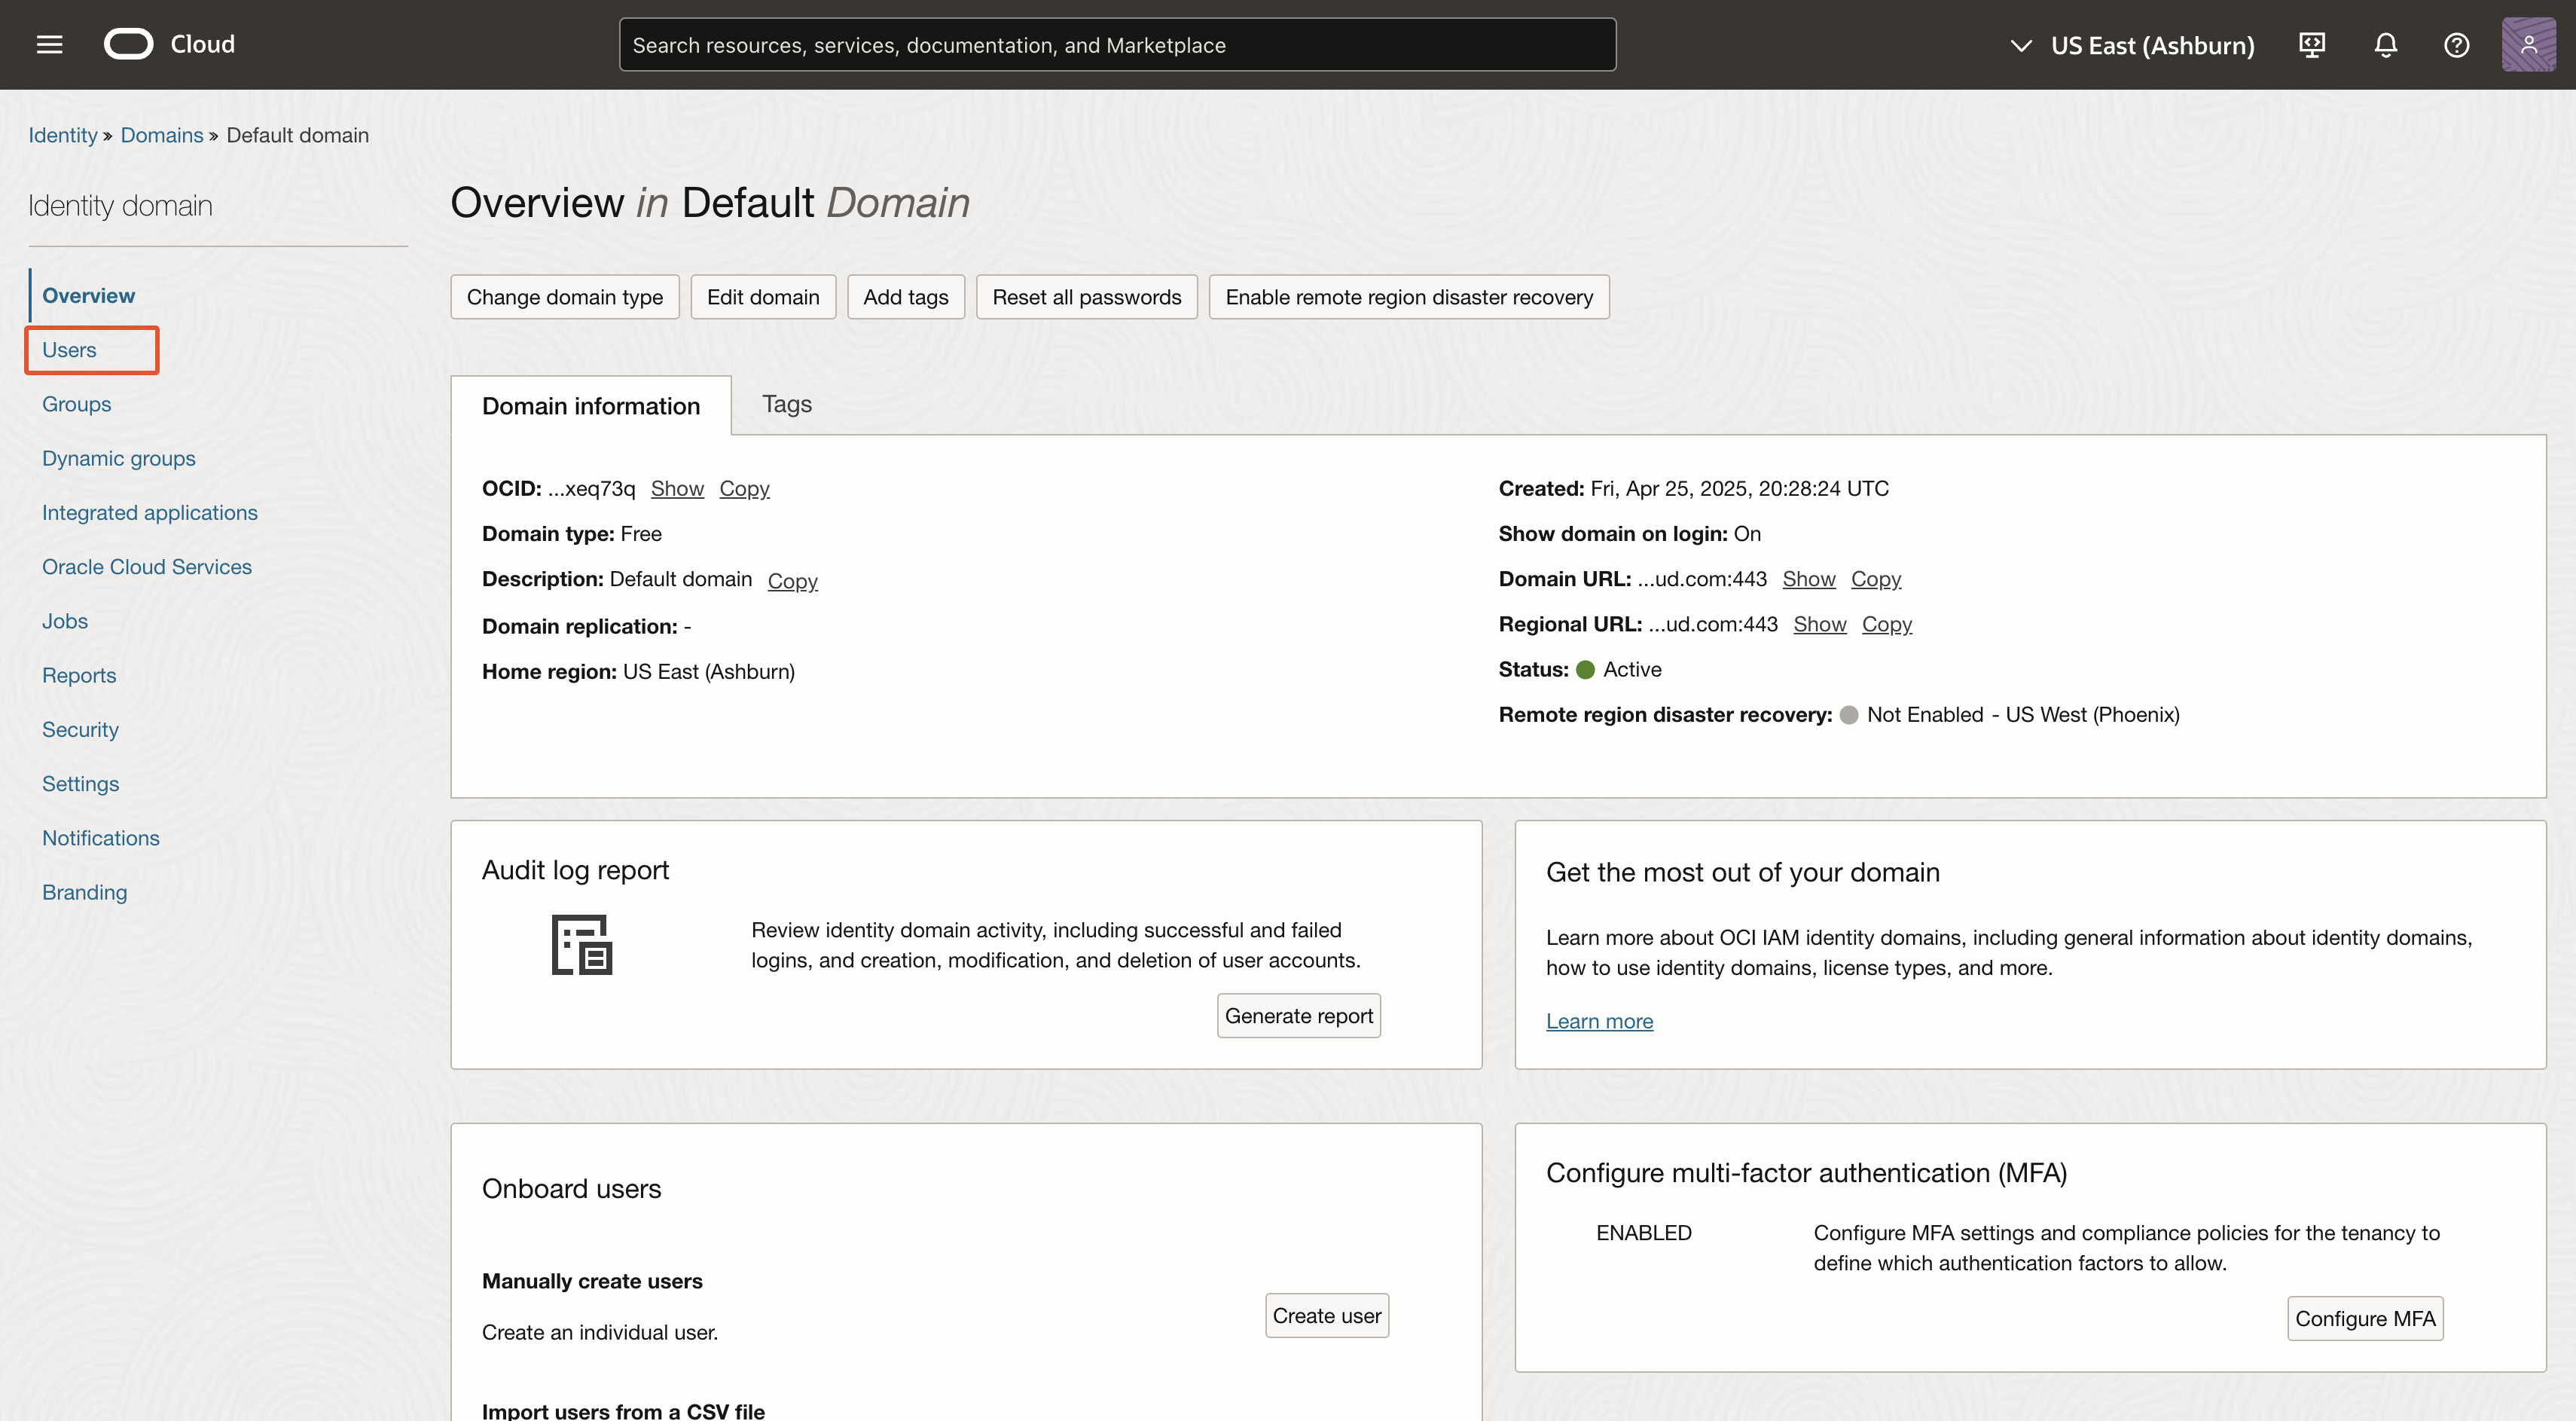
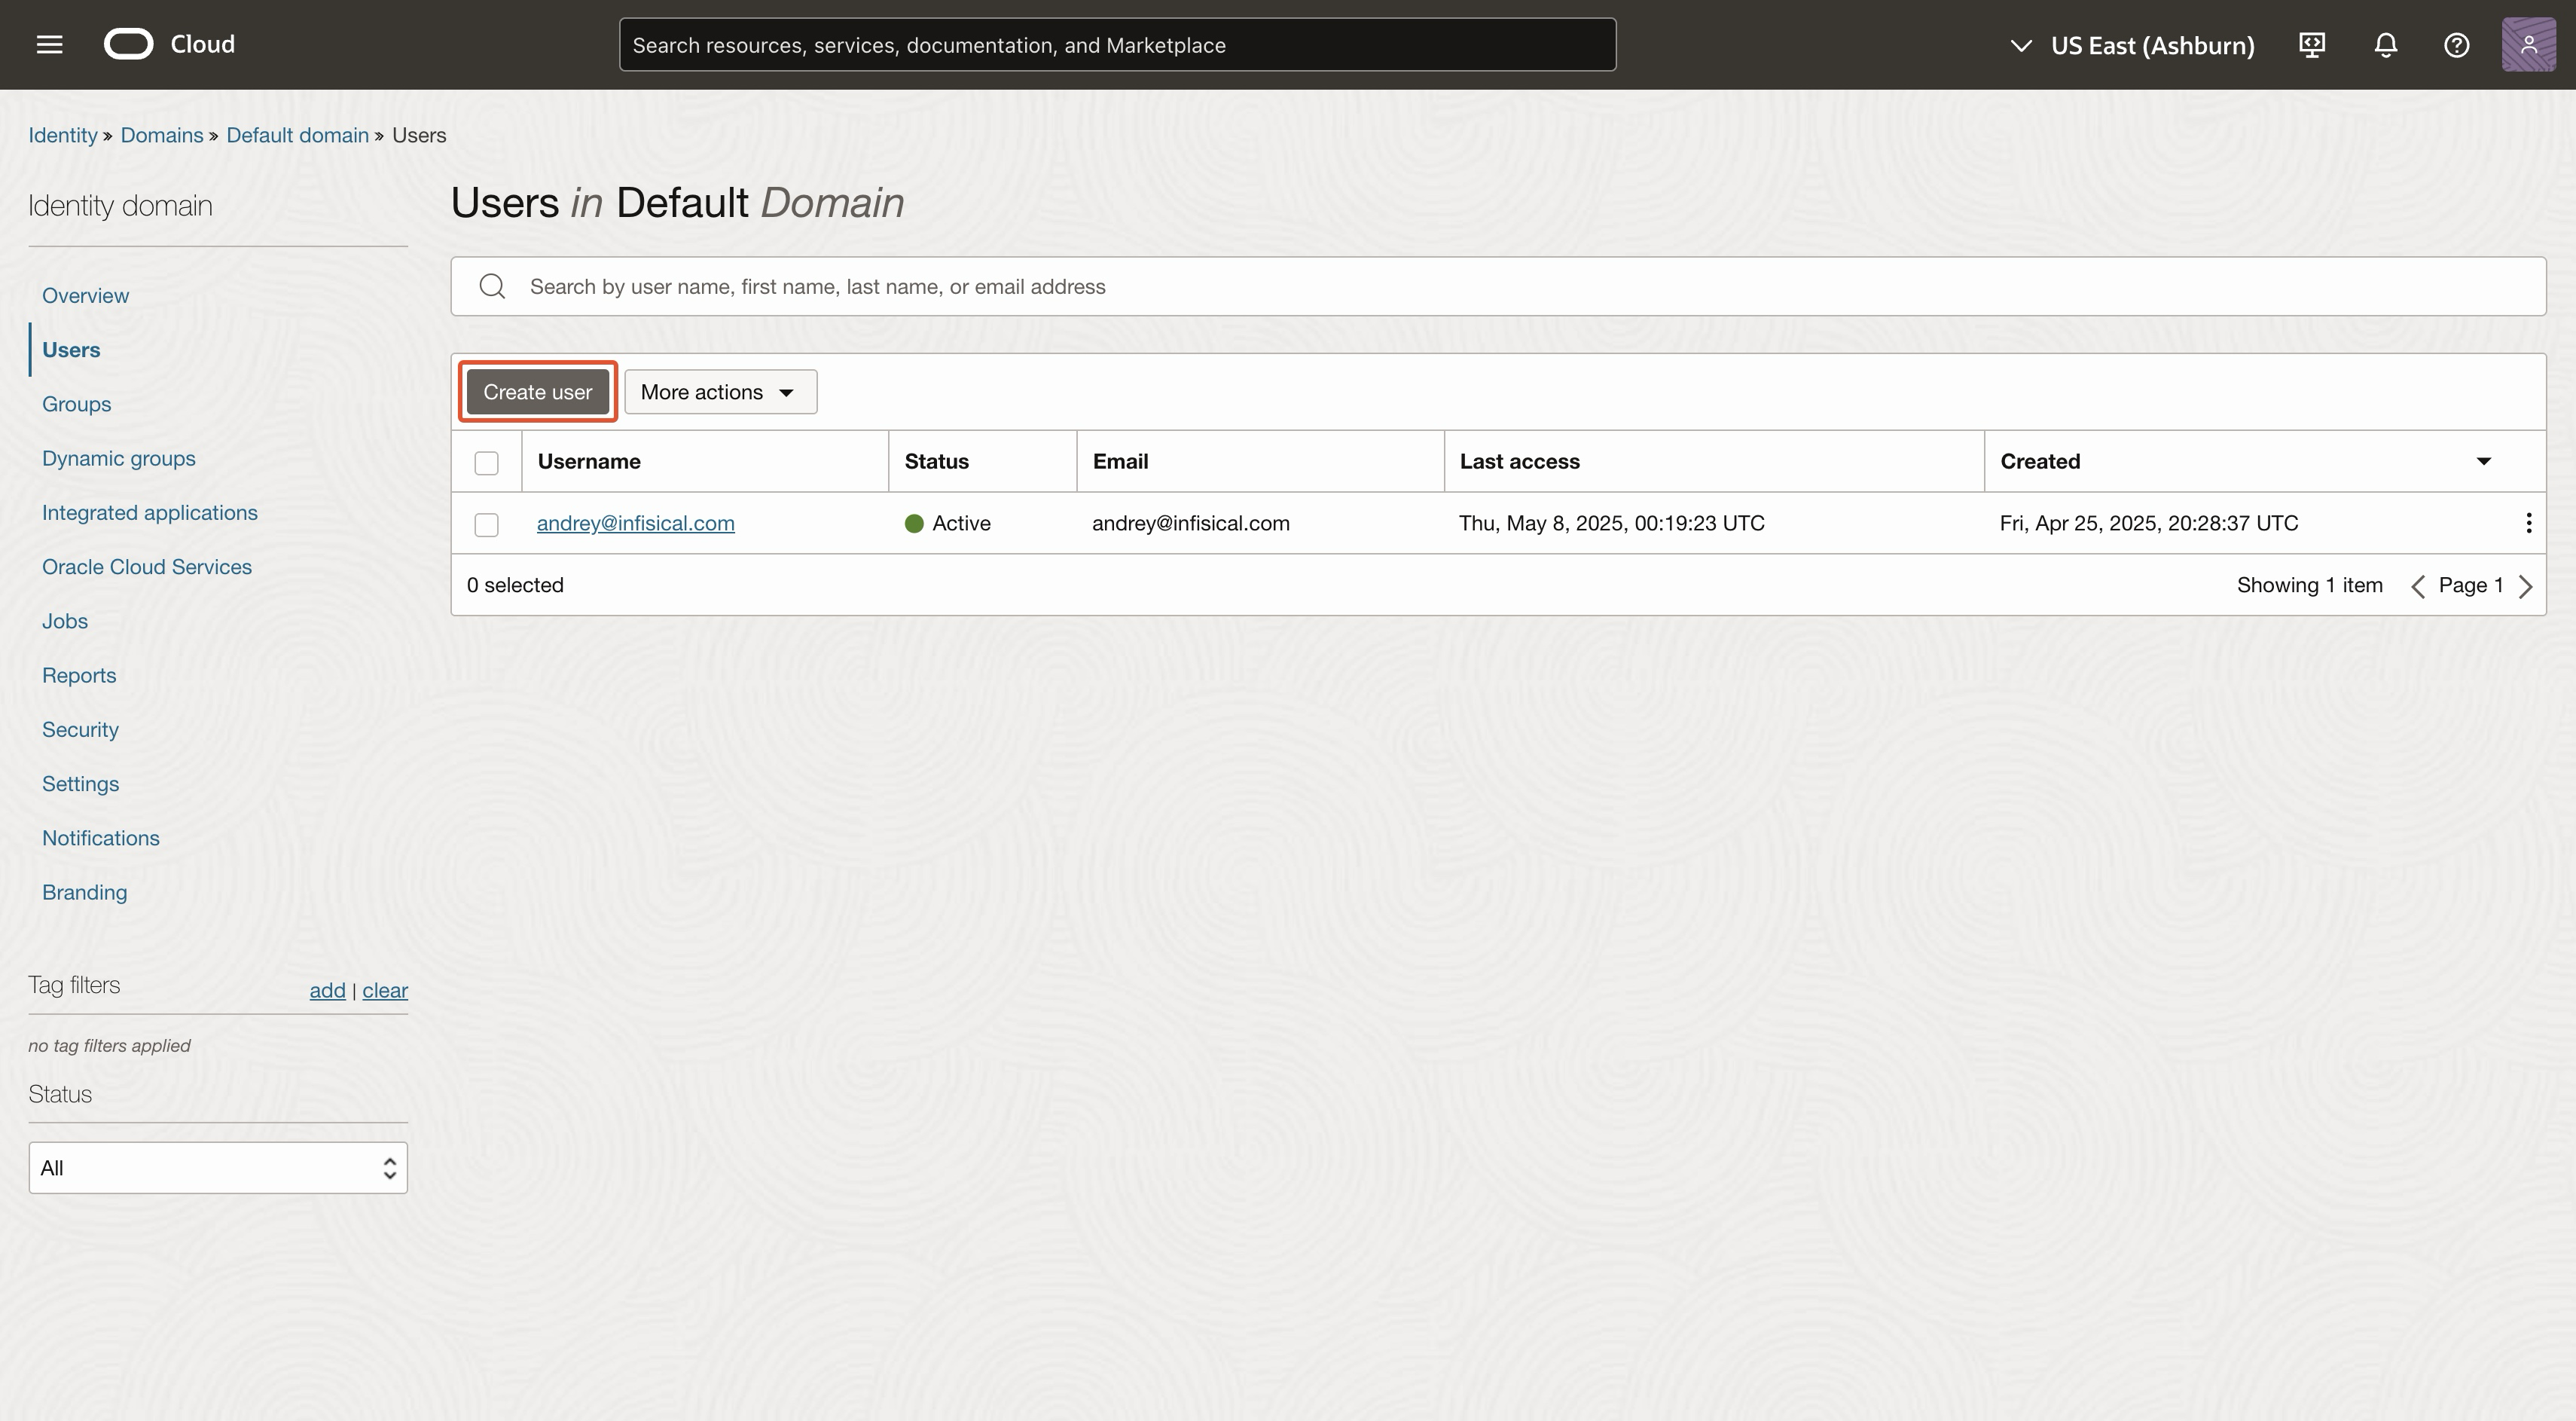
4
Click 'Create user'
5
Create user
The name, email, and username can be anything.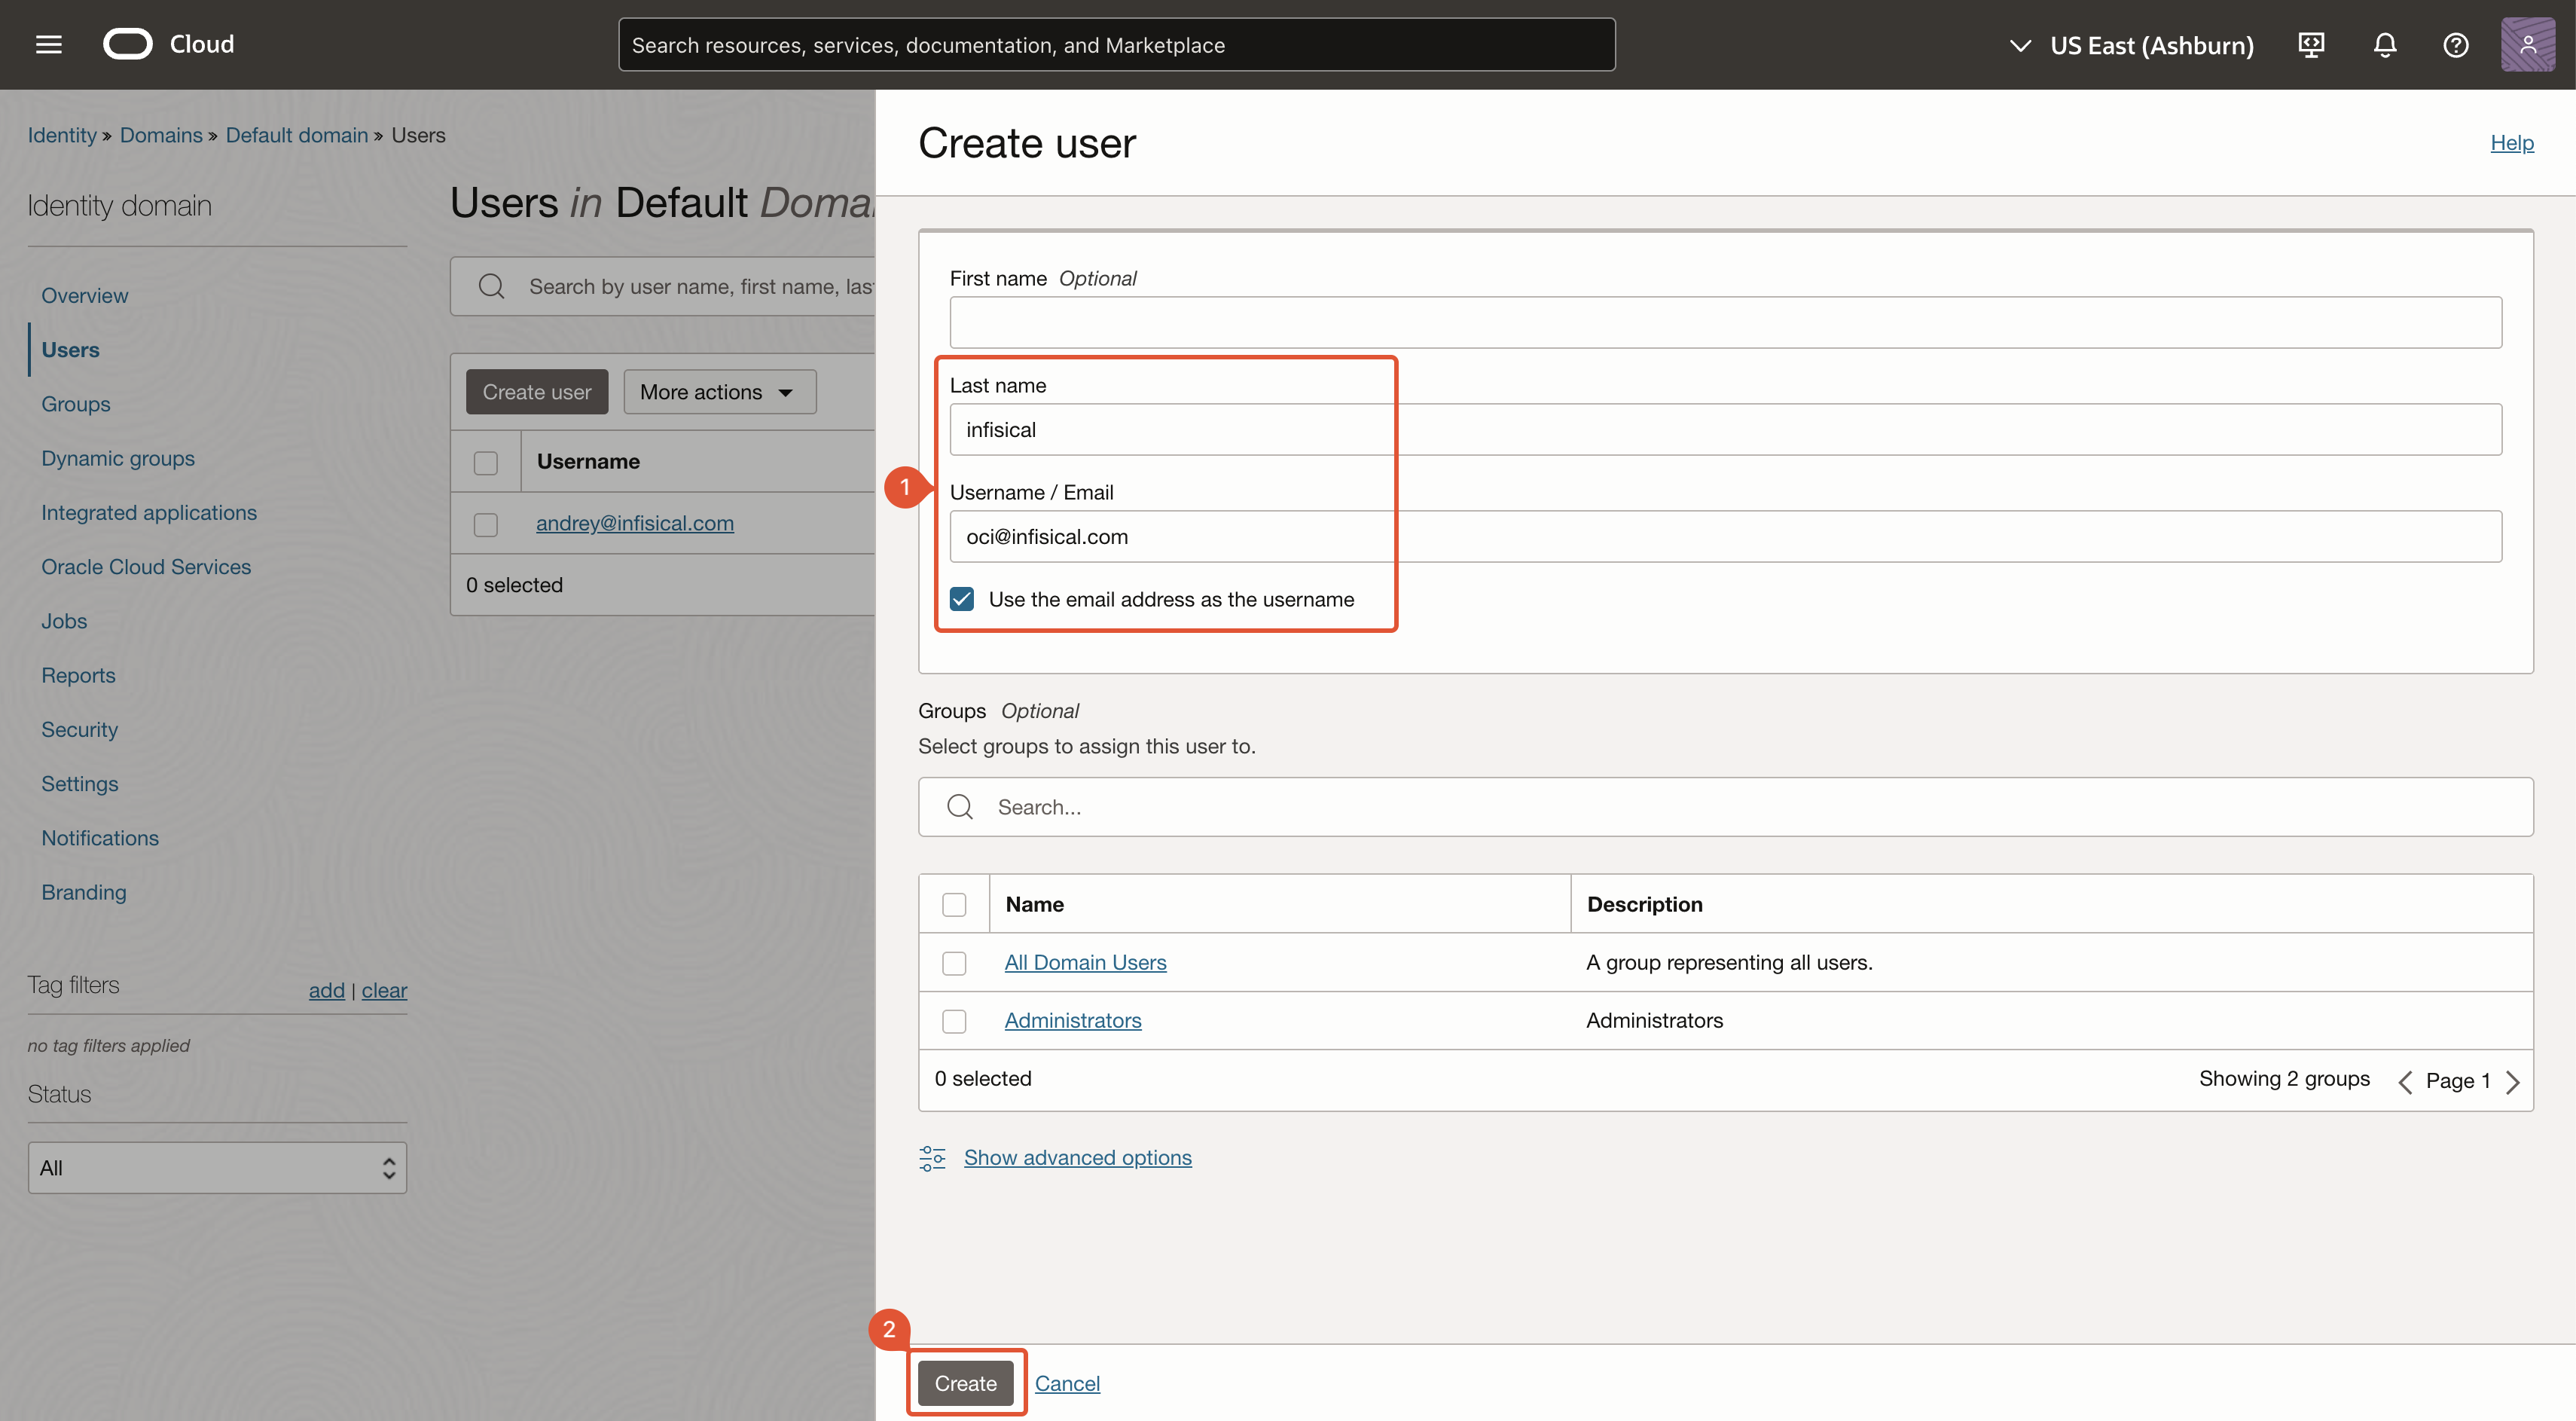
6
Navigate to 'API keys'
After you’ve created a user, you’ll be redirected to the user’s page. Navigate to ‘API keys’.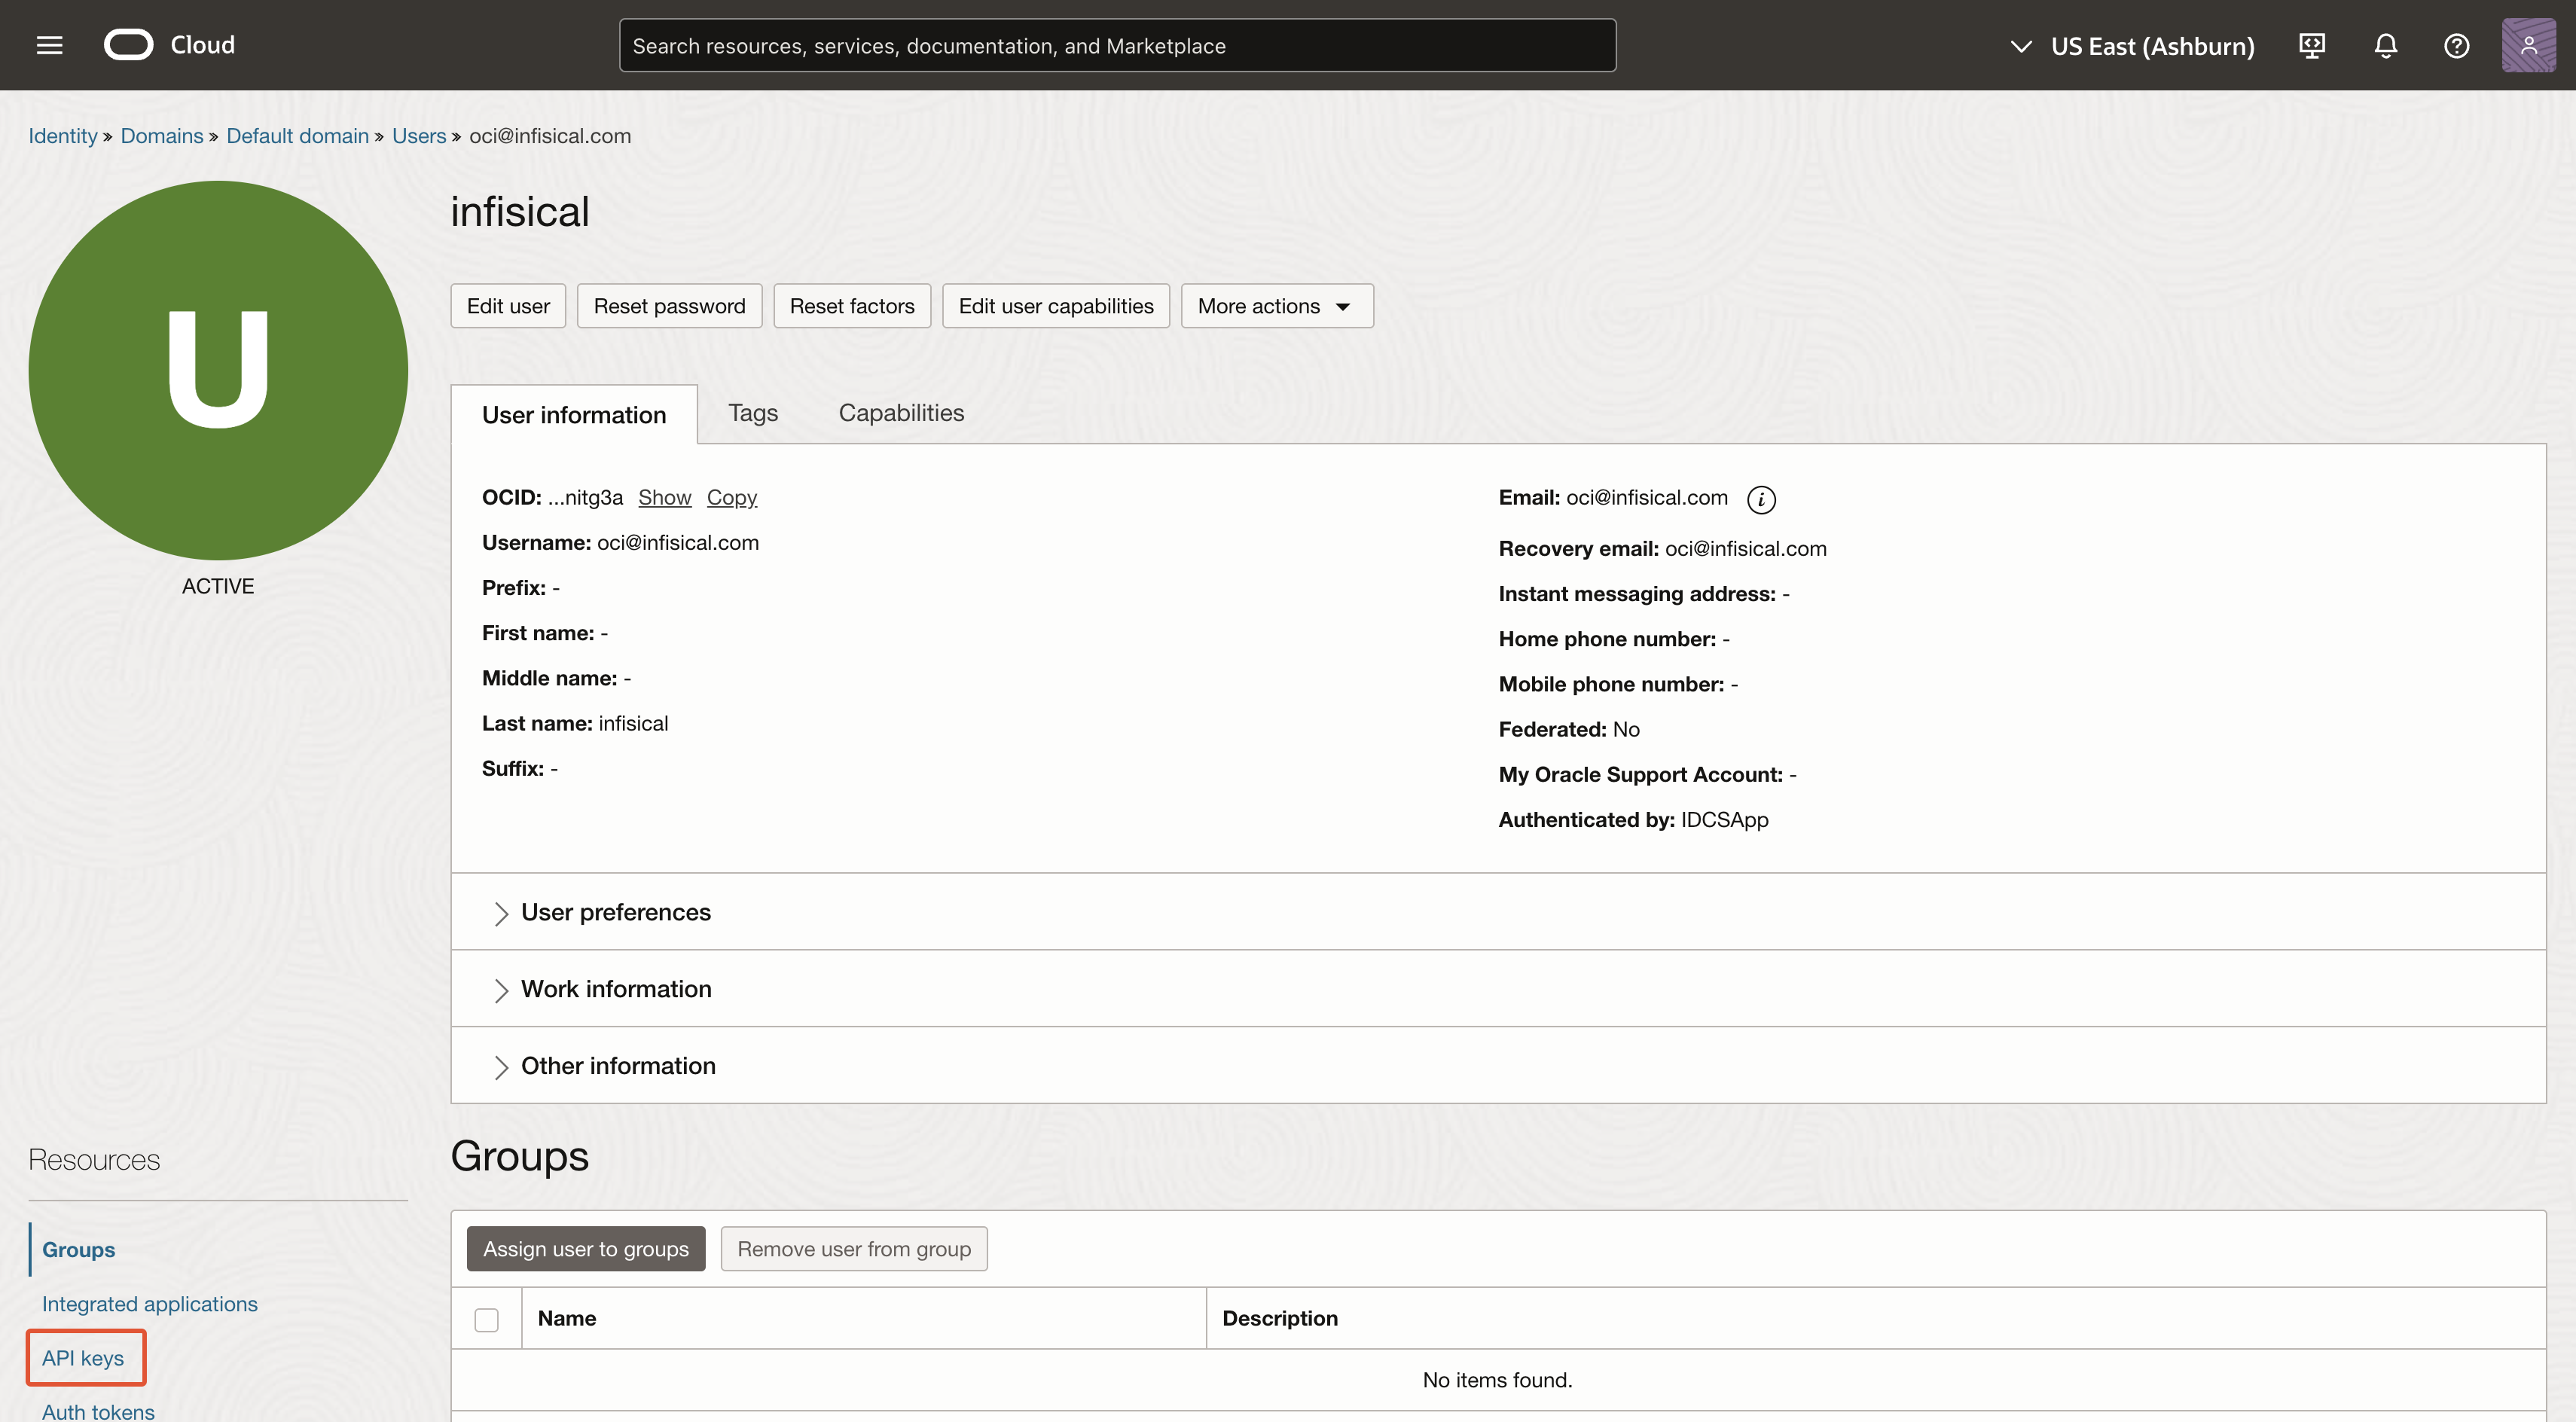
7
Add API key
Click on ‘Add API key’ and then download or import the private key. After you’ve obtained the private key, click ‘Add’.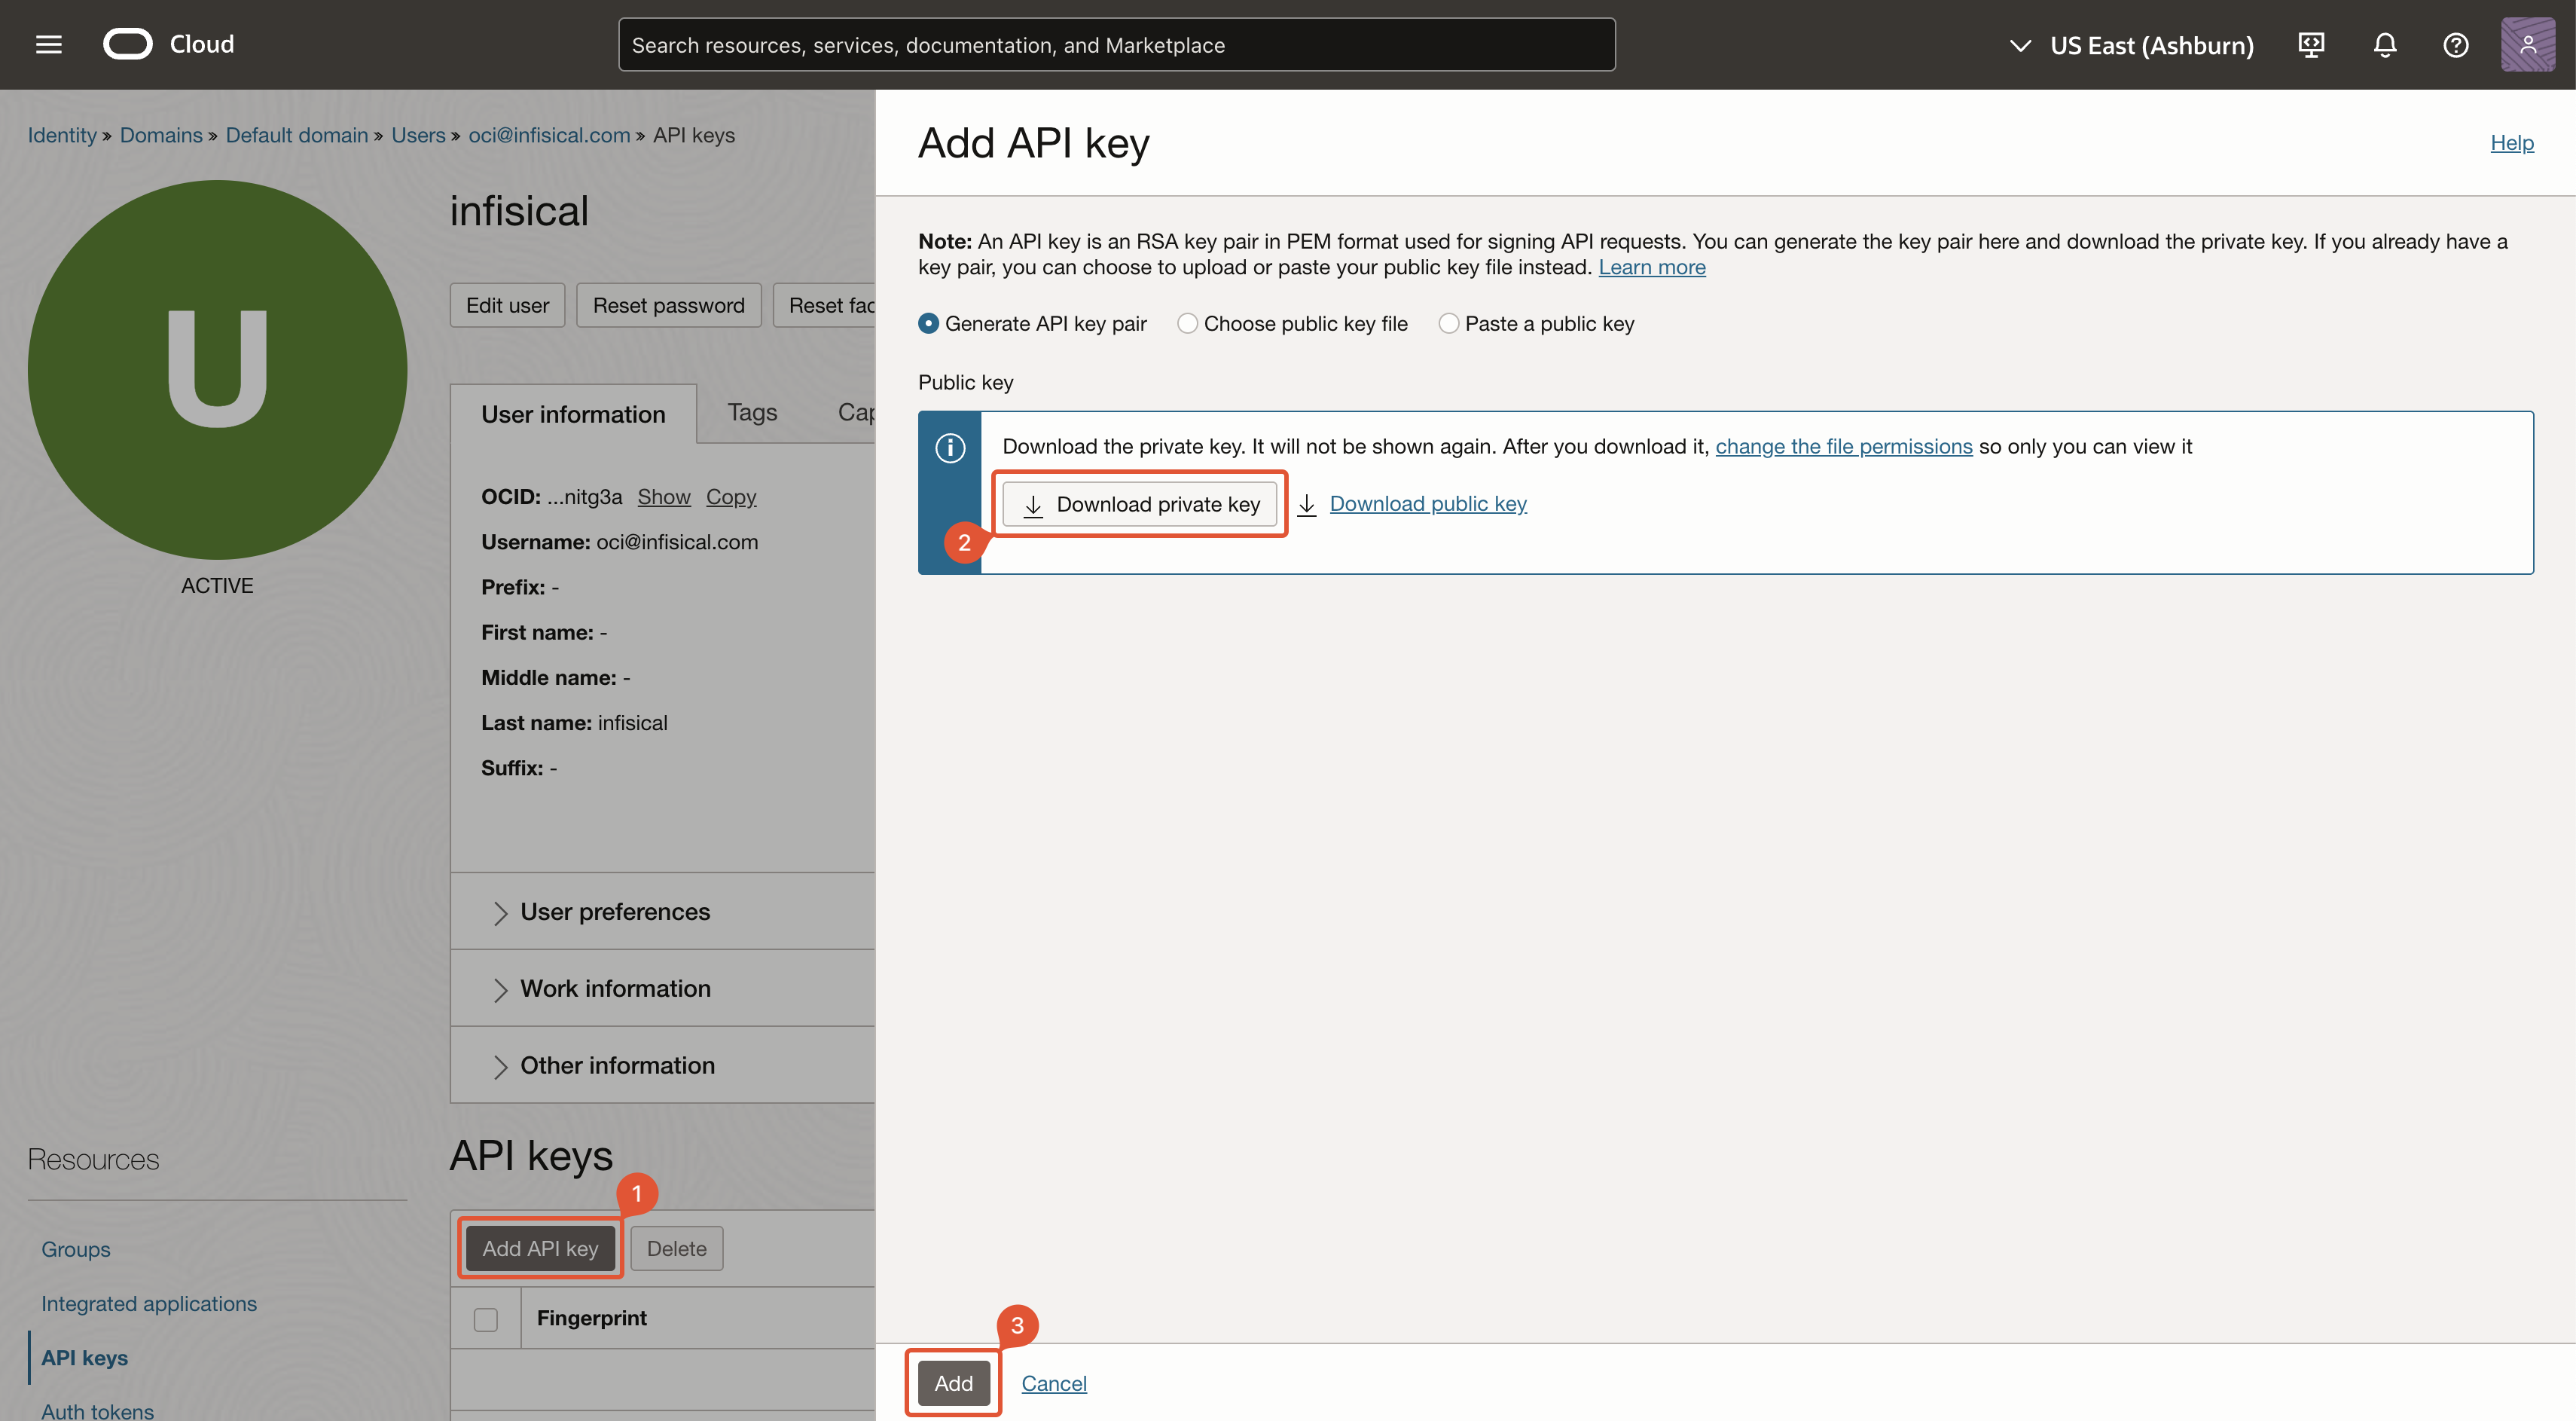
8
Store configuration
After creating the API key, you’ll be shown a modal with relevant information. Save the highlighted values (and the private key) for later steps.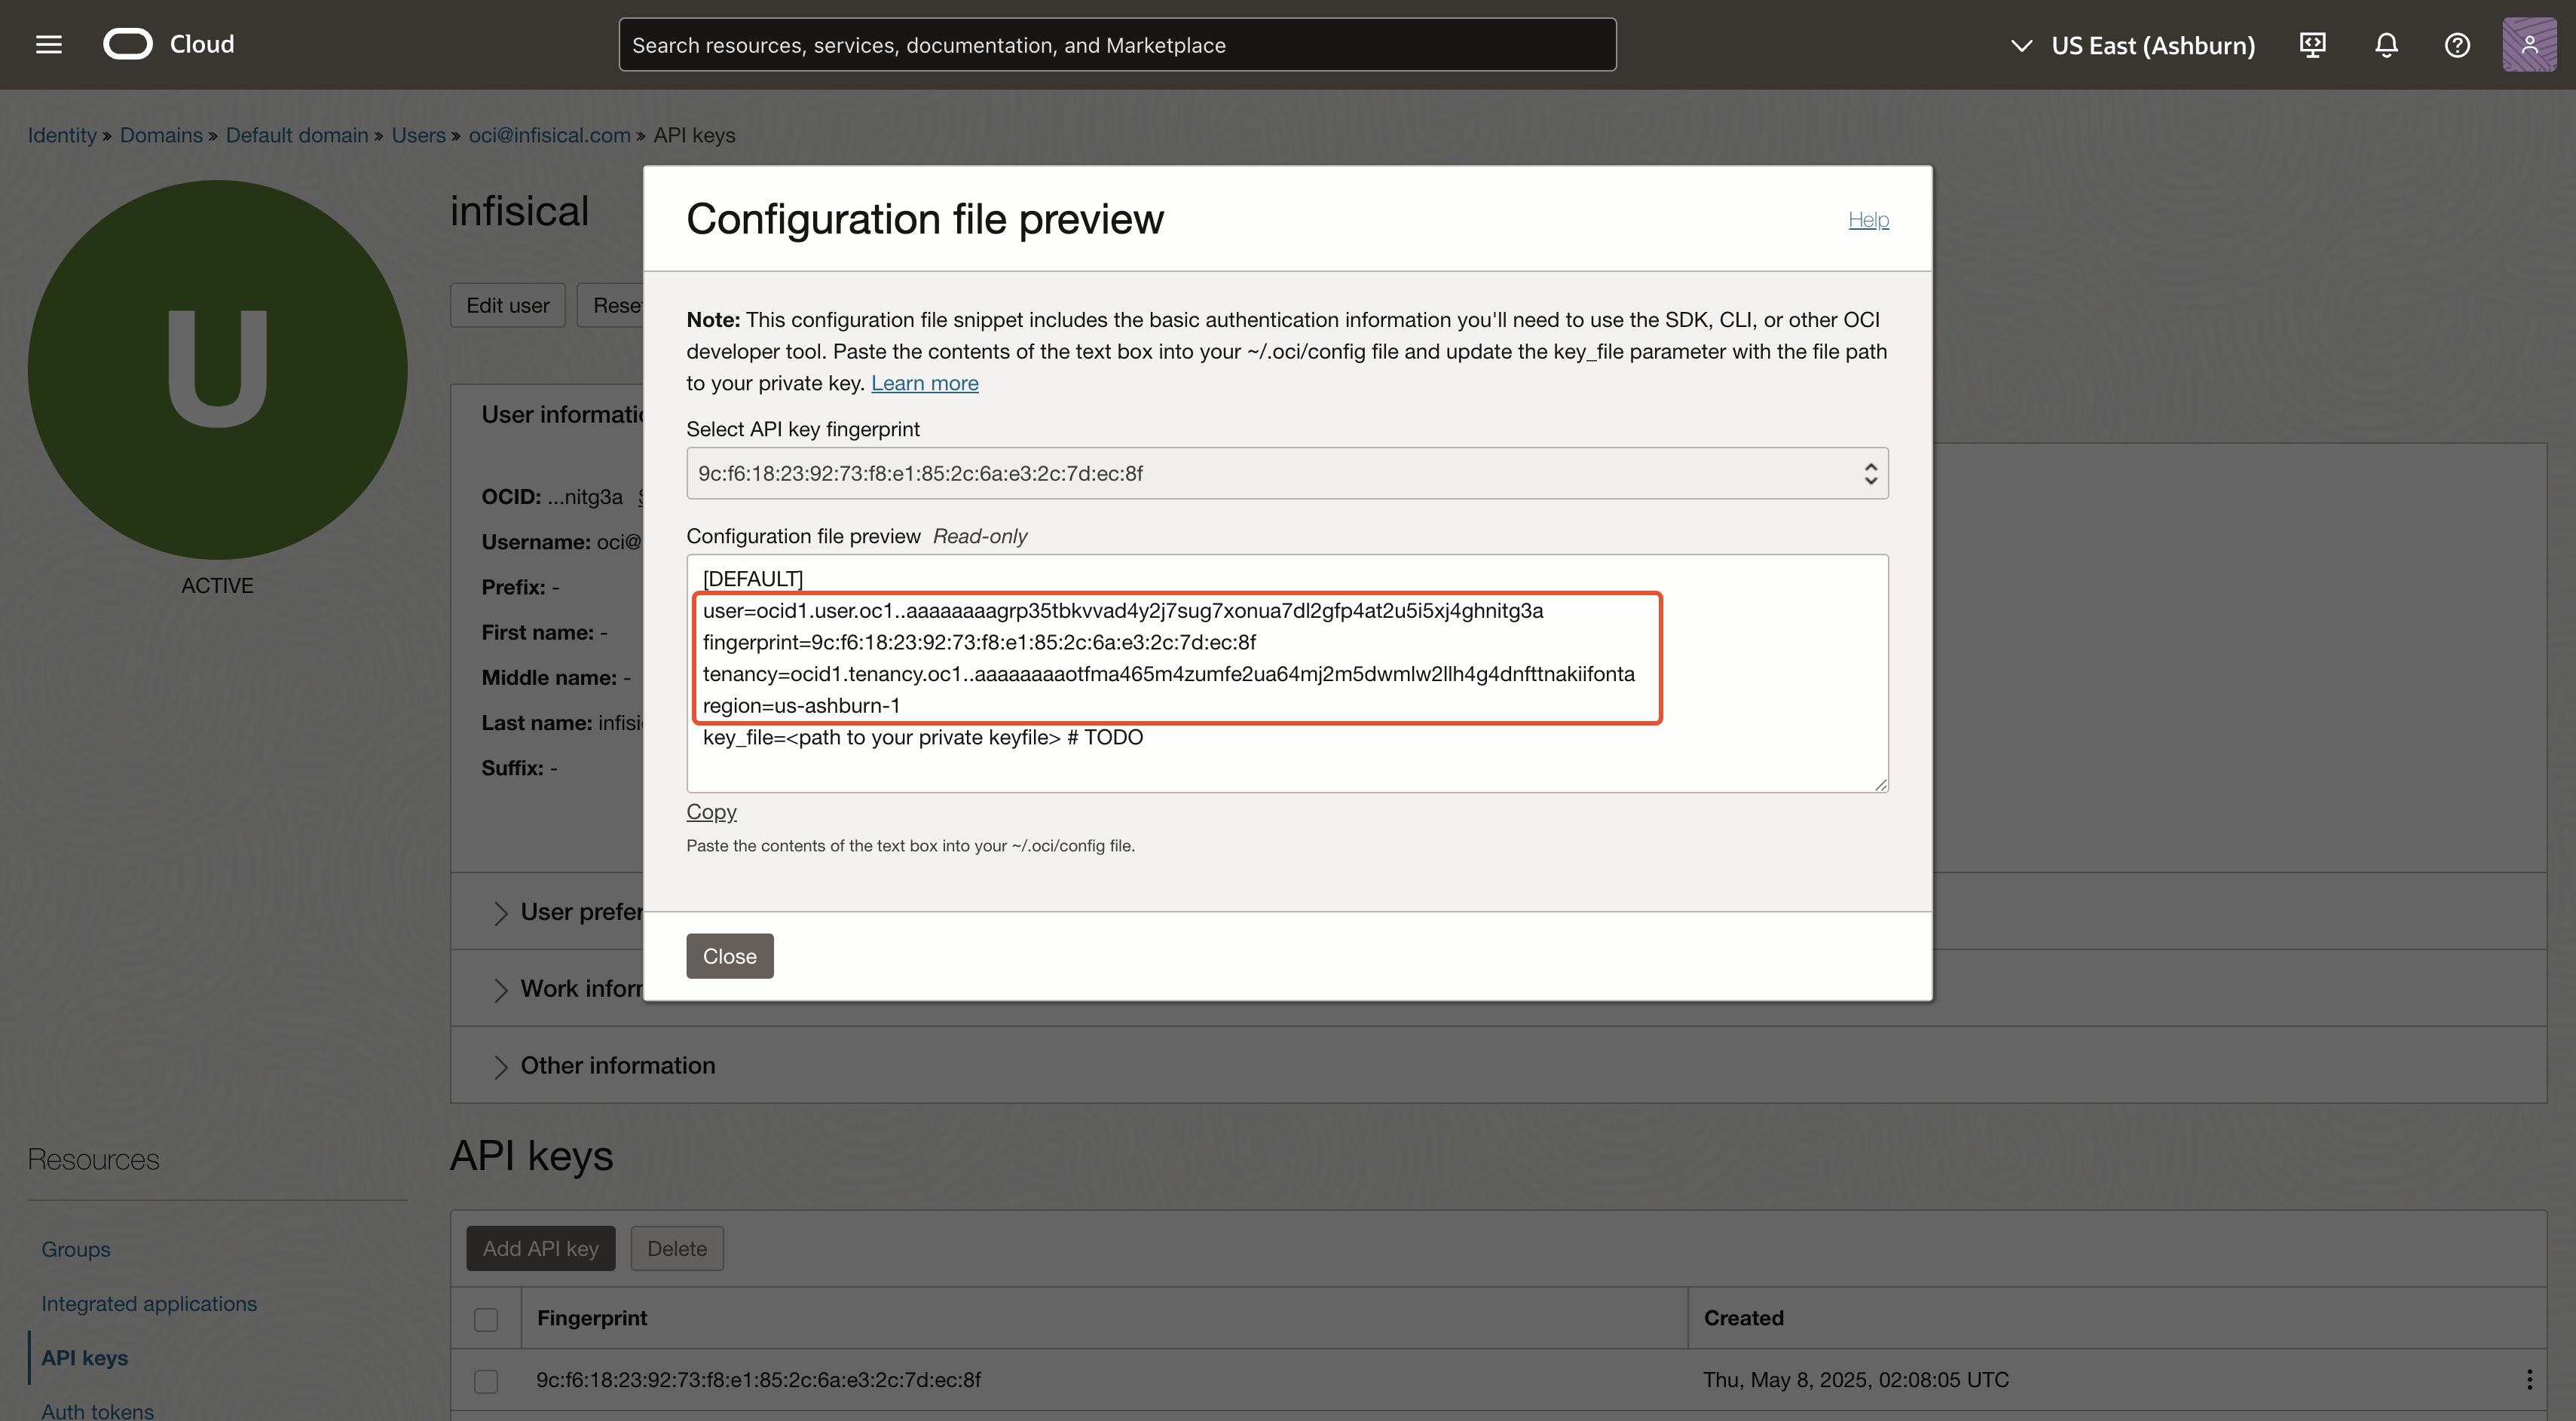
Create OCI Group
1
Search for 'Domains' and click as shown
2
Select domain
Select the domain in which you want to create the Infisical user account.
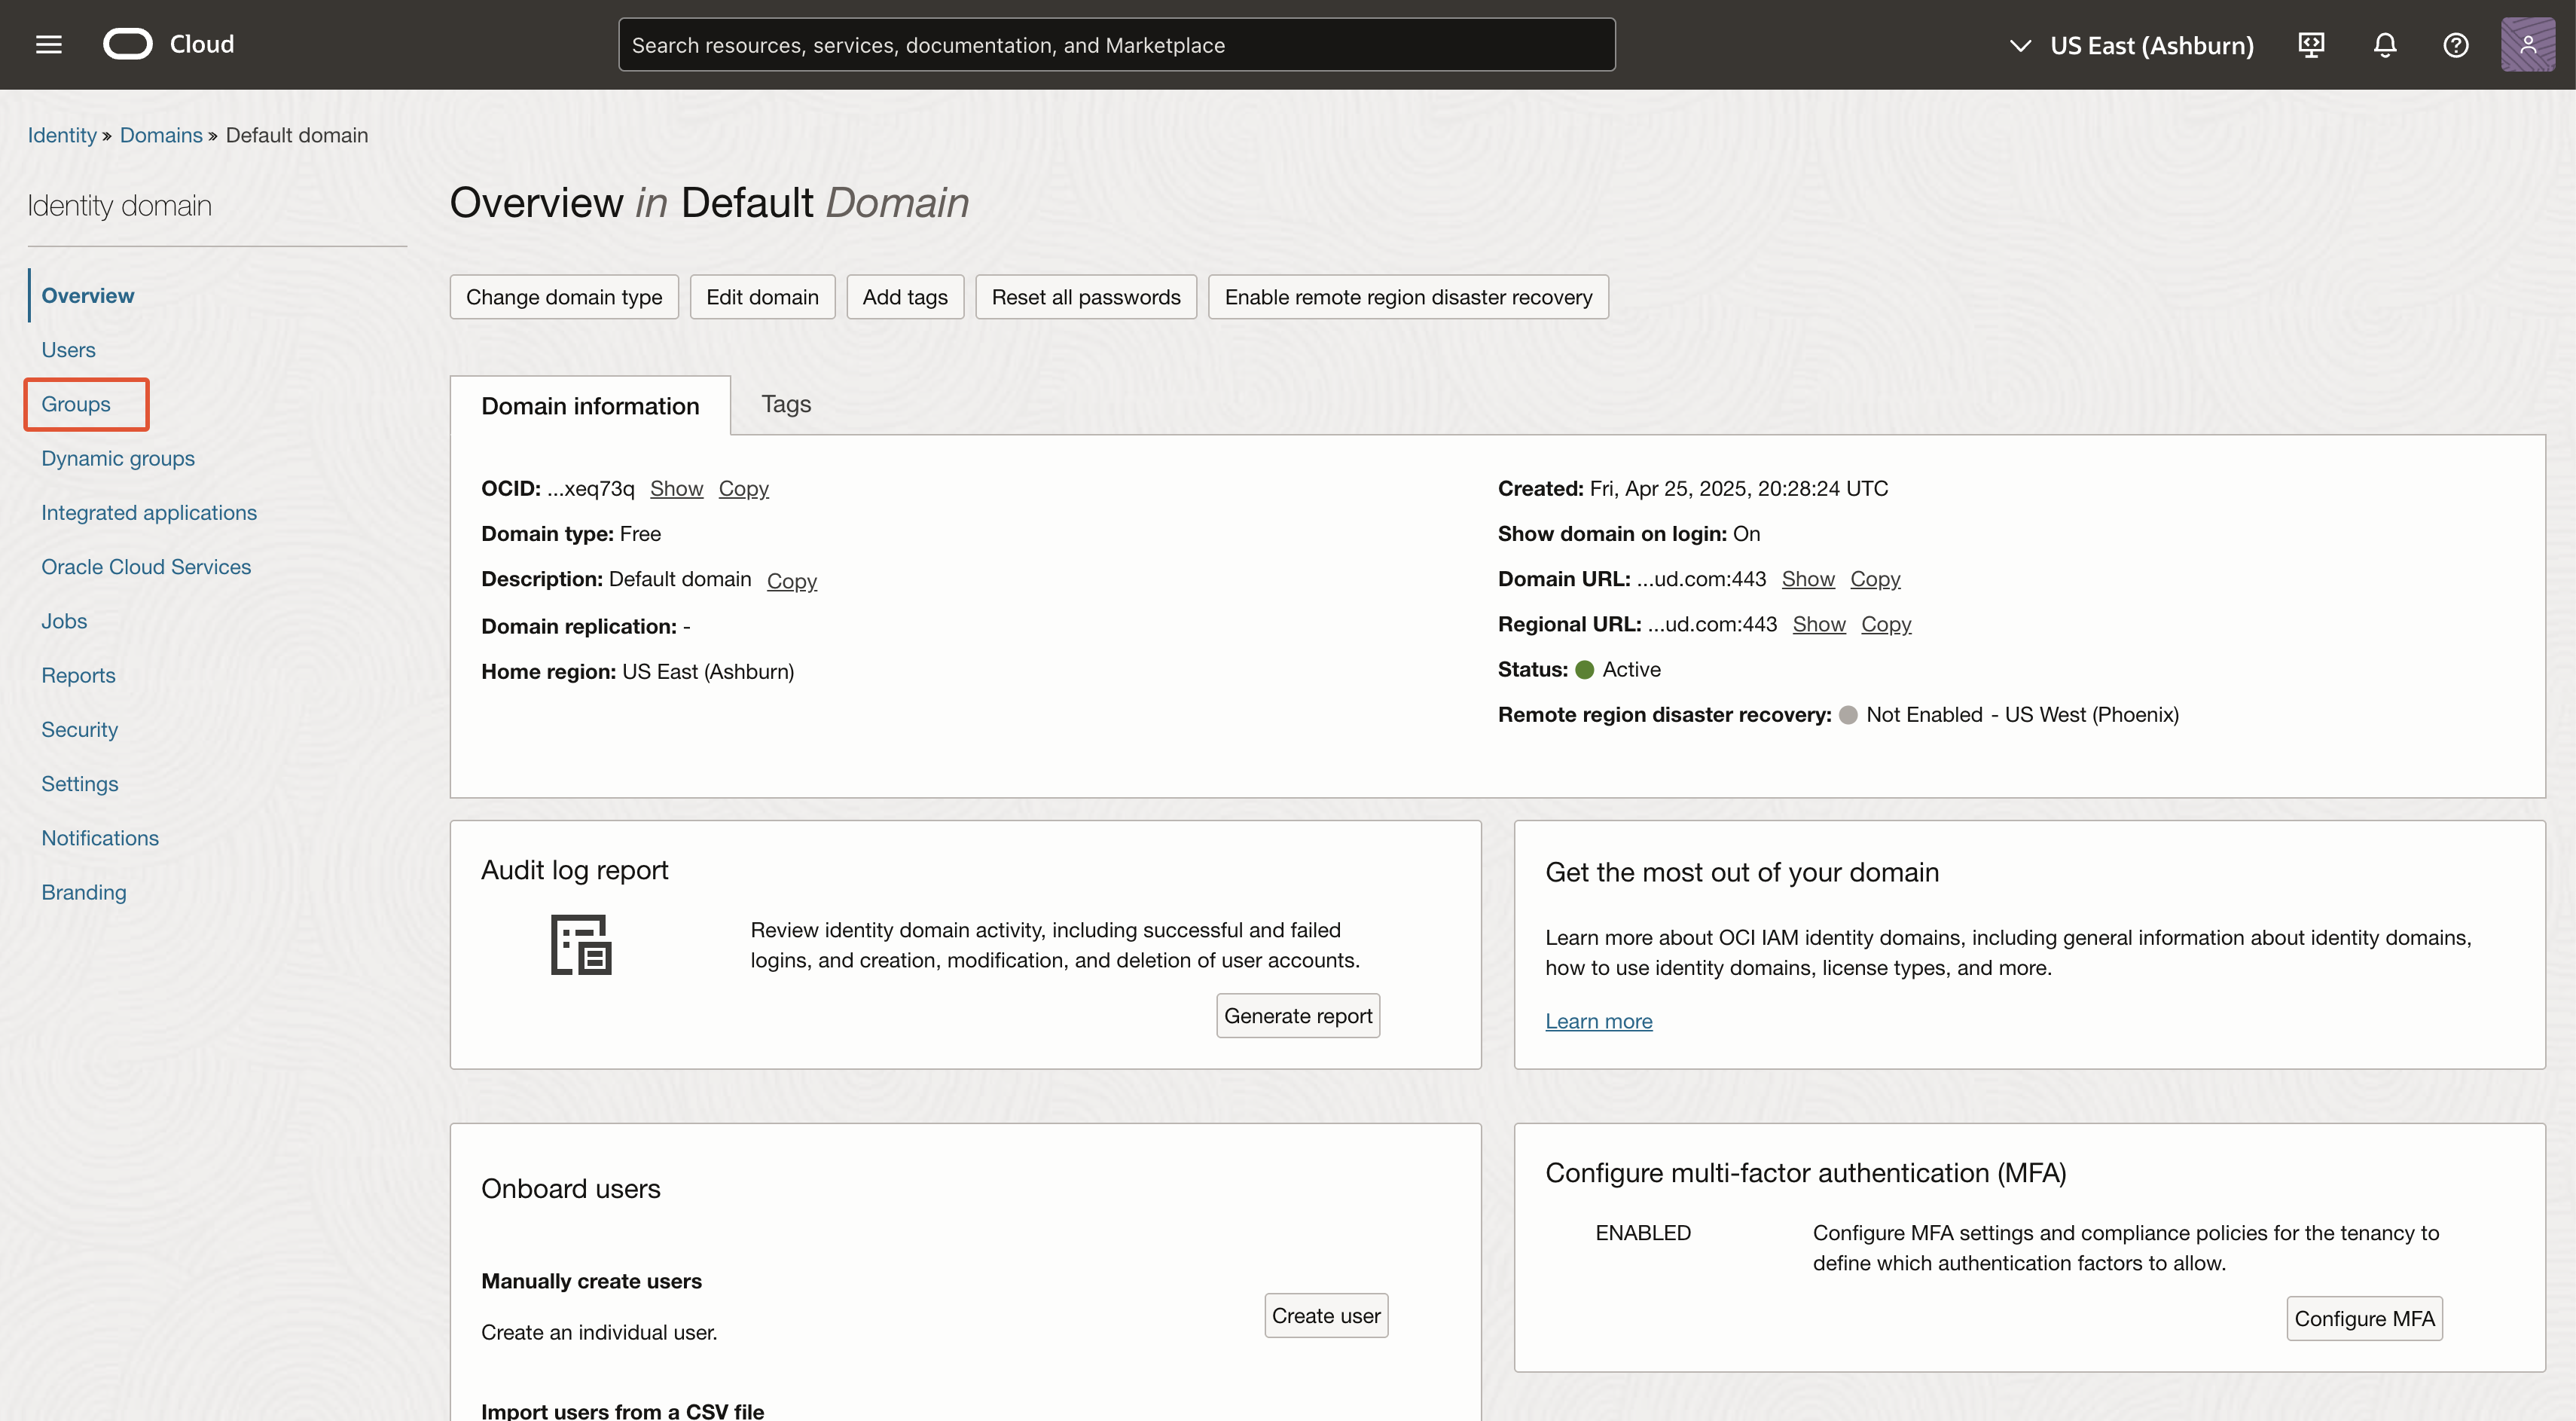
3
Navigate to 'Groups'
4
Create group
The name and description can be anything. Ensure that you assign the user created in earlier steps to this group.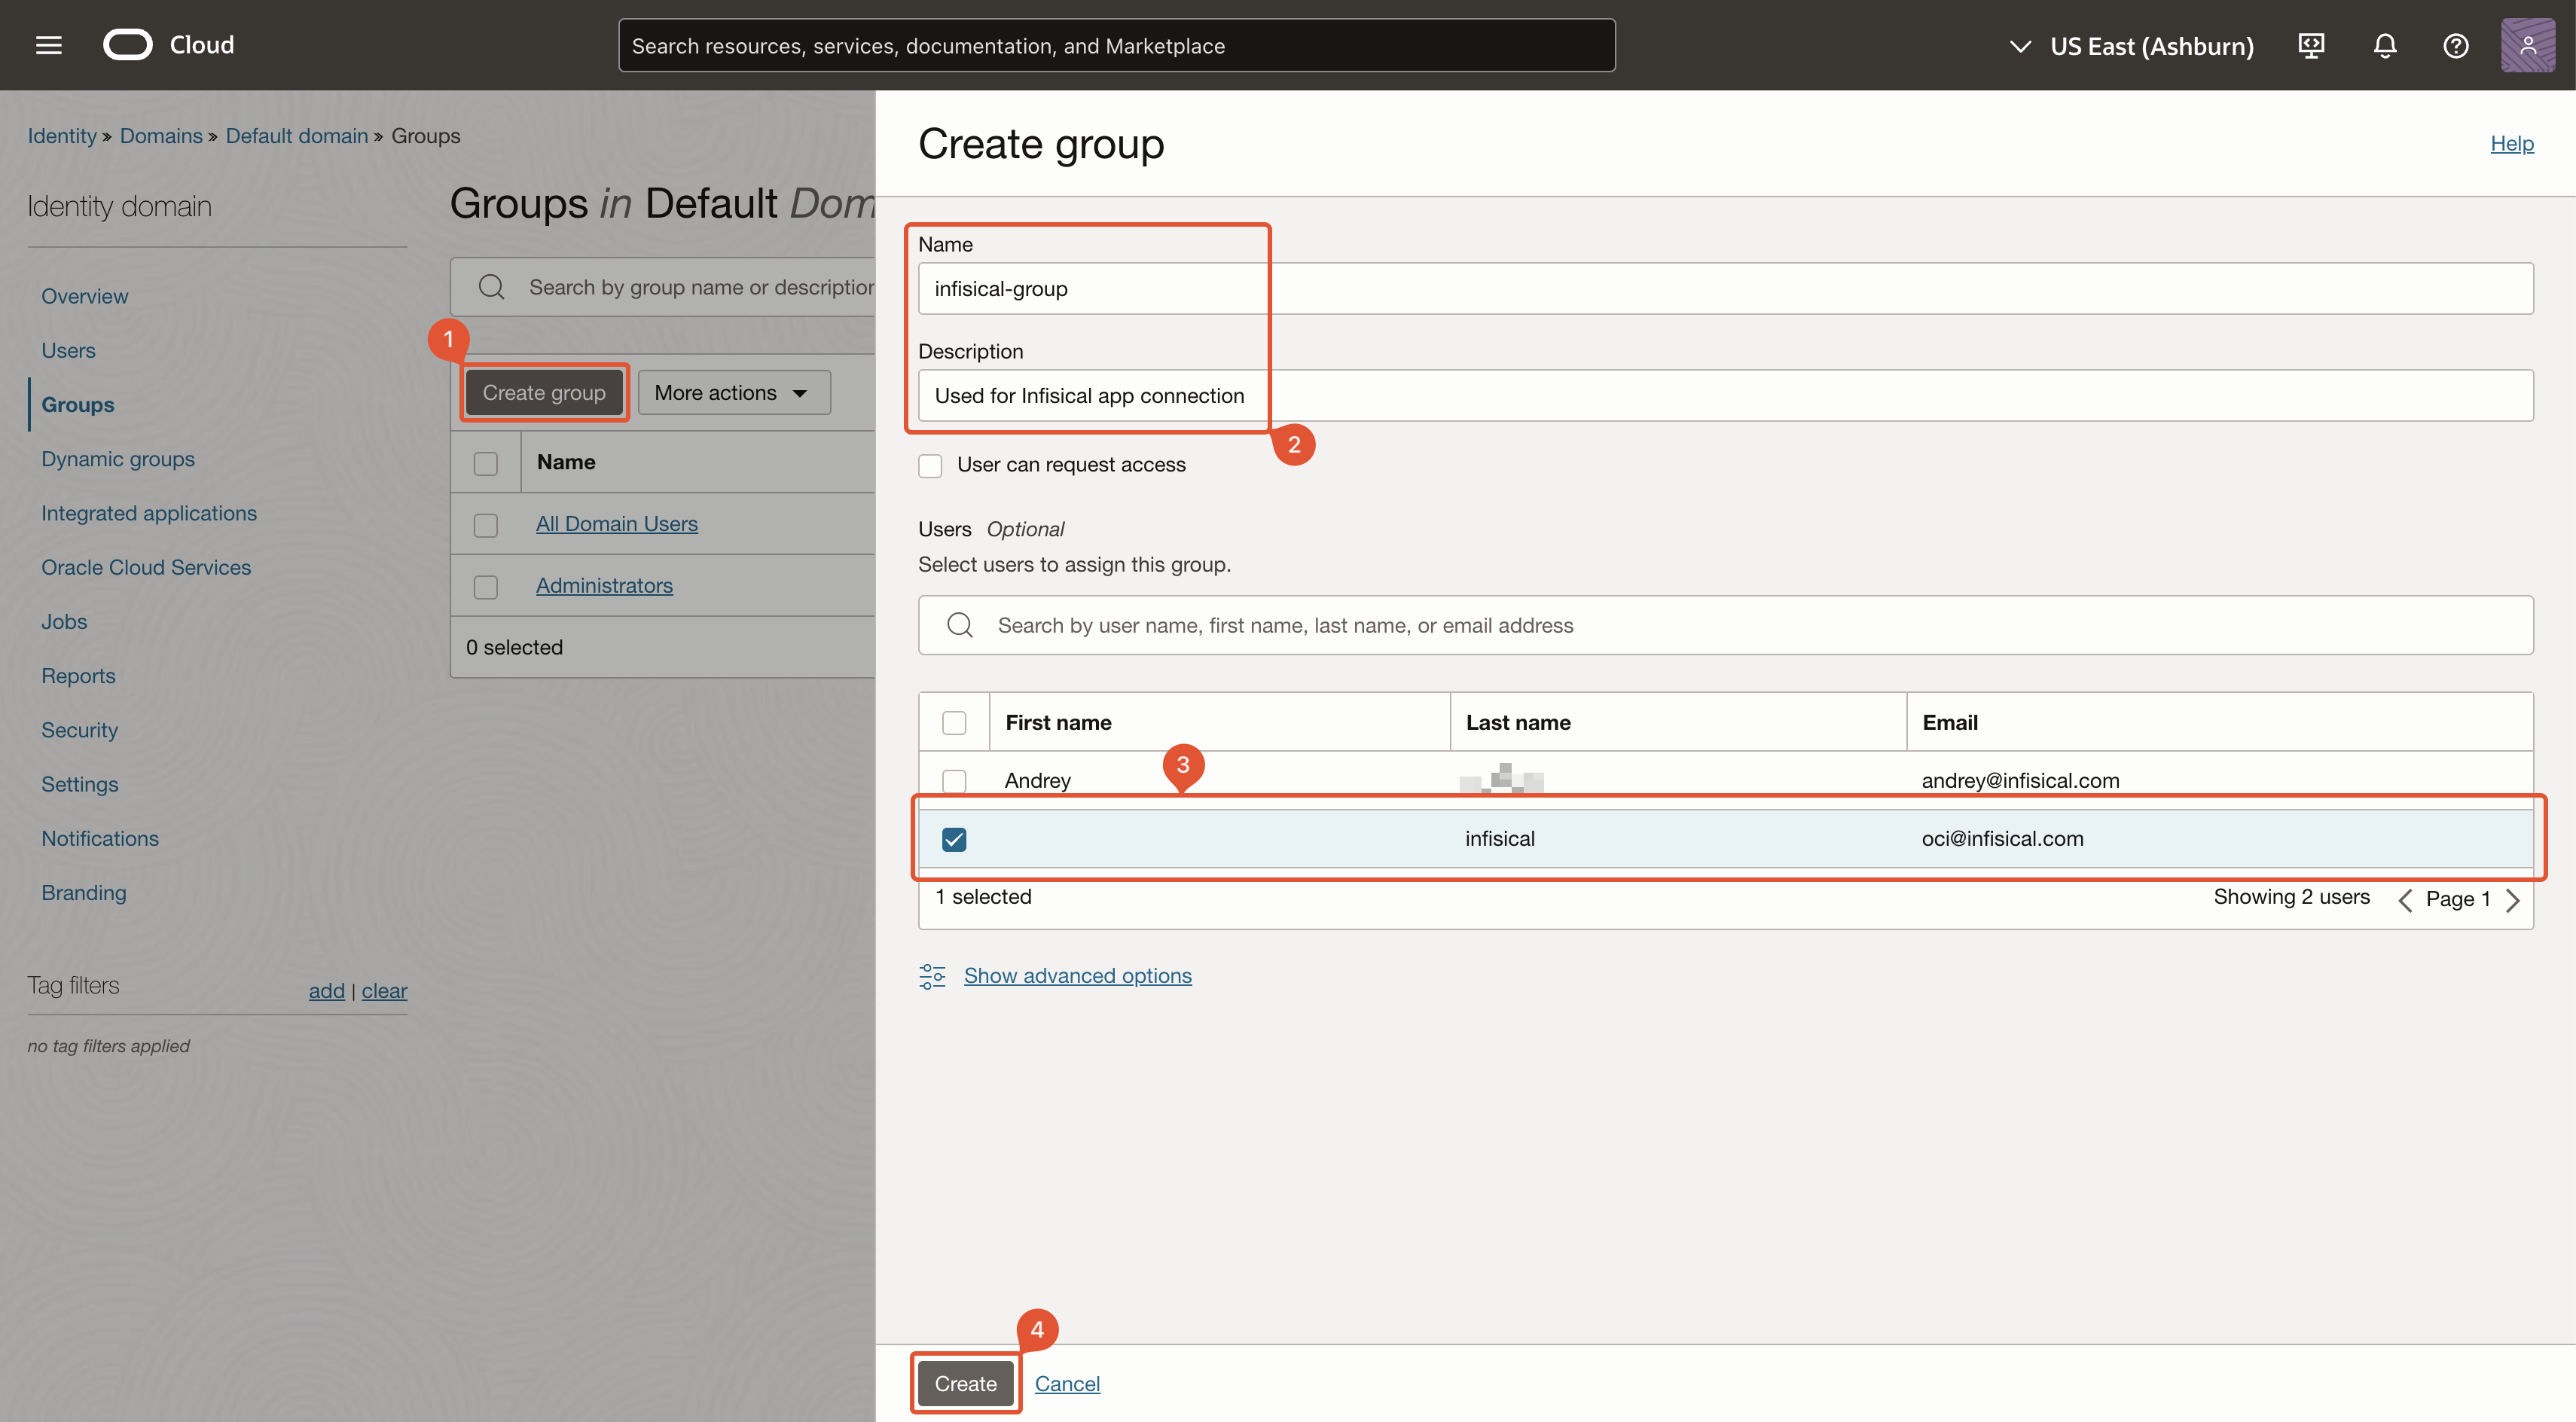
5
Store group name
After creating the group, take note of its name. It will be used in later steps.
Create OCI Policy
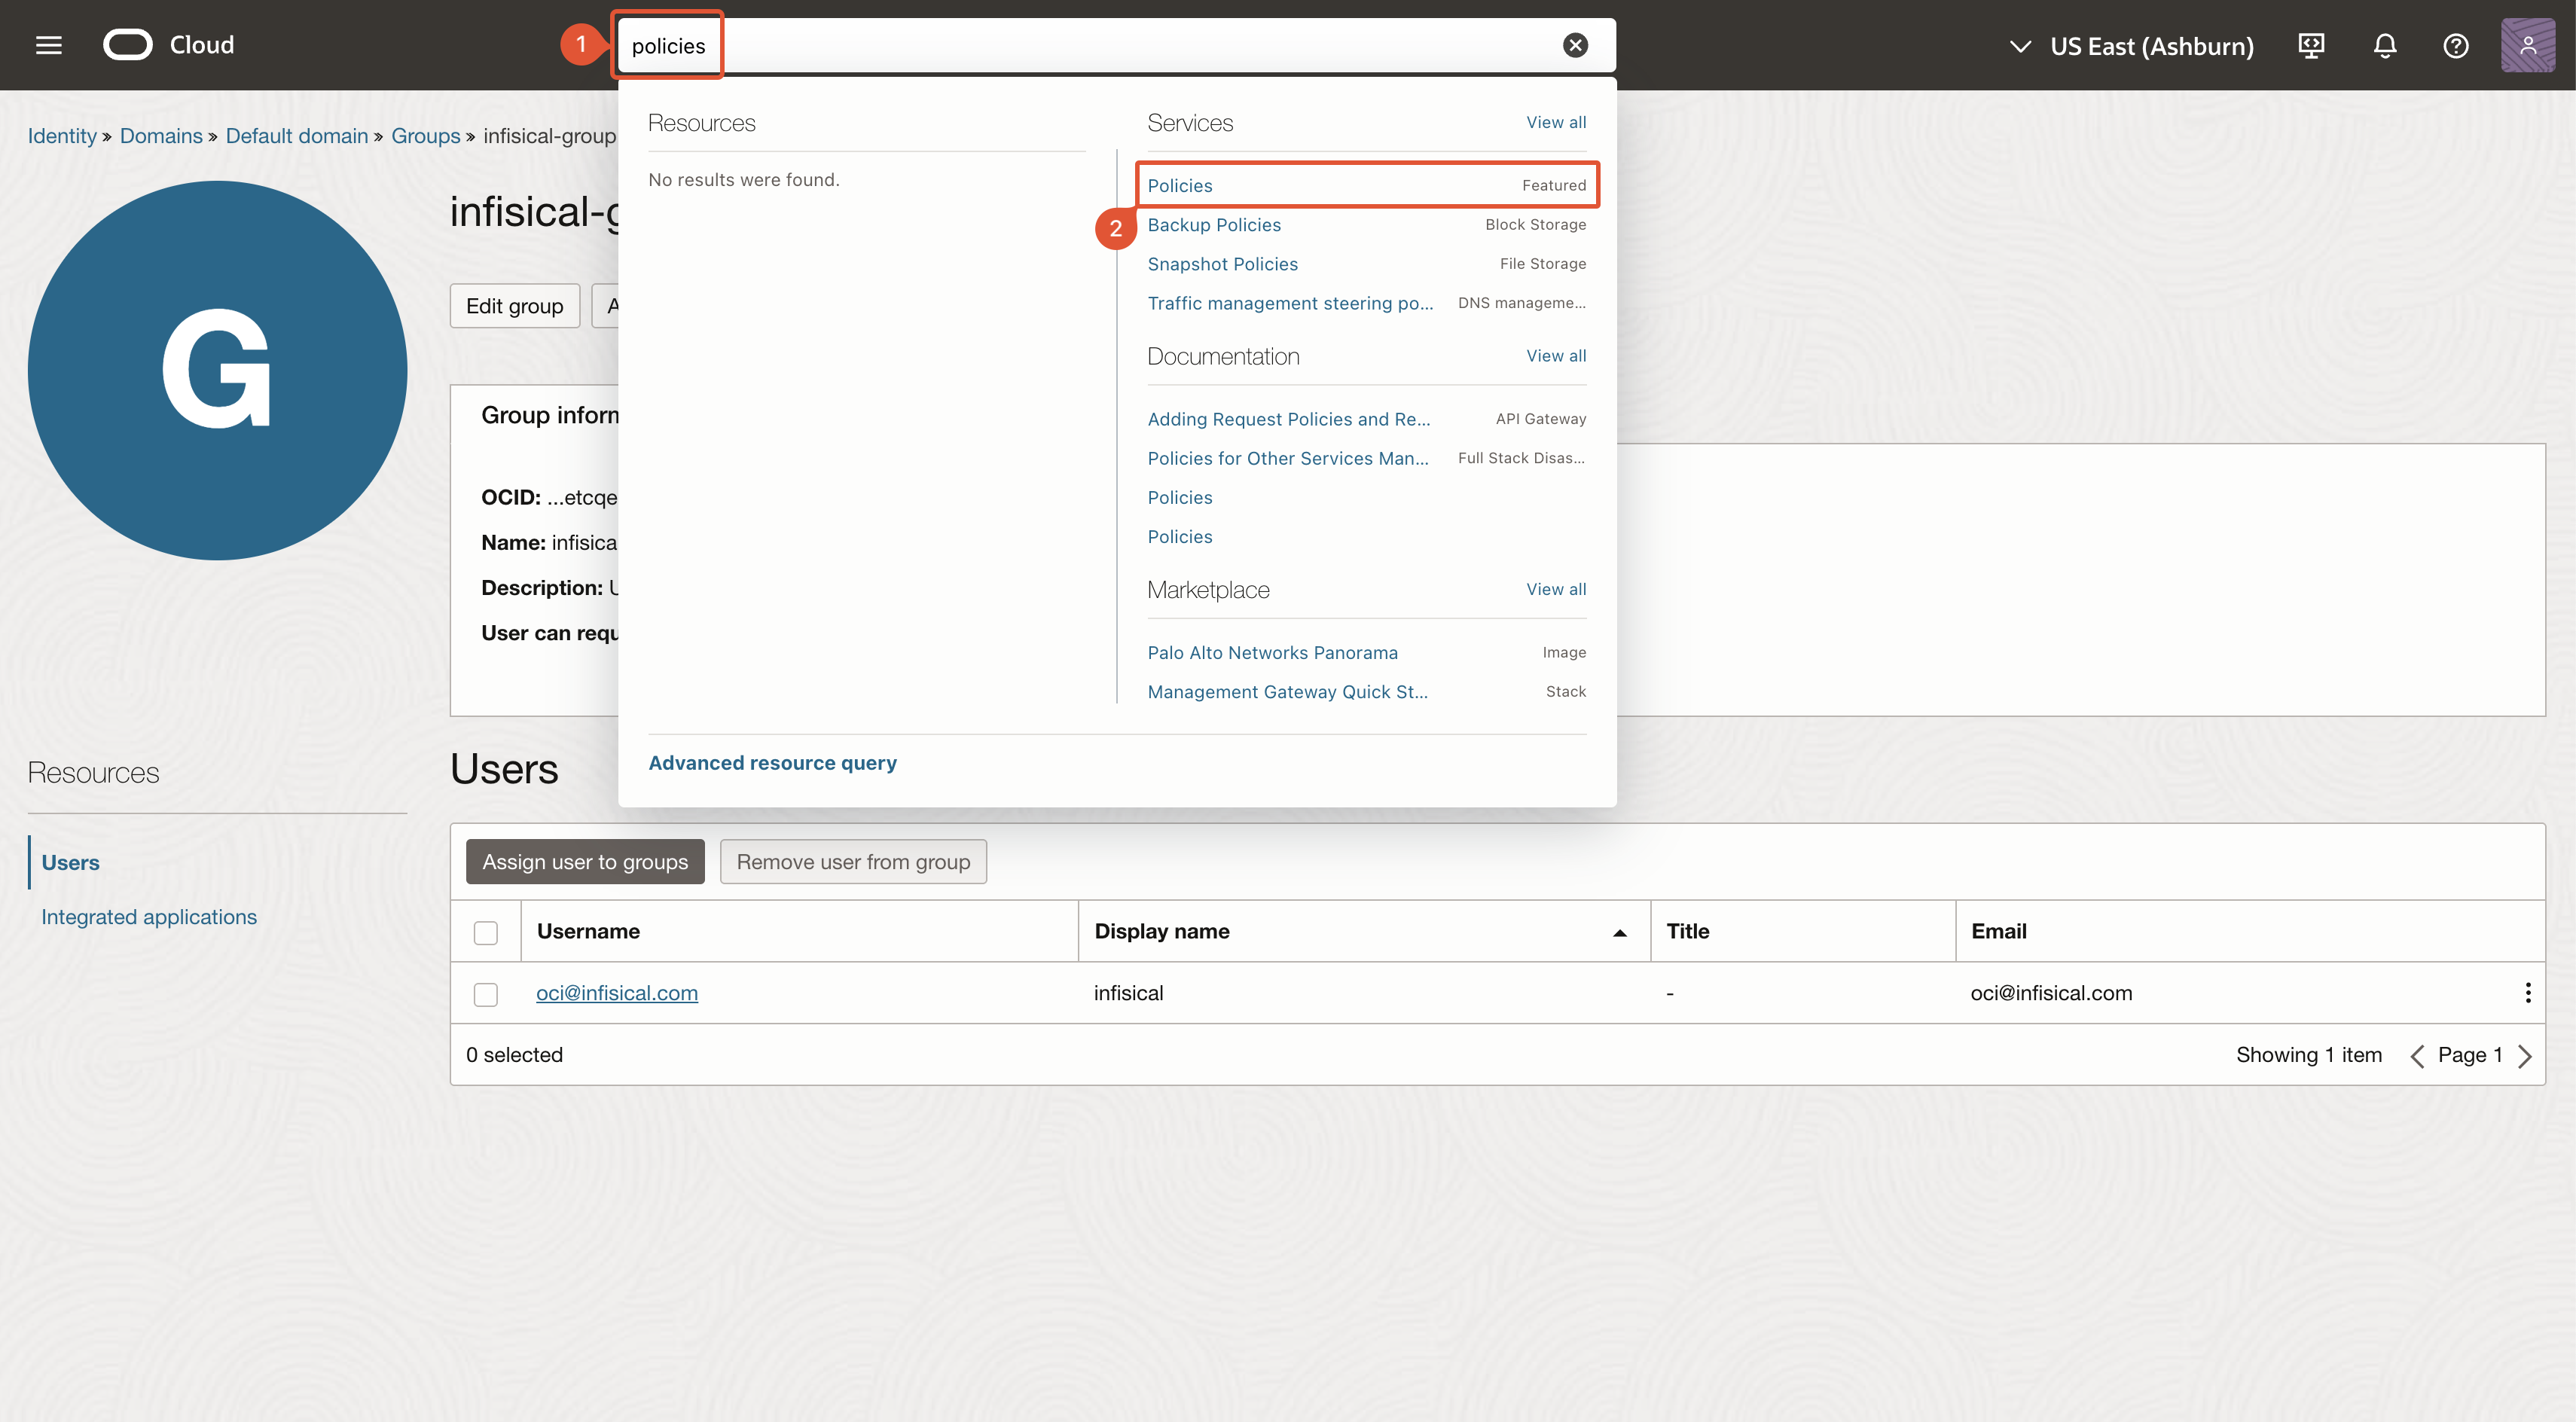
1
Search for 'Policies' and click as shown
2
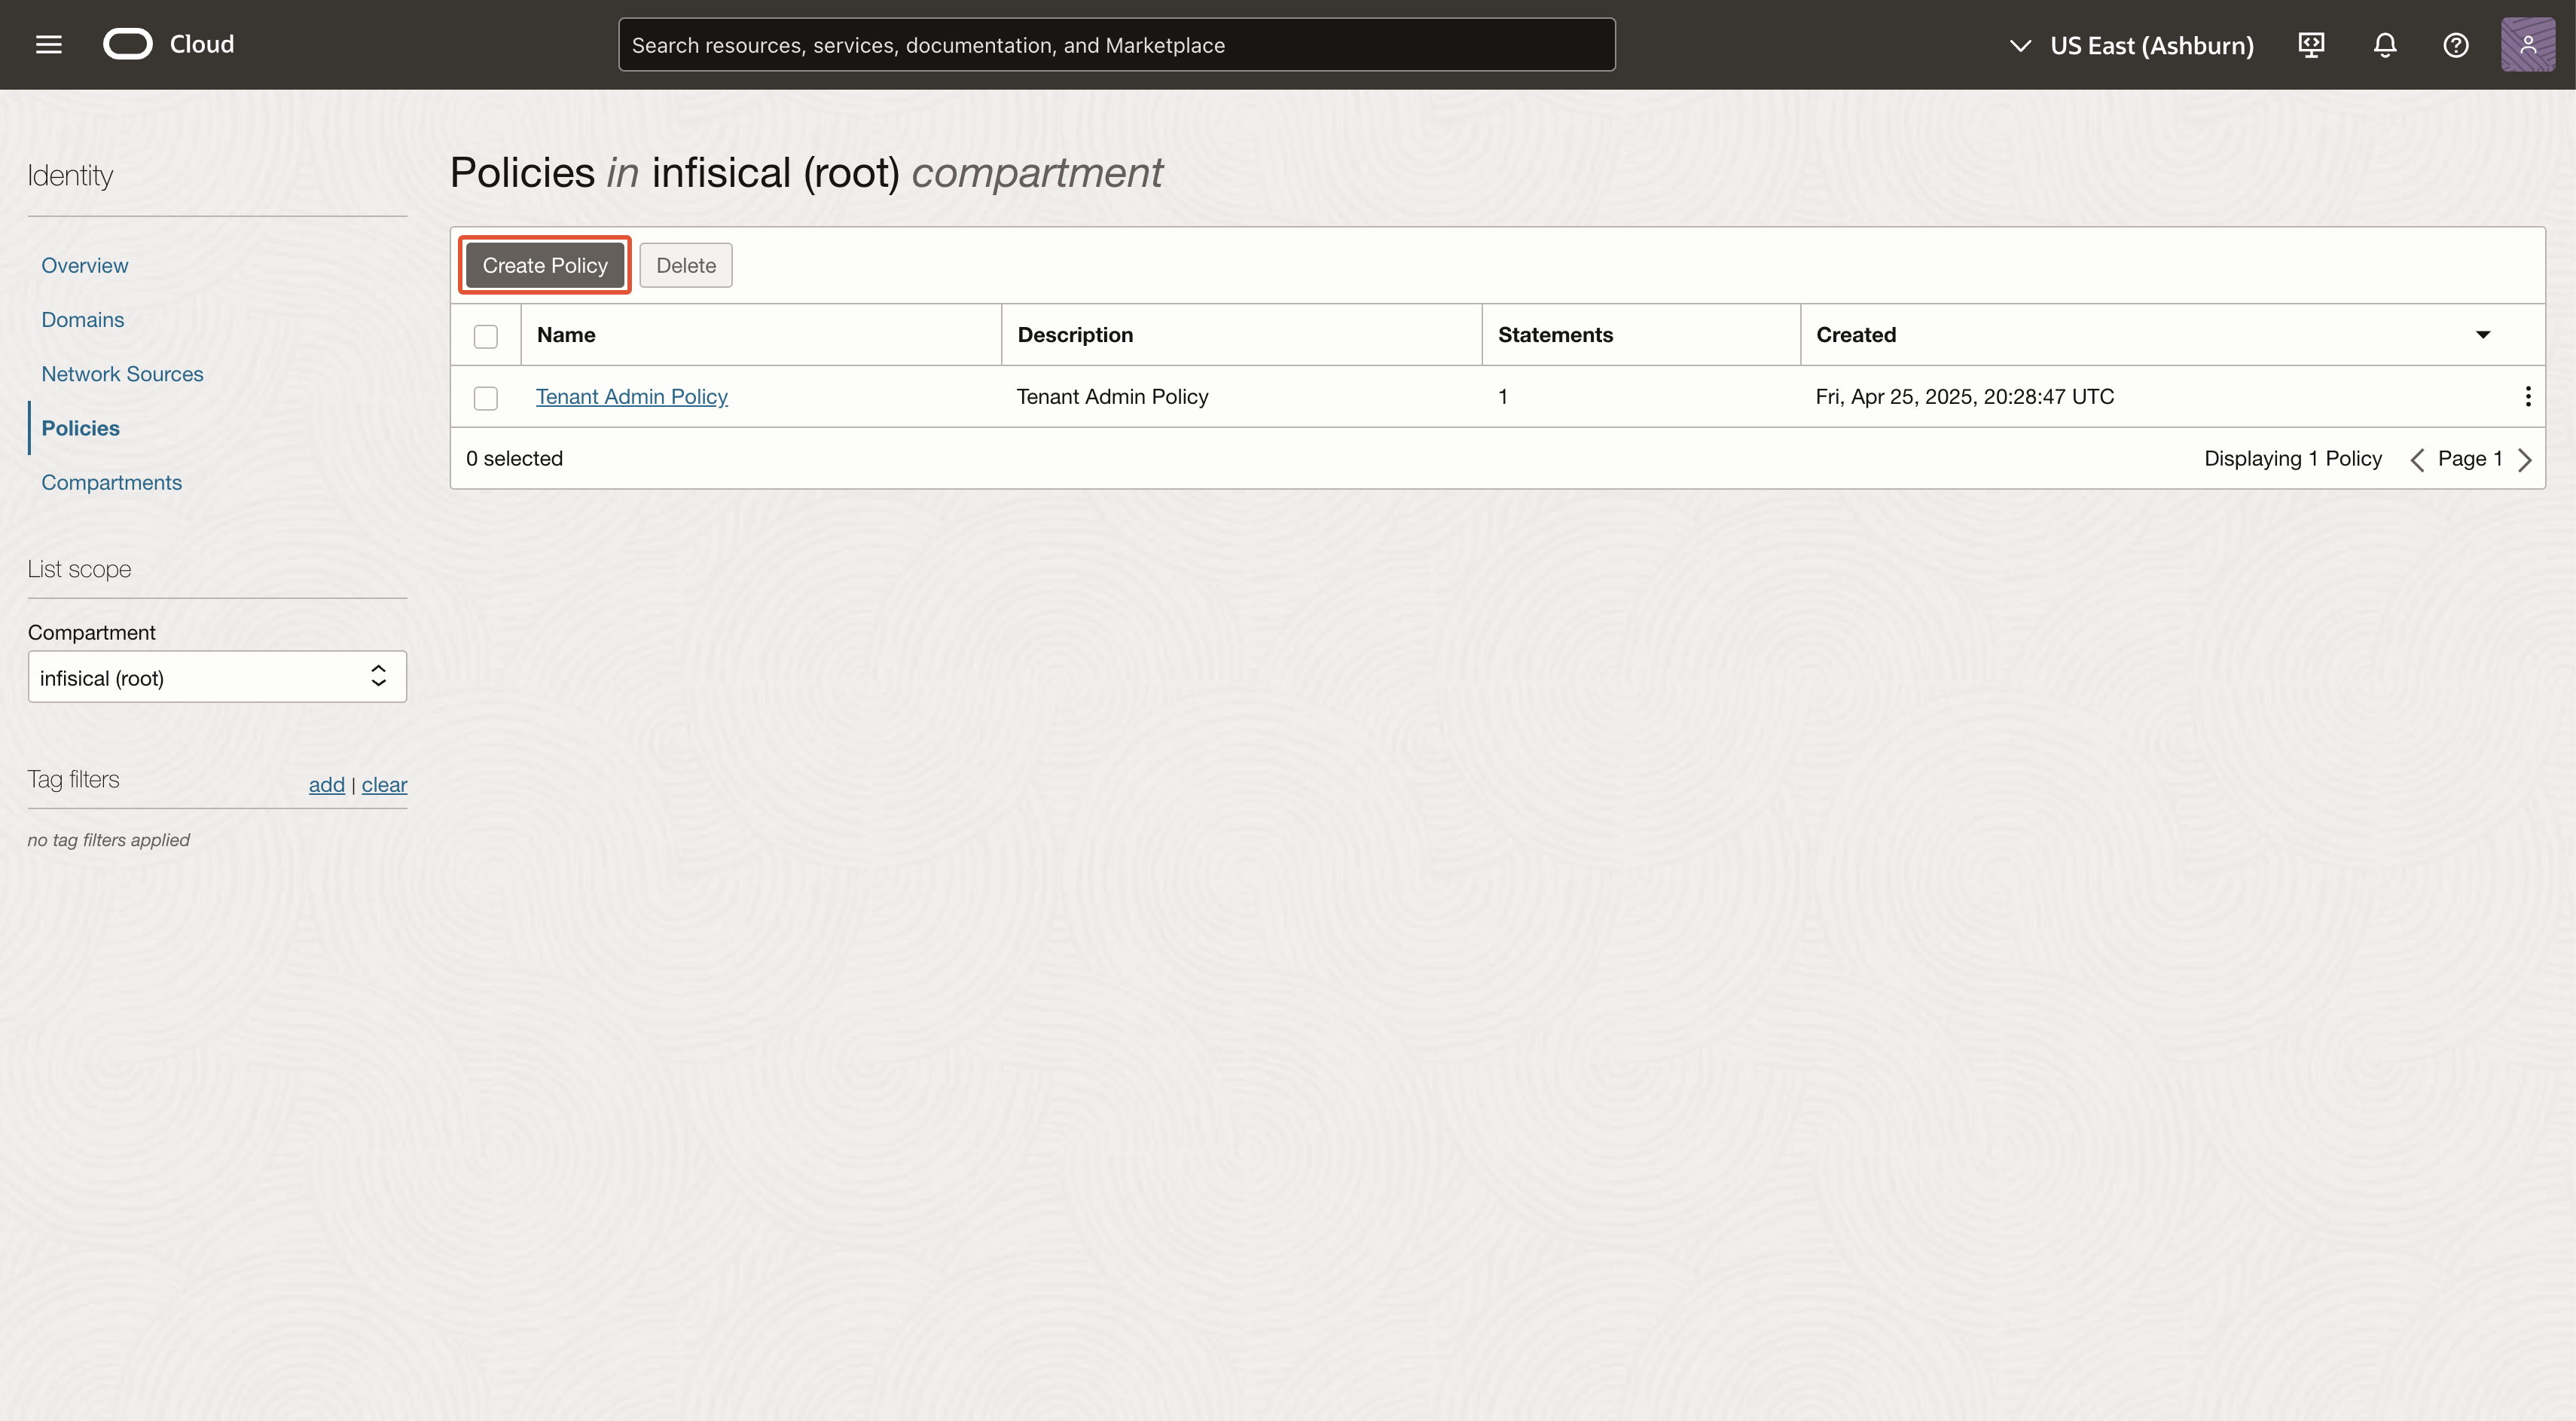
Click 'Create Policy'
3
Create policy
The name and description can be anything. Click ‘Show manual editor’ and paste in the policy rules relevant to your task: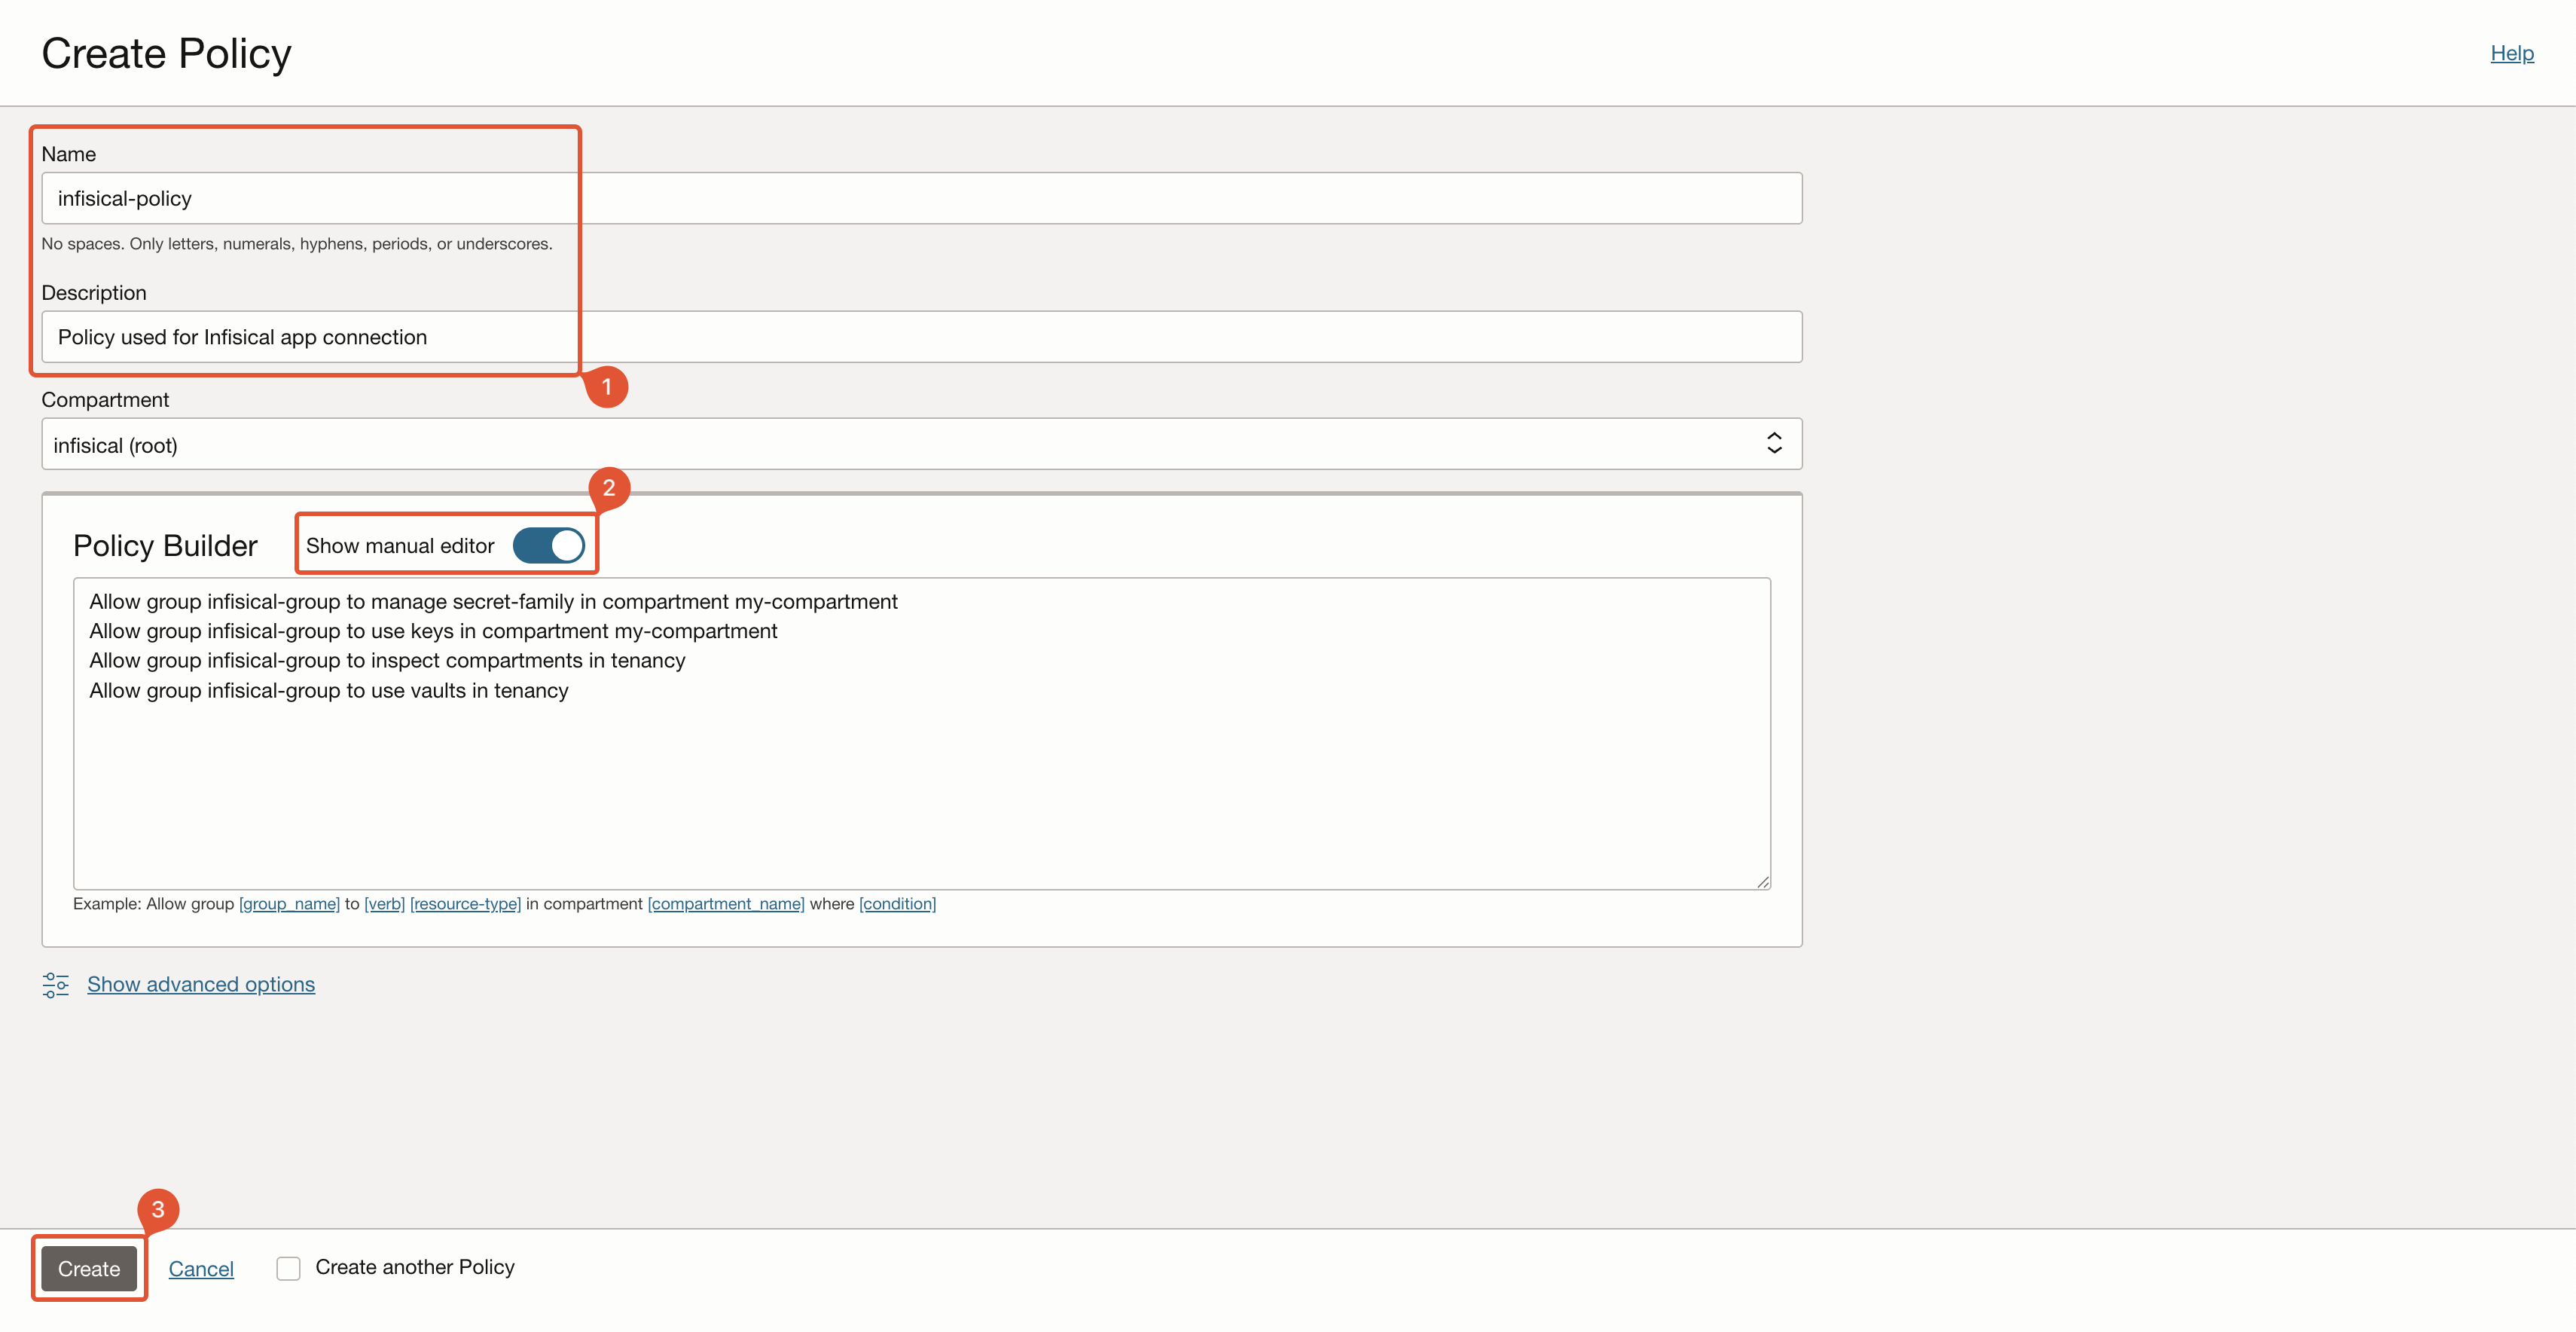
- Secret Sync
- Group Name: The name of the group you created in earlier steps.
- Compartment Name: The name of the compartment which has your secrets vault.
compartment <compartment name> with tenancy.You must create this policy on the root compartment, otherwise some functionality may not work.
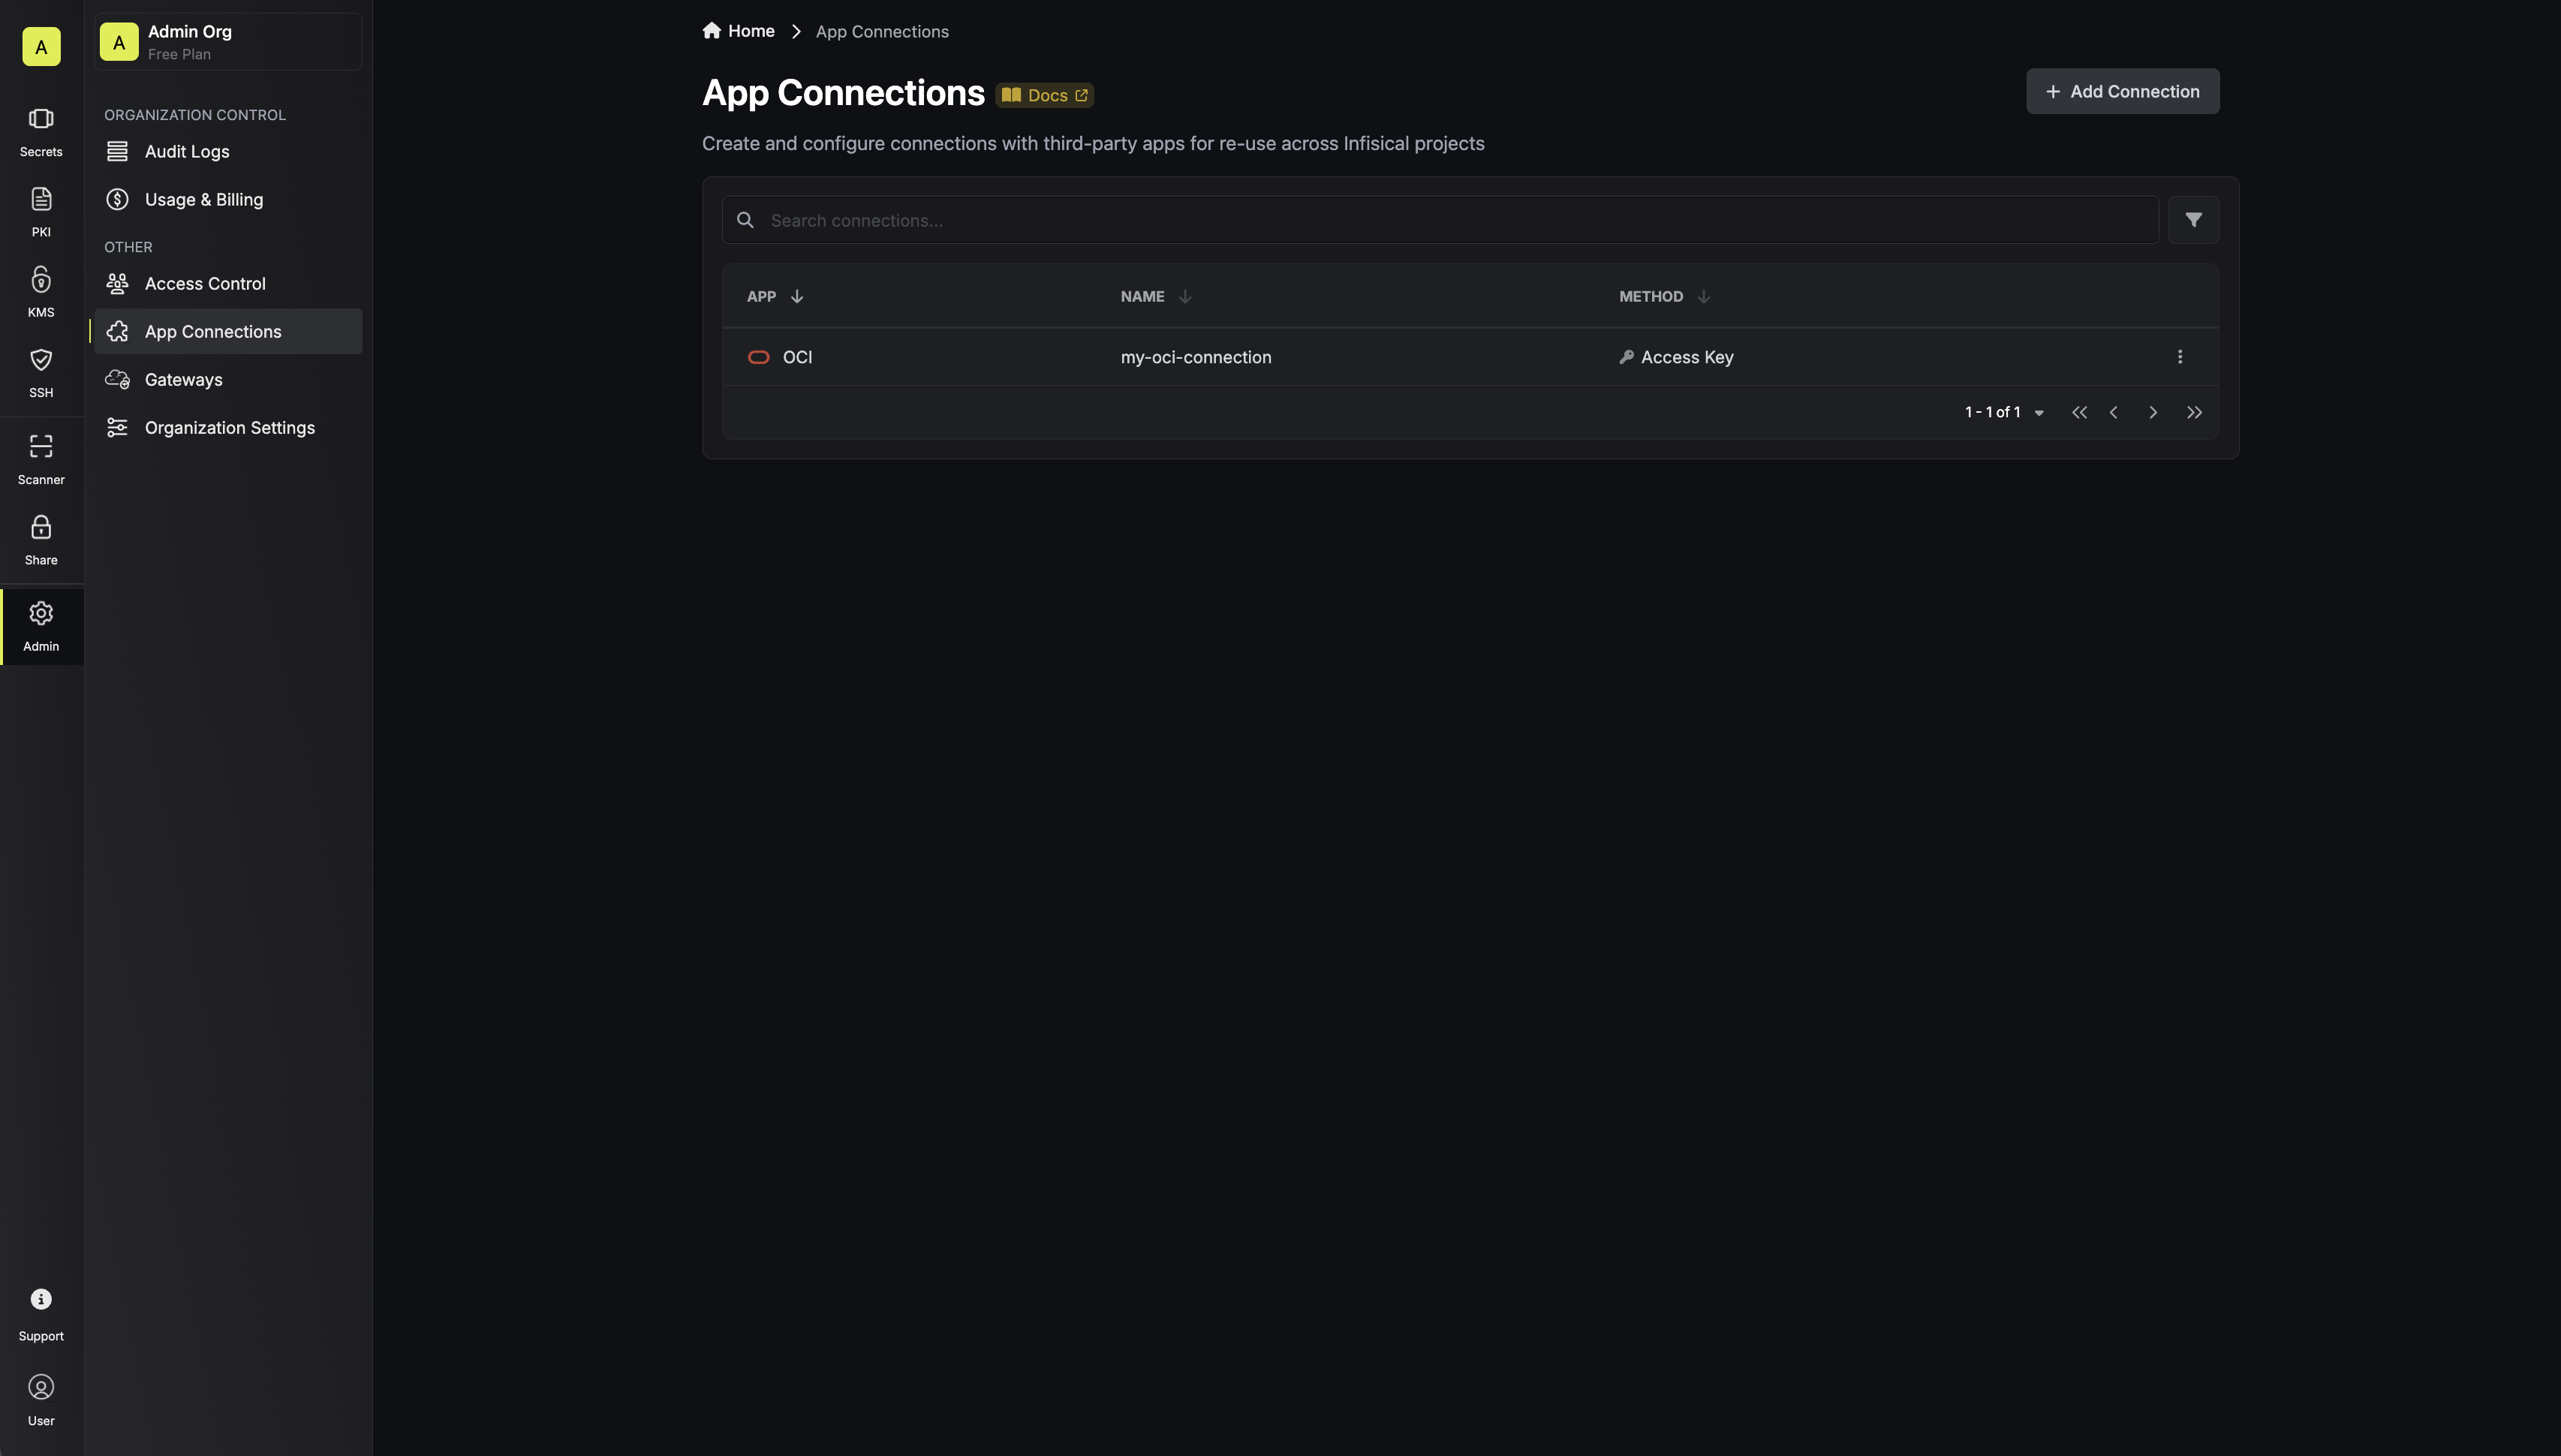
Create OCI Connection in Infisical
- Infisical UI
- API
1
Navigate to App Connections
In your Infisical dashboard, navigate to the Integrations tab in the desired project, then select App Connections.
2
Select OCI Connection
Click the + Add Connection button and select the OCI Connection option from the available integrations.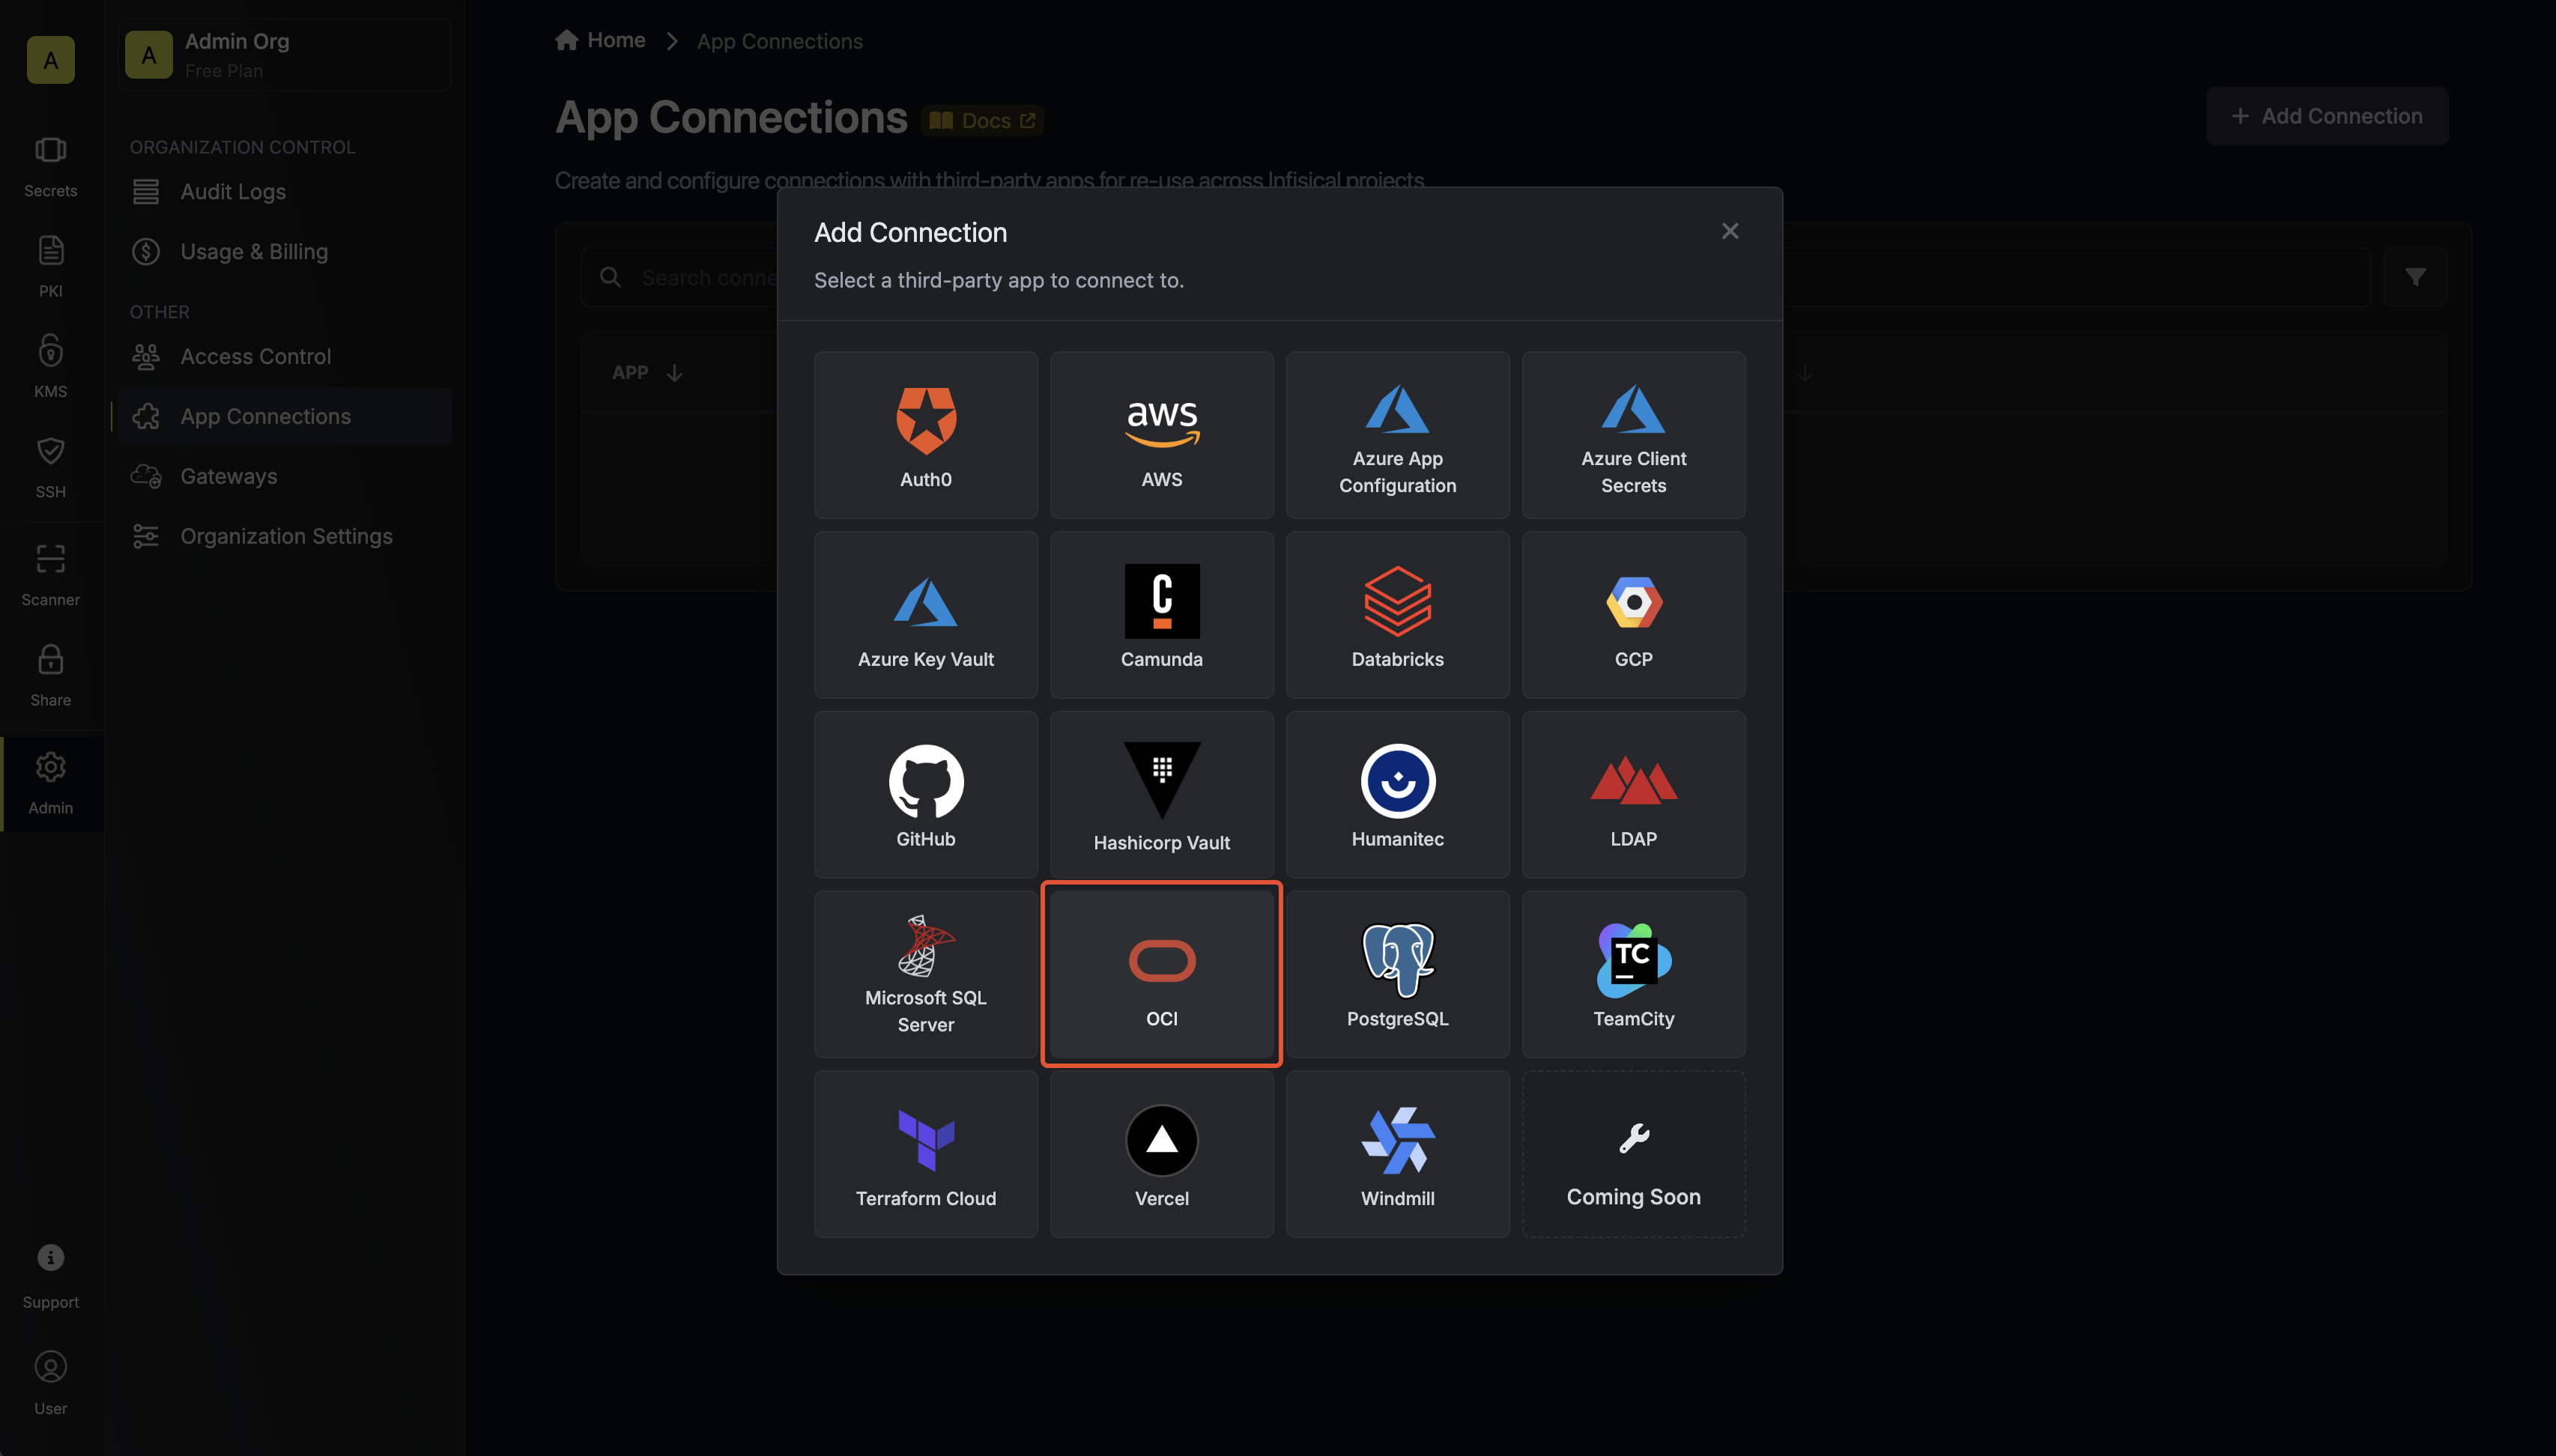
3
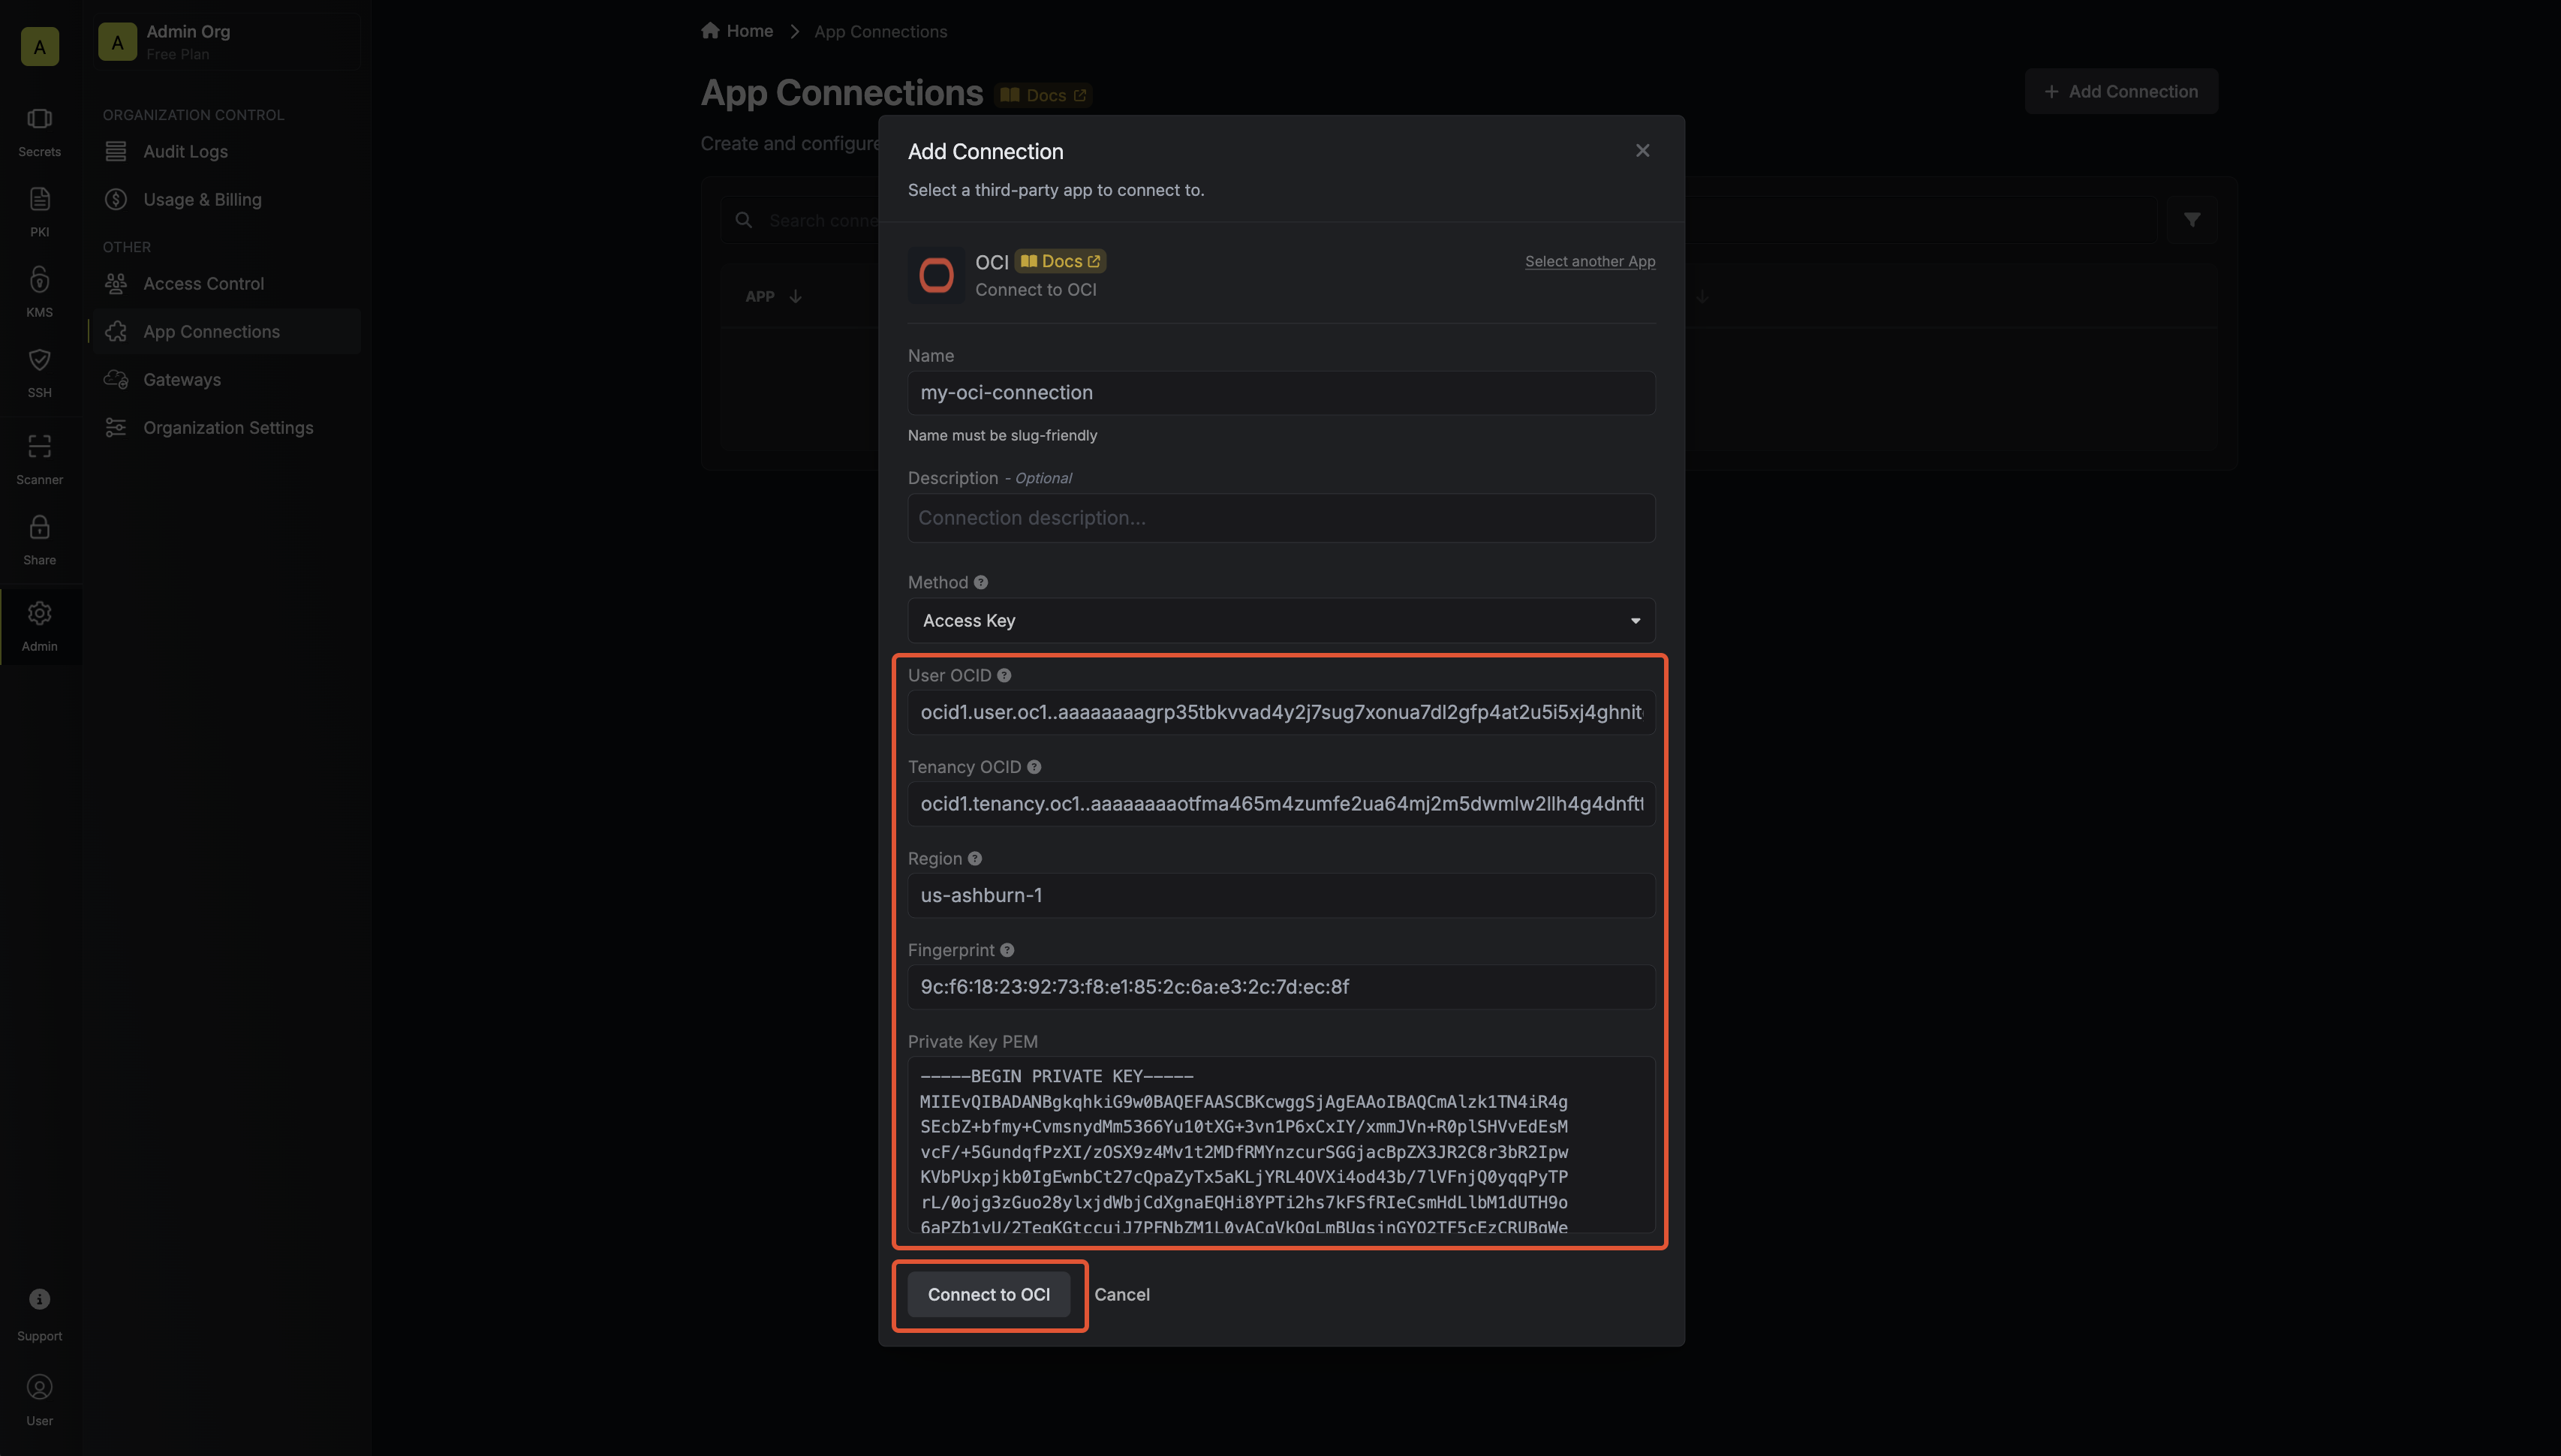
Fill out the OCI Connection Modal
Complete the OCI Connection form by entering:
- A descriptive name for the connection
- An optional description for future reference
- The User OCID from earlier steps
- The Tenancy OCID from earlier steps
- The Region from earlier steps
- The Fingerprint from earlier steps
-
The Private Key PEM from earlier steps
4
Connection Created
After clicking Create, your OCI Connection is established and ready to use with your Infisical project.