Azure SAML SSO is a paid feature.If you’re using Infisical Cloud, then it is available under the Pro Tier. If you’re self-hosting Infisical,
then you should contact sales@infisical.com to purchase an enterprise license to use it.
Prepare the SAML SSO configuration in Infisical
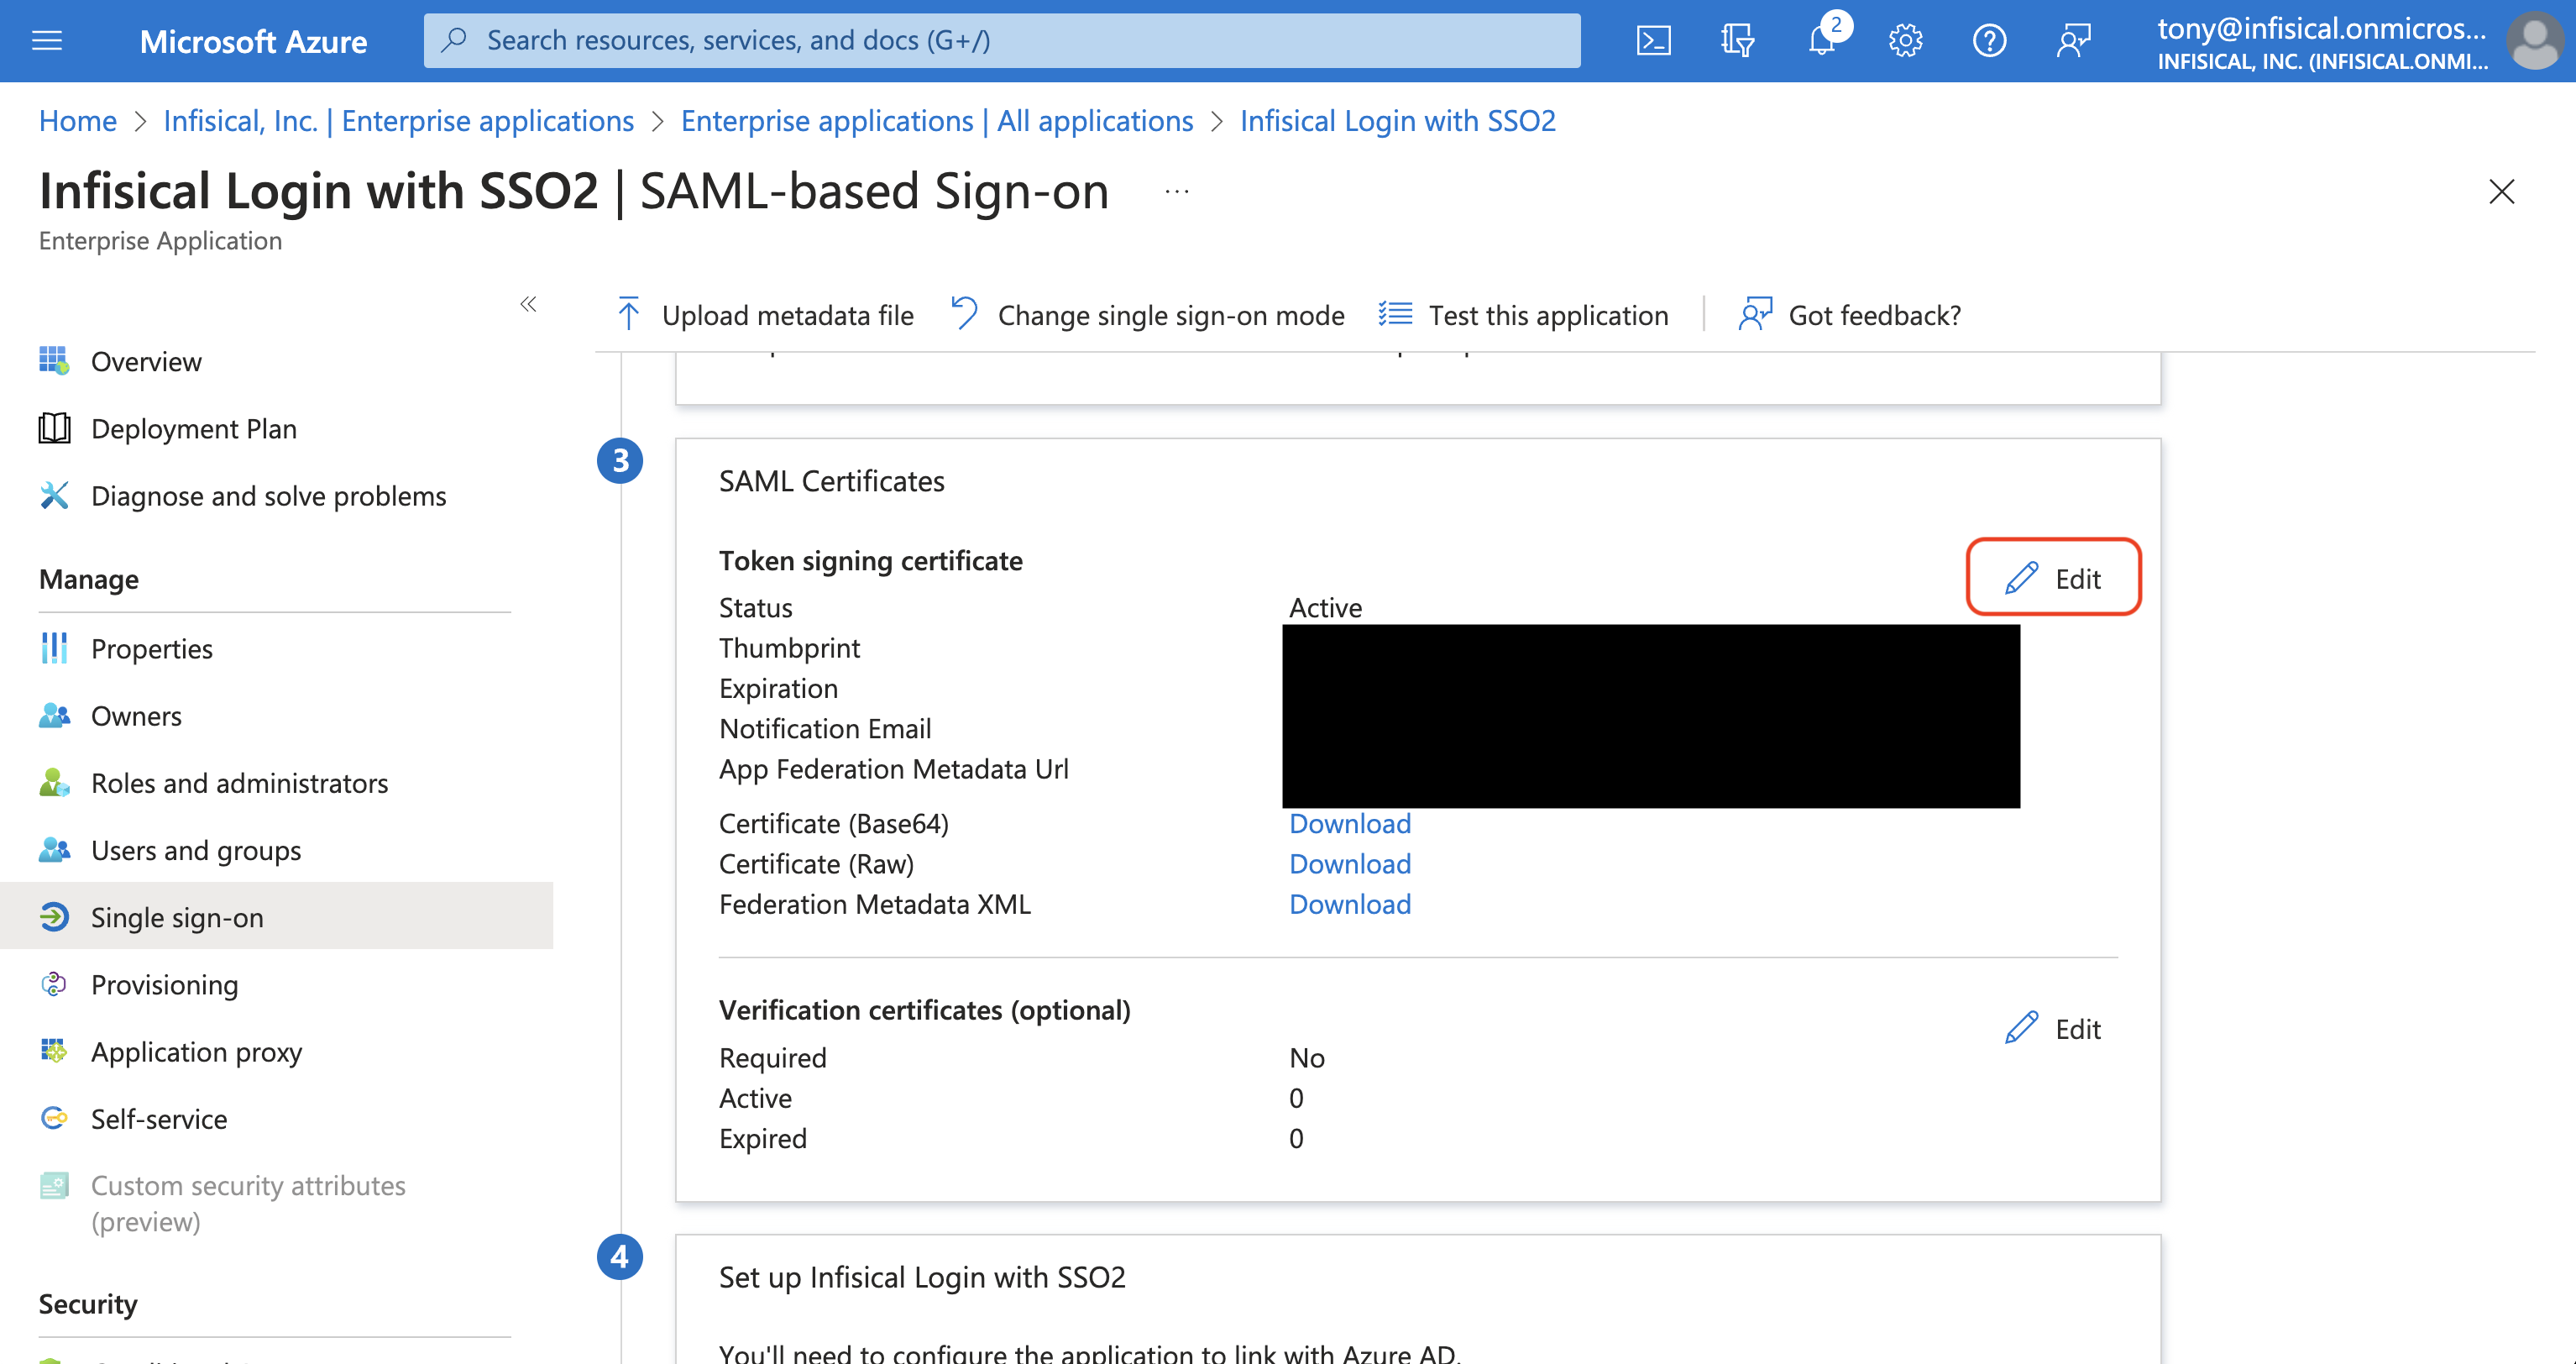
In Infisical, head to the Single Sign-On (SSO) page and select the General tab. Click Connect for SAML under the Connect to an Identity Provider section. Select Azure / Entra, then click Connect again.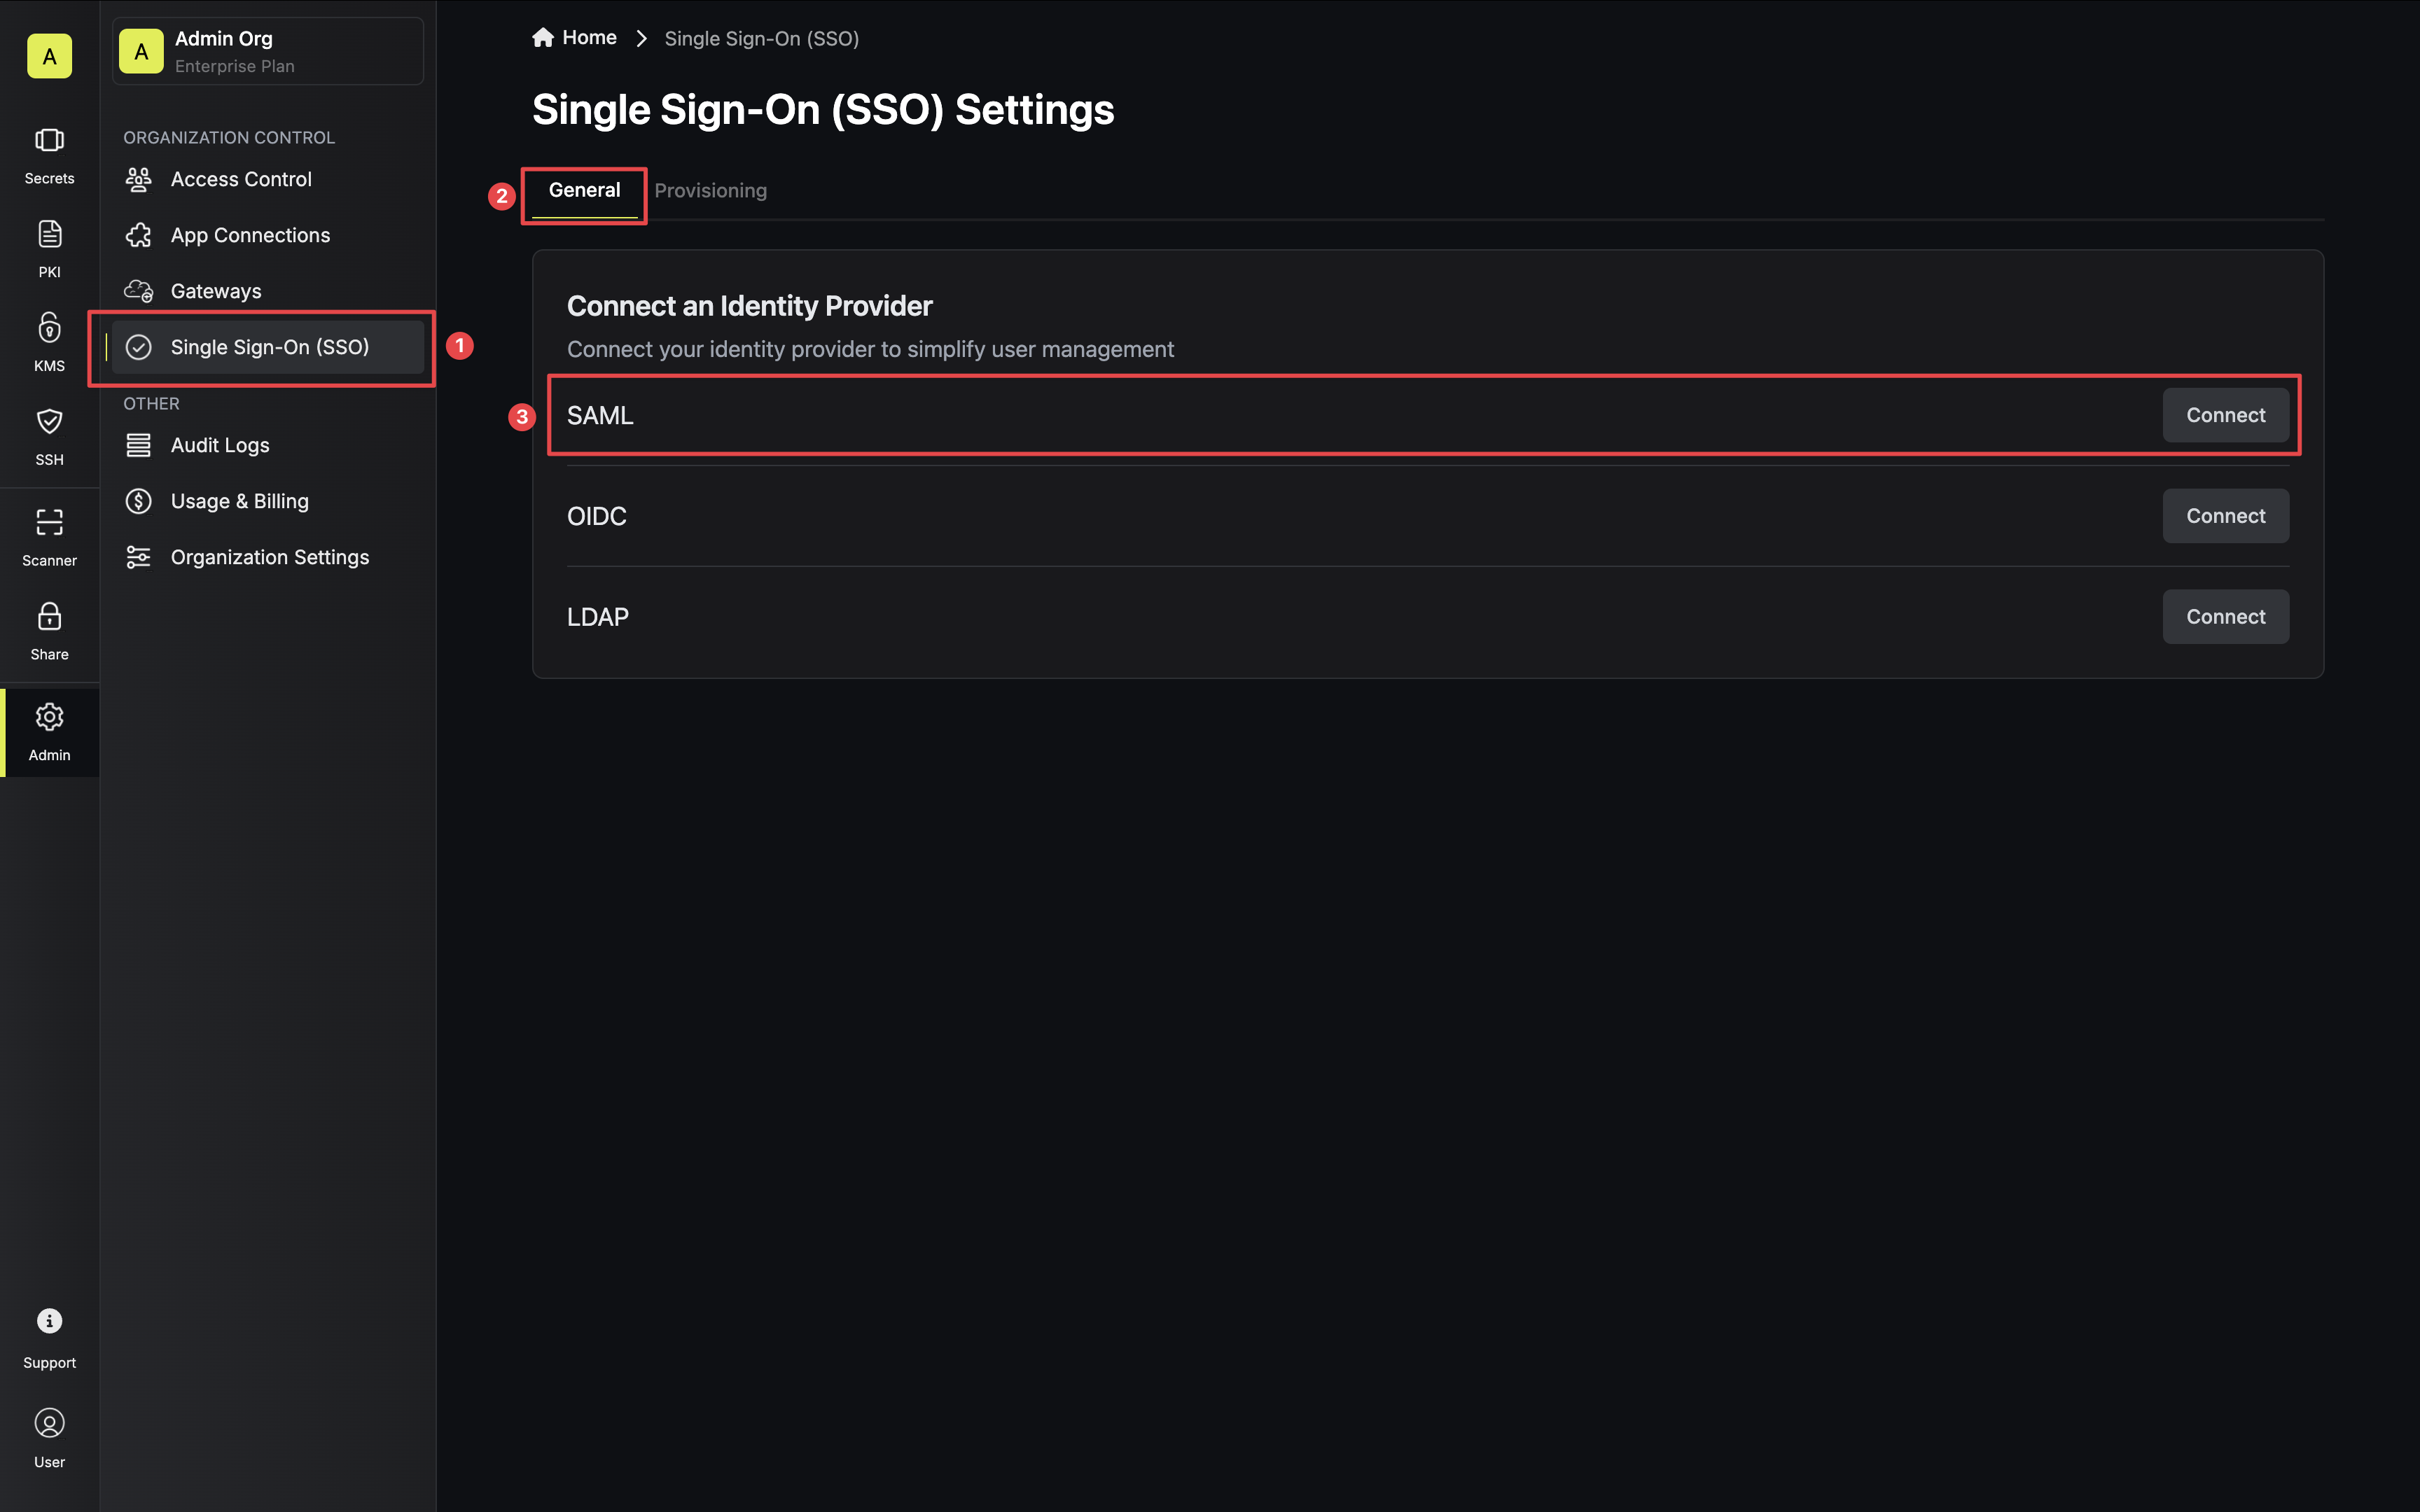 Next, copy the Reply URL (Assertion Consumer Service URL) and Identifier (Entity ID) to use when configuring the Azure SAML application.
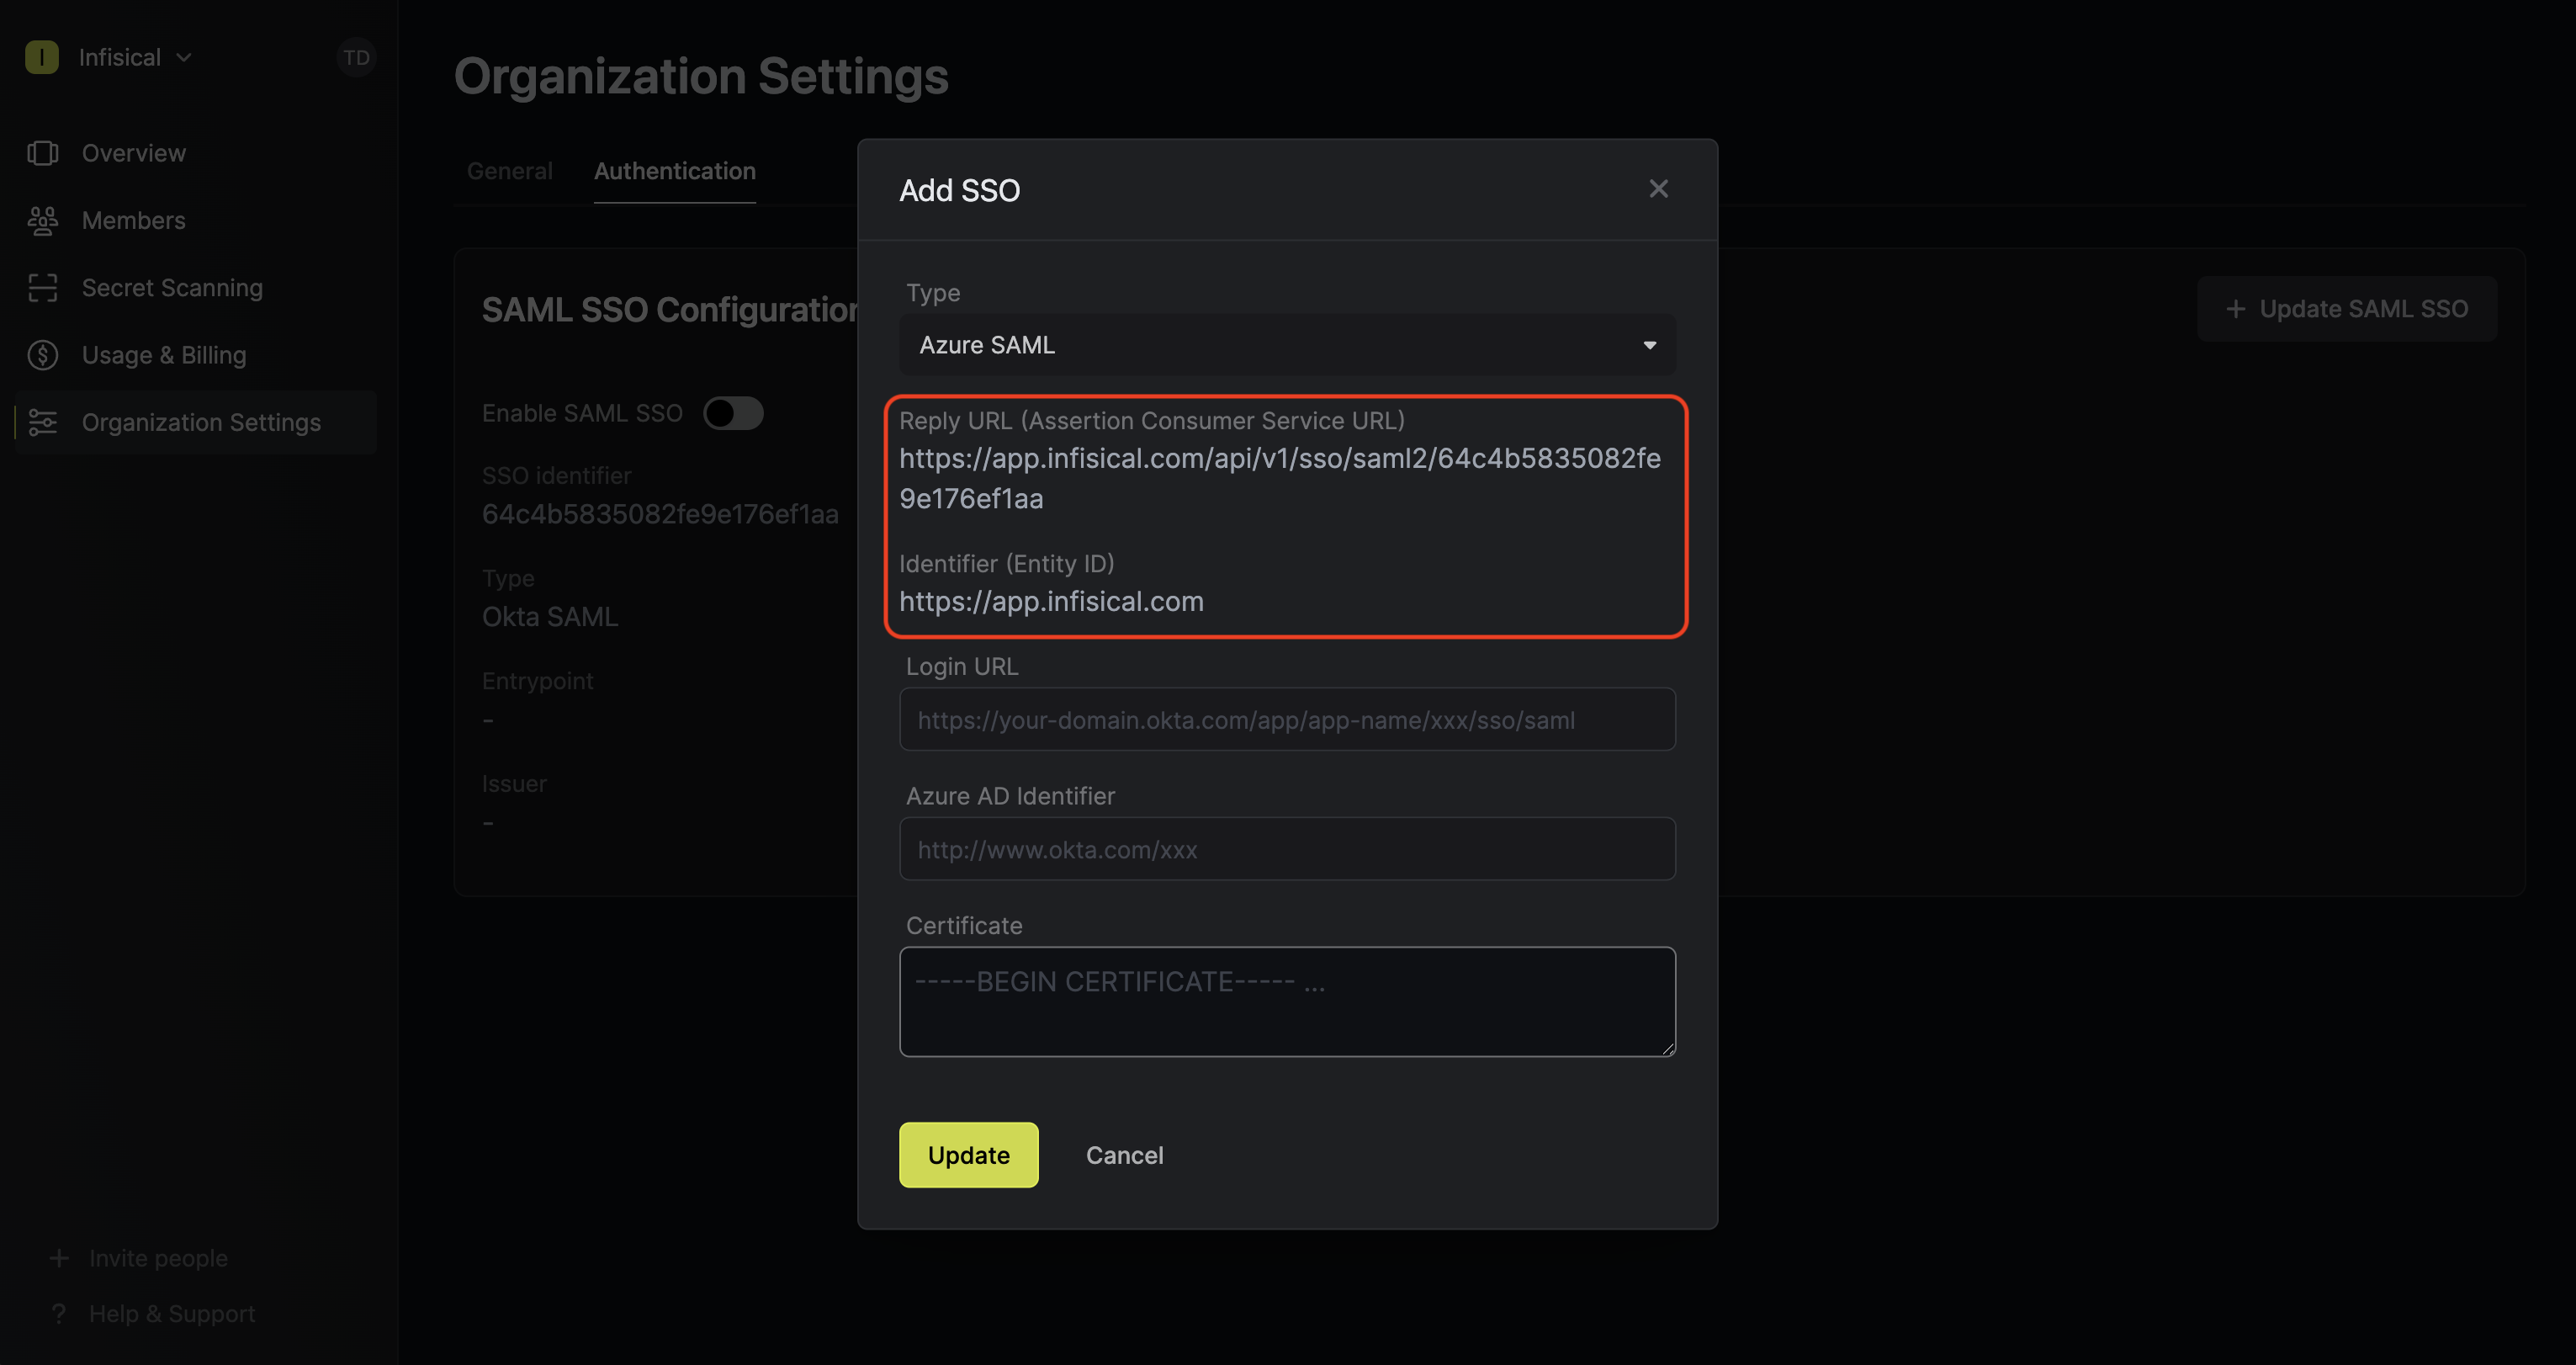
 Next, copy the Reply URL (Assertion Consumer Service URL) and Identifier (Entity ID) to use when configuring the Azure SAML application.
Create a SAML application in Azure
In the Azure Portal, navigate to the Azure Active Directory and select Enterprise applications. On this screen, select + New application.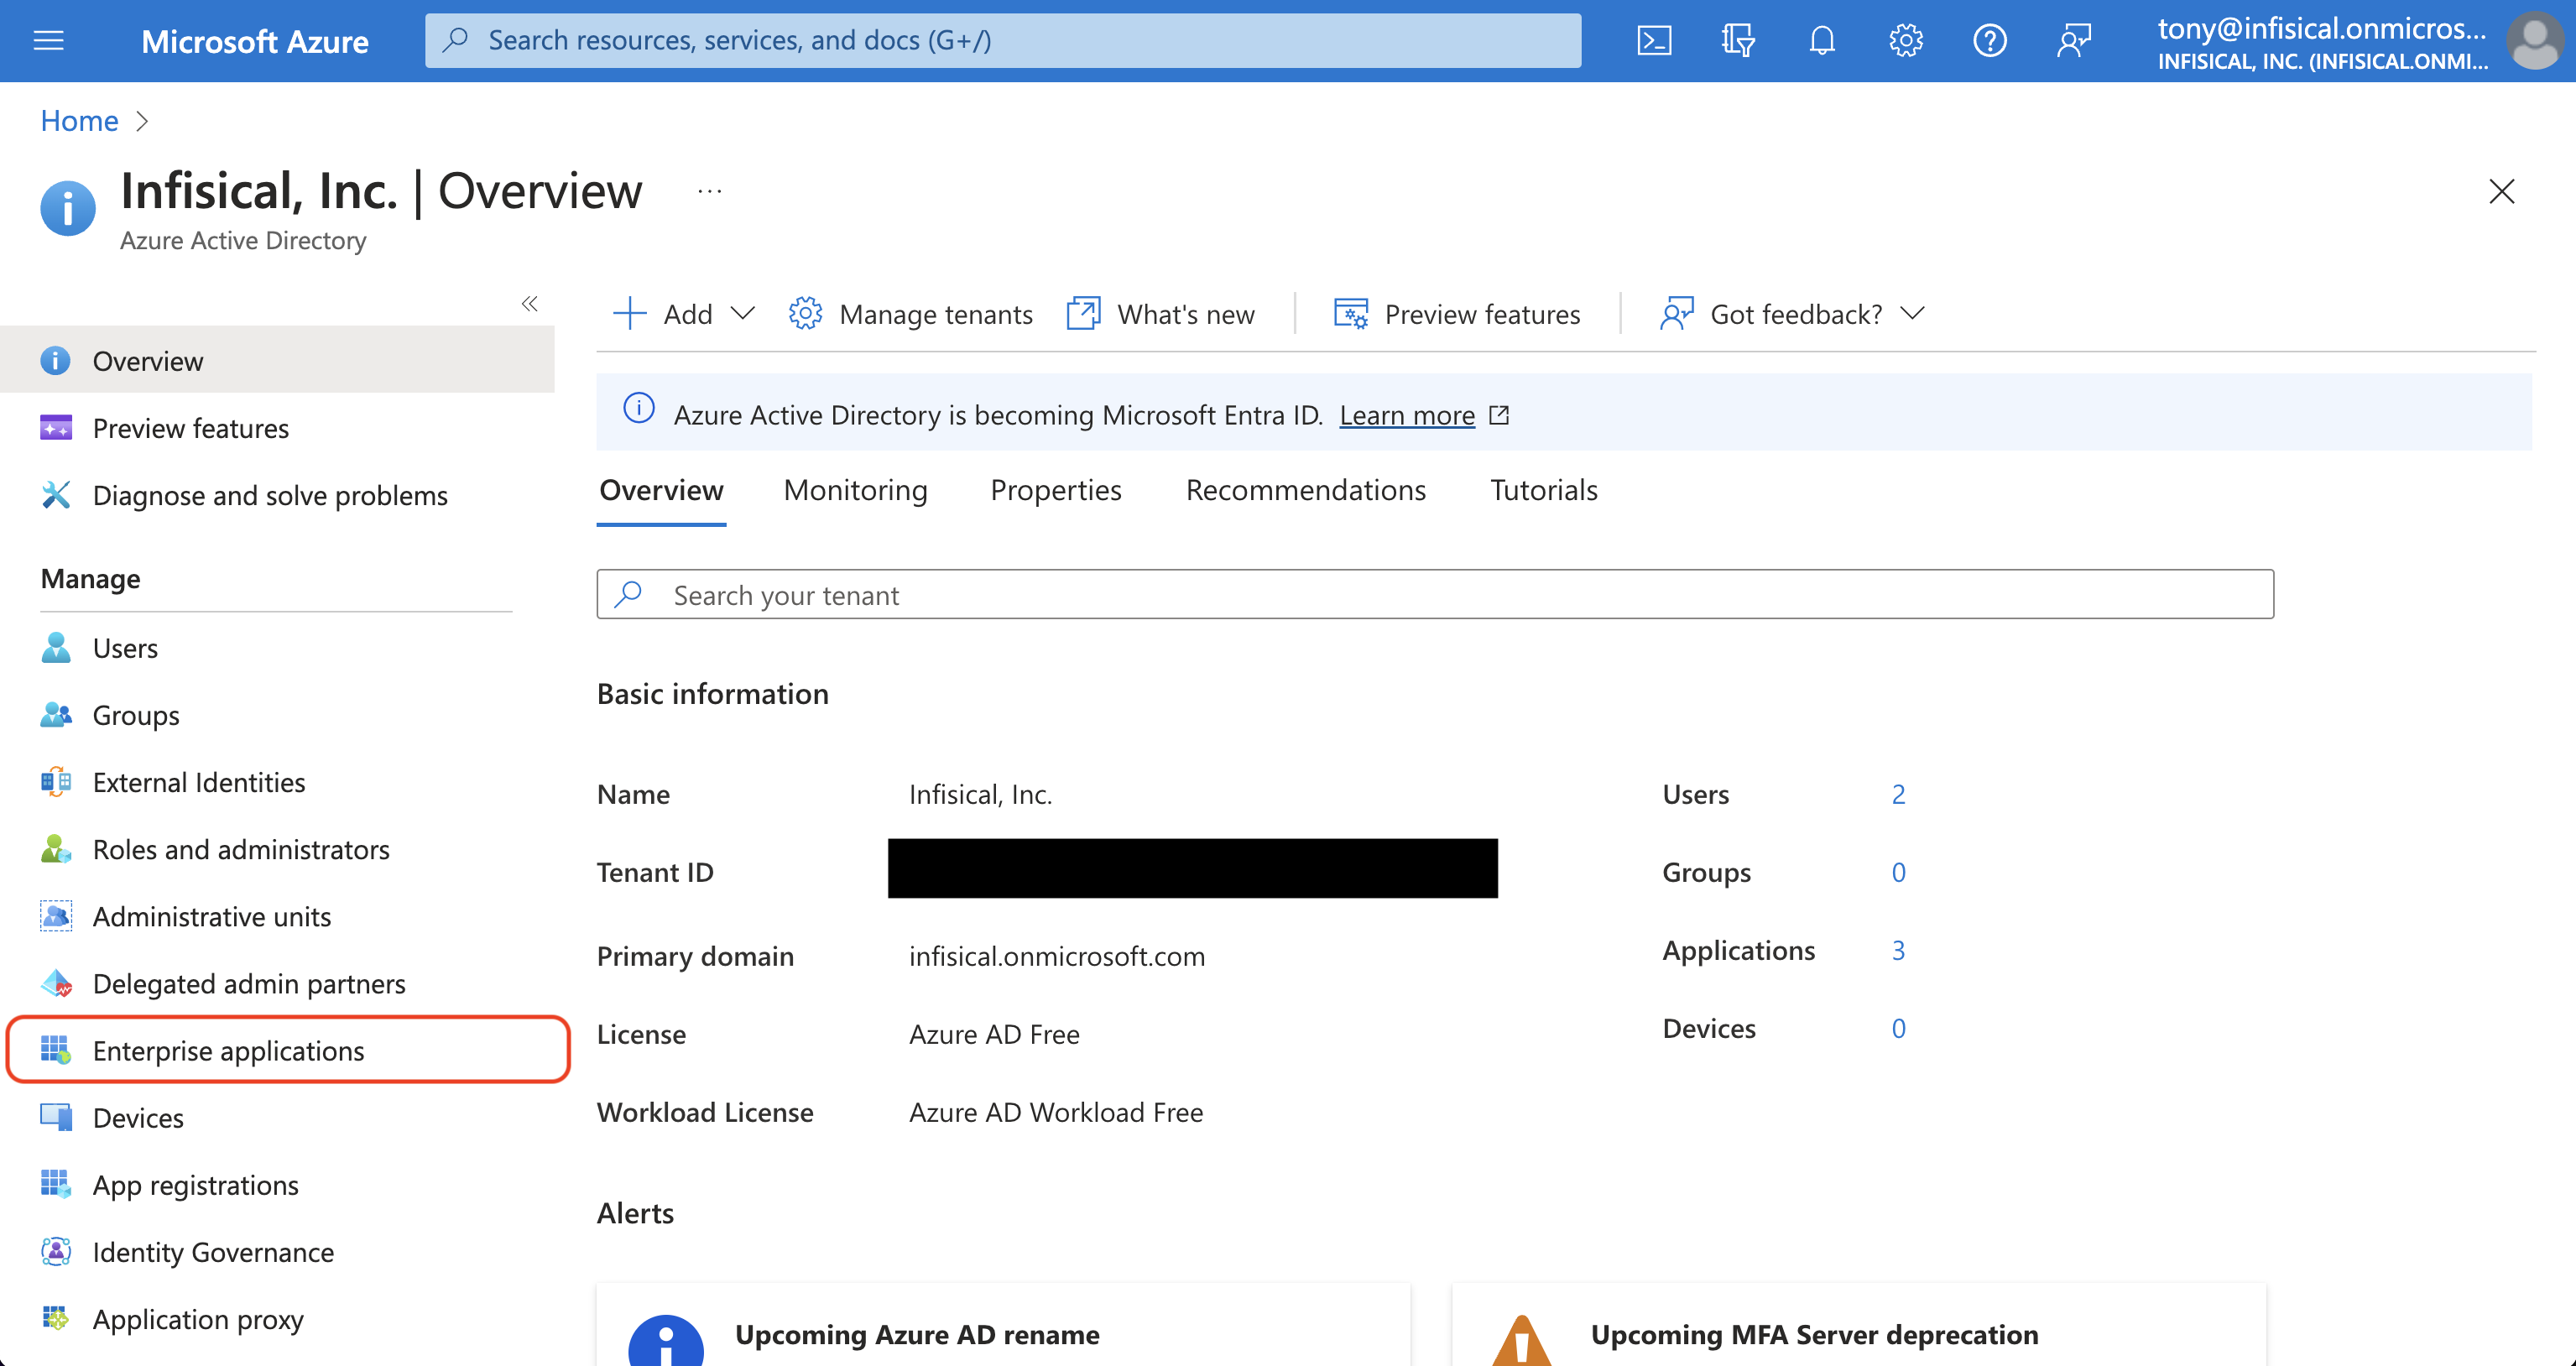
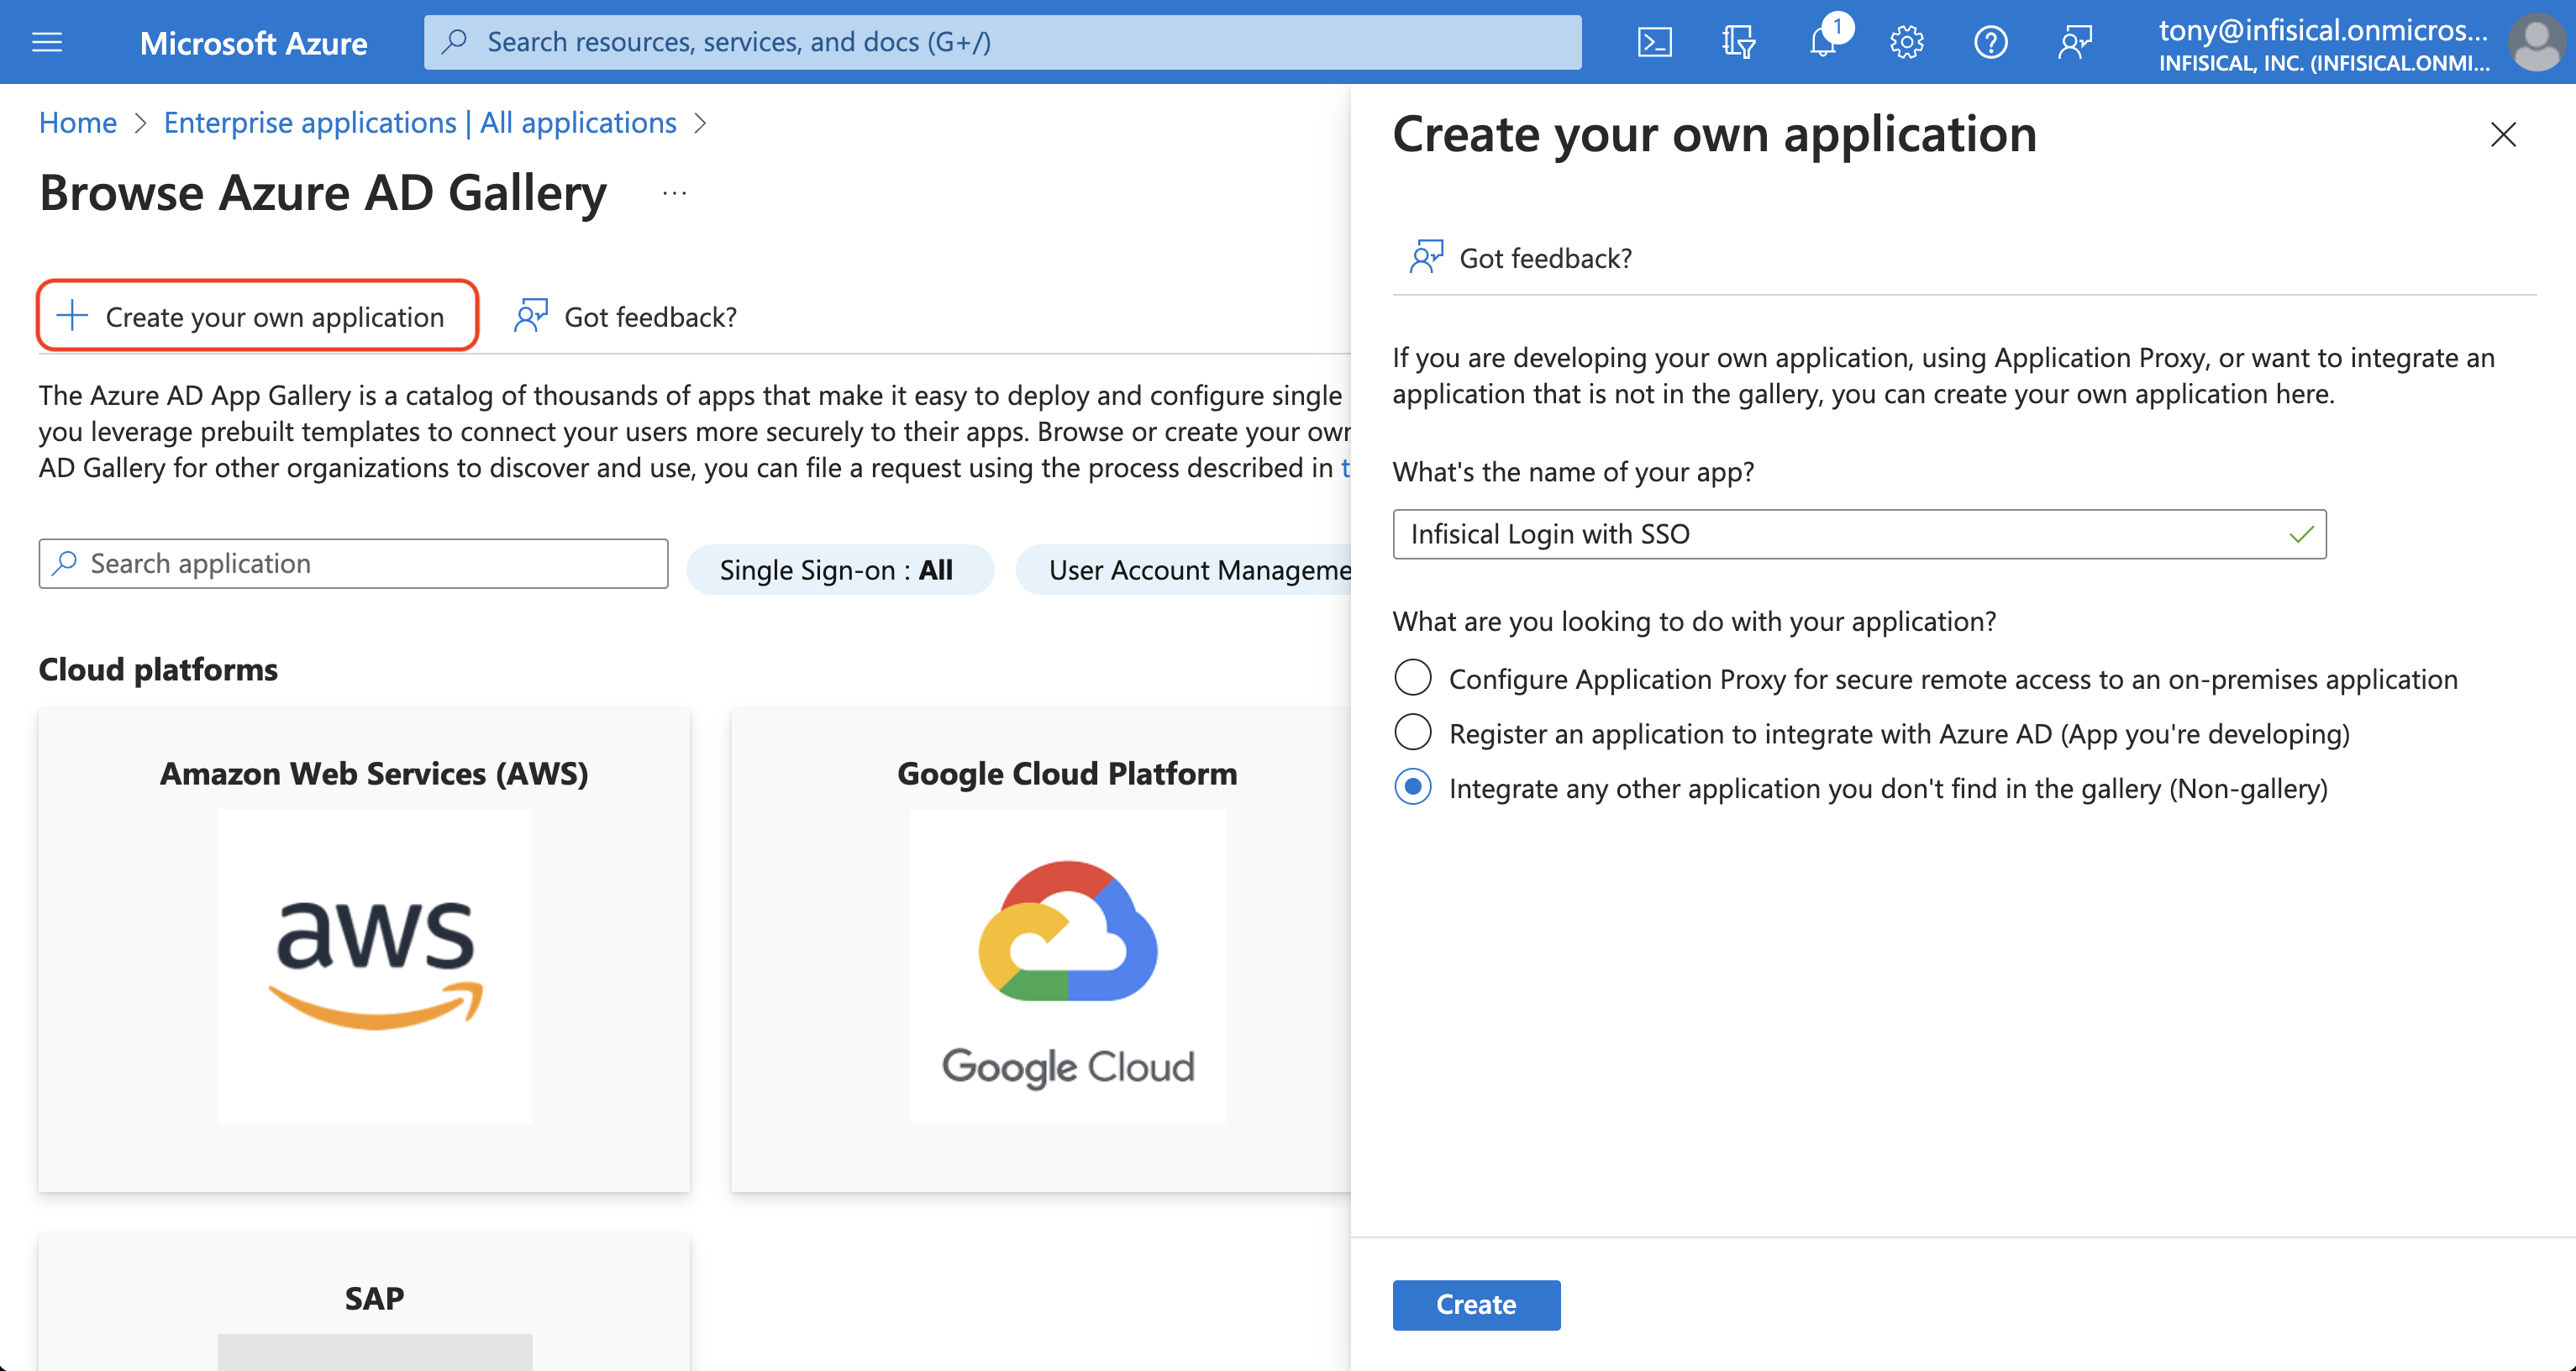
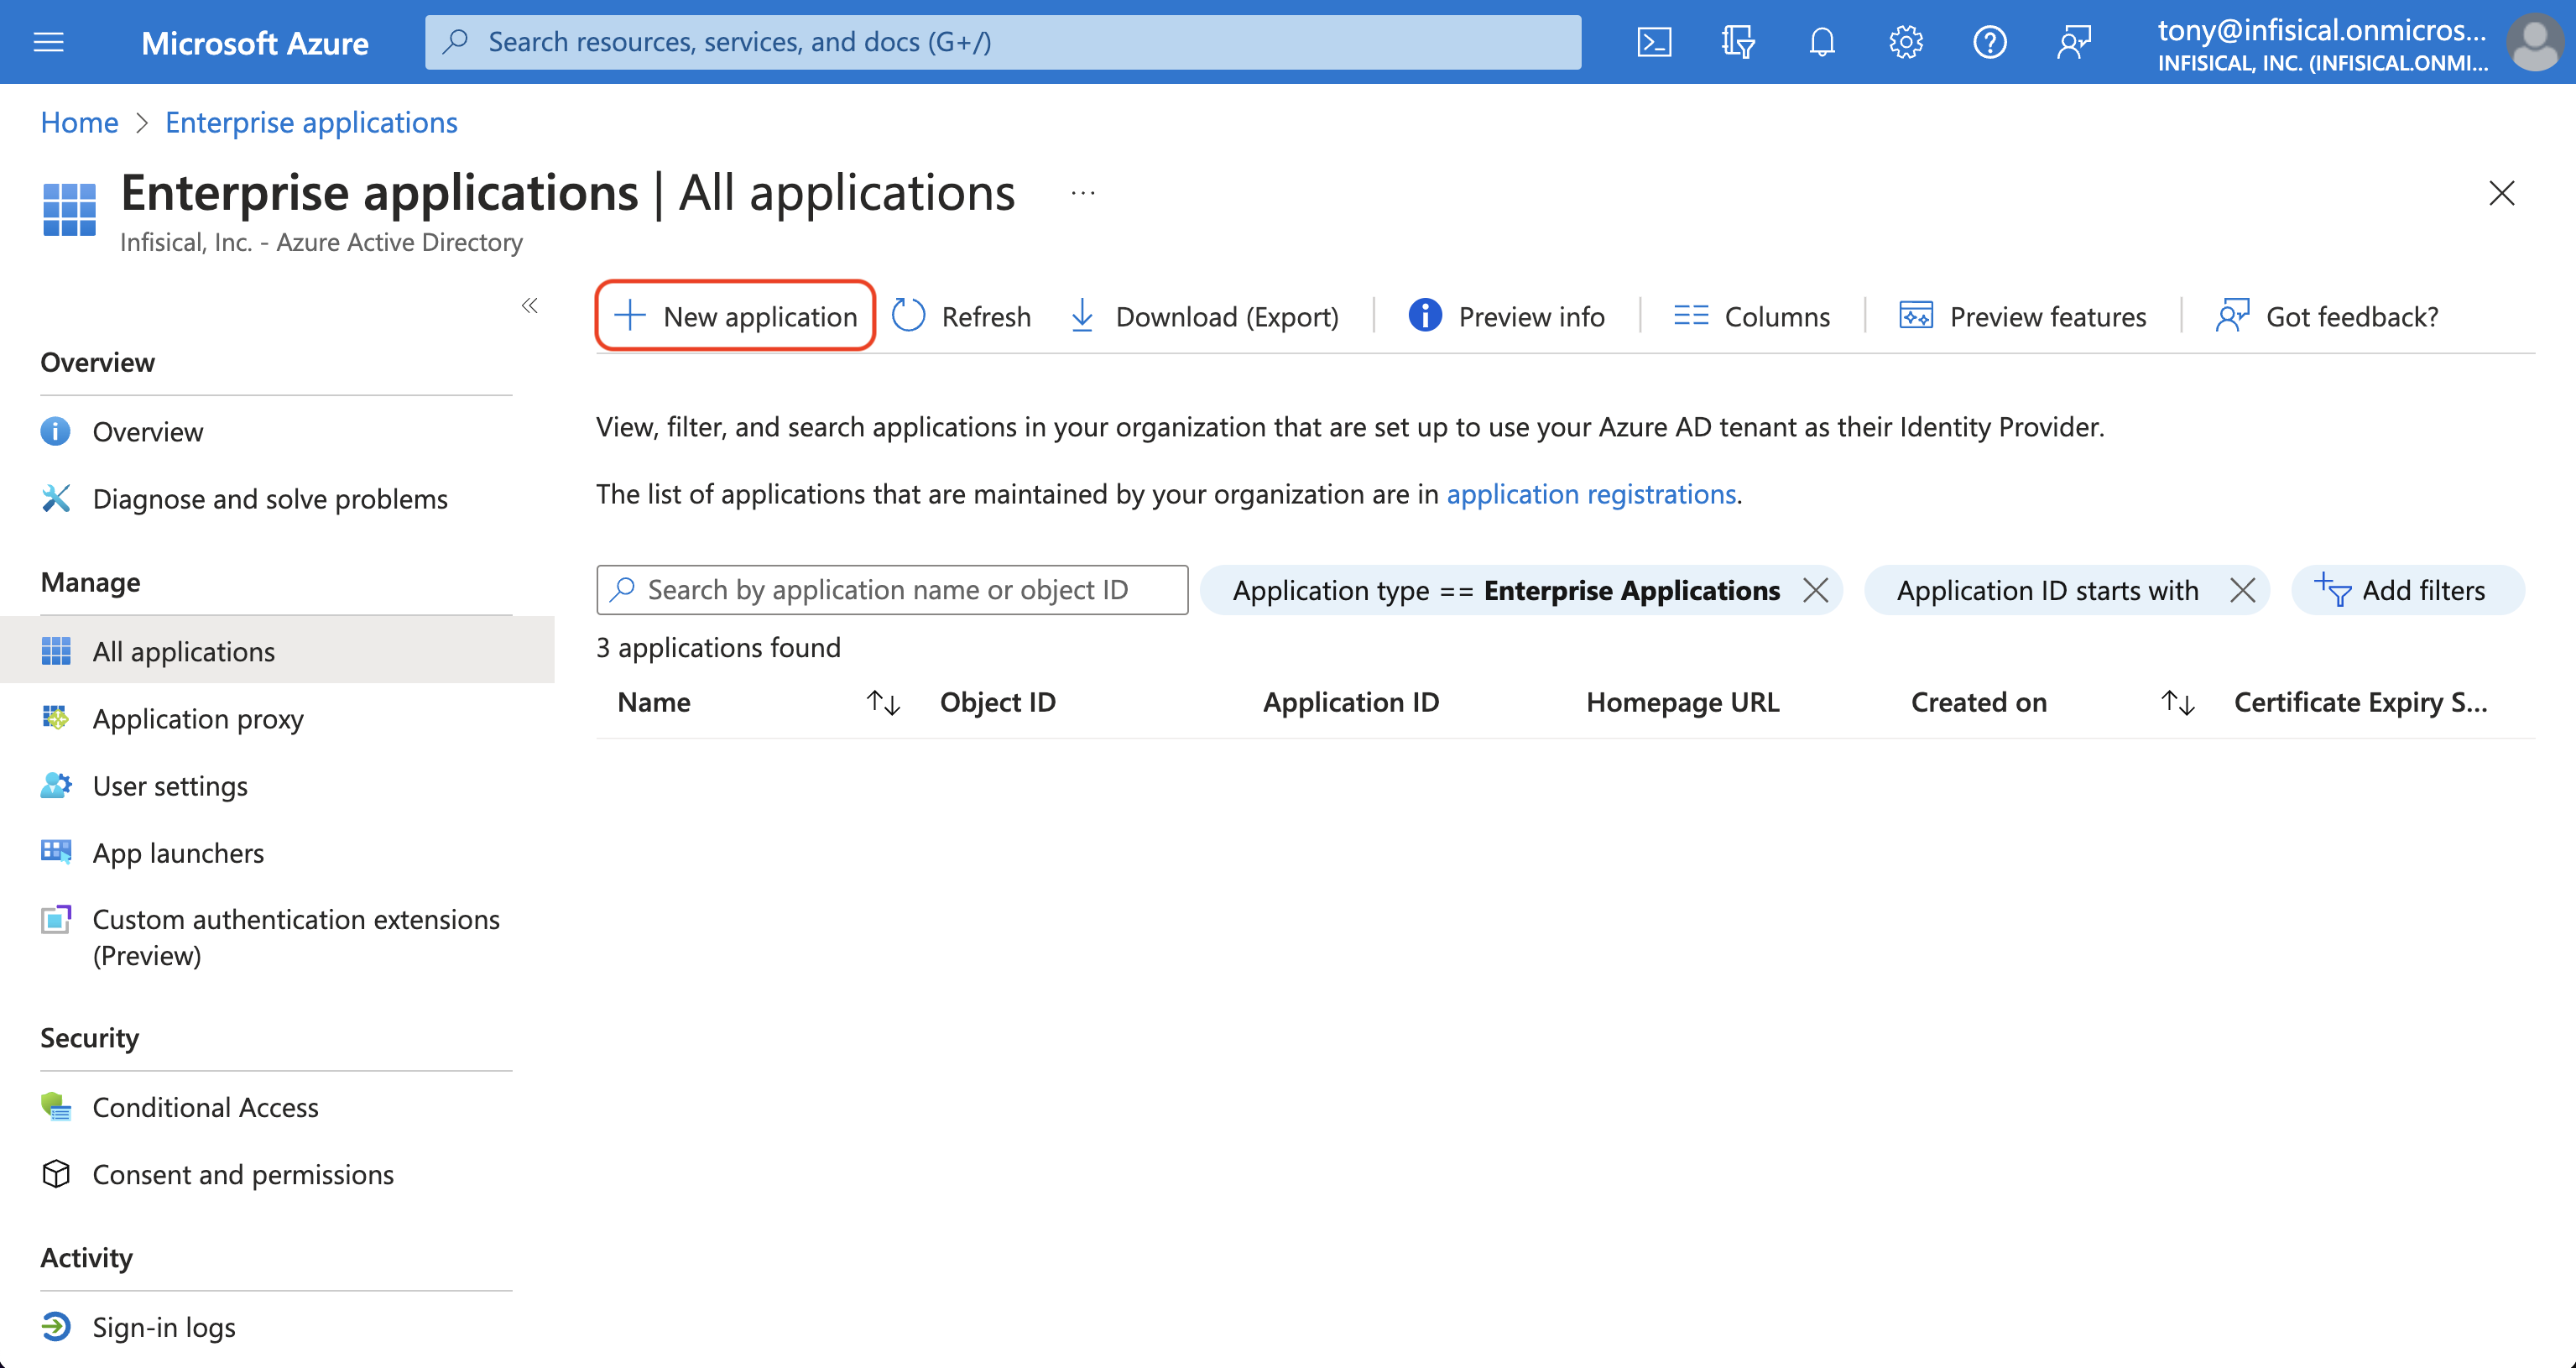 On the next screen, press the + Create your own application button.
Give the application a unique name like Infisical; choose the “Integrate any other application you don’t find in the gallery (Non-gallery)”
option and hit the Create button.
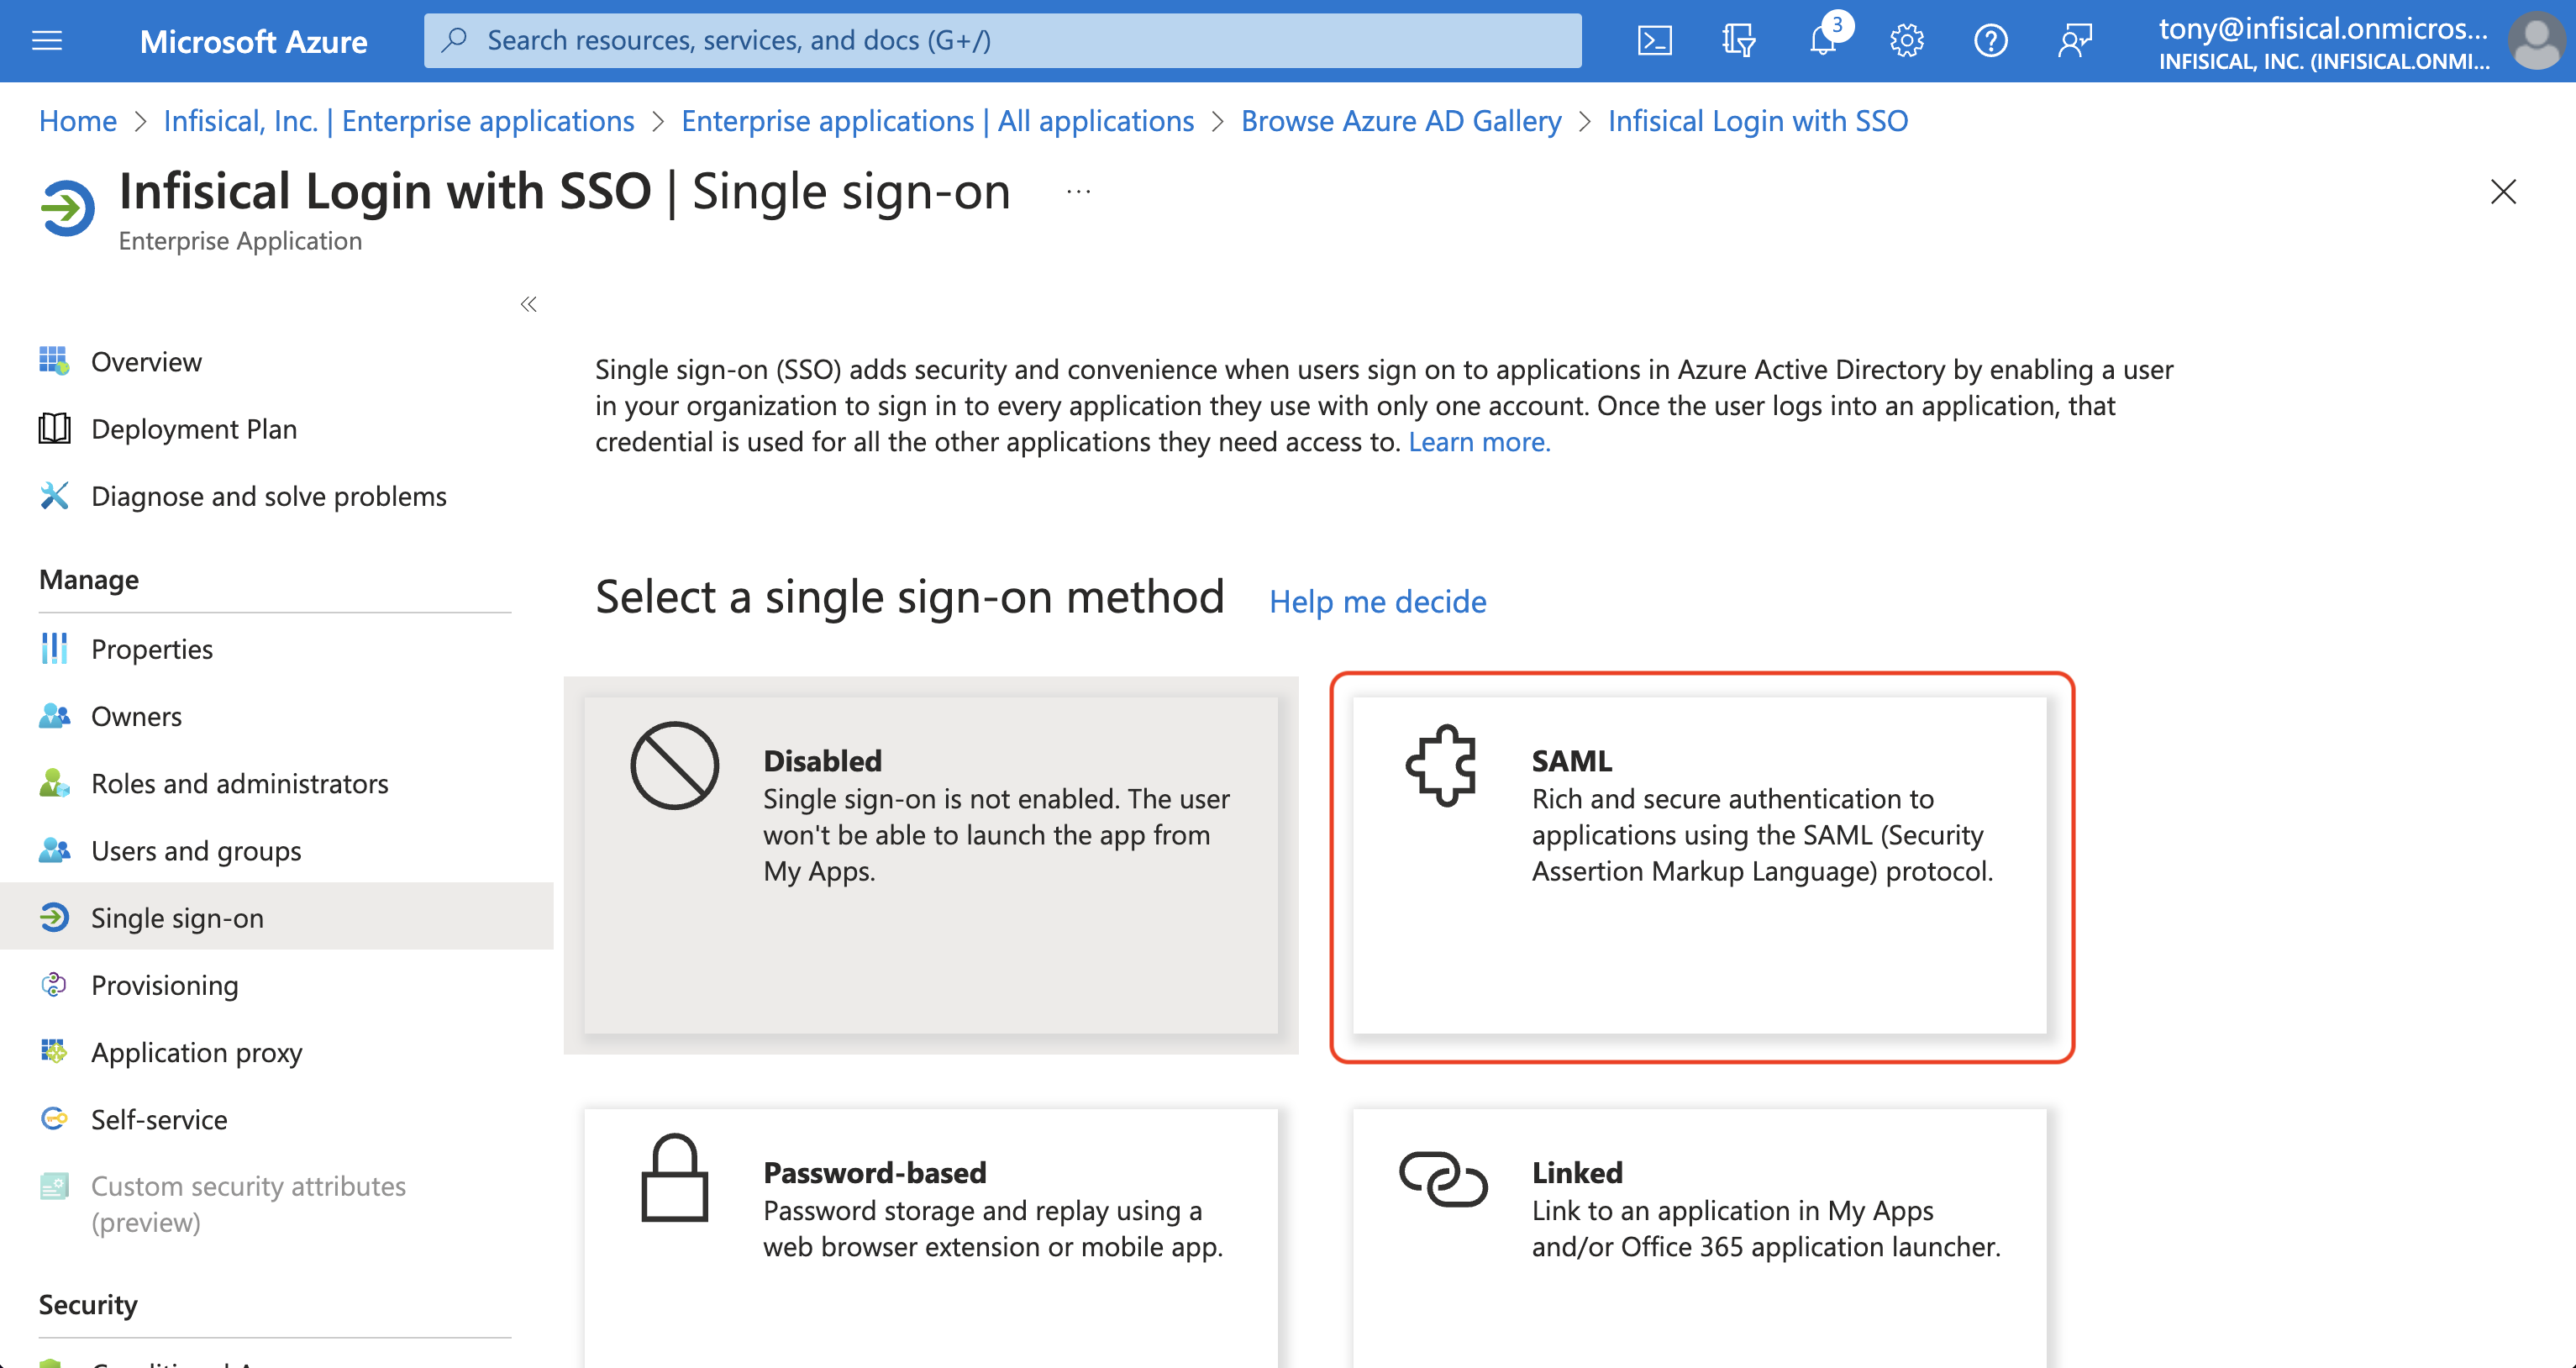
 On the application overview screen, select Single sign-on from the left sidebar. From there, select the SAML single sign-on method.
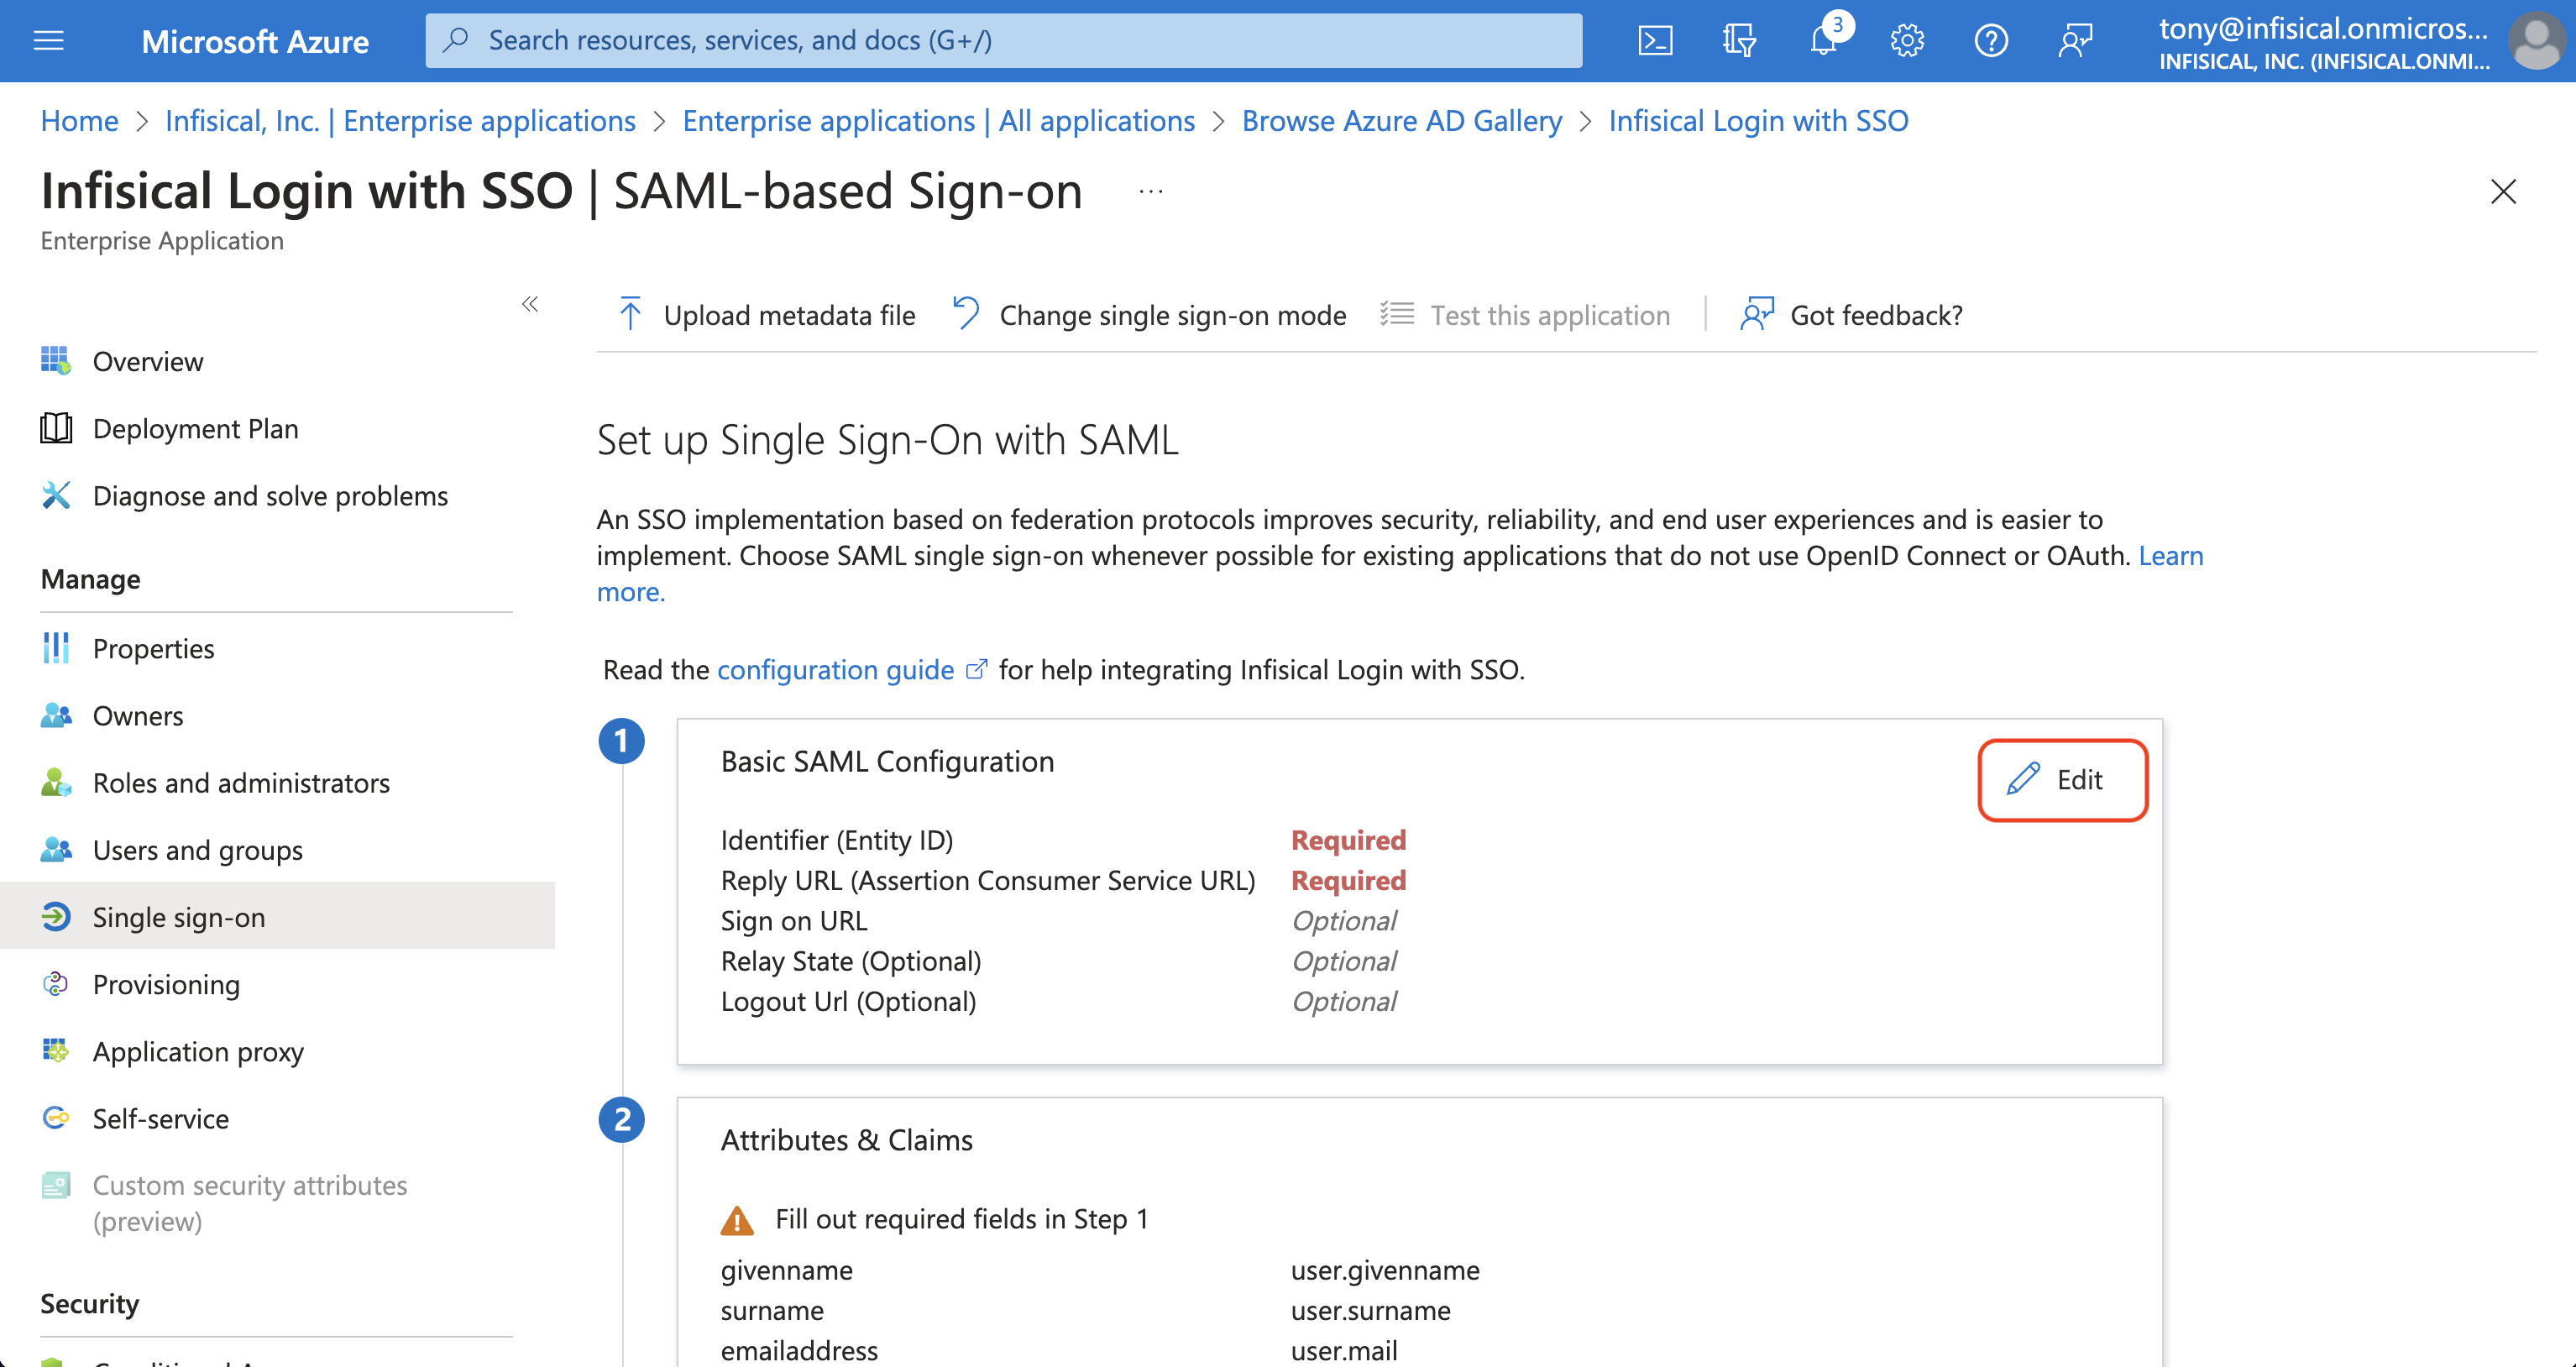
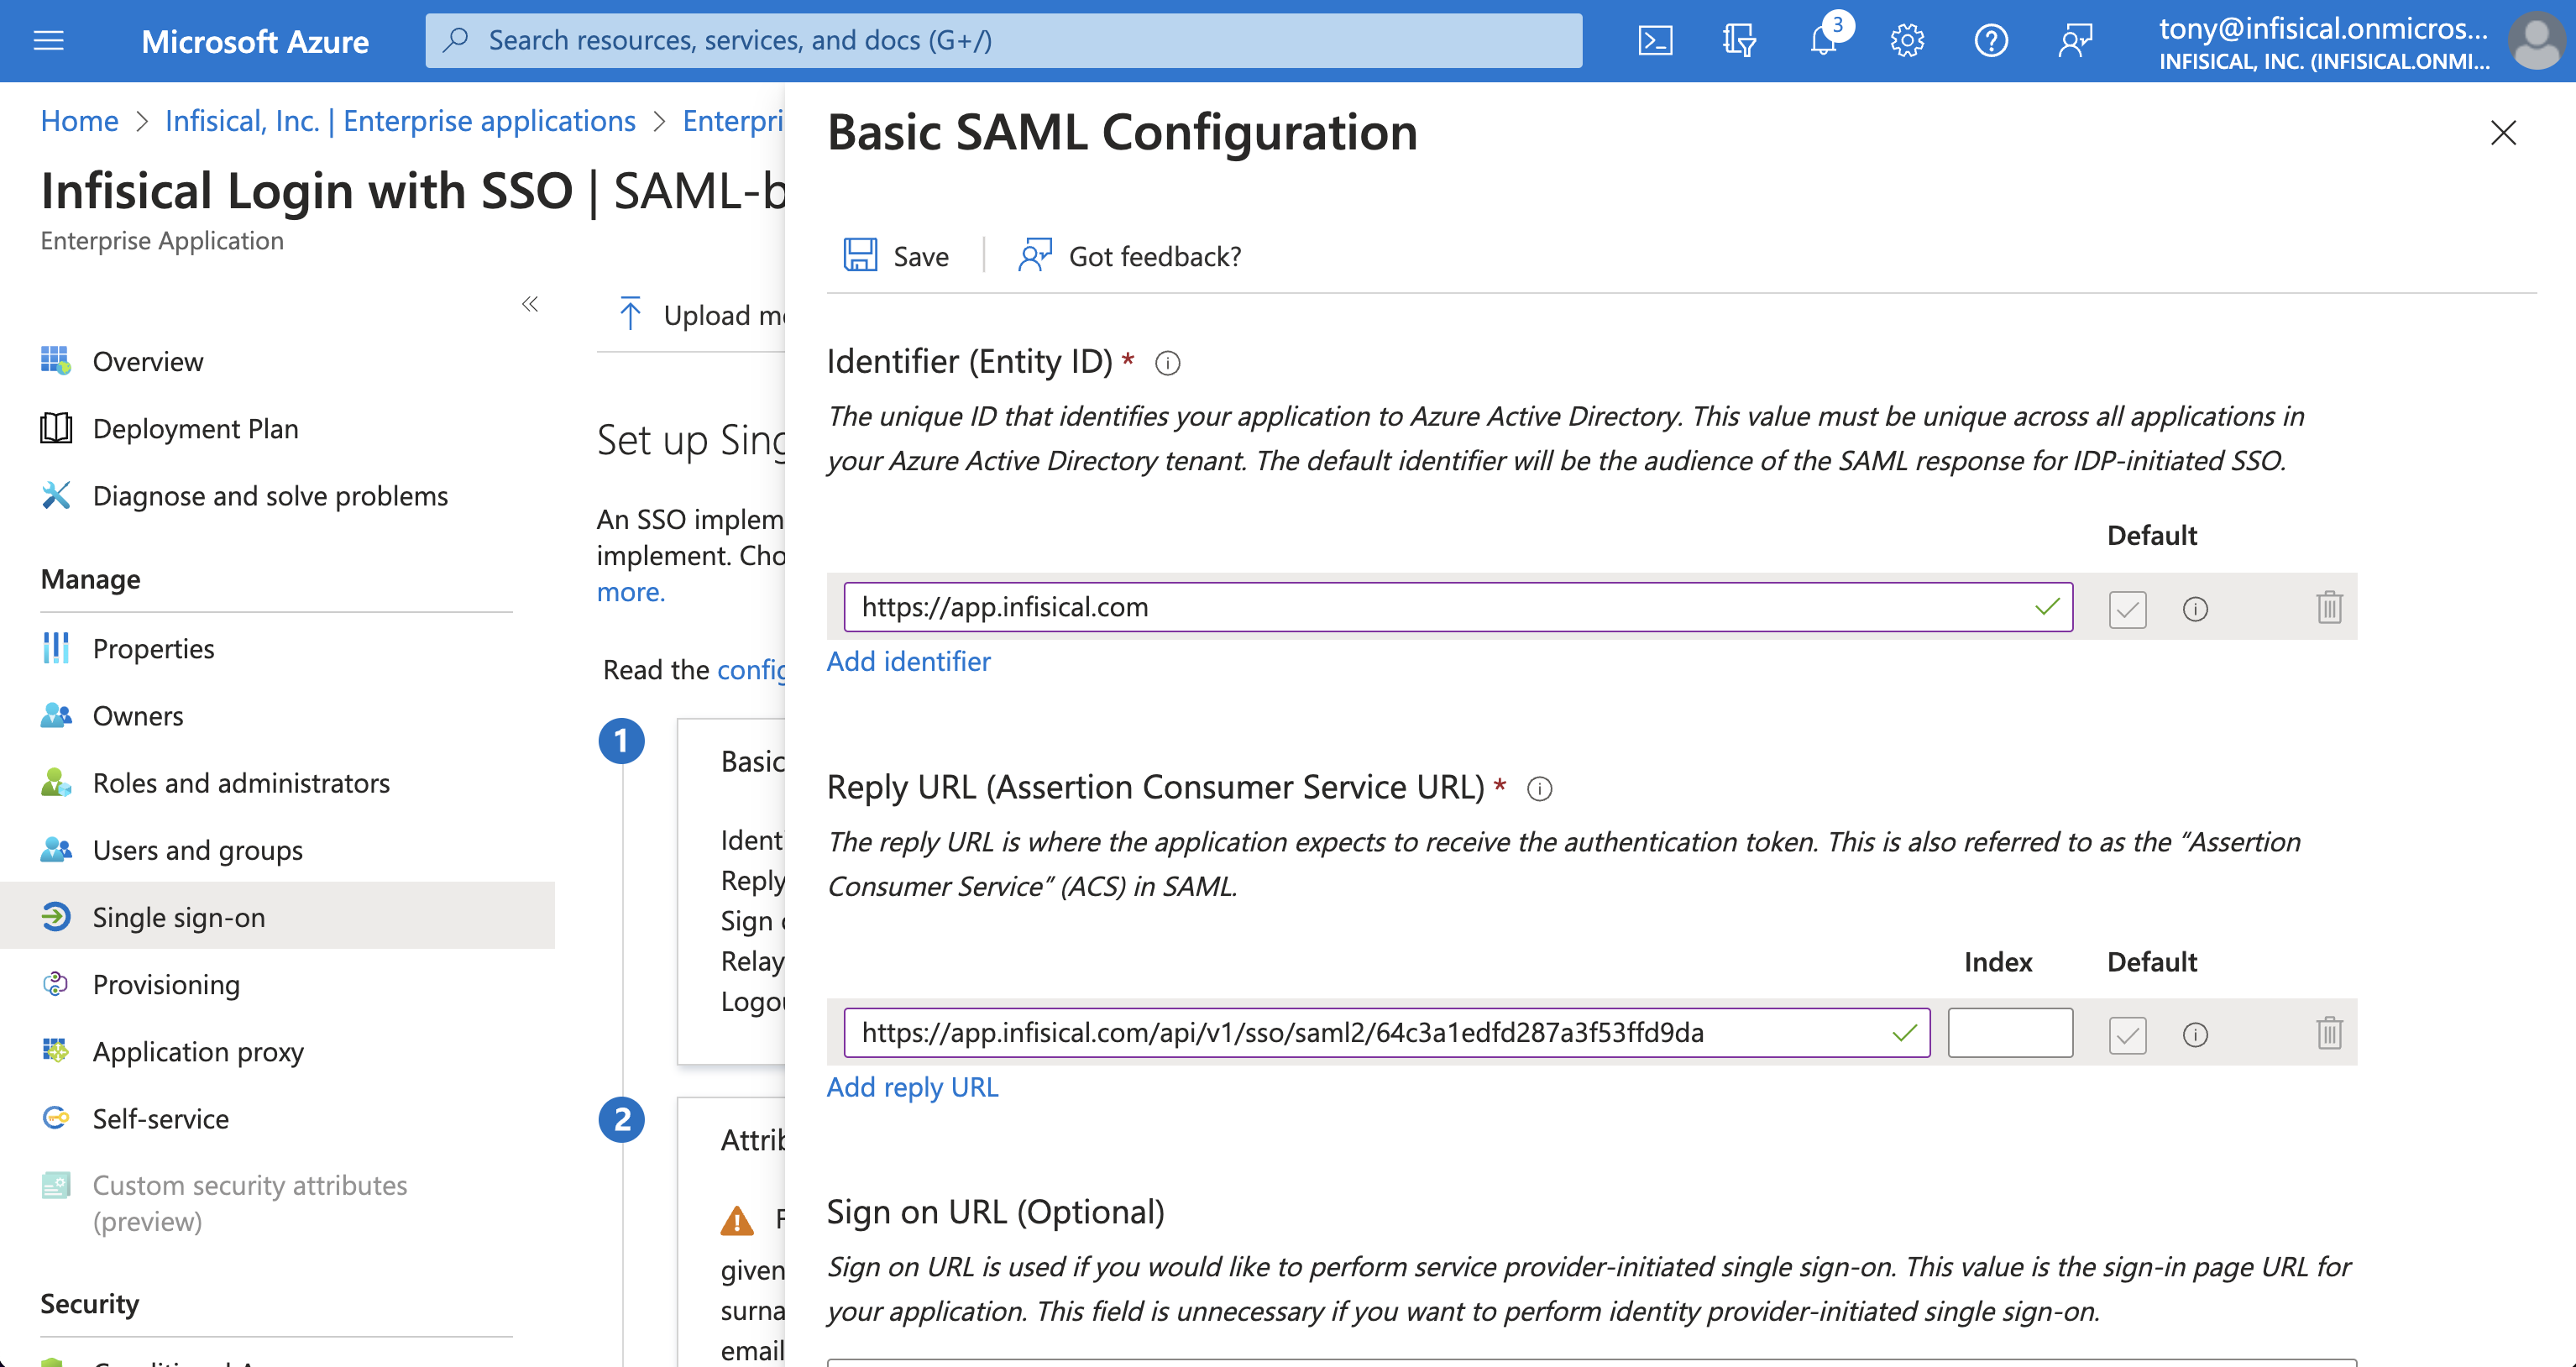
 Next, select Edit in the Basic SAML Configuration section and add/set the Identifier (Entity ID) to Entity ID and add/set the Reply URL (Assertion Consumer Service URL) to ACS URL from step 1.
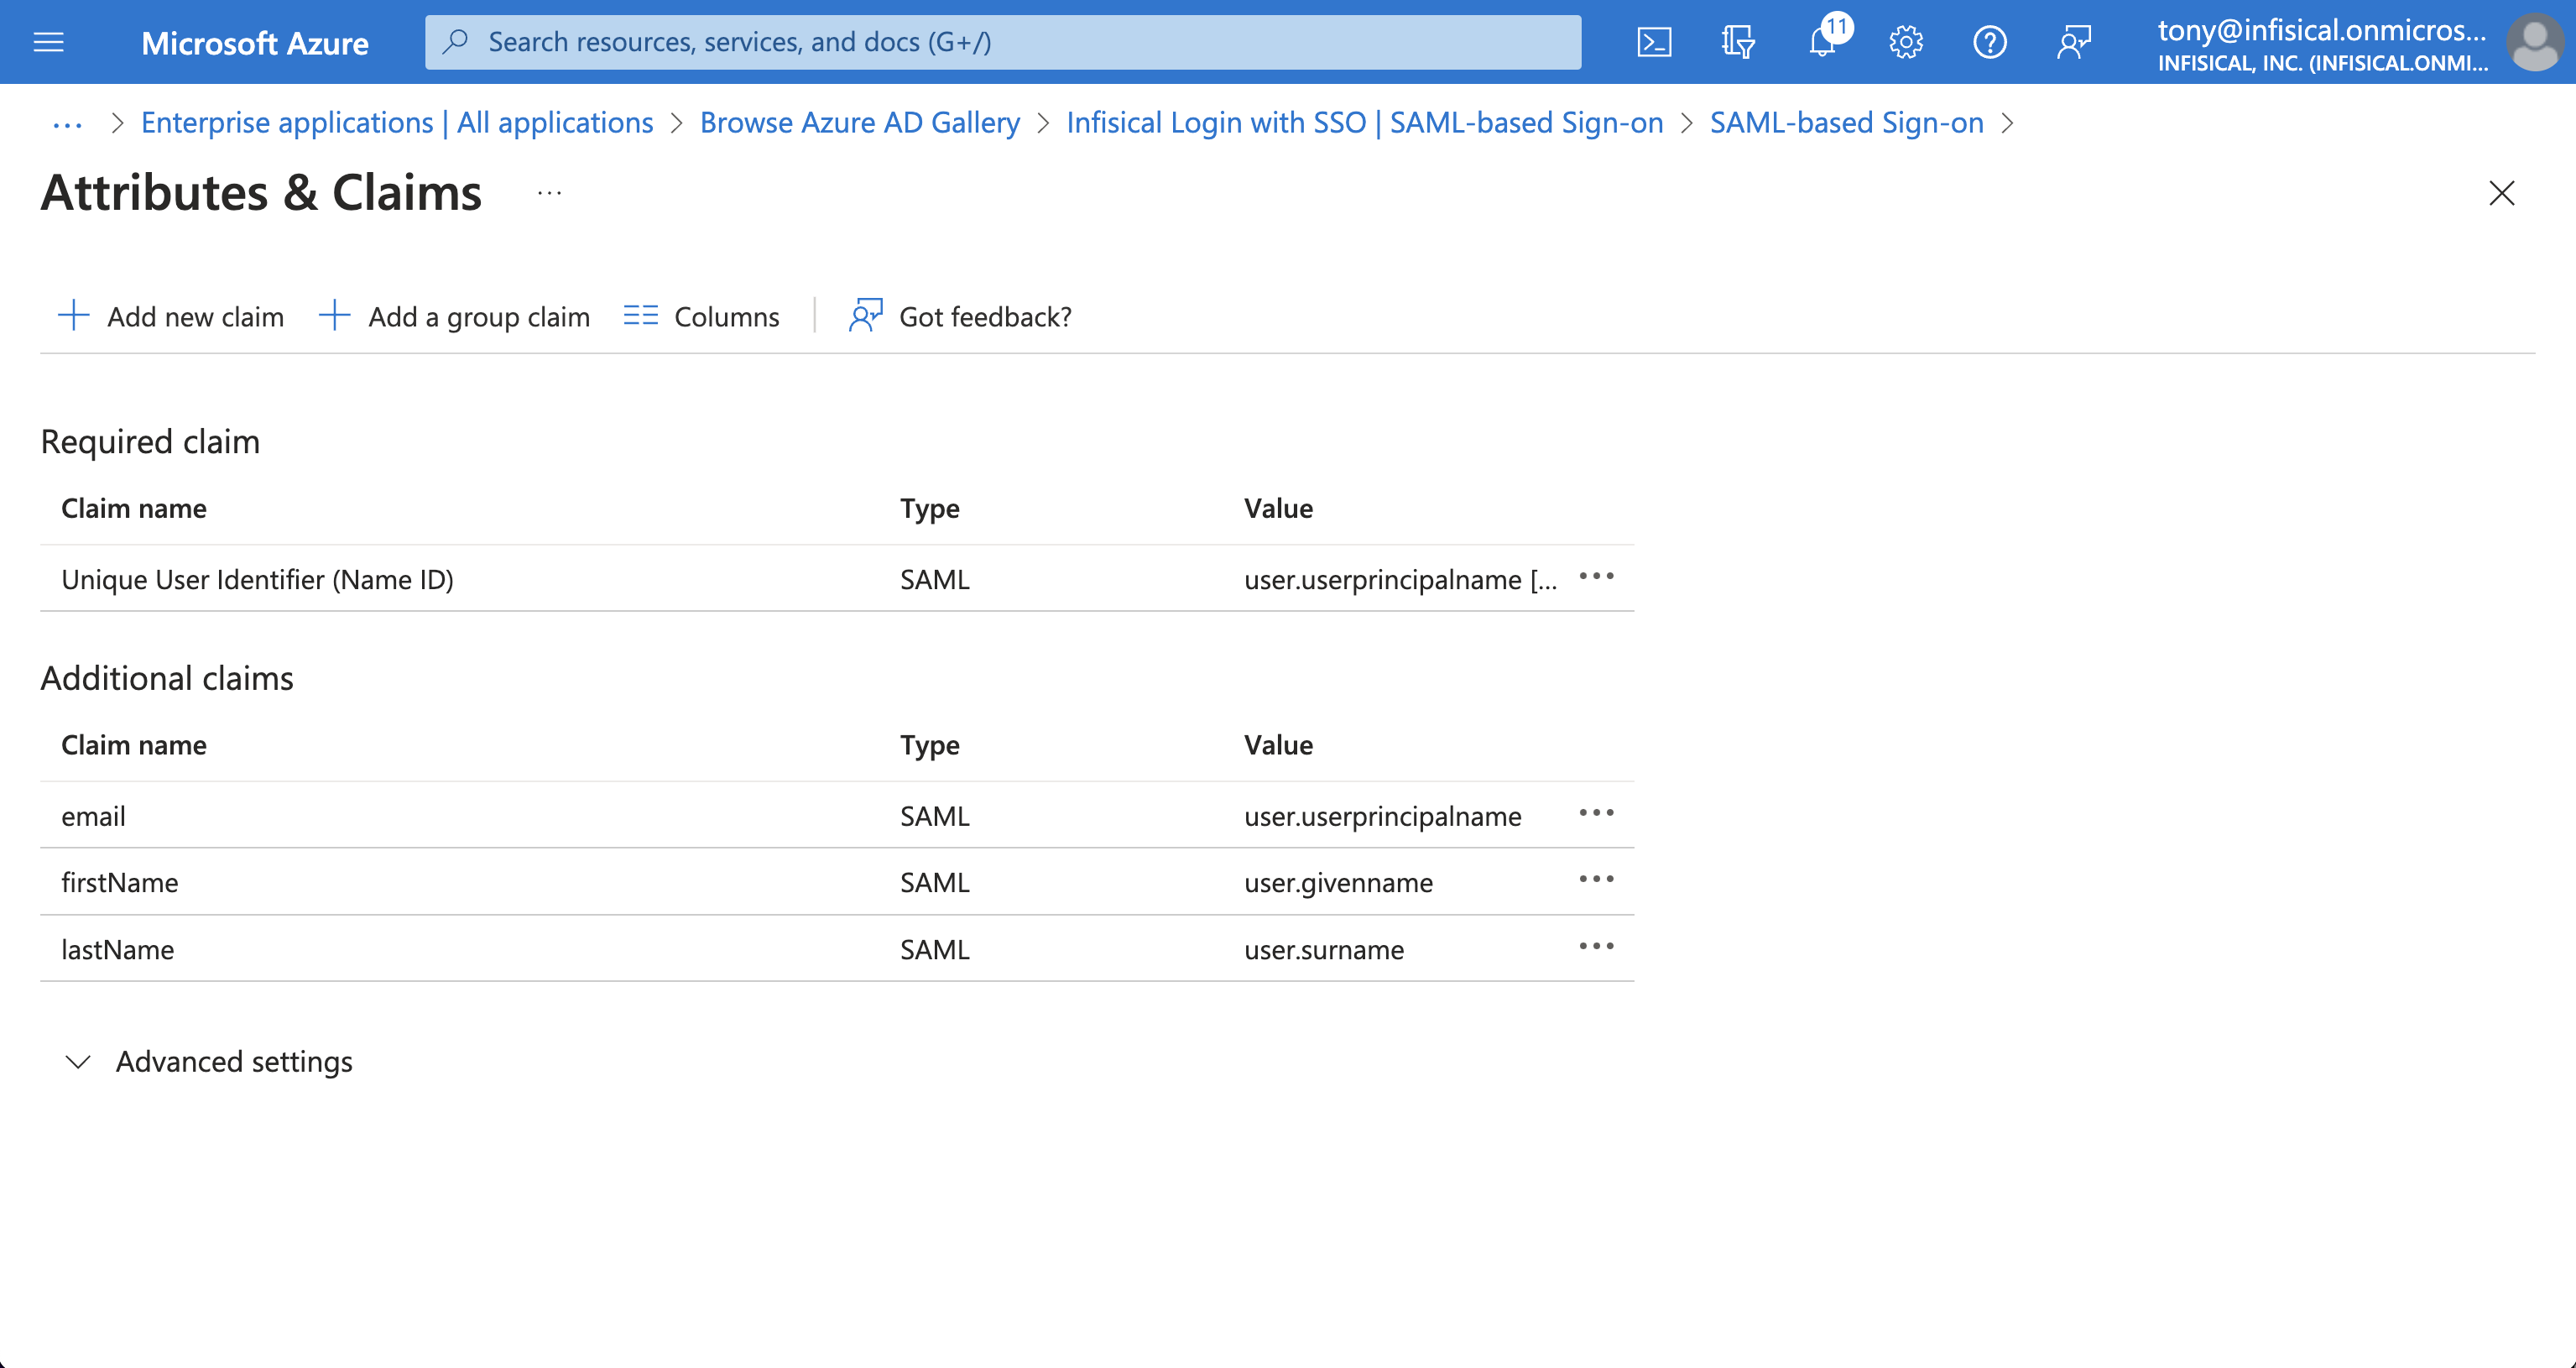
 Back in the Set up Single Sign-On with SAML screen, select Edit in the Attributes & Claims section and configure the following map:

 On the next screen, press the + Create your own application button.
Give the application a unique name like Infisical; choose the “Integrate any other application you don’t find in the gallery (Non-gallery)”
option and hit the Create button.
 On the application overview screen, select Single sign-on from the left sidebar. From there, select the SAML single sign-on method.
 Next, select Edit in the Basic SAML Configuration section and add/set the Identifier (Entity ID) to Entity ID and add/set the Reply URL (Assertion Consumer Service URL) to ACS URL from step 1.

If you’re self-hosting Infisical, then you will want to replace
https://app.infisical.com with your own domain.-
email -> user.userprincipalname -
firstName -> user.givenname -
lastName -> user.surname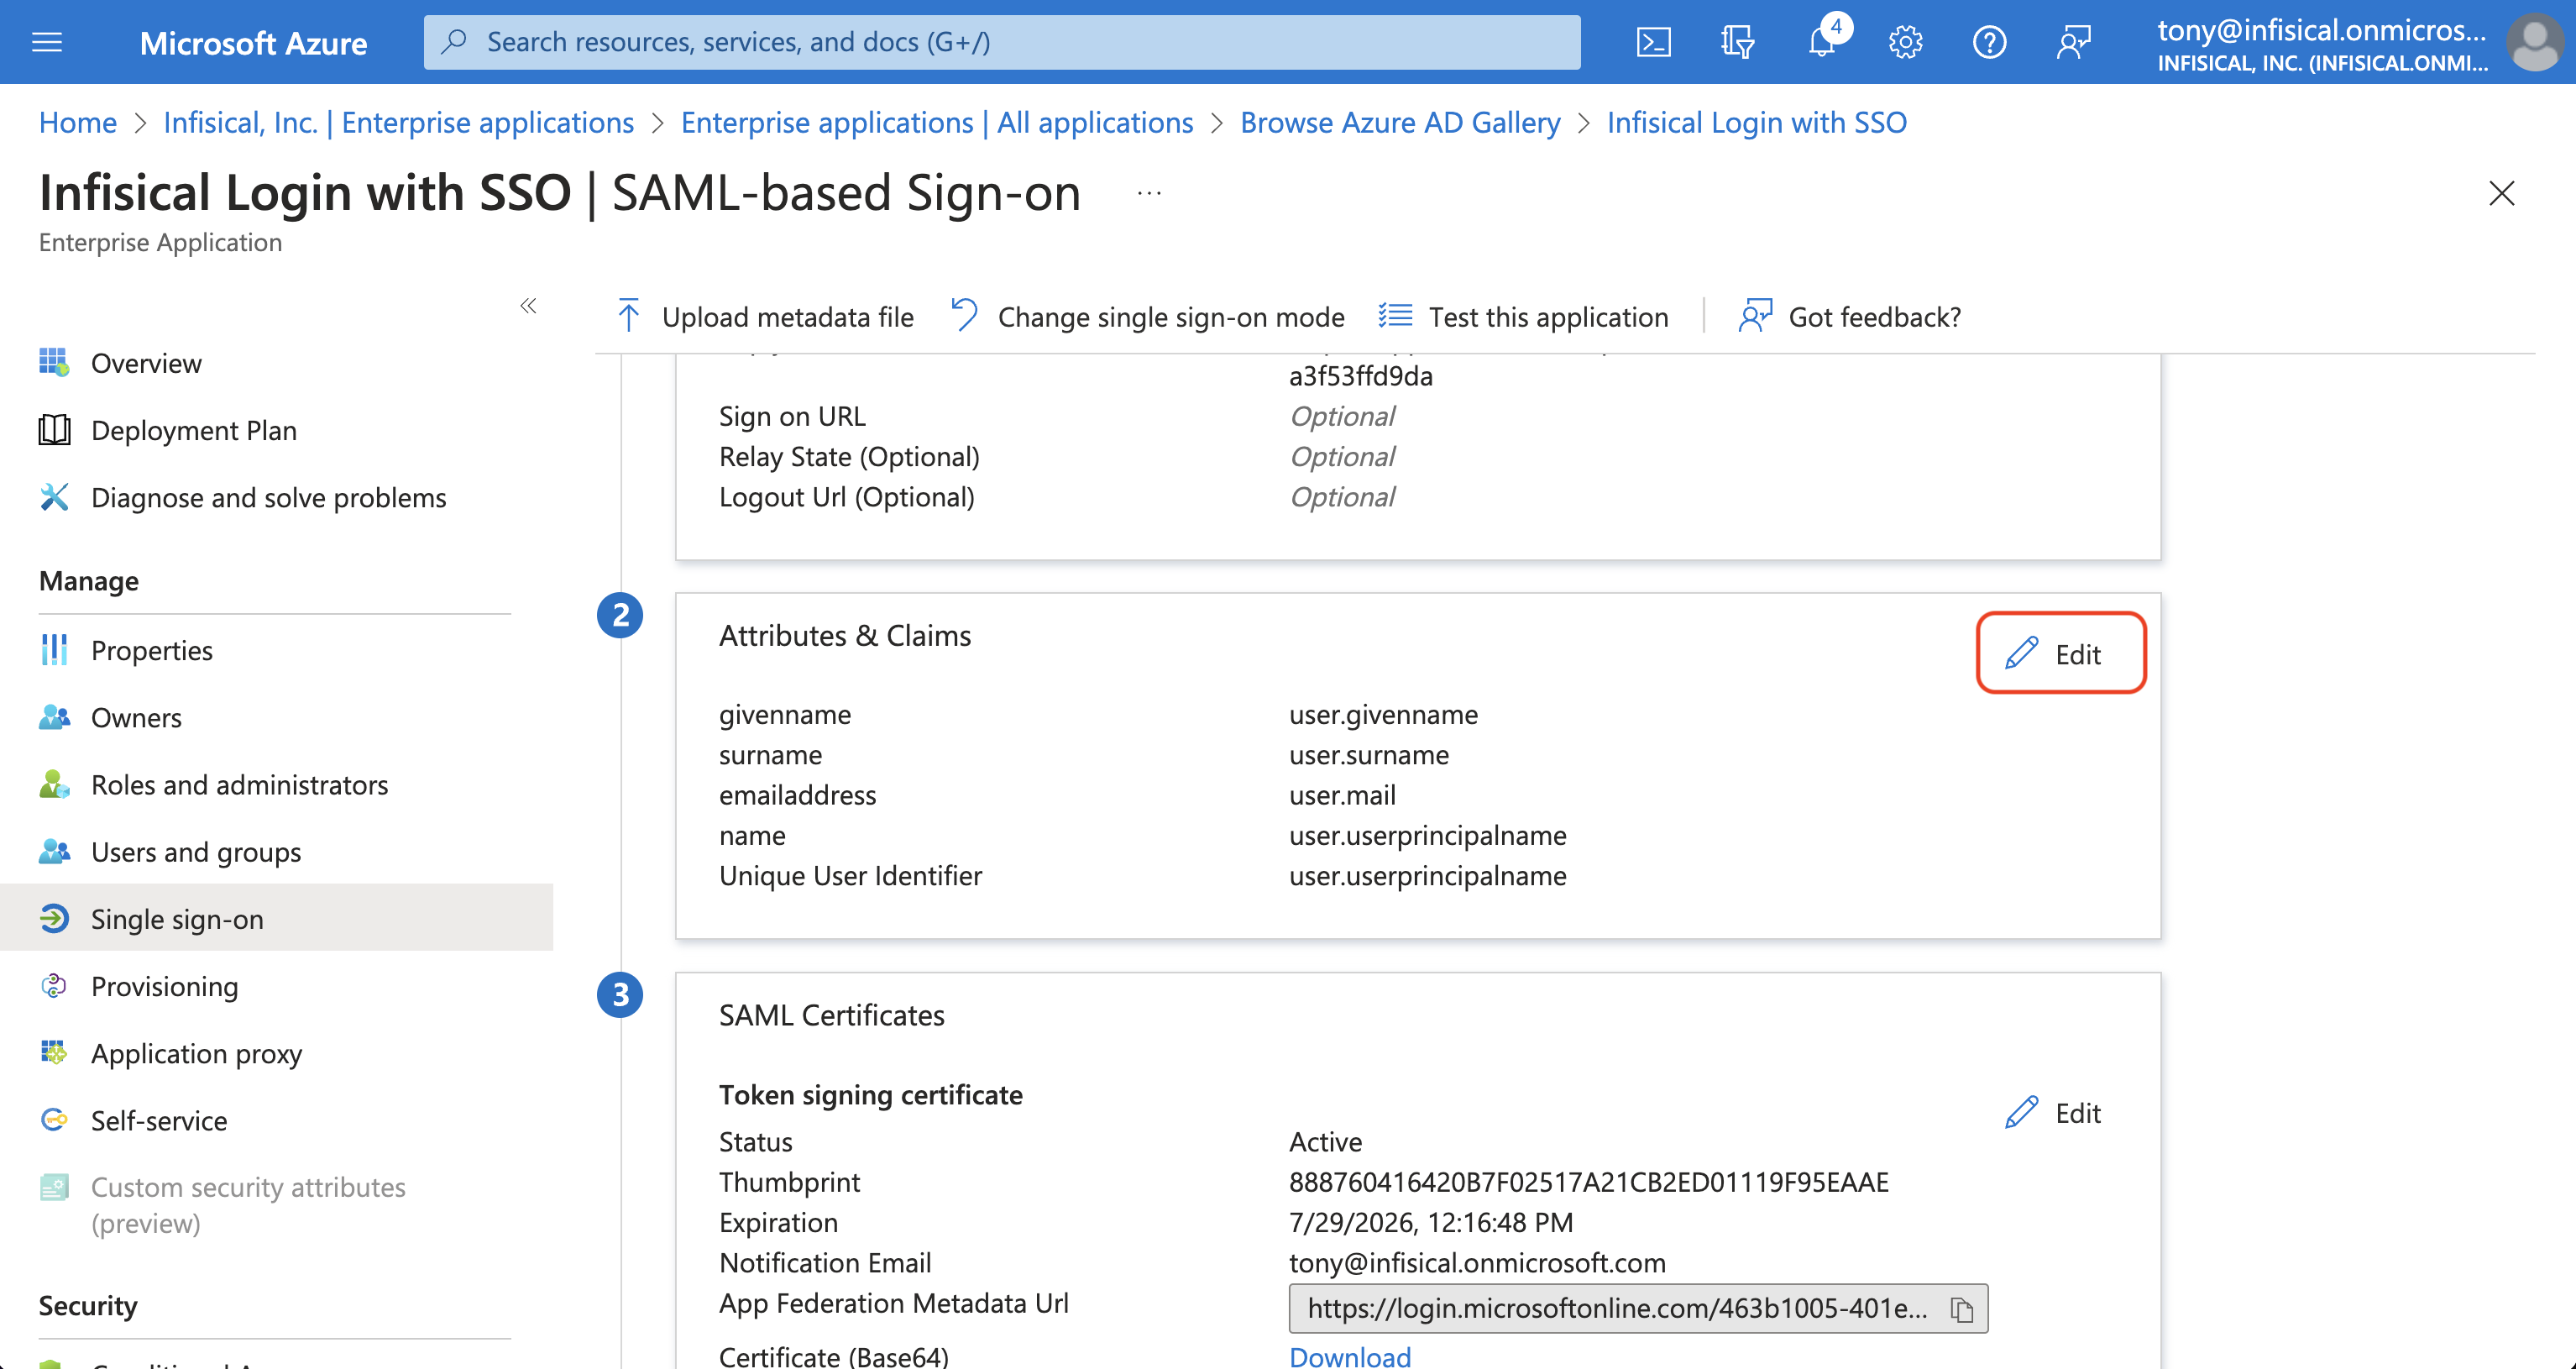


Retrieve Identity Provider (IdP) Information from Azure
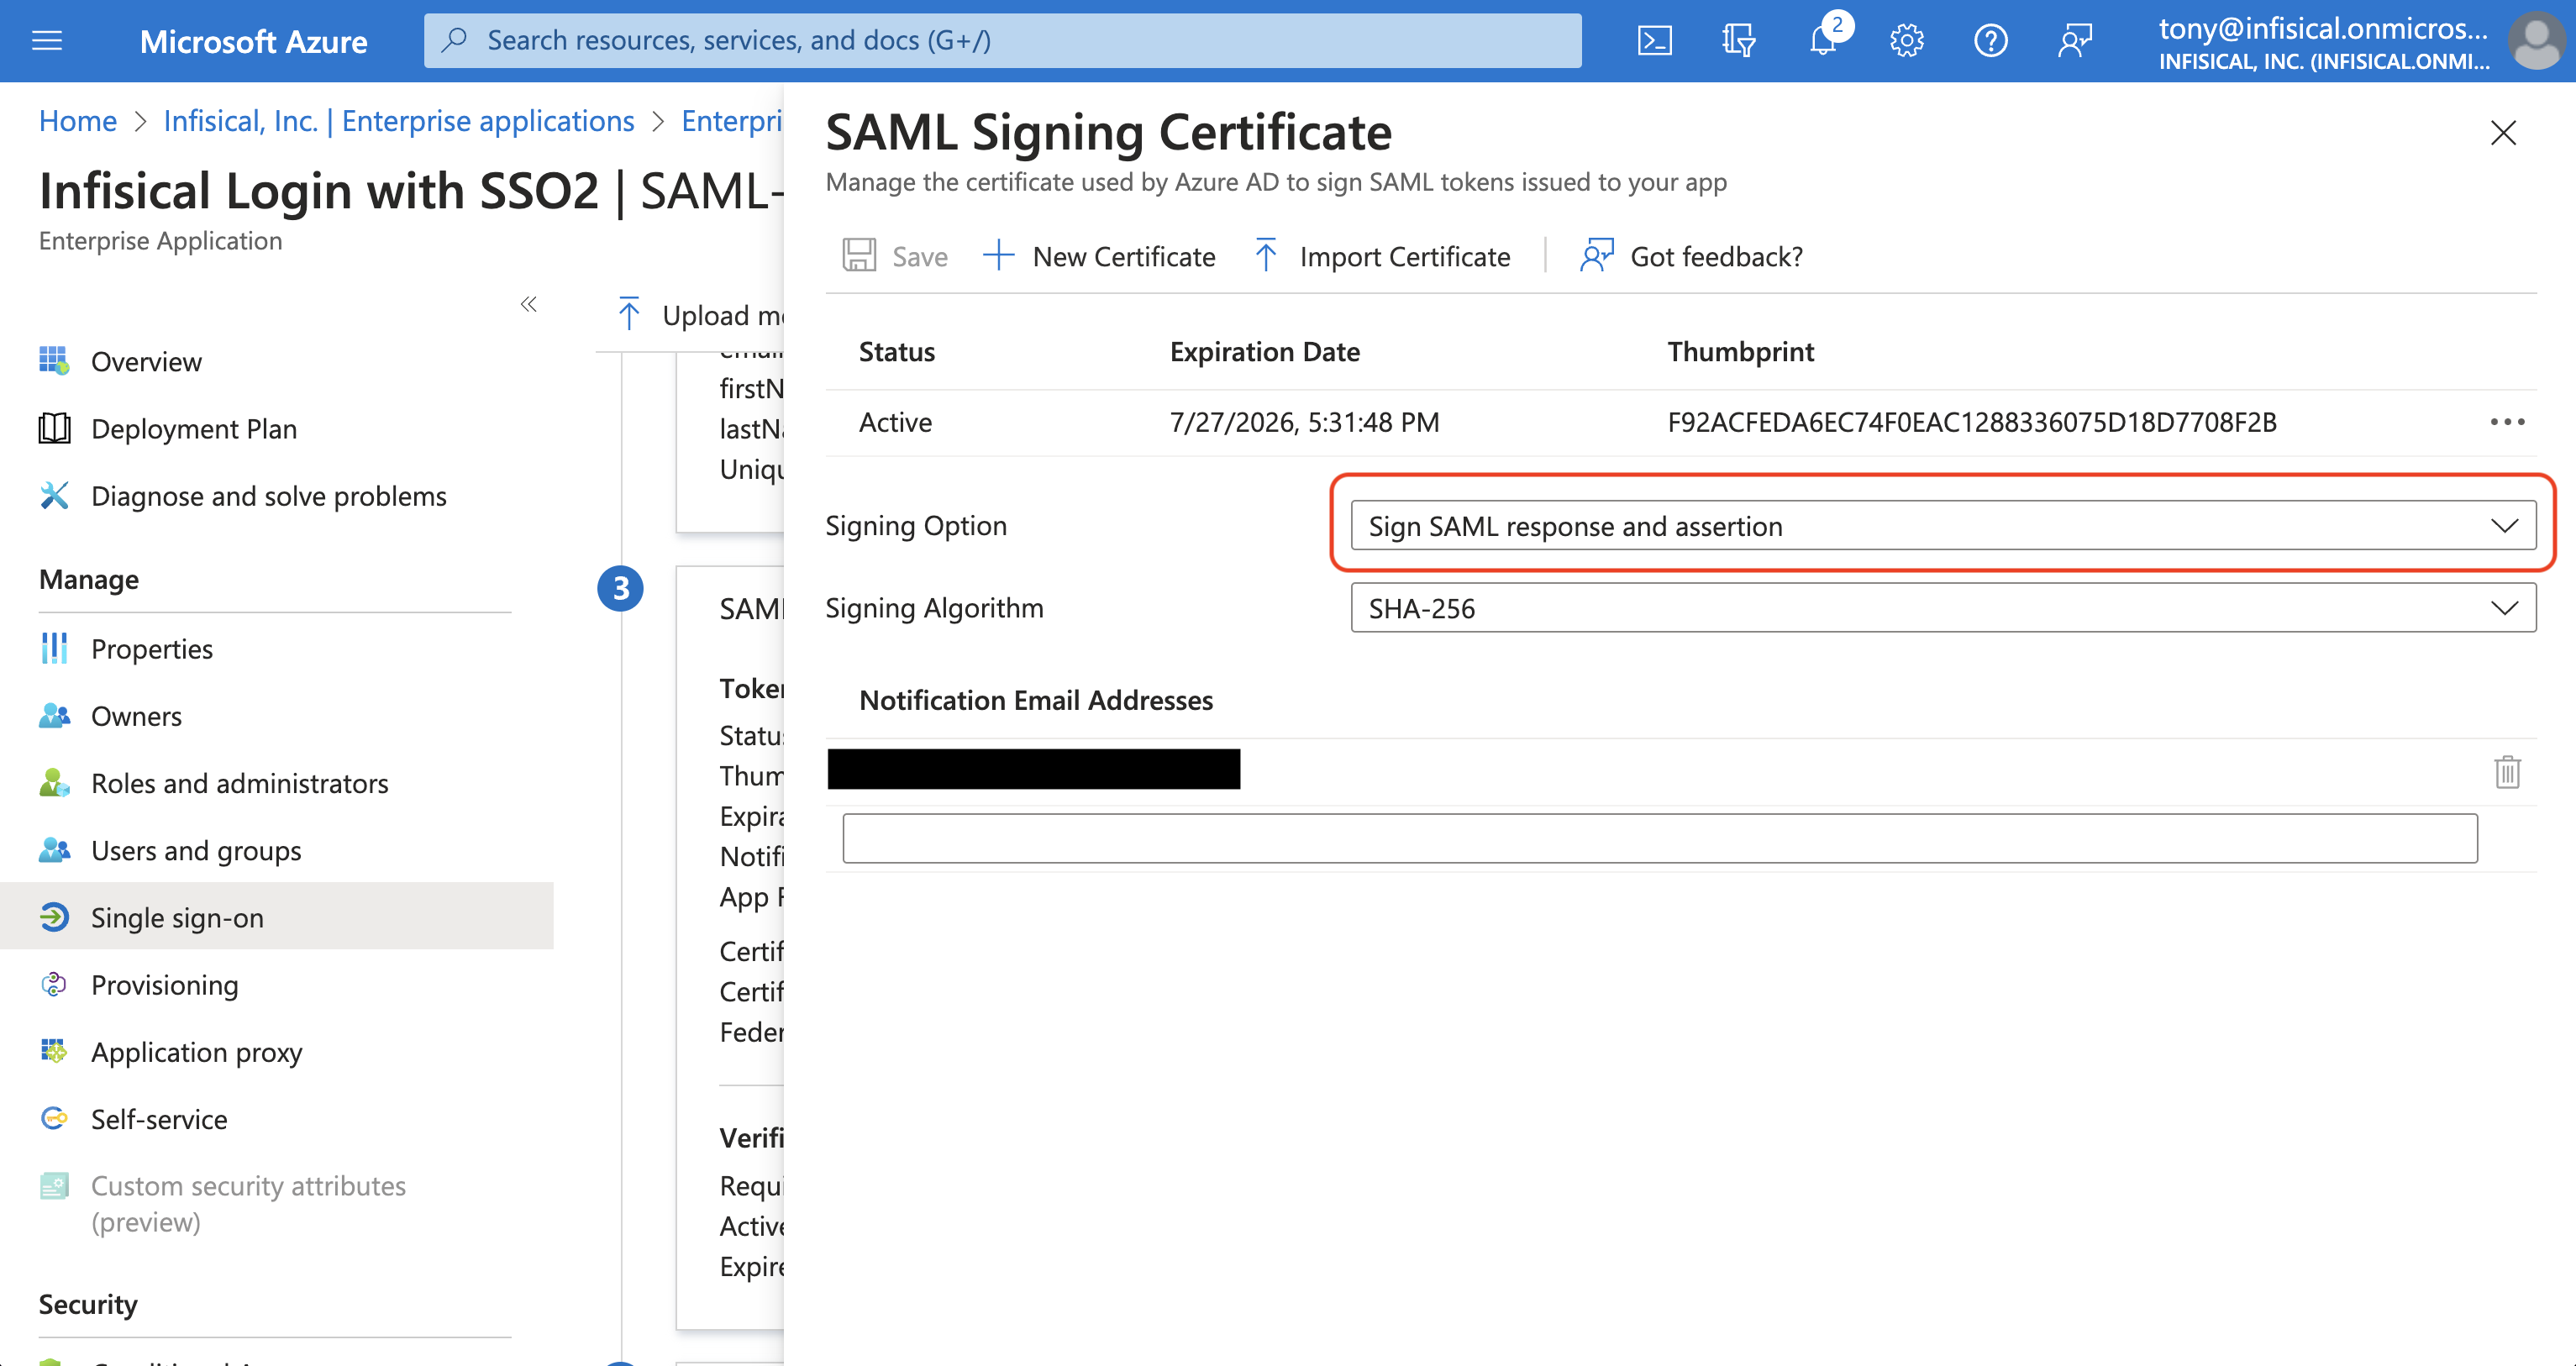
In the Set up Single Sign-On with SAML screen, copy the Login URL and SAML Certificate to use when finishing configuring Azure SAML in Infisical.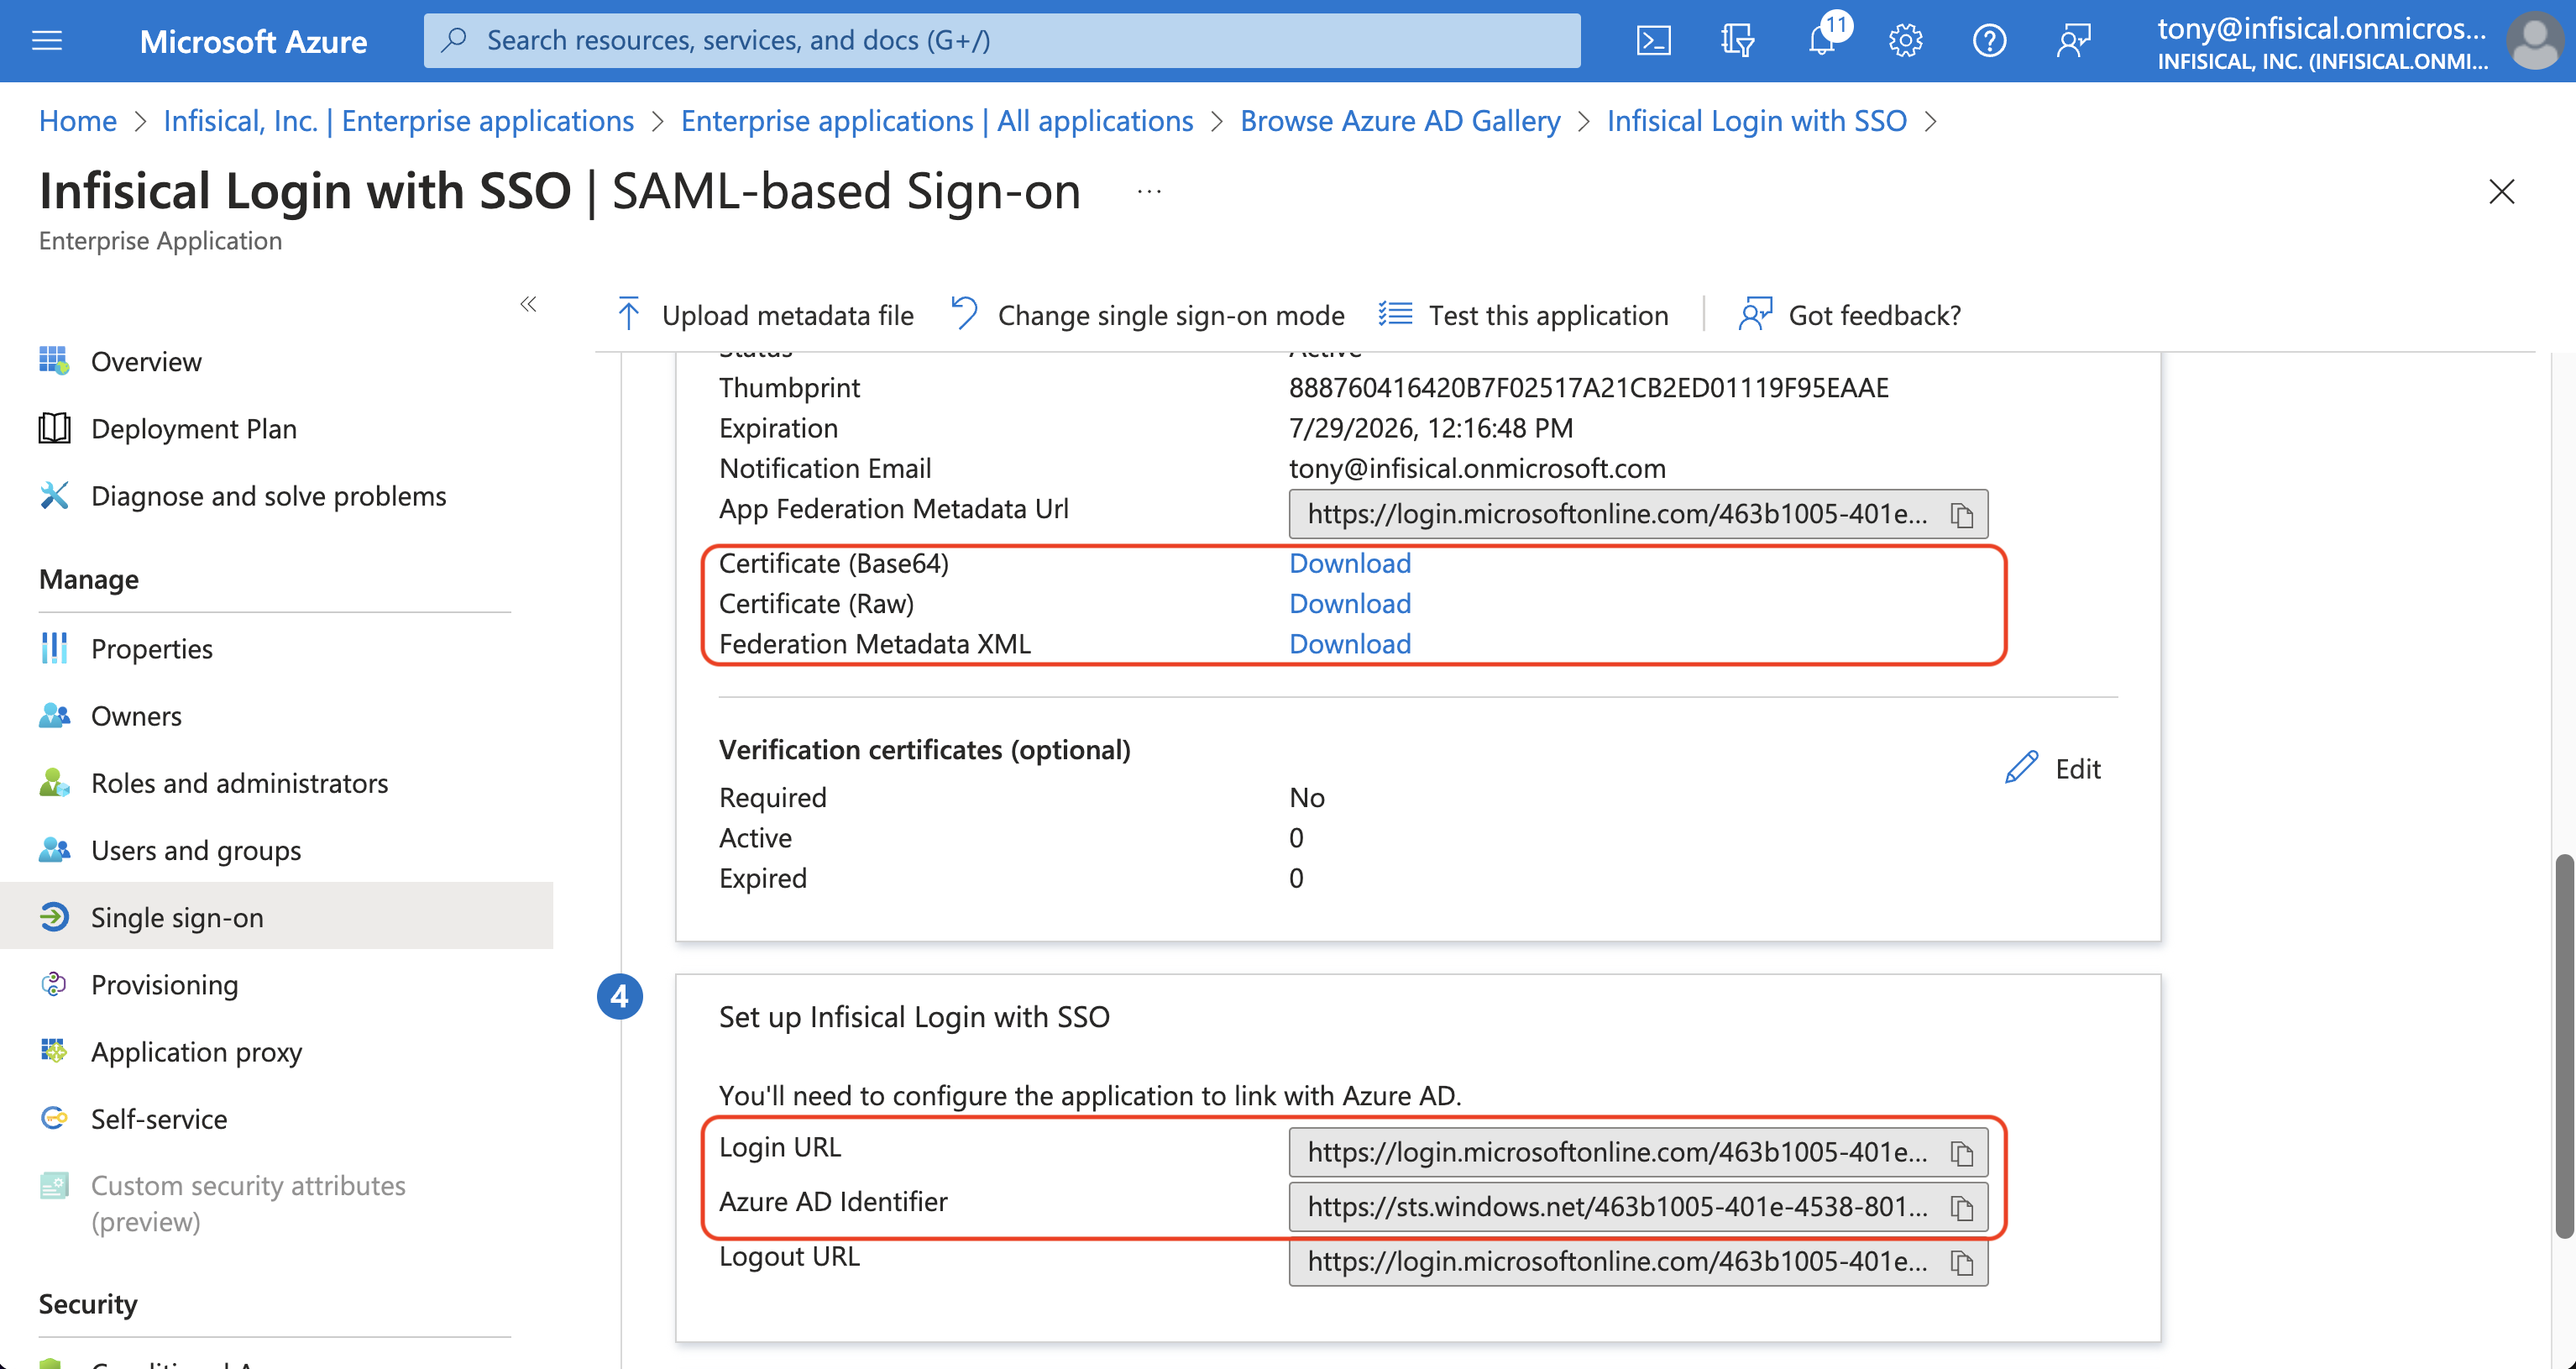 In the Properties screen, copy the Application ID to use when finishing configuring Azure SAML in Infisical.
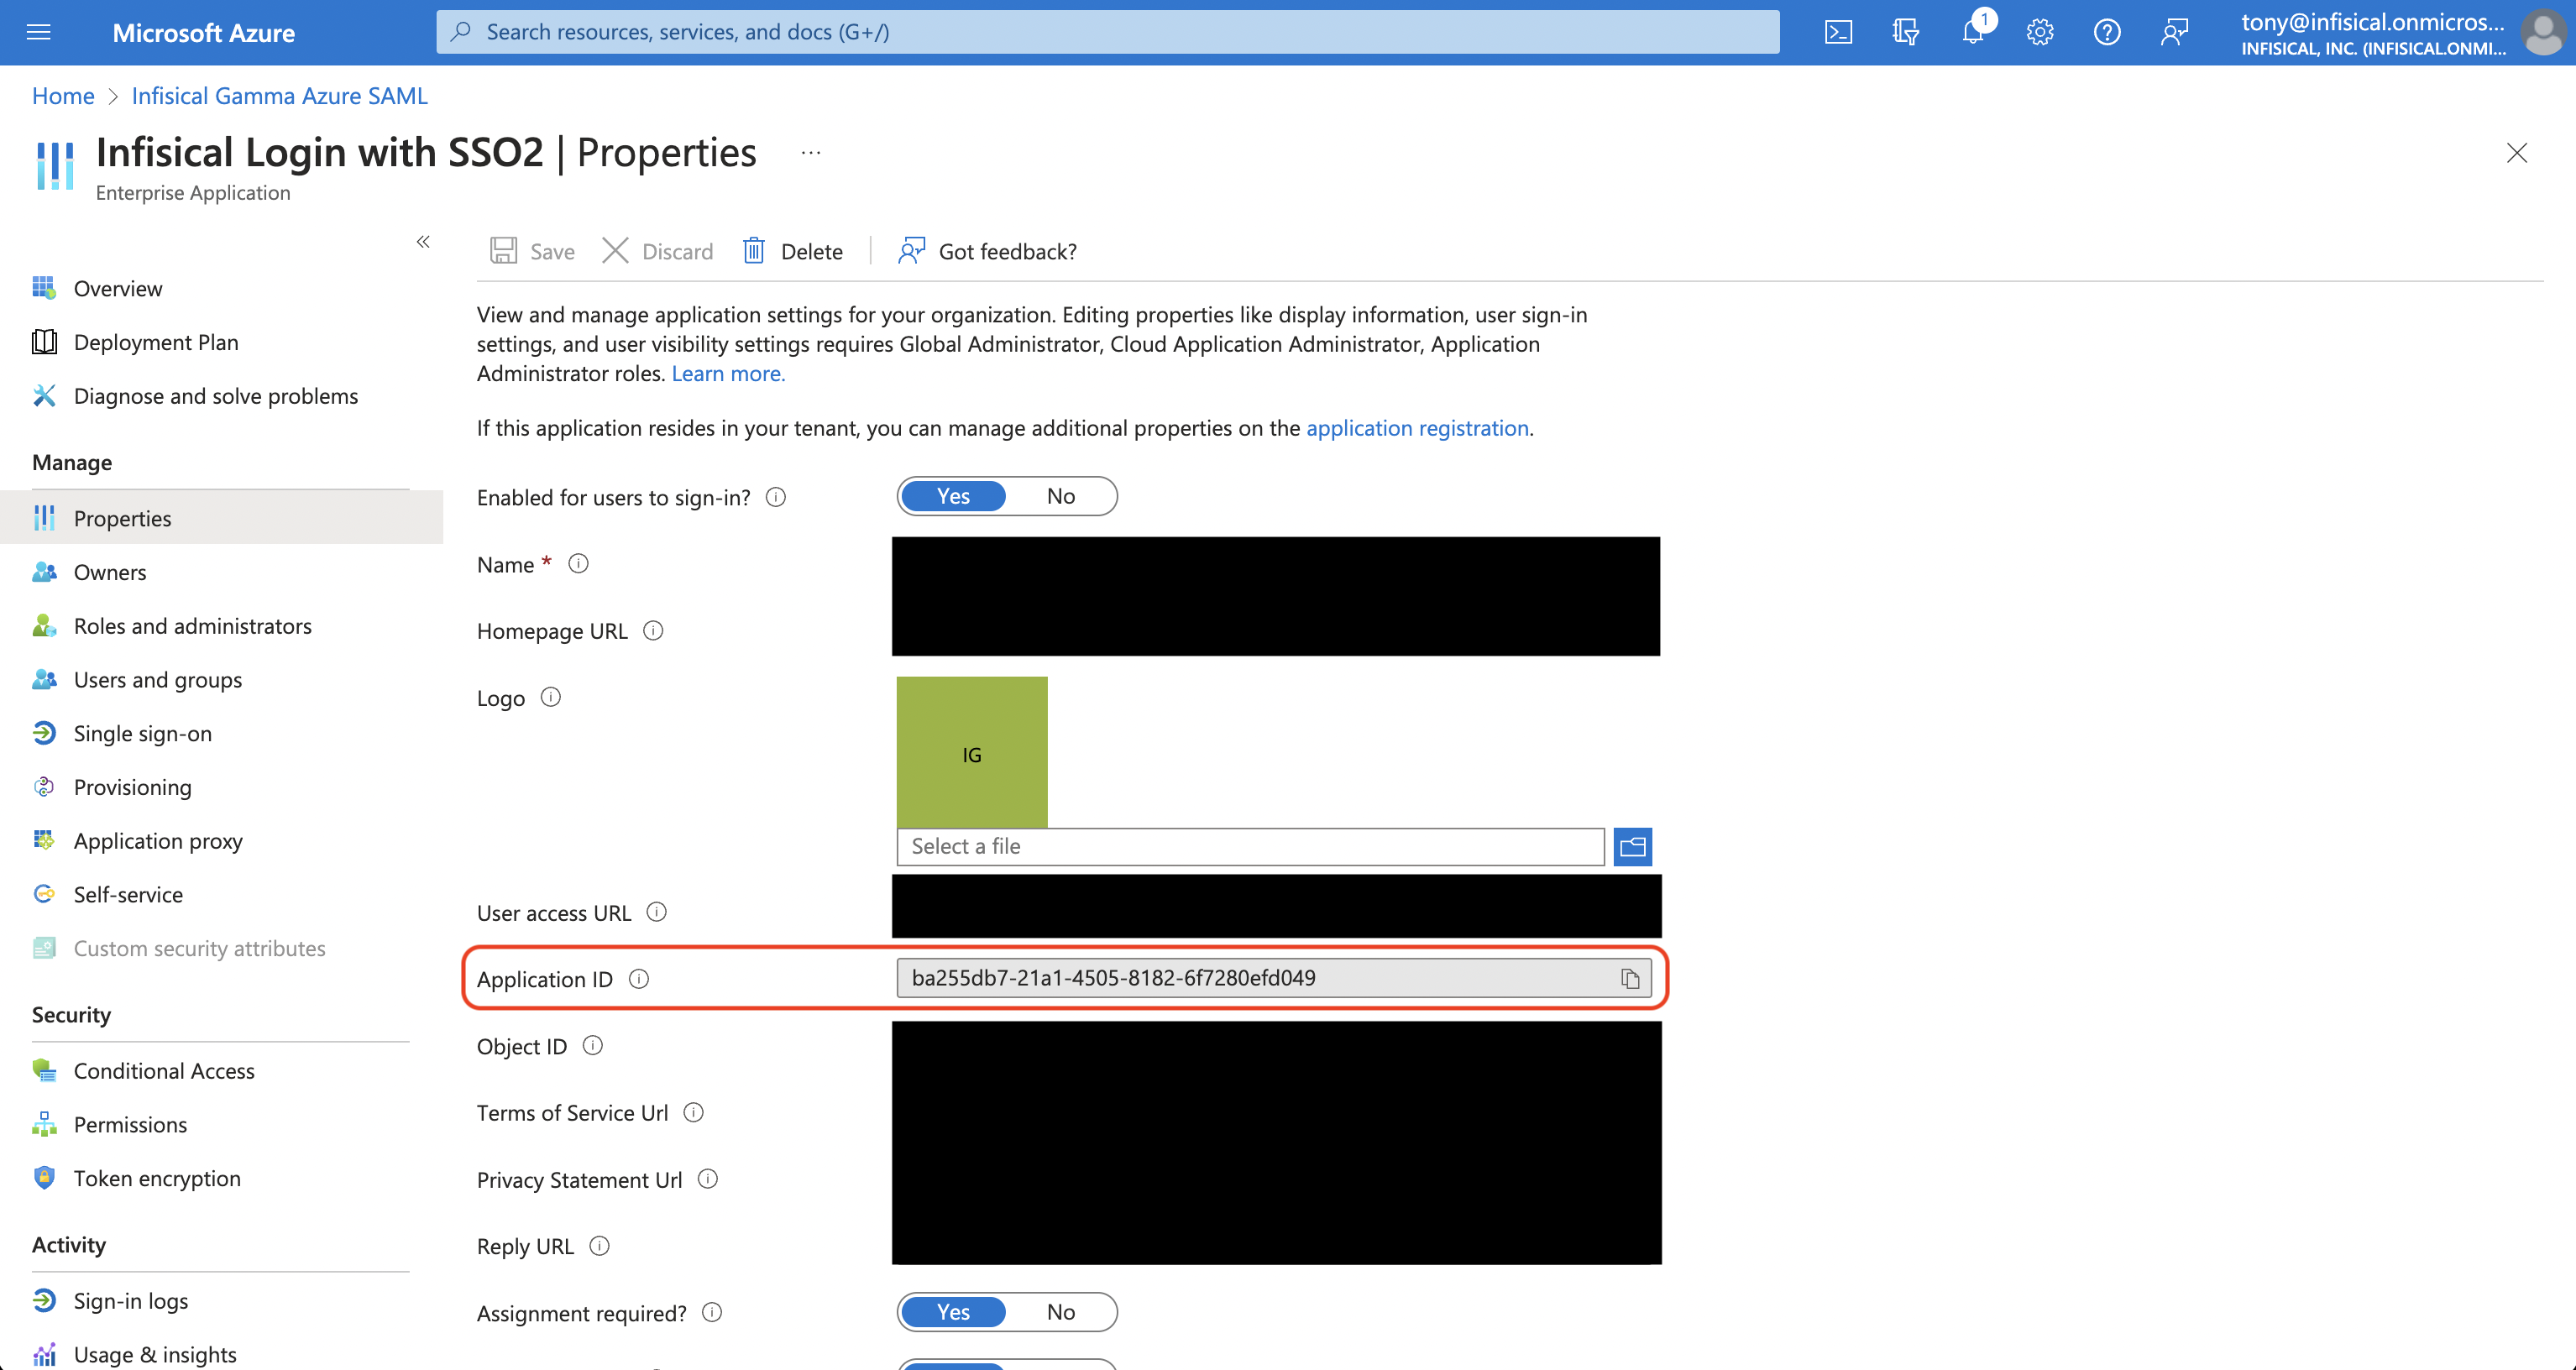
 In the Properties screen, copy the Application ID to use when finishing configuring Azure SAML in Infisical.
Finish configuring SAML in Infisical
Back in Infisical, set Login URL, Azure Application ID, and SAML Certificate from step 3. Once you’ve done that, press Update to complete the required configuration.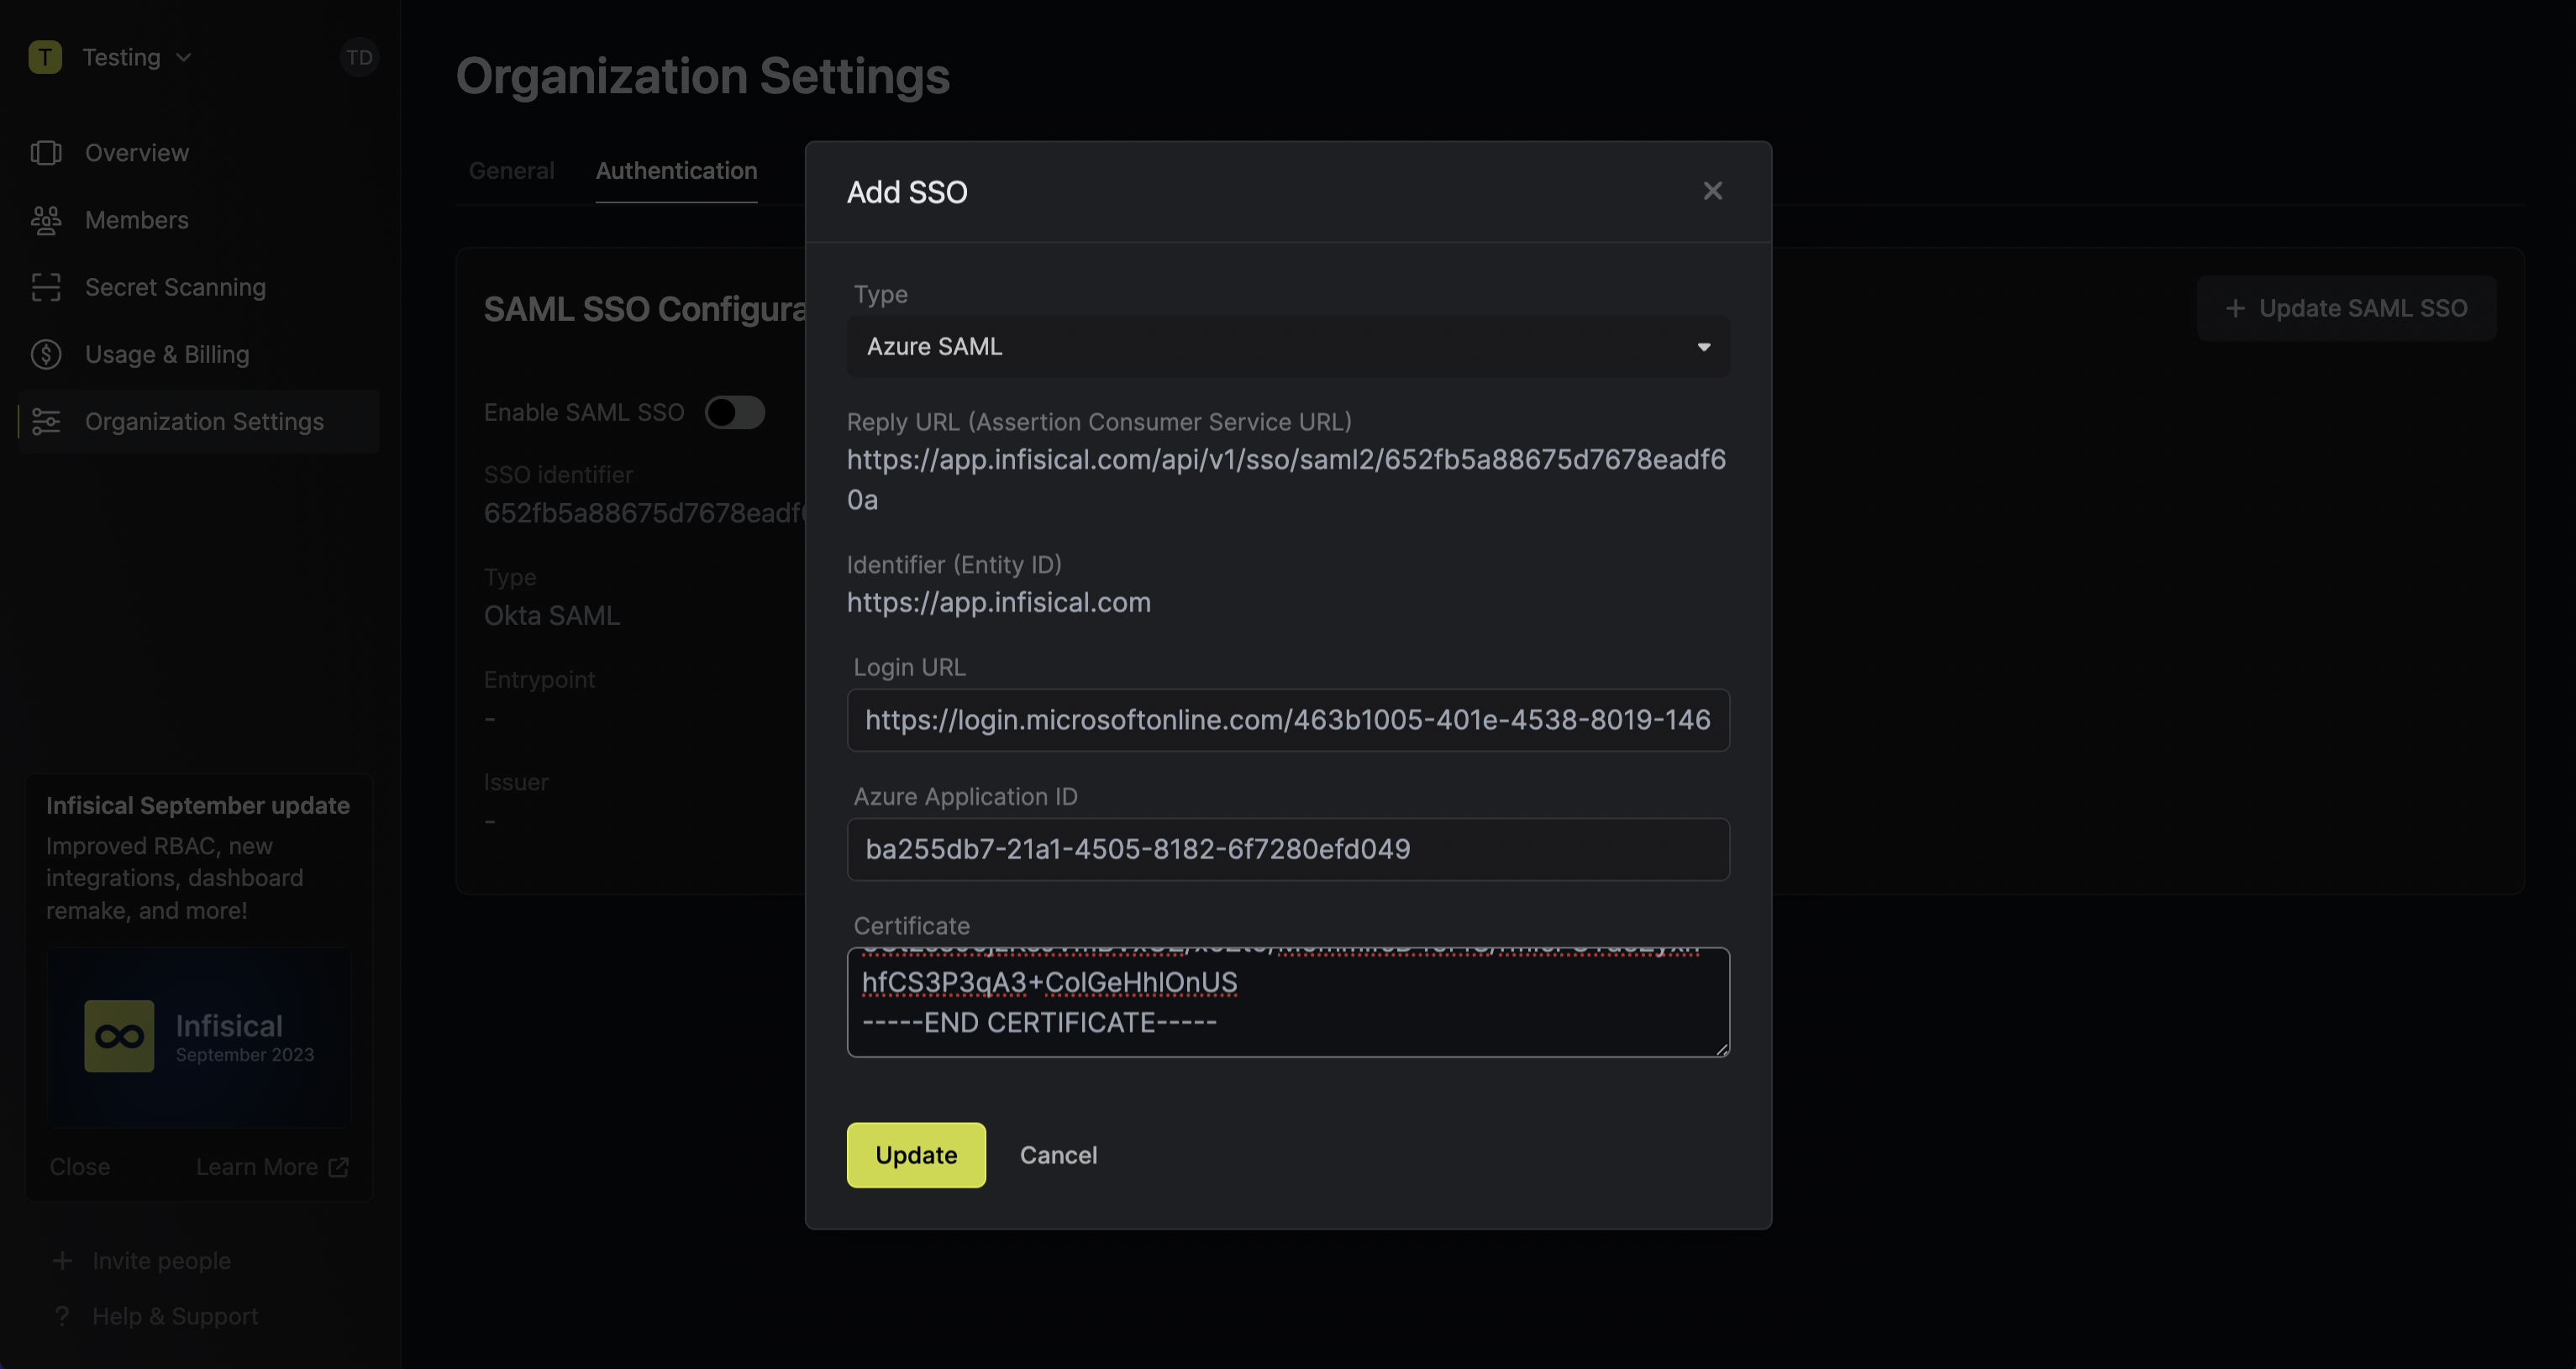

When pasting the certificate into Infisical, you’ll want to retain
-----BEGIN CERTIFICATE----- and -----END CERTIFICATE----- at the first and last line
of the text area respectively.Having trouble?, try copying the X509 certificate information from the Federation Metadata XML file in Azure.Assign users in Azure to the application
Back in Azure, navigate to the Users and groups tab and select + Add user/group to assign access to the login with SSO application on a user or group-level.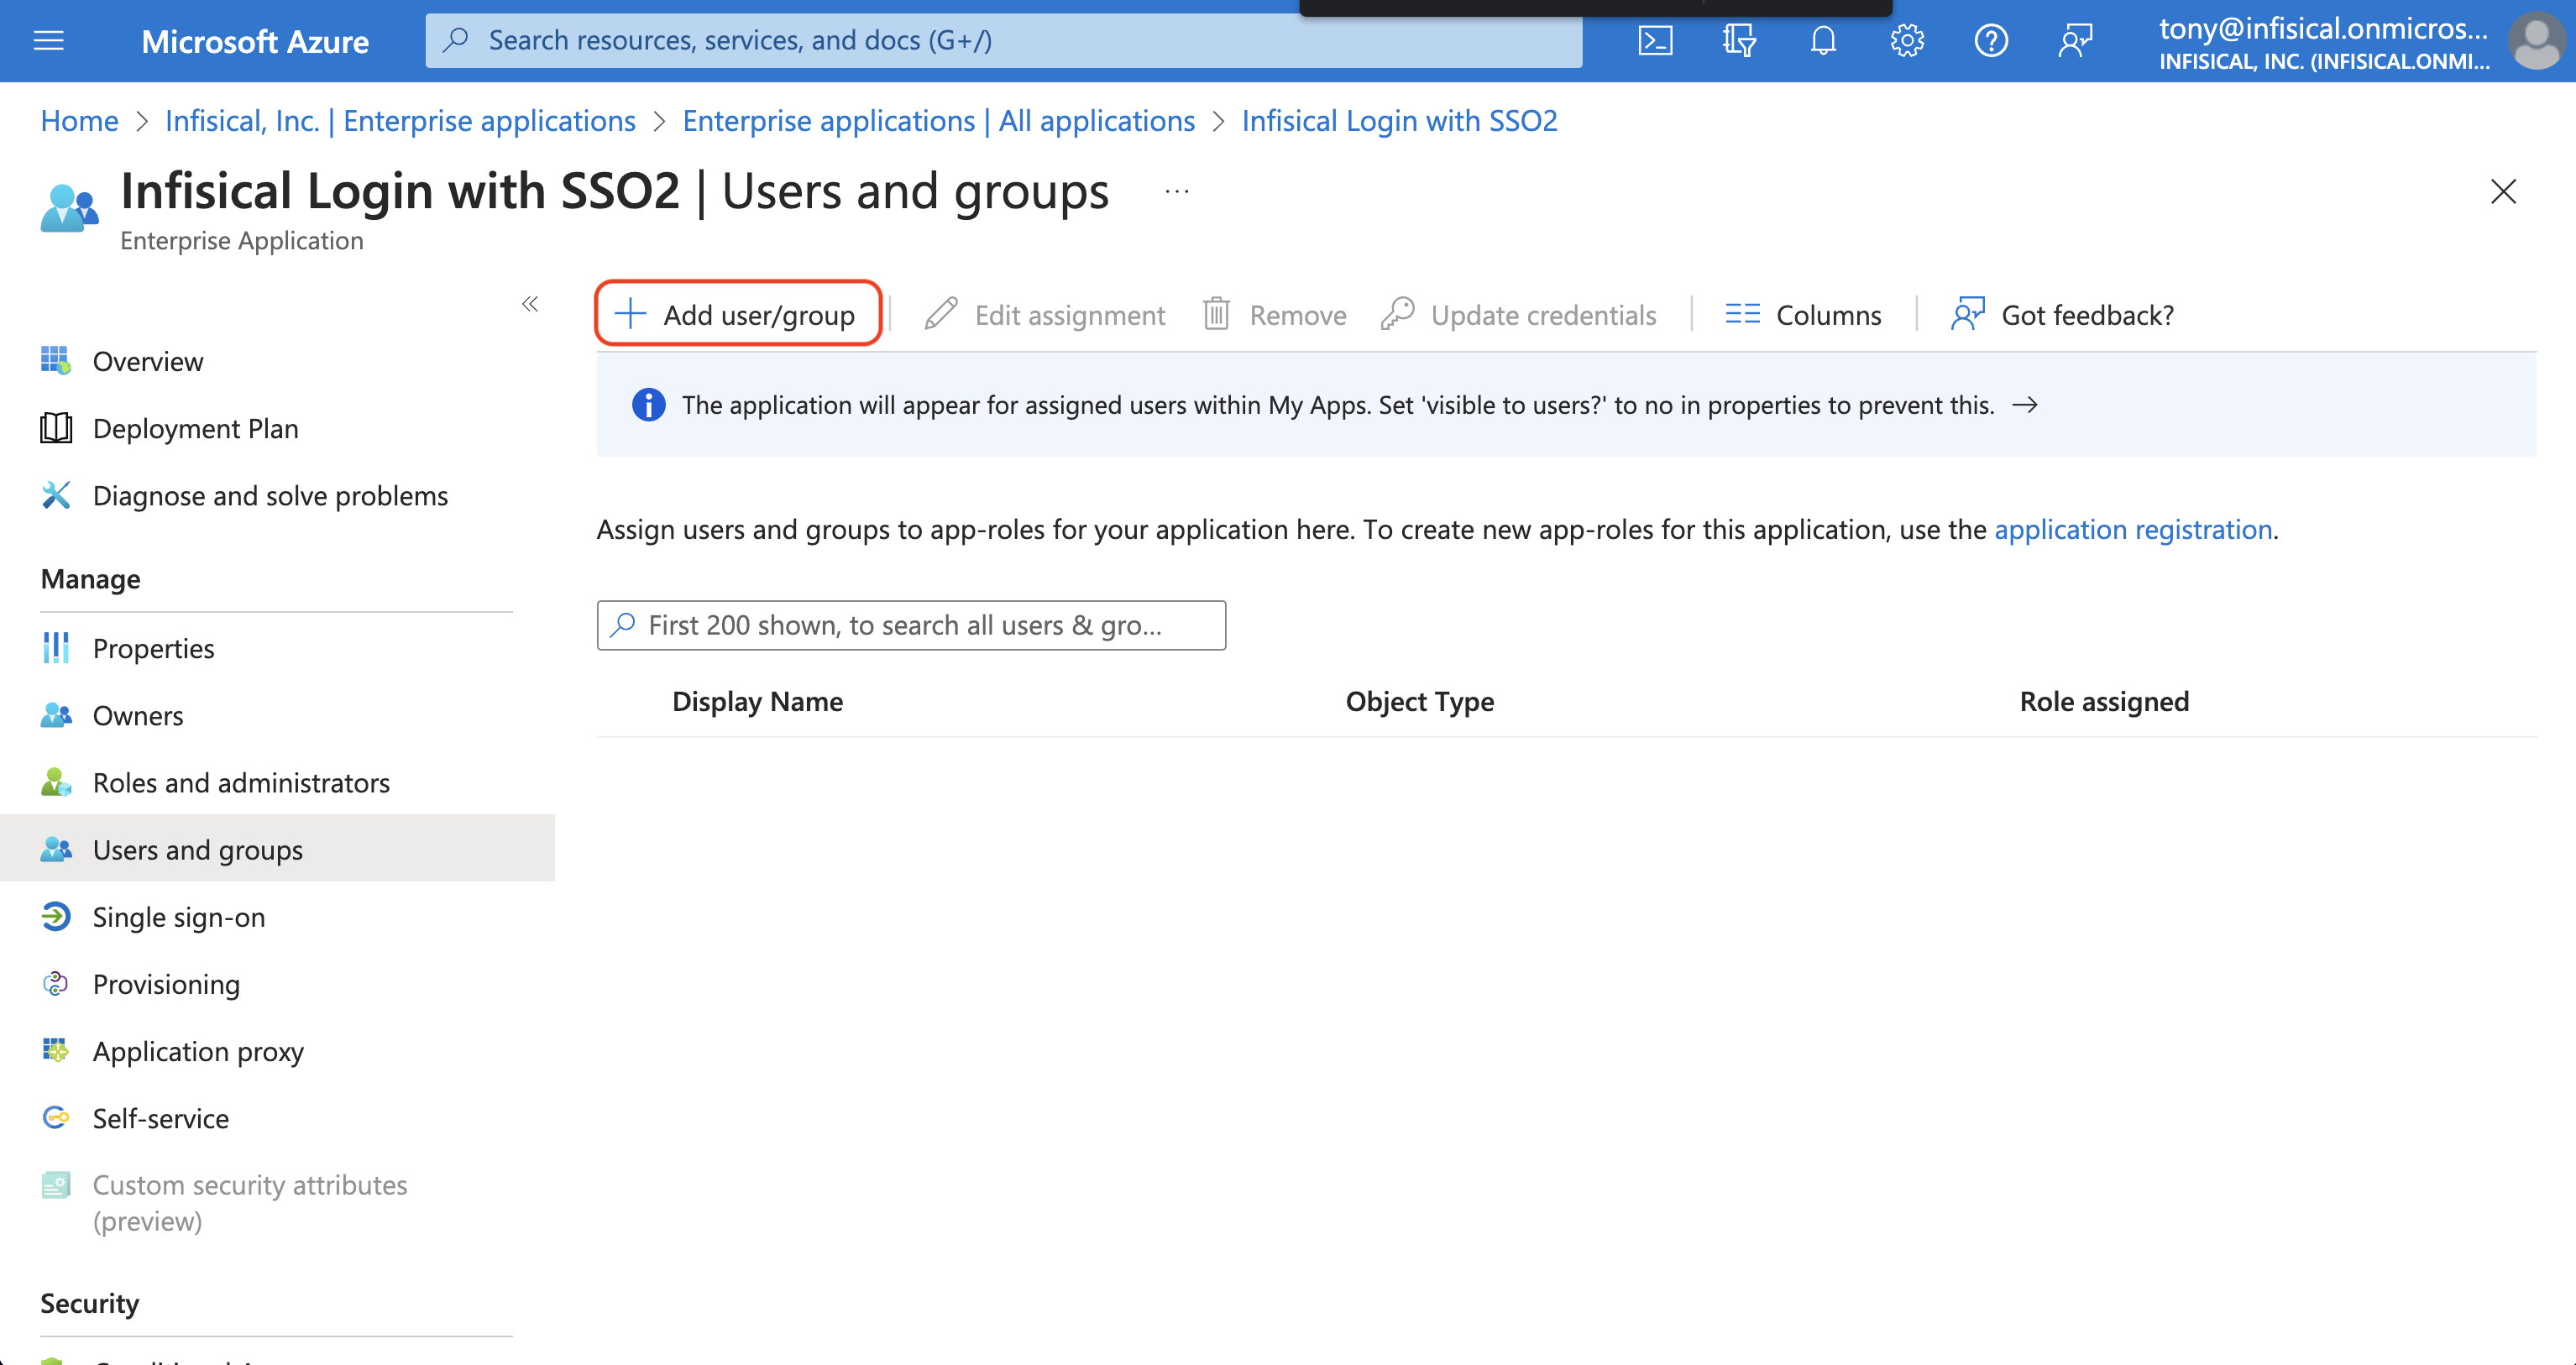

Enable SAML SSO in Infisical
Enabling SAML SSO allows members in your organization to log into Infisical via Azure.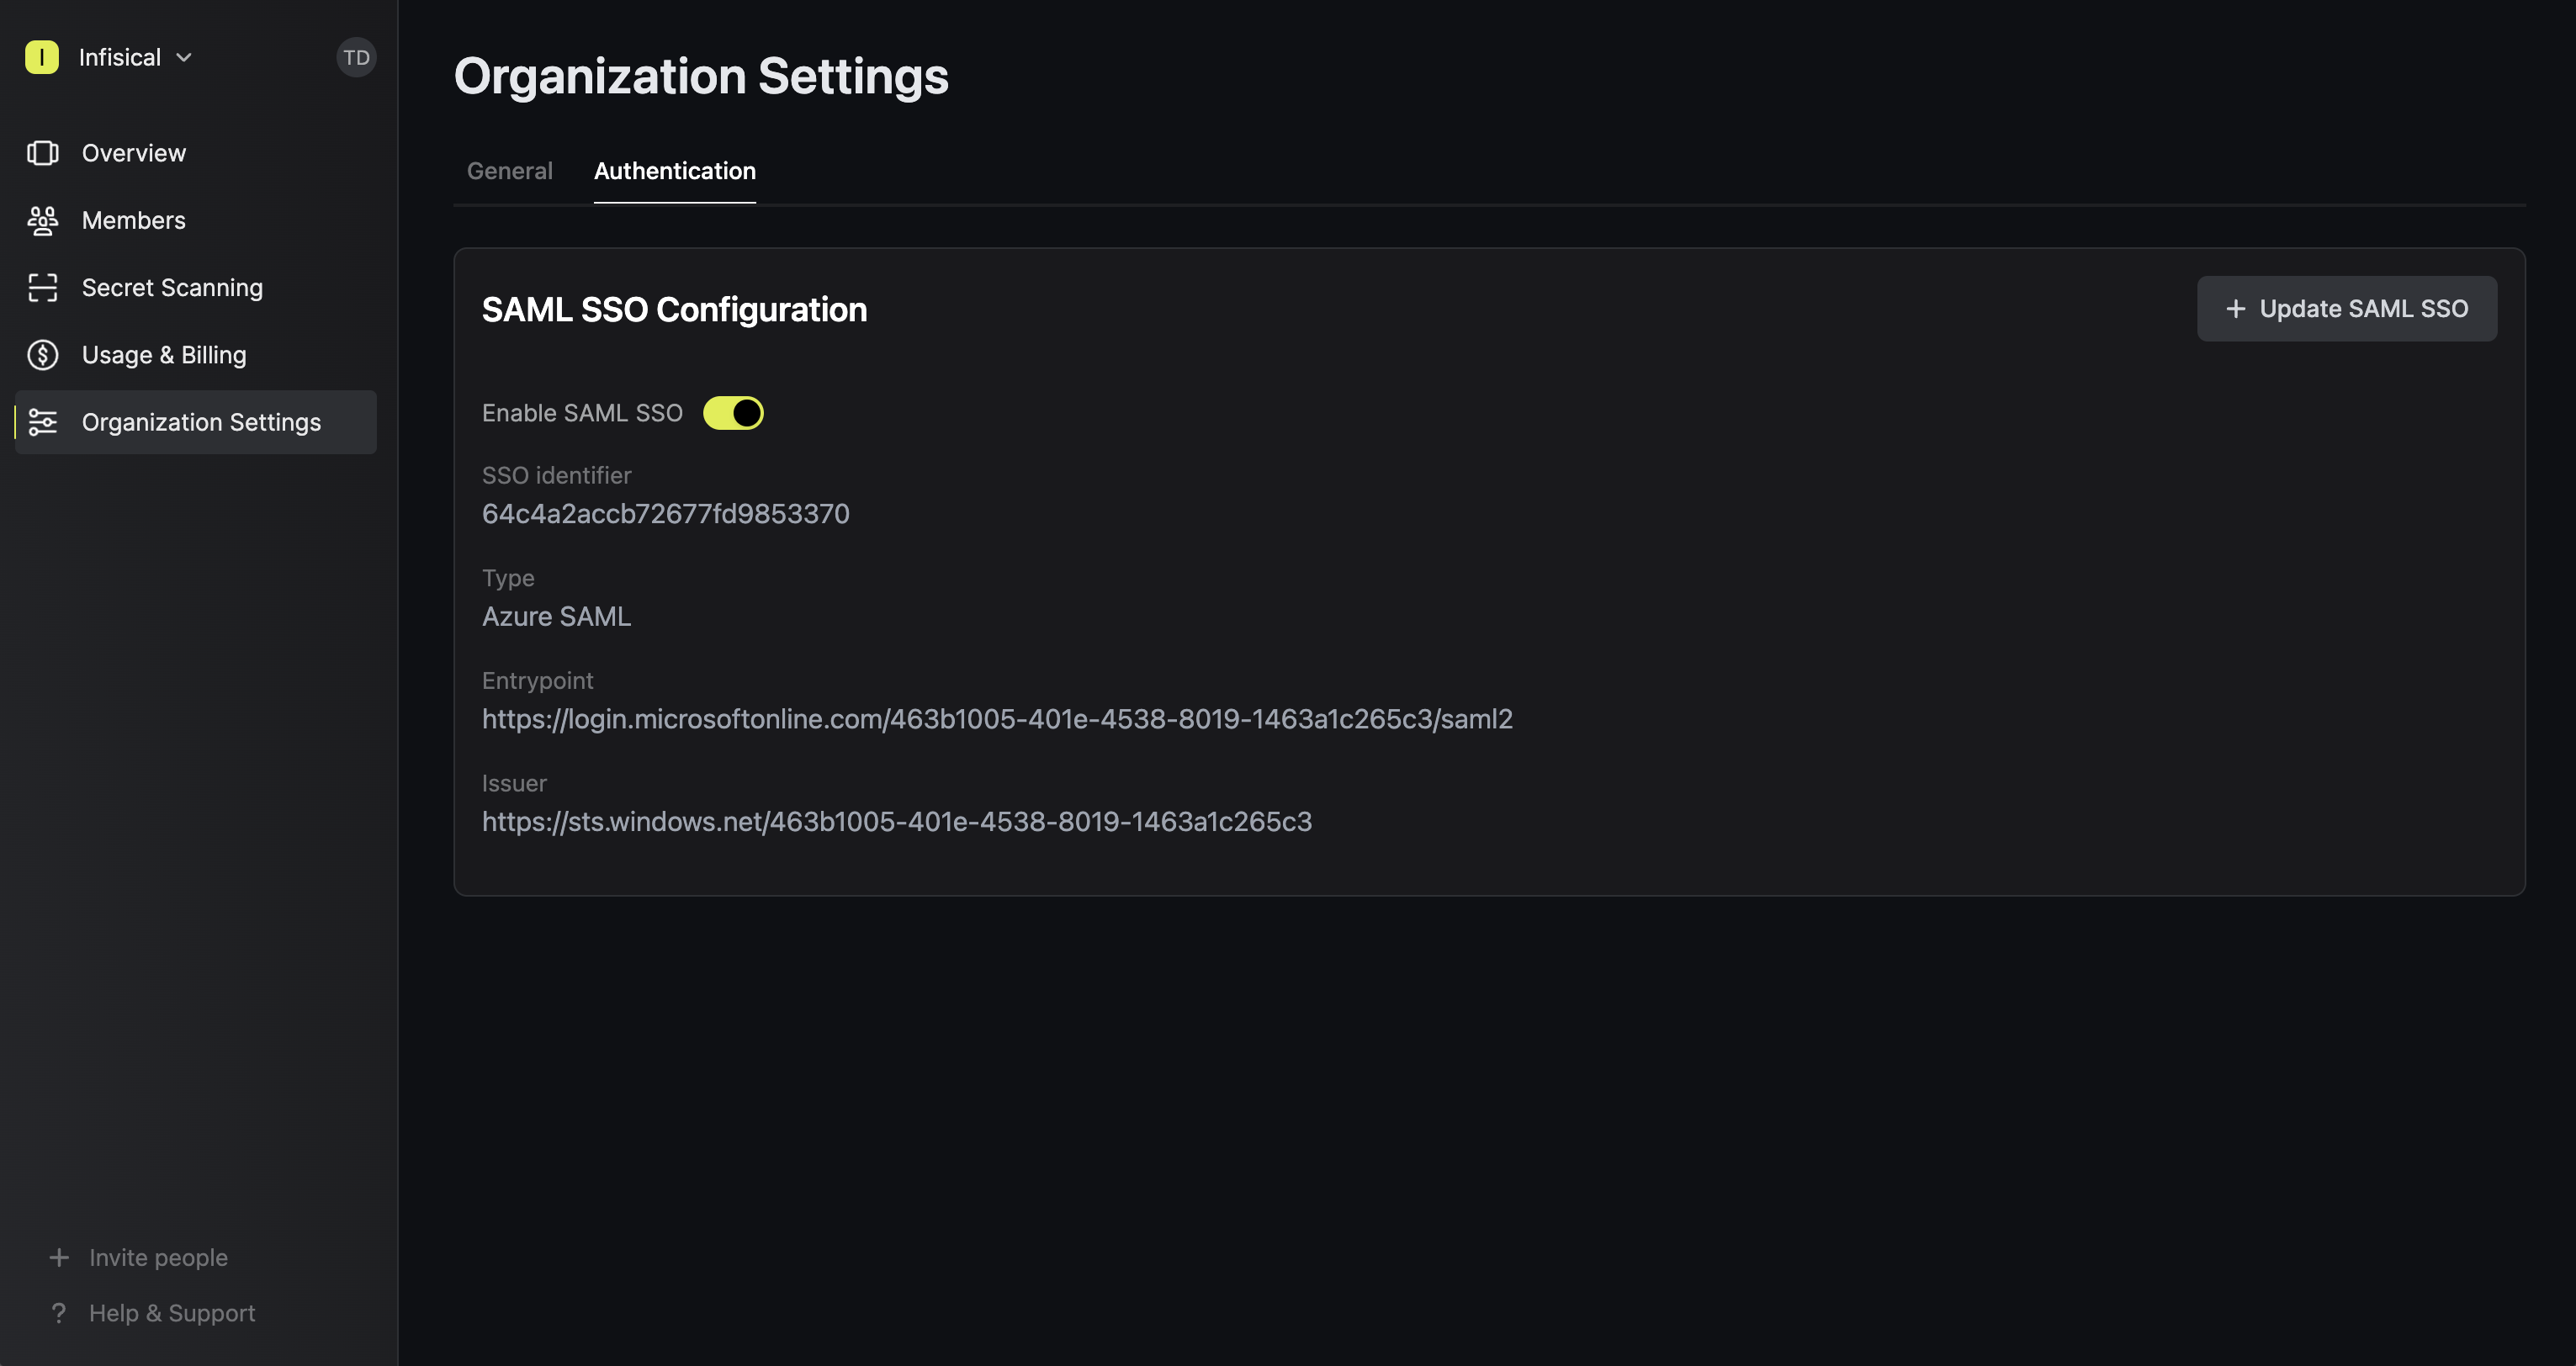

Enforce SAML SSO in Infisical
Enforcing SAML SSO ensures that members in your organization can only access Infisical
by logging into the organization via Azure.To enforce SAML SSO, you’re required to test out the SAML connection by successfully authenticating at least one Azure user with Infisical;
Once you’ve completed this requirement, you can toggle the Enforce SAML SSO button to enforce SAML SSO.
In case of a lockout, an organization admin can use the Admin Login Portal in the
/login/admin path e.g. https://app.infisical.com/login/admin.If you’re configuring SAML SSO on a self-hosted instance of Infisical, make
sure to set the
AUTH_SECRET and SITE_URL environment variable for it to
work:AUTH_SECRET: A secret key used for signing and verifying JWT. This can be a random 32-byte base64 string generated withopenssl rand -base64 32.
SITE_URL: The absolute URL of your self-hosted instance of Infisical including the protocol (e.g. https://app.infisical.com)
If you’d like to require Multi-factor Authentication for your team members to access Infisical check out our Entra ID / Azure AD MFA guide.

