Keycloak OIDC SSO is a paid feature. If you’re using Infisical Cloud, then it
is available under the Pro Tier. If you’re self-hosting Infisical, then
you should contact sales@infisical.com to purchase a self-hosted license to
use it.
SSO authentication requires Email Domain Verification.
You must verify your organization’s email domain before users can log in via SSO.
1
Create an OIDC client application in Keycloak
1.1. In your realm, navigate to the Clients tab and click Create client to create a new client application. 1.2. In the General Settings step, set Client type to OpenID Connect, the Client ID field to an appropriate identifier, and the Name field to a friendly name like Infisical.
 1.3. Next, in the Capability Config step, ensure that Client Authentication is set to On and that Standard flow is enabled in the Authentication flow section.
 1.4. In the Login Settings step, set the following values:1.5. Next, navigate to the Client scopes tab and select the client’s dedicated scope.
 1.6. Next, click Add predefined mapper.
 1.7. Select the email, given name, family name attributes and click Add.
 Once you’ve completed the above steps, the list of mappers should look like the following:
You don’t typically need to make a realm dedicated to Infisical. We recommend adding Infisical as a client to your primary realm.
1.3. Next, in the Capability Config step, ensure that Client Authentication is set to On and that Standard flow is enabled in the Authentication flow section.1.4. In the Login Settings step, set the following values:-
Root URL:
https://app.infisical.com. -
Home URL:
https://app.infisical.com. -
Valid Redirect URIs:
https://app.infisical.com/api/v1/sso/oidc/callback. -
Web origins:
https://app.infisical.com.
If you’re self-hosting Infisical, then you will want to replace https://app.infisical.com (base URL) with your own domain.
1.6. Next, click Add predefined mapper.1.7. Select the email, given name, family name attributes and click Add.Once you’ve completed the above steps, the list of mappers should look like the following:2
Retrieve Identity Provider (IdP) Information from Keycloak
2.1. Back in Keycloak, navigate to Configure > Realm settings > General tab > Endpoints > OpenID Endpoint Configuration and copy the opened URL. This is what is to referred to as the Discovery Document URL and it takes the form:  2.2. From the Clients page, navigate to the Credential tab and copy the Client Secret to be used in the next steps.
https://keycloak-mysite.com/realms/myrealm/.well-known/openid-configuration.2.2. From the Clients page, navigate to the Credential tab and copy the Client Secret to be used in the next steps.3
Finish configuring OIDC in Infisical
3.1. Back in Infisical, head to the Single Sign-On (SSO) page and select the General tab. Click Connect for OIDC.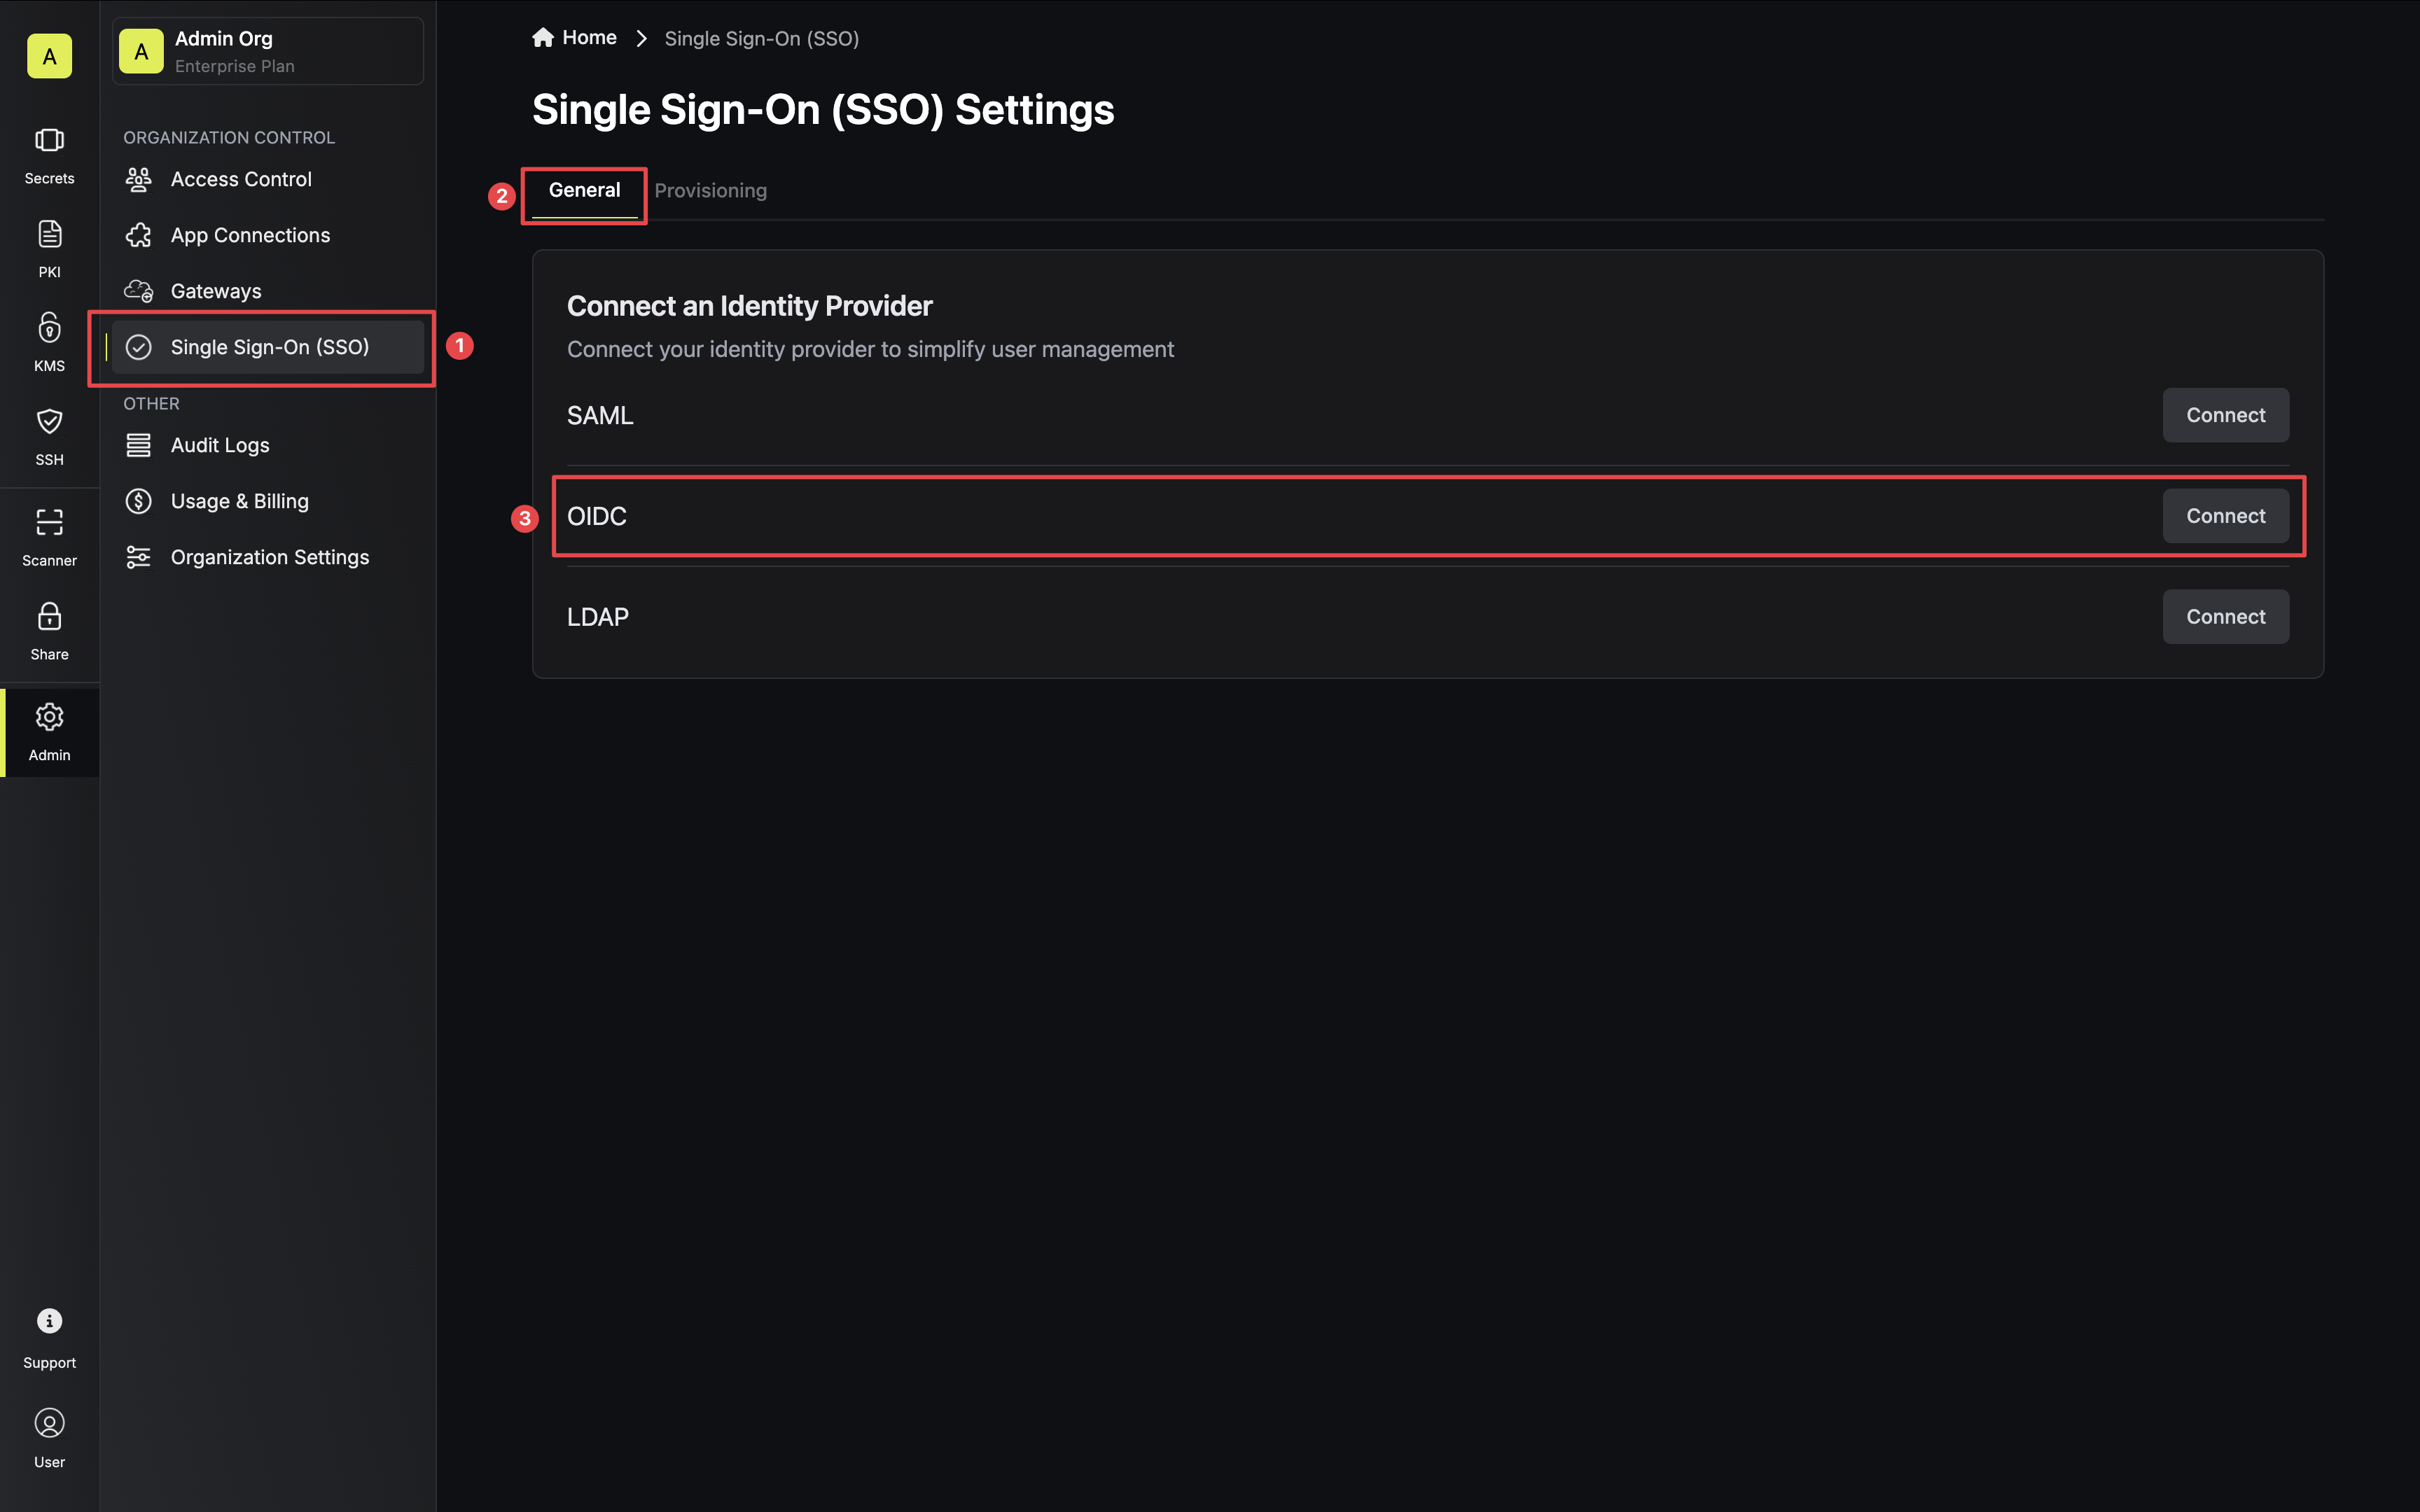 3.2. For configuration type, select Discovery URL. Then, set the appropriate values for Discovery Document URL, JWT Signature Algorithm, Client ID, and Client Secret.
 Once you’ve done that, press Update to complete the required configuration.
3.2. For configuration type, select Discovery URL. Then, set the appropriate values for Discovery Document URL, JWT Signature Algorithm, Client ID, and Client Secret.Currently, the following JWT signature algorithms are supported: RS256, RS512, HS256, and EdDSA
4
Enable OIDC SSO in Infisical
Enabling OIDC SSO allows members in your organization to log into Infisical via Keycloak.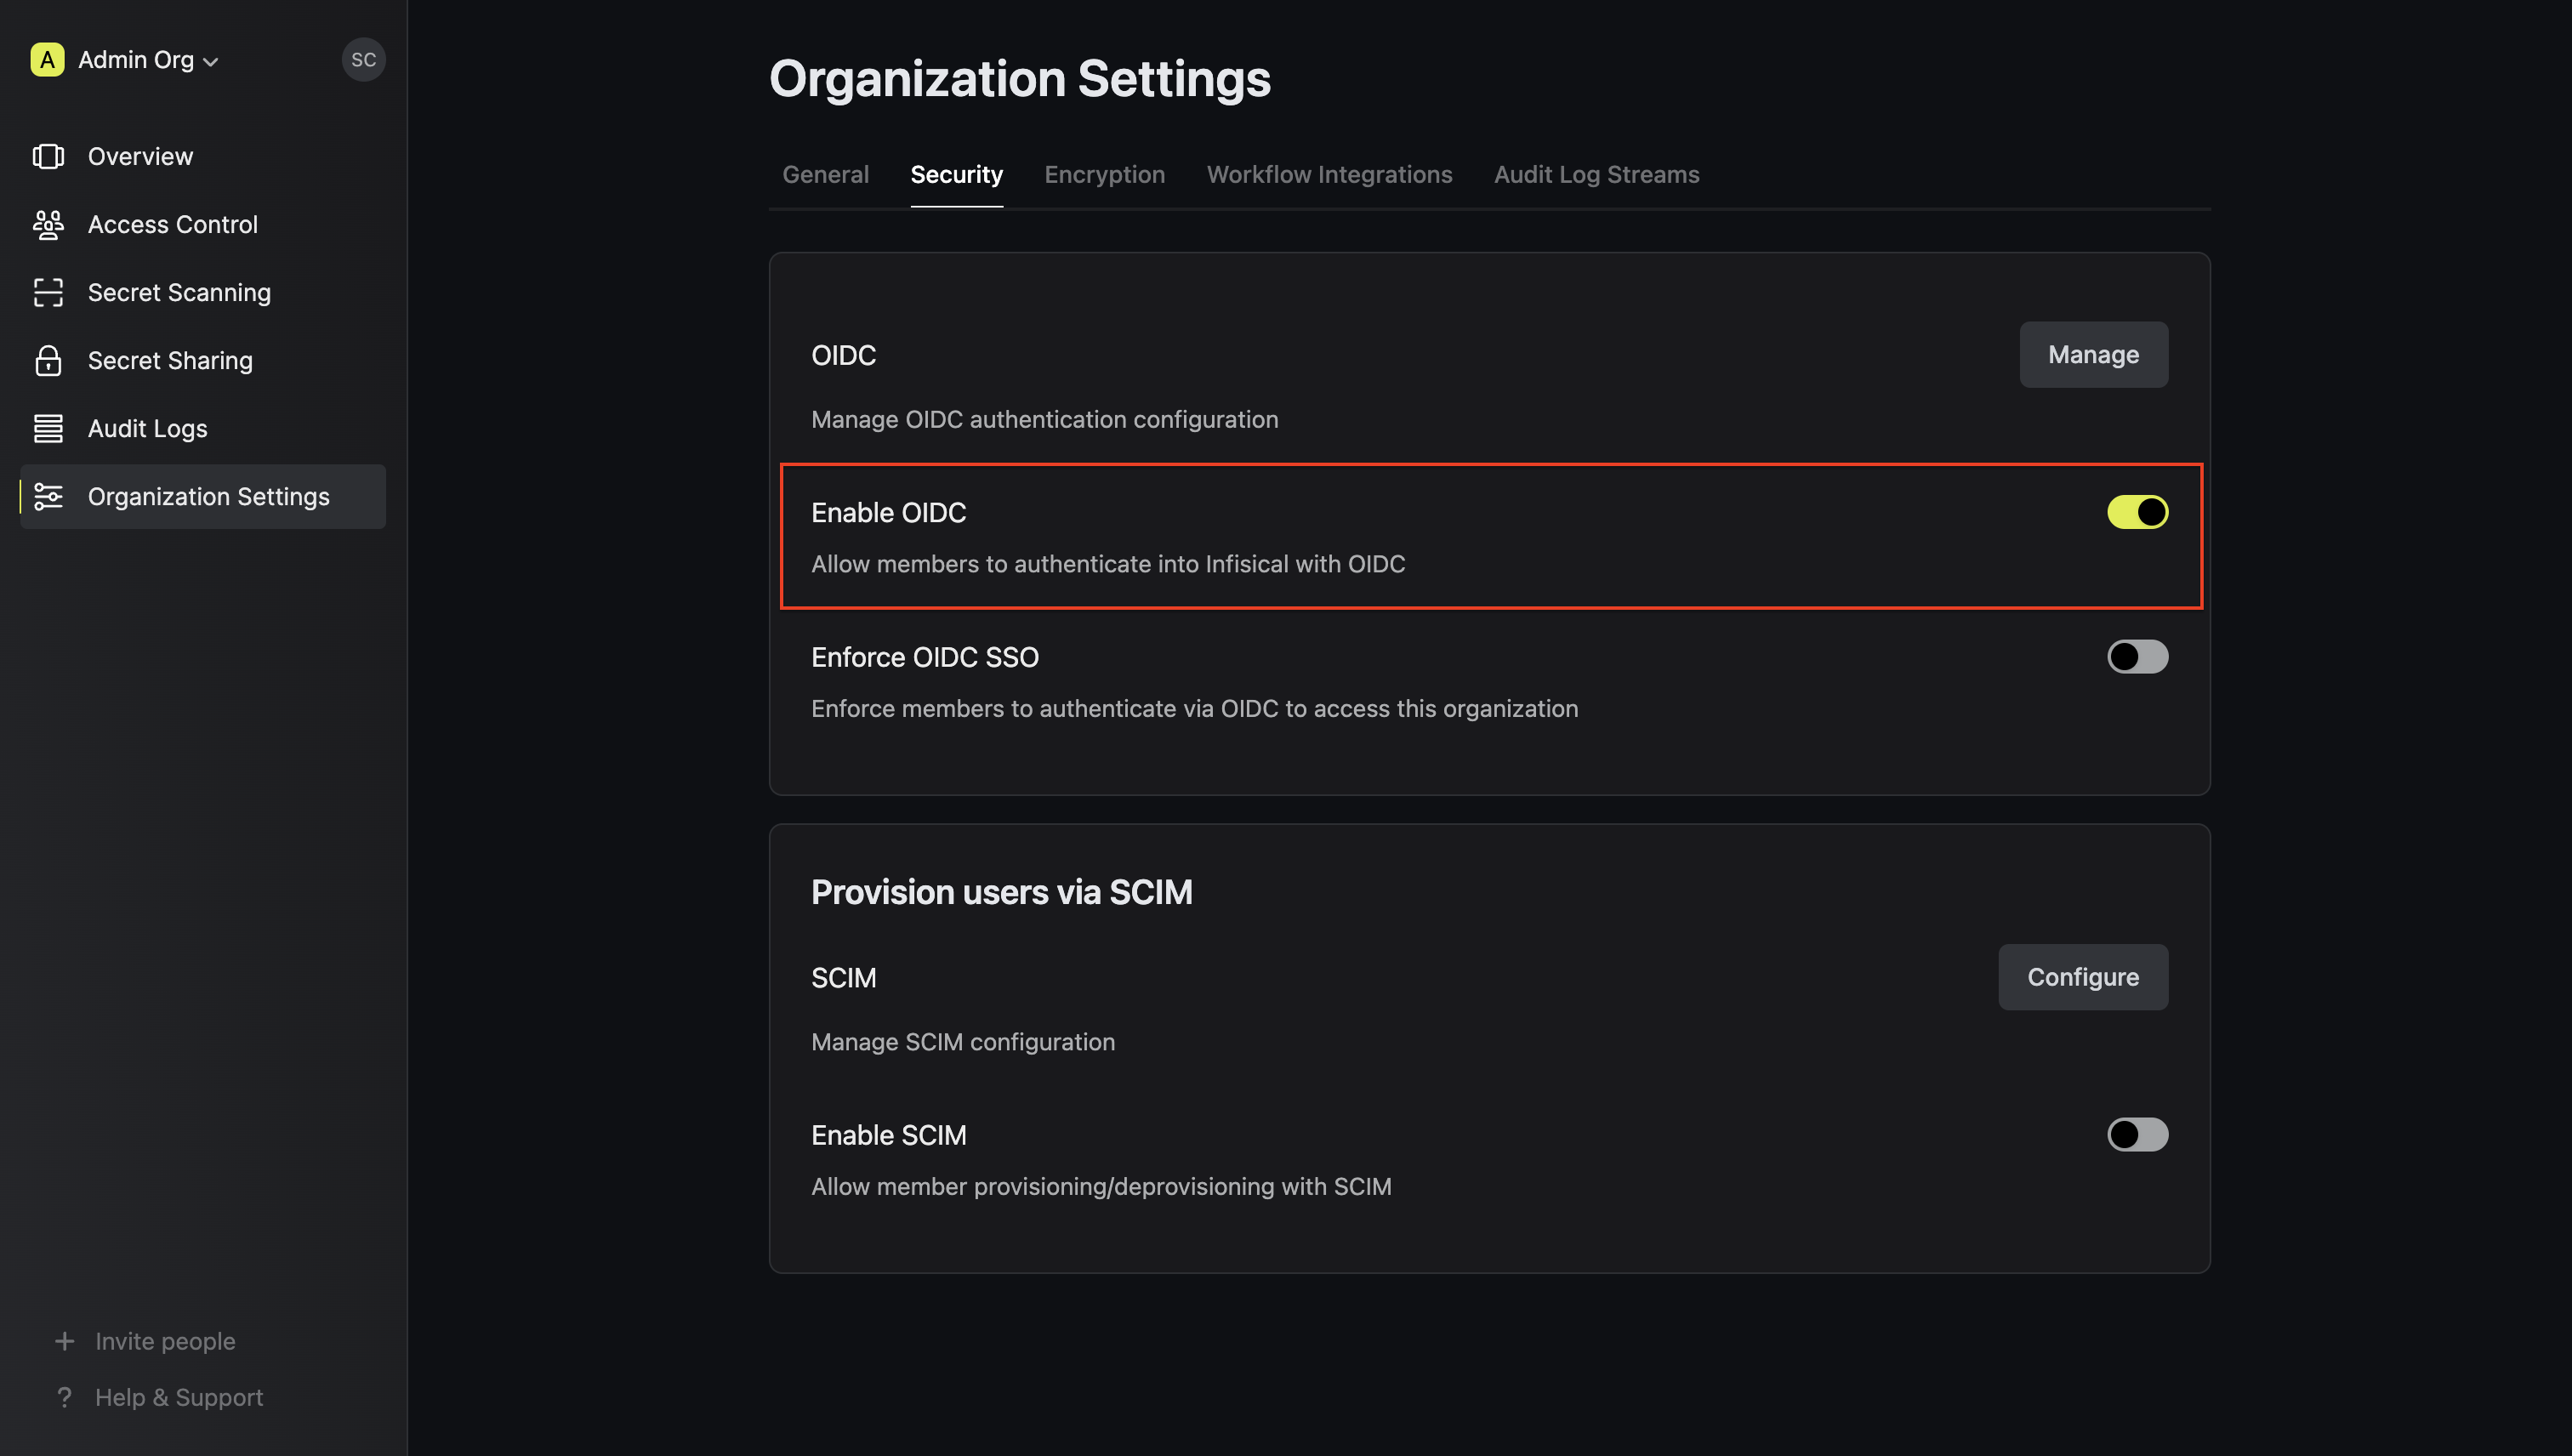
5
Enforce OIDC SSO in Infisical
Enforcing OIDC SSO ensures that members in your organization can only access Infisical
by logging into the organization via Keycloak.To enforce OIDC SSO, you’re required to test out the OpenID connection by successfully authenticating at least one Keycloak user with Infisical.
Once you’ve completed this requirement, you can toggle the Enforce OIDC SSO button to enforce OIDC SSO.
In case of a lockout, an organization admin can use the Admin Login Portal in the
/login/admin path e.g. https://app.infisical.com/login/admin.If you’re configuring OIDC SSO on a self-hosted instance of Infisical, make
sure to set the
AUTH_SECRET and SITE_URL environment variable for it to
work:AUTH_SECRET: A secret key used for signing and verifying JWT. This can be a random 32-byte base64 string generated withopenssl rand -base64 32.
SITE_URL: The absolute URL of your self-hosted instance of Infisical including the protocol (e.g. https://app.infisical.com)