

Prerequisites
Before you begin, you’ll first need to set up a GCP Service Account, add a KMS key and set the required permissions.1
Create a GCP Service Account
-
Navigate to the Create Service Account page in your GCP Console.
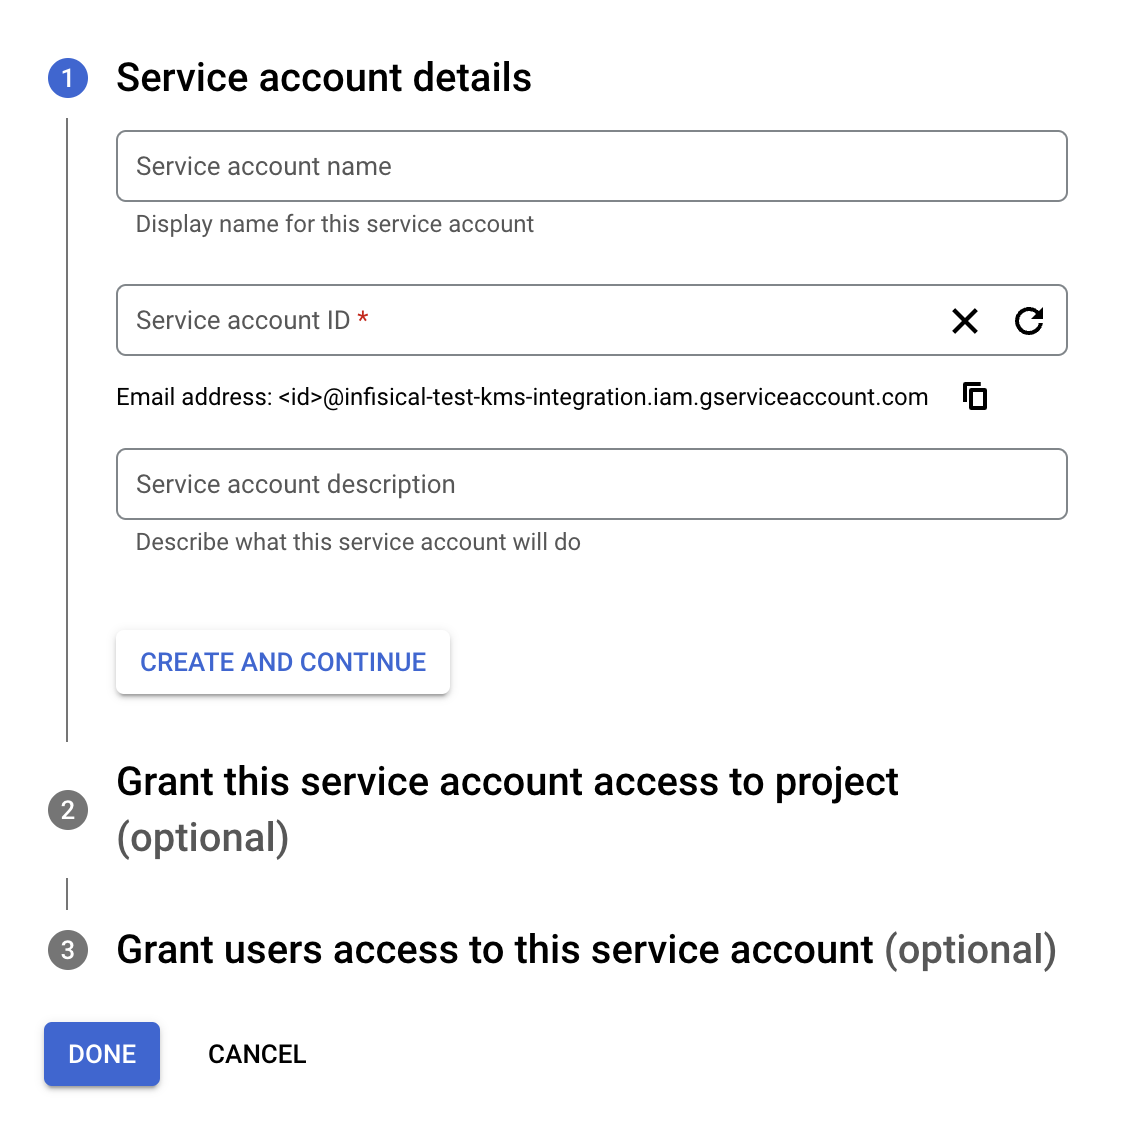
- Give the service account a suitable name and description. Then click Create and Continue.
-
Under Grant this service account access to project, click Select a role and select the
Cloud KMS Viewer and Cloud KMS CryptoKey Encrypter/Decrypter* roles, then click Continue.
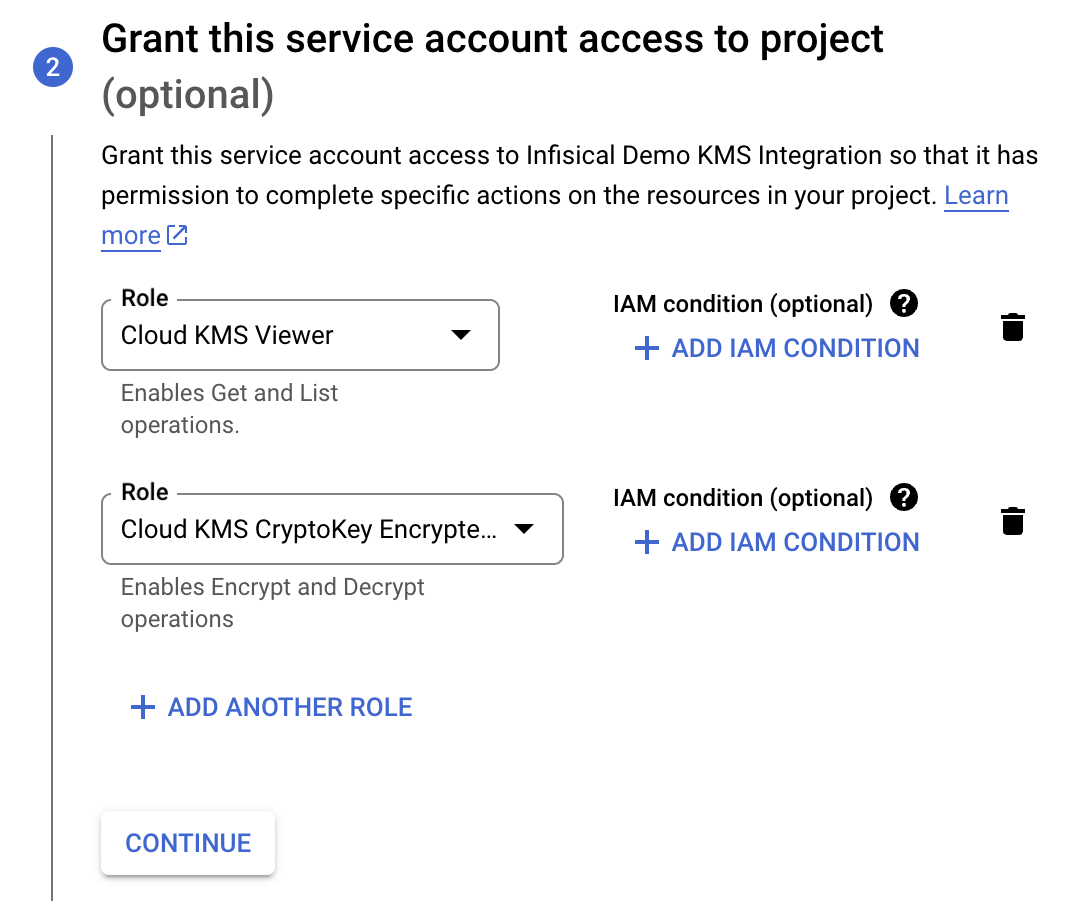
- You can skip the Grant users access to this service account options.
- Click Done.
- You should see the service account in the list of service accounts. Click it to view the service account details.
- Select the Keys tab, click Add Key, select Create new key, select JSON as the key type, then click Create.
- You’ll be prompted to download a JSON file that we will need later on.
Remember to keep the JSON file in a secure location. It will be used to authenticate your GCP service account.Once you have successfully set up GCP KMS with Infisical, you should permanently delete the JSON file.
2
Add a GCP KMS Key
- Navigate to the KMS page in your GCP Console.
If you haven’t used GCP KMS before, you’ll be redirected to the Cloud Key Management Service (KMS) API page.Click Enable to enable the KMS API, then continue the steps below.It may take a few minutes for the API to be enabled and KMS section of the Cloud Console to become viewable.
-
In the KMS section, click Create Key Ring.
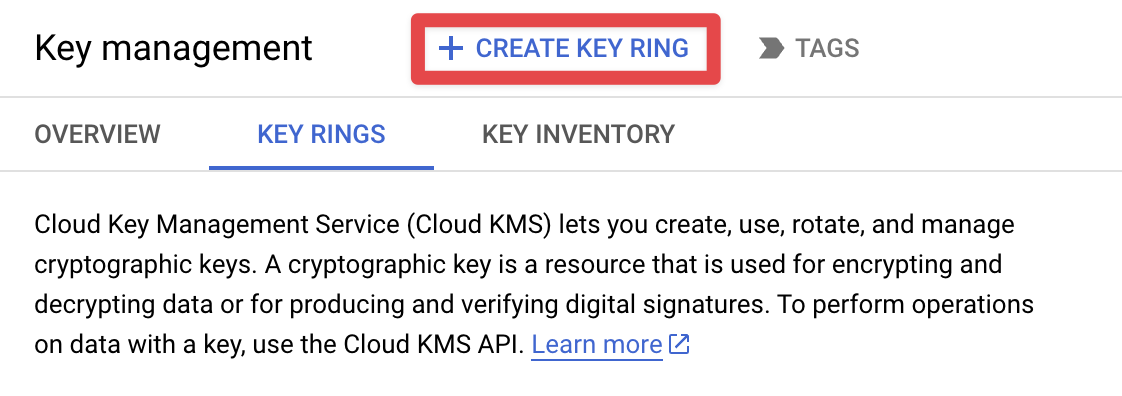
- Give the key ring a Name and select a Region, then click Create.
We don’t currently support multi-region key rings.
- On the “Create Key” page, give the key a Name and set the Protection Level based on your requirements (or use default Software), then click Continue.
- Under Key Material, select Generated Key, then click Continue.
- Under Purpose, select Symmetric encrypt/decrypt, then click Continue.
- For Key Rotation Period, select Never (manual rotation), then click Continue followed by Create.
- You should see the key in the list of keys. We’re now ready to set it up in Infisical.
Setup GCP KMS in the organization settings
Next, you’ll need to follow the steps listed below to add GCP KMS for your organization.1
Open the Encryption settings
Go to Settings, select Encryption, then select Add KMS.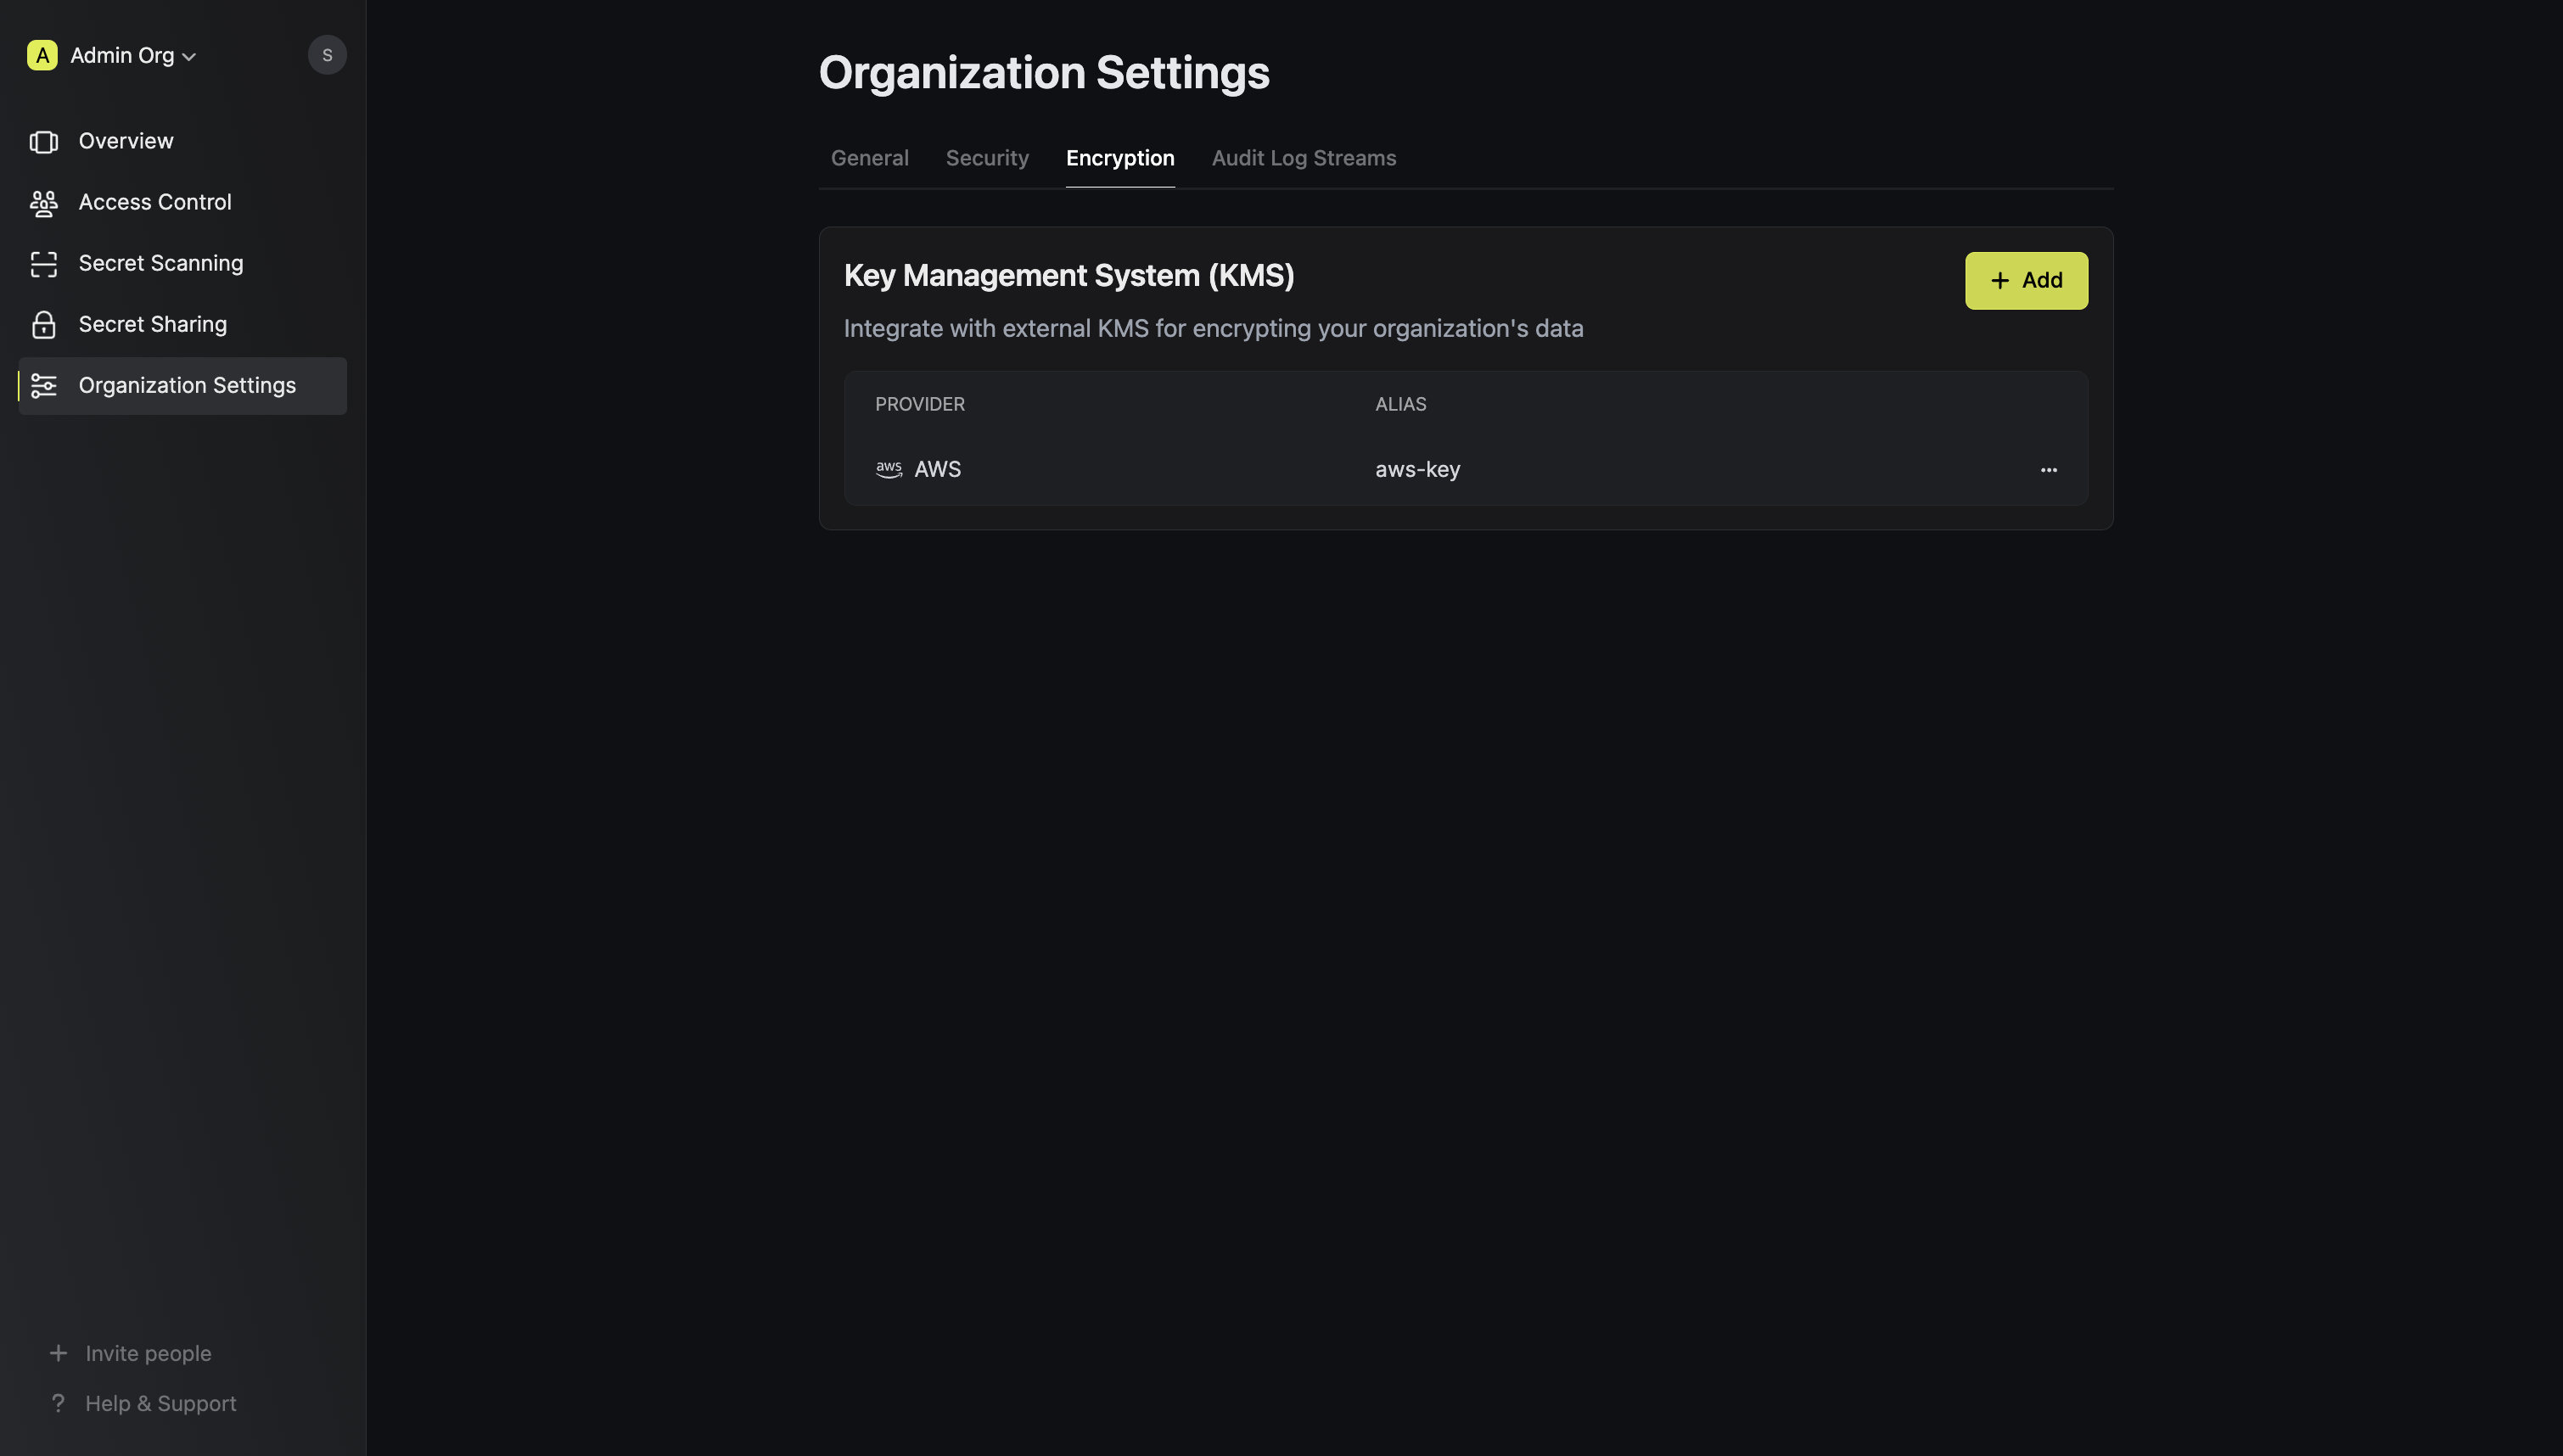
2
Select GCP KMS
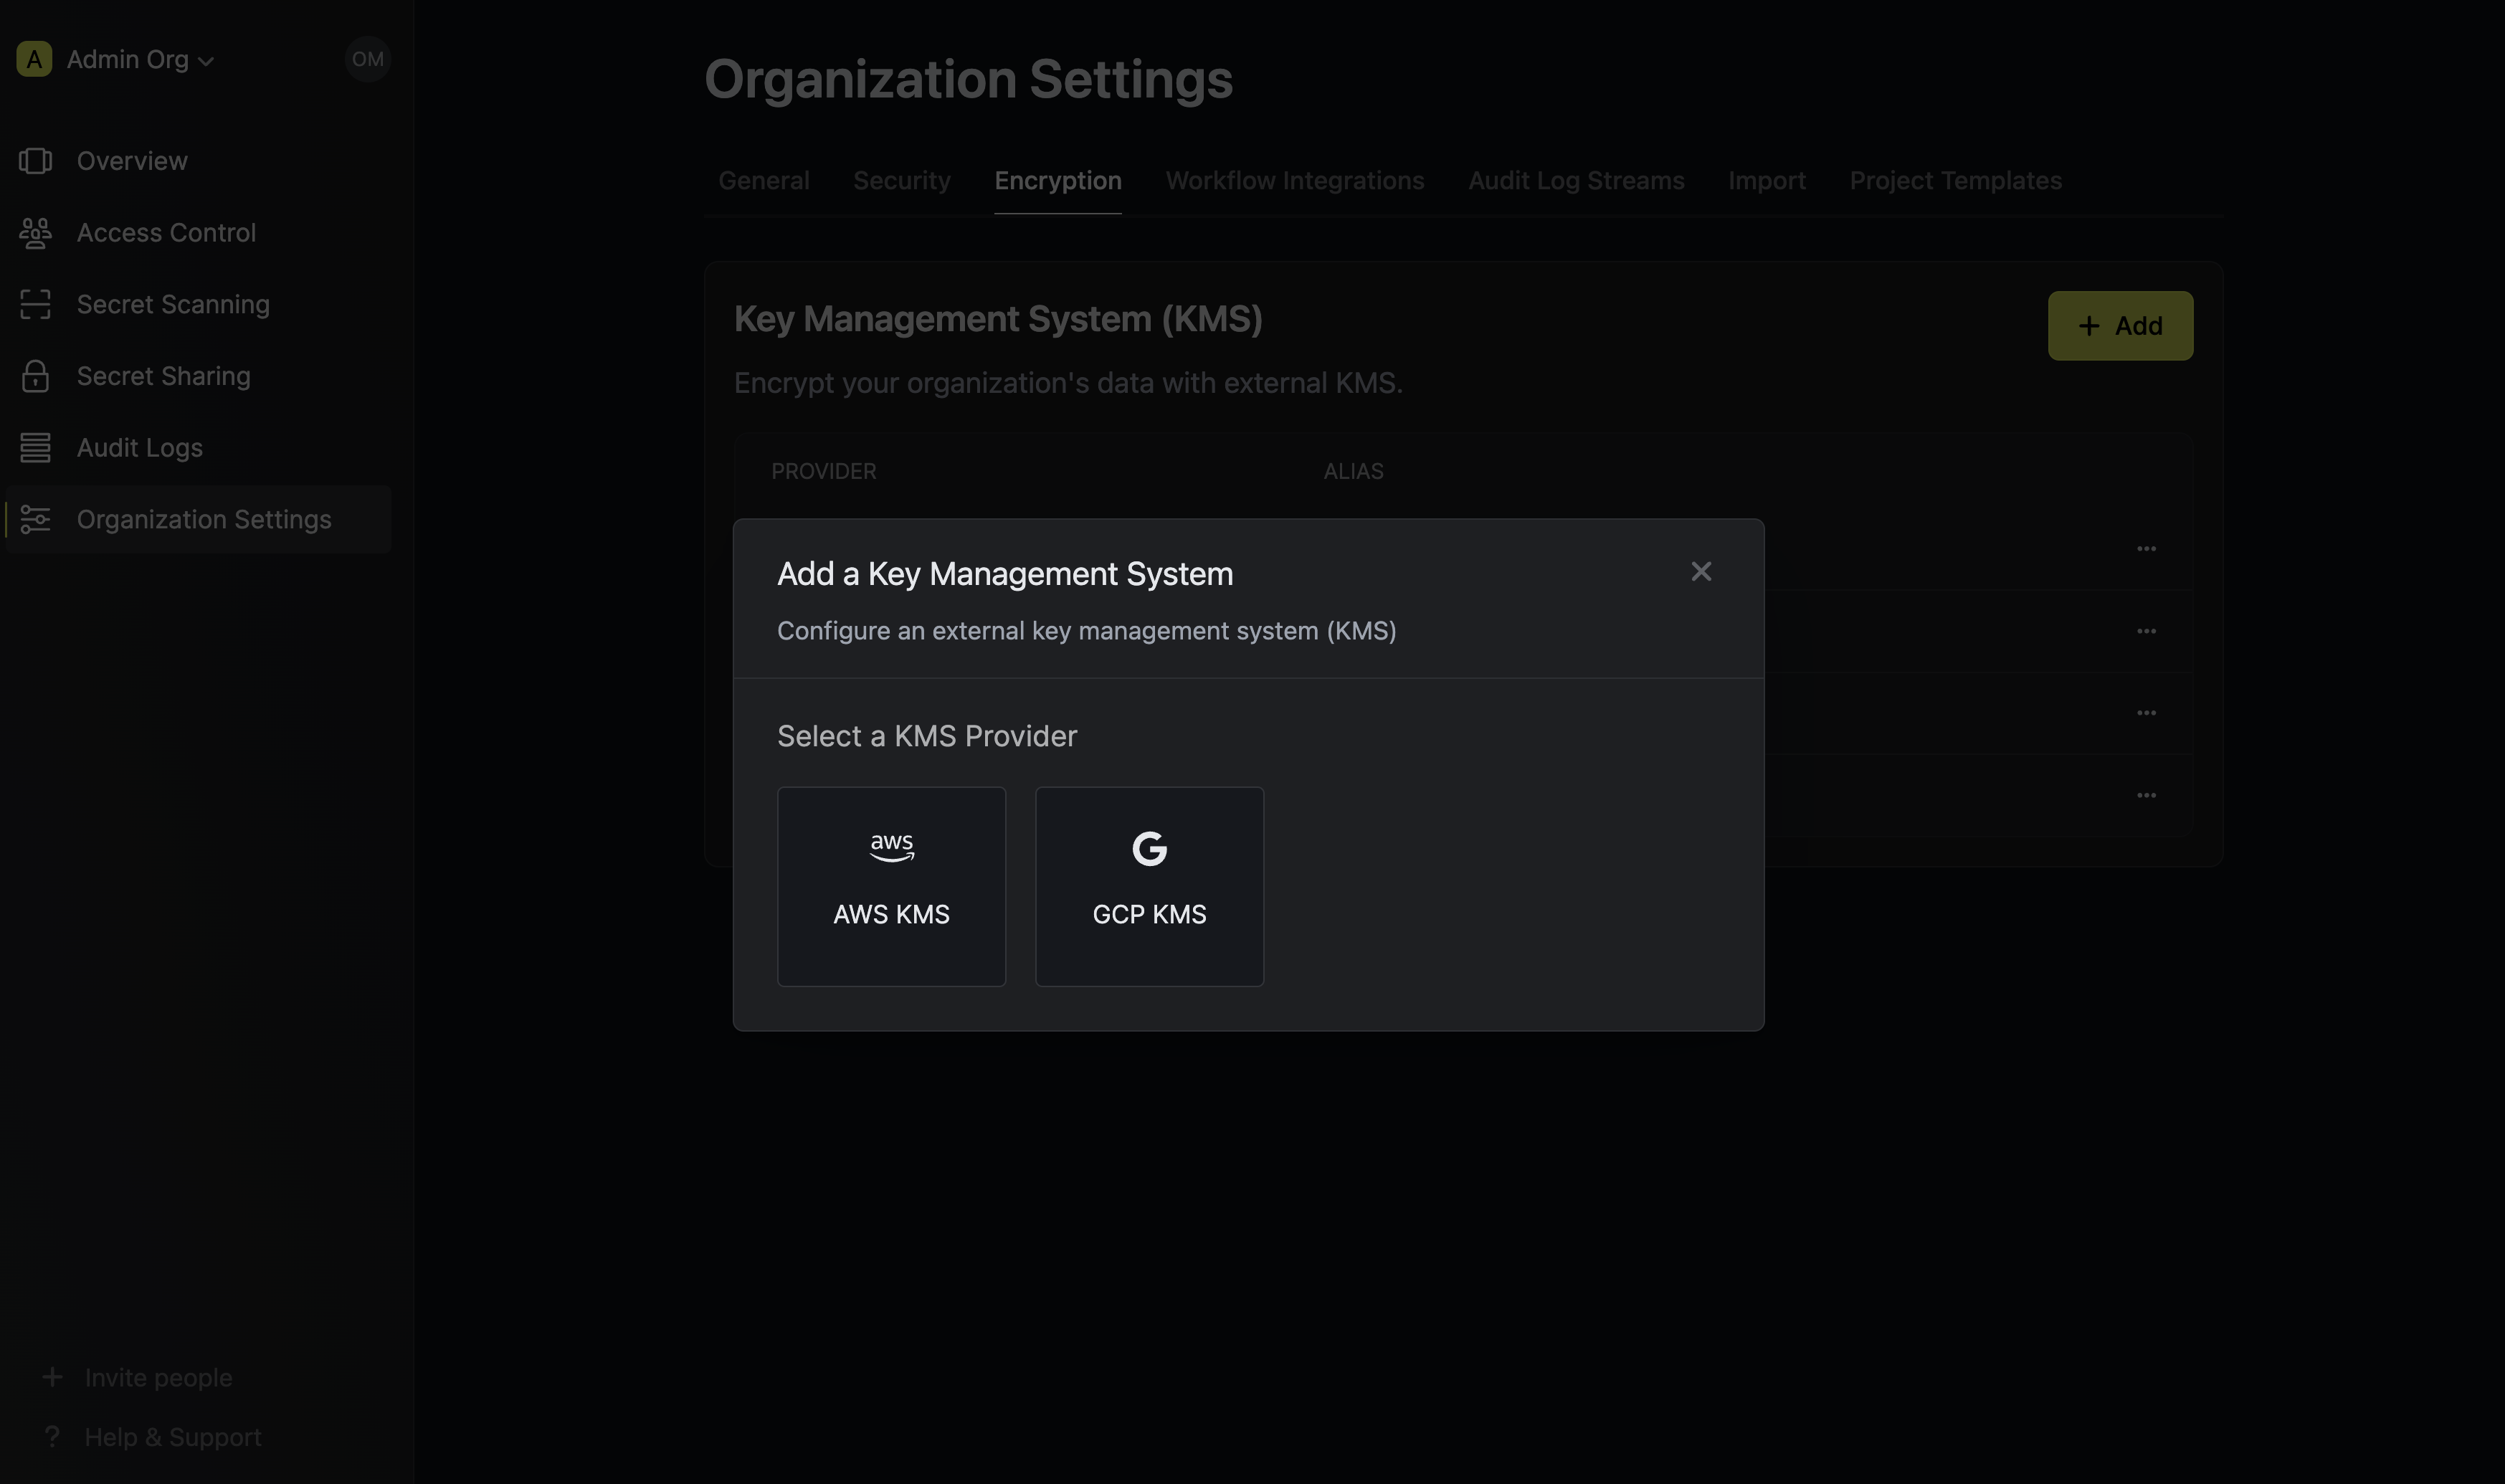 Choose GCP KMS from the list of encryption providers.
3
Provide the inputs for GCP KMS
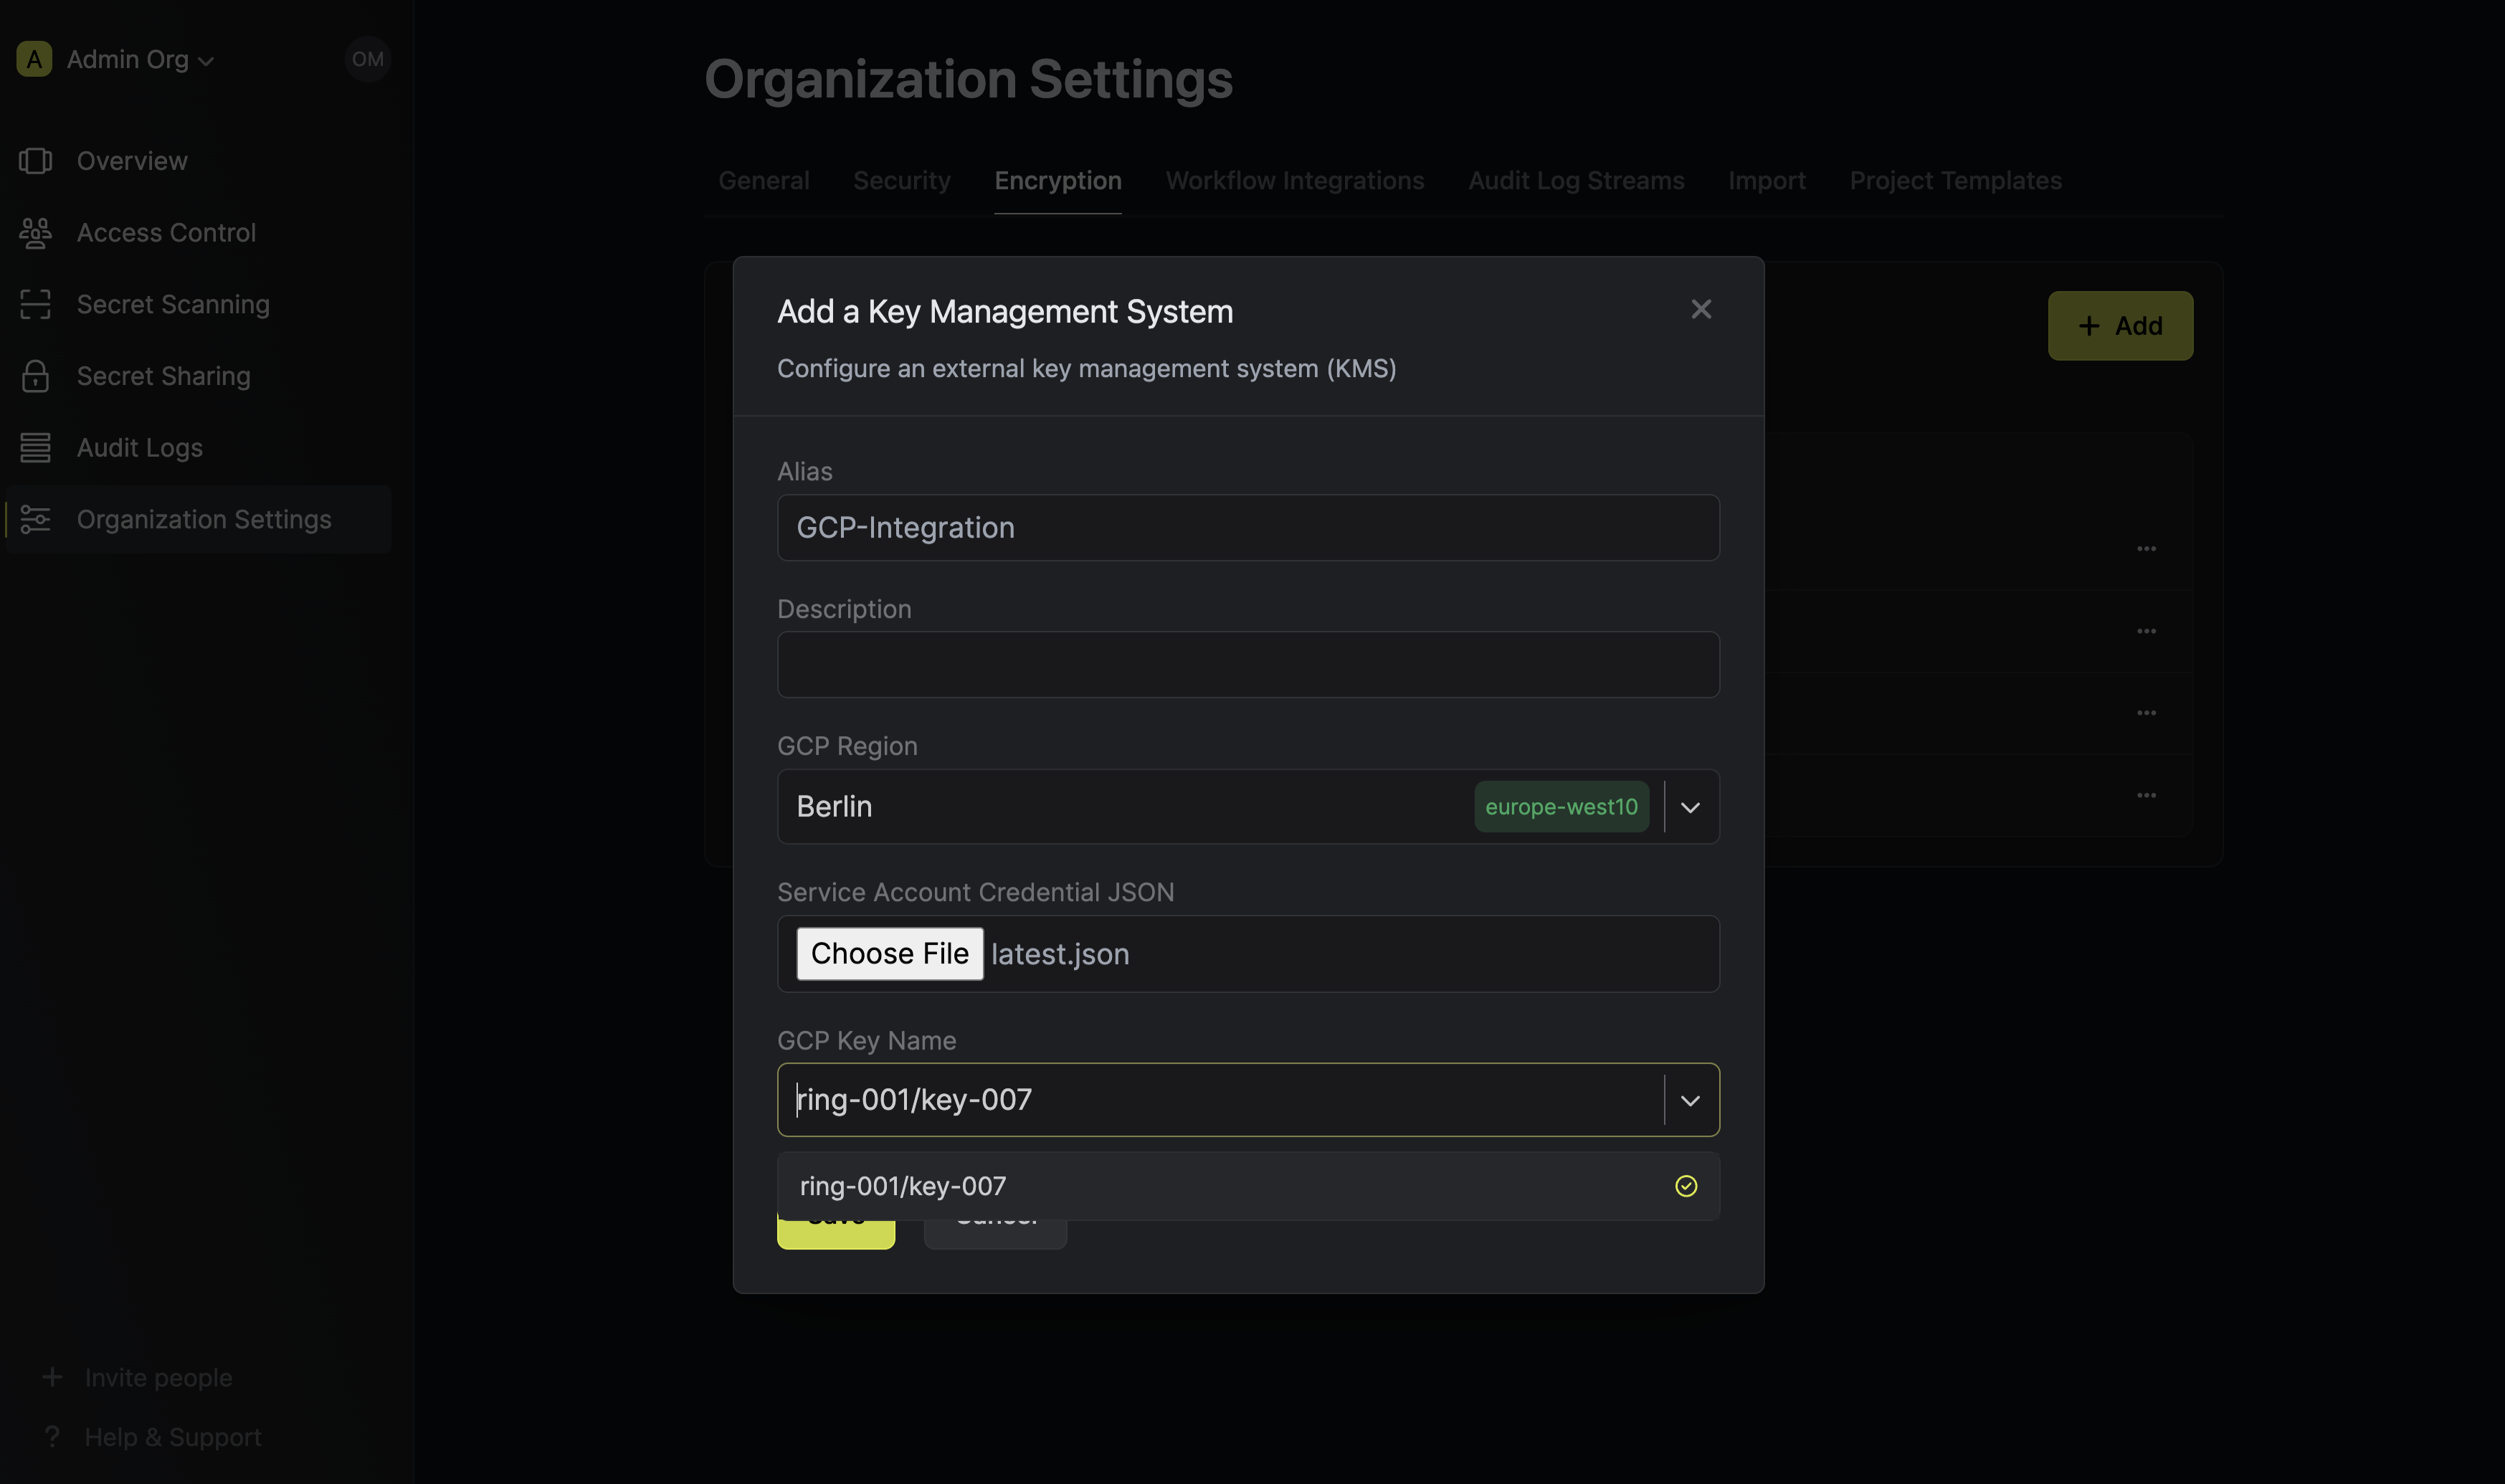 Selecting GCP as the provider will require you input the following fields.
string
required
Name for referencing the GCP KMS key within the organization.
string
Short description of the GCP KMS key.
dropdown
required
The GCP region where the GCP KMS key ring is located.
file
required
Upload the JSON file you downloaded earlier when creating the GCP service account.
dropdown
required
This field will be populated with the list of GCP KMS keys in the selected region. Select the key you created earlier.
4
Save the configuration
Select Save to apply the settings.
Assign GCP KMS key to an existing project
To assign the GCP KMS key you added to your organization, follow the steps below.1
Open the project's Encryption settings
Open the project, go to Settings, and select Encryption.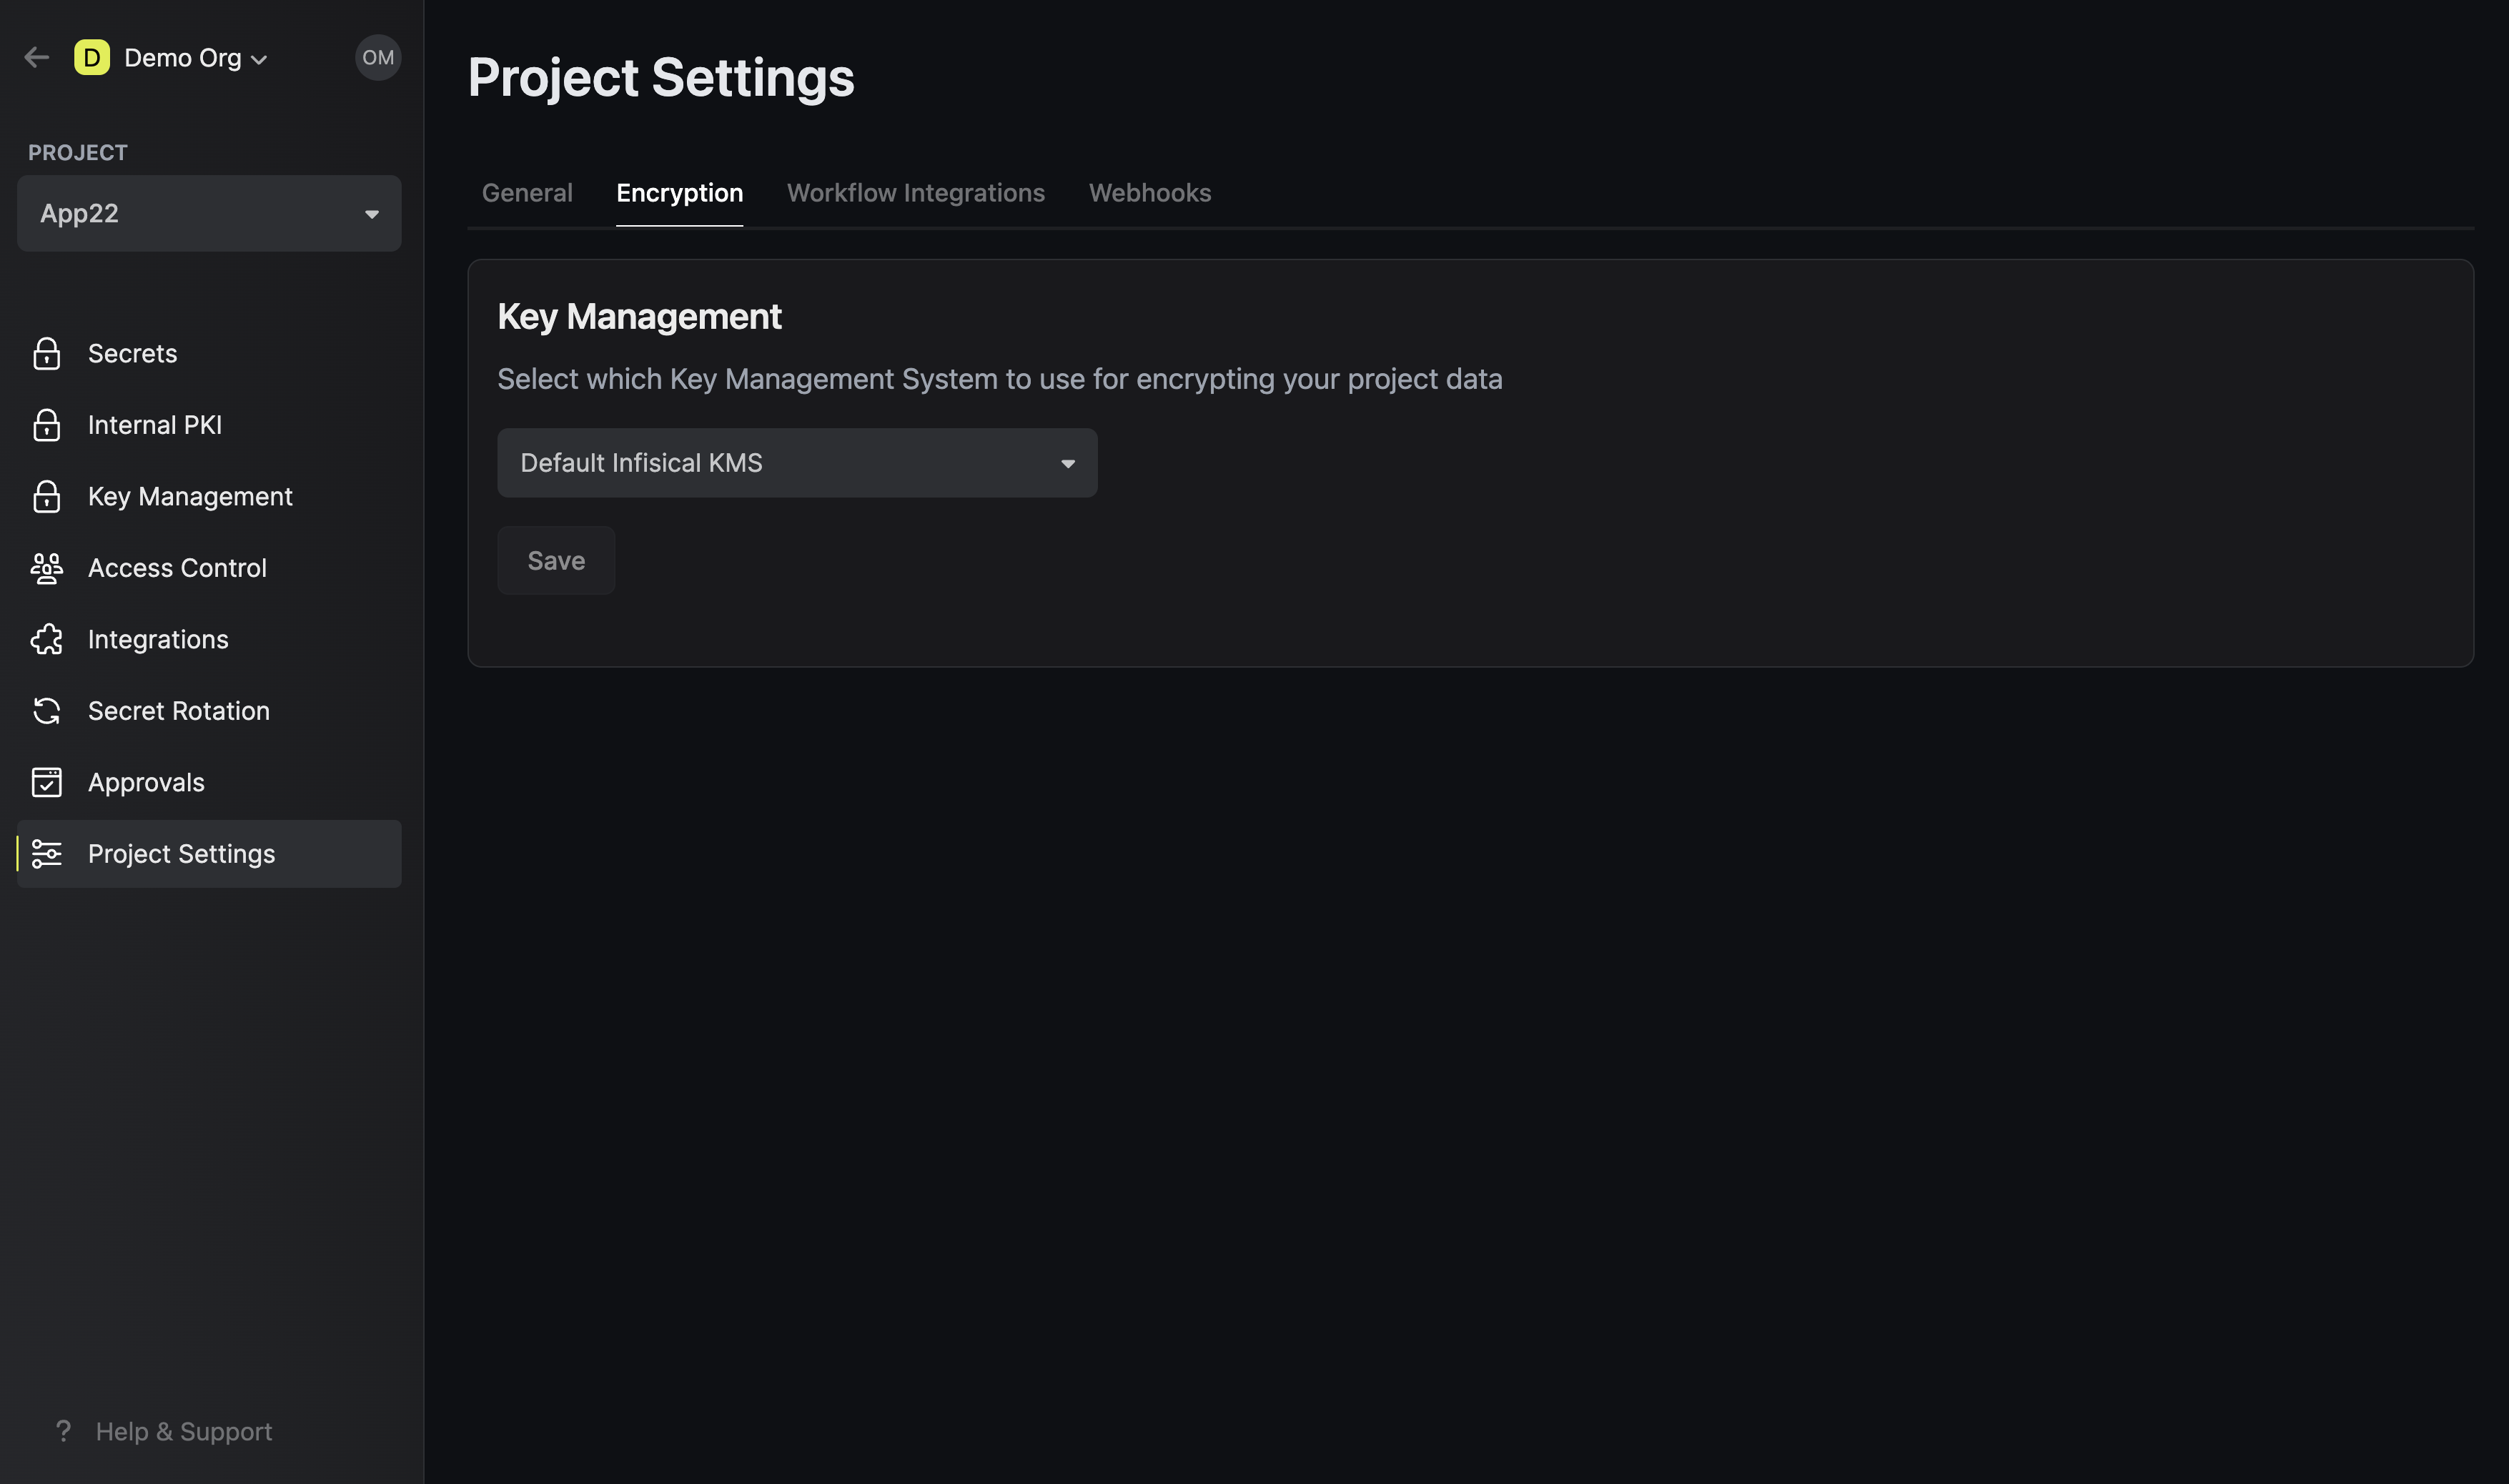
2
Select the key under Key Management
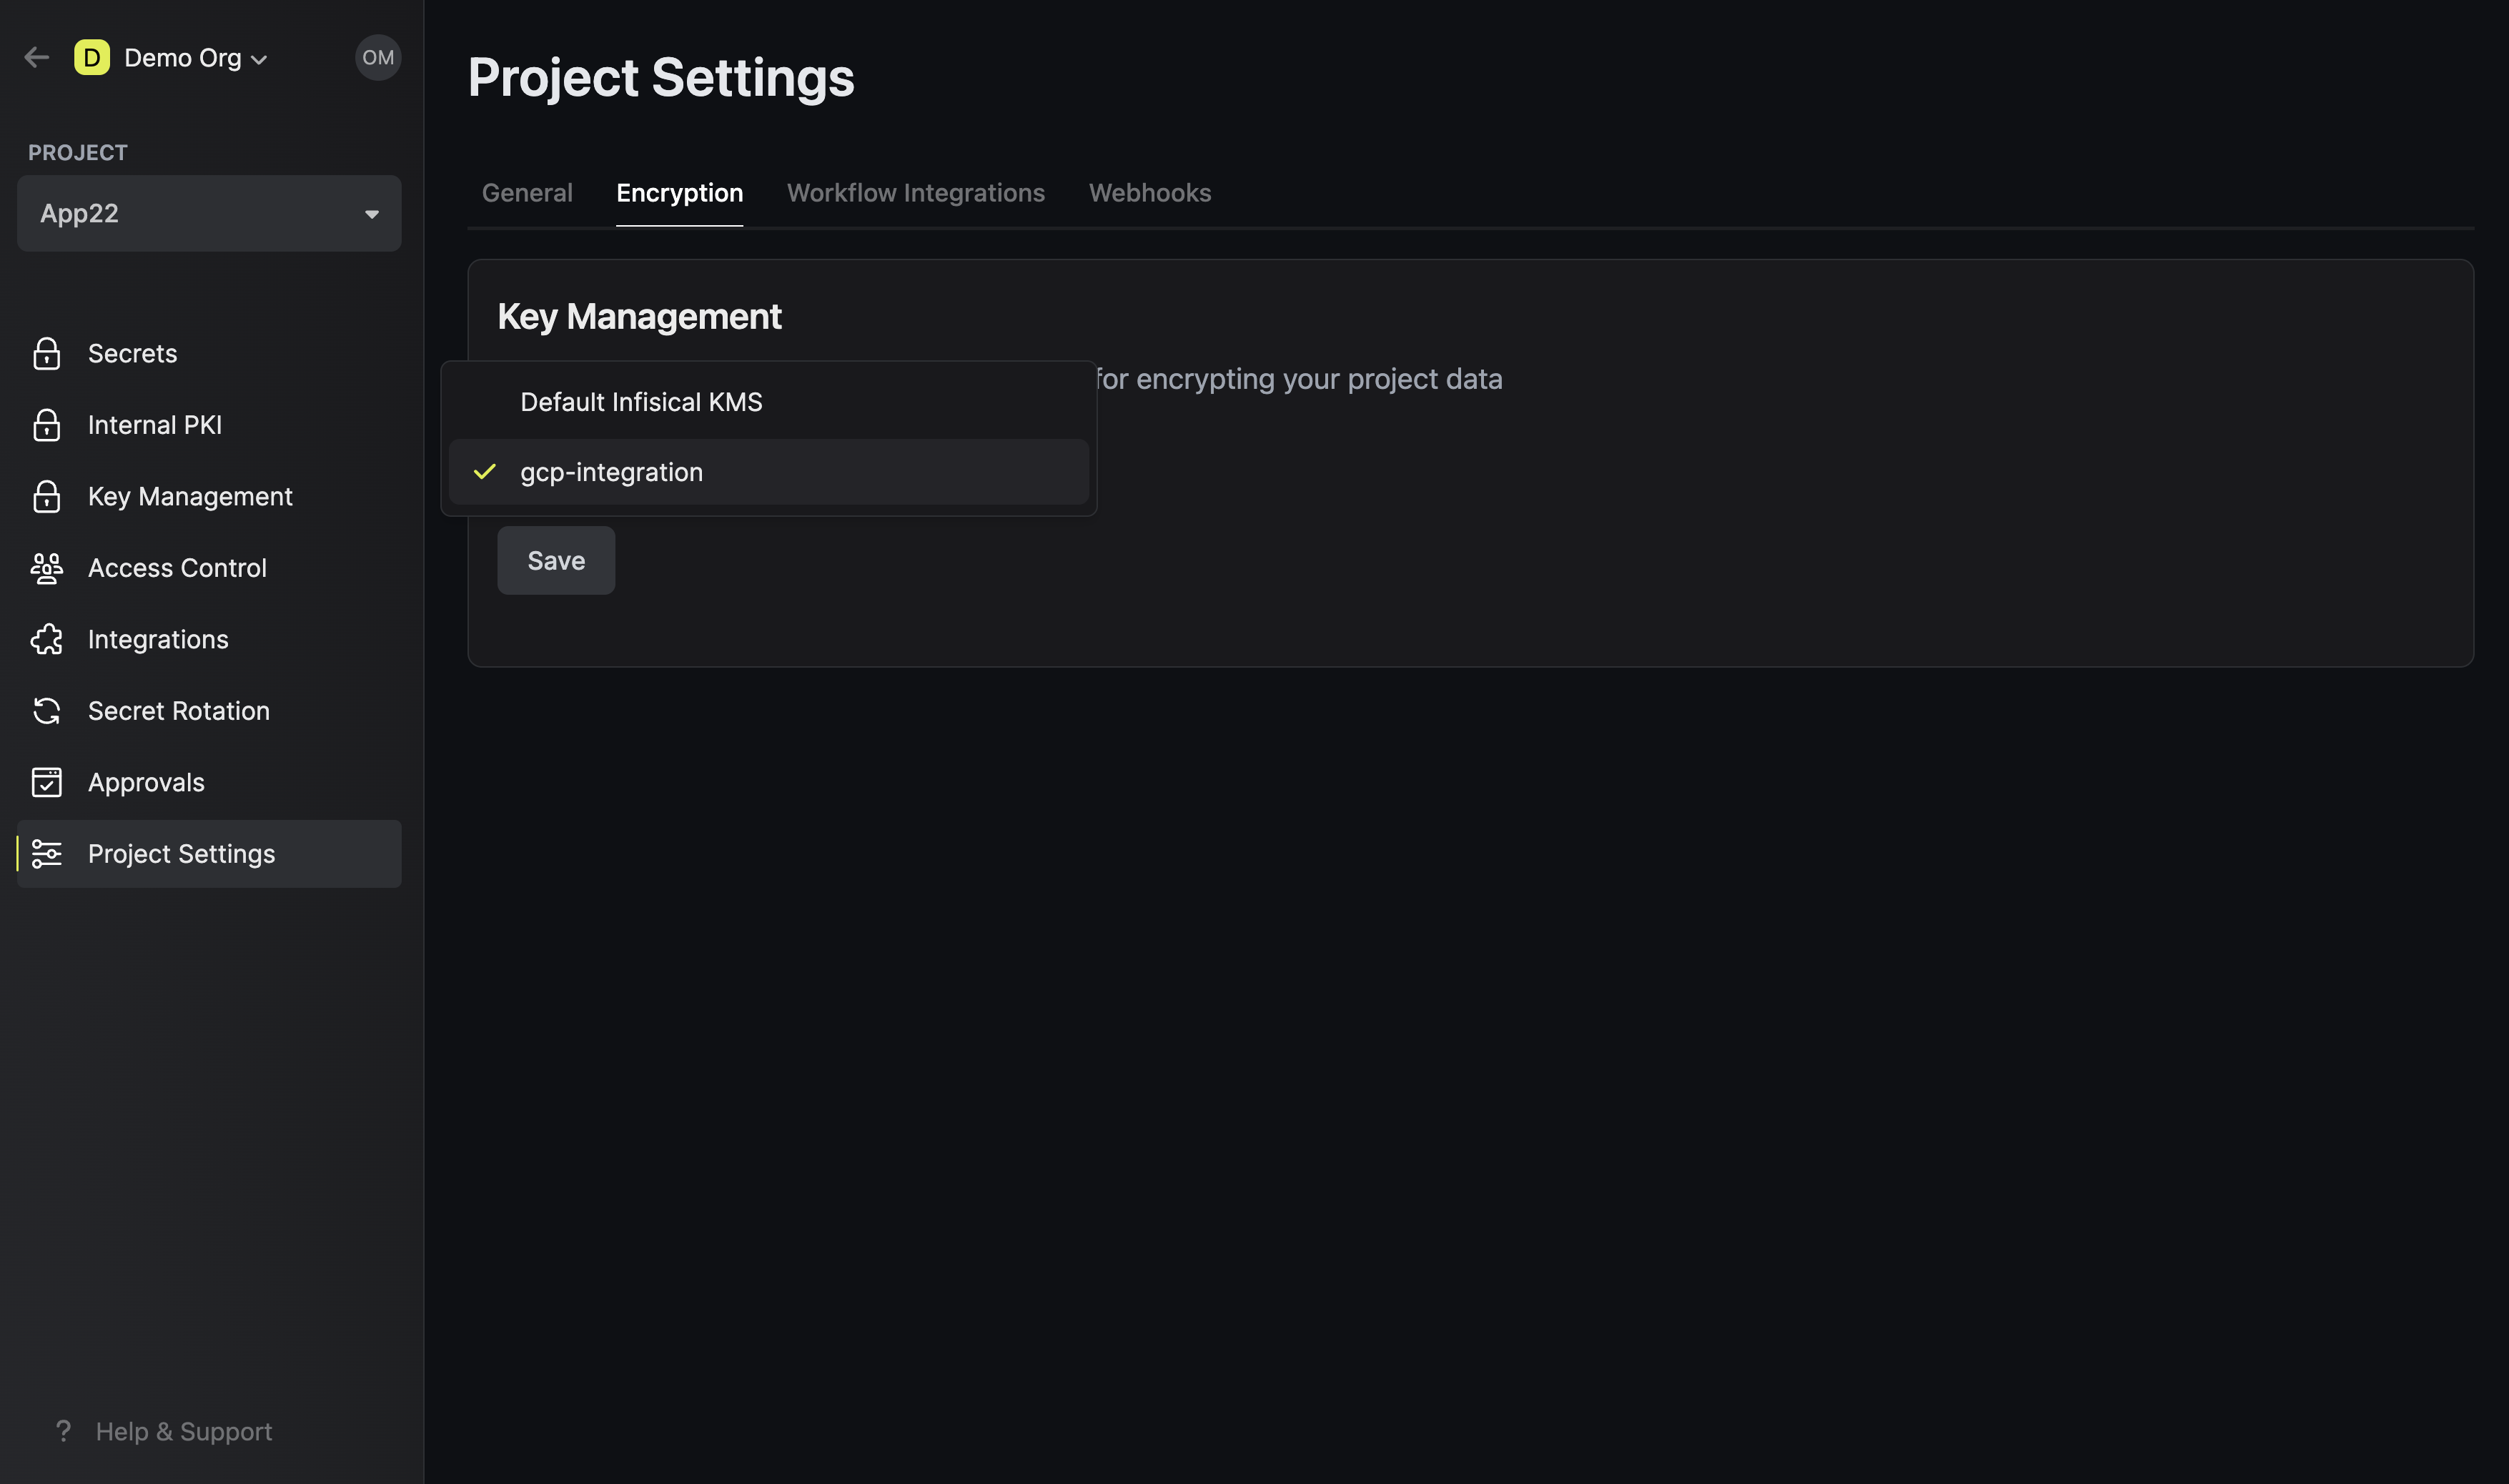 Choose the GCP KMS key you configured earlier.
3
Save the change
Once you have selected the KMS of choice, select Save.