Prerequisites
- Ensure that the
managementplugin is enabled on your RabbitMQ instance. This is required for the dynamic secret to work.
Set up Dynamic Secrets with RabbitMQ
Open Secret Overview Dashboard
Open the Secret Overview dashboard and select the environment in which you would like to add a dynamic secret.
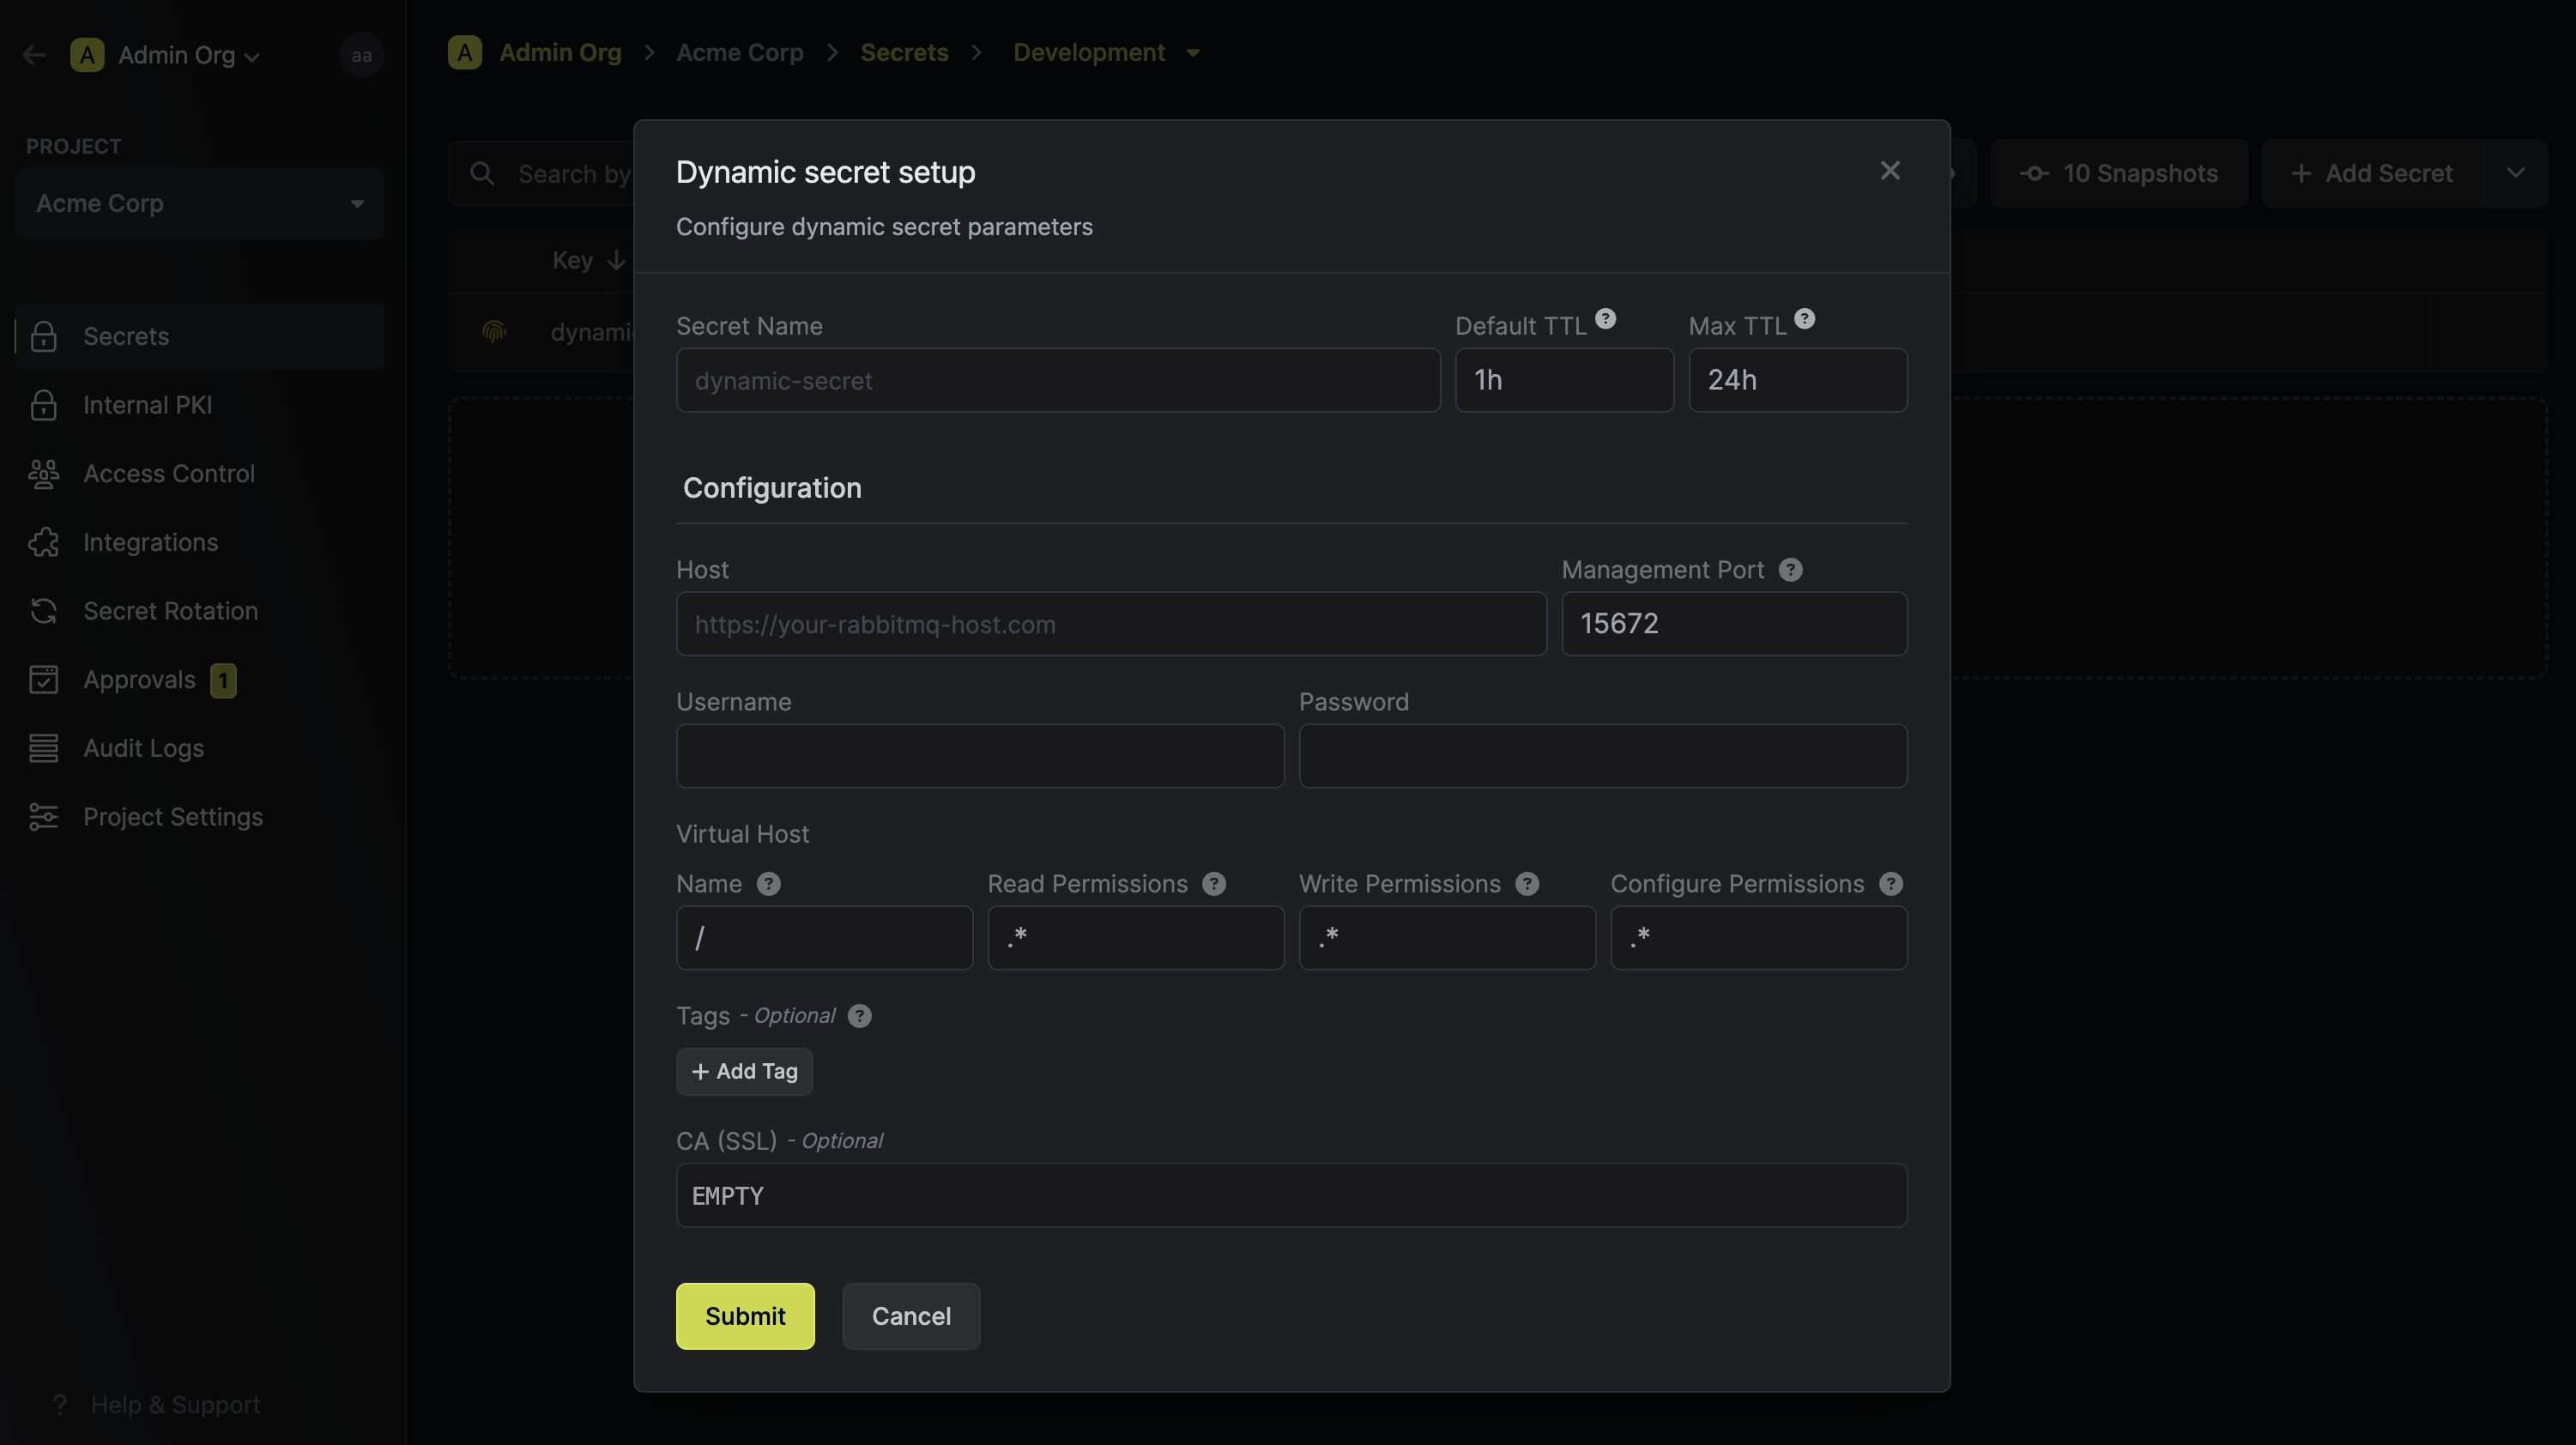
Provide the inputs for dynamic secret parameters
Name by which you want the secret to be referenced
Default time-to-live for a generated secret (it is possible to modify this value after a secret is generated)
Maximum time-to-live for a generated secret.
Your RabbitMQ host. This must be in HTTP format. (Example: http://your-cluster-ip)
The port that the RabbitMQ management plugin is listening on. This is
15672 by default.The name of the virtual host that the user will be assigned to. This defaults
to
/.The permissions that the user will have on the virtual host. This defaults to
.*.The three permission fields all take a regular expression (regex), that should match resource names for which the user is granted read / write / configuration permissionsThe username of the user that will be used to provision new dynamic secret
leases.
The password of the user that will be used to provision new dynamic secret
leases.
Specifies a template for generating usernames. This field allows customization of how usernames are automatically created.Allowed template variables are:
{{randomUsername}}: Random username string.{{unixTimestamp}}: Current Unix timestamp at the time of lease creation.{{identity.name}}: Name of the identity that is generating the lease.{{dynamicSecret.name}}: Name of the associated dynamic secret.{{dynamicSecret.type}}: Type of the associated dynamic secret.{{random N}}: Random string of N characters.
truncate: Truncates a string to a specified length.replace: Replaces a substring with another value.uppercase: Converts a string to uppercase.lowercase: Converts a string to lowercase.
A CA may be required if your DB requires it for incoming connections. This is often the case when connecting to a managed service.

Click `Submit`
After submitting the form, you will see a dynamic secret created in the dashboard.
If this step fails, you may have to add the CA certificate.
Generate dynamic secrets
Once you’ve successfully configured the dynamic secret, you’re ready to generate on-demand credentials.
To do this, simply click on the ‘Generate’ button which appears when hovering over the dynamic secret item.
Alternatively, you can initiate the creation of a new lease by selecting ‘New Lease’ from the dynamic secret lease list section.
 When generating these secrets, it’s important to specify a Time-to-Live (TTL) duration. This will dictate how long the credentials are valid for.
 Once you click the

 When generating these secrets, it’s important to specify a Time-to-Live (TTL) duration. This will dictate how long the credentials are valid for.
 Once you click the
 Submit button, a new secret lease will be generated and the credentials from it will be shown to you.
Audit or Revoke Leases
Once you have created one or more leases, you will be able to access them by clicking on the respective dynamic secret item on the dashboard. This will allow you to see the expiration time of the lease or delete a lease before it’s set time to live.
Renew Leases
To extend the life of the generated dynamic secret leases past its initial time to live, simply click on the Renew button as illustrated below.


