Diagram
The following sequence diagram illustrates the Universal Auth workflow for authenticating clients with Infisical.Concept
In this method, Infisical authenticates a client by verifying the credentials issued for it at the/api/v1/auth/universal-auth/login endpoint. If successful,
then Infisical returns a short-lived access token that can be used to make authenticated requests to the Infisical API.
To be more specific:
- The client submits a Client ID and Client Secret to Infisical at the
/api/v1/auth/universal-auth/loginendpoint. - Infisical verifies the credential pair.
- If all is well, Infisical returns a short-lived access token that the client can use to make authenticated requests to the Infisical API.
Guide
In the following steps, we explore how to create and use identities for your workloads and applications to access the Infisical API using the Universal Auth authentication method.1
Creating an identity
To create an identity, head to your Organization Settings > Access Control > Identities and press Create identity. When creating an identity, you specify an organization level role for it to assume; you can configure roles in Organization Settings > Access Control > Organization Roles.
 Now input a few details for your new identity. Here’s some guidance for each field:
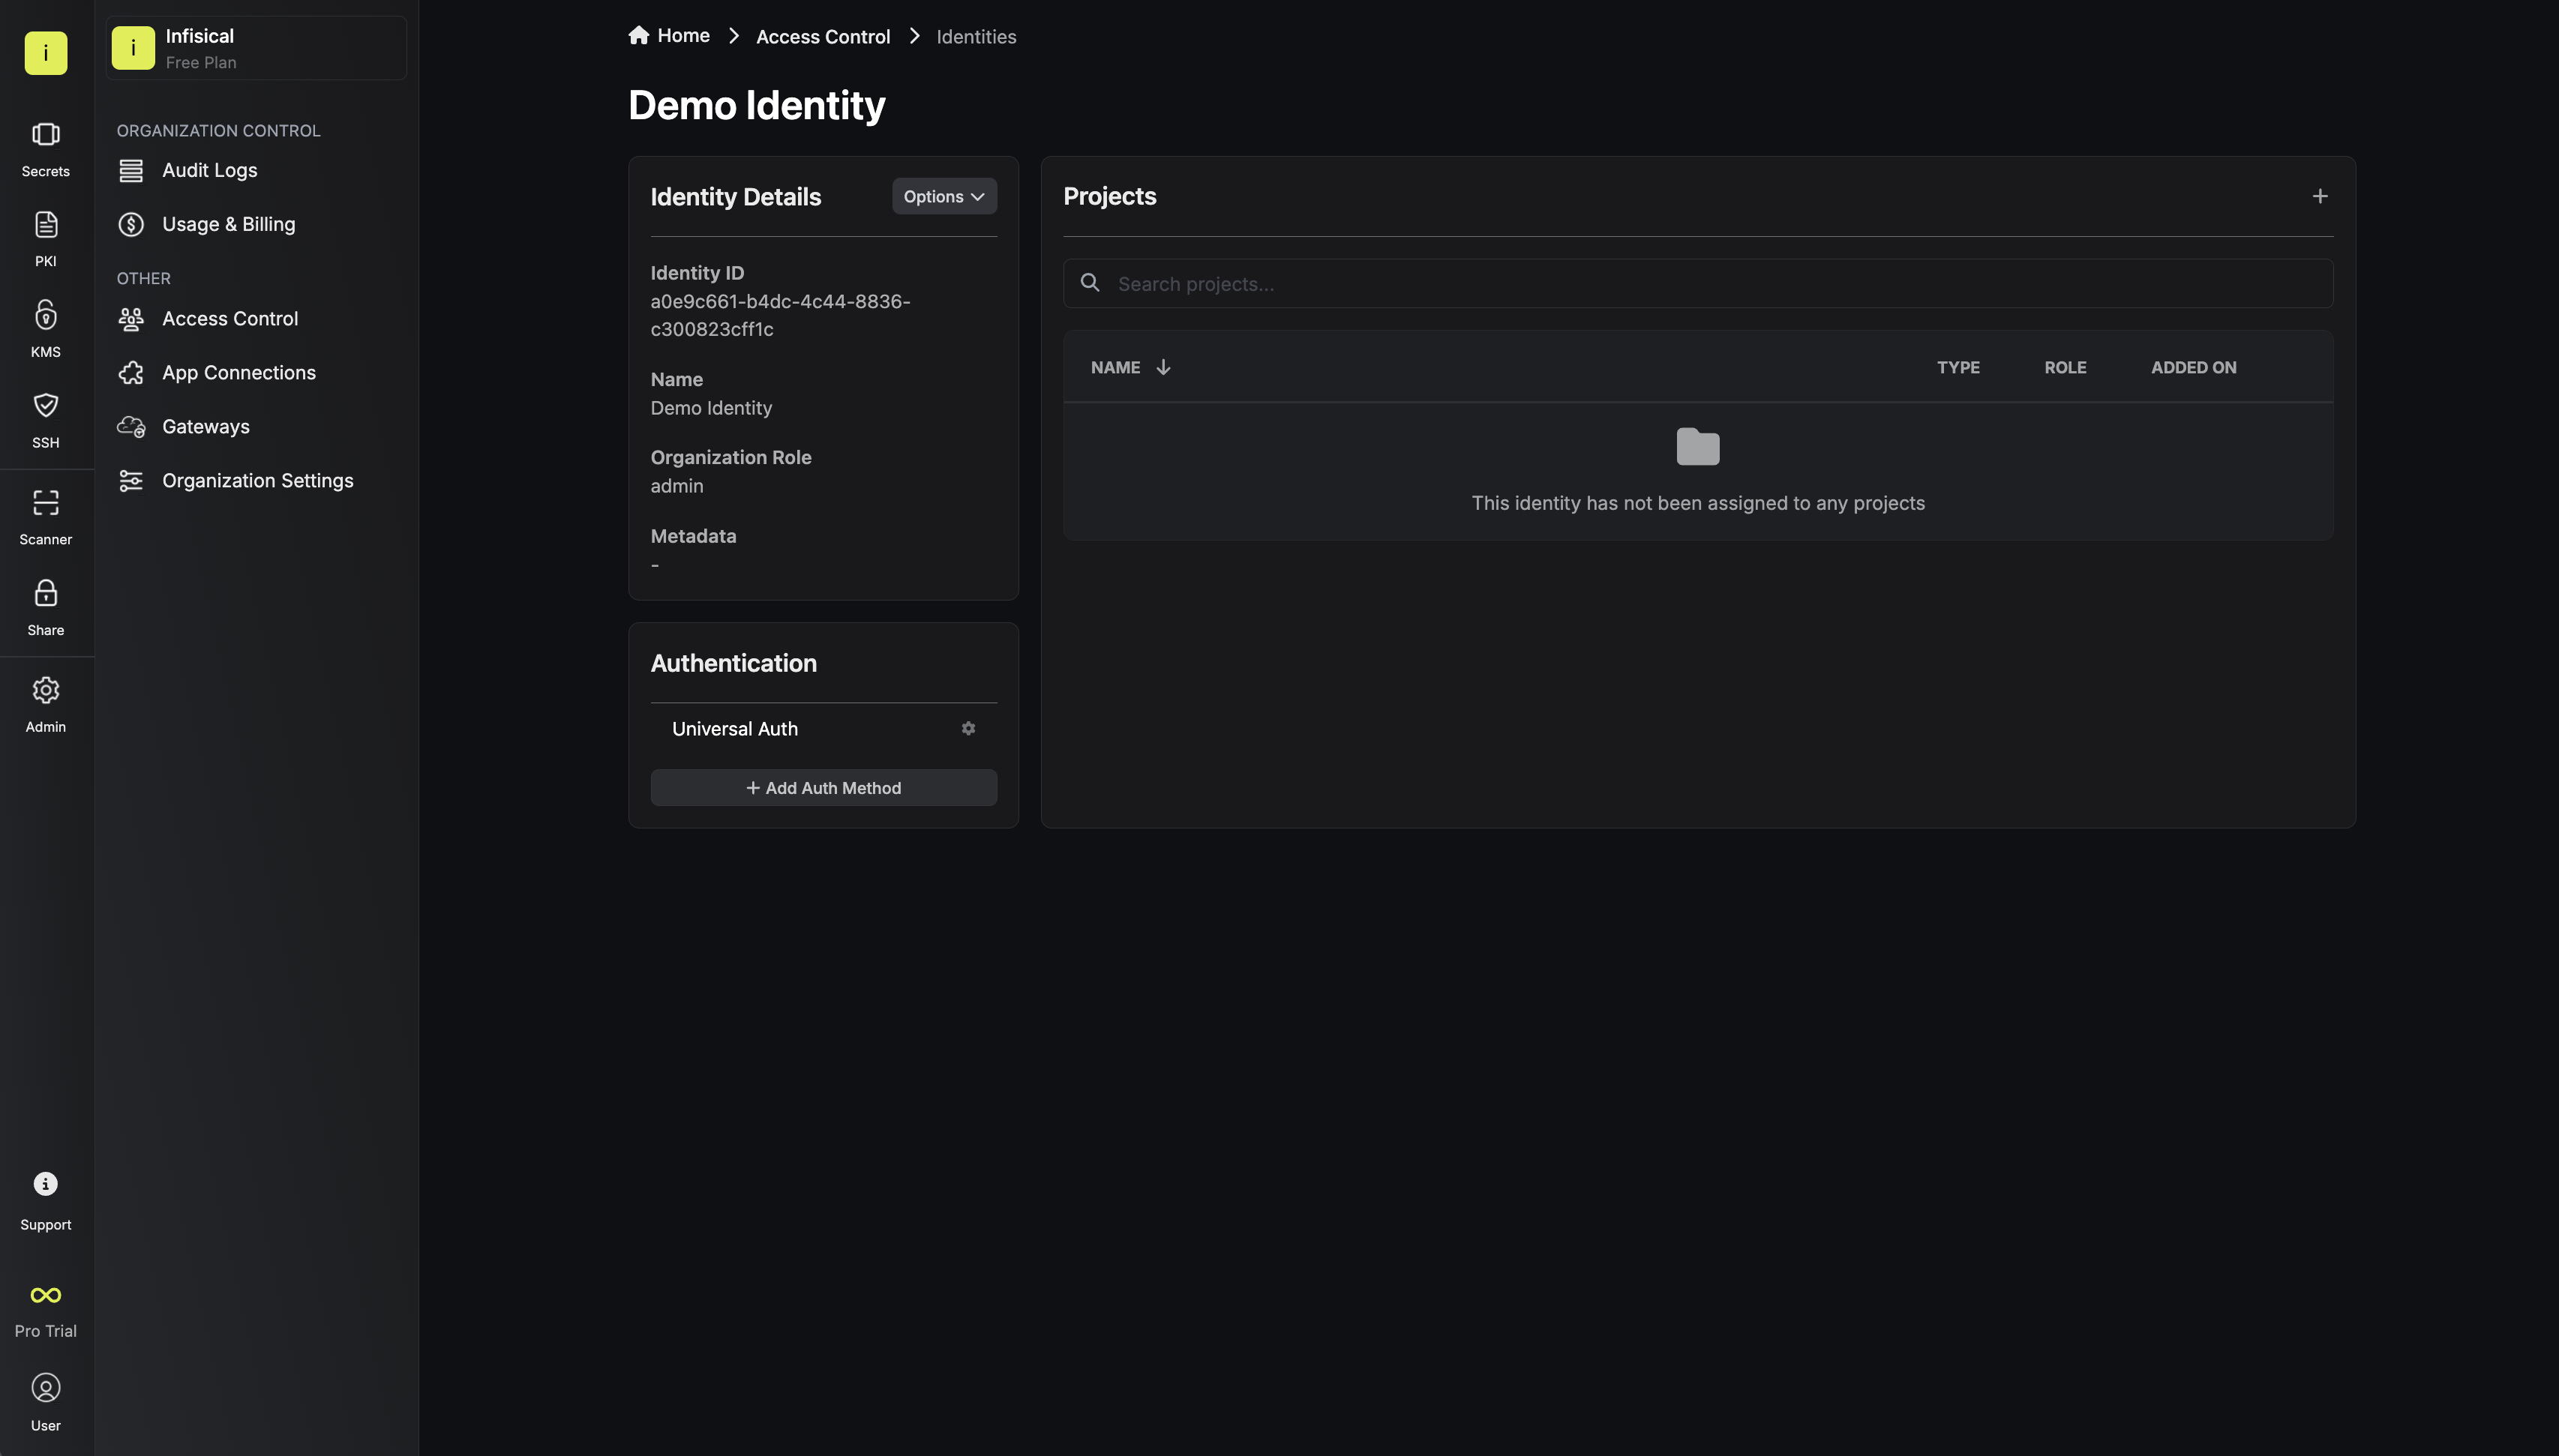 Once you’ve created an identity, you’ll be prompted to configure the Universal Auth authentication method for it.By default, the identity has been configured with Universal Auth. If you wish, you can edit the Universal Auth configuration
details by pressing to edit the Authentication section.Here’s some guidance on each field:Configuration Tab
Once you’ve created an identity, you’ll be prompted to configure the Universal Auth authentication method for it.By default, the identity has been configured with Universal Auth. If you wish, you can edit the Universal Auth configuration
details by pressing to edit the Authentication section.Here’s some guidance on each field:Configuration Tab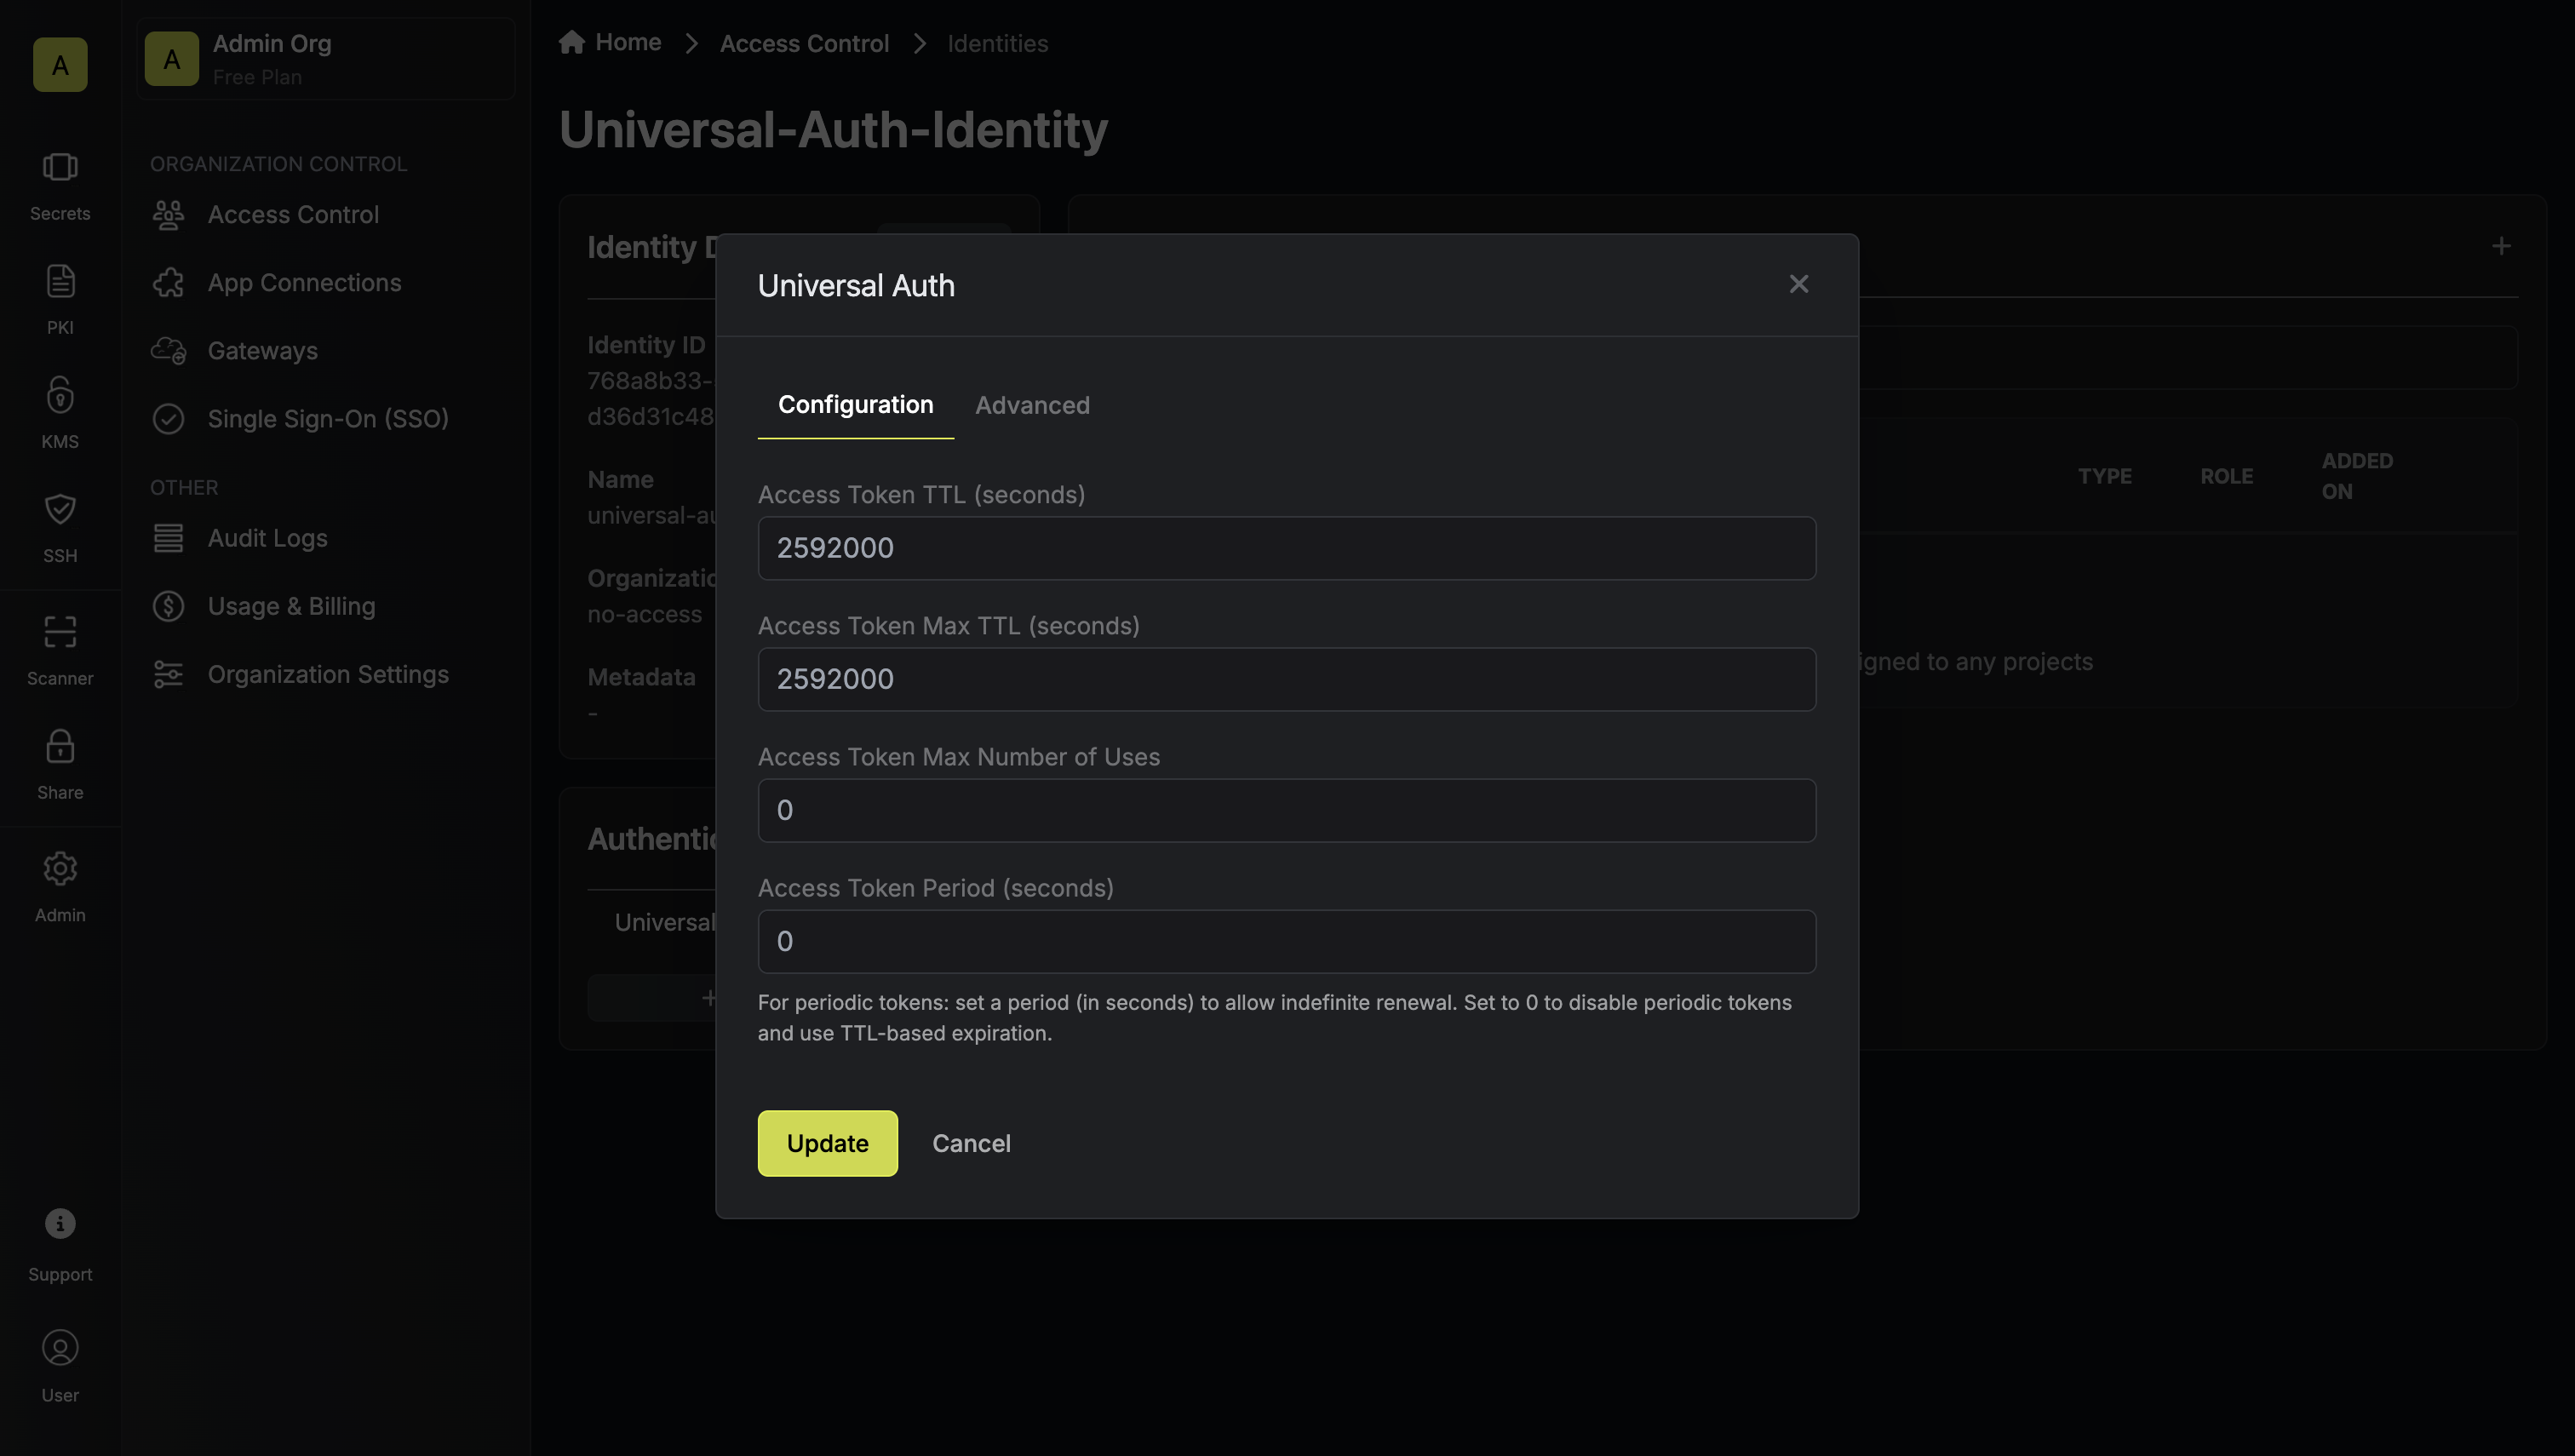
When creating an identity, you specify an organization level role for it to assume; you can configure roles in Organization Settings > Access Control > Organization Roles.Now input a few details for your new identity. Here’s some guidance for each field:- Name (required): A friendly name for the identity.
- Role (required): A role from the Organization Roles tab for the identity to assume. The organization role assigned will determine what organization level resources this identity can have access to.
Once you’ve created an identity, you’ll be prompted to configure the Universal Auth authentication method for it.By default, the identity has been configured with Universal Auth. If you wish, you can edit the Universal Auth configuration
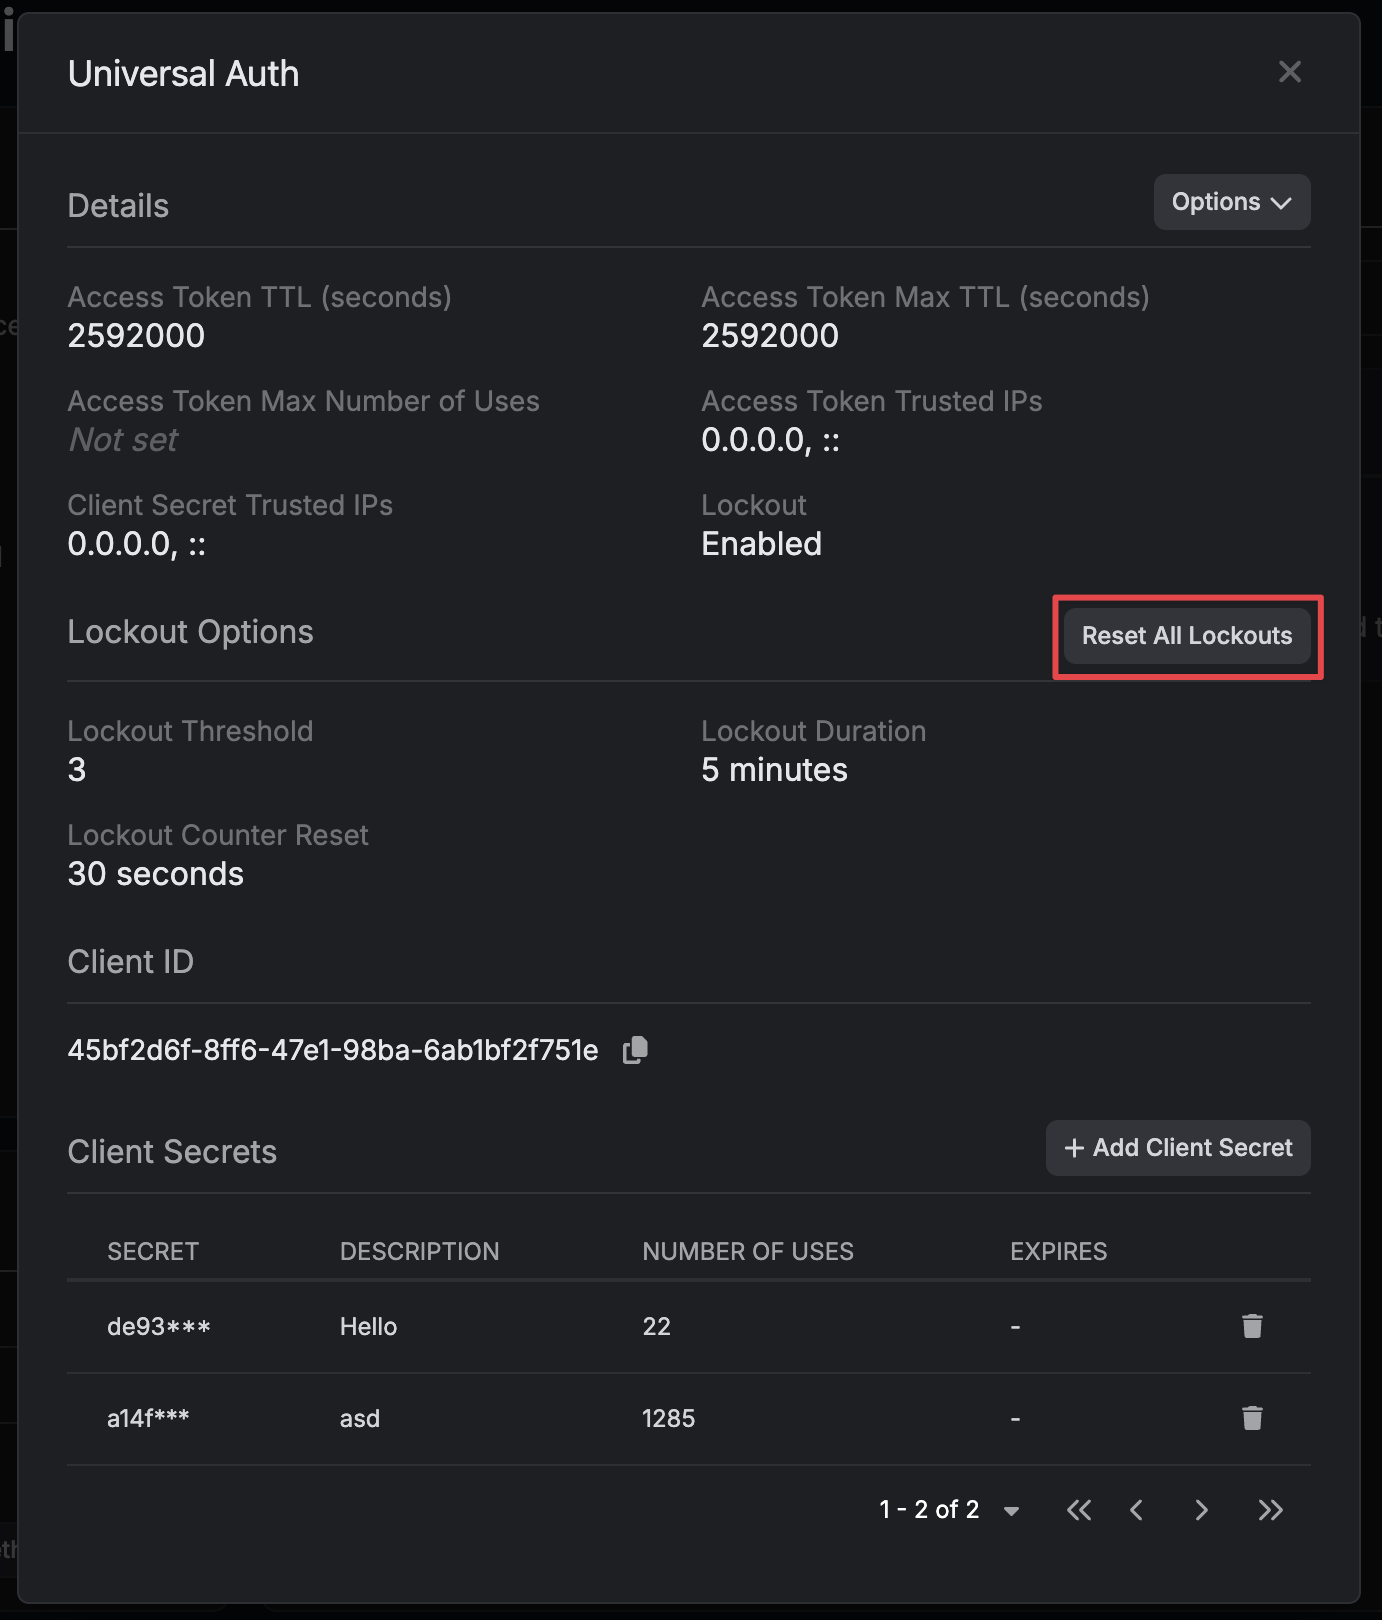
details by pressing to edit the Authentication section.Here’s some guidance on each field:Configuration Tab- Access Token TTL (default is
2592000equivalent to 30 days): The lifetime for an access token in seconds. This value will be referenced at renewal time. - Access Token Max TTL (default is
2592000equivalent to 30 days): The maximum lifetime for an access token in seconds. This value will be referenced at renewal time. - Access Token Max Number of Uses (default is
0): The maximum number of times that an access token can be used; a value of0implies infinite number of uses. - Access Token Period (optional, default is
0): If set, the access token becomes a renewable, non-expiring token for the specified period (in seconds). TTL and Max TTL are ignored when this is set. This is ideal for “secret zero” scenarios, where a workload needs to bootstrap itself securely without hard-coded static secrets.
- Lockout (enabled by default): The lockout feature will temporarily block login attempts after X consecutive login failures.
- Lockout Threshold (default is
3): The amount of times login must fail before locking the identity auth method. - Lockout Duration (default is
5 minutes): How long an identity auth method lockout lasts. - Lockout Counter Reset (default is
30 seconds): How long to wait from the most recent failed login until resetting the lockout counter.
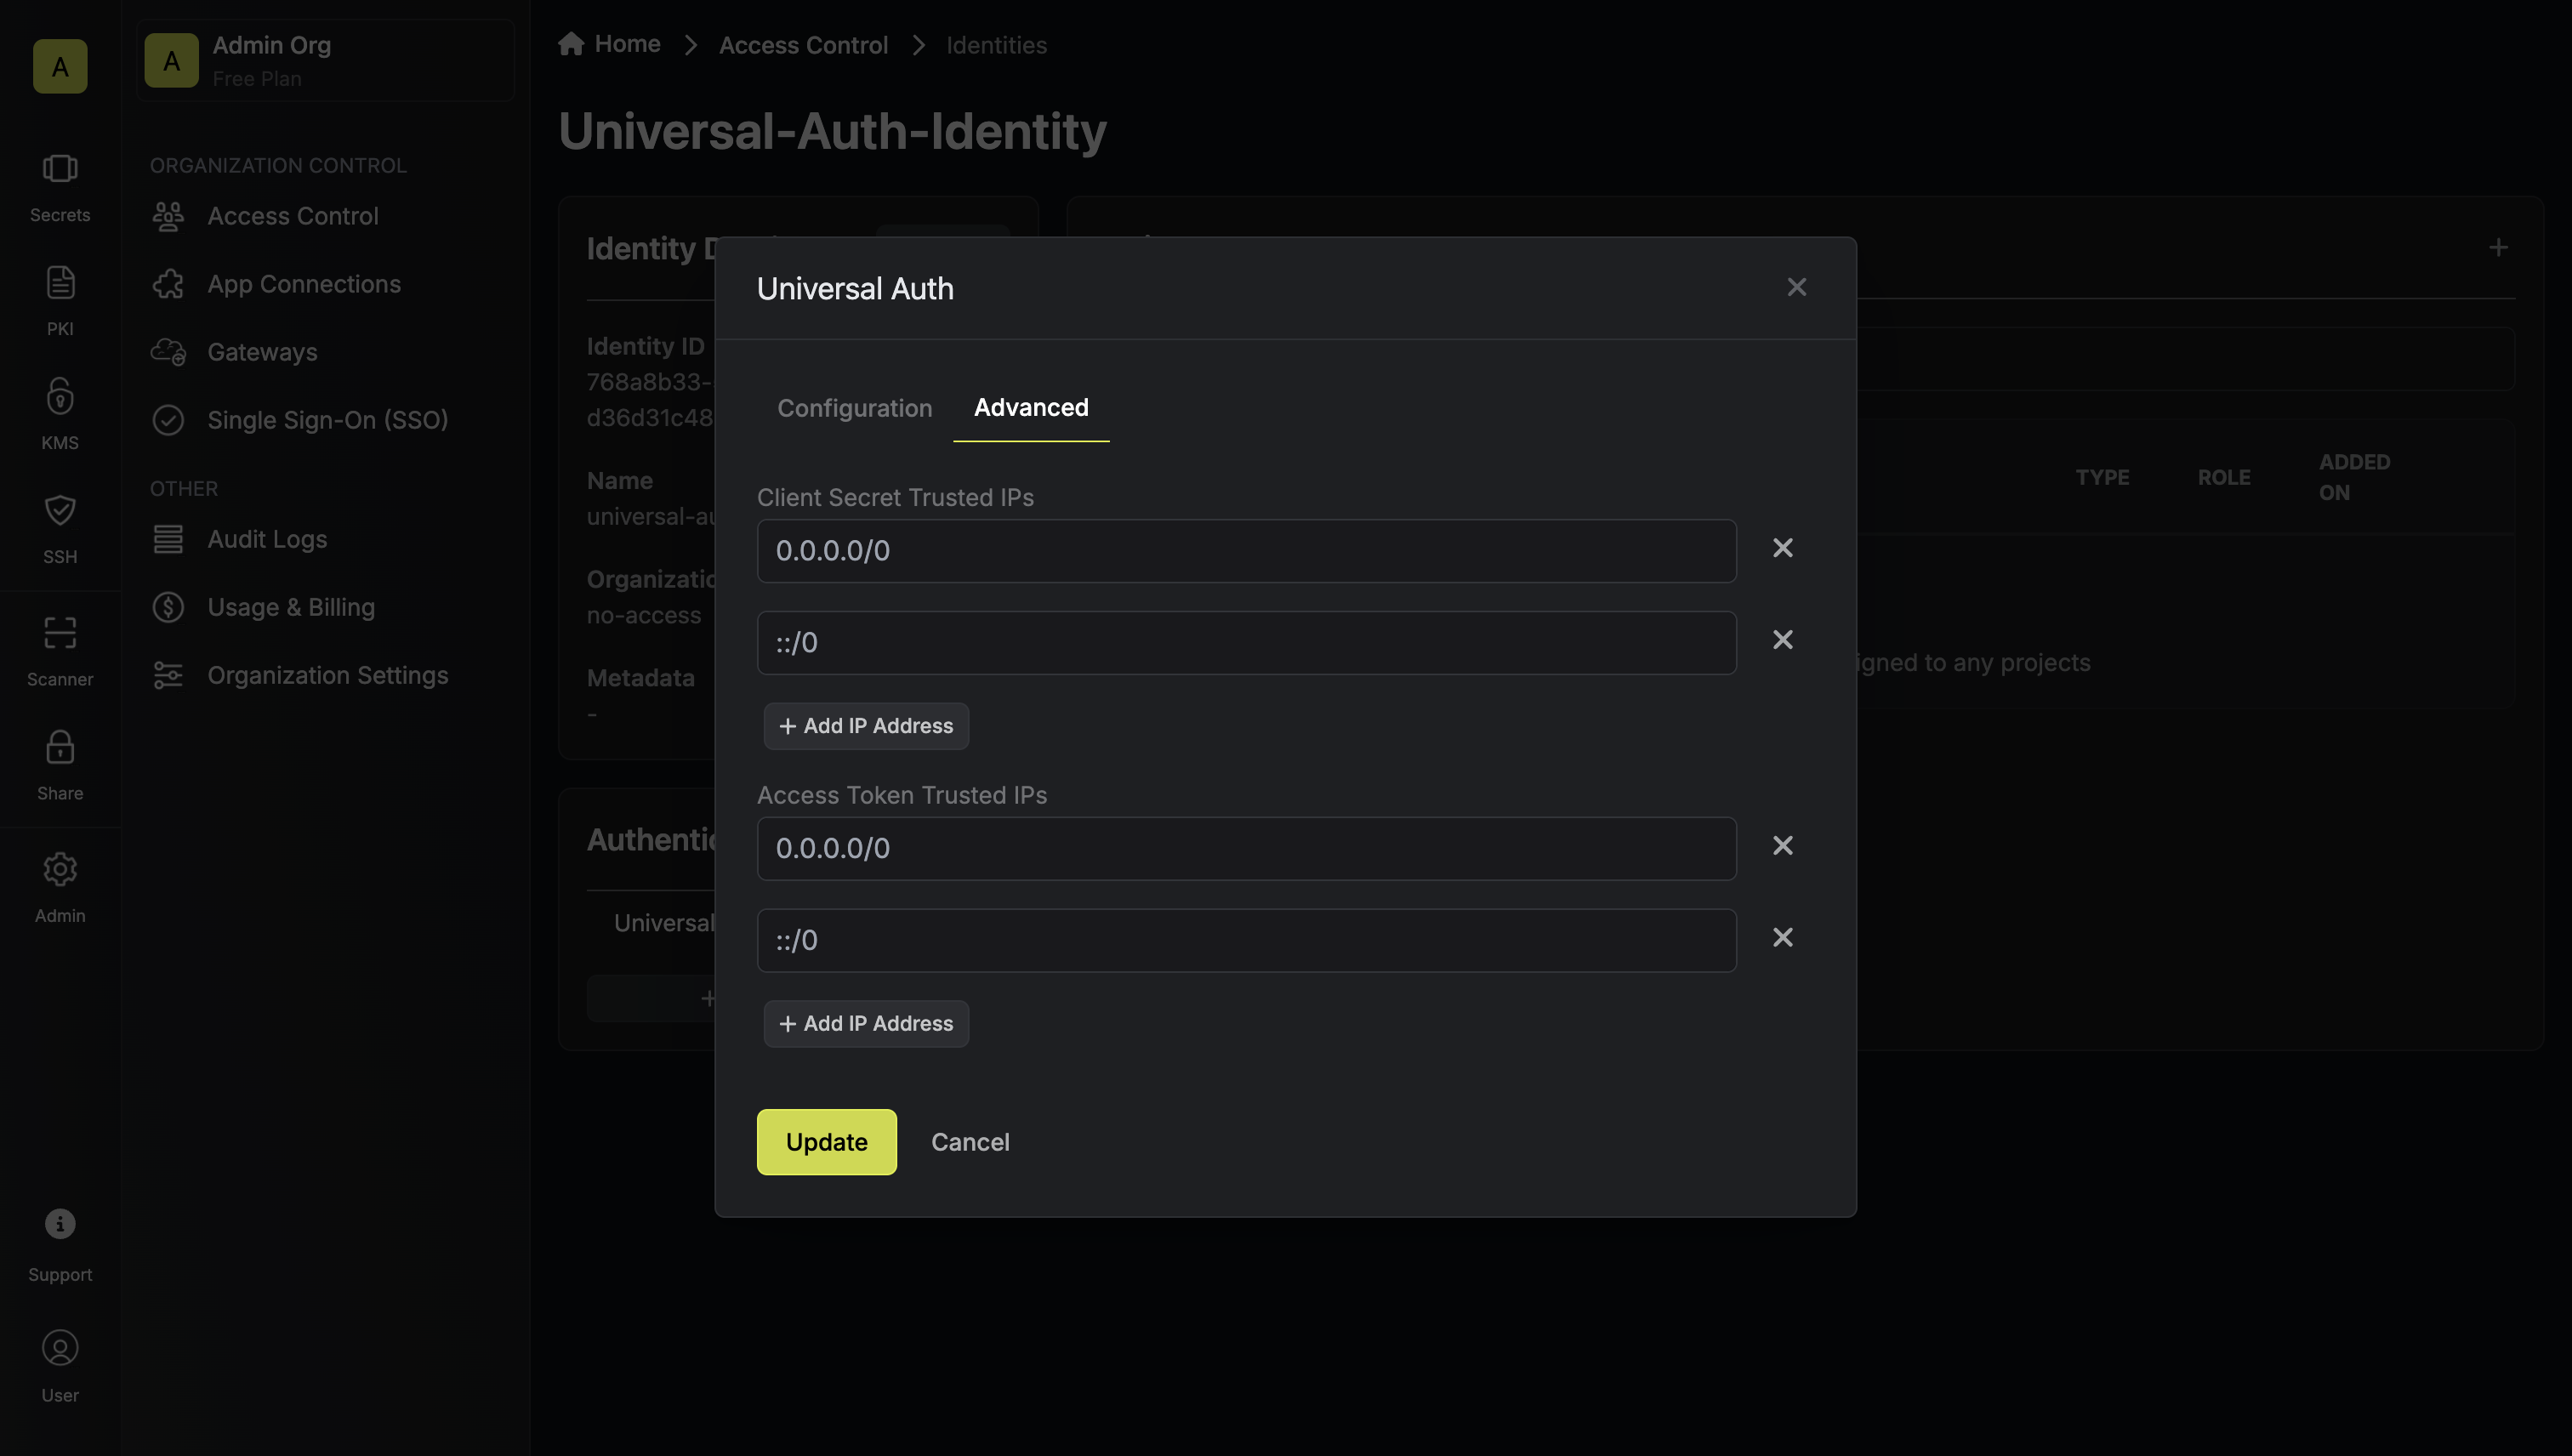
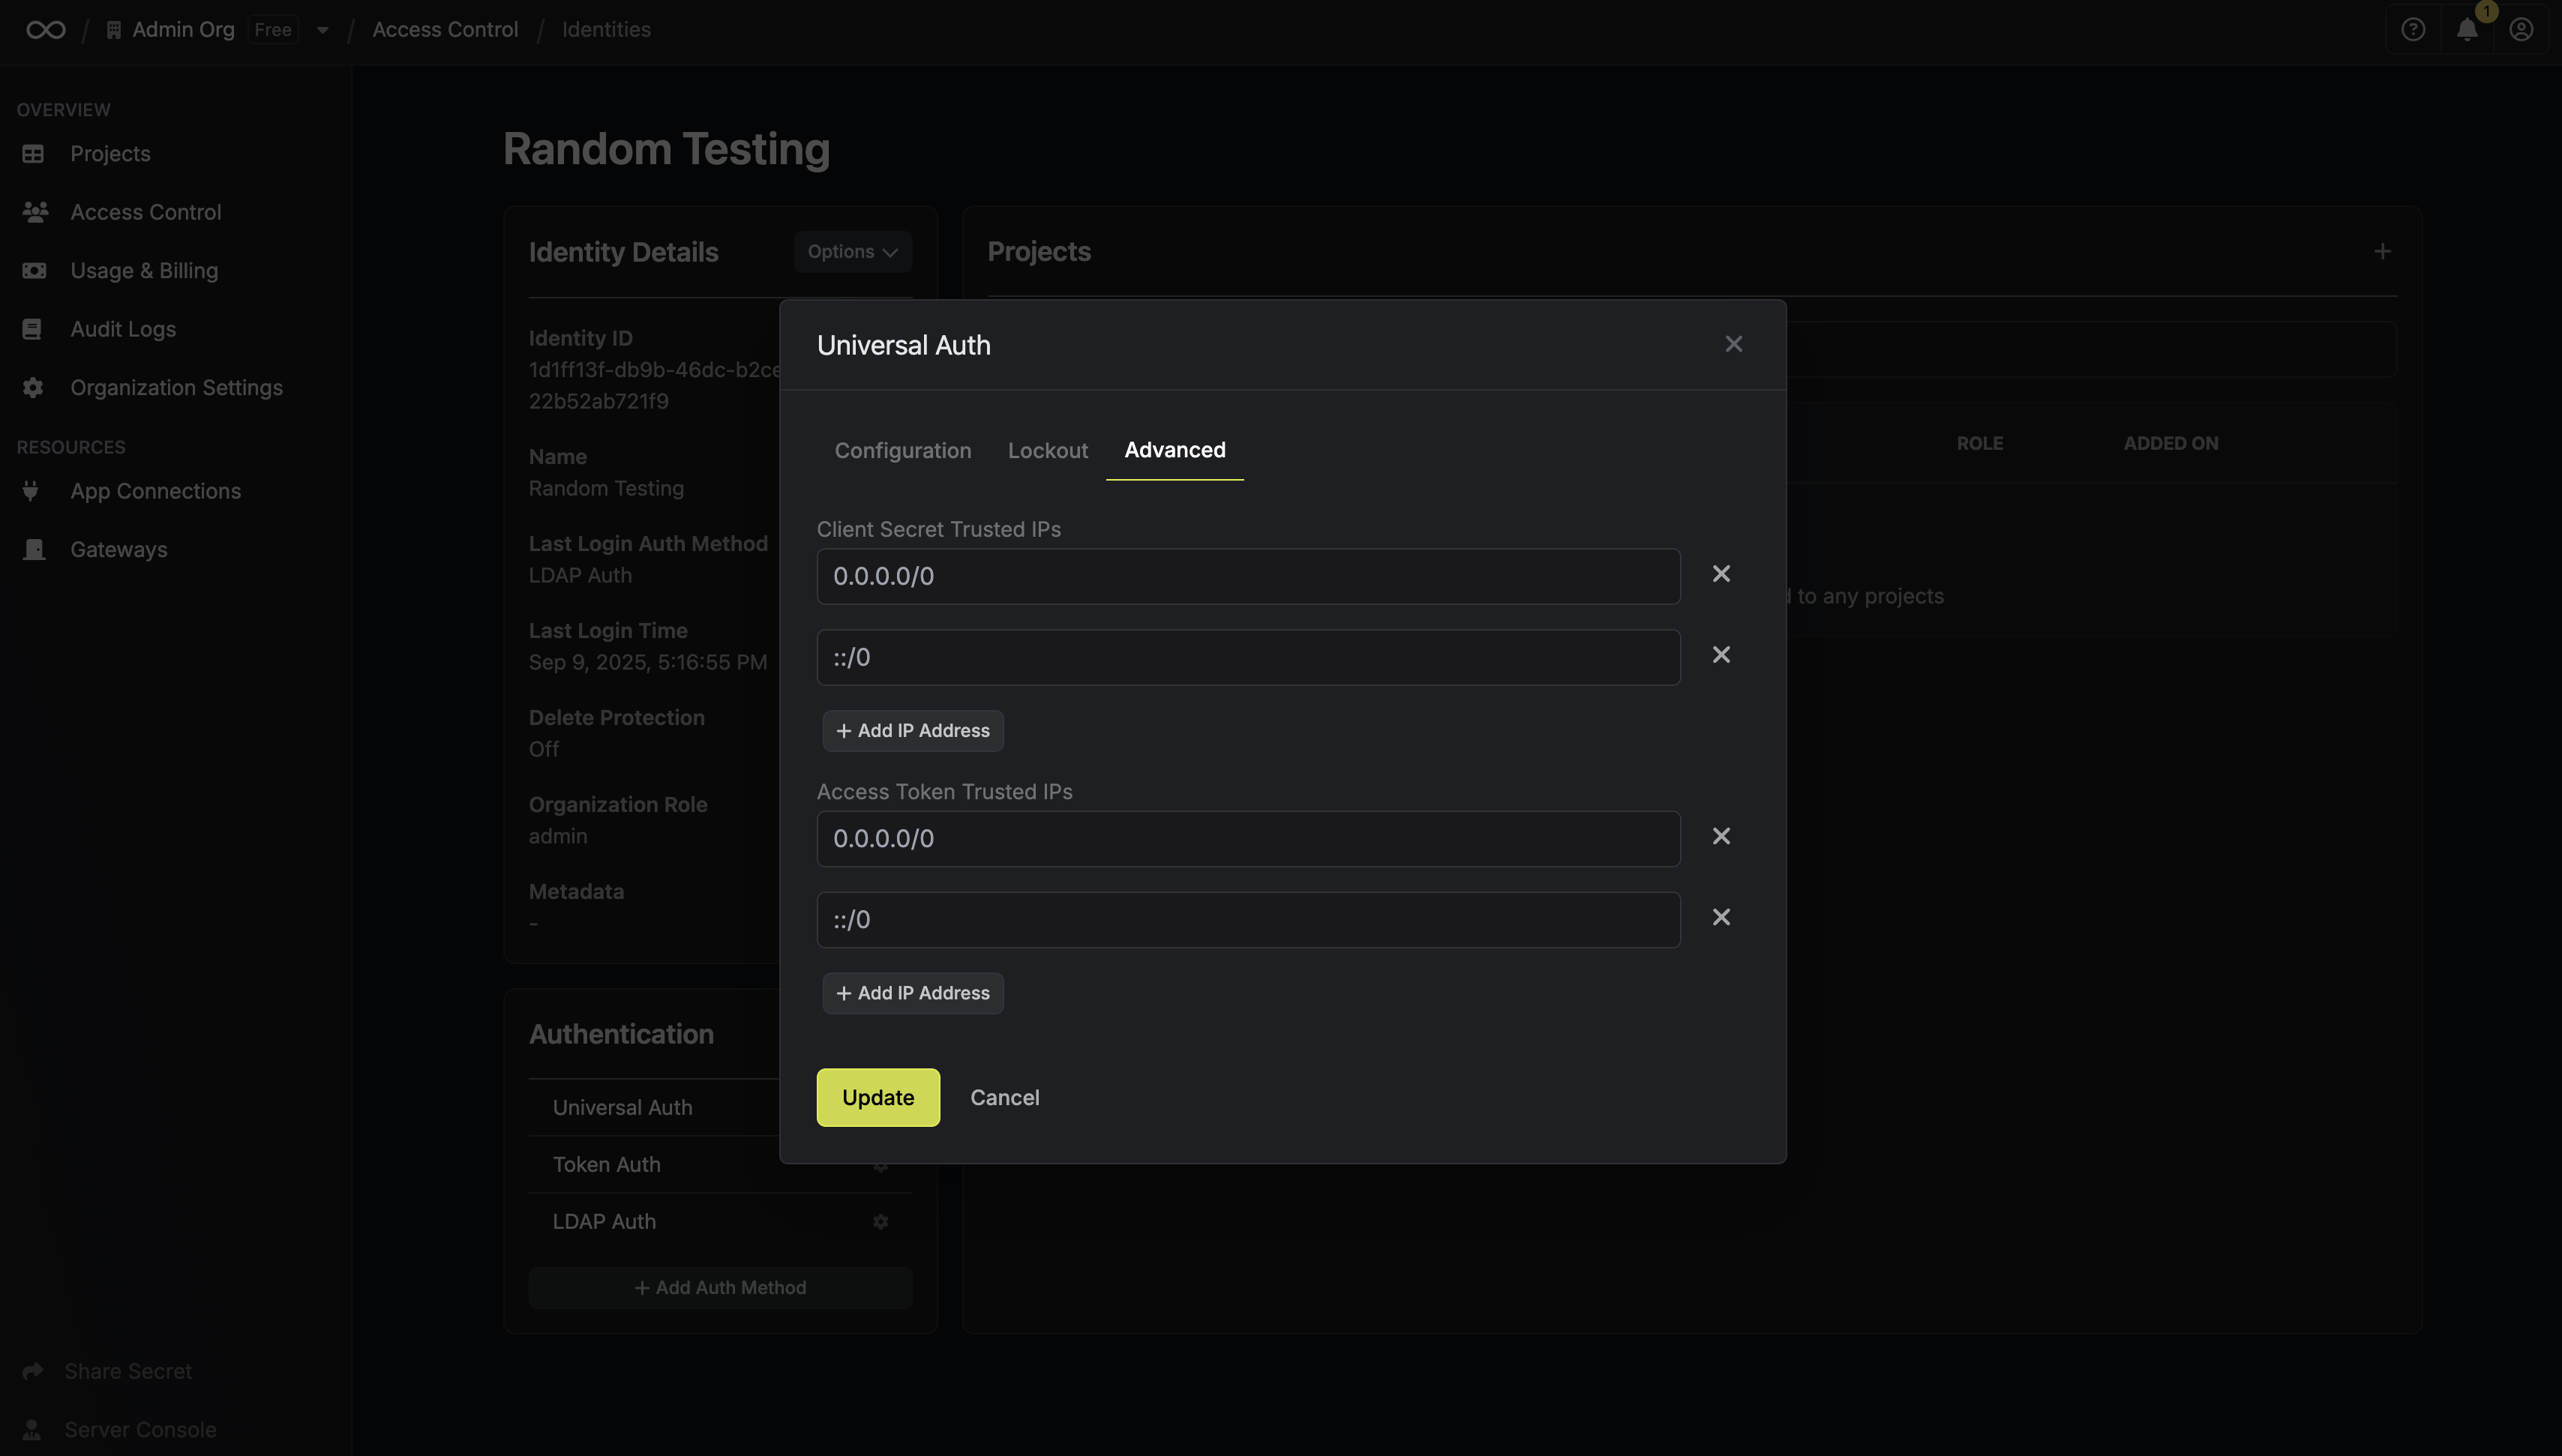
- Client Secret Trusted IPs: The IPs or CIDR ranges that the Client Secret can be used from together with the Client ID to get back an access token. By default, Client Secrets are given the
0.0.0.0/0, allowing usage from any network address. - Access Token Trusted IPs: The IPs or CIDR ranges that access tokens can be used from. By default, each token is given the
0.0.0.0/0, allowing usage from any network address.
2
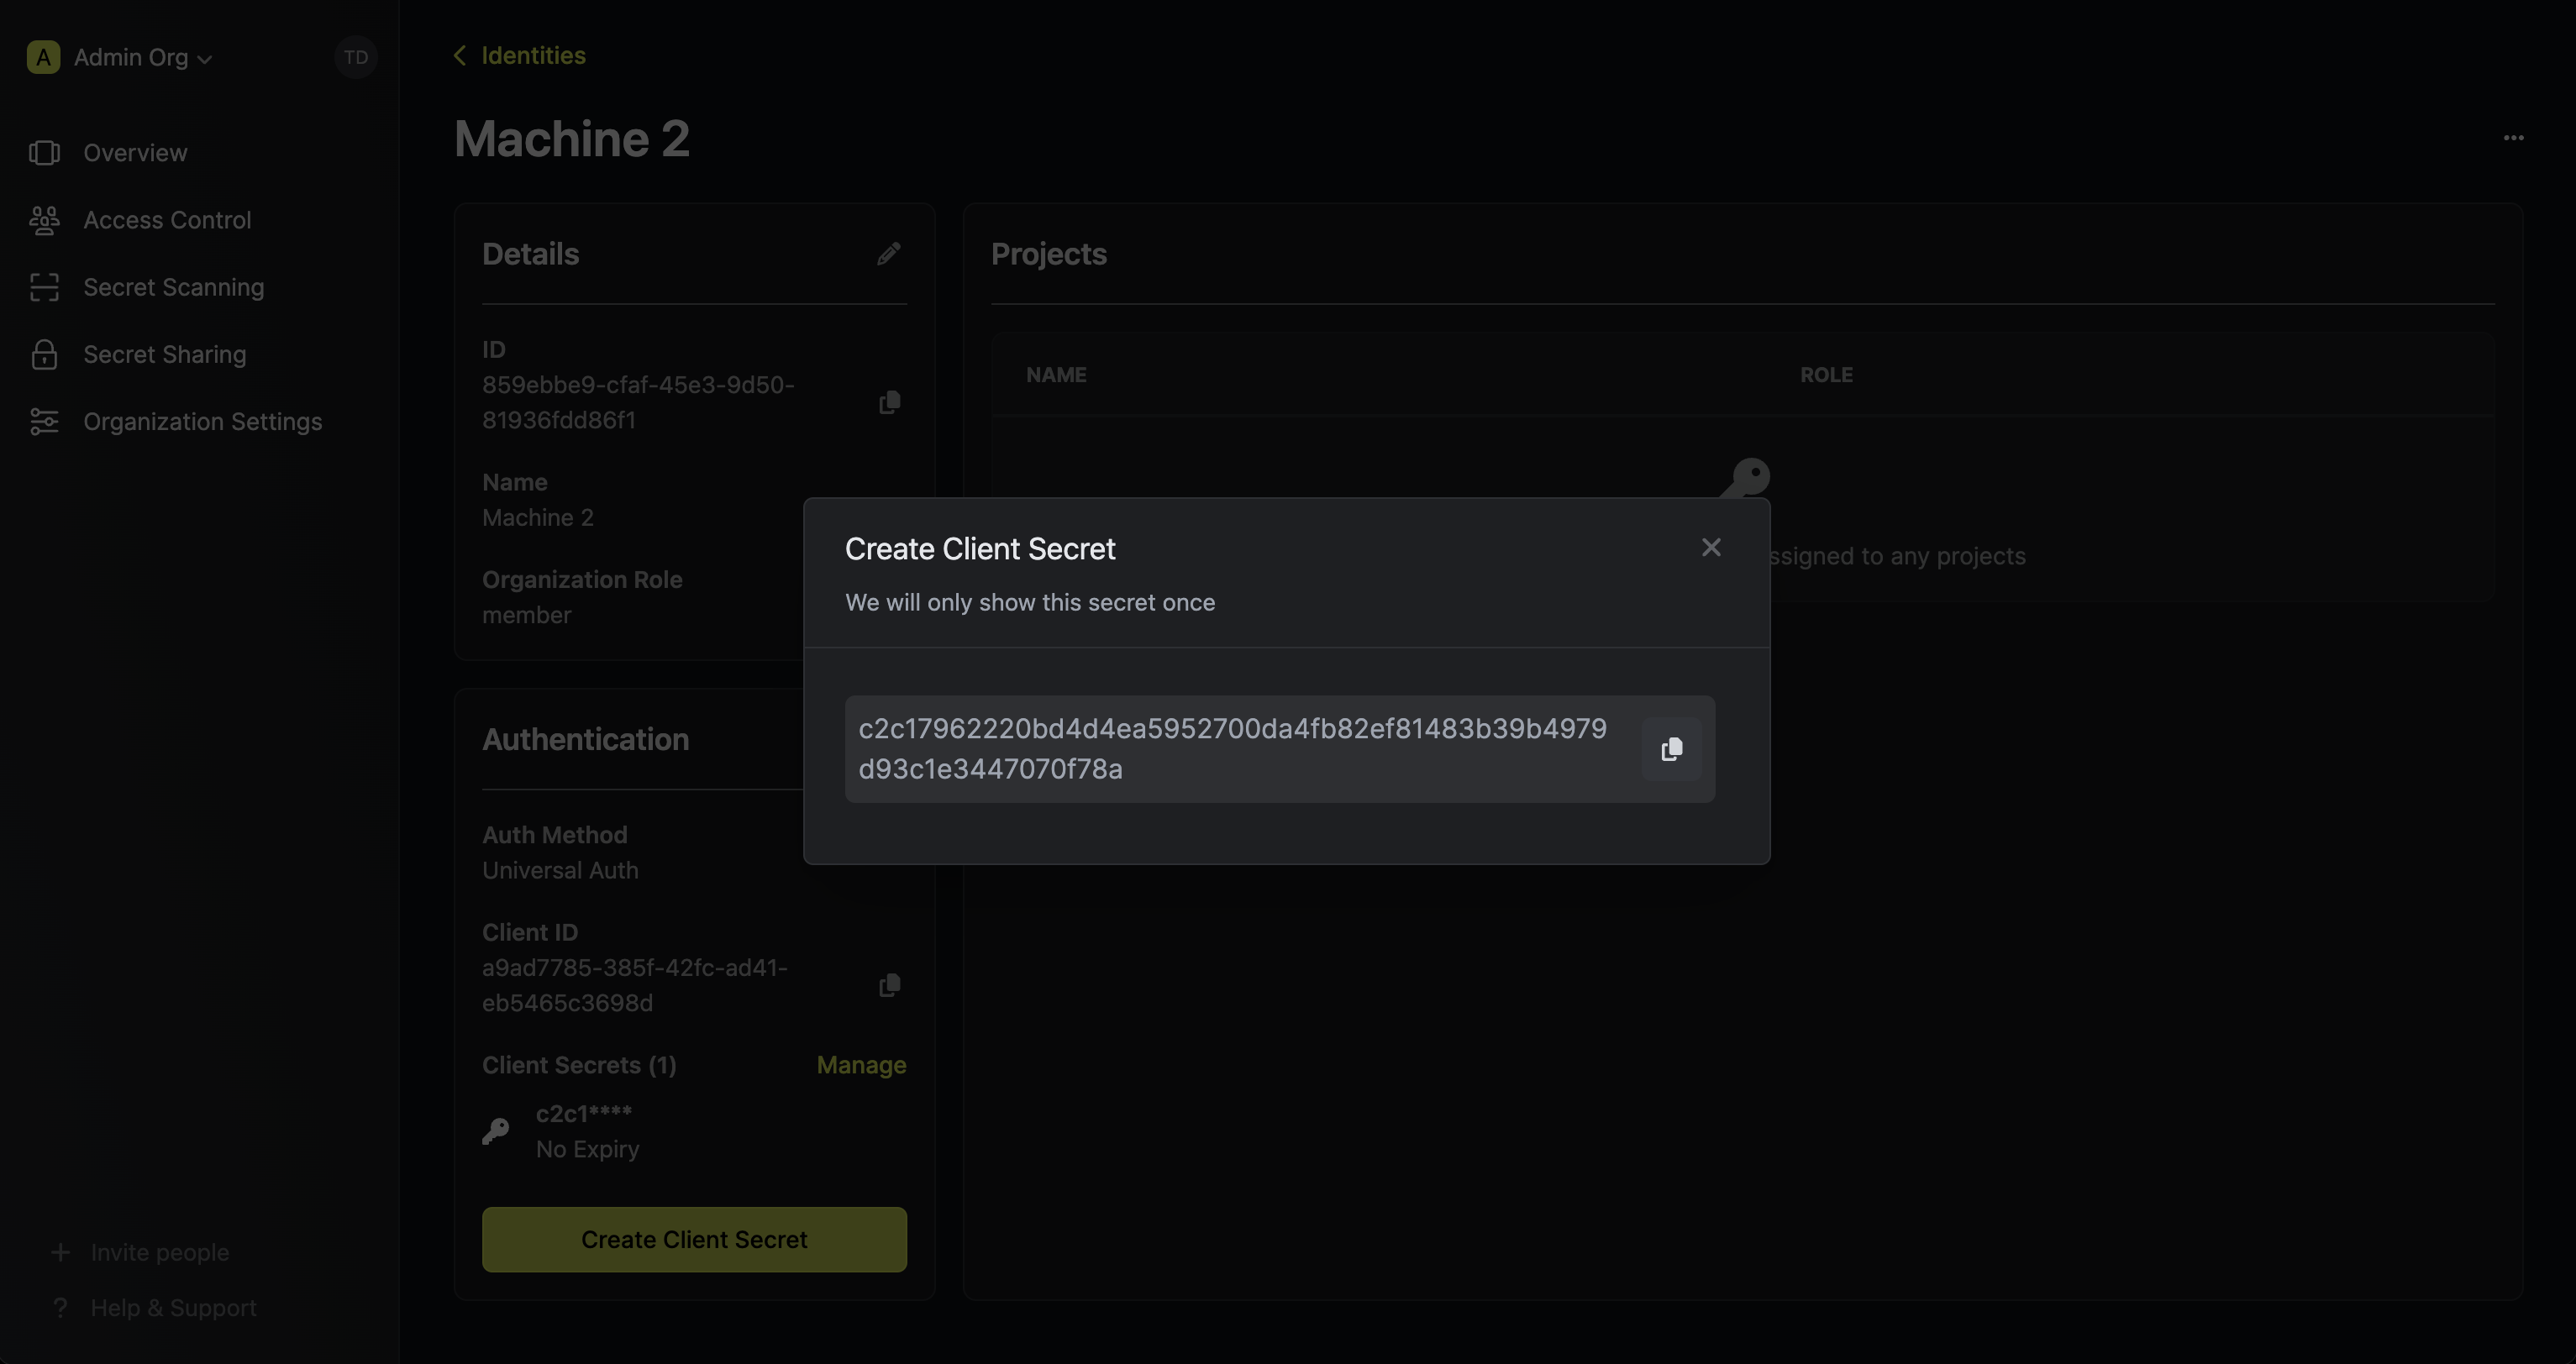
Creating a Client Secret
In order to use the identity, you’ll need the non-sensitive Client ID
of the identity and a Client Secret for it; you can think of these credentials akin to a username
and password used to authenticate with the Infisical API.
With that, press Create Client Secret.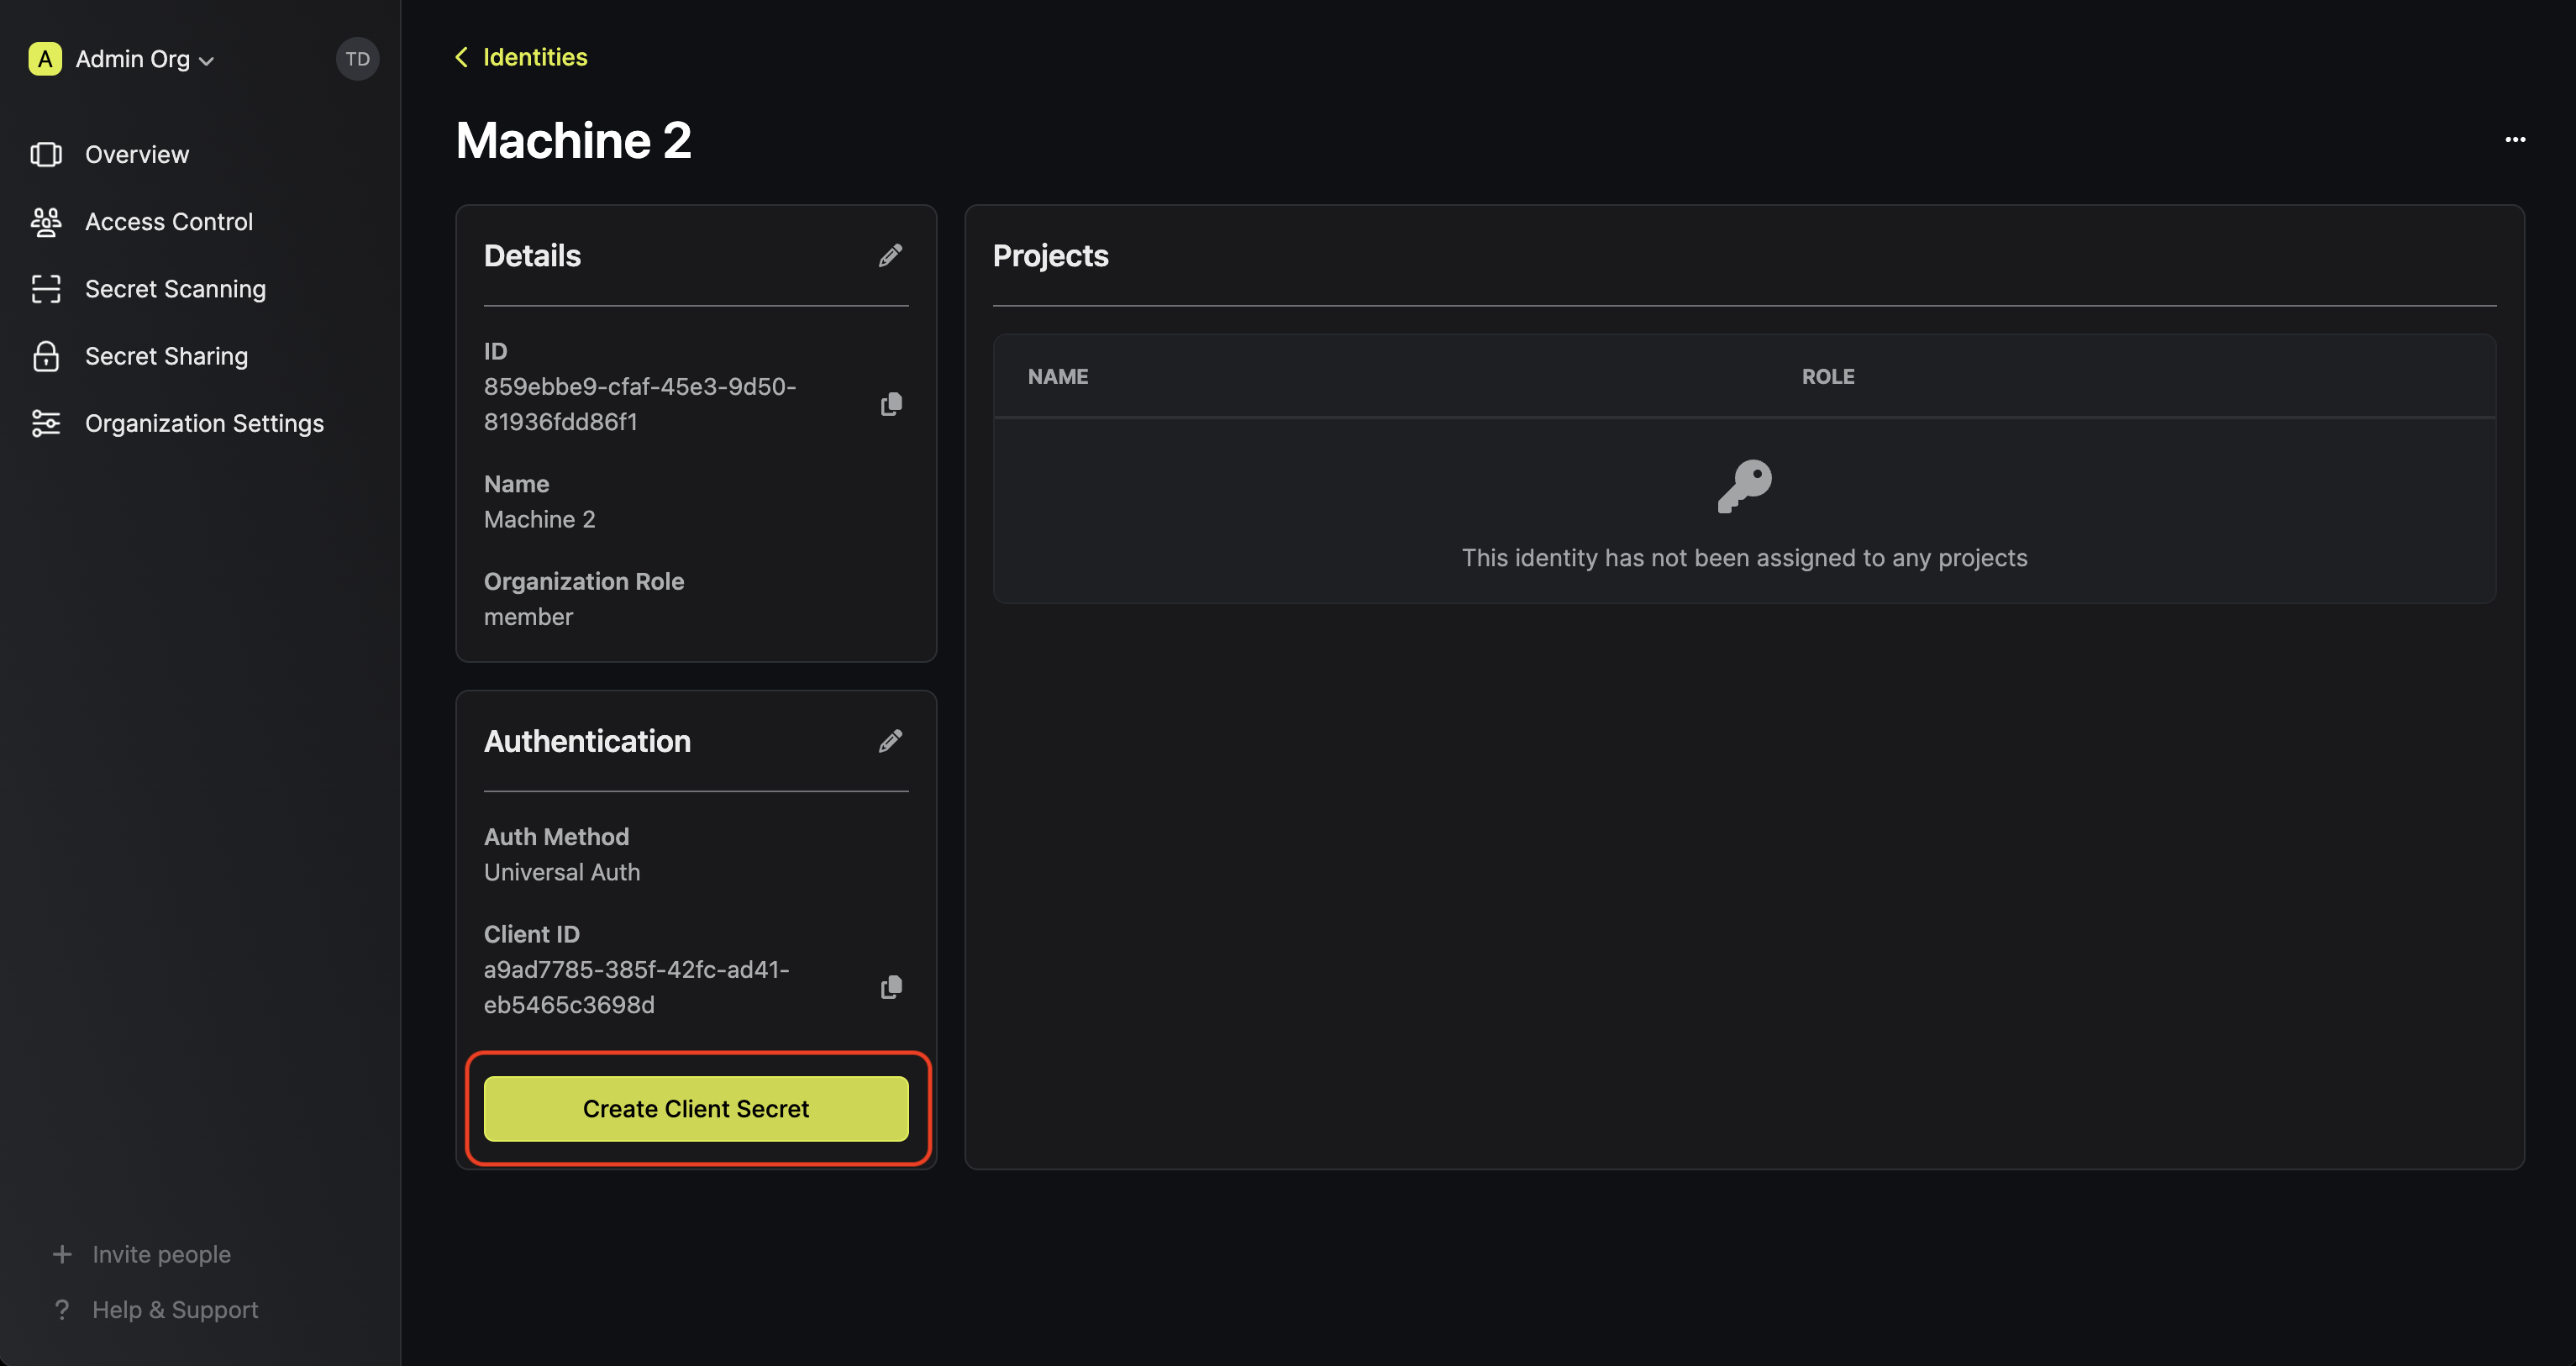
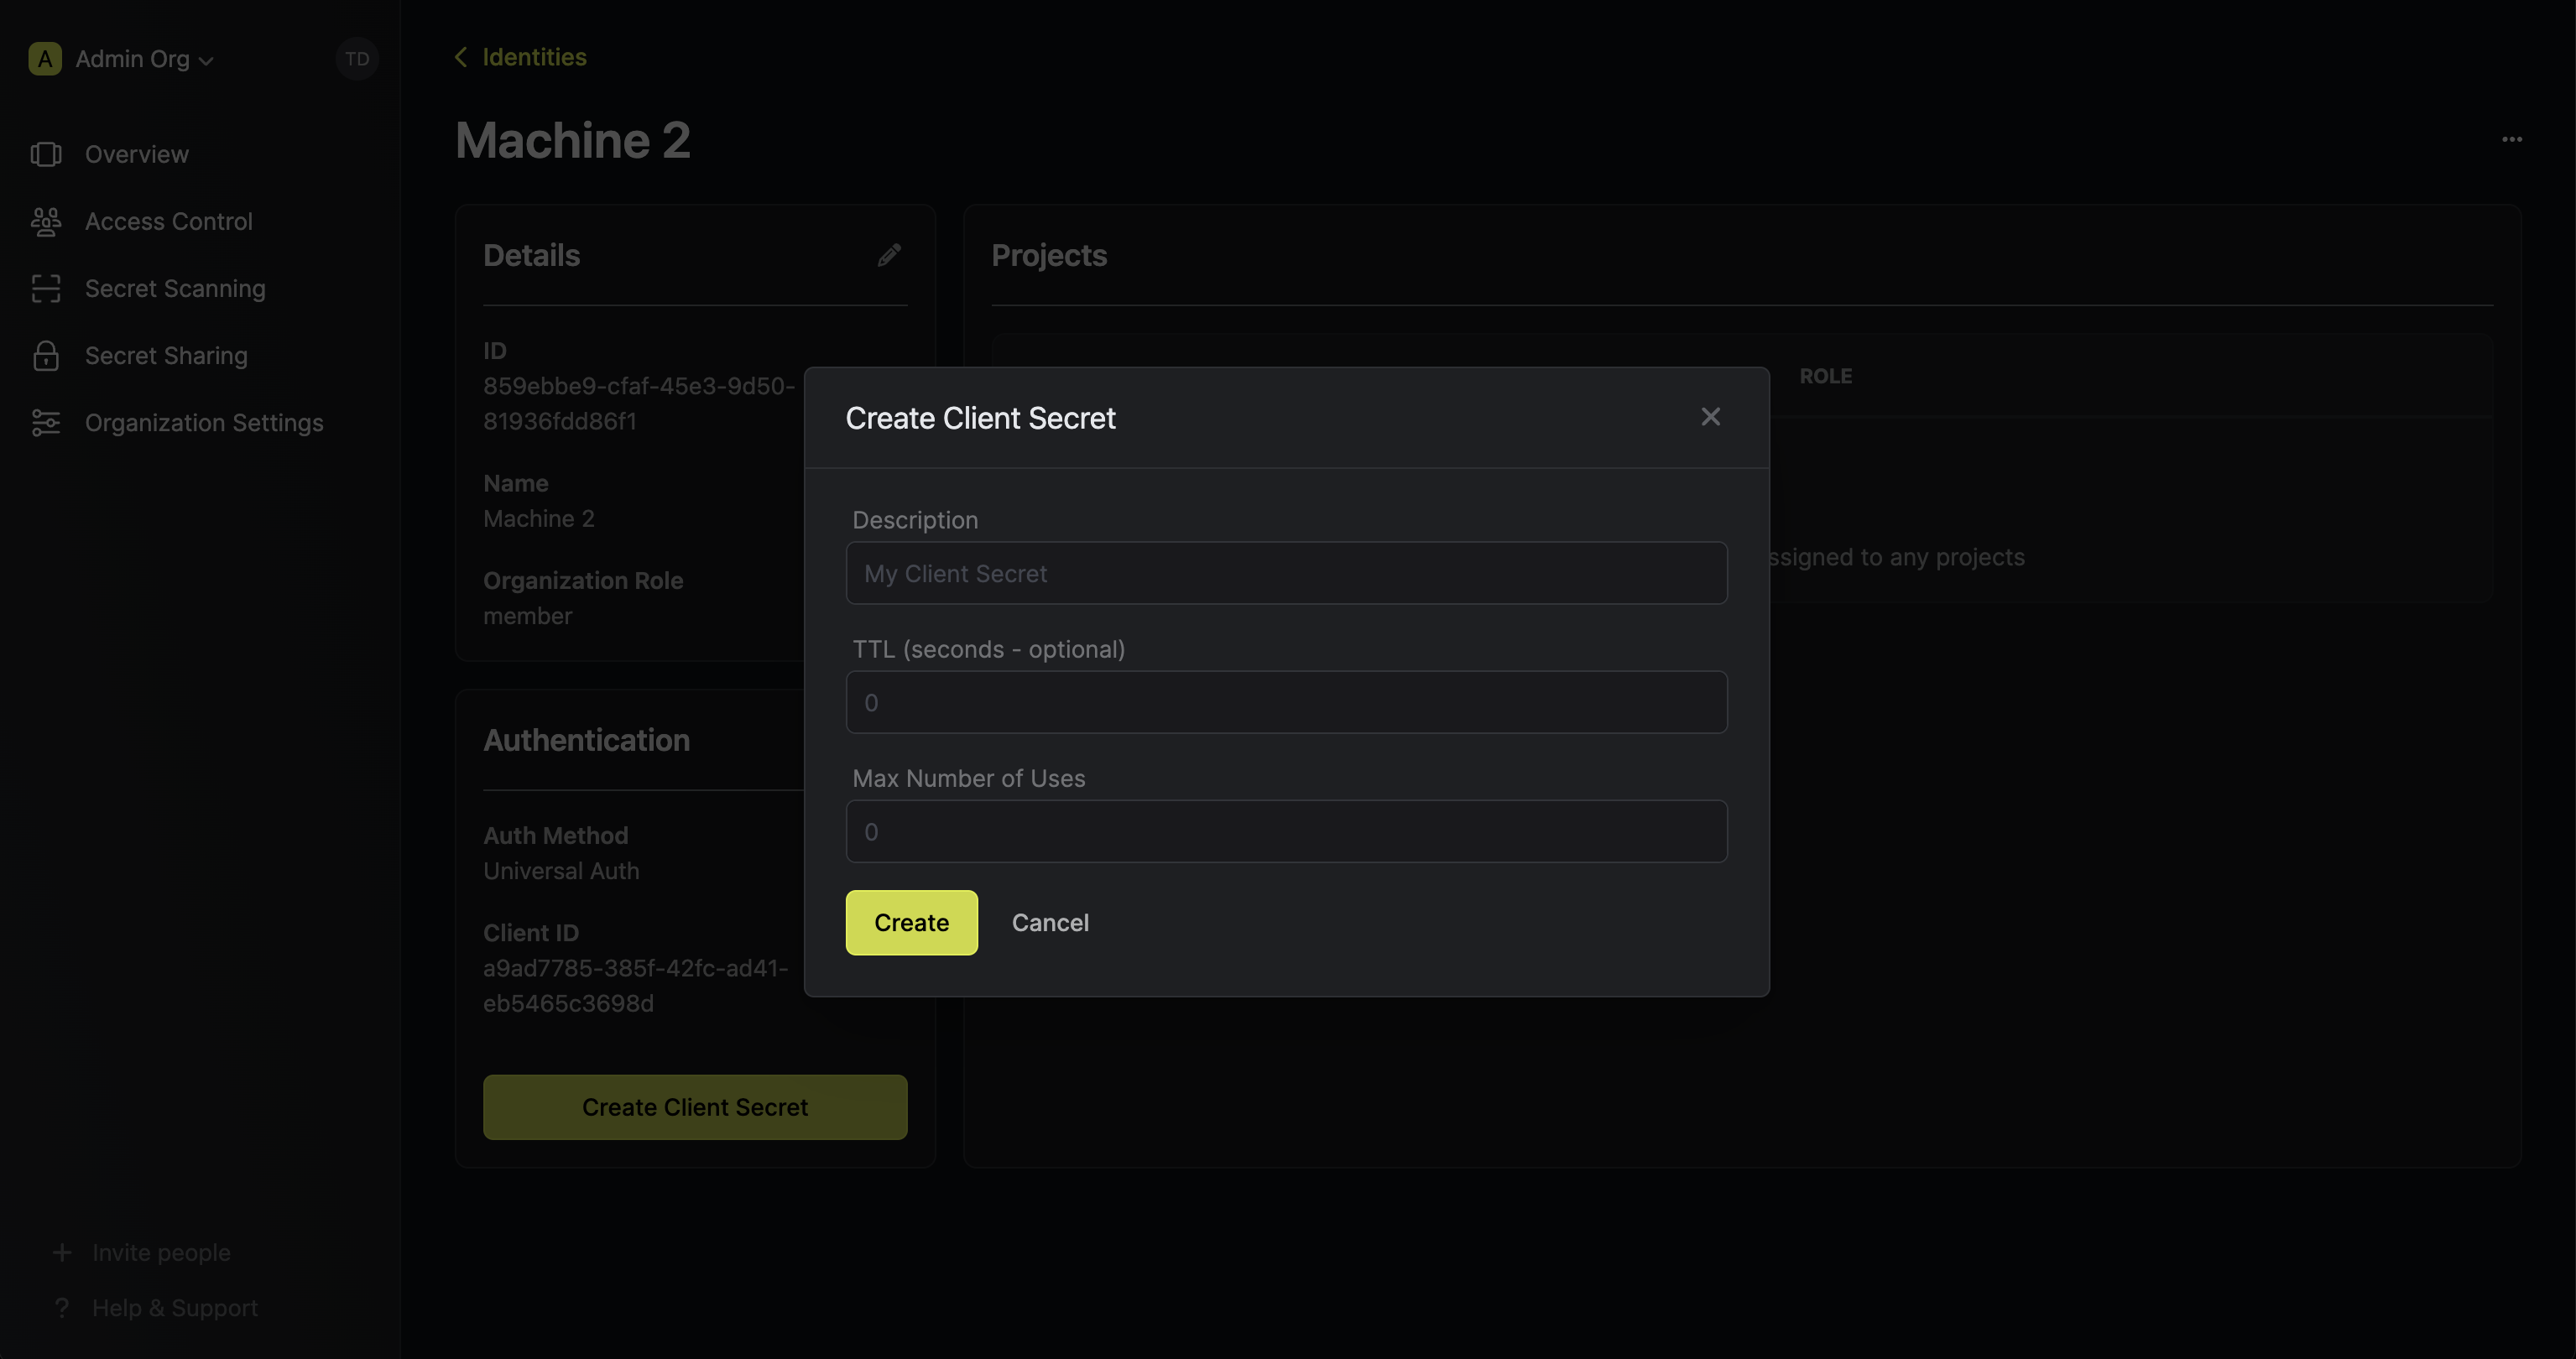
 Feel free to input any (optional) details for the Client Secret configuration:
Feel free to input any (optional) details for the Client Secret configuration:- Description: A description for the Client Secret.
- TTL (default is
0): The time-to-live for the Client Secret. By default, the TTL will be set to 0 which implies that the Client Secret will never expire; a value of0implies an infinite lifetime. When you set a TTL, configure a credential expiry alert so your team is notified before the Client Secret expires. - Max Number of Uses (default is
0): The maximum number of times that the Client Secret can be used together with the Client ID to get back an access token; a value of0implies infinite number of uses.
When Max Number of Uses is unlimited (
0), the displayed usage count is approximate. Client Secrets with a finite limit are always counted exactly.3
Adding an identity to a project
To enable the identity to access project-level resources such as secrets within a specific project, you should add it to that project.To do this, head over to the project you want to add the identity to and go to Project Settings > Access Control > Machine Identities and press Add identity.Next, select the identity you want to add to the project and the project level role you want to allow it to assume. The project role assigned will determine what project level resources this identity can have access to.

4
Accessing the Infisical API with the identity
To access the Infisical API as the identity, you should first perform a login operation
that is to exchange the Client ID and Client Secret of the identity for an access token
by making a request to the Next, you can use the access token to authenticate with the Infisical API
/api/v1/auth/universal-auth/login endpoint.Sample request
Request
Sample response
Response
Each identity access token has a time-to-live (TTL) which you can infer from the response of the login operation;
the default TTL is
7200 seconds which can be adjusted in the Universal Auth configuration.If an identity access token expires, it can no longer authenticate with the Infisical API. In this case,
a new access token should be obtained by performing another login operation.Solving Secret Zero with Periodic Tokens
In many automated, cloud-native, or ephemeral environments (such as VMs, containers, or serverless functions), it is often unsafe or impractical to hard-code long-lived credentials for bootstrapping access to secrets management systems. The “secret zero” problem refers to the challenge of securely providing a workload with its initial credential, without manual intervention or static secrets that could be leaked or reused. Periodic tokens in Universal Auth are designed to solve this problem by enabling secure, automated bootstrapping and ongoing access renewal, even in dynamic or short-lived environments. Periodic tokens in Universal Auth solve this by allowing you to issue an access token that can be continuously renewed by your workload before it expires (i.e., a client-initiated rotation mechanism):- When you set the Access Token Period in the Universal Auth configuration, the issued access token can be renewed by your workload for the specified period (in seconds).
- The token can be renewed any number of times, each time for the same period, with no maximum lifetime (unless you set a use limit).
- As long as the token is renewed before its period expires, it remains valid, so you do not need to re-issue static credentials.
- TTL and Max TTL are ignored when Access Token Period is set.
Example: Bootstrapping with a Periodic Token
- Configure Universal Auth for your identity and set Access Token Period (e.g.,
3600for 1 hour). - For improved security, configure the Client Secret with a low number of uses (e.g.,
1) or a short TTL. This ensures that after the initial login, the Client Secret cannot be reused, and any disruption in token renewal will require manual intervention. - Deploy your workload with the Client Secret and Client ID.
- The workload authenticates with Infisical using the Client Secret and Client ID to obtain the initial access token (JWT).
- The workload uses the access token to authenticate and continuously renews it before expiration:
Why is the Infisical API rejecting my identity credentials?
Why is the Infisical API rejecting my identity credentials?
There are a few reasons for why this might happen:
- The client secret or access token has expired.
- The identity is insufficiently permissioned to interact with the resources you wish to access.
- The client secret/access token is being used from an untrusted IP.
What is access token renewal and TTL/Max TTL?
What is access token renewal and TTL/Max TTL?
A identity access token can have a time-to-live (TTL) or incremental lifetime after which it expires.In certain cases, you may want to extend the lifespan of an access token; to do so, you must set a max TTL parameter.A token can be renewed any number of times where each call to renew it can extend the token’s lifetime by increments of the access token’s TTL.
Regardless of how frequently an access token is renewed, its lifespan remains bound to the maximum TTL determined at its creation.
How do I reset a lockout?
How do I reset a lockout?
You can reset (remove) all lockouts for an identity auth method by clicking into the auth method and pressing Reset All Lockouts.