

Diagram
The following sequence diagram illustrates the OIDC Auth workflow for authenticating clients with Infisical.Concept
At a high-level, Infisical authenticates a client by verifying the JWT and checking that it meets specific requirements (e.g. it’s issued by a trusted identity provider) at the/api/v1/auth/oidc-auth/login endpoint. If successful,
then Infisical returns a short-lived access token that can be used to make authenticated requests to the Infisical API.
To be more specific:
- The client requests an identity token from its identity provider.
- The client sends the identity token to Infisical at the
/api/v1/auth/oidc-auth/loginendpoint. - Infisical fetches the public key that was used to sign the identity token from the identity provider using OIDC Discovery.
- Infisical validates the JWT using the public key provided by the identity provider and checks that the subject, audience, and claims of the token matches with the set criteria.
- If all is well, Infisical returns a short-lived access token that the client can use to make authenticated requests to the Infisical API.
Infisical needs network-level access to the identity provider configuration
endpoints.
Guide
In the following steps, we explore how to create and use identities to access the Infisical API using the OIDC Auth authentication method.1
Creating an identity
To create an identity, go to Access Control > Machine Identities in your organization and select Create. When creating an identity, you specify an organization level role for it to assume; you can configure roles in Access Control > Roles.
 Now input a few details for your new identity. Here’s some guidance for each field:
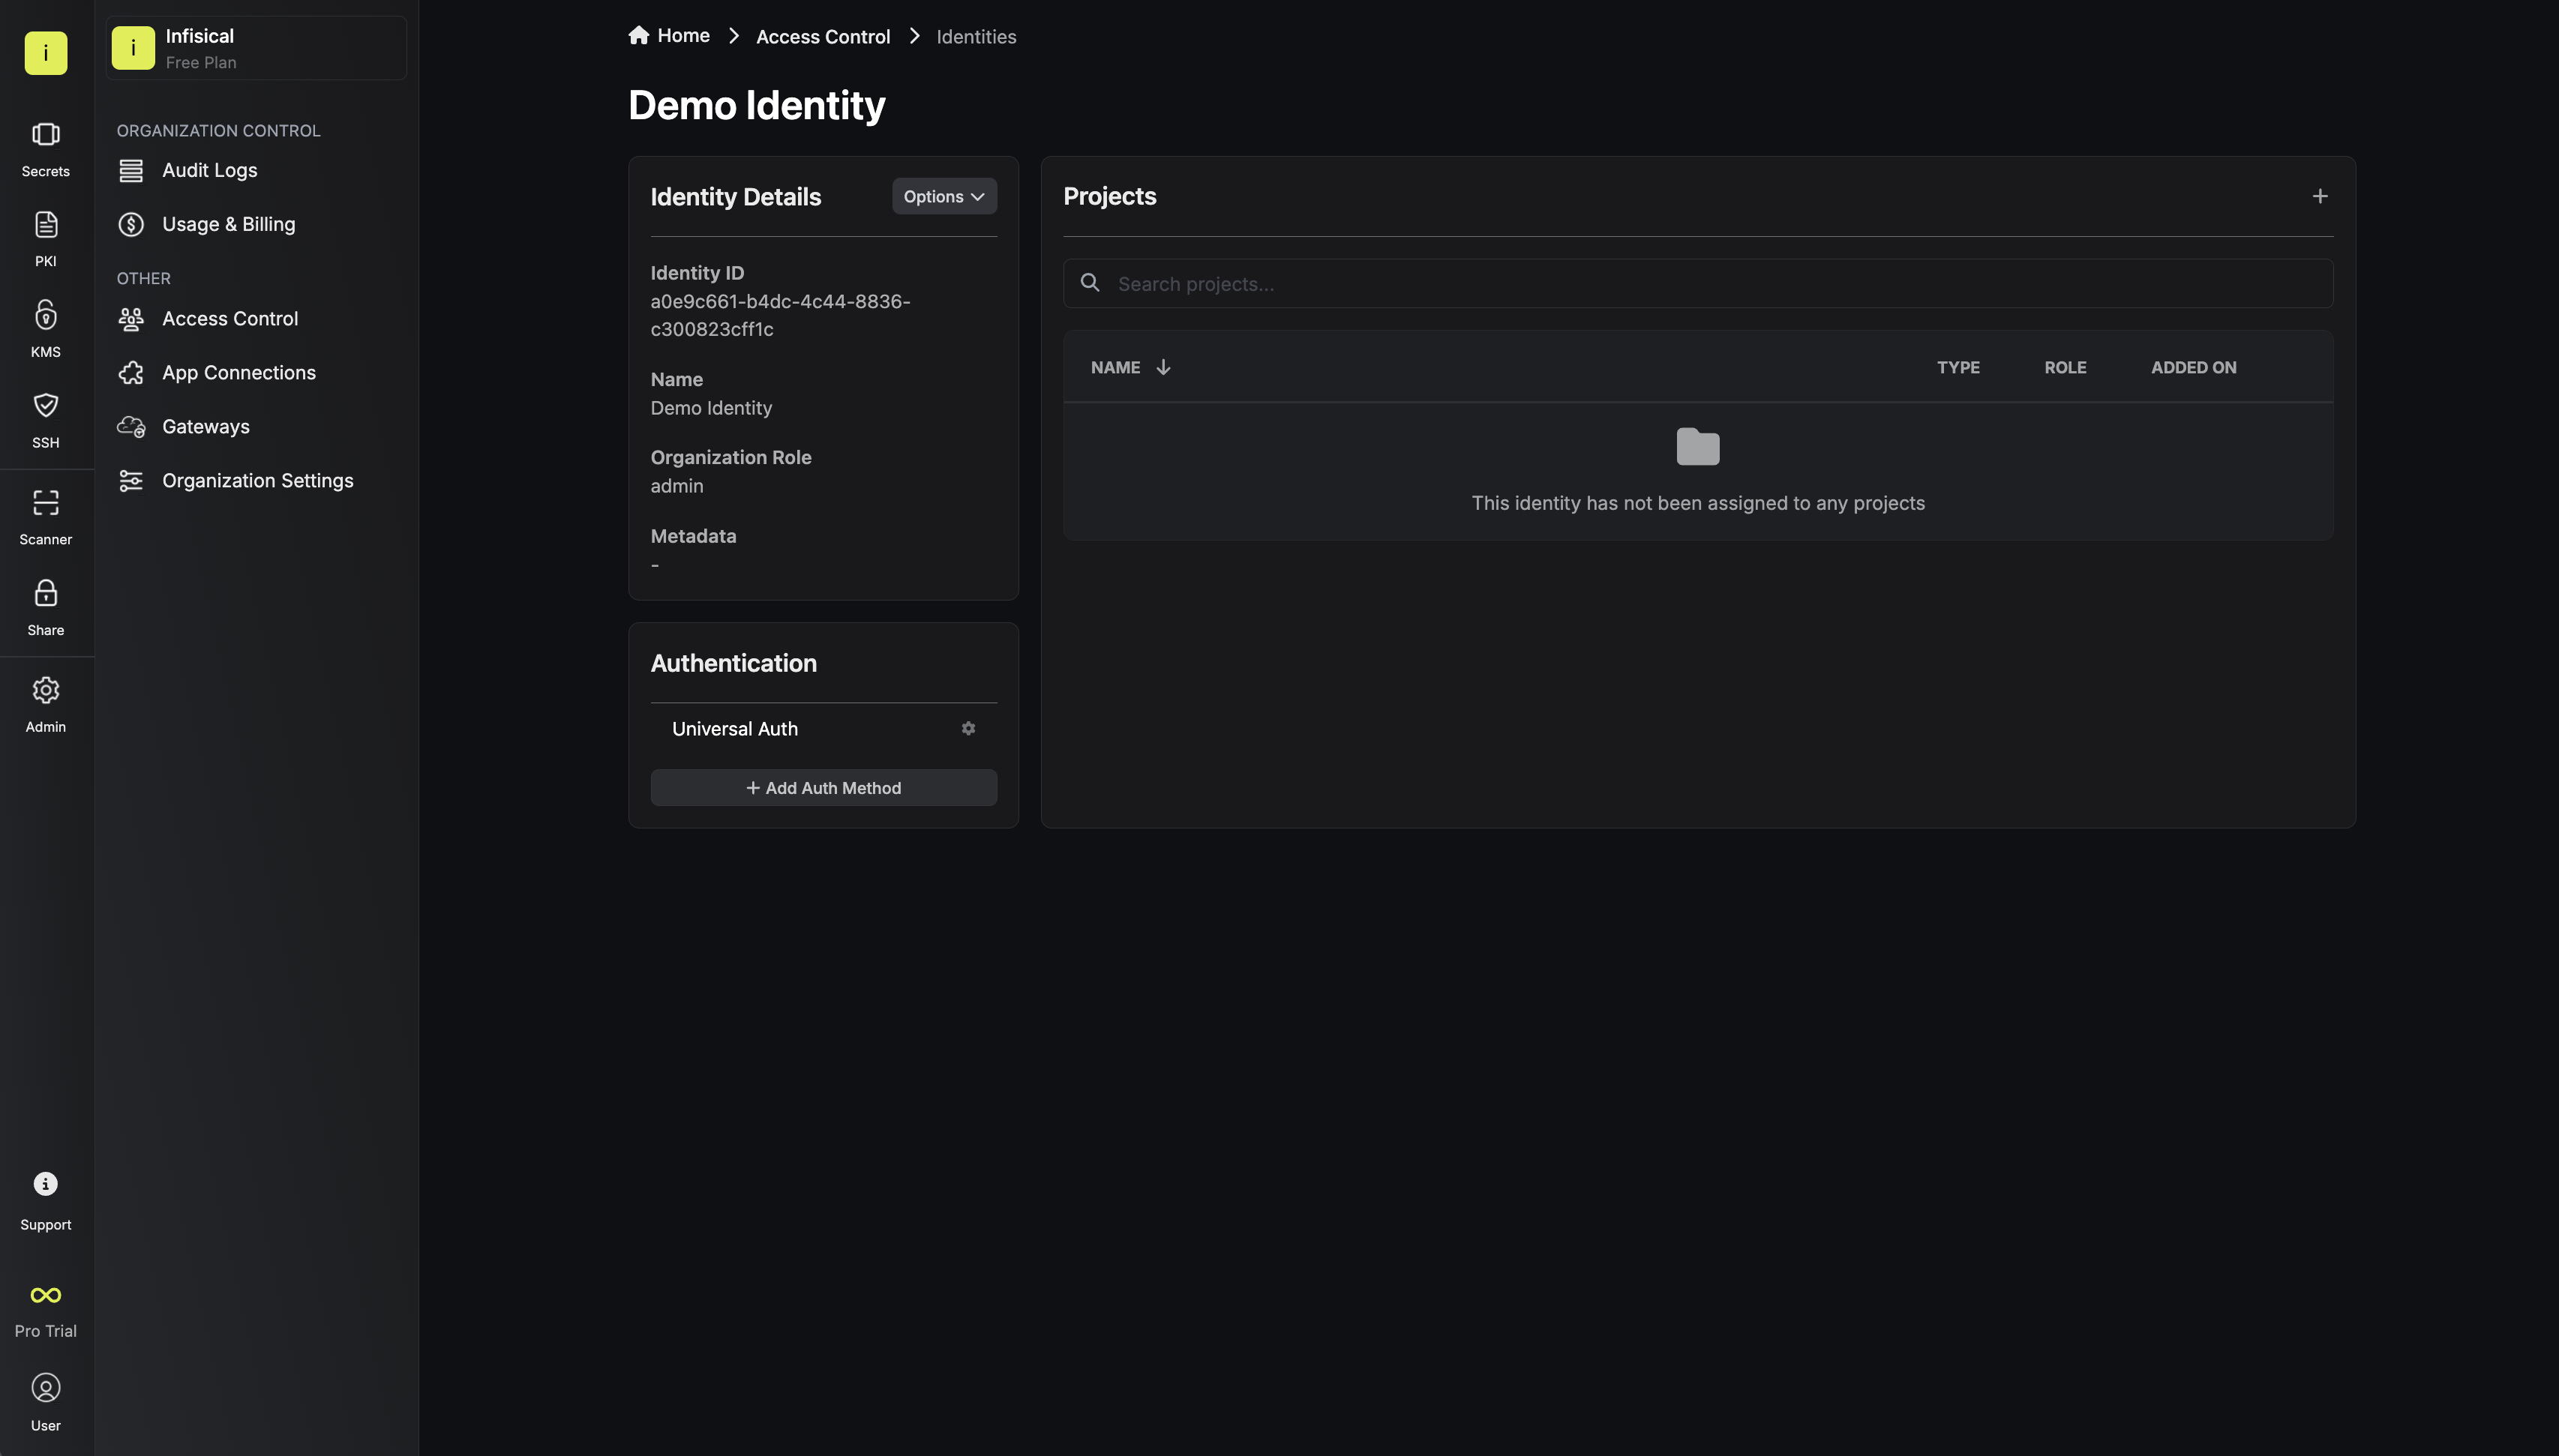 Since the identity has been configured with Universal Auth by default, you should re-configure it to use OIDC Auth instead. To do this, press to edit the Authentication section,
remove the existing Universal Auth configuration, and add a new OIDC Auth configuration onto the identity.
Since the identity has been configured with Universal Auth by default, you should re-configure it to use OIDC Auth instead. To do this, press to edit the Authentication section,
remove the existing Universal Auth configuration, and add a new OIDC Auth configuration onto the identity.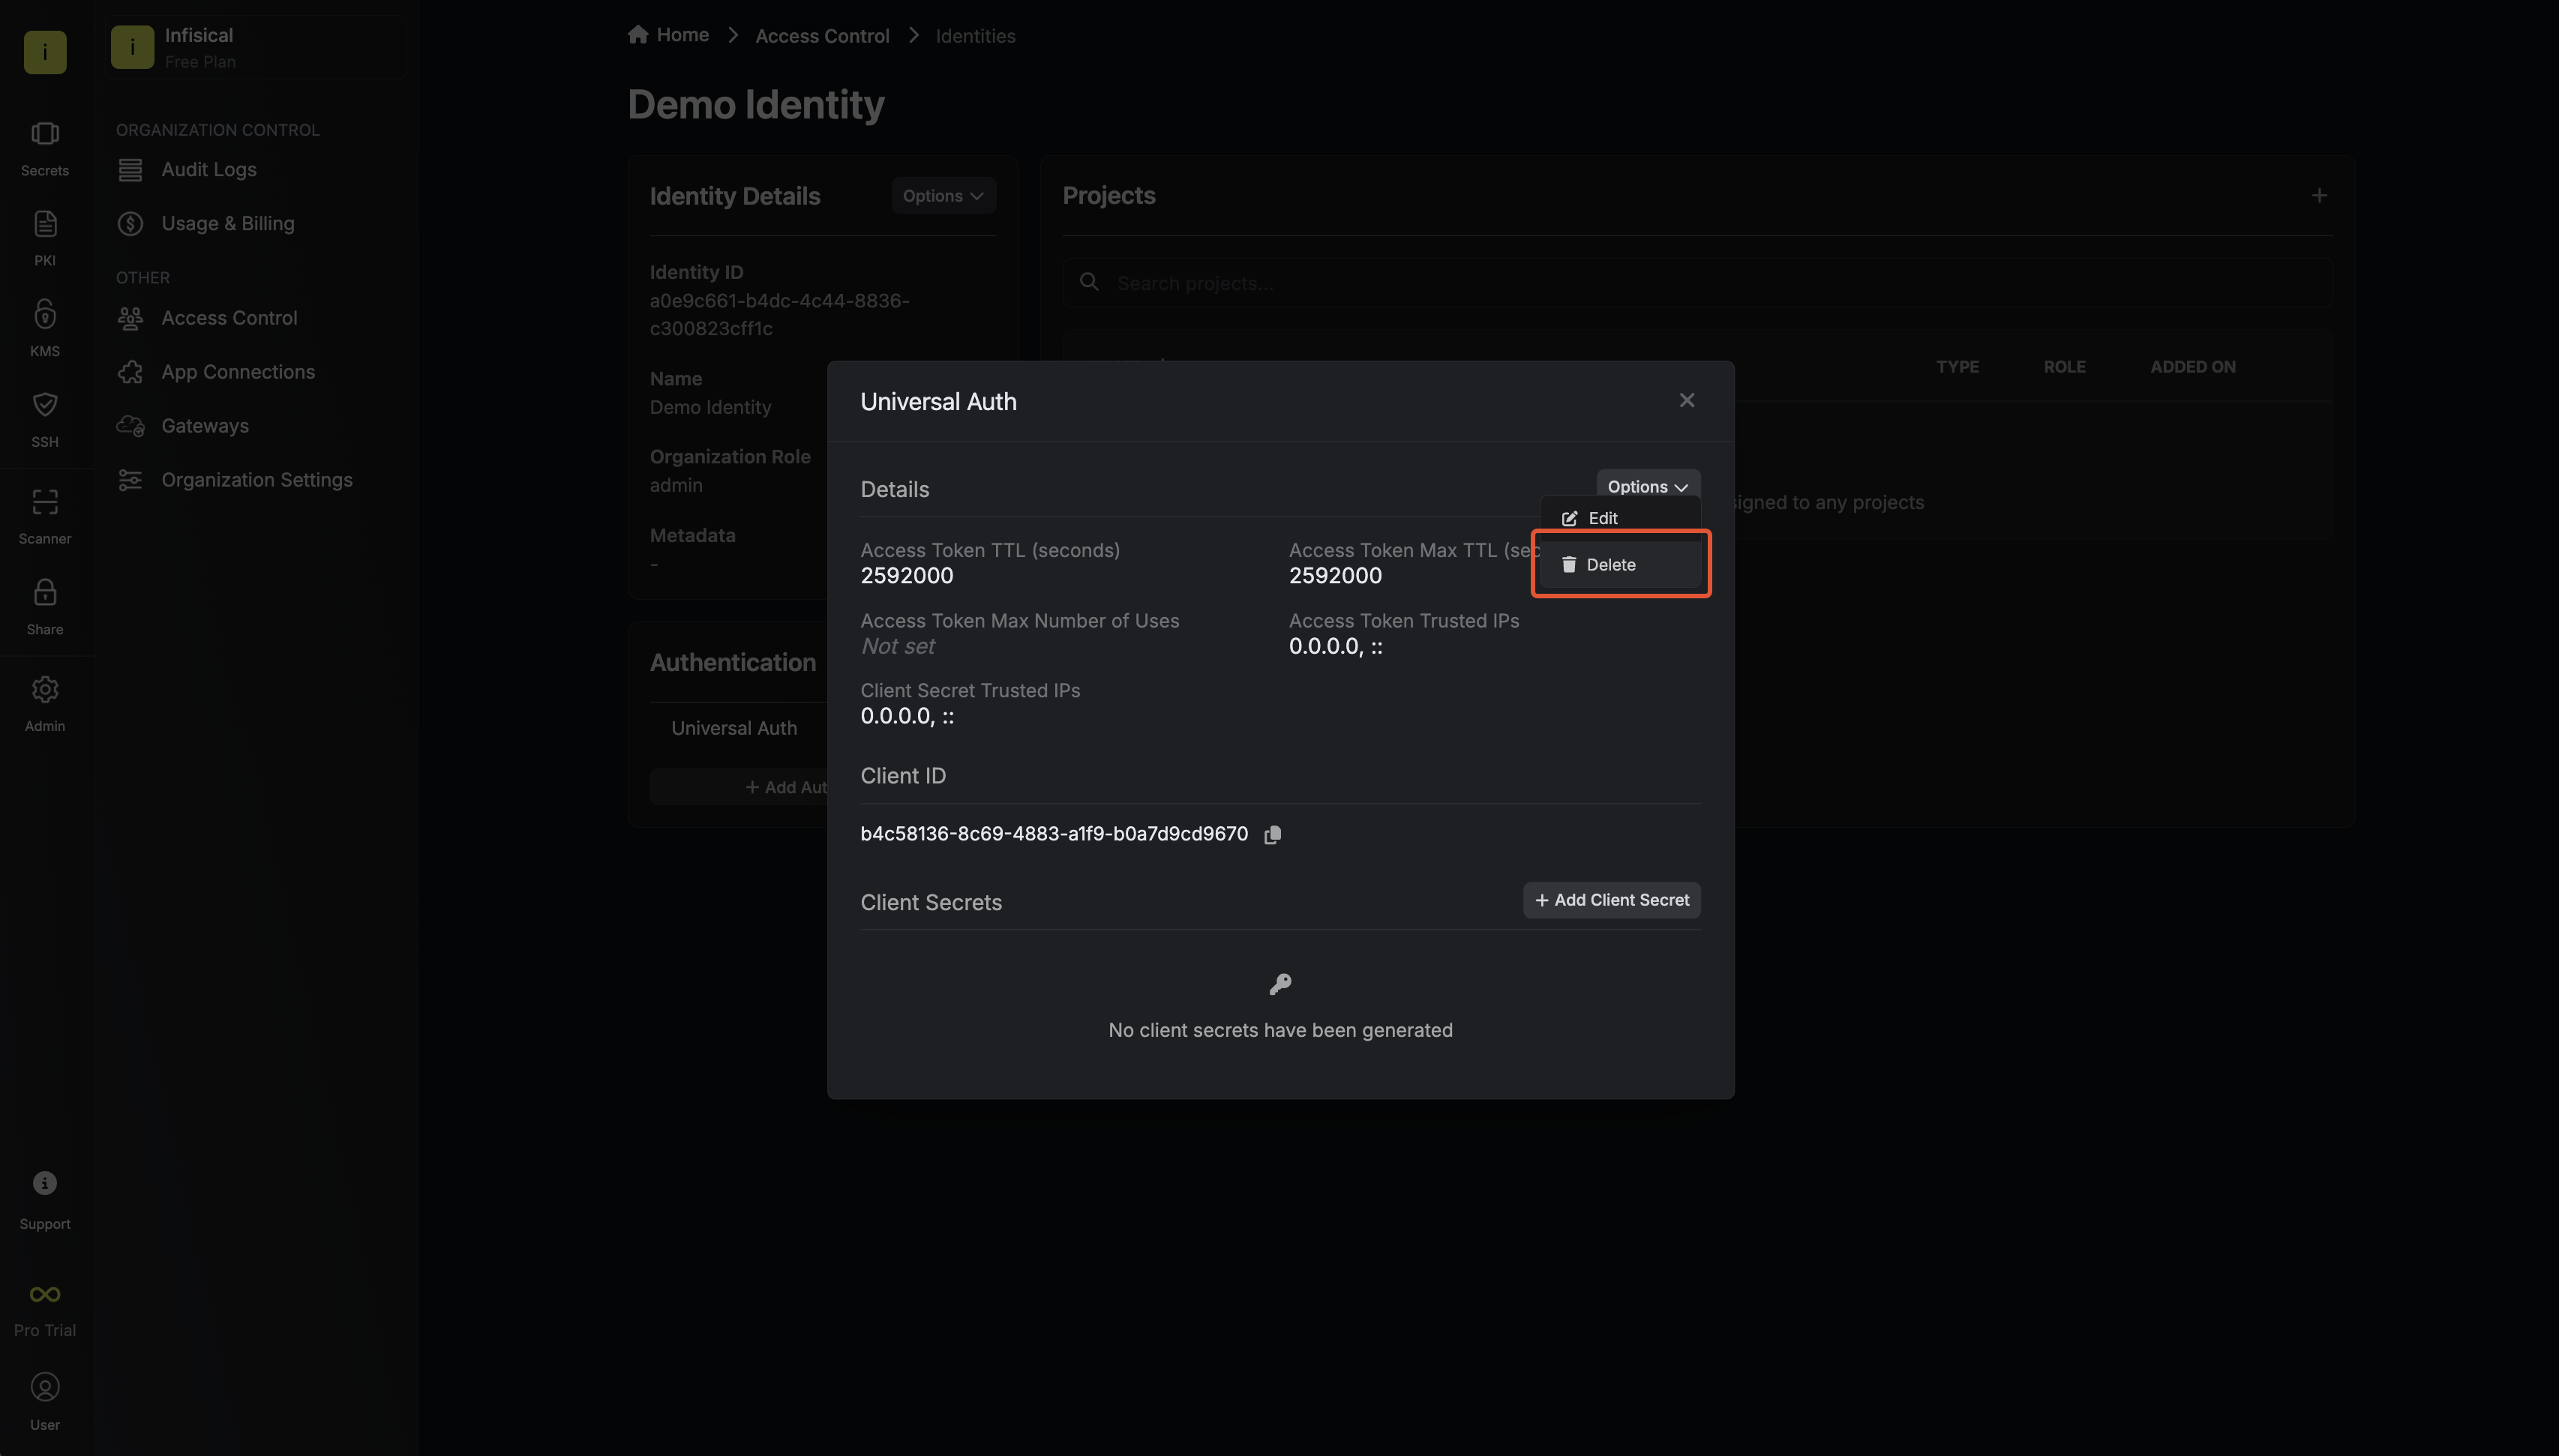
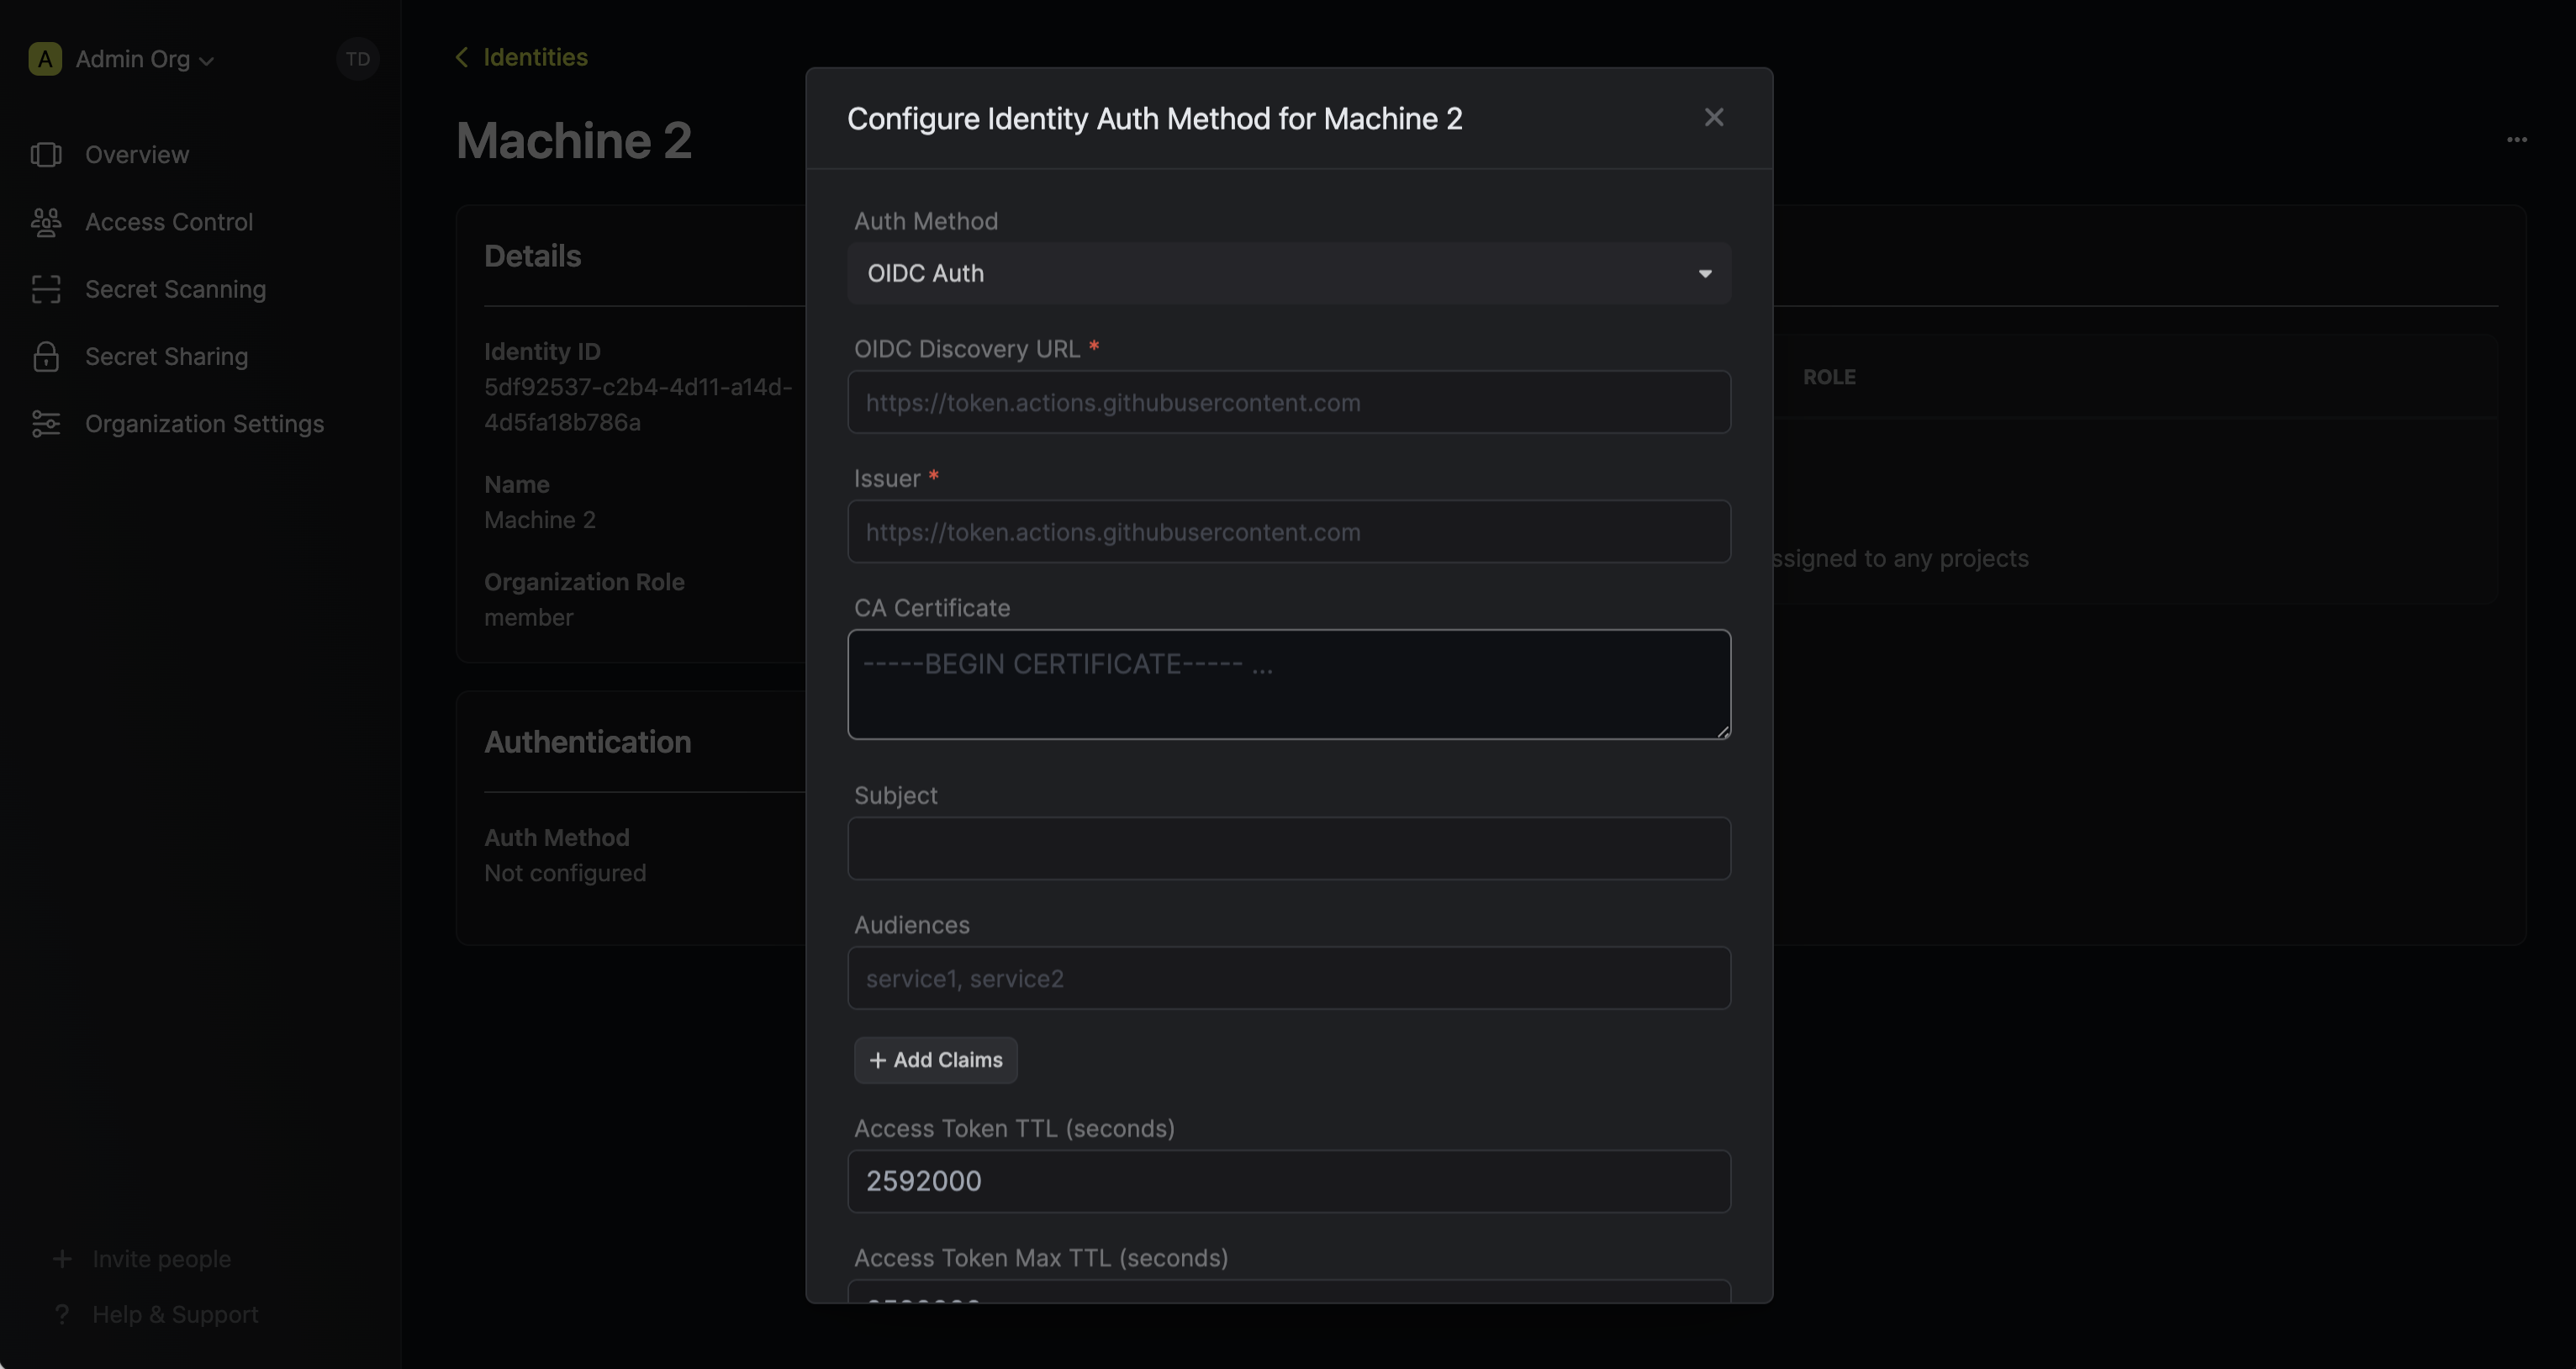 Here’s some more guidance on each field:
When creating an identity, you specify an organization level role for it to assume; you can configure roles in Access Control > Roles.Now input a few details for your new identity. Here’s some guidance for each field:Once you’ve created an identity, you’ll be redirected to a page where you can manage the identity.
Since the identity has been configured with Universal Auth by default, you should re-configure it to use OIDC Auth instead. To do this, press to edit the Authentication section,
remove the existing Universal Auth configuration, and add a new OIDC Auth configuration onto the identity.Here’s some more guidance on each field:The
subject, audiences, and claims fields support glob pattern matching; however, we highly recommend using hardcoded values whenever possible.Note that * acts as ** in OIDC auth and matches any characters including : and /. Use specific patterns to avoid overly broad matching.The subjects above are for illustration; see GitHub OIDC Auth for GitHub’s current subject format.
2
Adding an identity to a project
To enable the identity to access project-level resources such as secrets within a specific project, you should add it to that project.To do this, open the project you want to add the identity to, go to Access Control > Machine Identities, and select Add Machine Identity to Project.Next, select Assign Existing, choose the identity you want to add, and set the project role it should assume. The project role assigned will determine what project level resources this identity can have access to.

3
Accessing the Infisical API with the identity
To access the Infisical API as the identity, you need to fetch an identity token from an identity provider and make a request to the
/api/v1/auth/oidc-auth/login endpoint in exchange for an access token.We provide an example below of how authentication is done with Infisical using OIDC. It is a snippet from the official GitHub secrets action.Sample usage
Sample OIDC login response
Response
Each identity access token has a time-to-live (TTL) which you can infer from the response of the login operation;
the default TTL is
7200 seconds which can be adjusted.If an identity access token expires, it can no longer authenticate with the Infisical API. In this case,
a new access token should be obtained by performing another login operation.