Diagram
The following sequence diagram illustrates the OCI Auth workflow for authenticating OCI users with Infisical.Concept
At a high level, Infisical authenticates an OCI user by verifying its identity and checking that it meets specific requirements (e.g., its username is authorized, its part of a tenancy) at the/api/v1/auth/oci-auth/login endpoint. If successful,
then Infisical returns a short-lived access token that can be used to make authenticated requests to the Infisical API.
To be more specific:
- The client signs a
/20160918/users/{userId}request using an OCI user’s private key; this is done using the OCI SDK or API. - The client sends the signed request’s headers and their user OCID to Infisical at the
/api/v1/auth/oci-auth/loginendpoint. - Infisical reconstructs the request and sends it to OCI via the Get User endpoint for verification and obtains the identity associated with the OCI user.
- Infisical checks the user’s properties against set criteria such as Allowed Usernames and Tenancy OCID.
- If all checks pass, Infisical returns a short-lived access token that the client can use to make authenticated requests to the Infisical API.
Prerequisite
In order to sign requests, you must have an OCI user with credentials such as the private key. If you’re unaware of how to create a user and obtain the needed credentials, expand the menu below.Creating an OCI user
Creating an OCI user
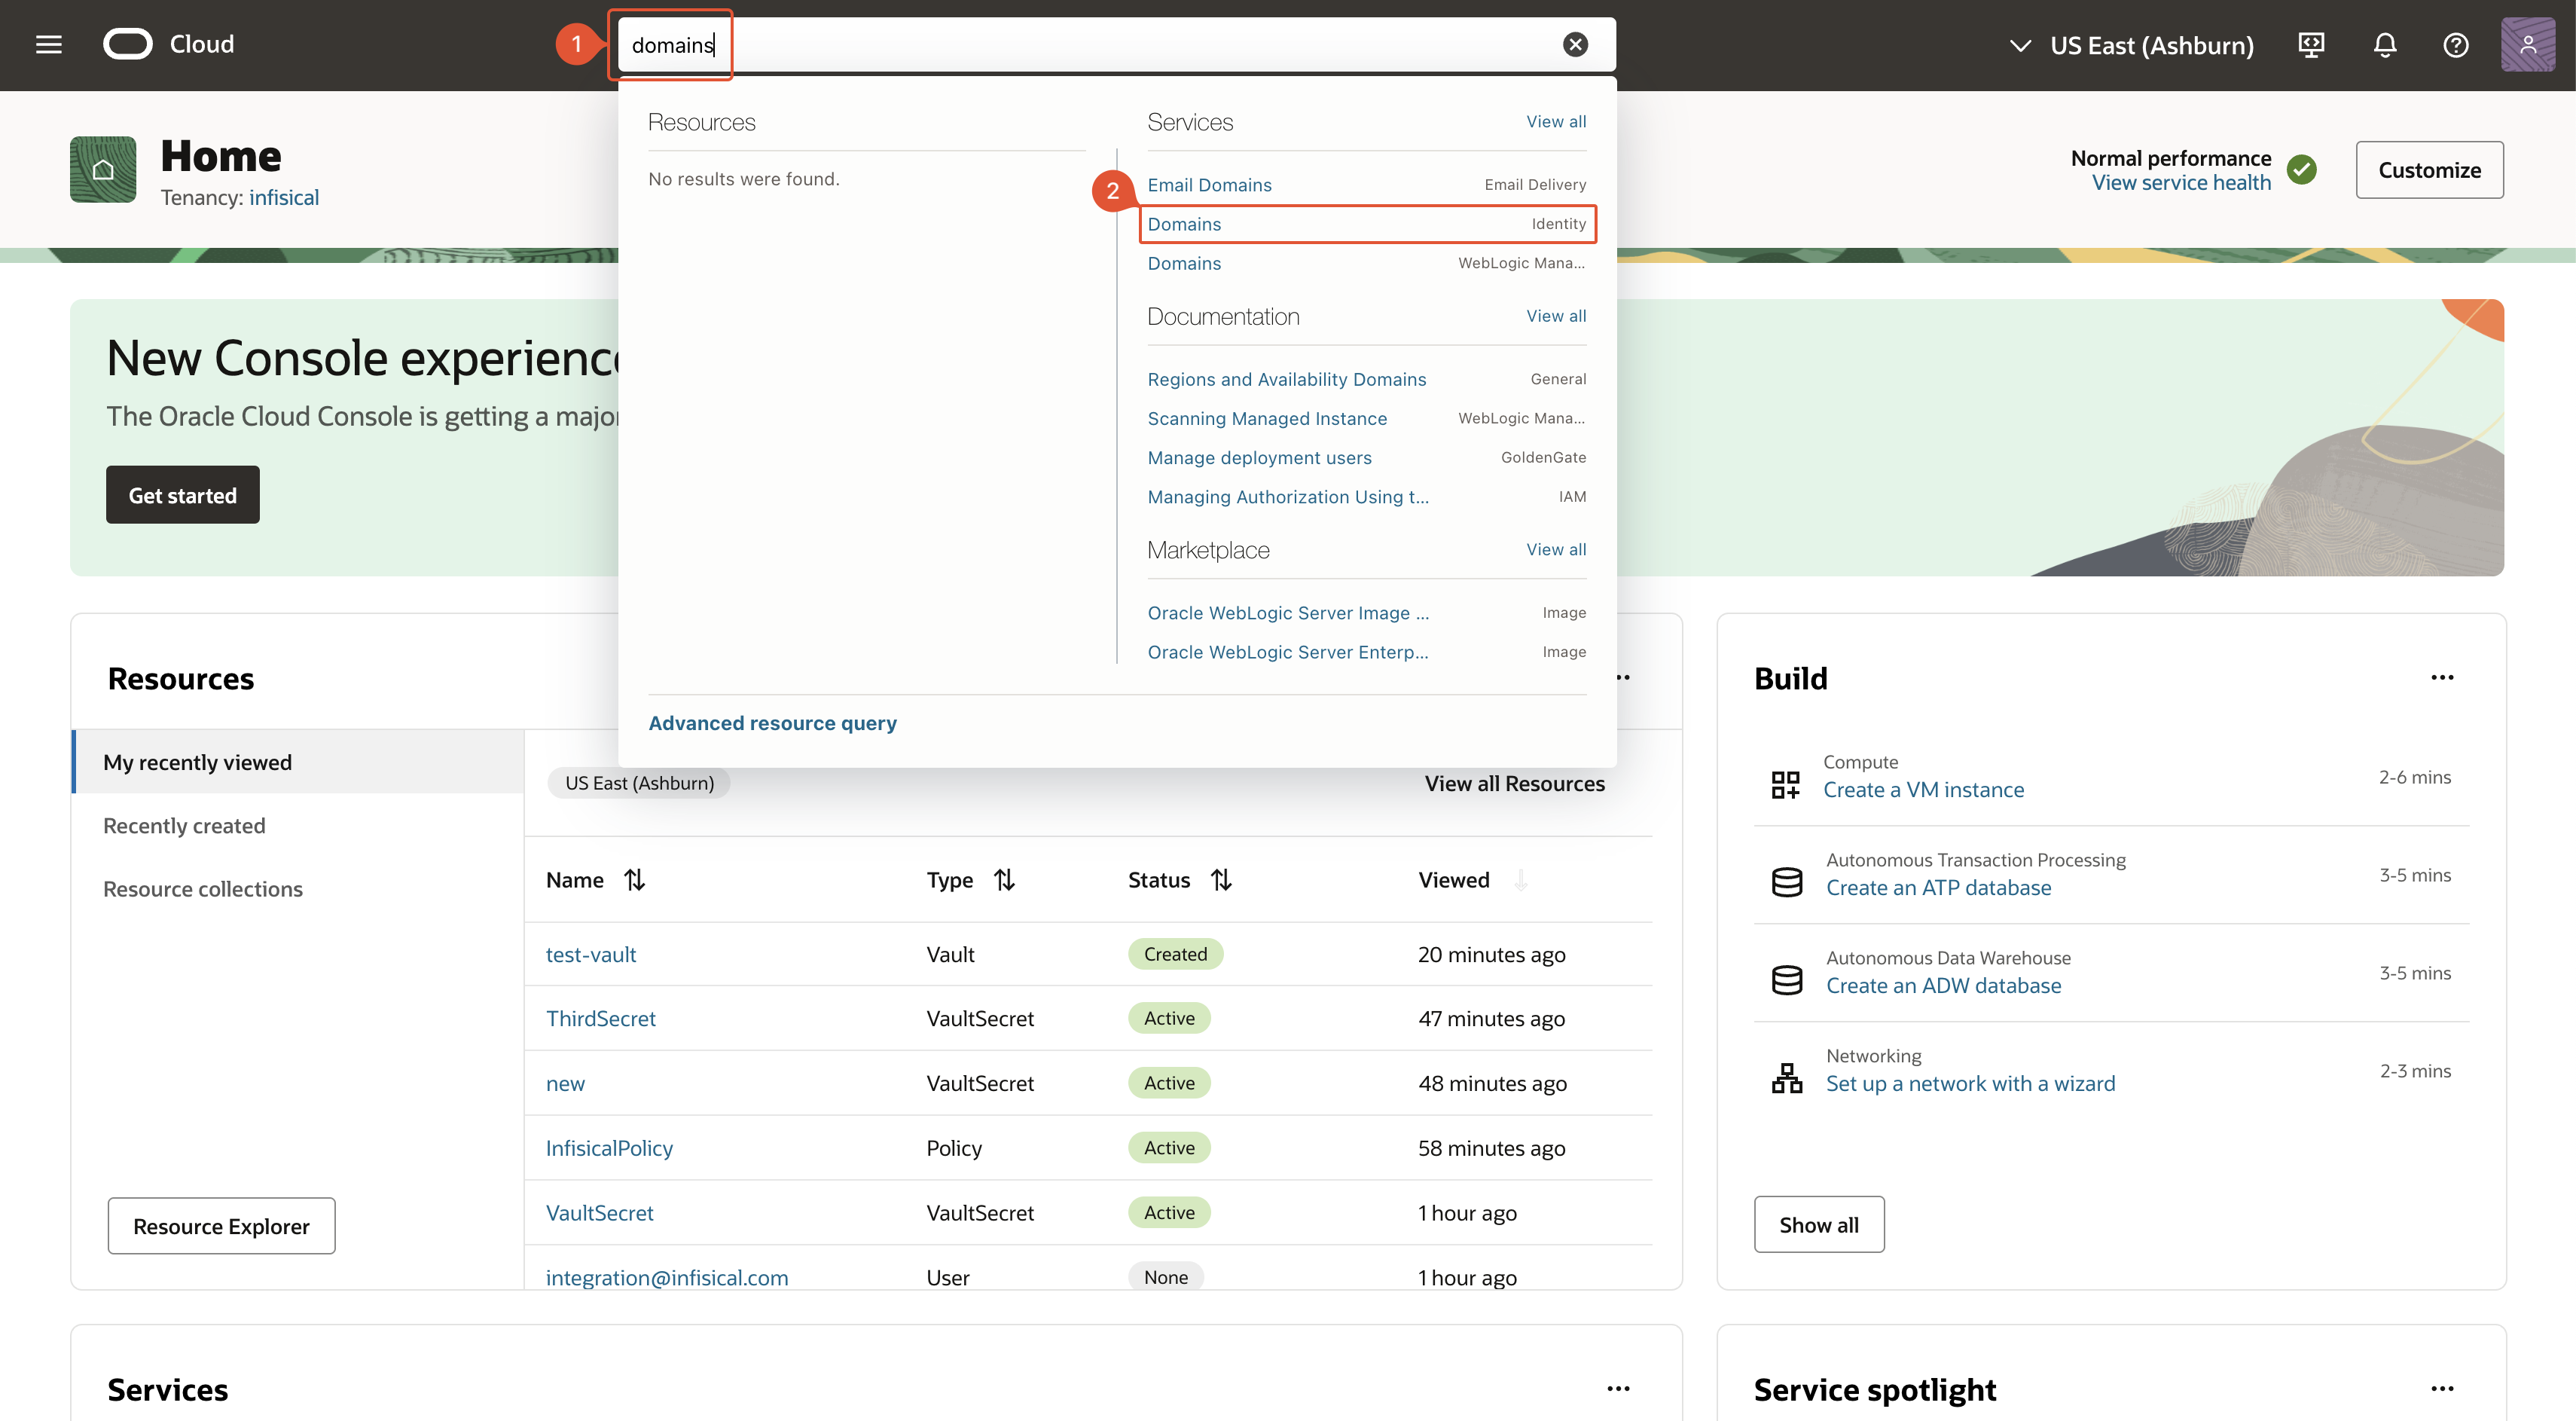
1
Search for 'Domains' and click as shown
2
Select domain
Select the domain in which you want to create the Infisical user account.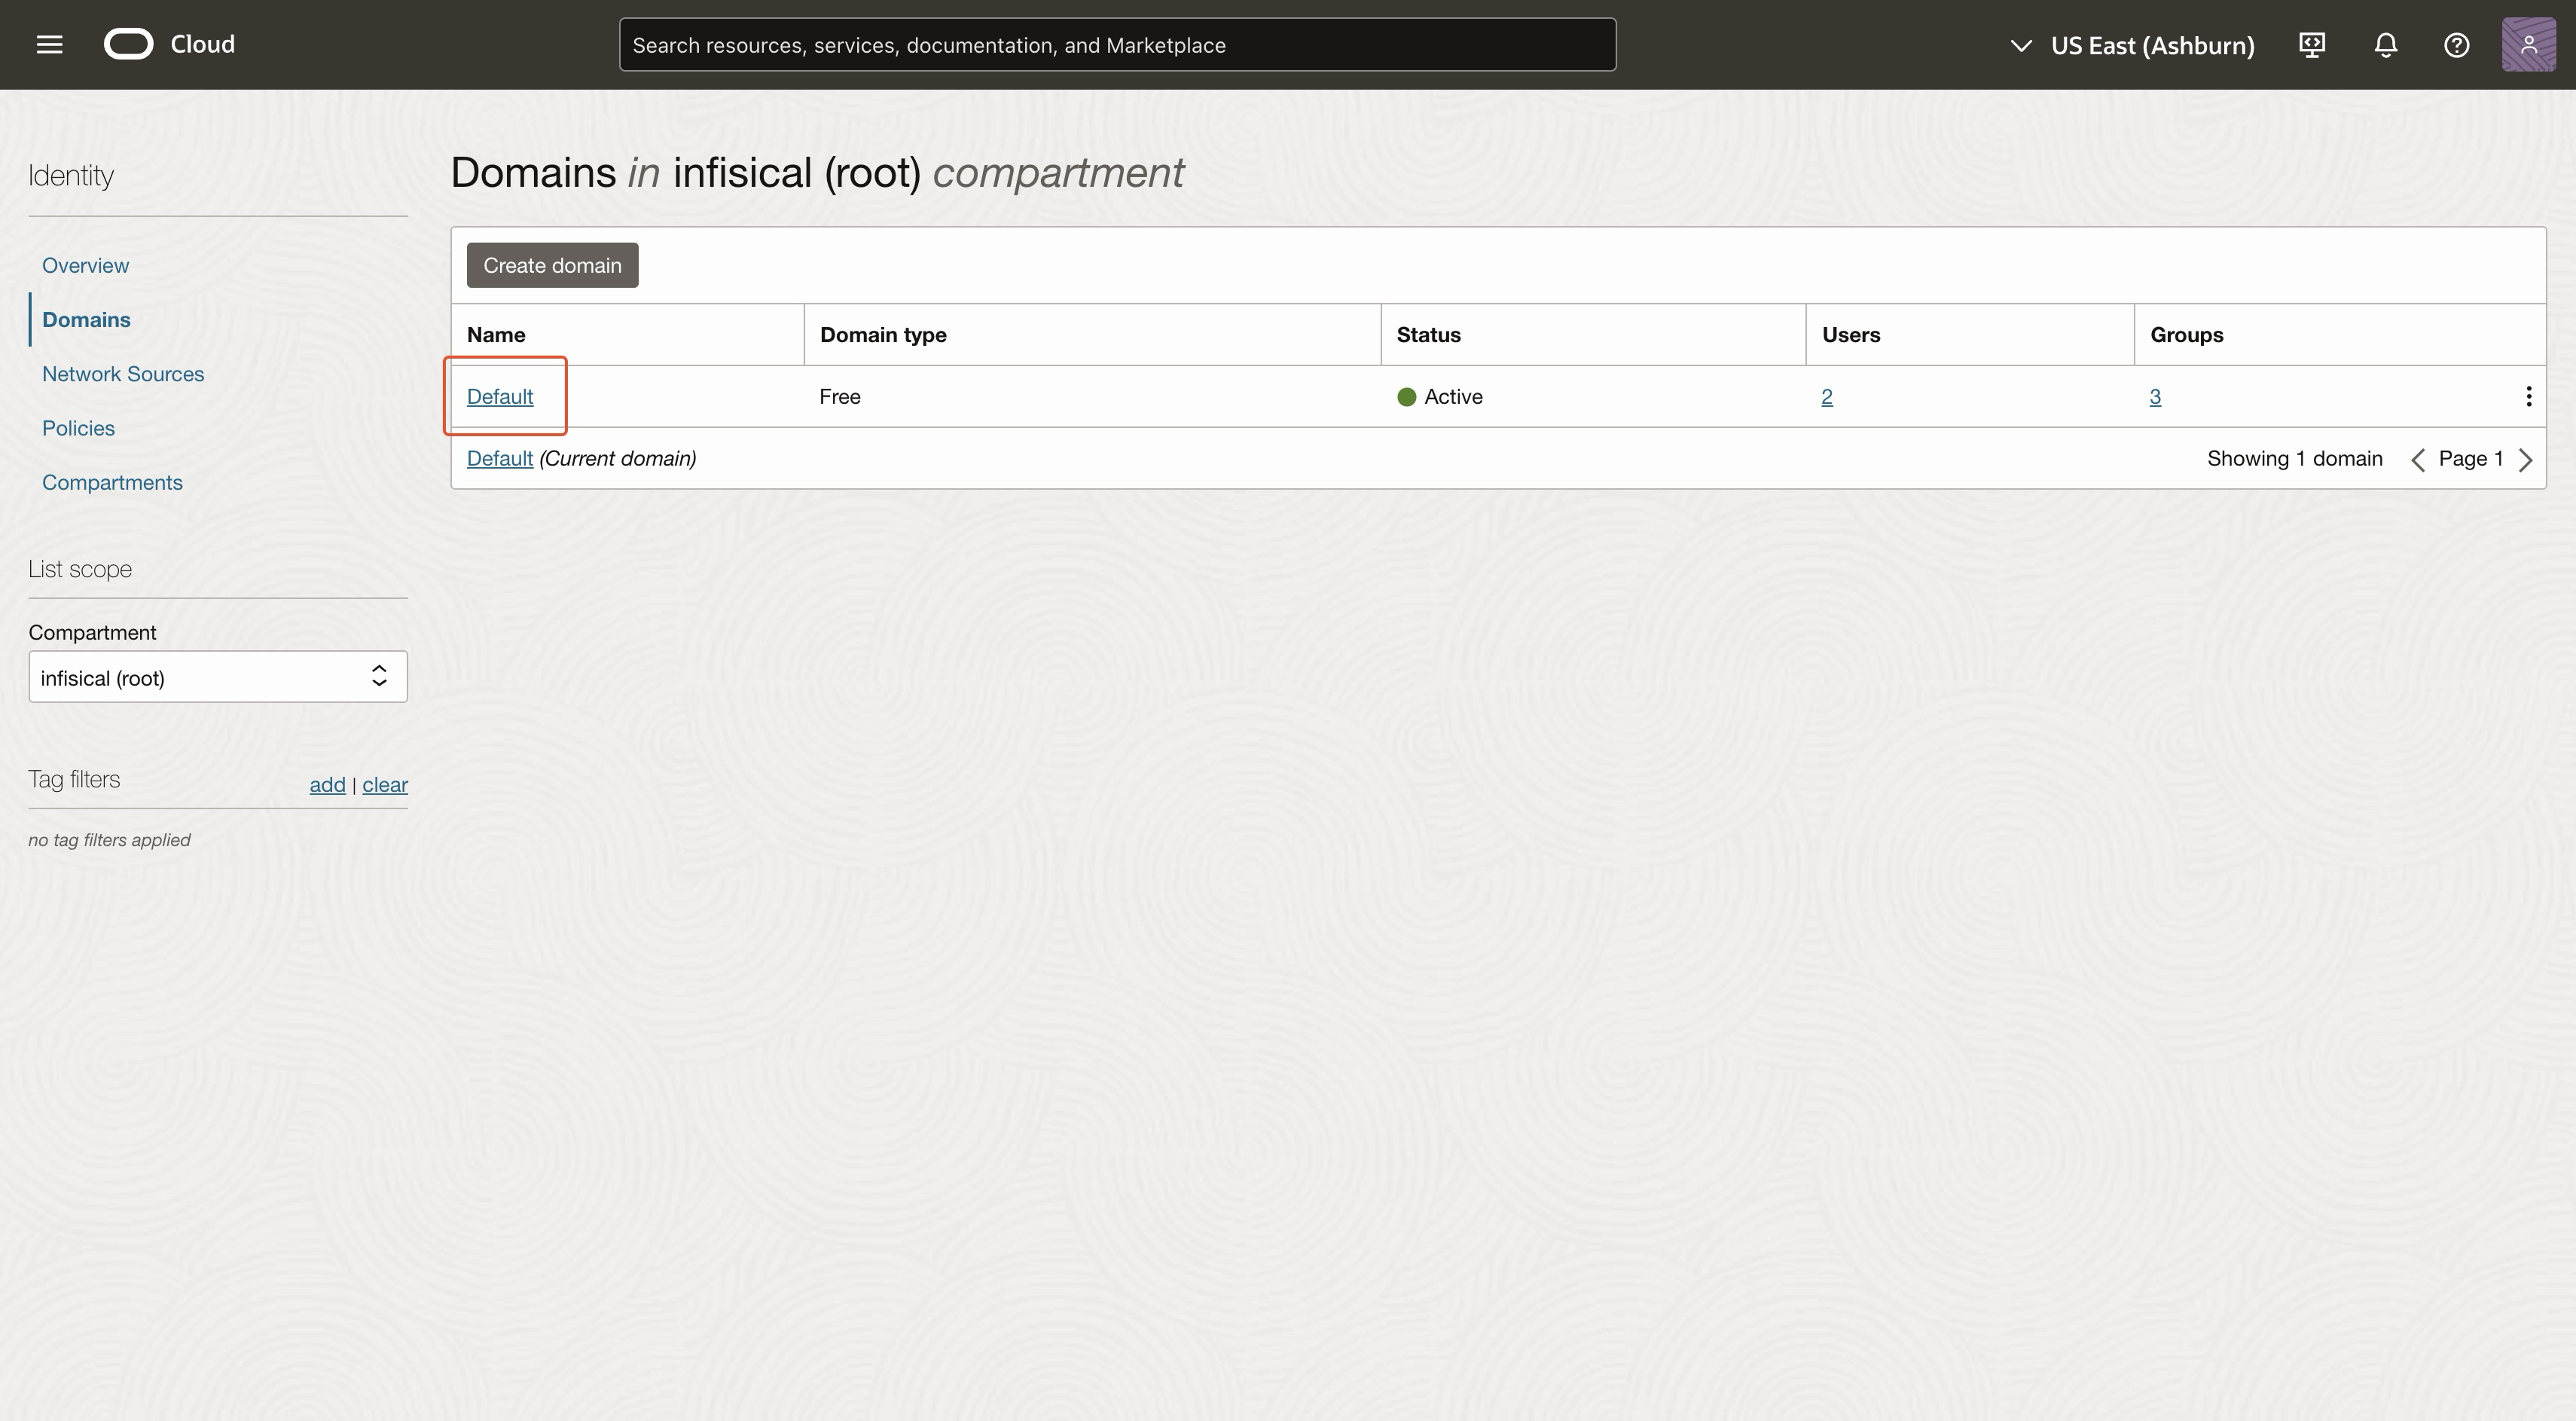
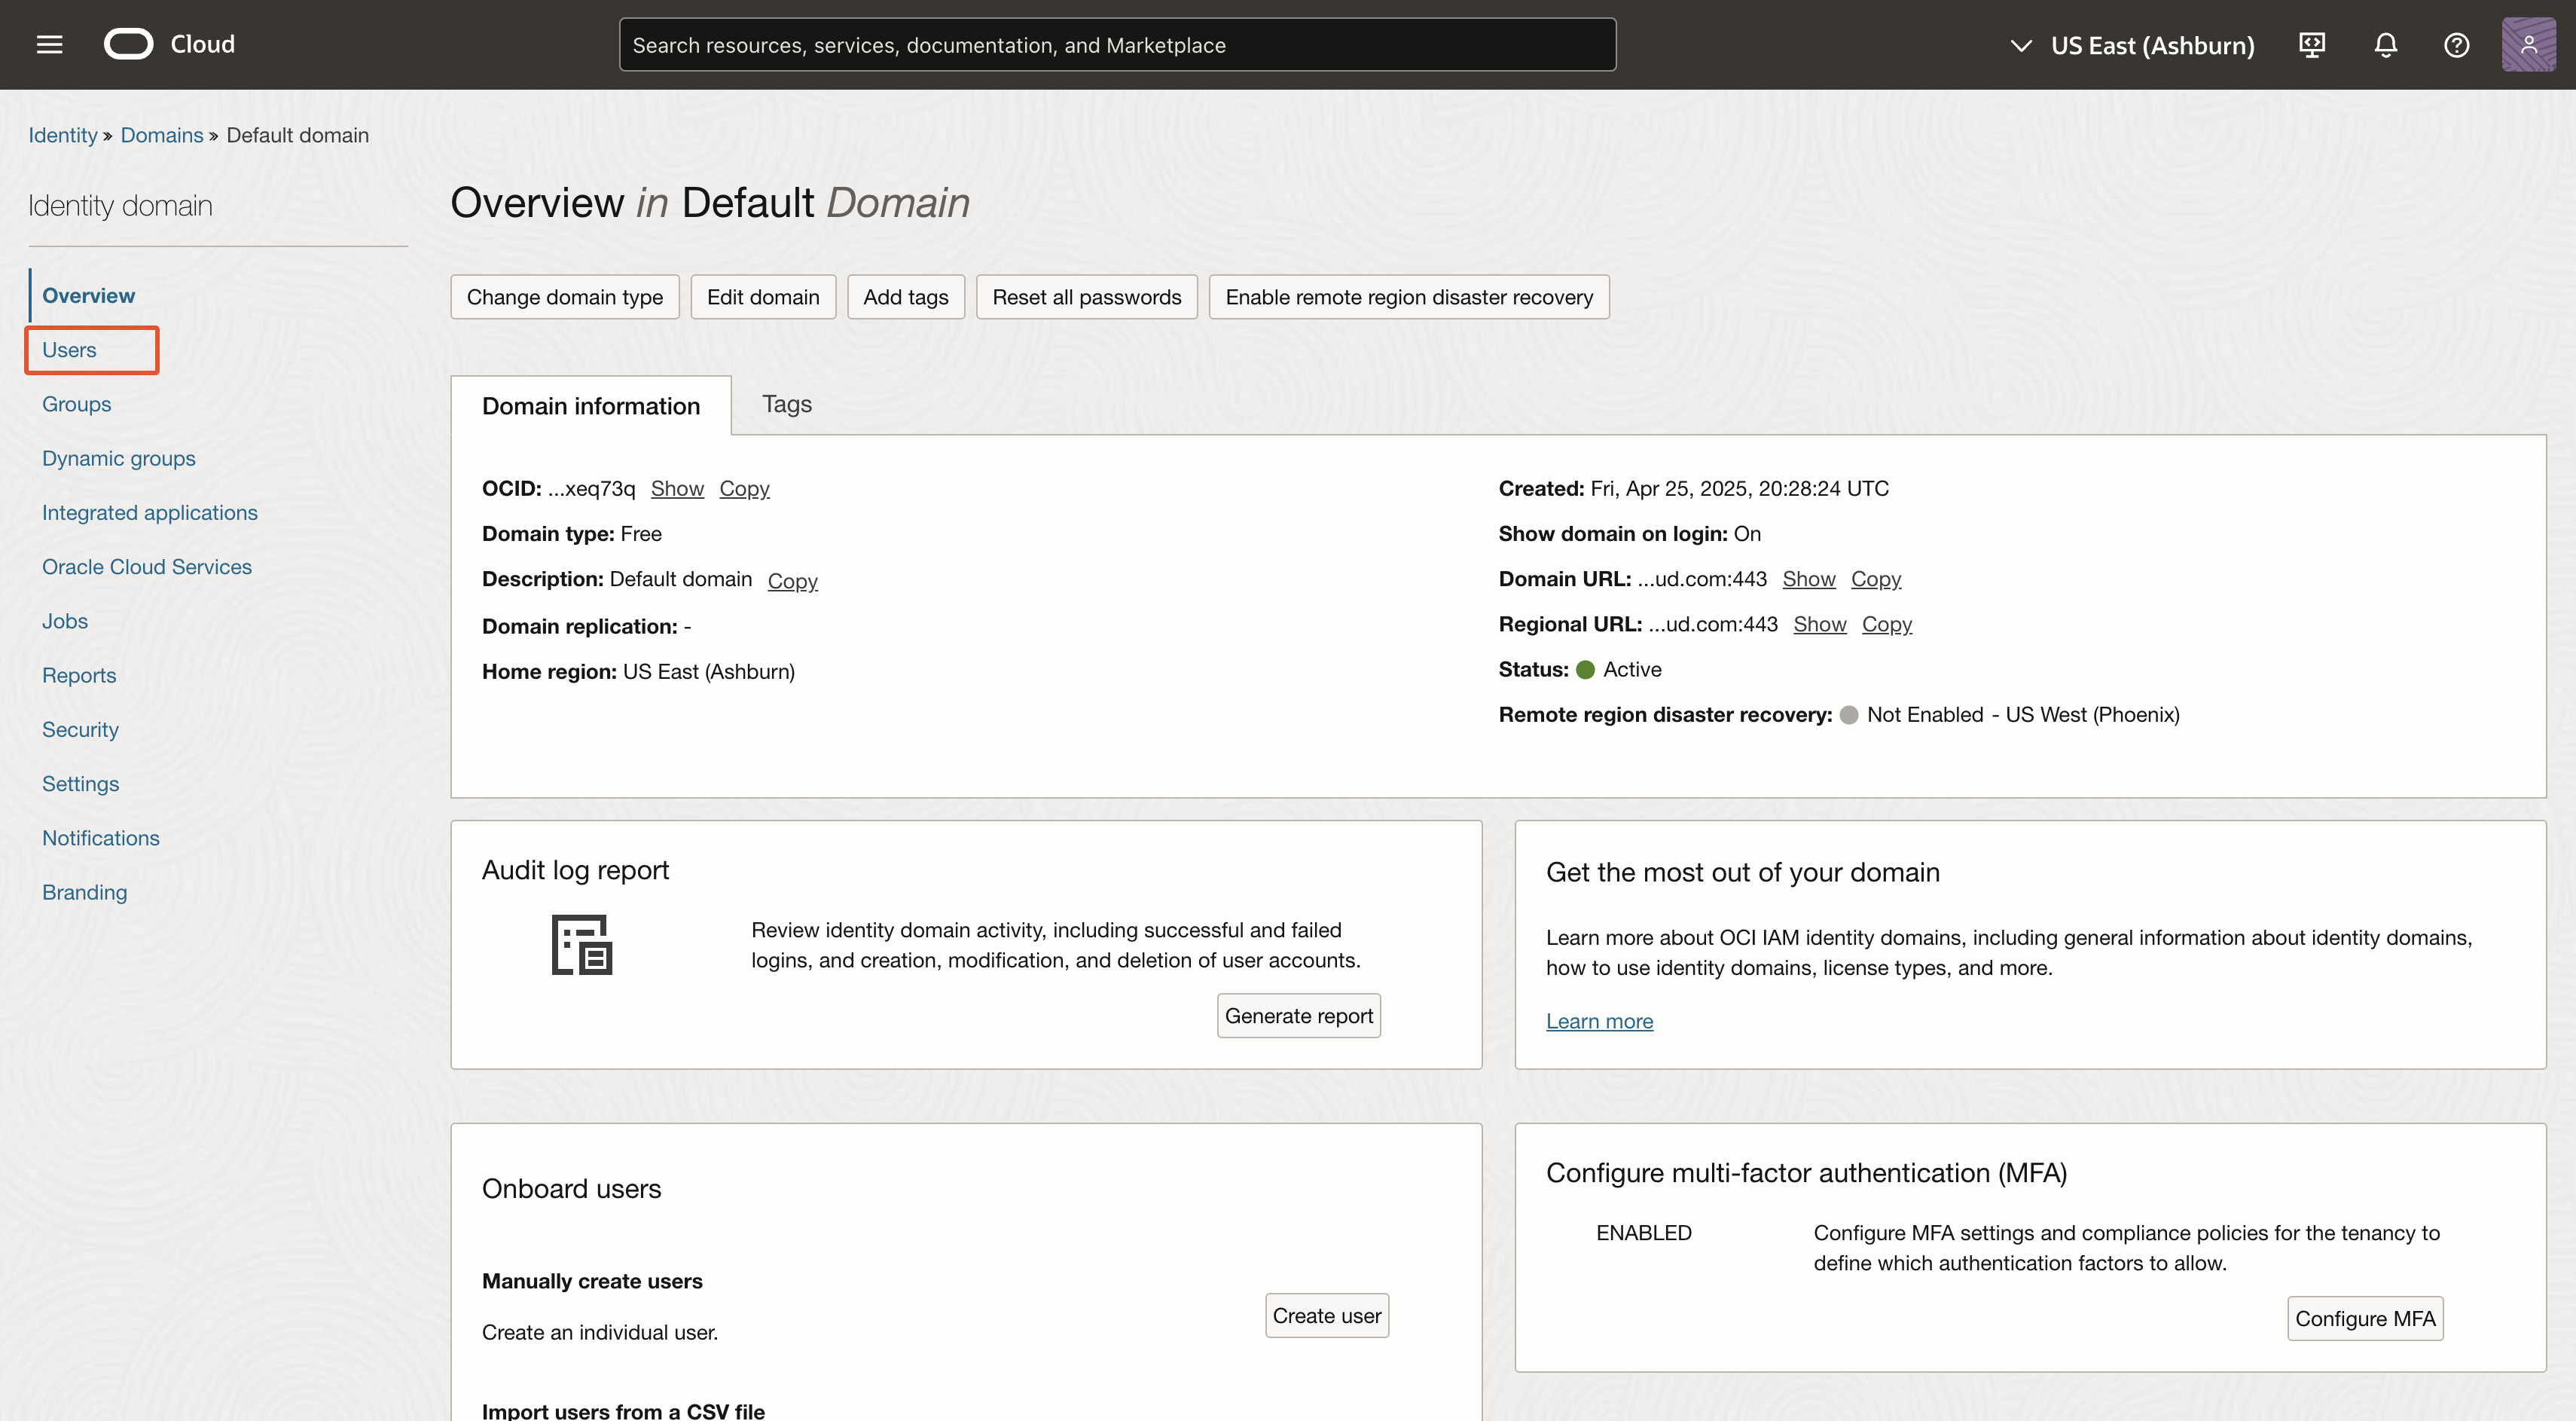
3
Navigate to 'Users'
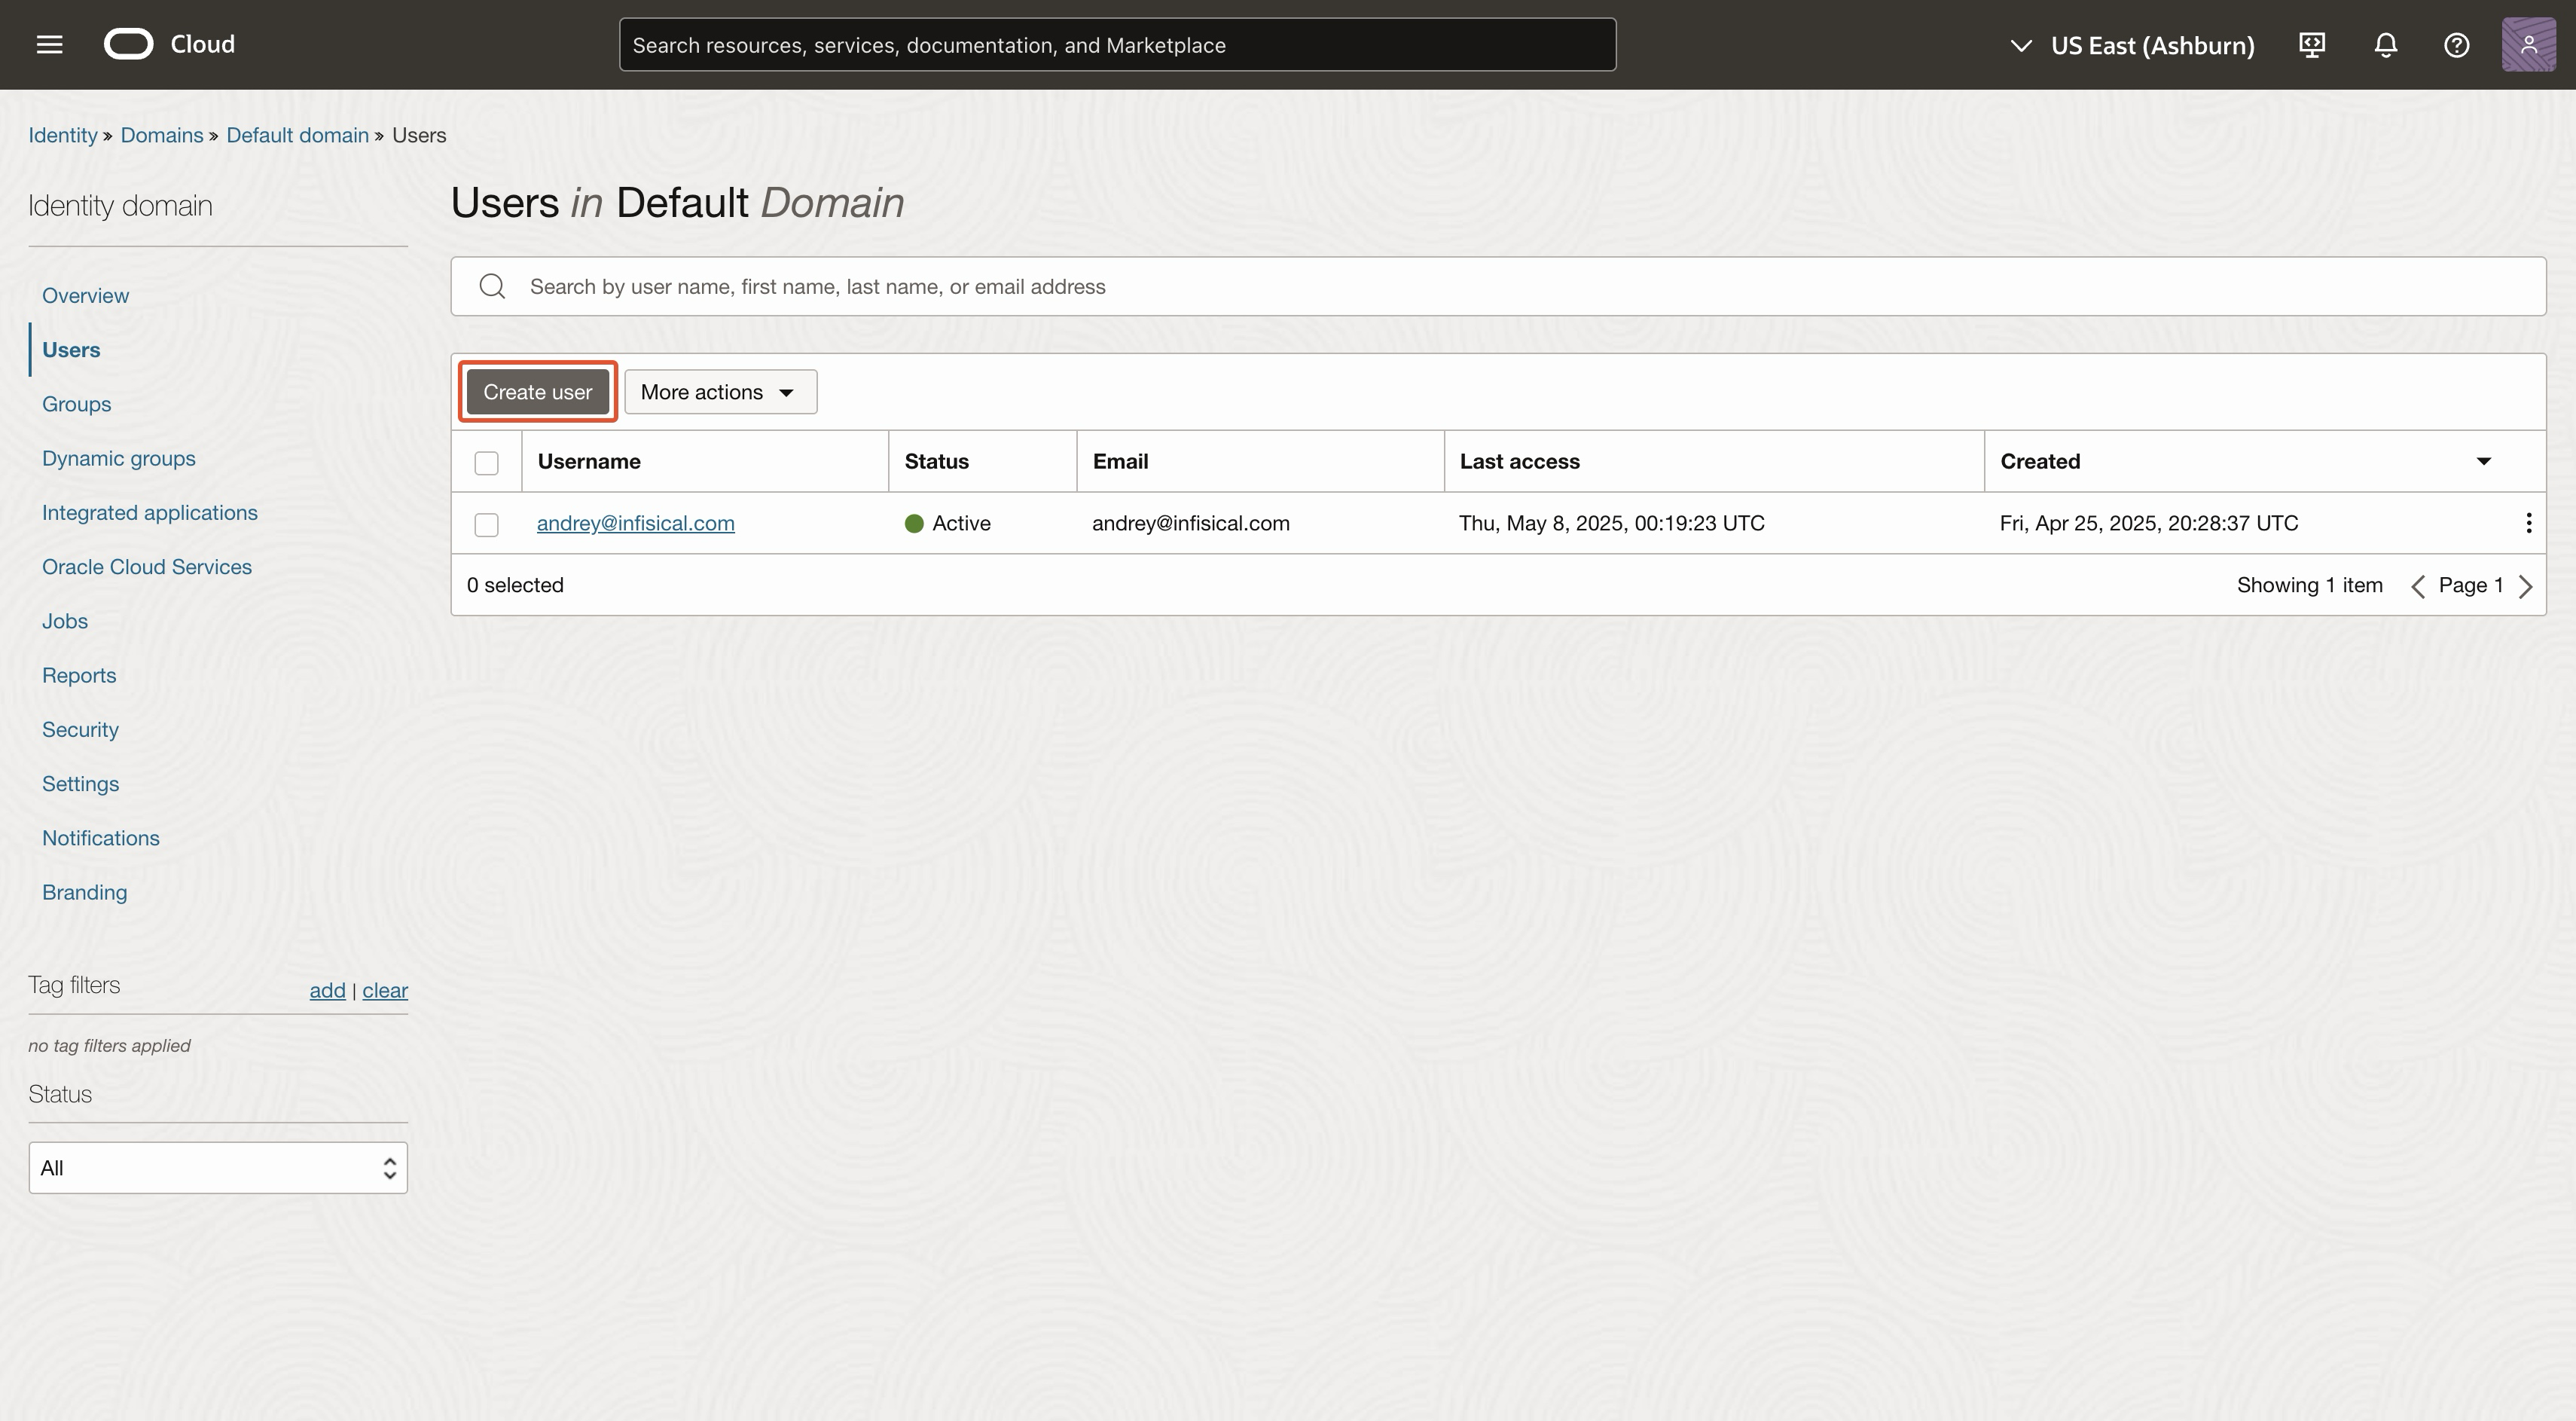
4
Click 'Create user'
5
Create user
The name, email, and username can be anything.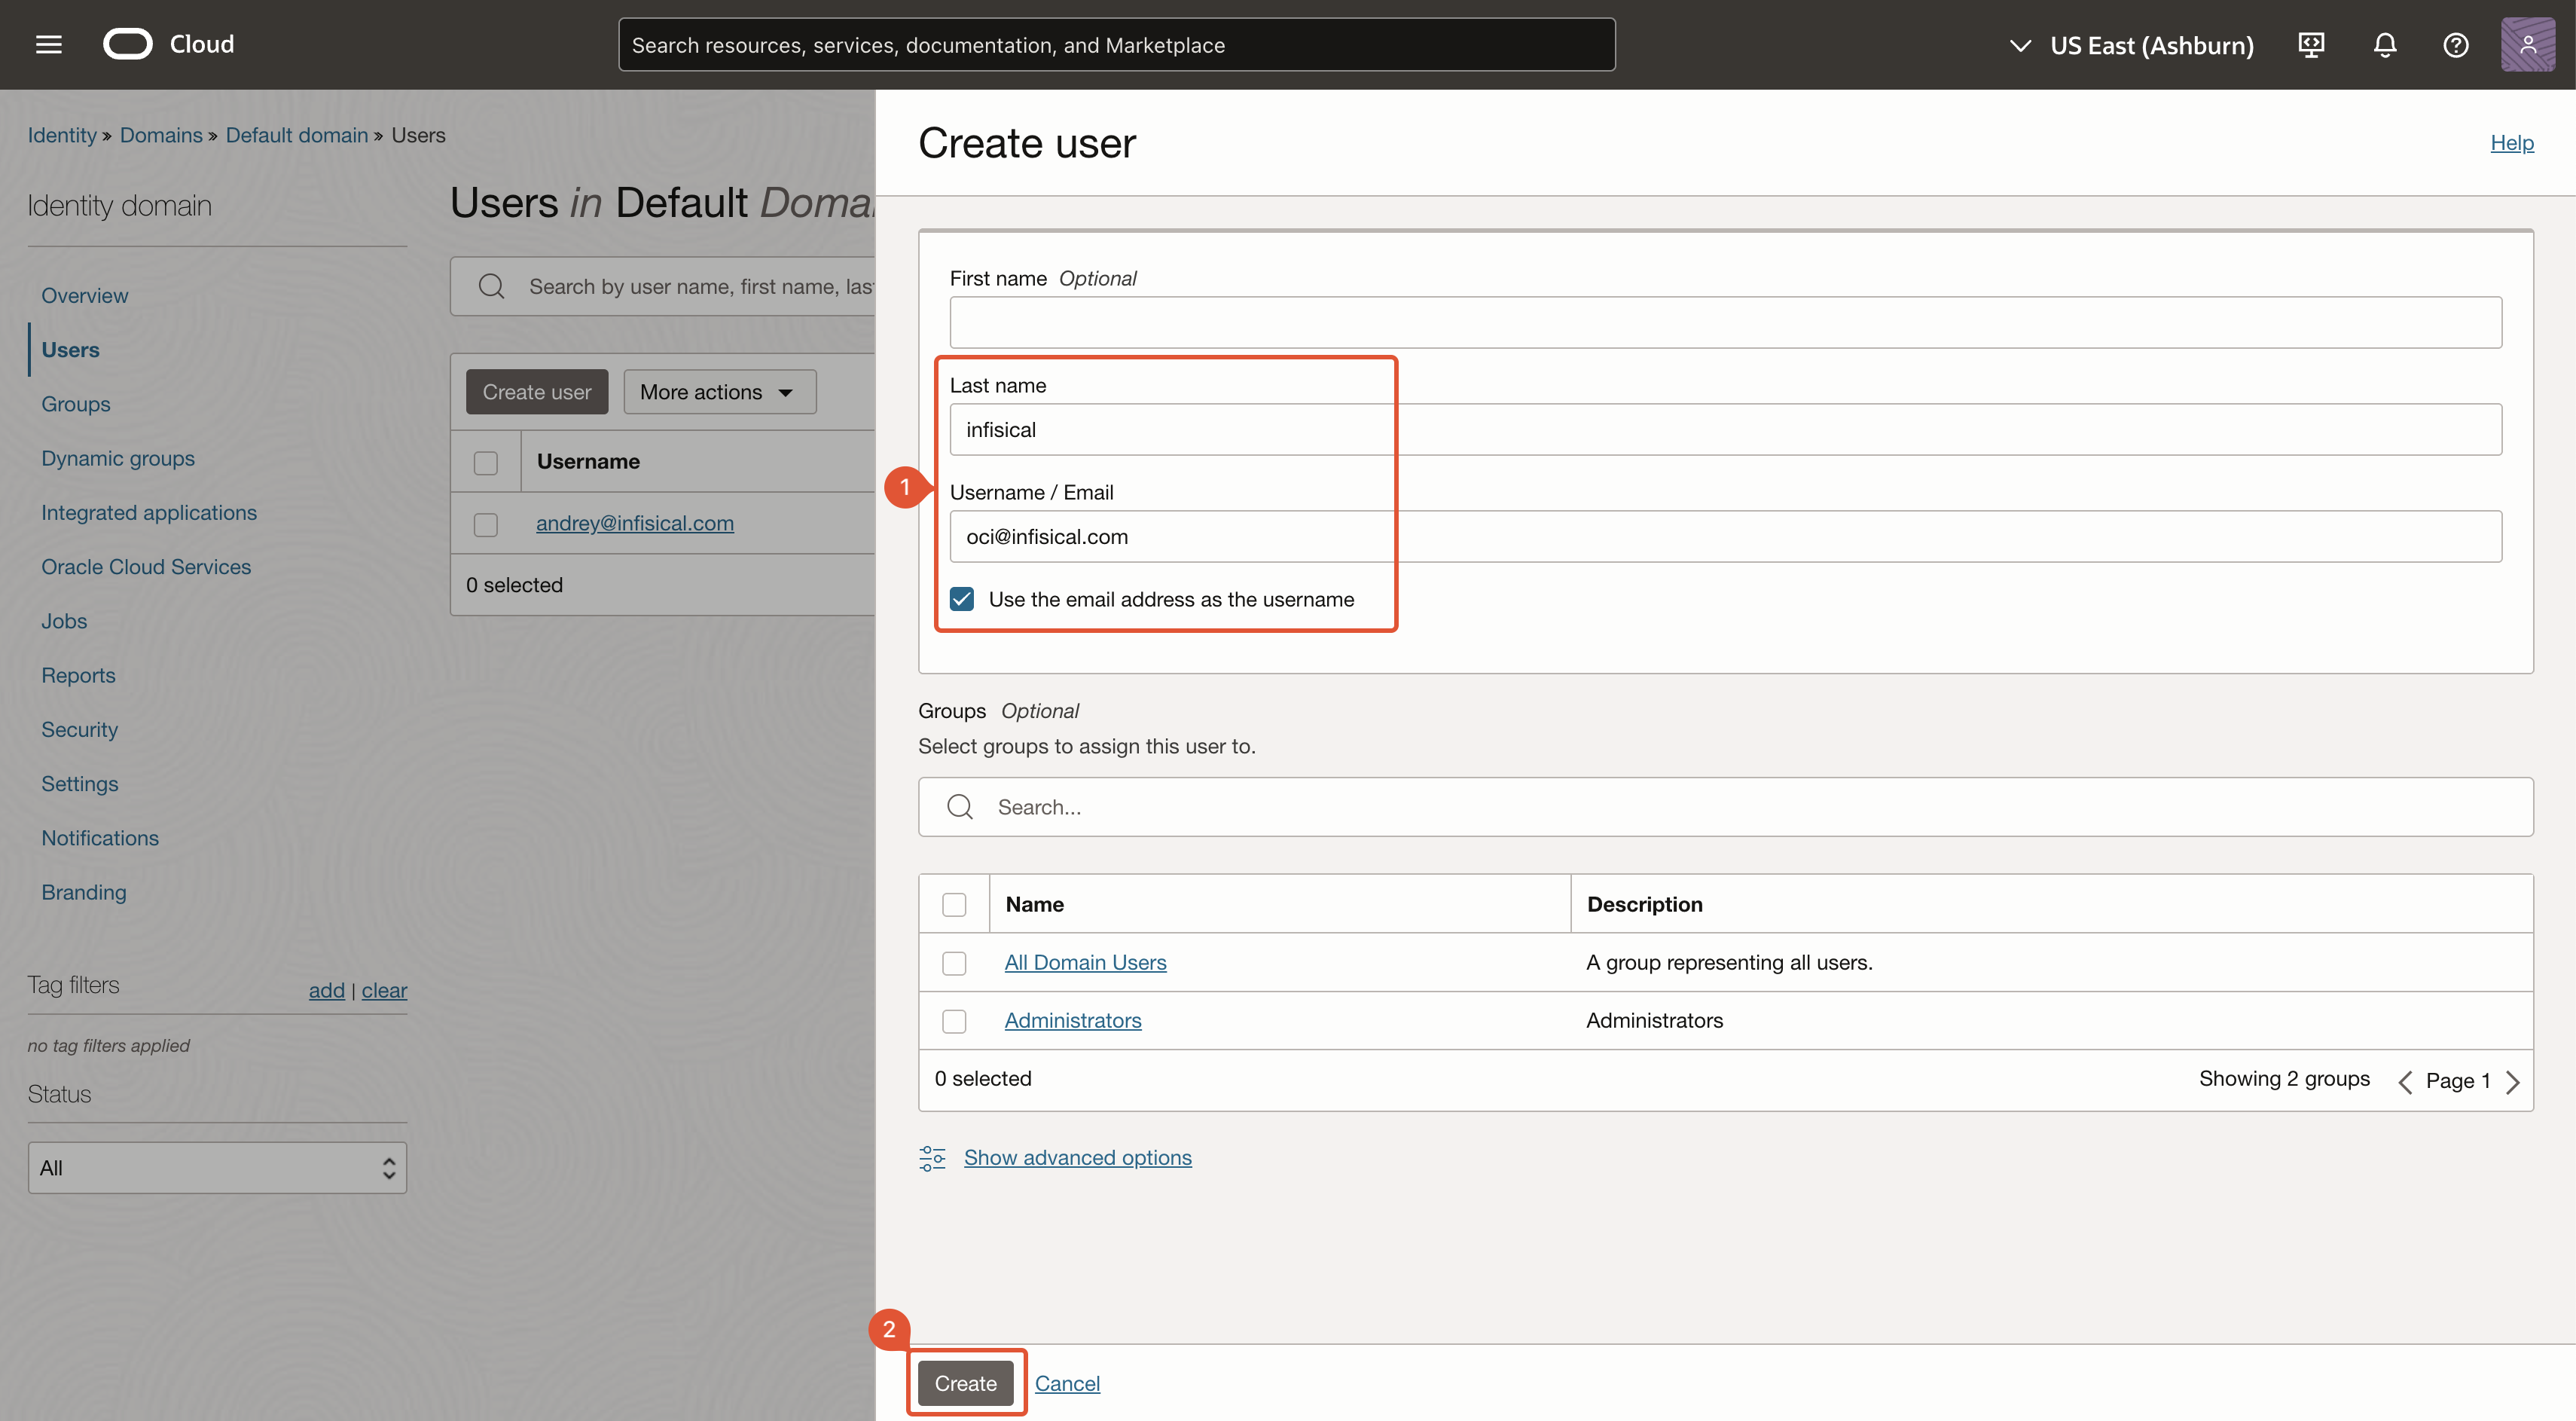
6
Navigate to 'API keys'
After you’ve created a user, you’ll be redirected to the user’s page. Navigate to ‘API keys’.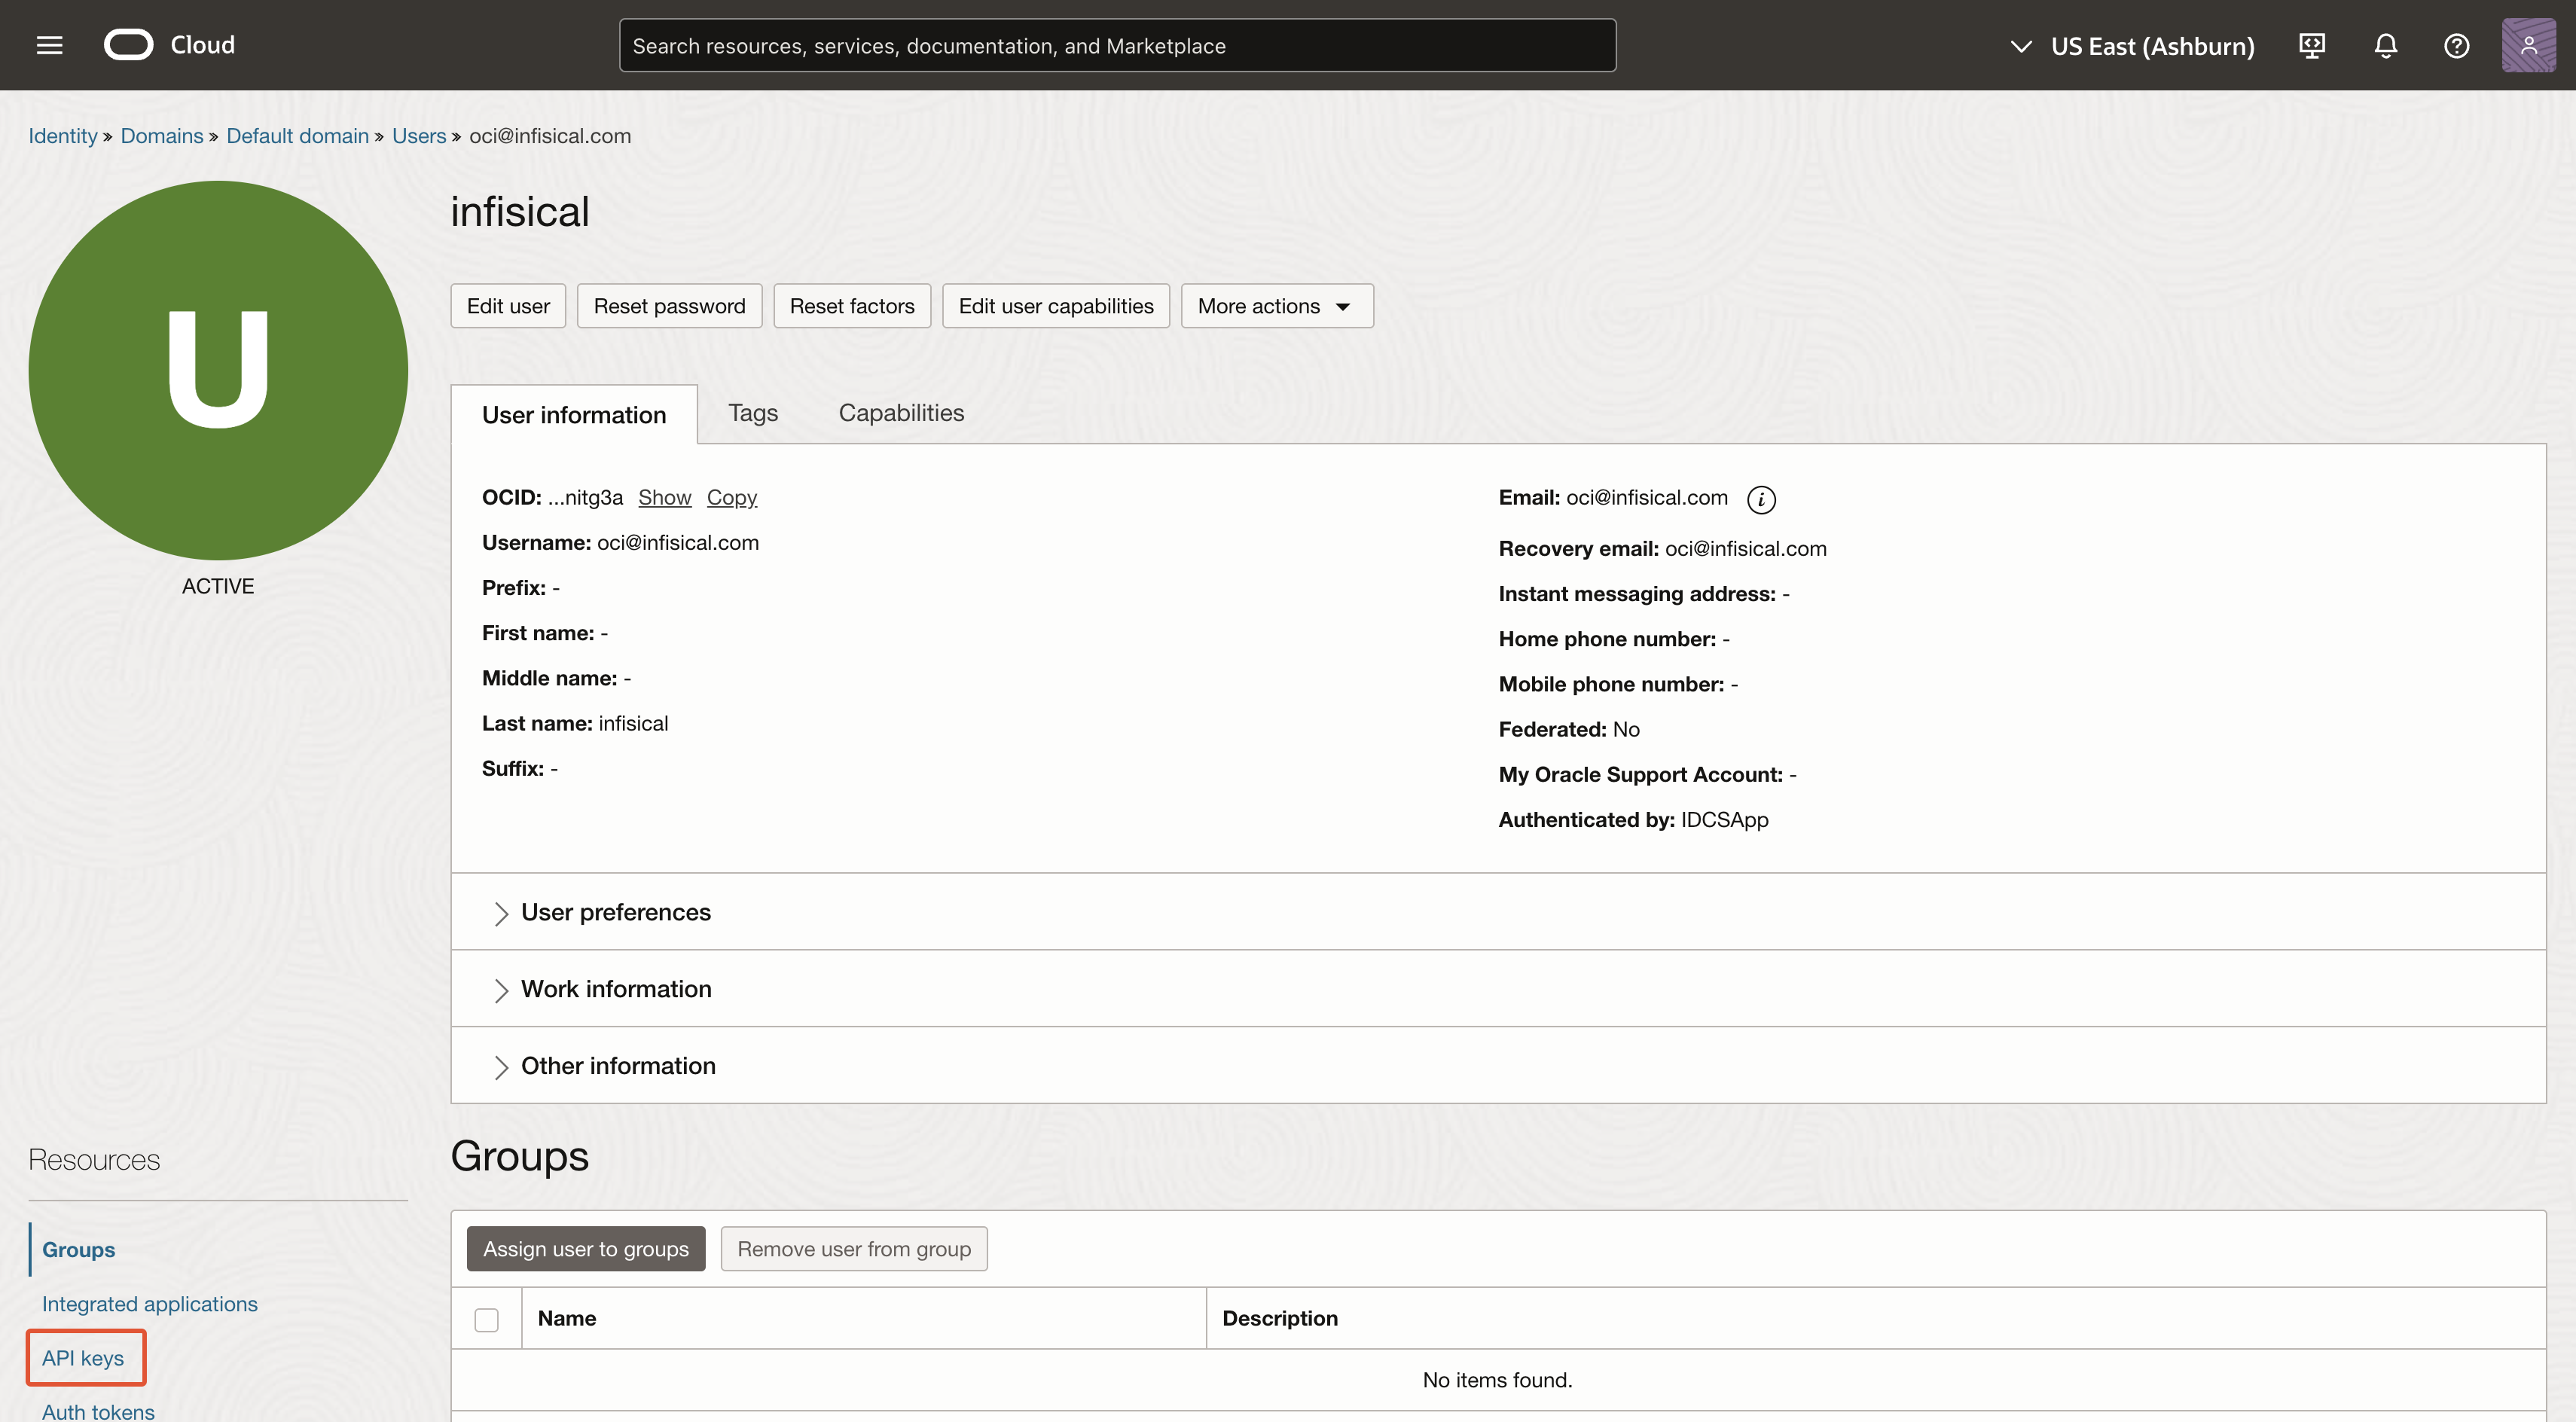
7
Add API key
Click on ‘Add API key’ and then download or import the private key. After you’ve obtained the private key, click ‘Add’.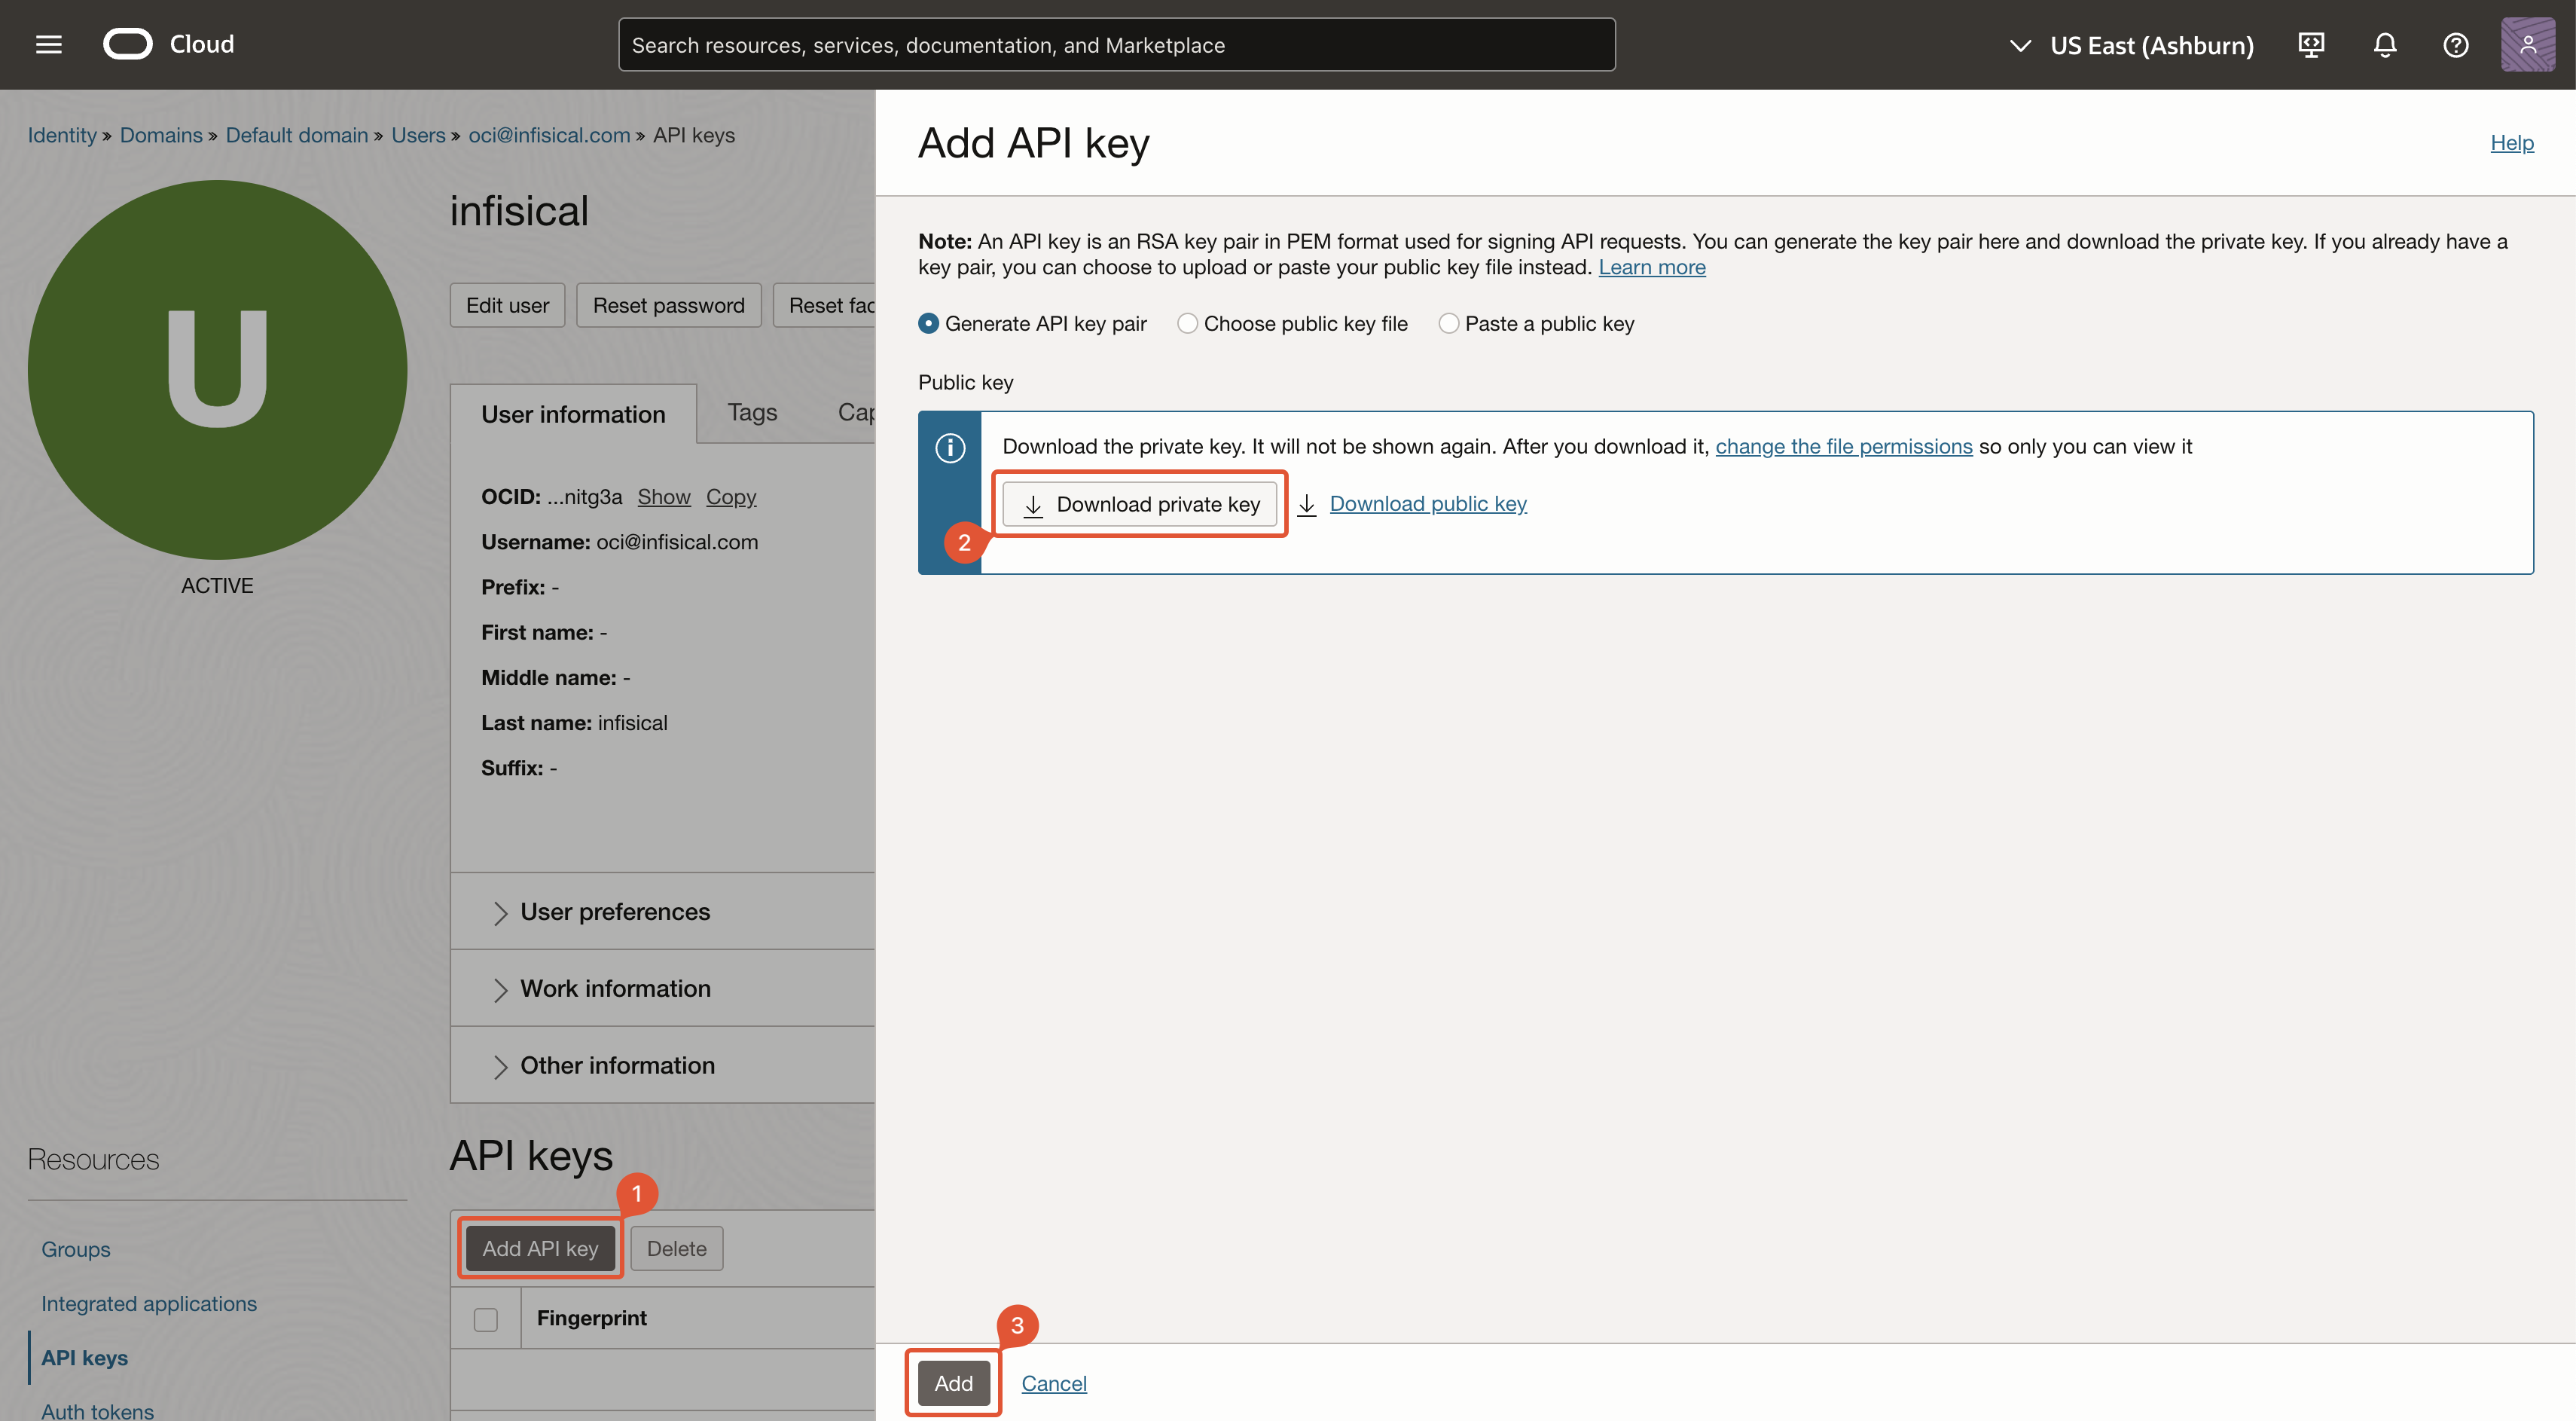
At the end of the downloaded private key file, you’ll see
OCI_API_KEY. This is not apart of the private key, and should not be included when you use the private key to sign requests.8
Store configuration
After creating the API key, you’ll be shown a modal with relevant information. Save the highlighted values (and the private key) for later steps.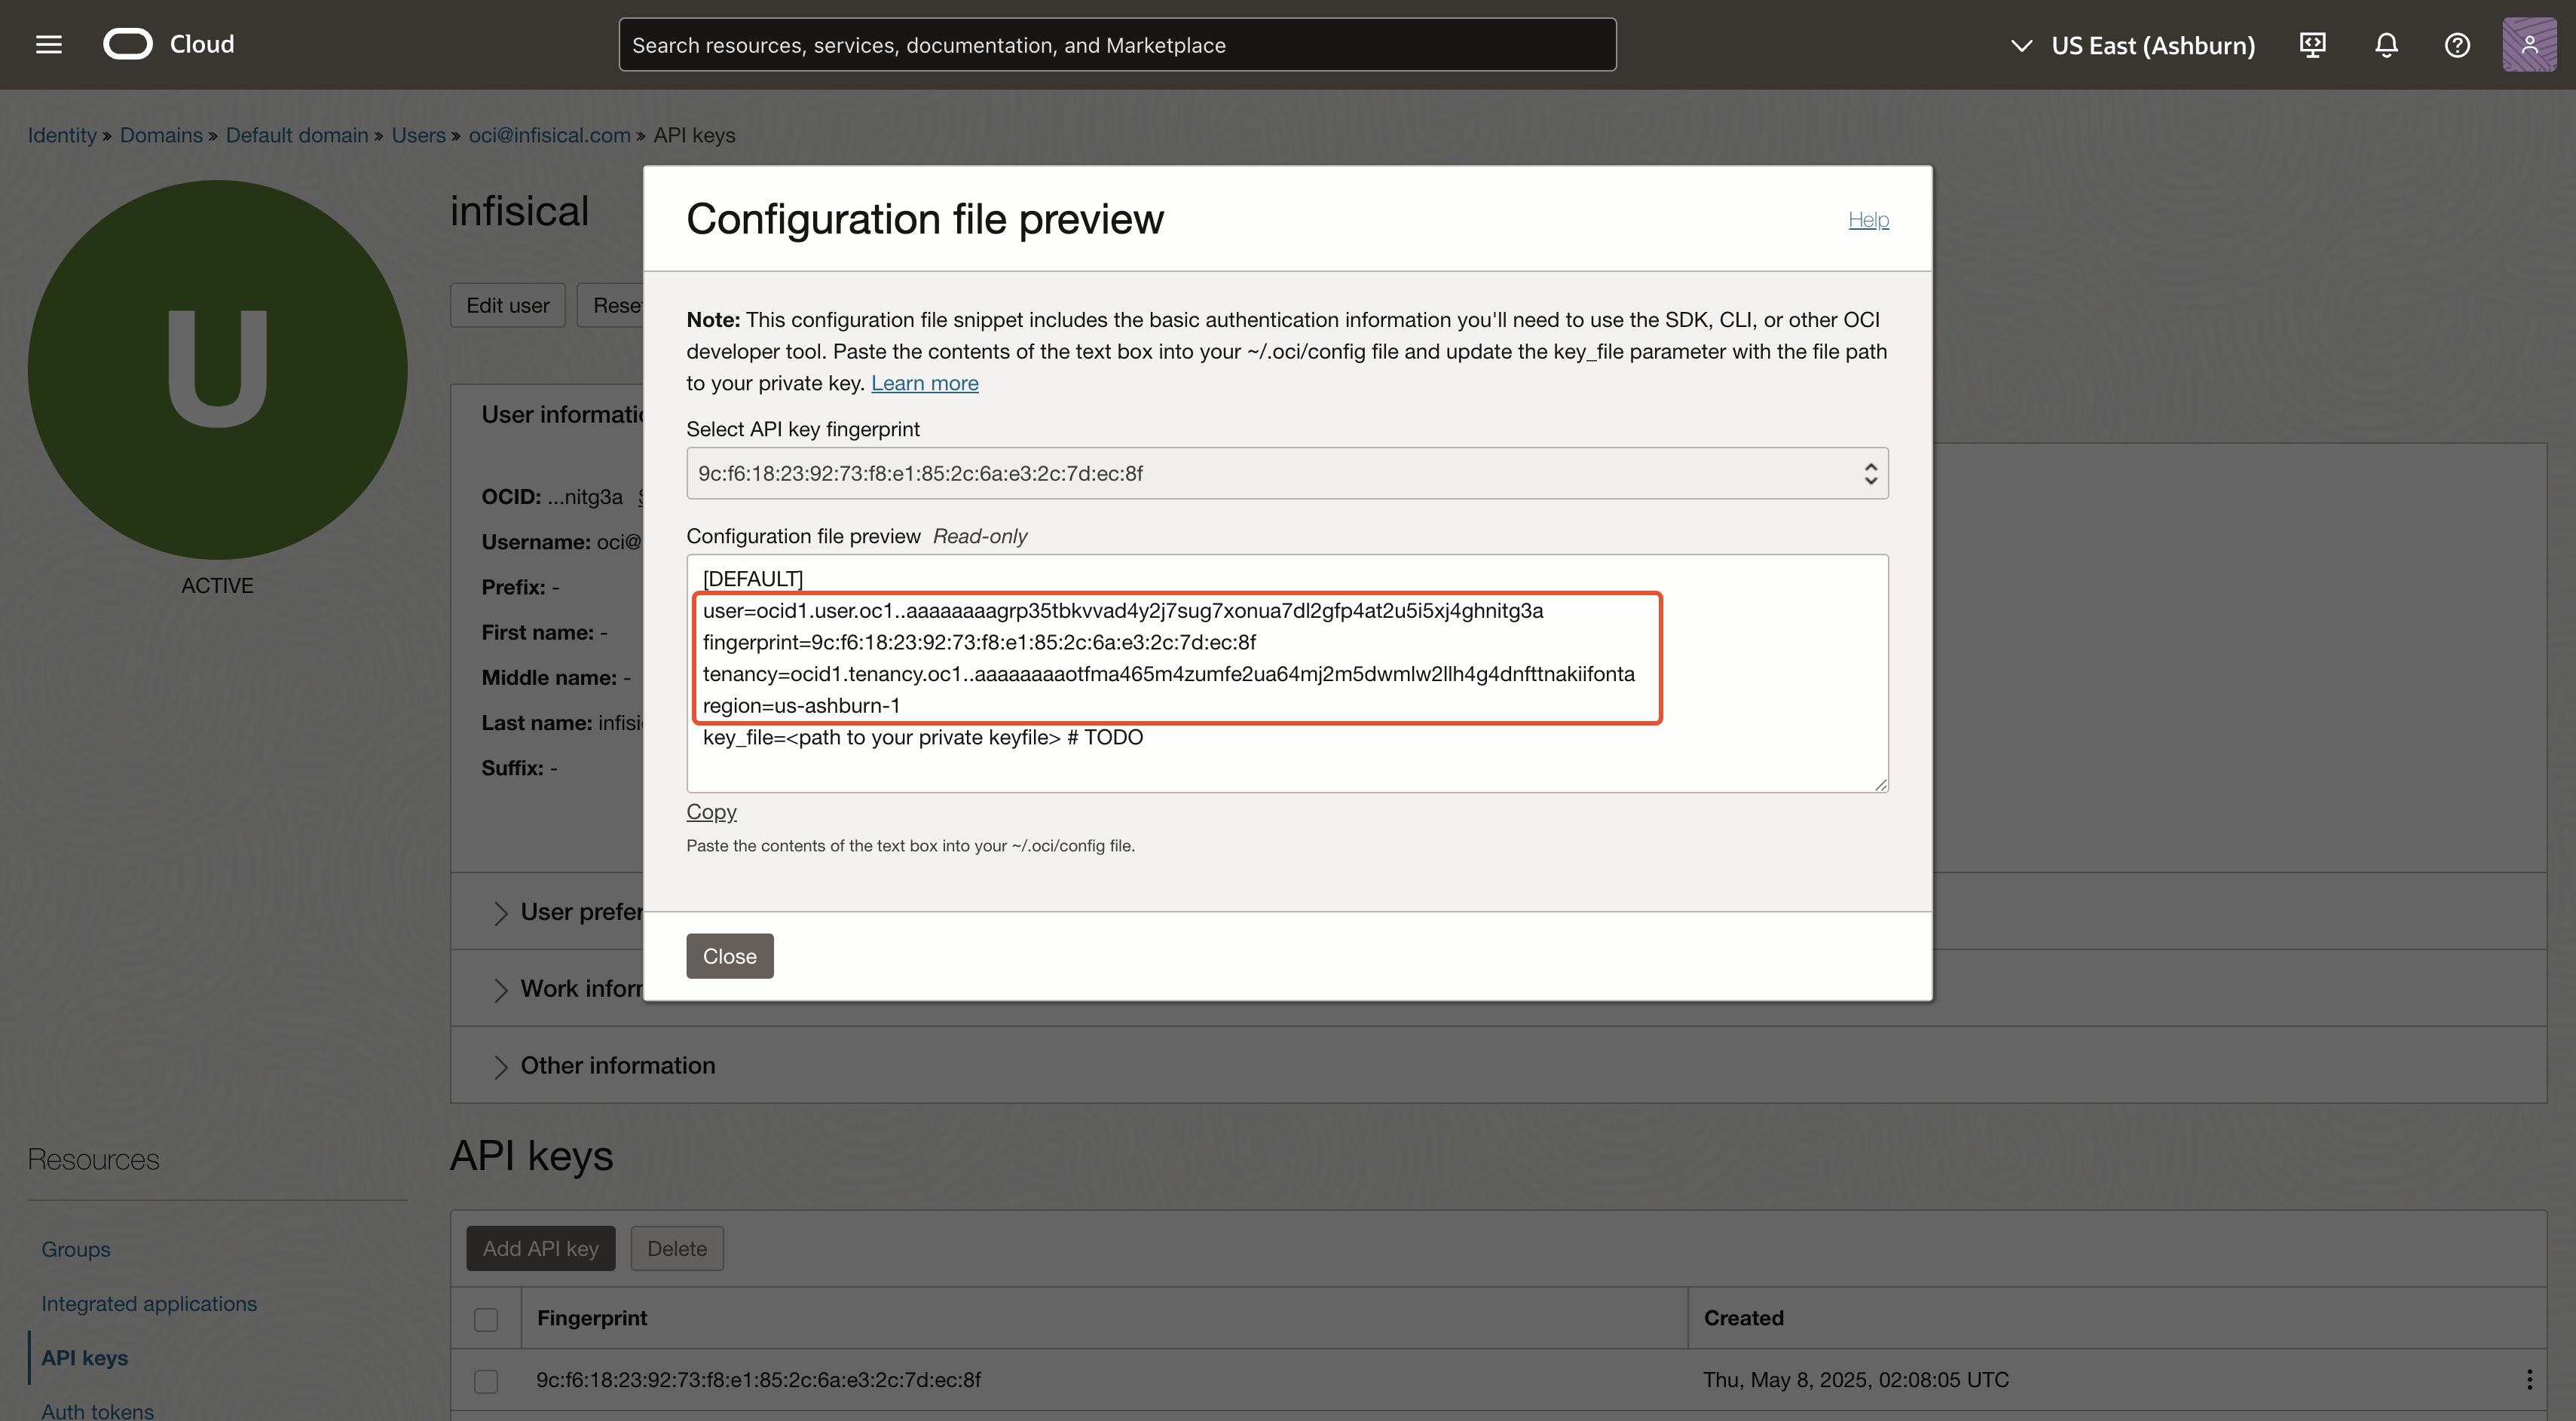
Guide
In the following steps, we explore how to create and use identities for your workloads and applications on OCI to access the Infisical API using the OCI request signing authentication method.Creating an identity
To create an identity, head to your Organization Settings > Access Control > Identities and press Create identity. When creating an identity, you specify an organization-level role for it to assume; you can configure roles in Organization Settings > Access Control > Organization Roles.
 Input some details for your new identity:
- Name (required): A friendly name for the identity.
- Role (required): A role from the Organization Roles tab for the identity to assume. The organization role assigned will determine what organization-level resources this identity can have access to.
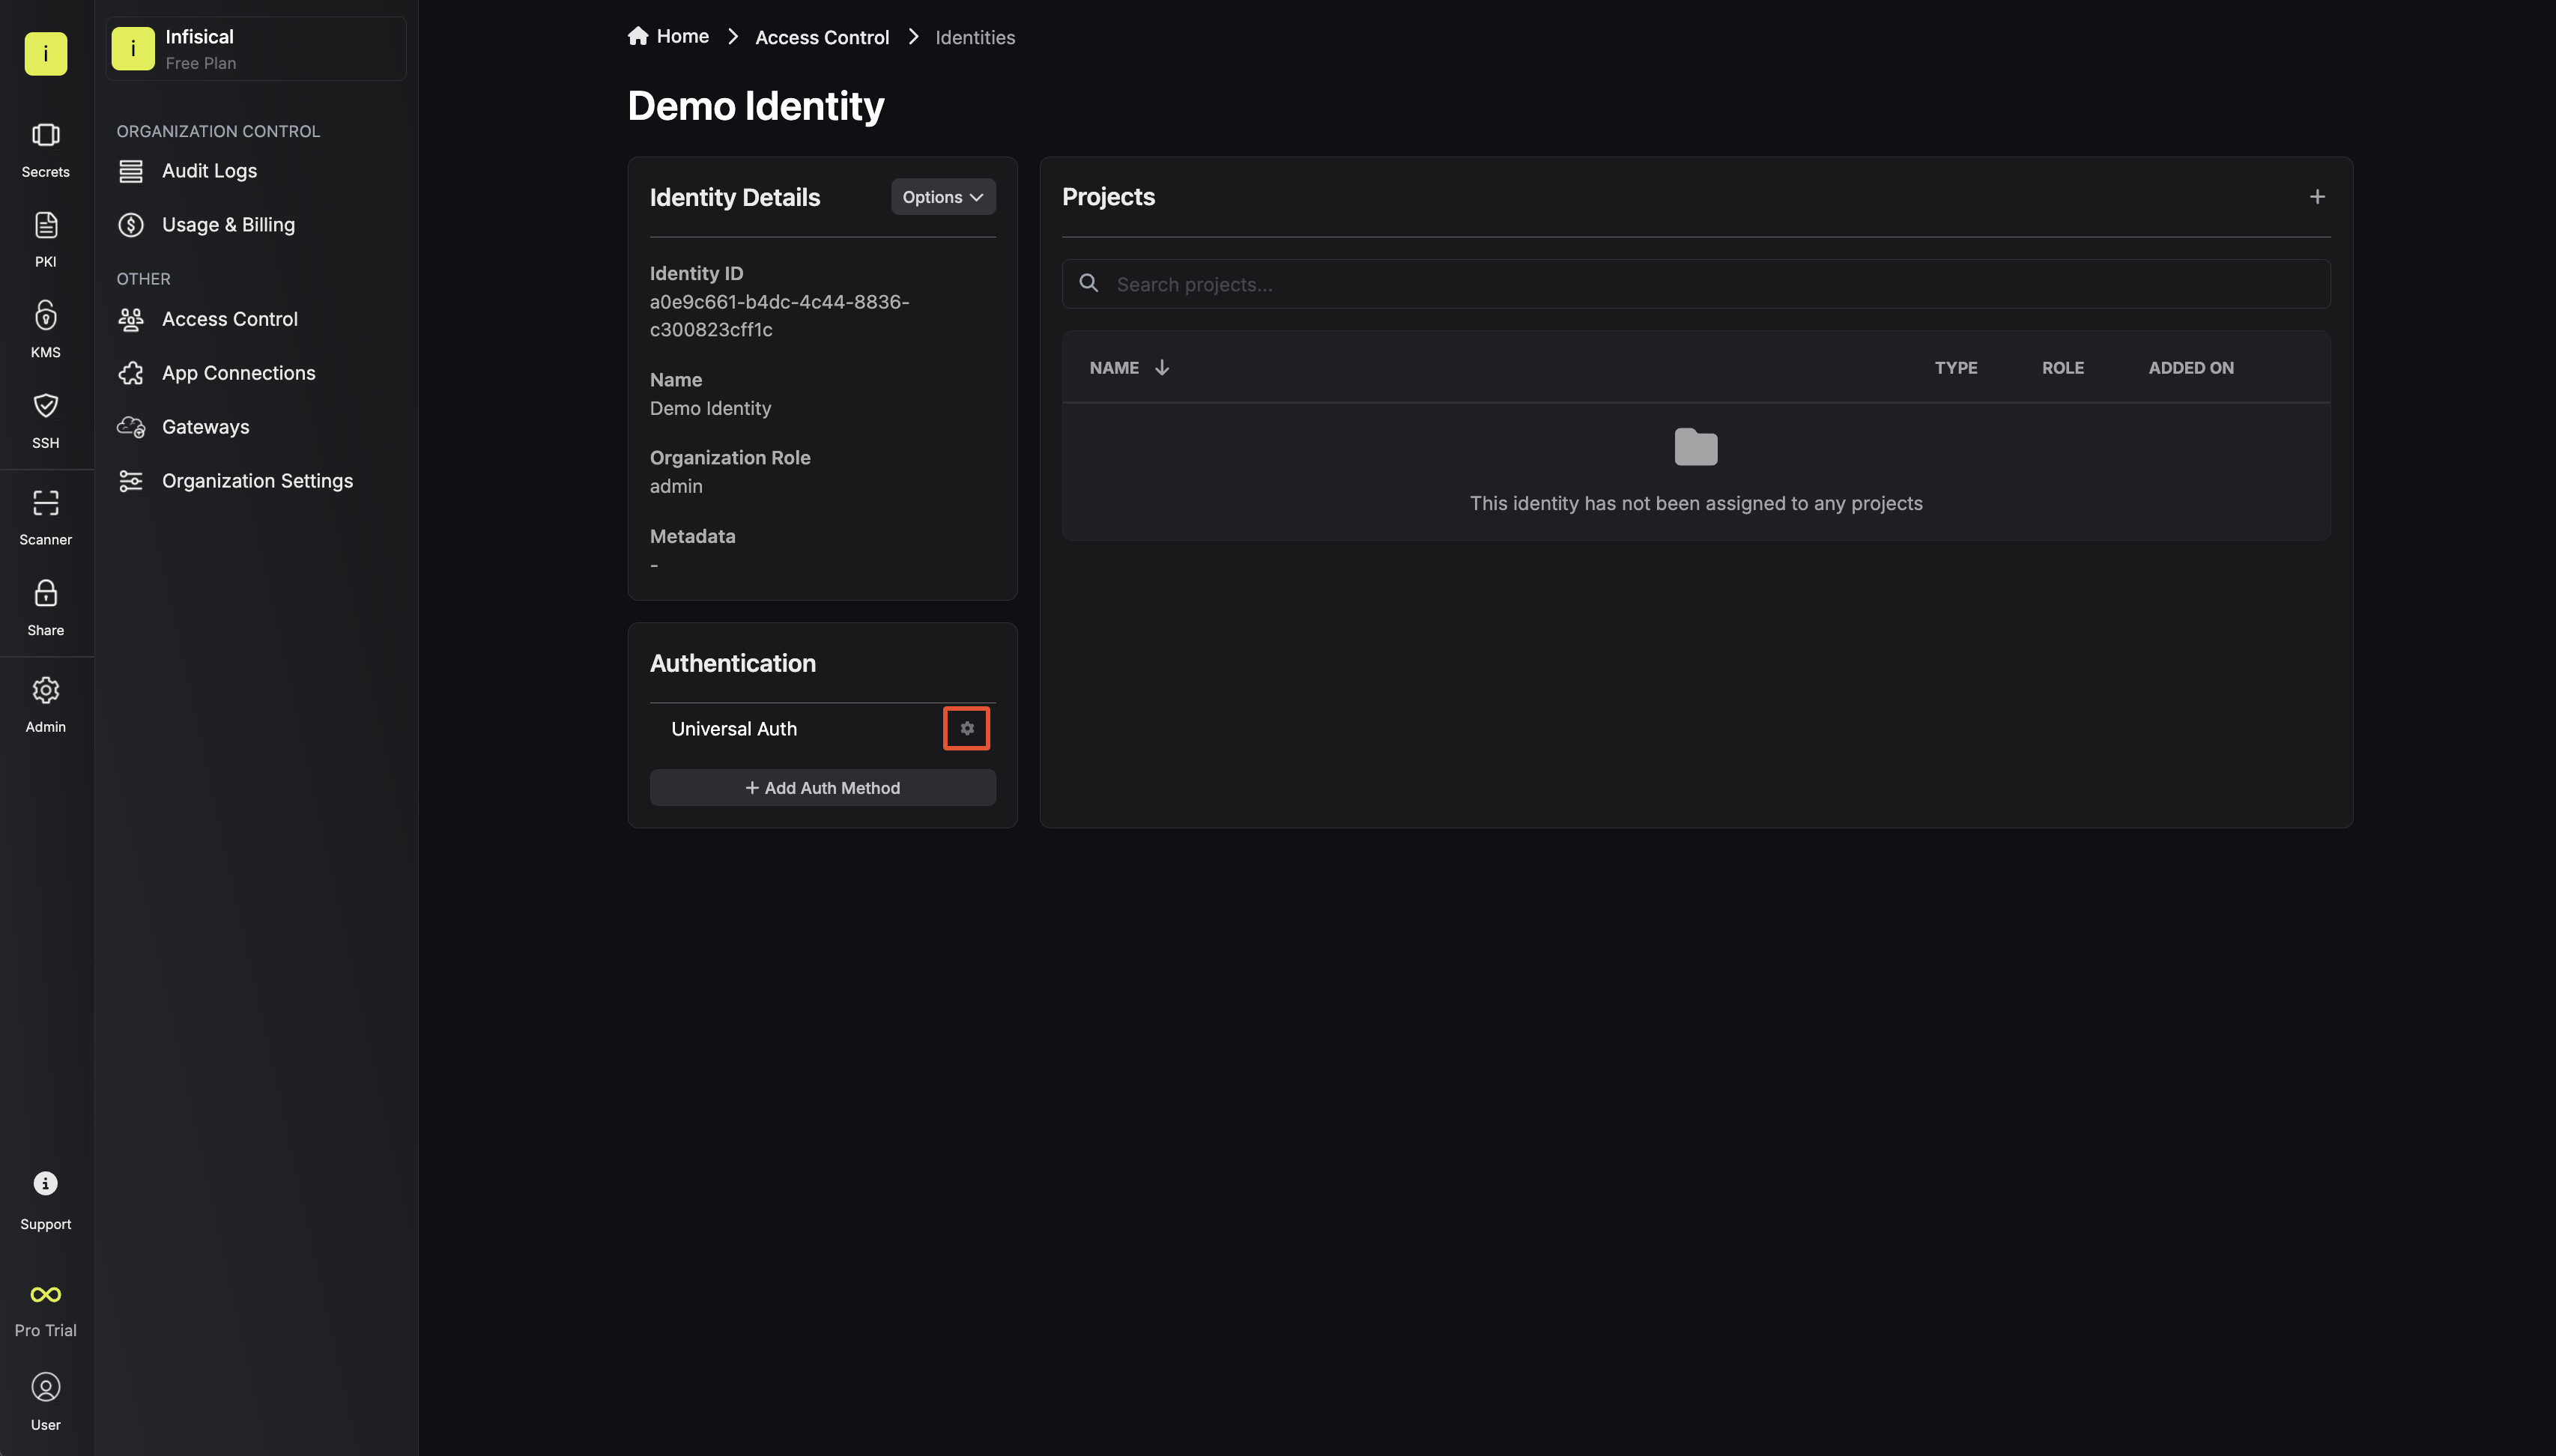
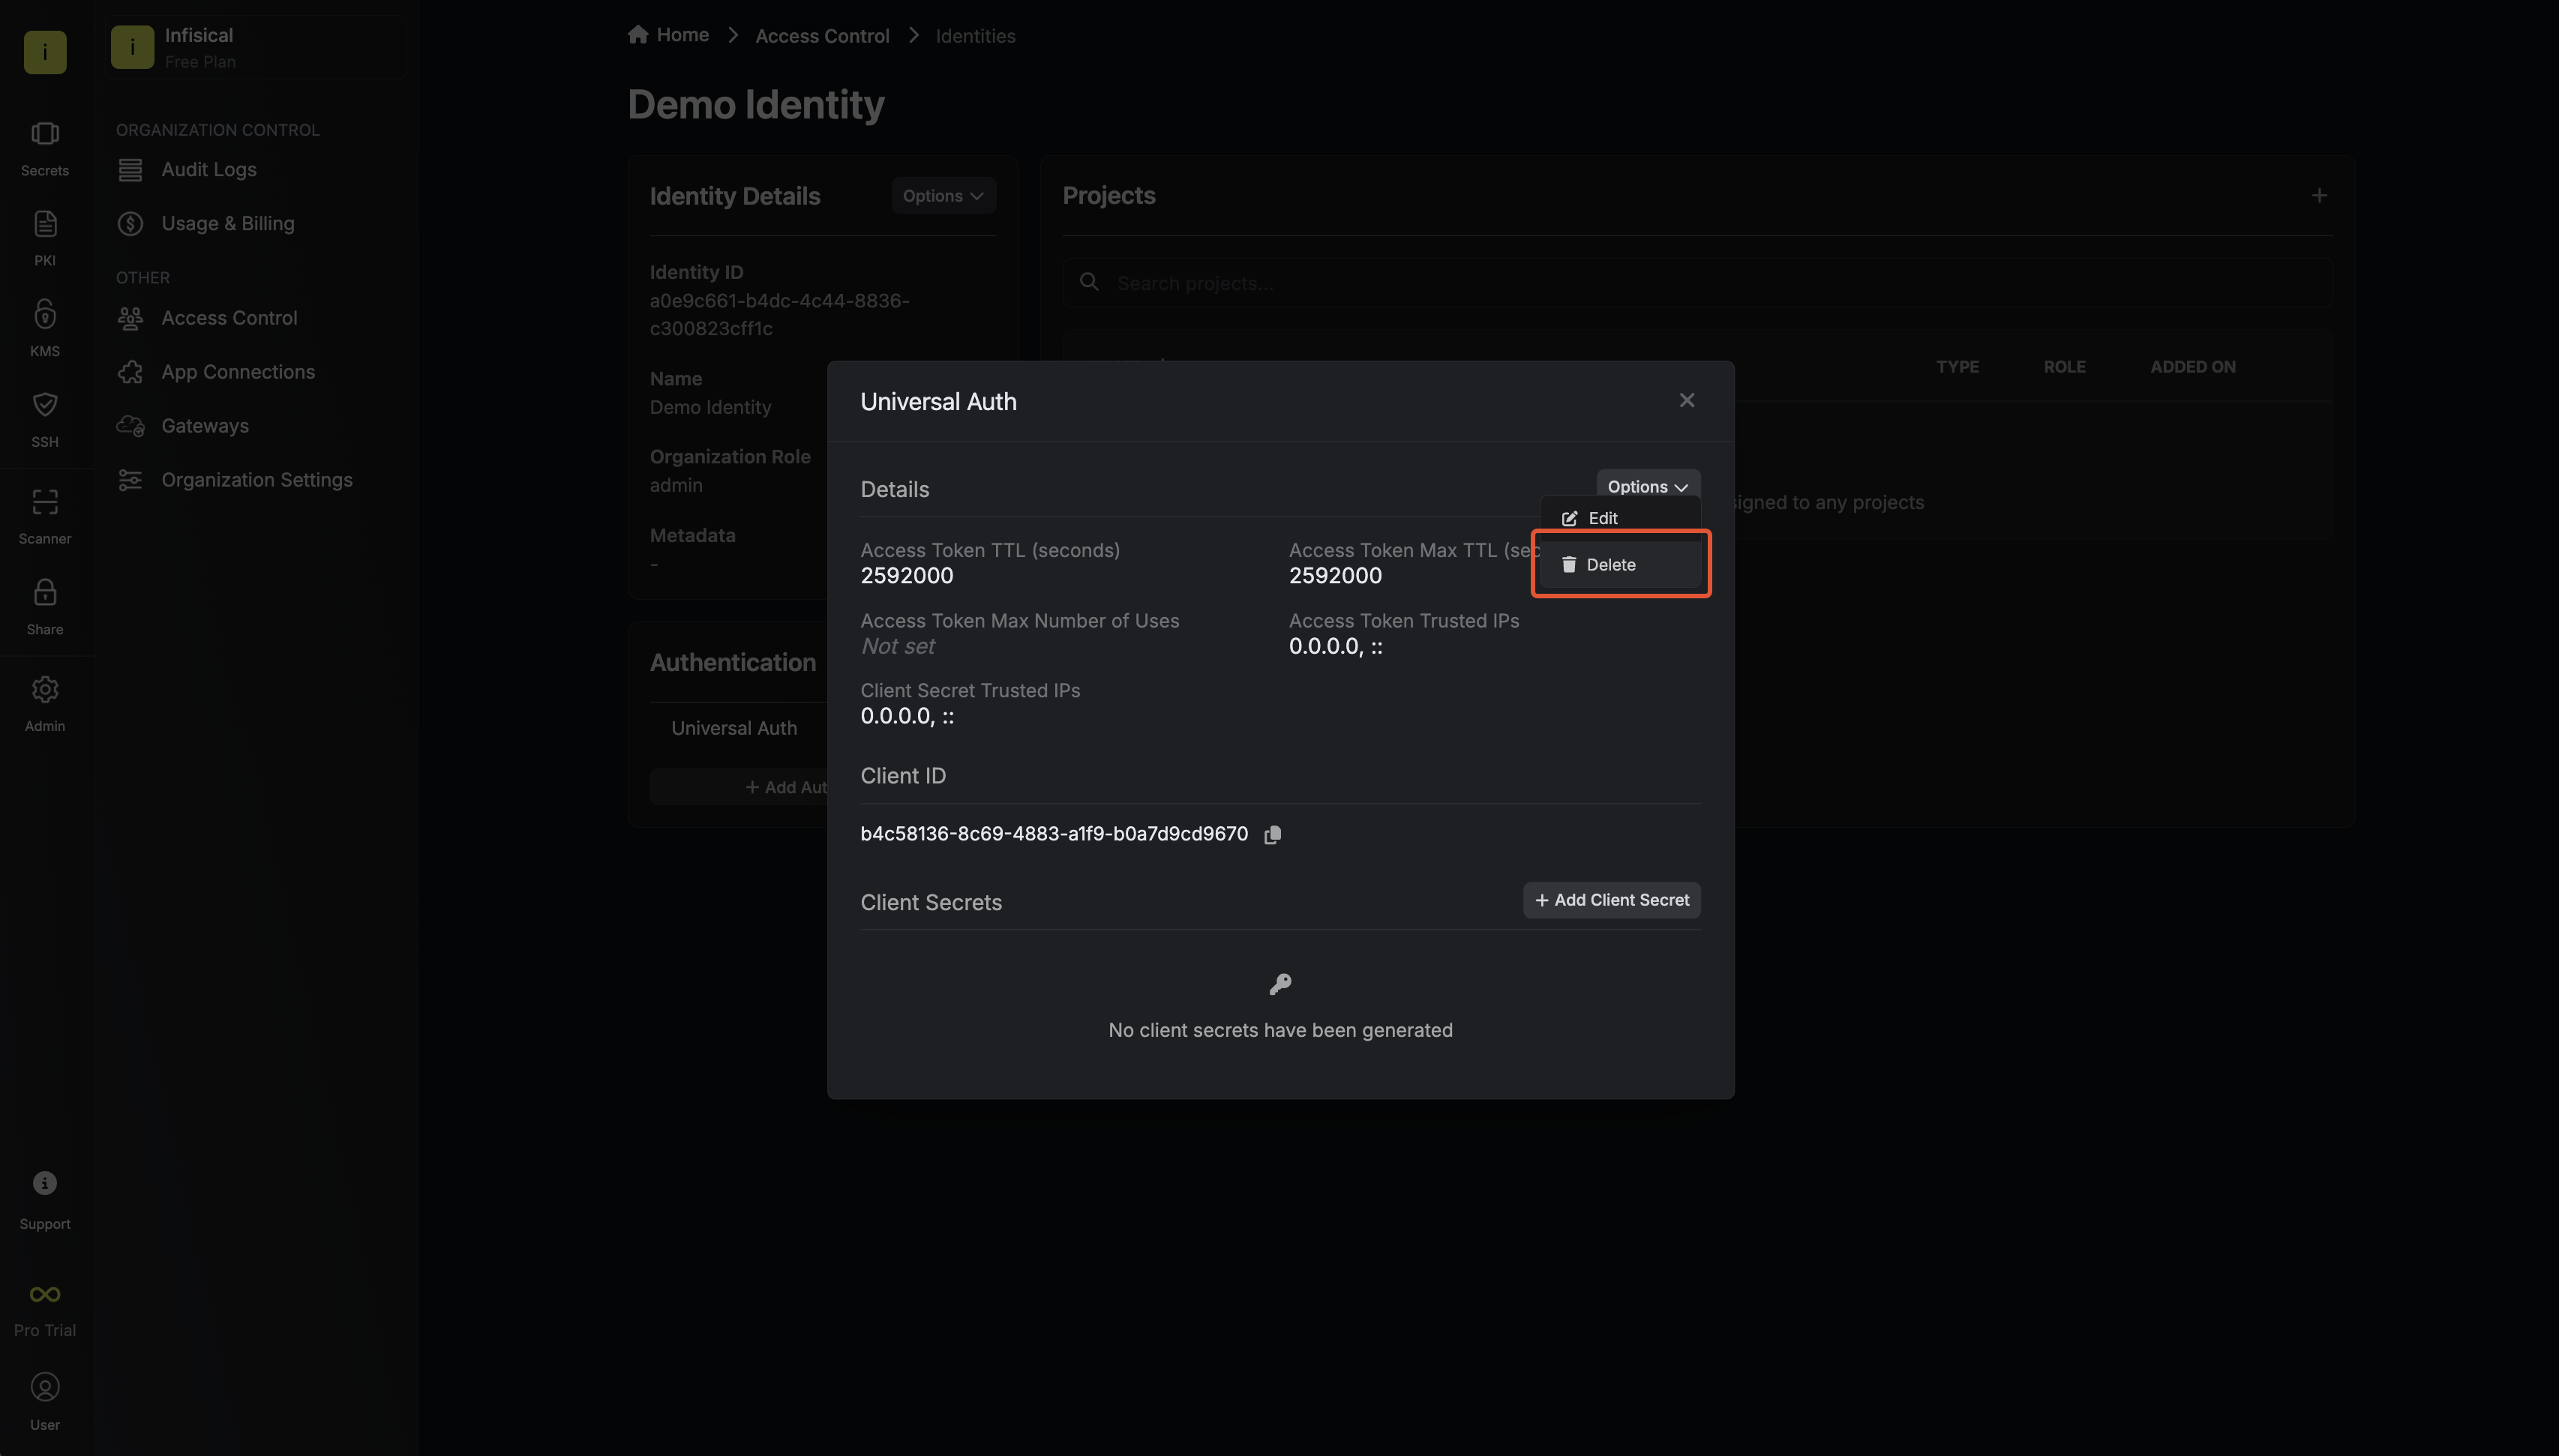
 Since the identity has been configured with Universal Auth by default, you should reconfigure it to use OCI Auth instead. To do this, click the cog next to Universal Auth and then select Delete in the options dropdown.
 Now create a new OCI Auth Method.
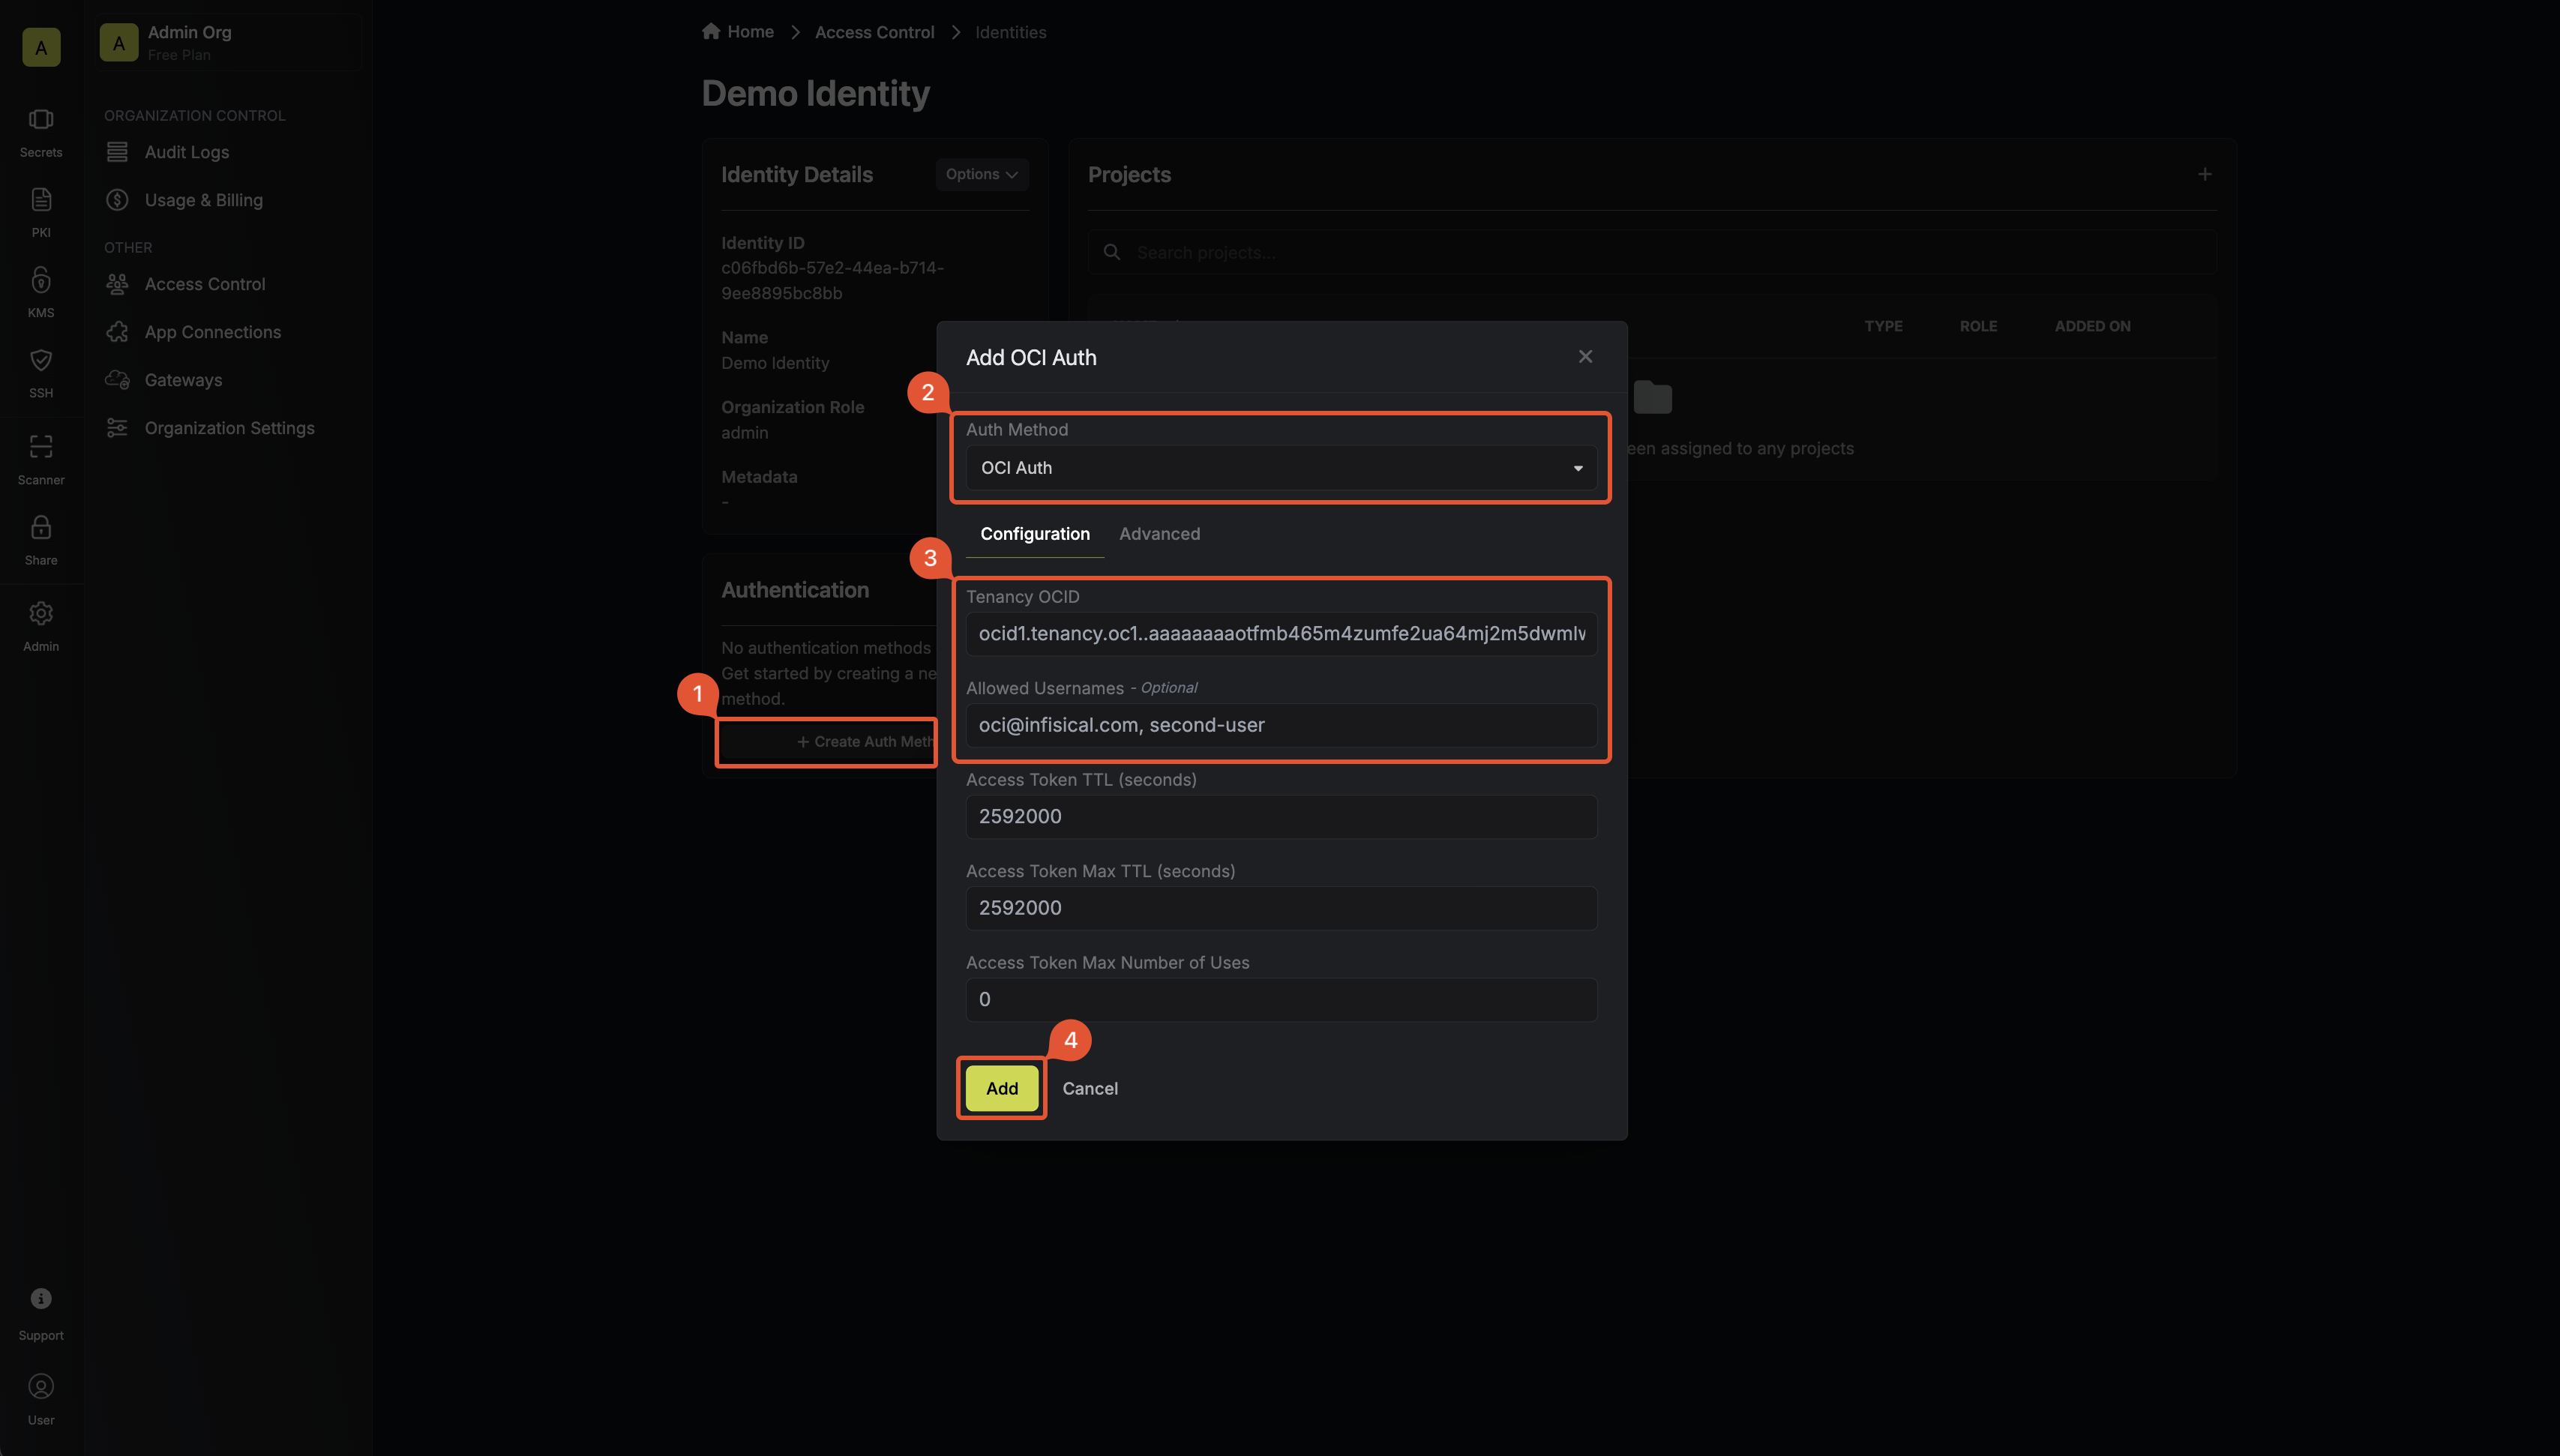 Here’s some information about each field:
- Tenancy OCID: The OCID of your tenancy. All users authenticating must be part of this Tenancy.
- Allowed Usernames: A comma-separated list of trusted OCI users that are allowed to authenticate with Infisical.
- Access Token TTL (default is
2592000equivalent to 30 days): The lifetime for an access token in seconds. This value will be referenced at renewal time. - Access Token Max TTL (default is
2592000equivalent to 30 days): The maximum lifetime for an access token in seconds. This value will be referenced at renewal time. - Access Token Max Number of Uses (default is
0): The maximum number of times that an access token can be used; a value of0implies an infinite number of uses. - Access Token Trusted IPs: The IPs or CIDR ranges that access tokens can be used from. By default, each token is given the
0.0.0.0/0, allowing usage from any network address.
Adding an identity to a project
In order to allow an identity to access project-level resources such as secrets, you must add it to the relevant projects. To do this, head over to the project you want to add the identity to and navigate to Project Settings > Access Control > Machine Identities and press Add Identity. Select the identity you want to add to the project and the project-level role you want it to assume. The project role given to the identity will determine what project-level resources this identity can access.

Accessing the Infisical API with the identity
To access the Infisical API as the identity, you need to construct a signed Get User request using OCI Signature v1 and then make a request to the/api/v1/auth/oci-auth/login endpoint passing the signed header data and user OCID.
Below is an example of how you can authenticate with Infisical using the oci-sdk for NodeJS.
Each identity access token has a time-to-live (TTL) which you can infer from the response of the login operation; the default TTL is
7200 seconds, which can be adjusted.If an identity access token expires, it can no longer access the Infisical API. A new access token should be obtained by performing another login operation.