Guide
Prepare LDAP in JumpCloud
In JumpCloud, head to USER MANAGEMENT > Users and create a new user via the Manual user entry option.
This user will be used as a privileged service account to facilitate Infisical’s ability to bind/search the LDAP directory.Next after creating the user, under User Security Settings and Permissions > Permission Settings, check the box next to Enable as LDAP Bind DN.
Creating an identity
To create an identity, head to your Organization Settings > Access Control > Identities and press Create identity.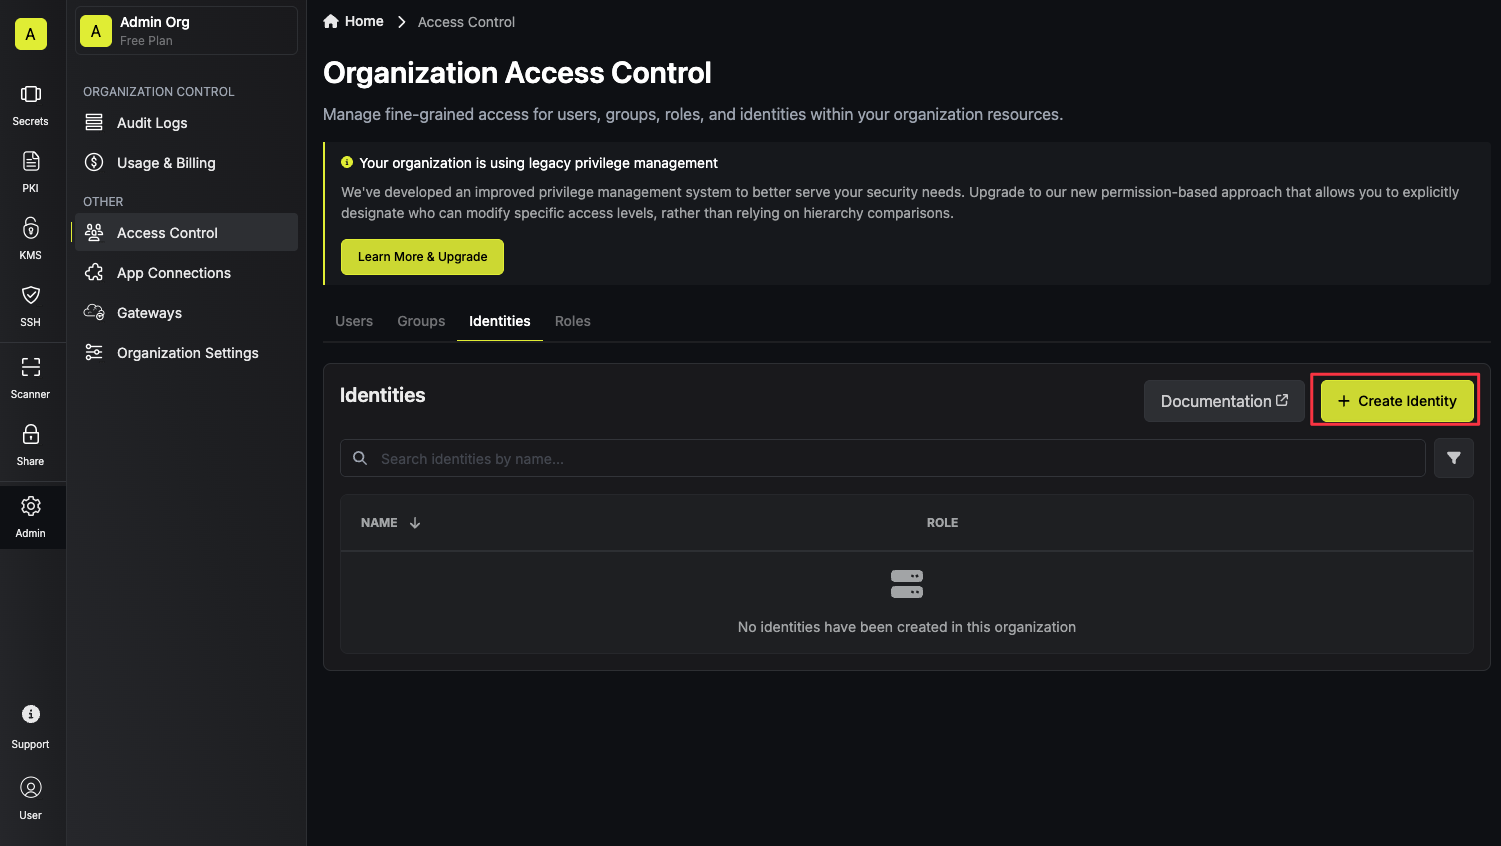 When creating an identity, you specify an organization level role for it to assume; you can configure roles in Organization Settings > Access Control > Organization Roles.
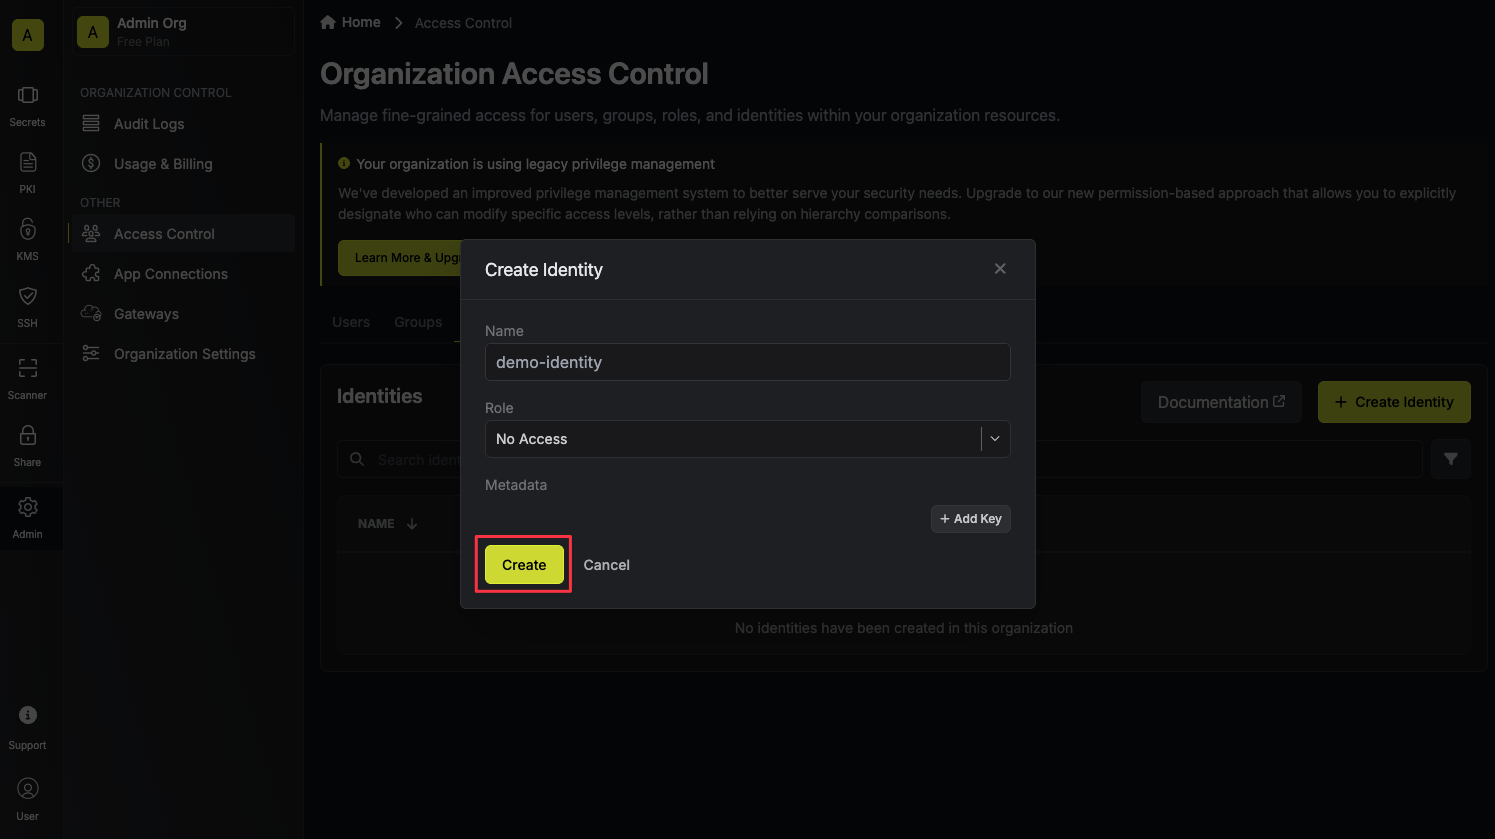 Now input a few details for your new identity. Here’s some guidance for each field:
When creating an identity, you specify an organization level role for it to assume; you can configure roles in Organization Settings > Access Control > Organization Roles.Now input a few details for your new identity. Here’s some guidance for each field:- Name (required): A friendly name for the identity.
- Role (required): A role from the Organization Roles tab for the identity to assume. The organization role assigned will determine what organization level resources this identity can have access to.
Configuring LDAP auth for your identity
To configure LDAP auth for your identity, press the Add Auth Method button on the identity’s page.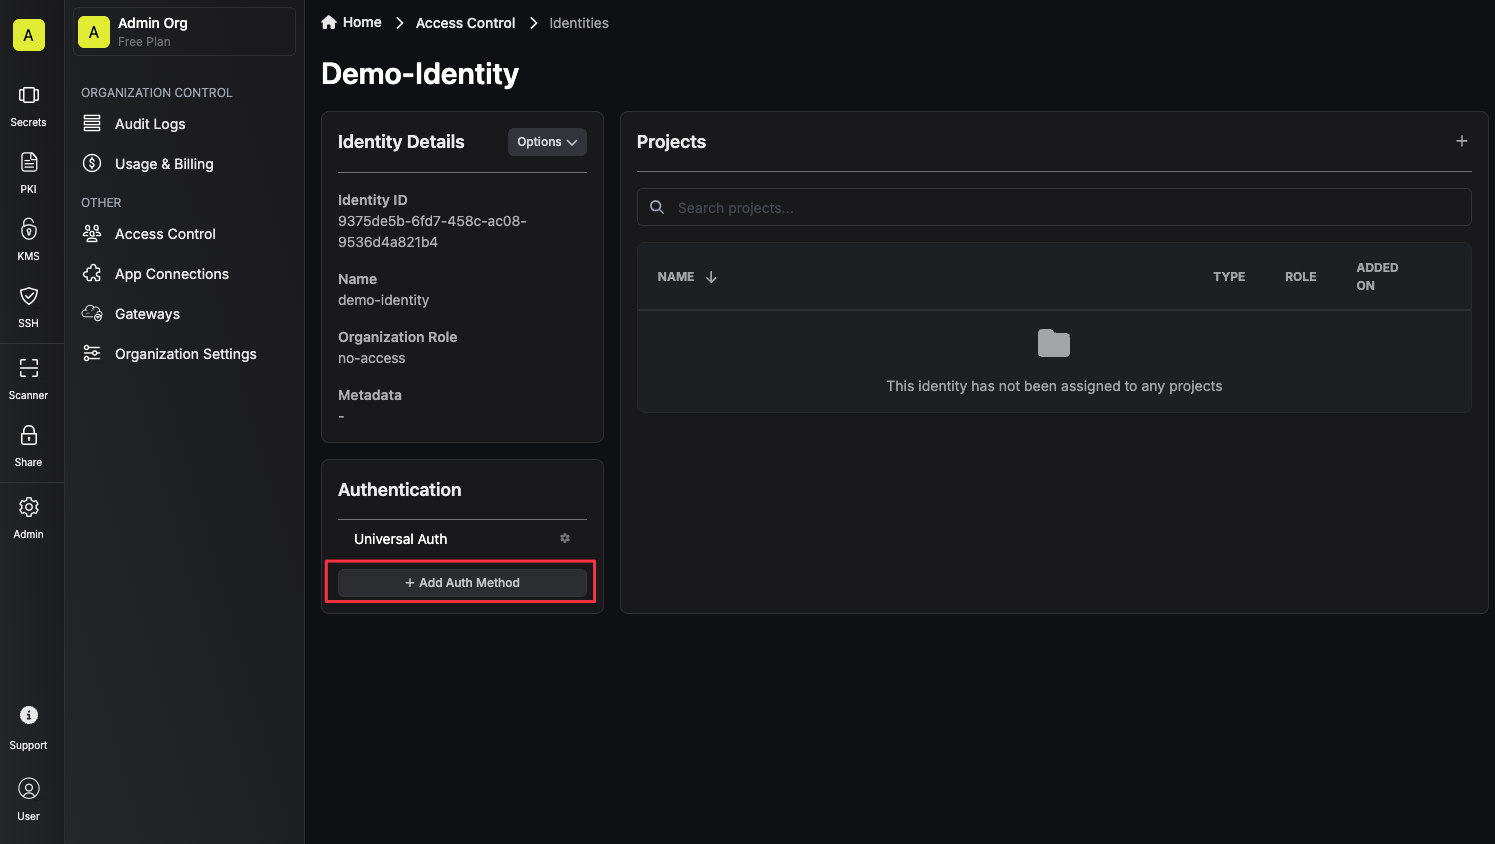 Now select LDAP Auth from the list of available auth methods for the identity.
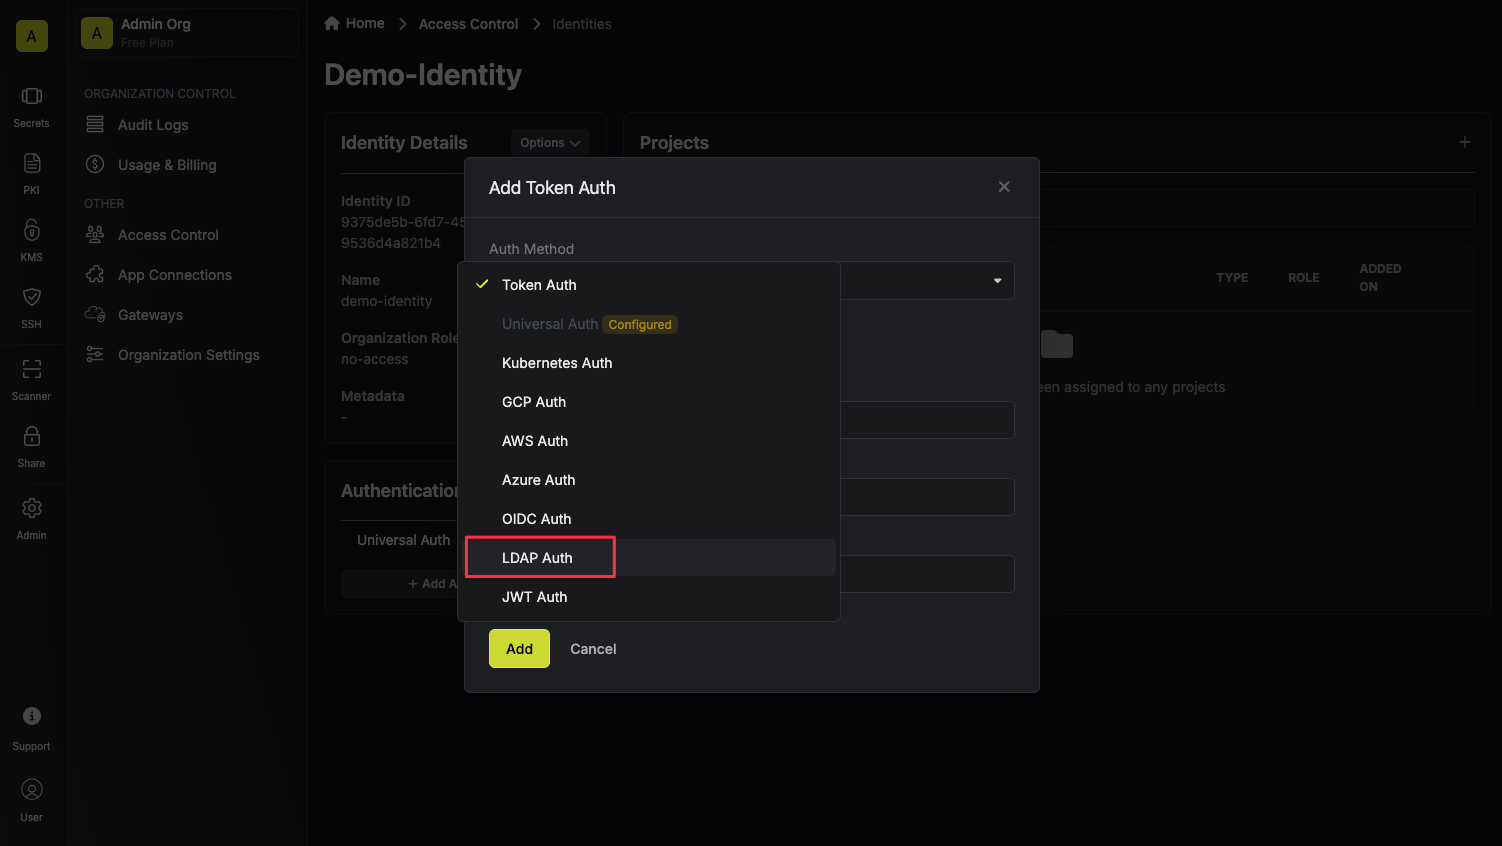 After selecting LDAP Auth, you’ll see the form you need to fill out to configure LDAP auth for your identity. The following fields are available:
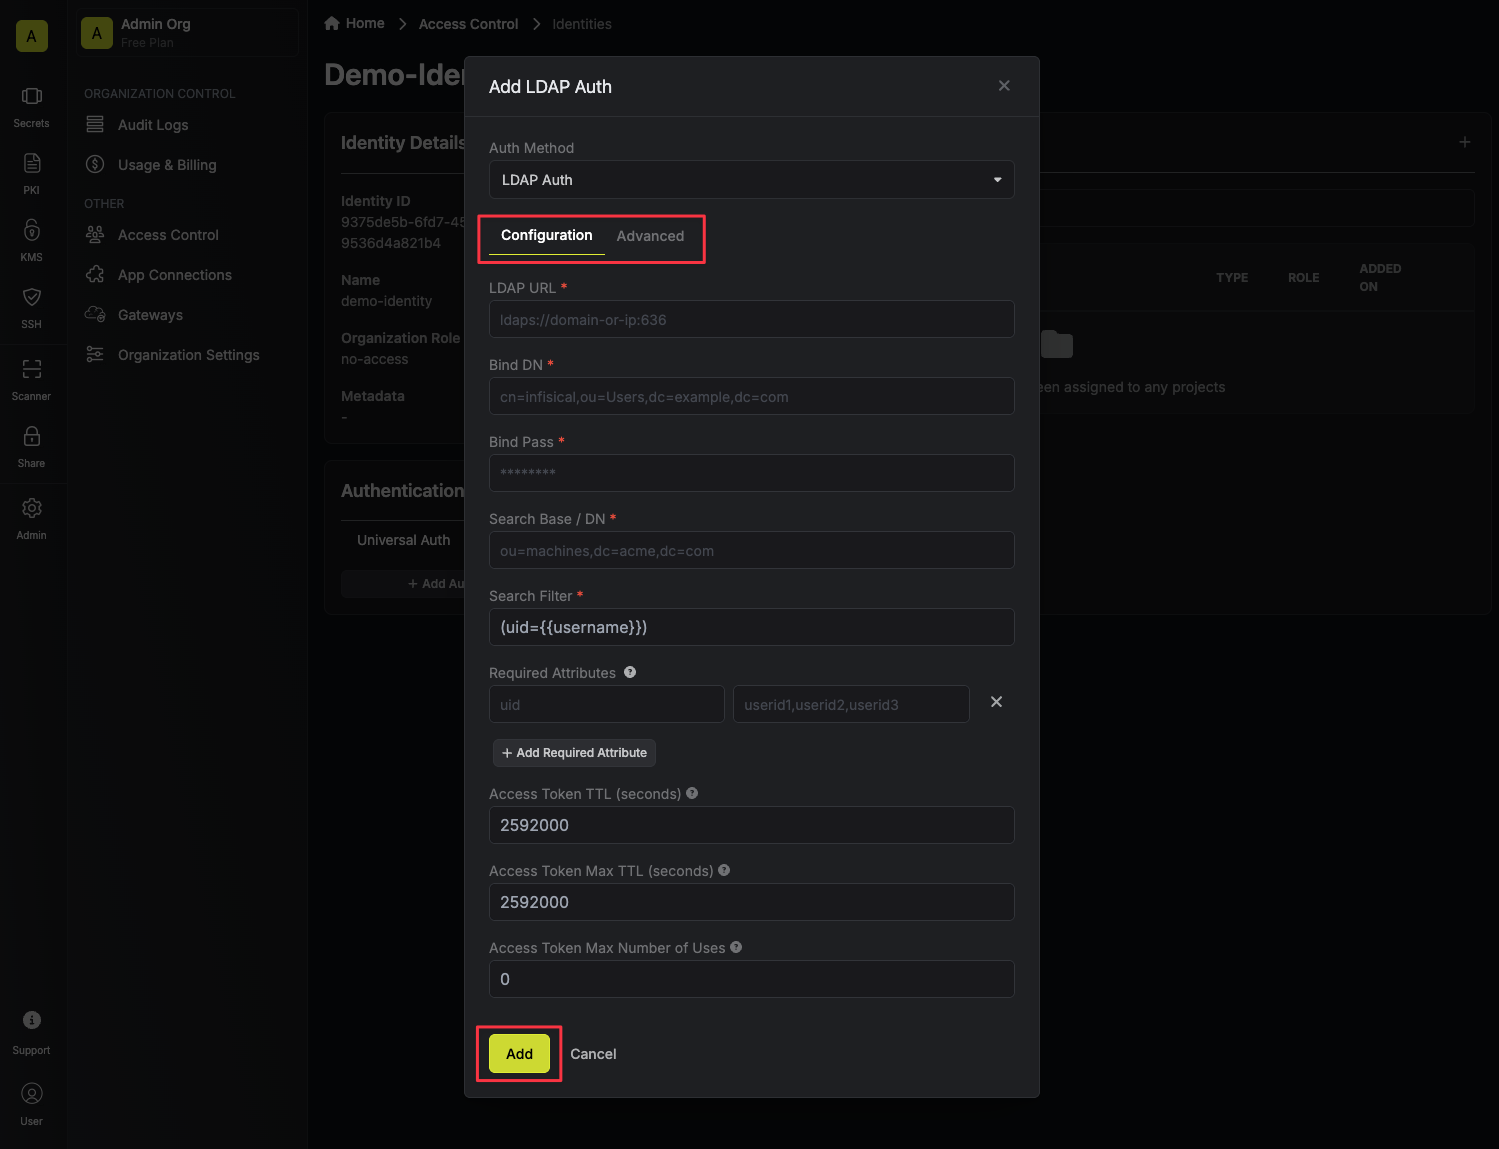
Now select LDAP Auth from the list of available auth methods for the identity.After selecting LDAP Auth, you’ll see the form you need to fill out to configure LDAP auth for your identity. The following fields are available:URL: The LDAP server to connect to (ldaps://ldap.jumpcloud.com:636).Bind DN: The distinguished name of object to bind when performing the user search (uid=<ldap-user-username>,ou=Users,o=<your-org-id>,dc=jumpcloud,dc=com).Bind Pass: The password to use along with Bind DN when performing the user search. This is the password for the user created in the previous step.Search Base / DN: Base DN under which to perform user search (ou=Users,o=<your-org-id>,dc=jumpcloud,dc=com).User Search Filter: Template used to construct the LDAP user search filter ((uid={{username}})).Required Attributes: A key/value pair of attributes that must be present in the LDAP user entry for them to be authenticated. As an example, if you set keyuidto valueuser1,user2,user3, then only users withuidofuser1,user2, oruser3will be able to login with this identity. Each value is a comma separated list of attributes.CA Certificate: The CA certificate to use when verifying the LDAP server certificate (instructions to obtain the certificate for JumpCloud here).Access Token TTL(default is 2592000 equivalent to 30 days): The lifetime for an access token in seconds. This value will be referenced at renewal time.Access Token Max TTL(default is 2592000 equivalent to 30 days): The maximum lifetime for an access token in seconds. This value will be referenced at renewal time.Access Token Max Number of Uses(default is 0): The maximum number of times that an access token can be used; a value of 0 implies infinite number of uses.Access Token Trusted IPs: The IPs or CIDR ranges that access tokens can be used from. By default, each token is given the 0.0.0.0/0, allowing usage from any network address.
Authenticating with the identity
After configuring LDAP auth for your identity, you can authenticate with the identity and obtain an access token using your LDAP credentials.If successful, you’ll receive an access token in the response body.You can read more about the login API endpoint here.
For EU Cloud and Self-Hosted users, make sure to replace
https://app.infisical.com with https://eu.infisical.com or your self-hosted instance’s URL in the request URL.