Groups is a paid feature. If you’re using Infisical Cloud, then it is
available under the Enterprise Tier. If you’re self-hosting Infisical,
then you should contact sales@infisical.com to purchase an enterprise license
to use it.
Concept
A group is a collection of identities (users and/or machine identities) that you can create in an Infisical organization to more efficiently manage permissions and access control for multiple identities together. For example, you can have a group calledMembers with the Member role containing all the members in your organization, or a group called CI/CD Identities containing all the machine identities used in your CI/CD pipelines.
Groups have the following properties:
- If a group is added to a project under specific role(s), all identities in the group will be provisioned access to the project with the role(s). Conversely, if a group is removed from a project, all identities in the group will lose access to the project.
- If an identity is added to a group, they will inherit the access control properties of the group including access to project(s) under the role(s) assigned to the group. Conversely, if an identity is removed from a group, they will lose access to project(s) that the group has access to.
- If an identity was previously added to a project under a role and is later added to a group that has access to the same project under a different role, then the identity will now have access to the project under the composite permissions of the two roles. If the group is subsequently removed from the project, the identity will not lose access to the project as they were previously added to the project separately.
- An identity can be part of multiple groups. If an identity is part of multiple groups, they will inherit the composite permissions of all the groups that they are part of.
Workflow
In the following steps, we explore how to create and use groups to provision access to projects in Infisical. Groups can contain both users and machine identities, and the workflow is the same for both types of identities.1
Creating a group
To create a group, head to your Organization Settings > Access Control > Groups and press Create group.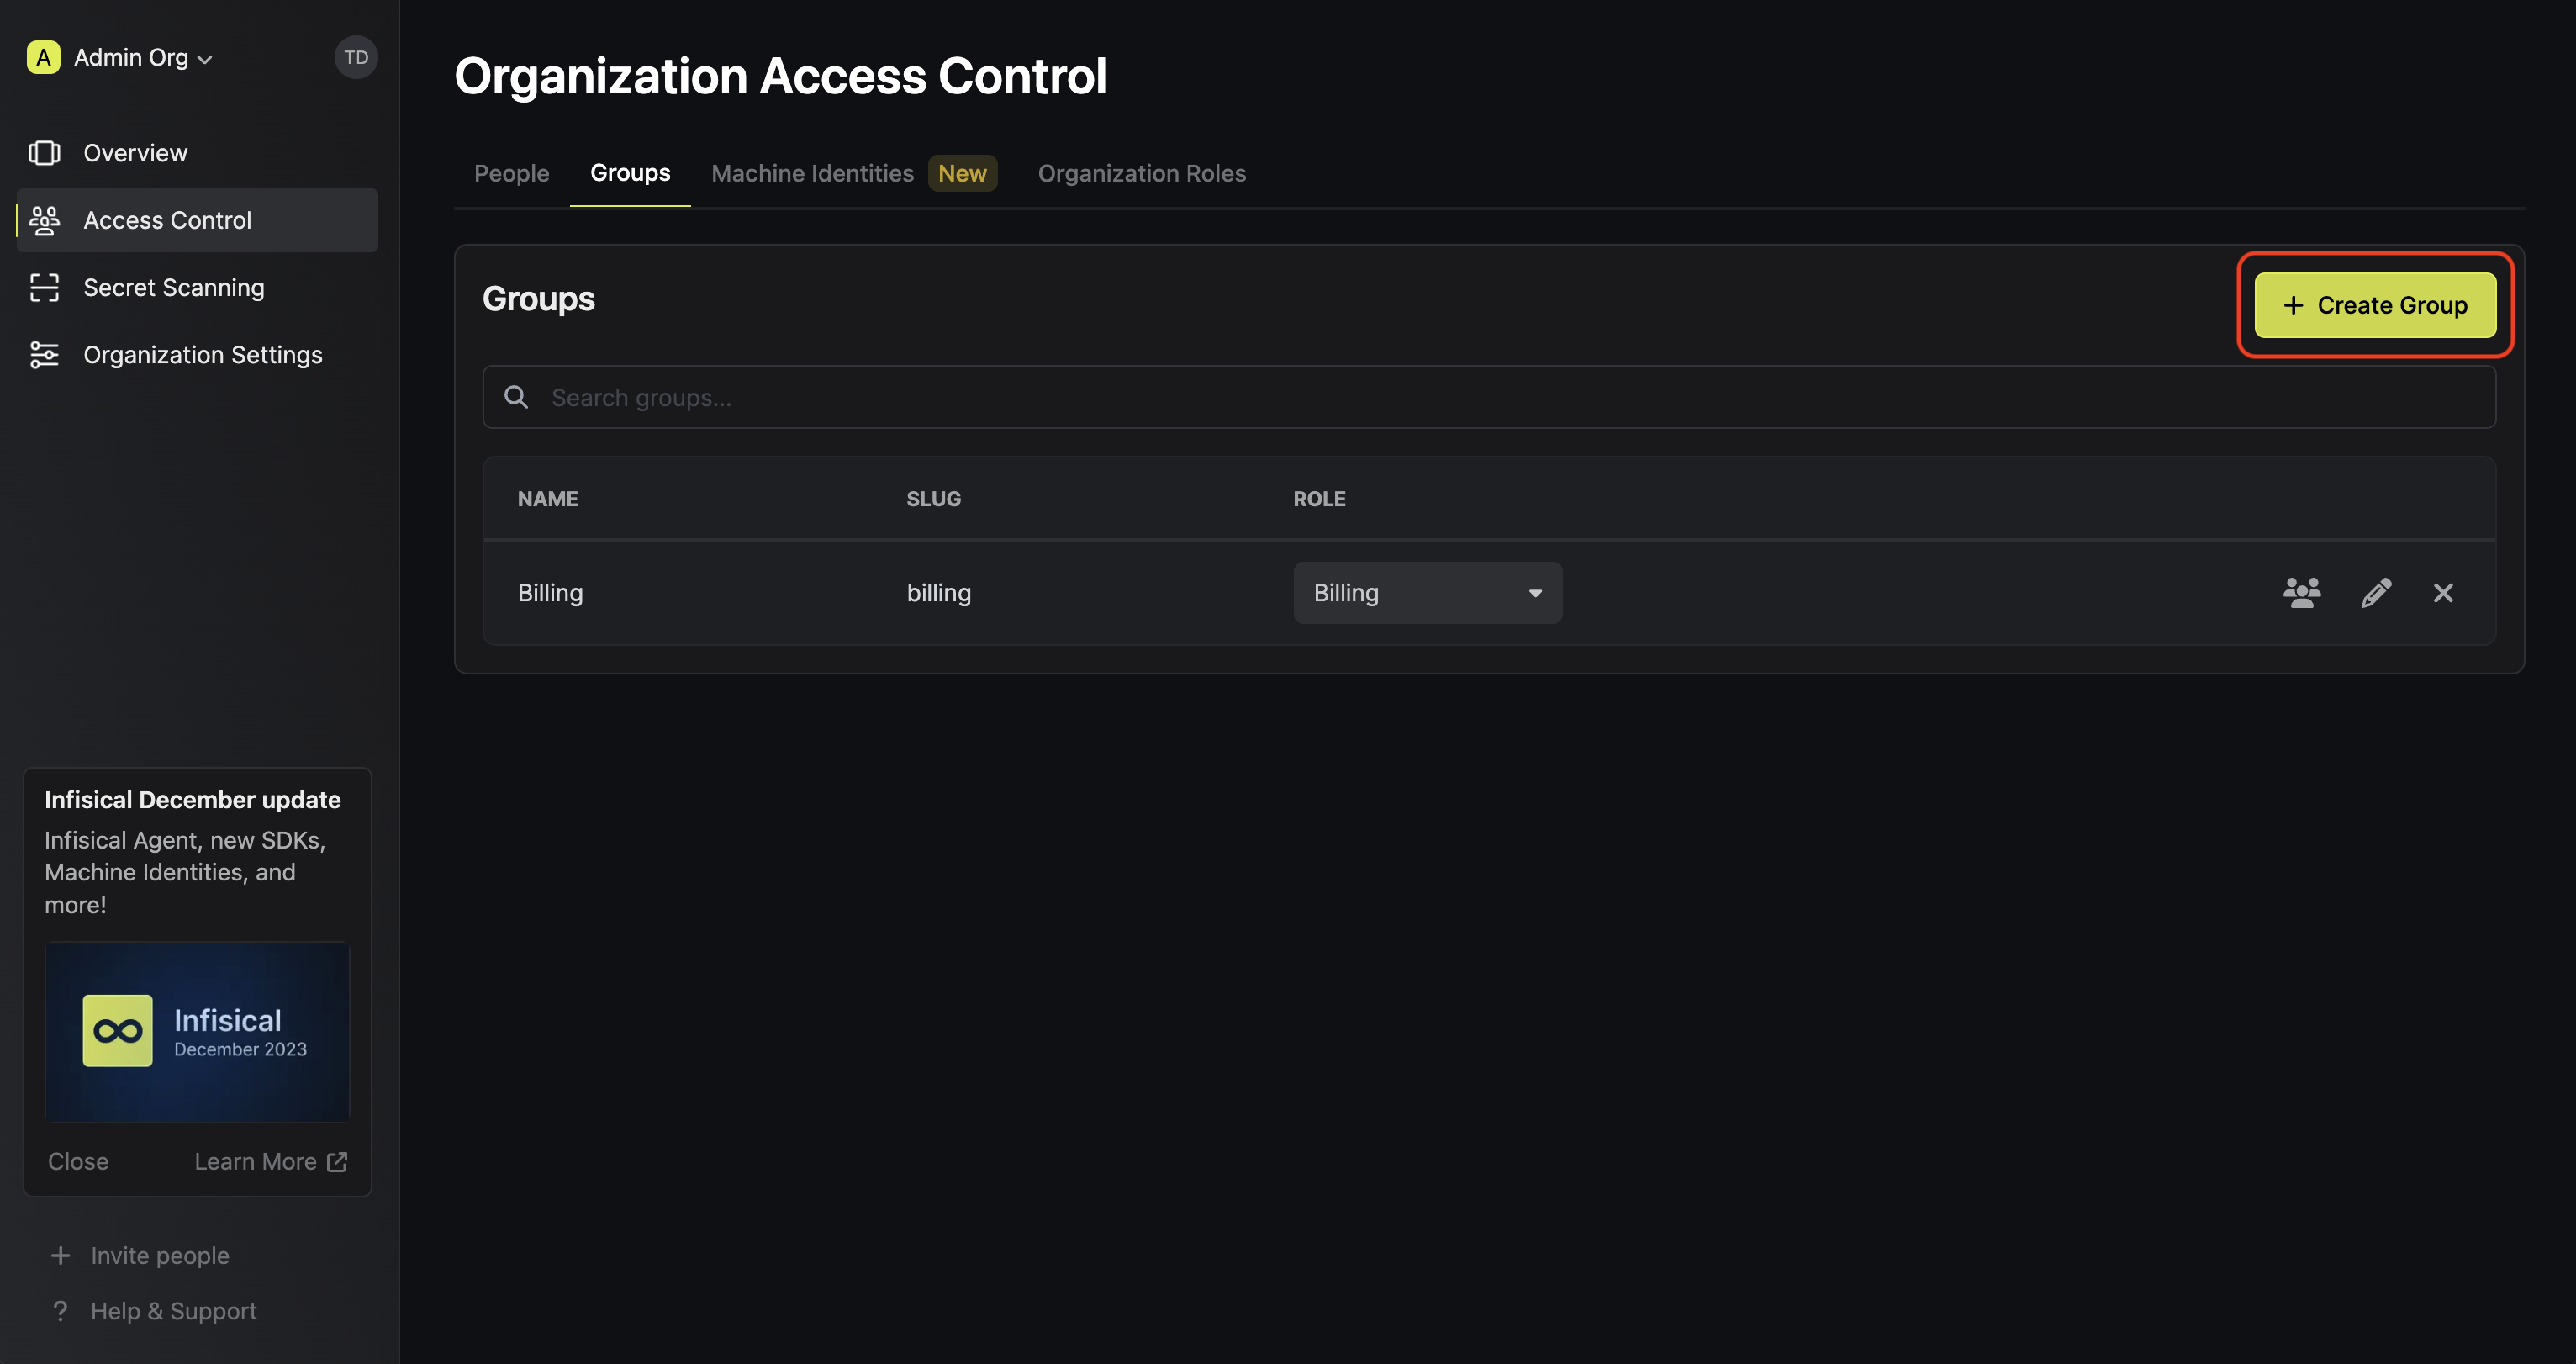 When creating a group, you specify an organization level role for it to assume; you can configure roles in Organization Settings > Access Control > Organization Roles.
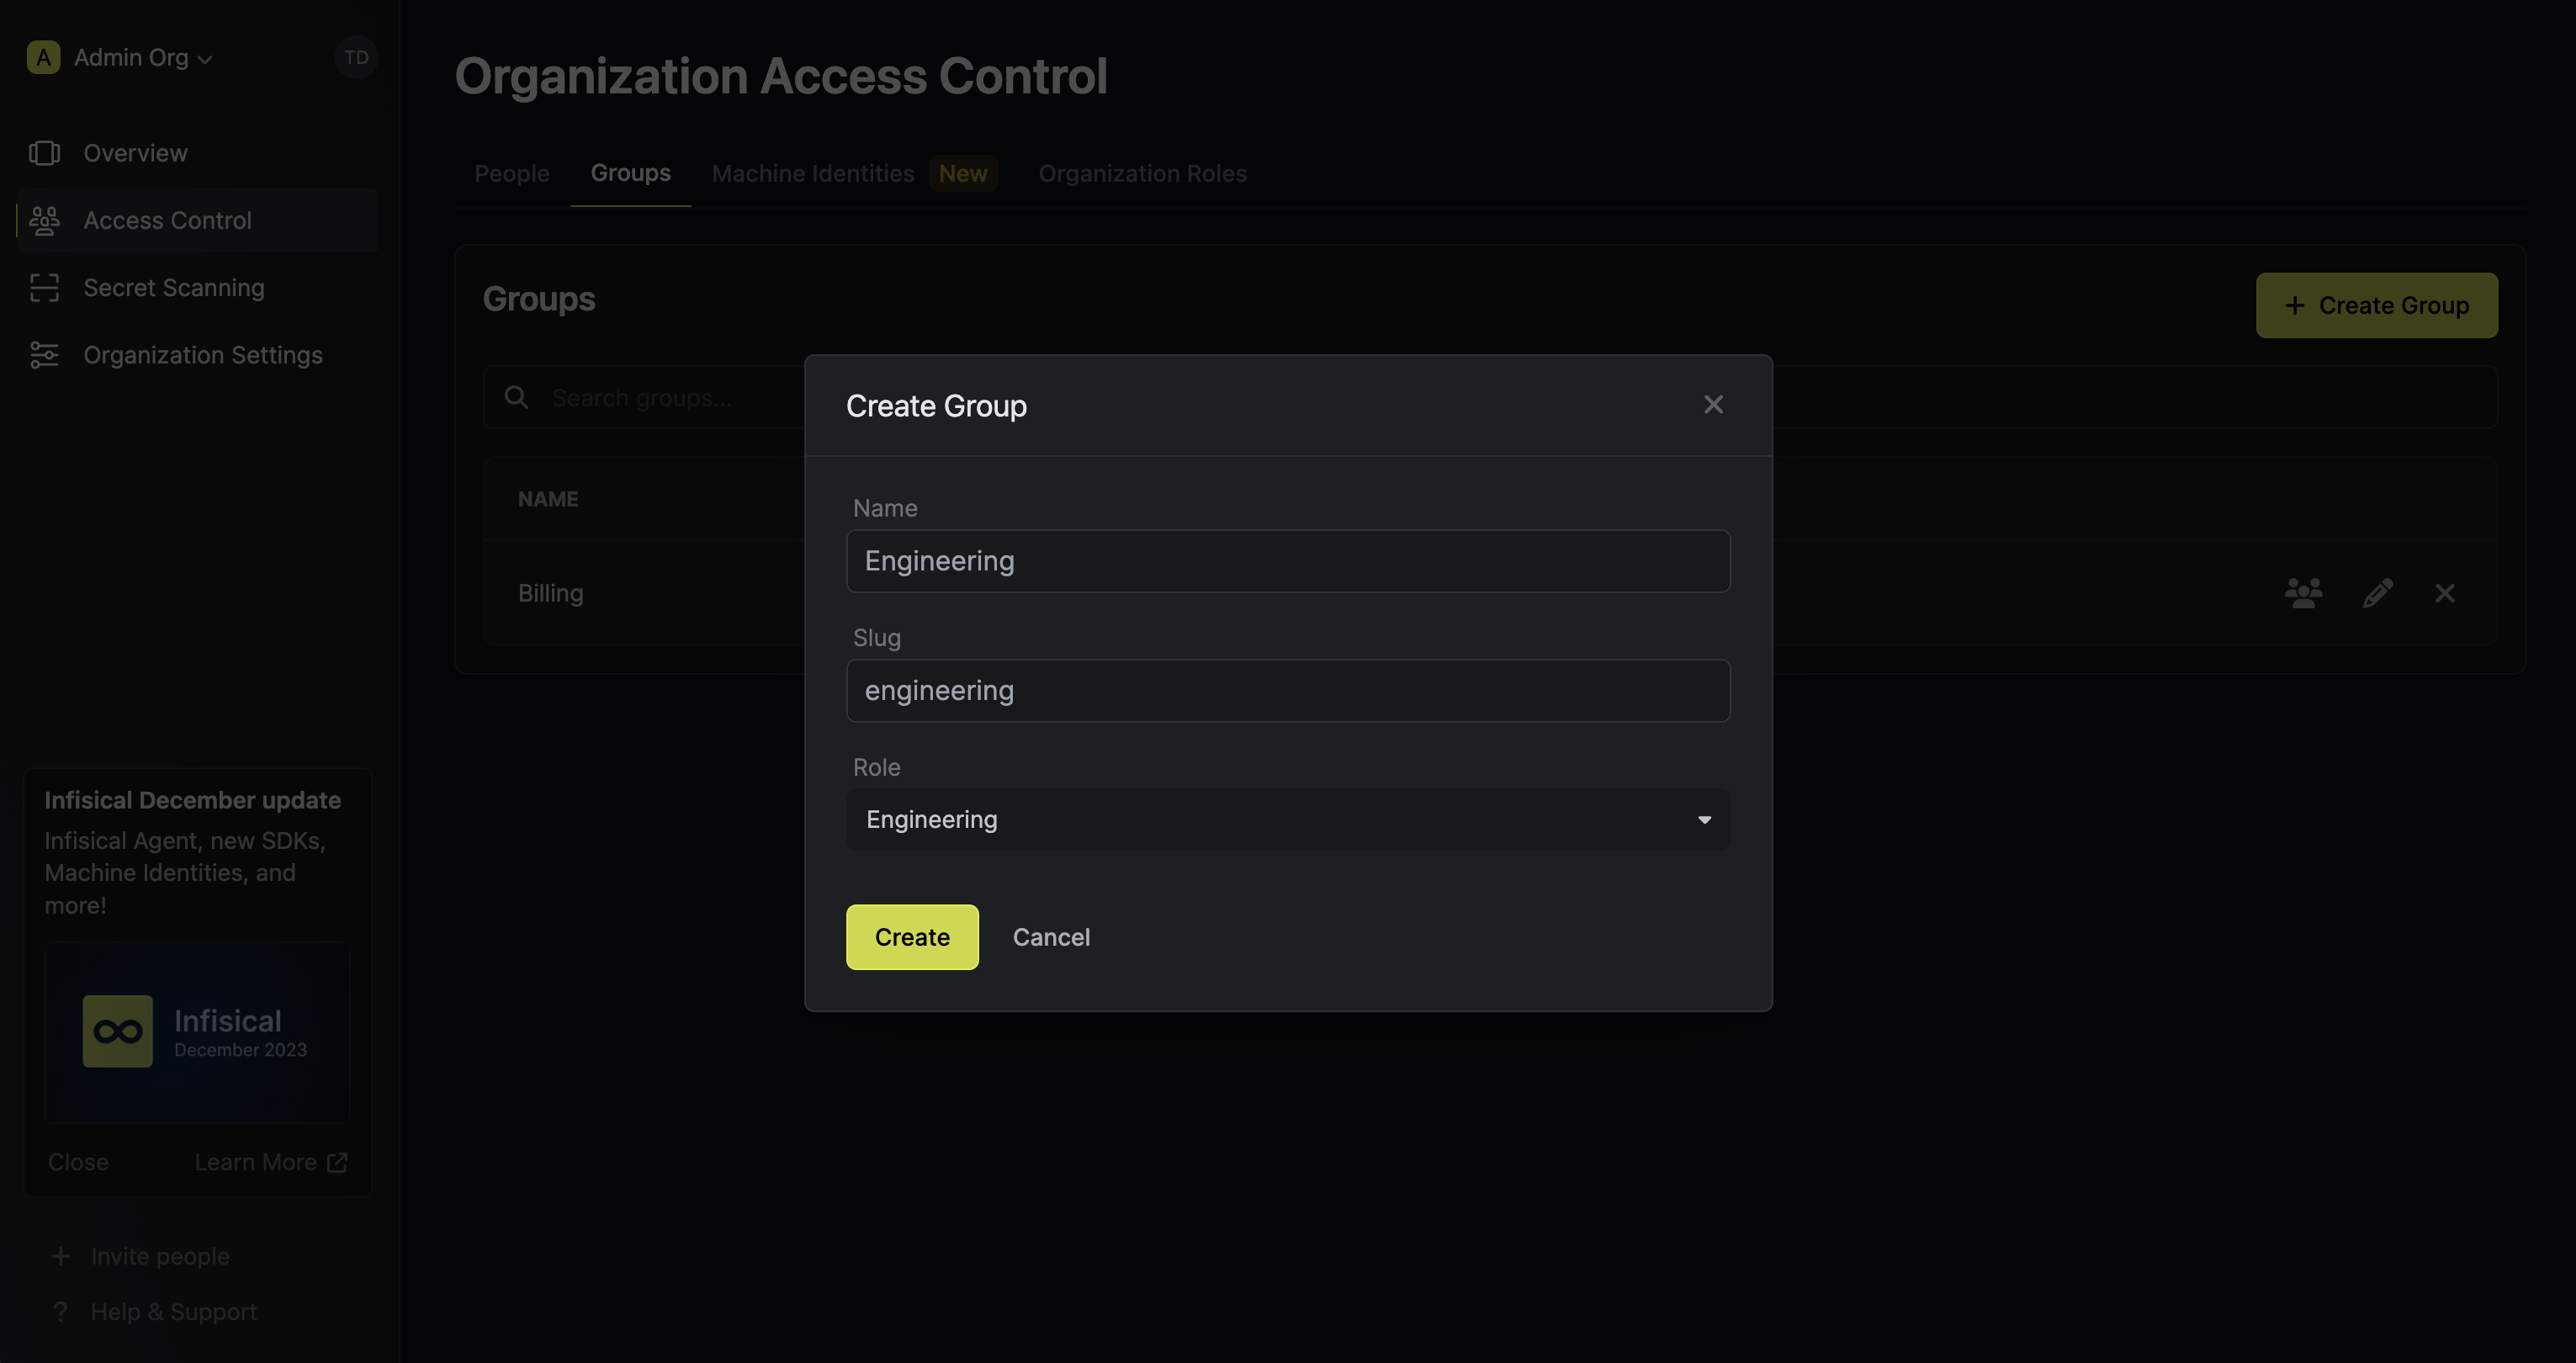 Now input a few details for your new group. Here’s some guidance for each field:
When creating a group, you specify an organization level role for it to assume; you can configure roles in Organization Settings > Access Control > Organization Roles.Now input a few details for your new group. Here’s some guidance for each field:- Name (required): A friendly name for the group like
Engineering. - Slug (required): A unique identifier for the group like
engineering. - Role (required): A role from the Organization Roles tab for the group to assume. The organization role assigned will determine what organization level resources this group can have access to.
2
Adding identities to the group
Next, you’ll want to assign identities (users and/or machine identities) to the group. To do this, click on the group row to open the group details page and click on the + button.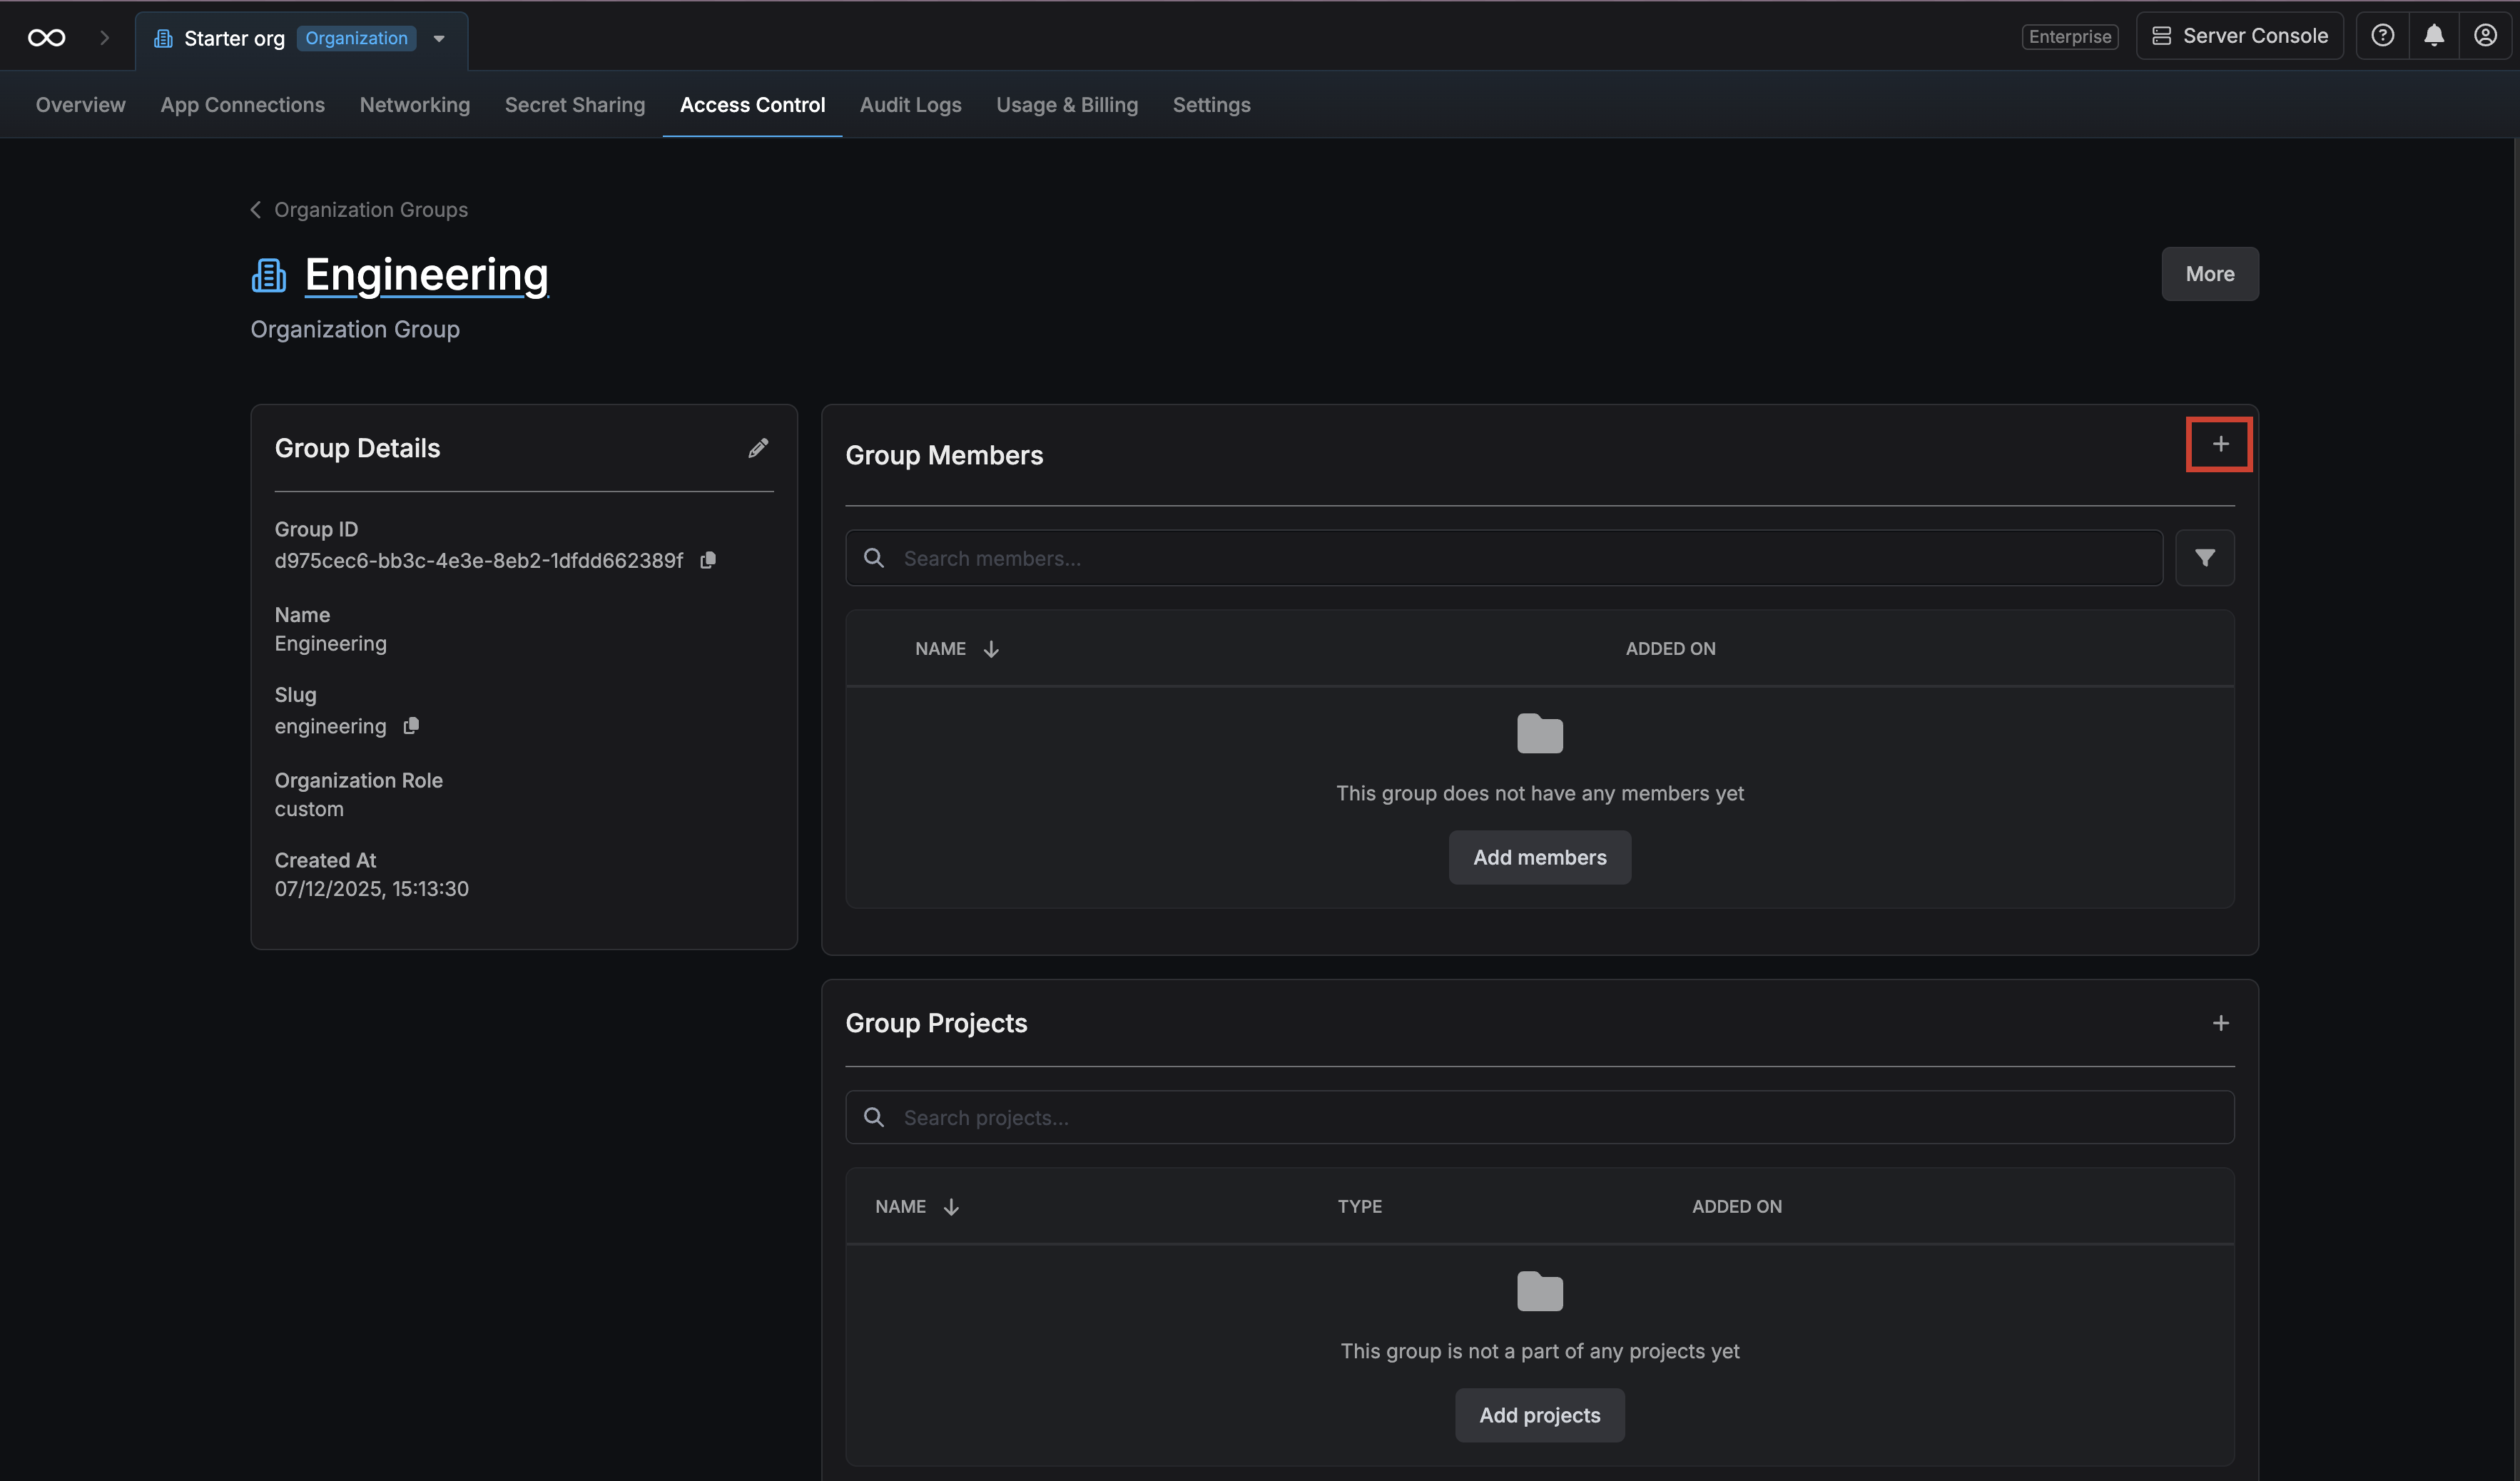 In this example, we’re assigning Alan Turing and Ada Lovelace (users) to the group Engineering. You can similarly add machine identities to the group by selecting them from the Machine Identities tab in the modal.
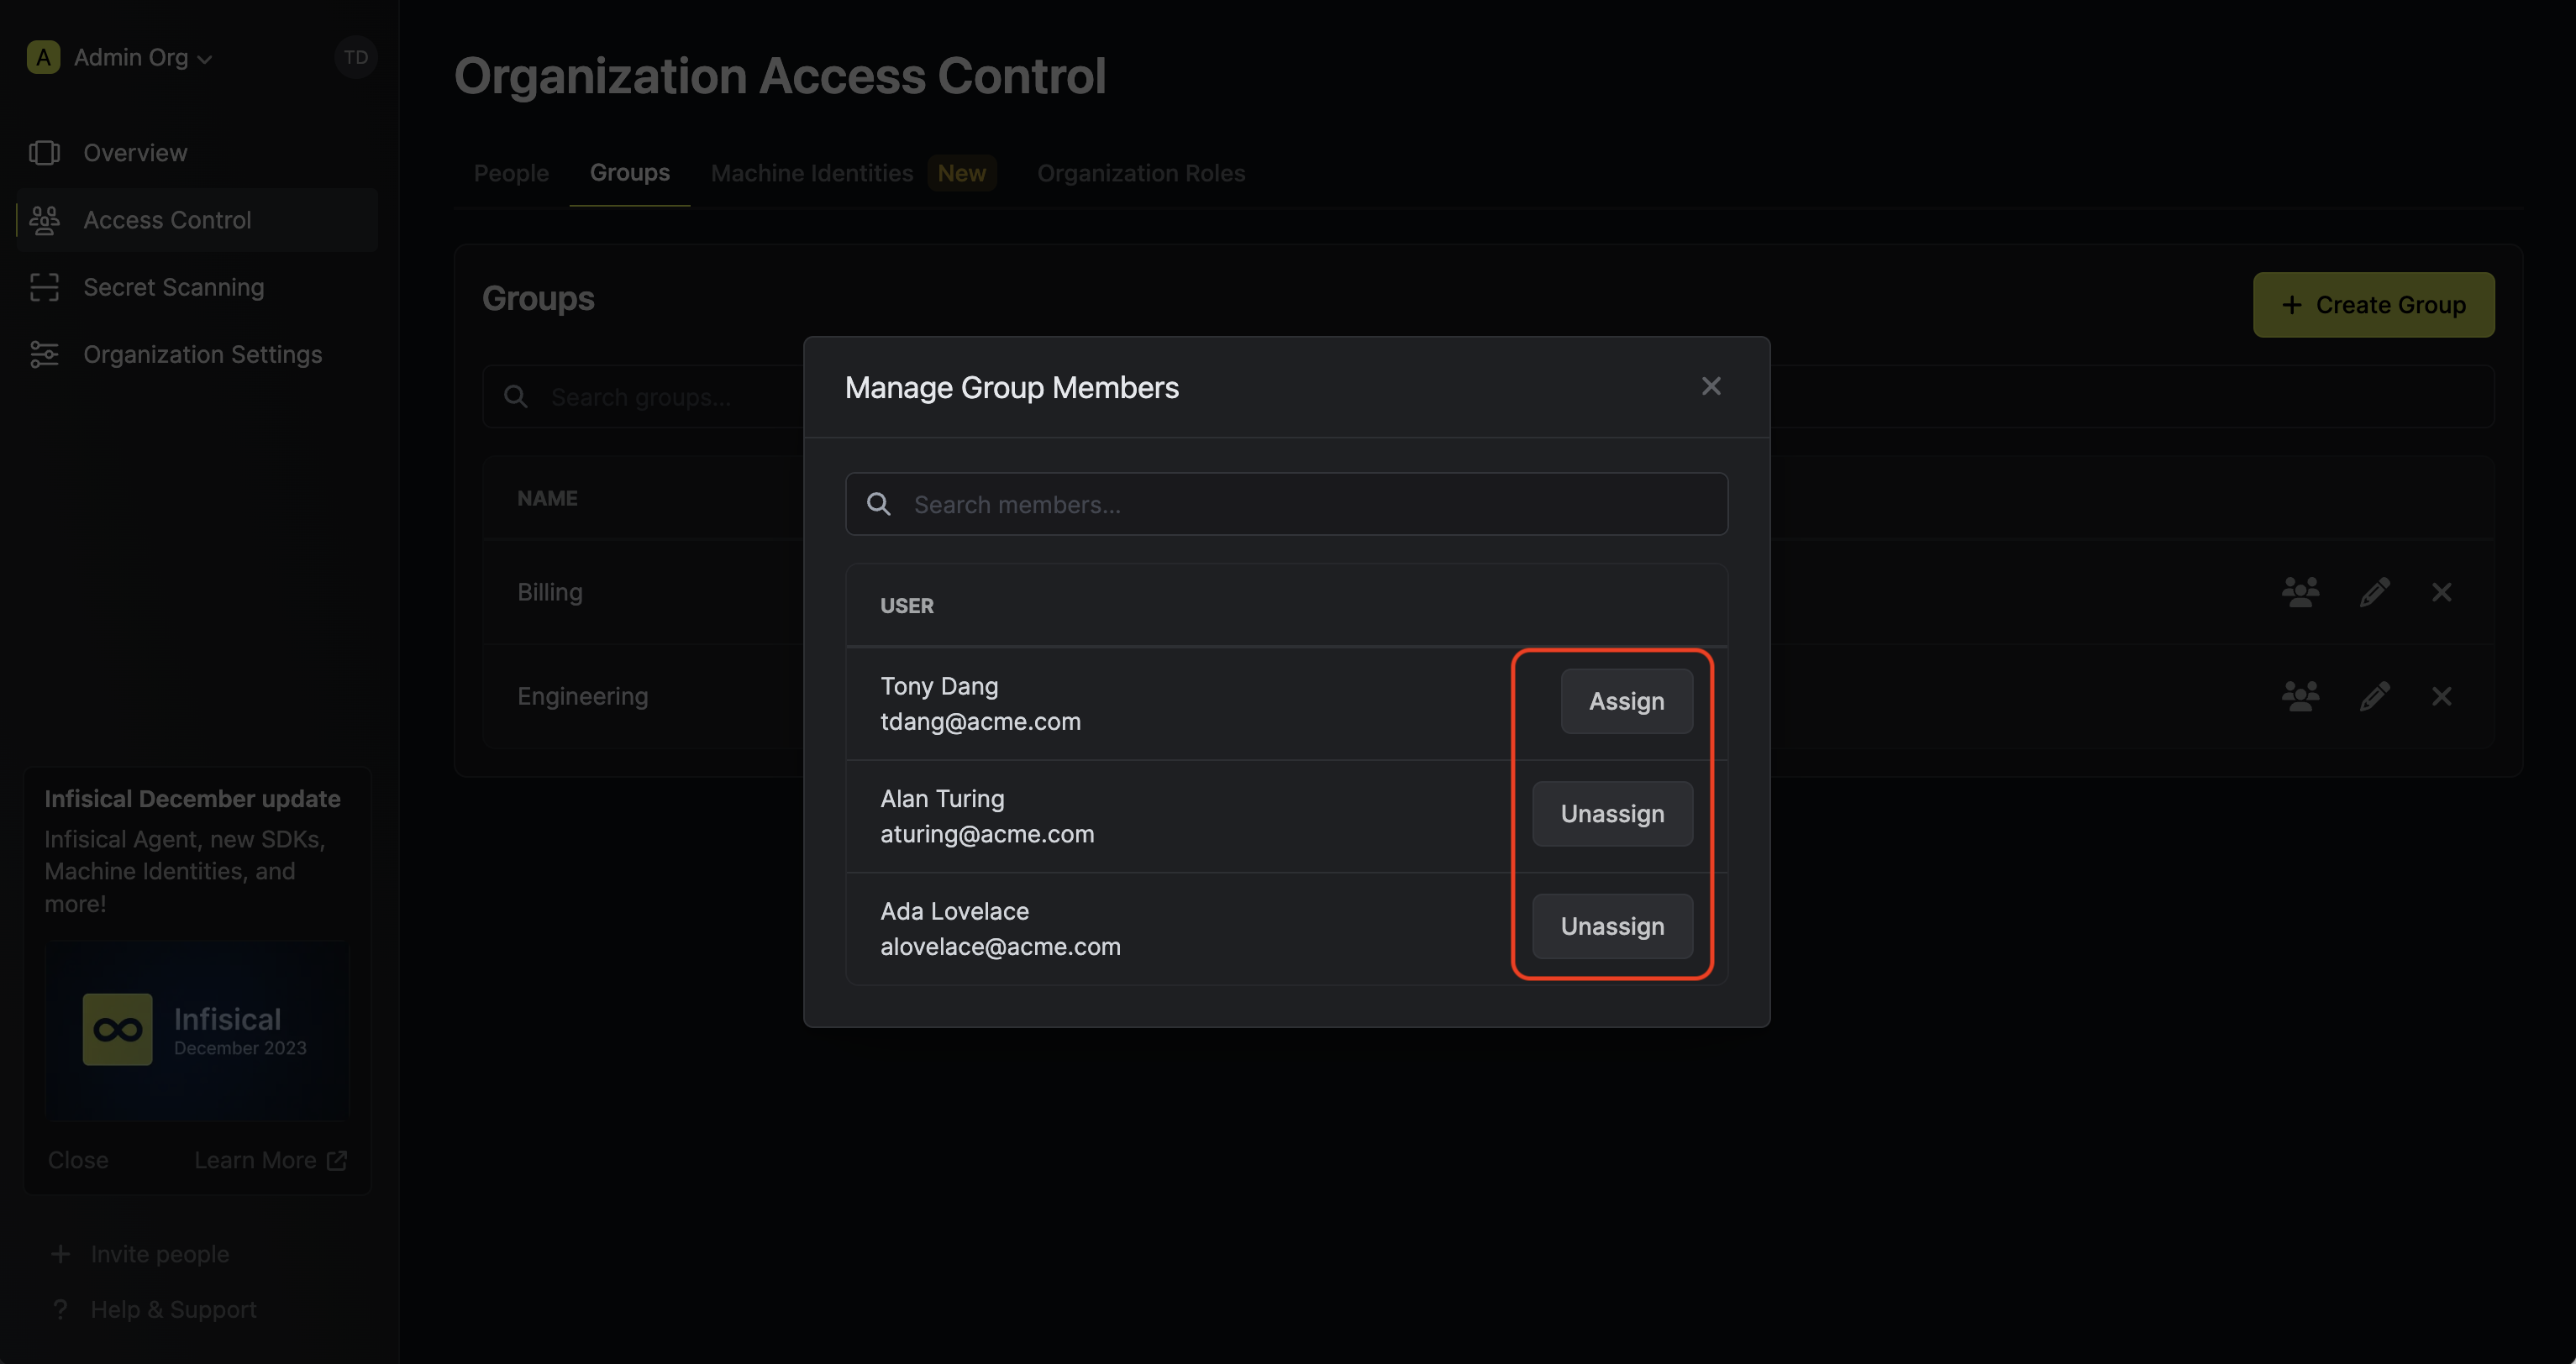
In this example, we’re assigning Alan Turing and Ada Lovelace (users) to the group Engineering. You can similarly add machine identities to the group by selecting them from the Machine Identities tab in the modal.3
Adding the group to a project
To enable the group to access project-level resources such as secrets within a specific project, you should add it to that project.To do this, head over to the project you want to add the group to and go to Project Settings > Access Control > Groups and press Add Group to Project.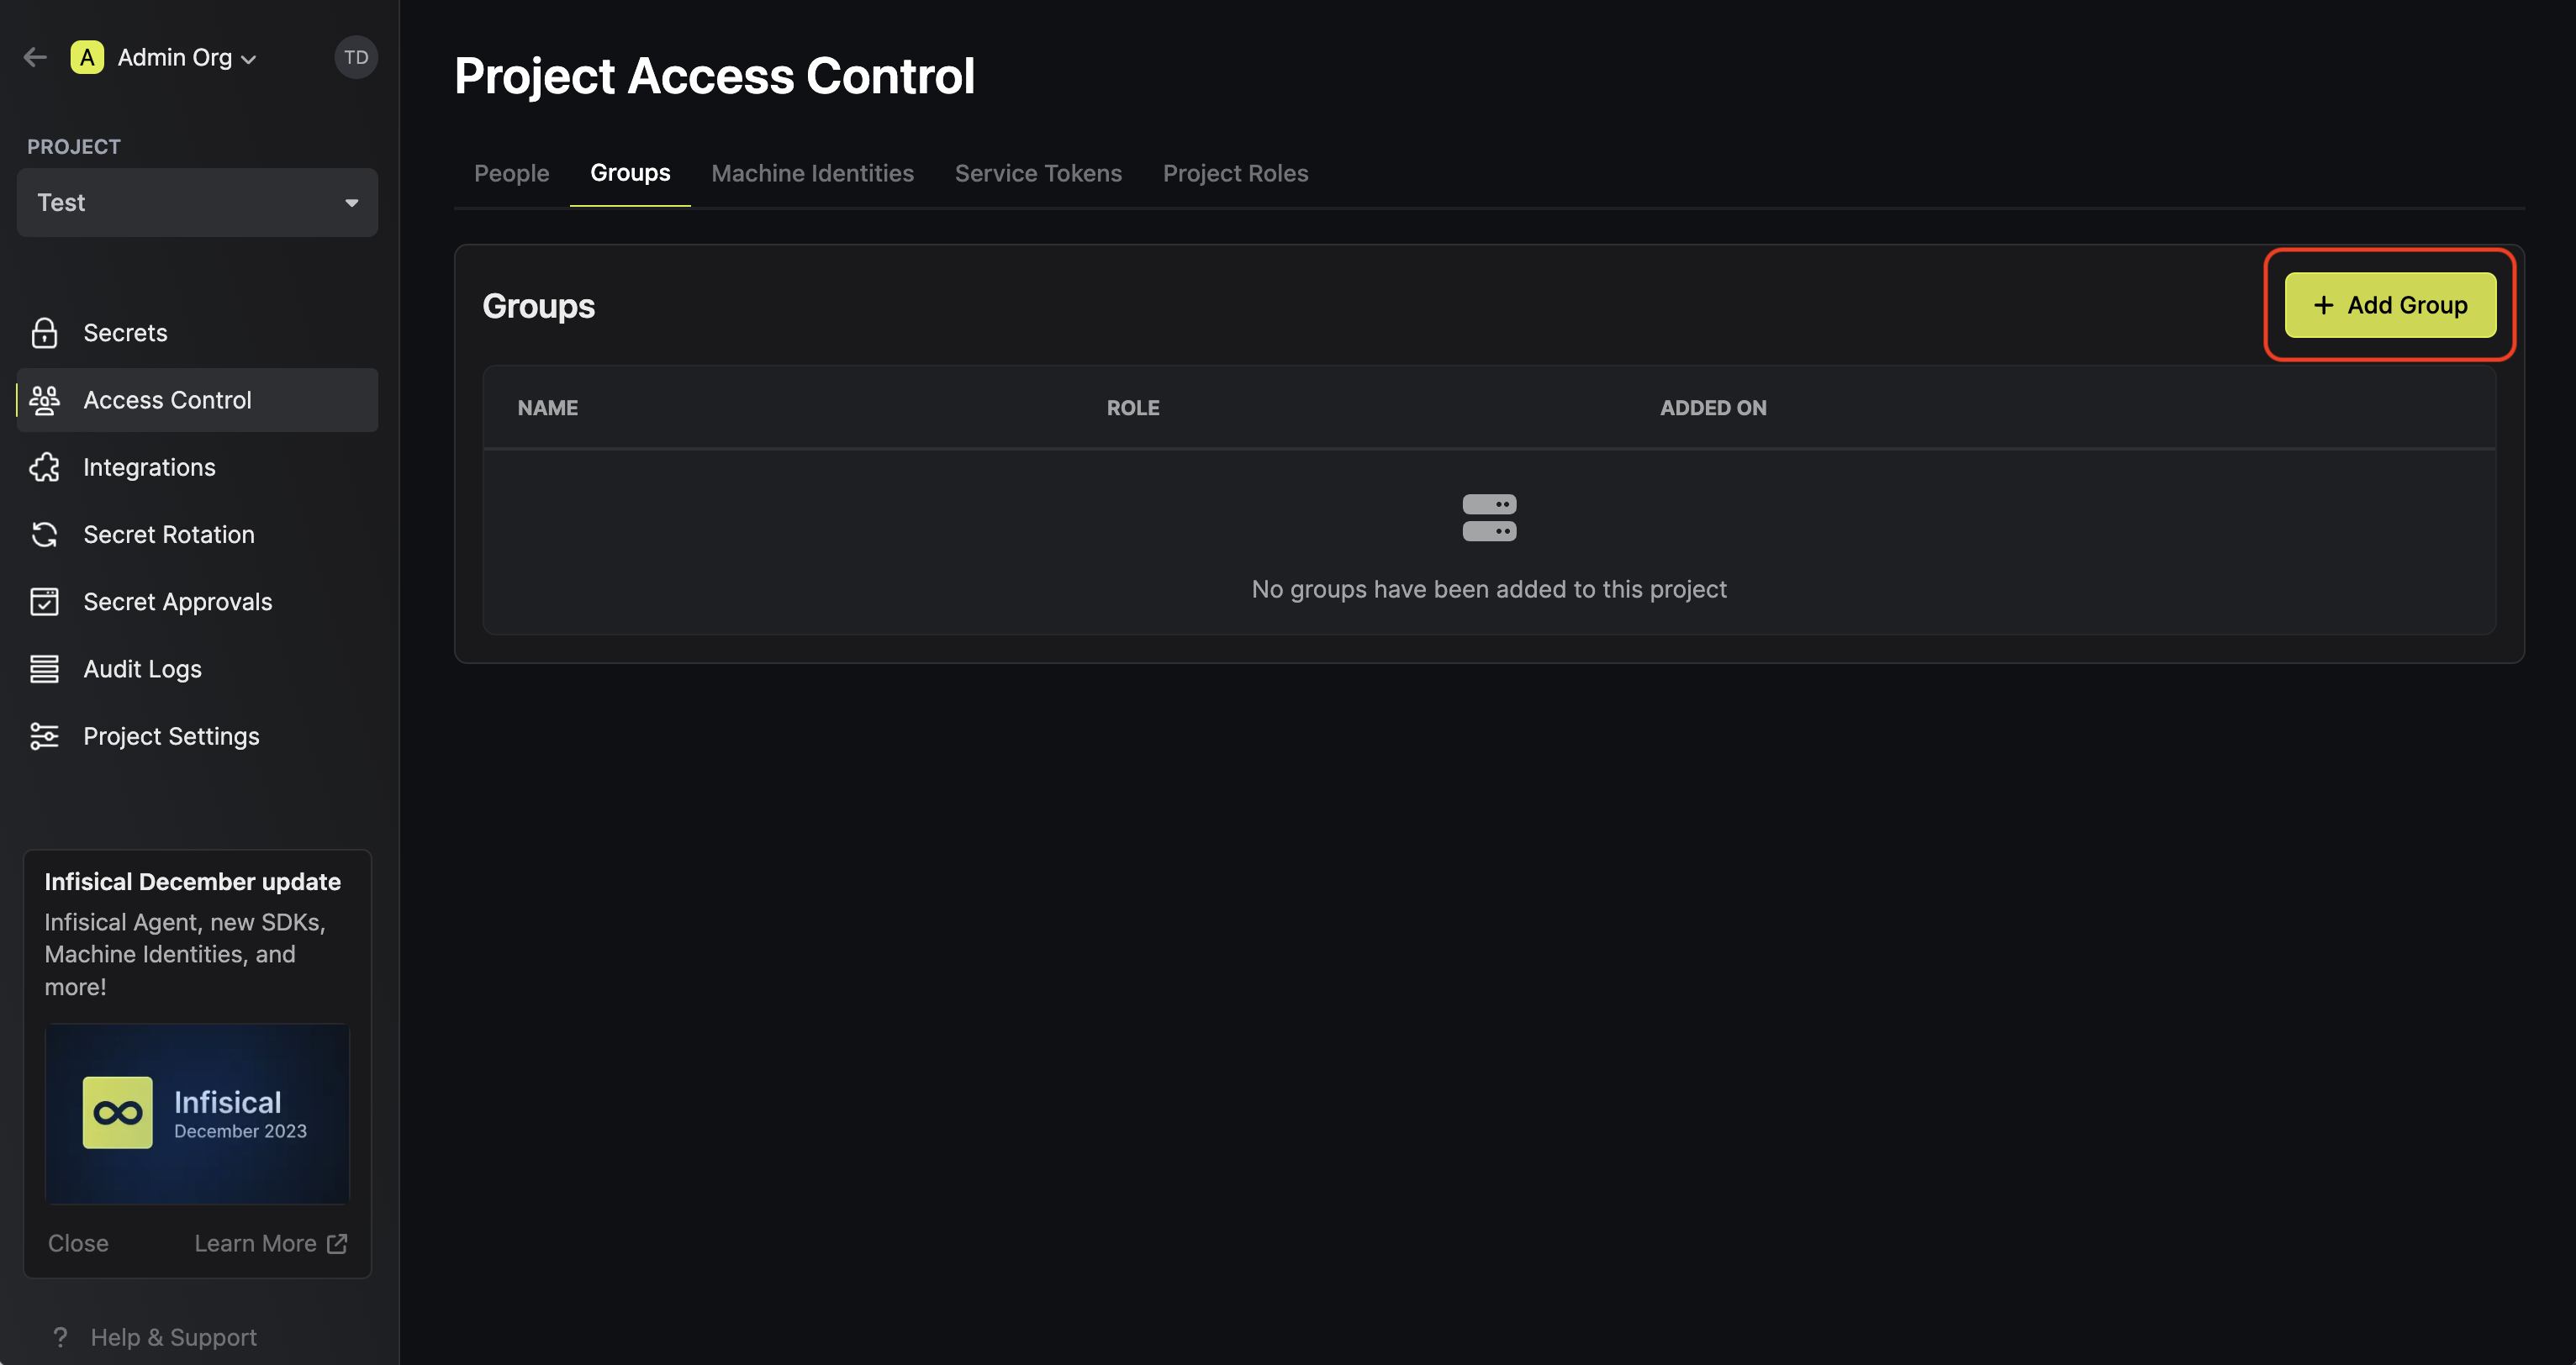 Next, select the group you want to add to the project and the project level role you want to allow it to assume. The project role assigned will determine what project level resources this group can have access to.
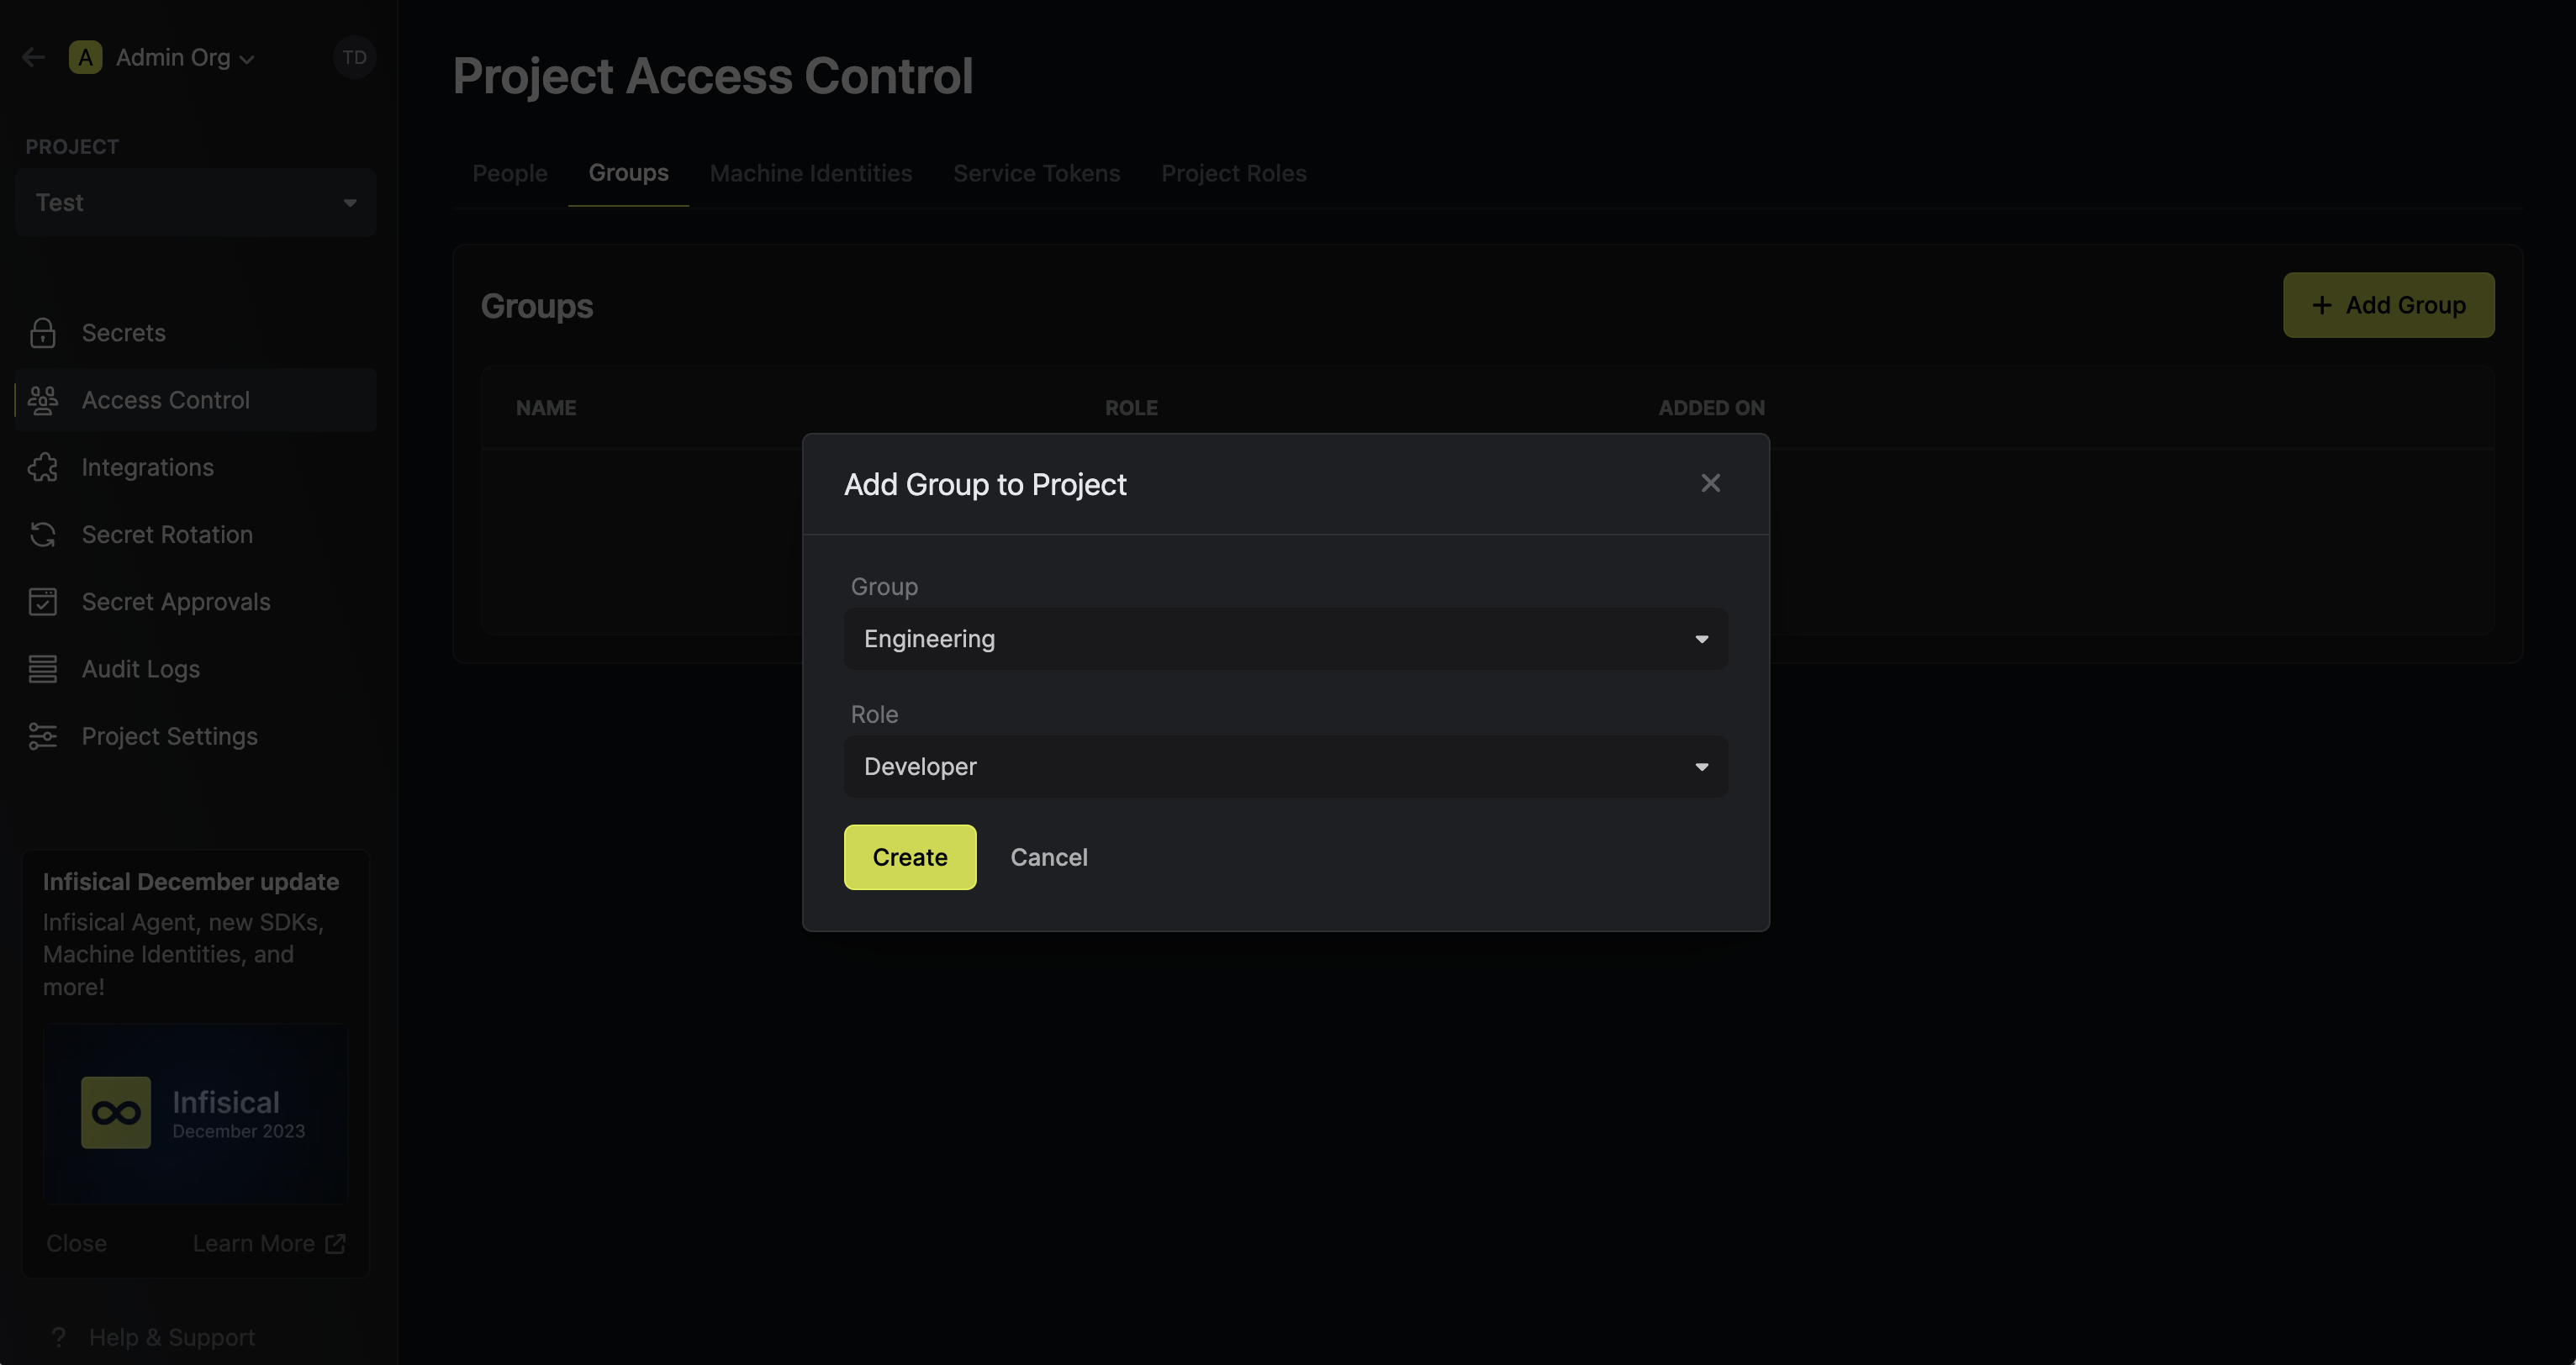 That’s it!All identities of the group now have access to the project under the role you assigned to the group.
Next, select the group you want to add to the project and the project level role you want to allow it to assume. The project role assigned will determine what project level resources this group can have access to.That’s it!All identities of the group now have access to the project under the role you assigned to the group.