Setting Metadata on Machine Identities
- Manually Configure Metadata
1
Navigate to the Access Control page on the organization sidebar and select a machine identity.

2
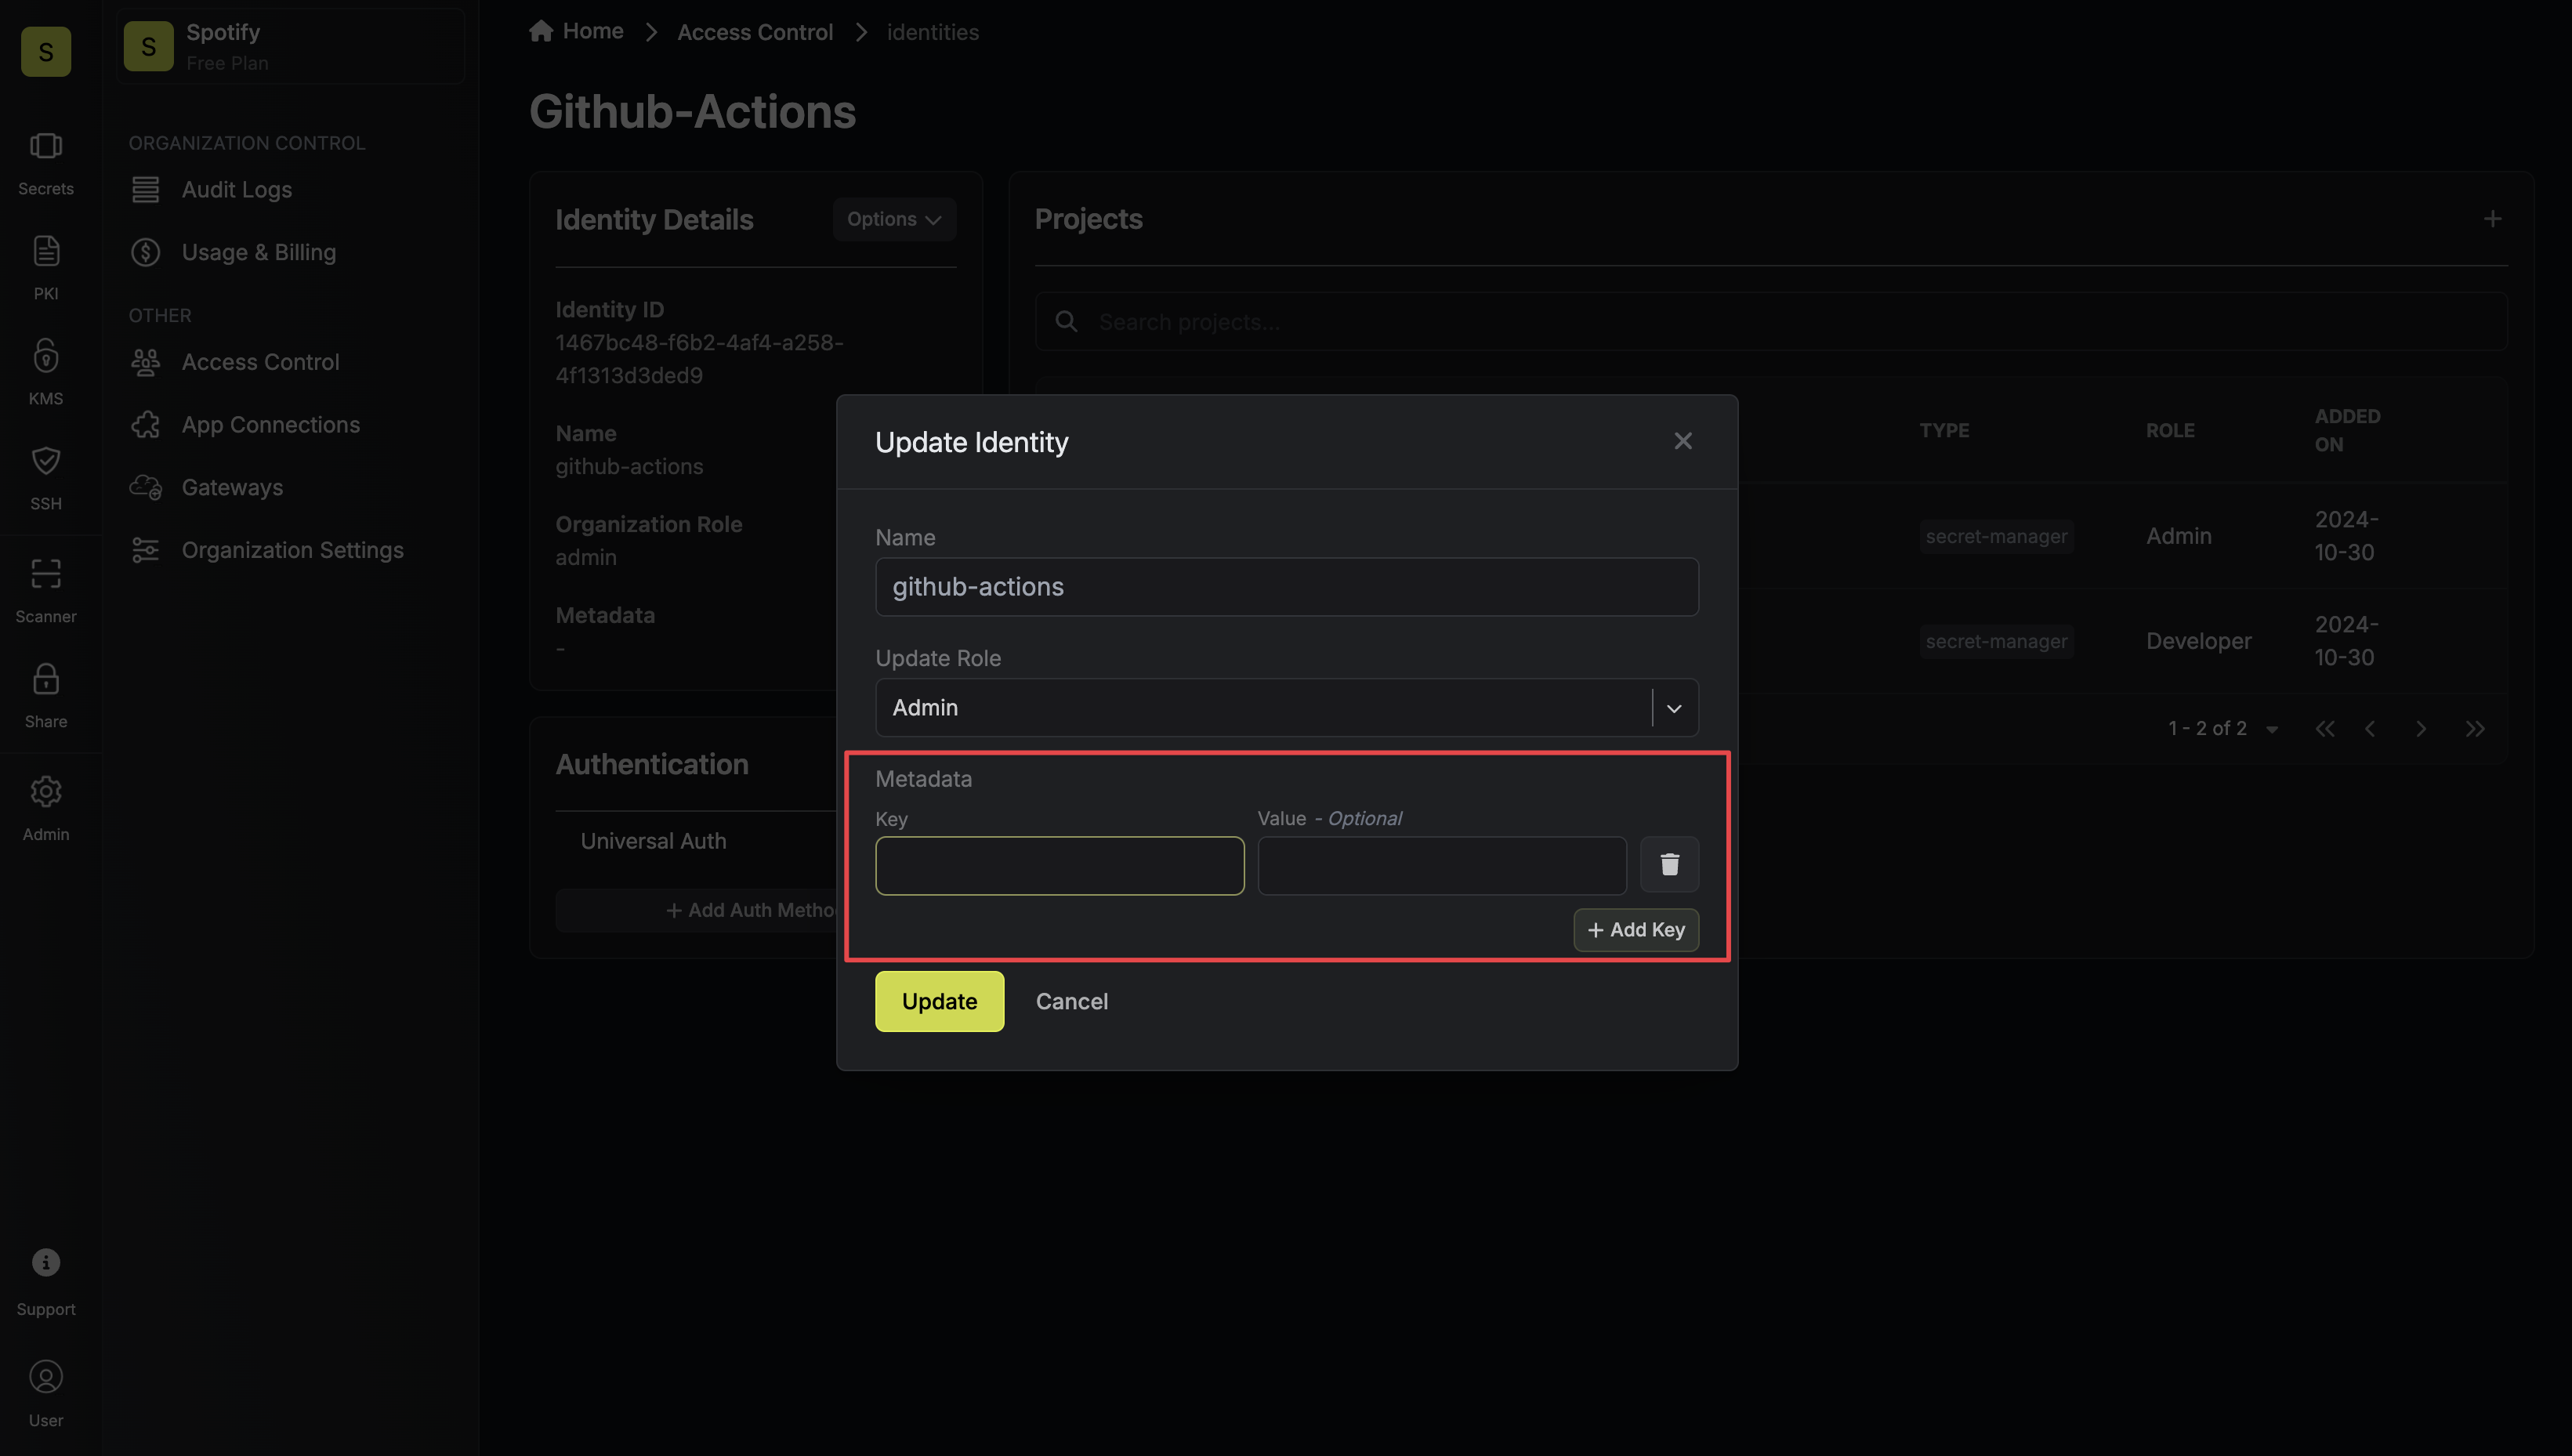
On the machine identity page, click the pencil icon to edit the selected identity.

3
Add metadata via key-value pairs and update the machine identity.
Accessing Attributes From Machine Identity Login
When machine identities authenticate, they may receive additional payloads/attributes from the service provider. For methods like OIDC, these come as claims in the token and can be made available in your policies.- OIDC Login Attributes
- Kubernetes Login Attributes
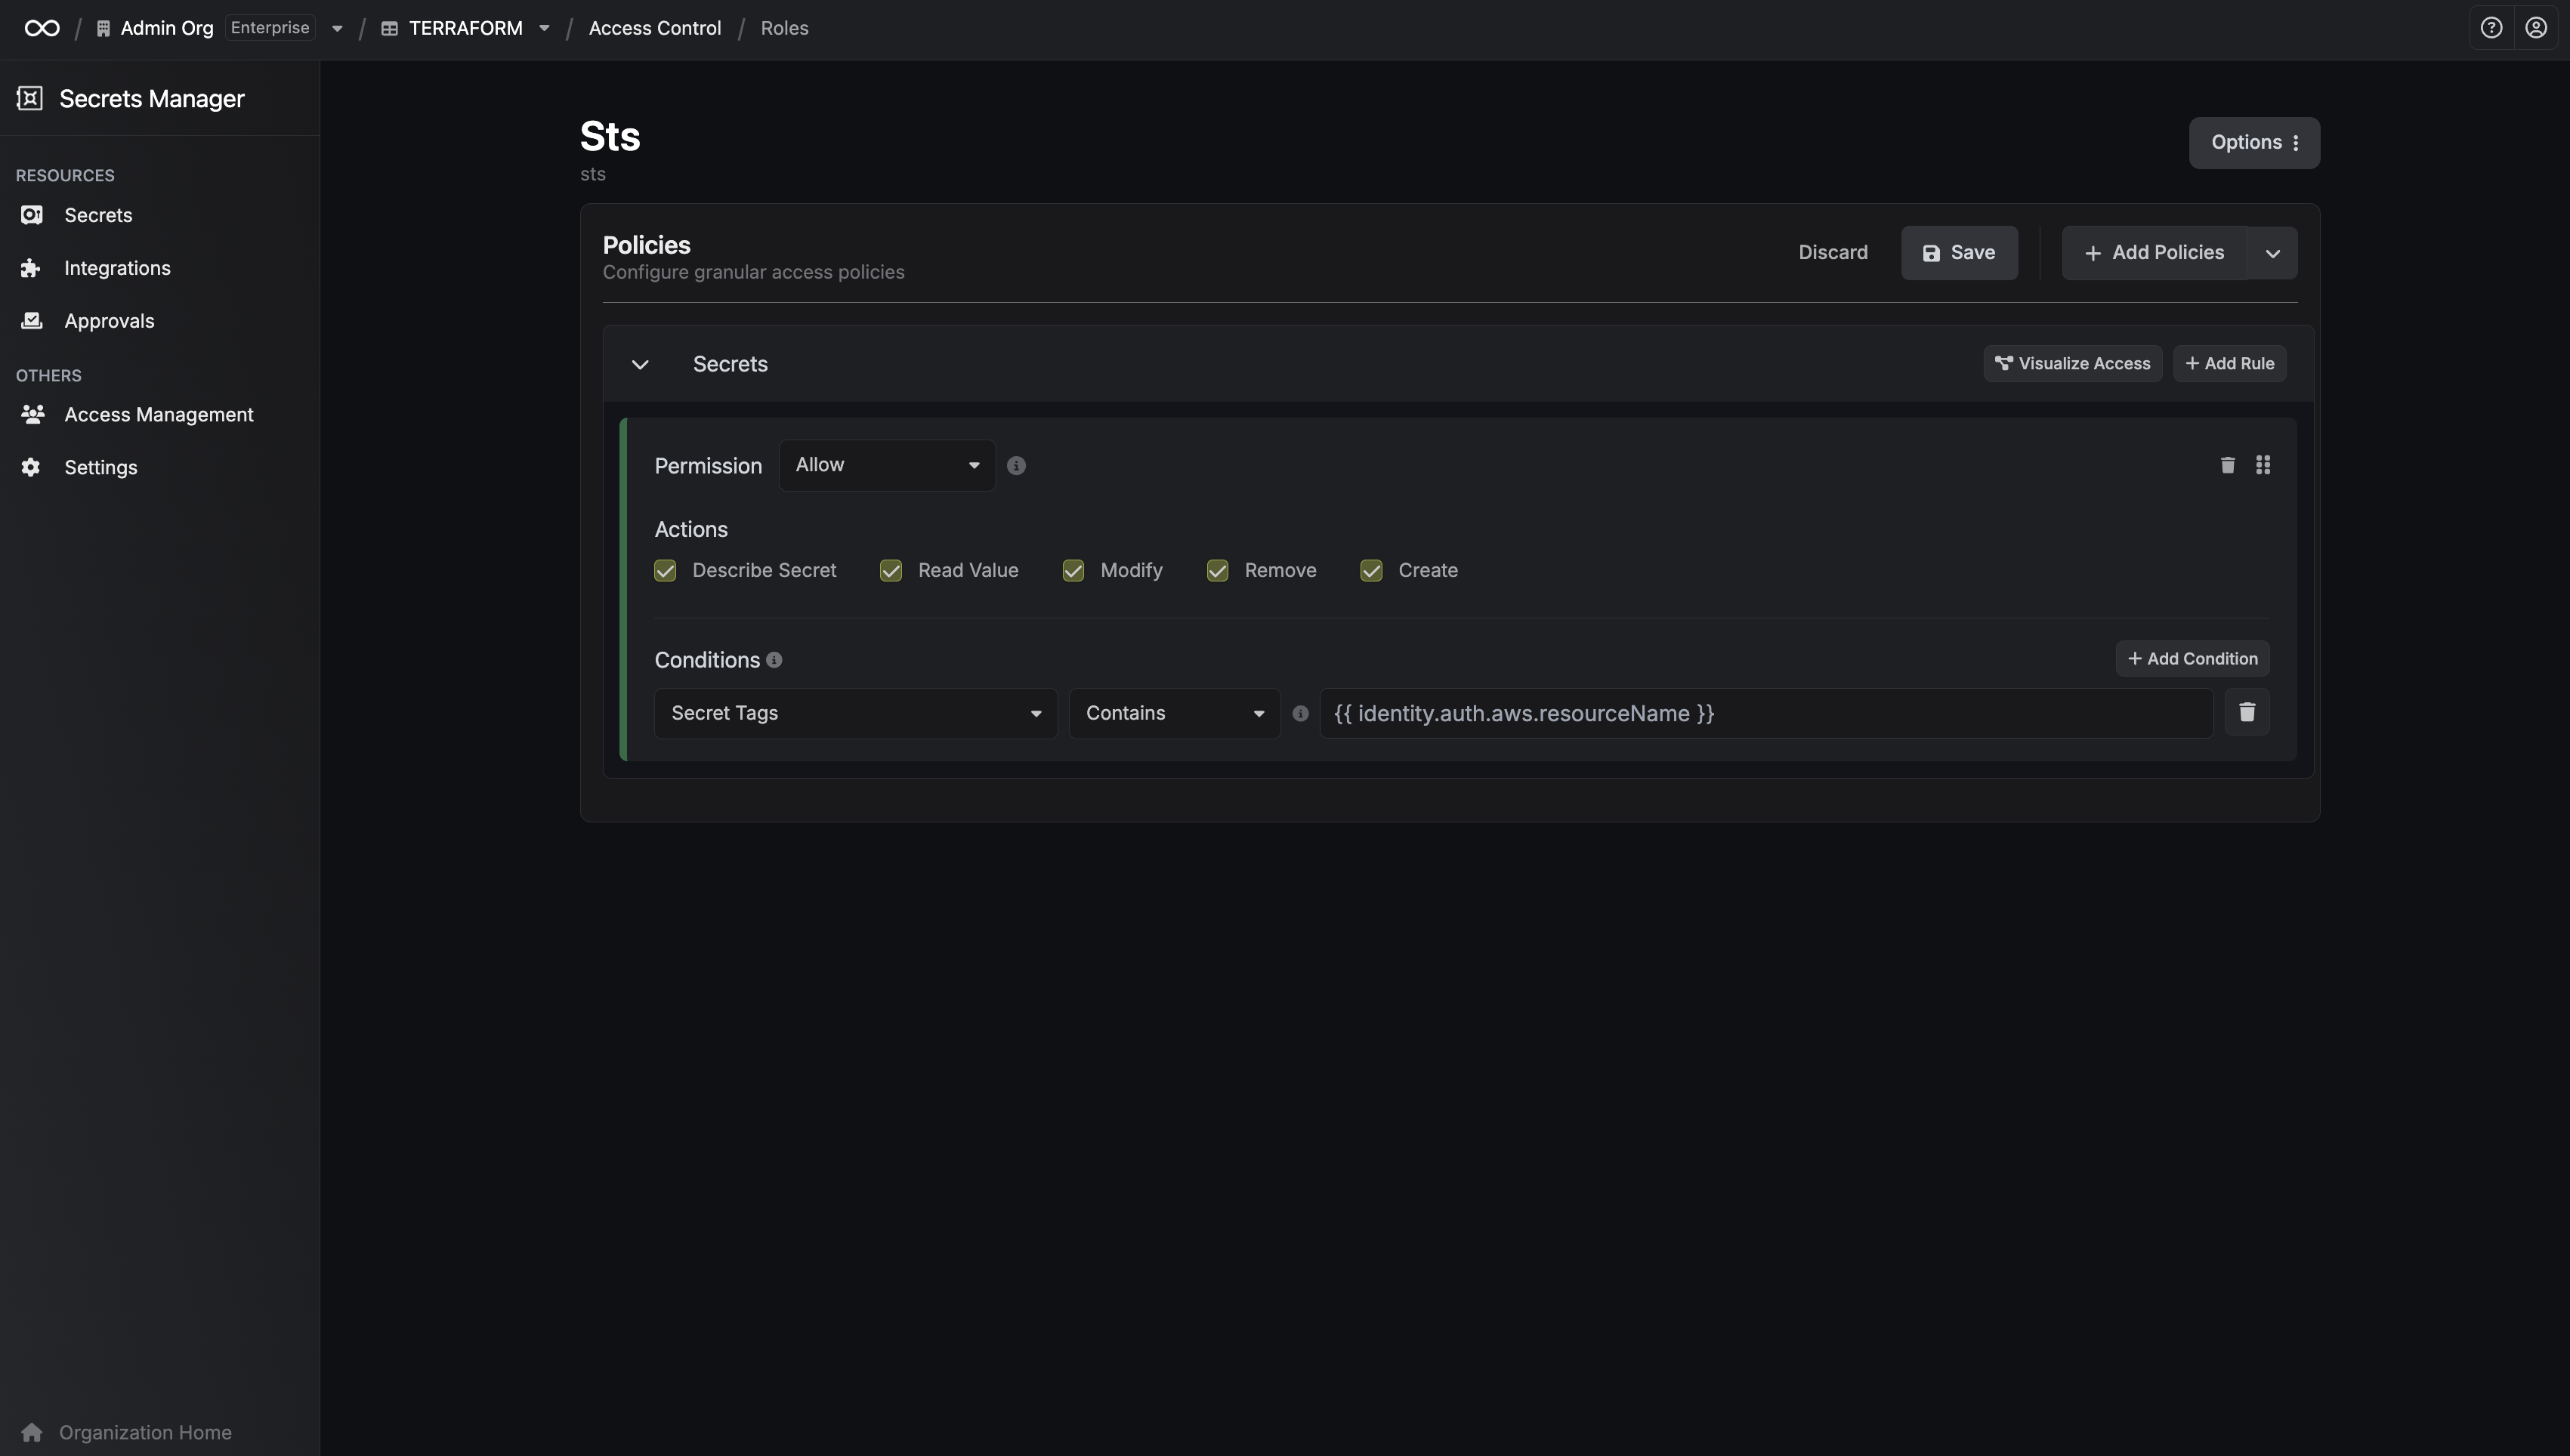
- AWS Attributes
- Other Authentication Method Attributes
- Navigate to the Identity Authentication settings and select the OIDC Auth Method.
- In the Advanced section, locate the Claim Mapping configuration.
- Map the OIDC claims to permission attributes by specifying:
- Attribute Name: The identifier to be used in your policies (e.g., department).
- Claim Path: The dot notation path to the claim in the OIDC token (e.g., user.department).
- department: to
user.department - role: to
user.role

Template Helper Functions
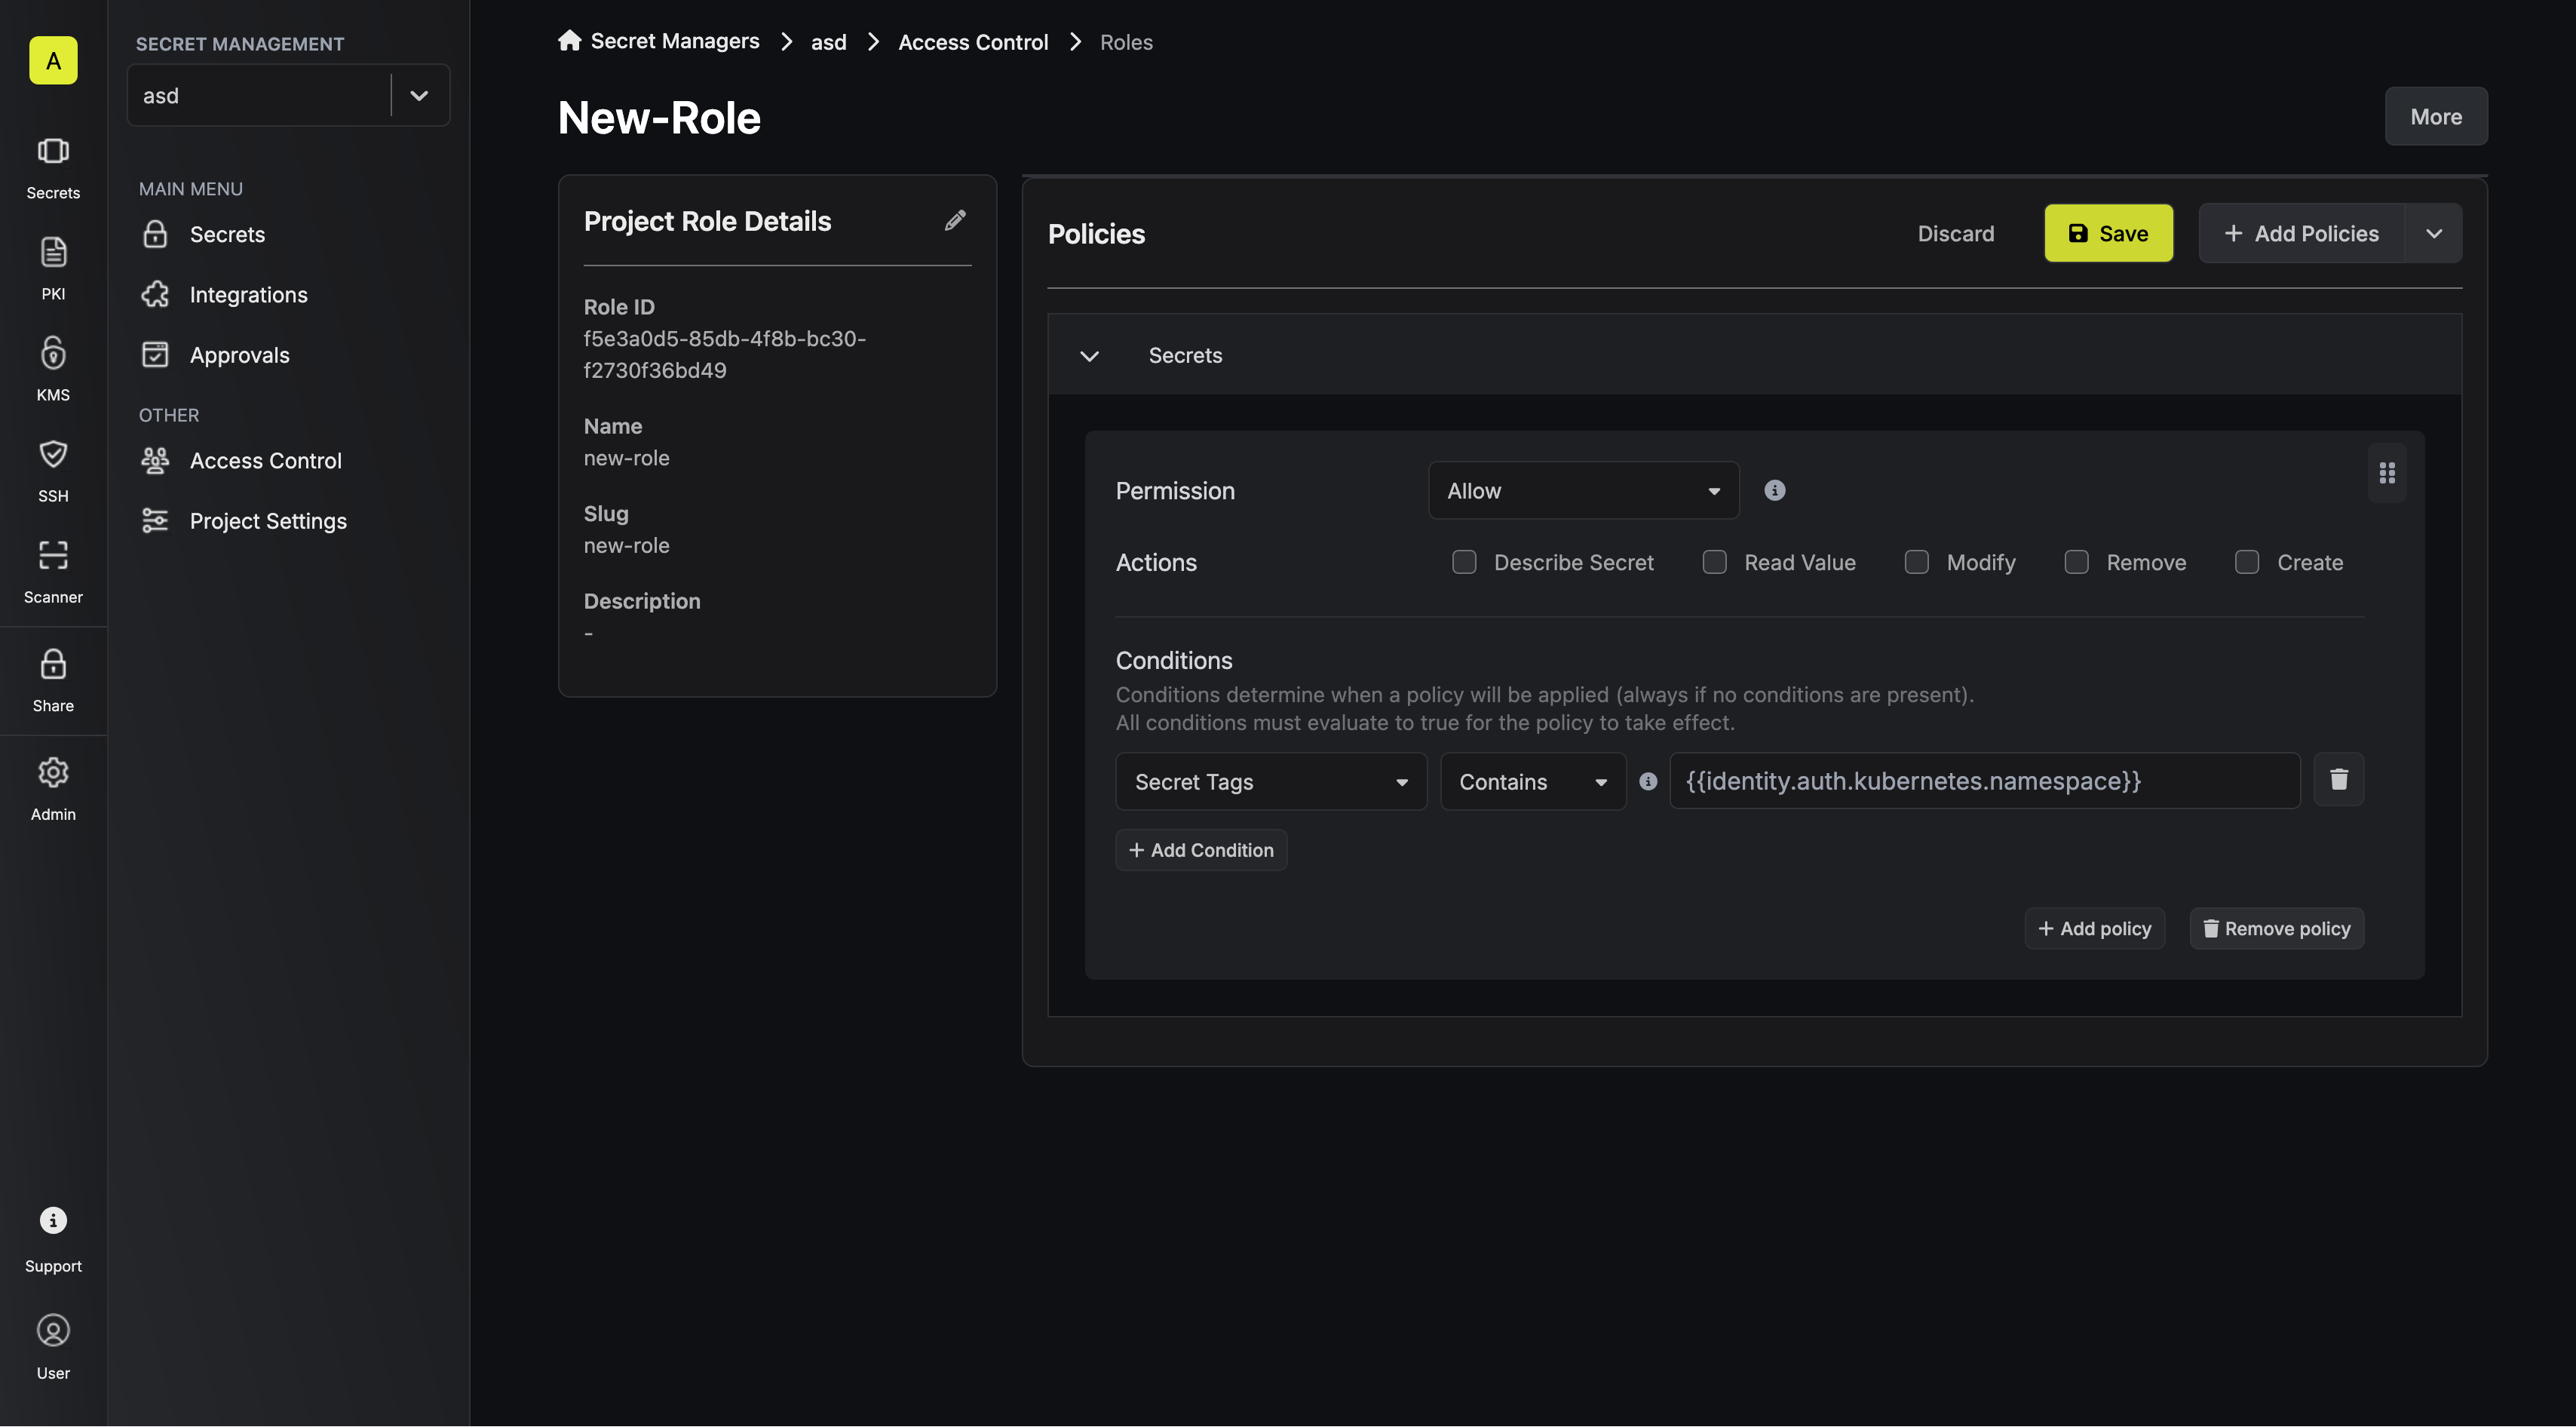
In addition to referencing attributes directly, you can use thestripPrefix helper function to transform attribute values within your policy templates.
stripPrefix
Removes a prefix from the beginning of a string. If the string does not start with the given prefix, it is returned unchanged.
Examples:
Given identity.auth.kubernetes.namespace = production-us-east:
identity.auth.aws.arn = arn:aws:iam::123456789012:user/example-user: