Azure SCIM provisioning is a paid feature.If you’re using Infisical Cloud, then it is available under the Enterprise Tier. If you’re self-hosting Infisical,
then you should contact sales@infisical.com to purchase an enterprise license to use it.
1
Create a SCIM token in Infisical
In Infisical, head to the Single Sign-On (SSO) page and select the Provisioning tab. Under SCIM Configuration,
press the Enable SCIM provisioning toggle to allow Azure to provision/deprovision users for your organization.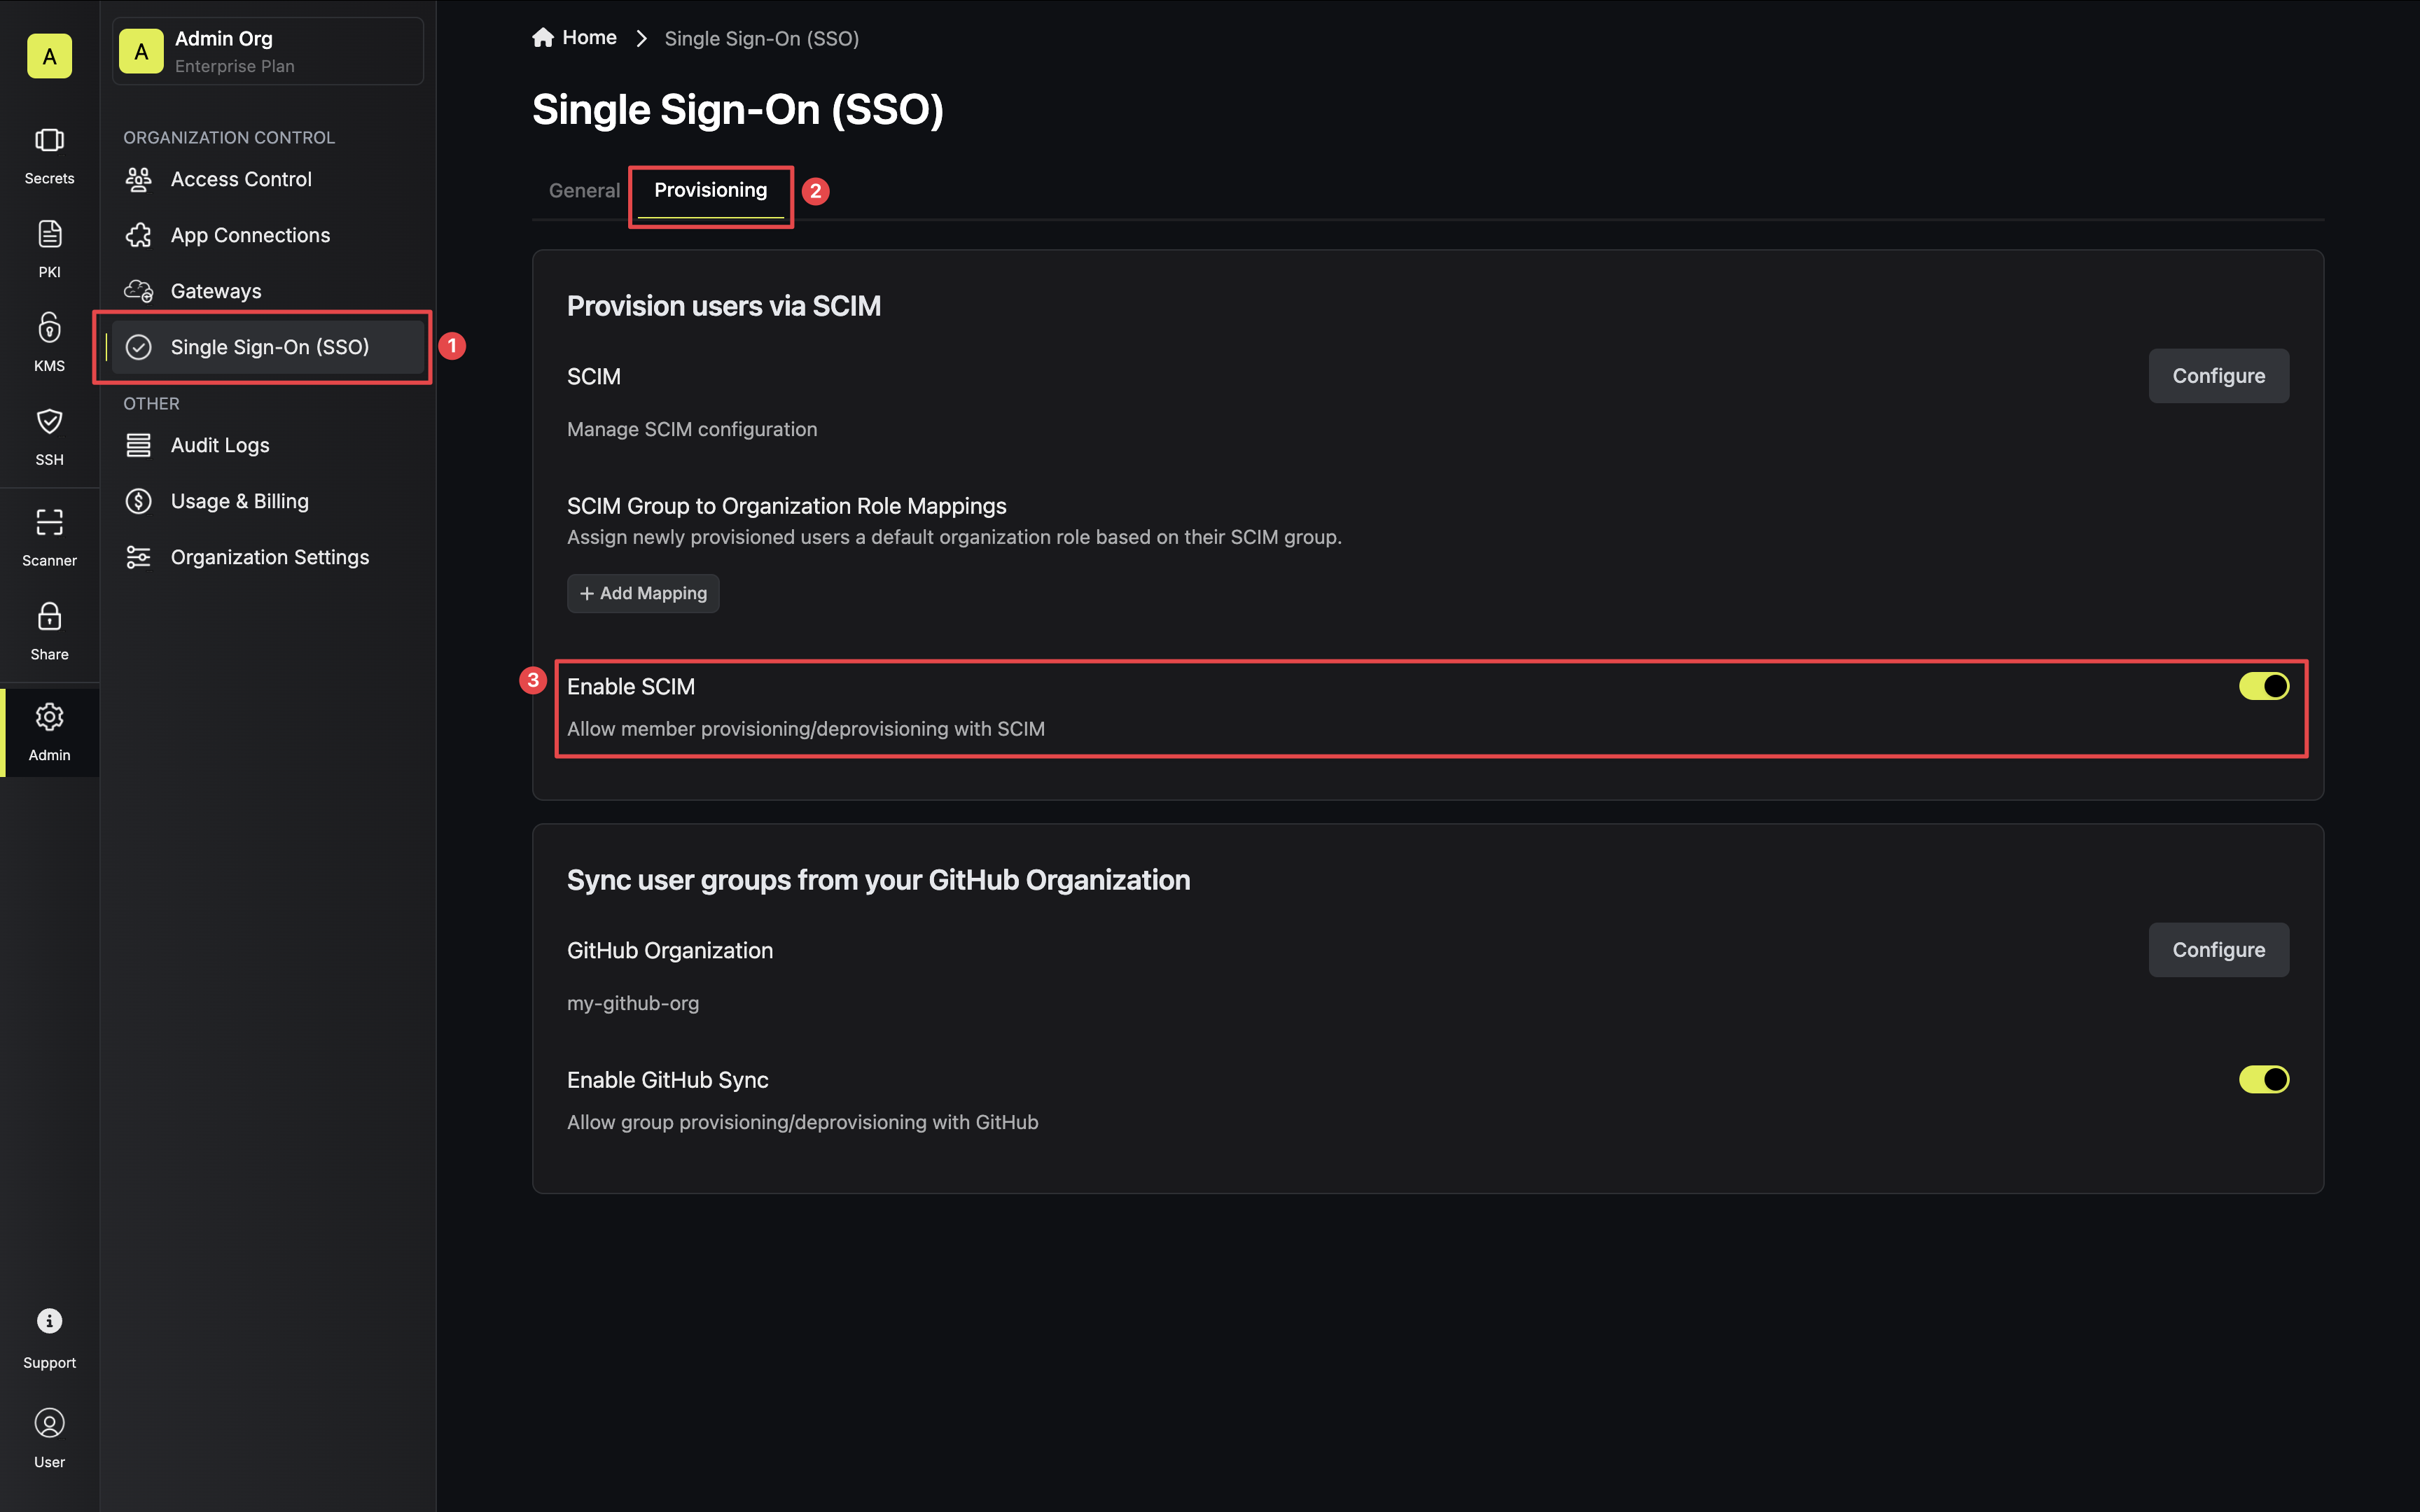 Next, press Manage SCIM Tokens and then Create to generate a SCIM token for Azure.
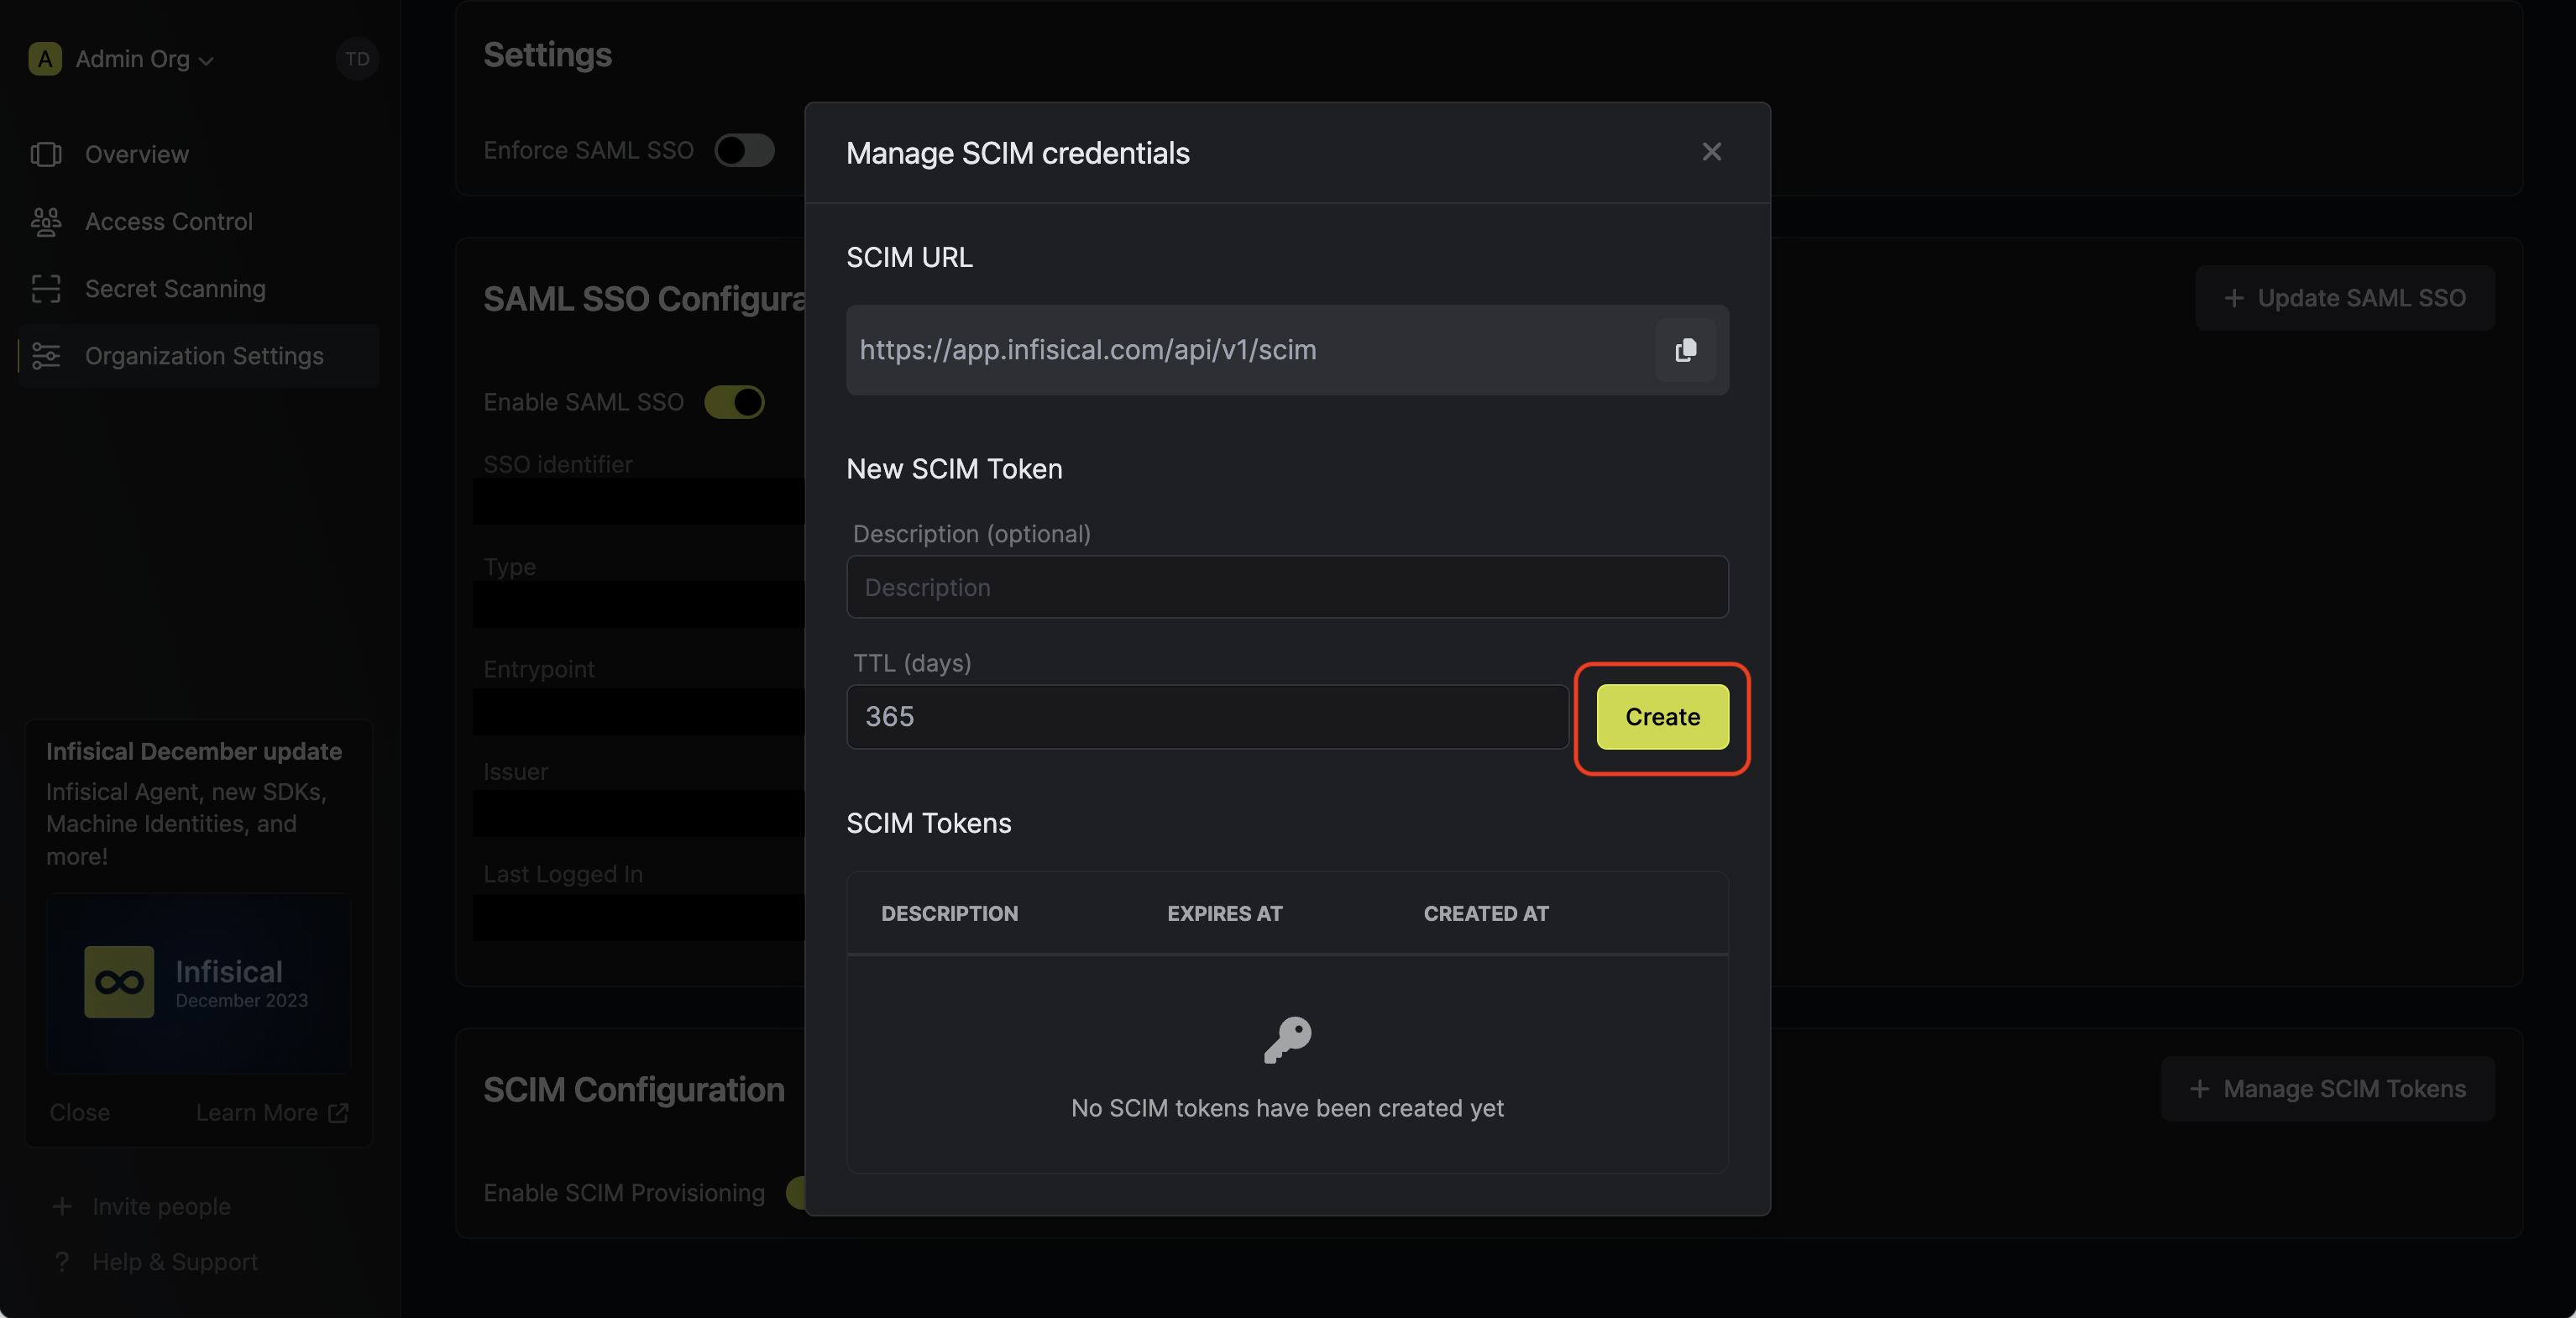 Next, copy the SCIM URL and New SCIM Token to use when configuring SCIM in Azure.
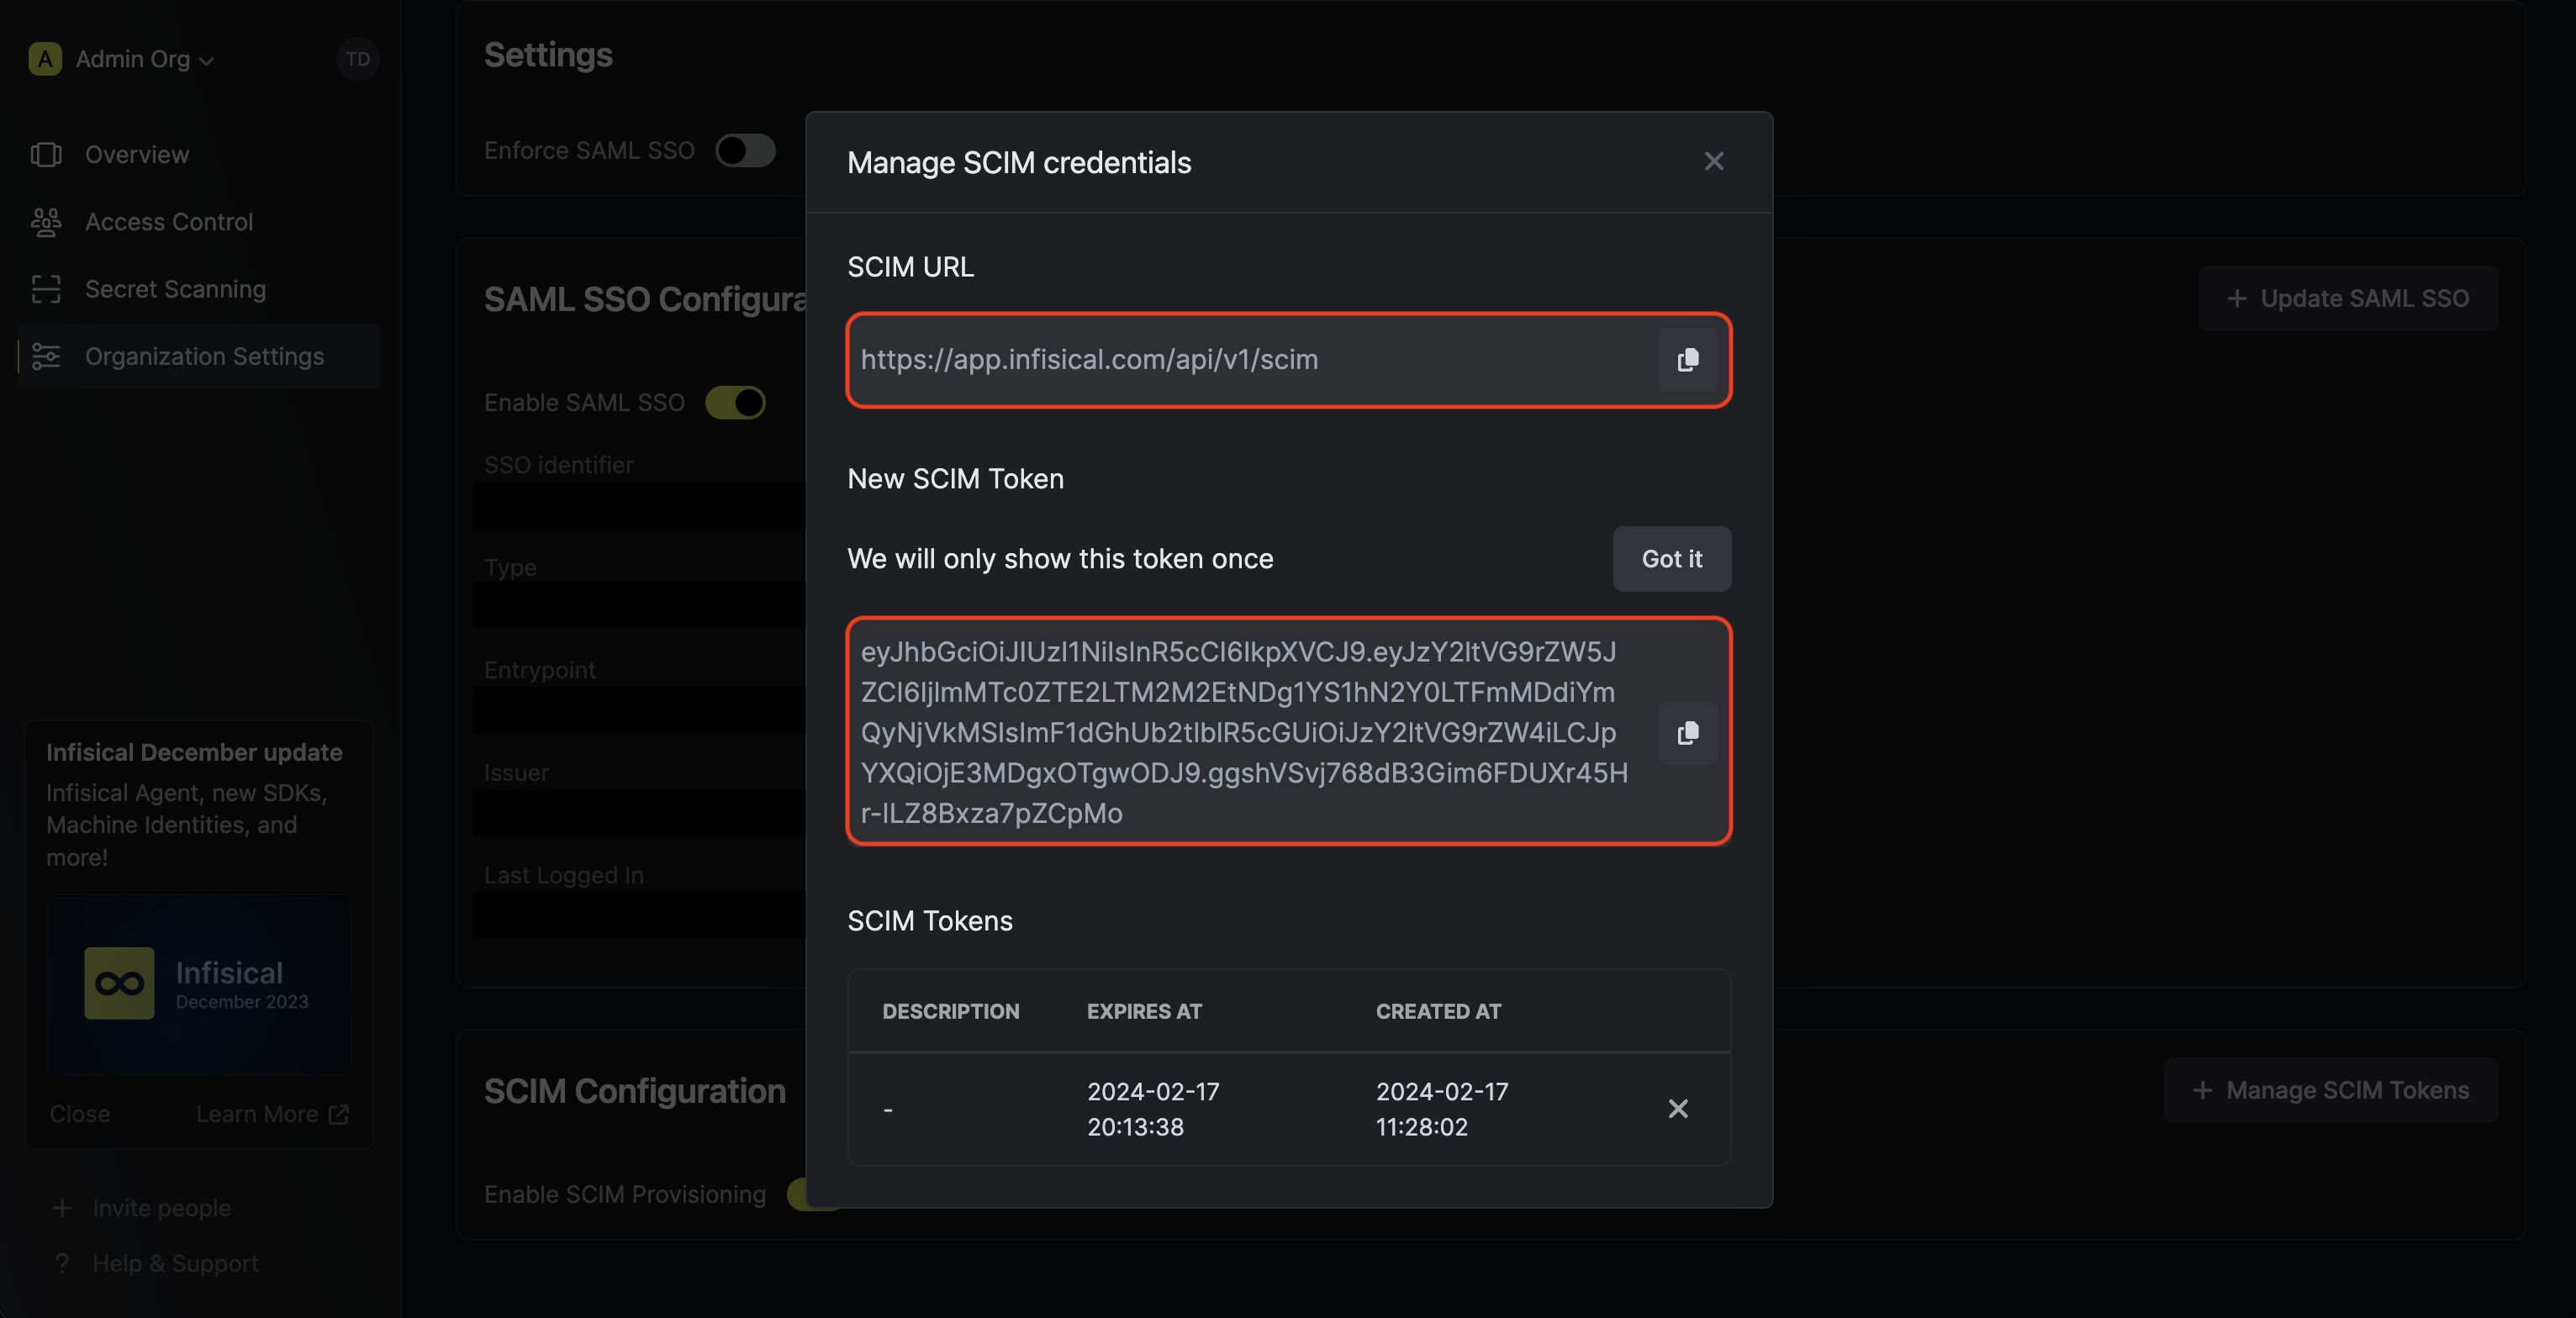
Next, press Manage SCIM Tokens and then Create to generate a SCIM token for Azure.Next, copy the SCIM URL and New SCIM Token to use when configuring SCIM in Azure.2
Add Users and Groups in Azure
In Azure, navigate to Enterprise Application > Users and Groups. Add any users and/or groups to your application that you would like
to be provisioned over to Infisical.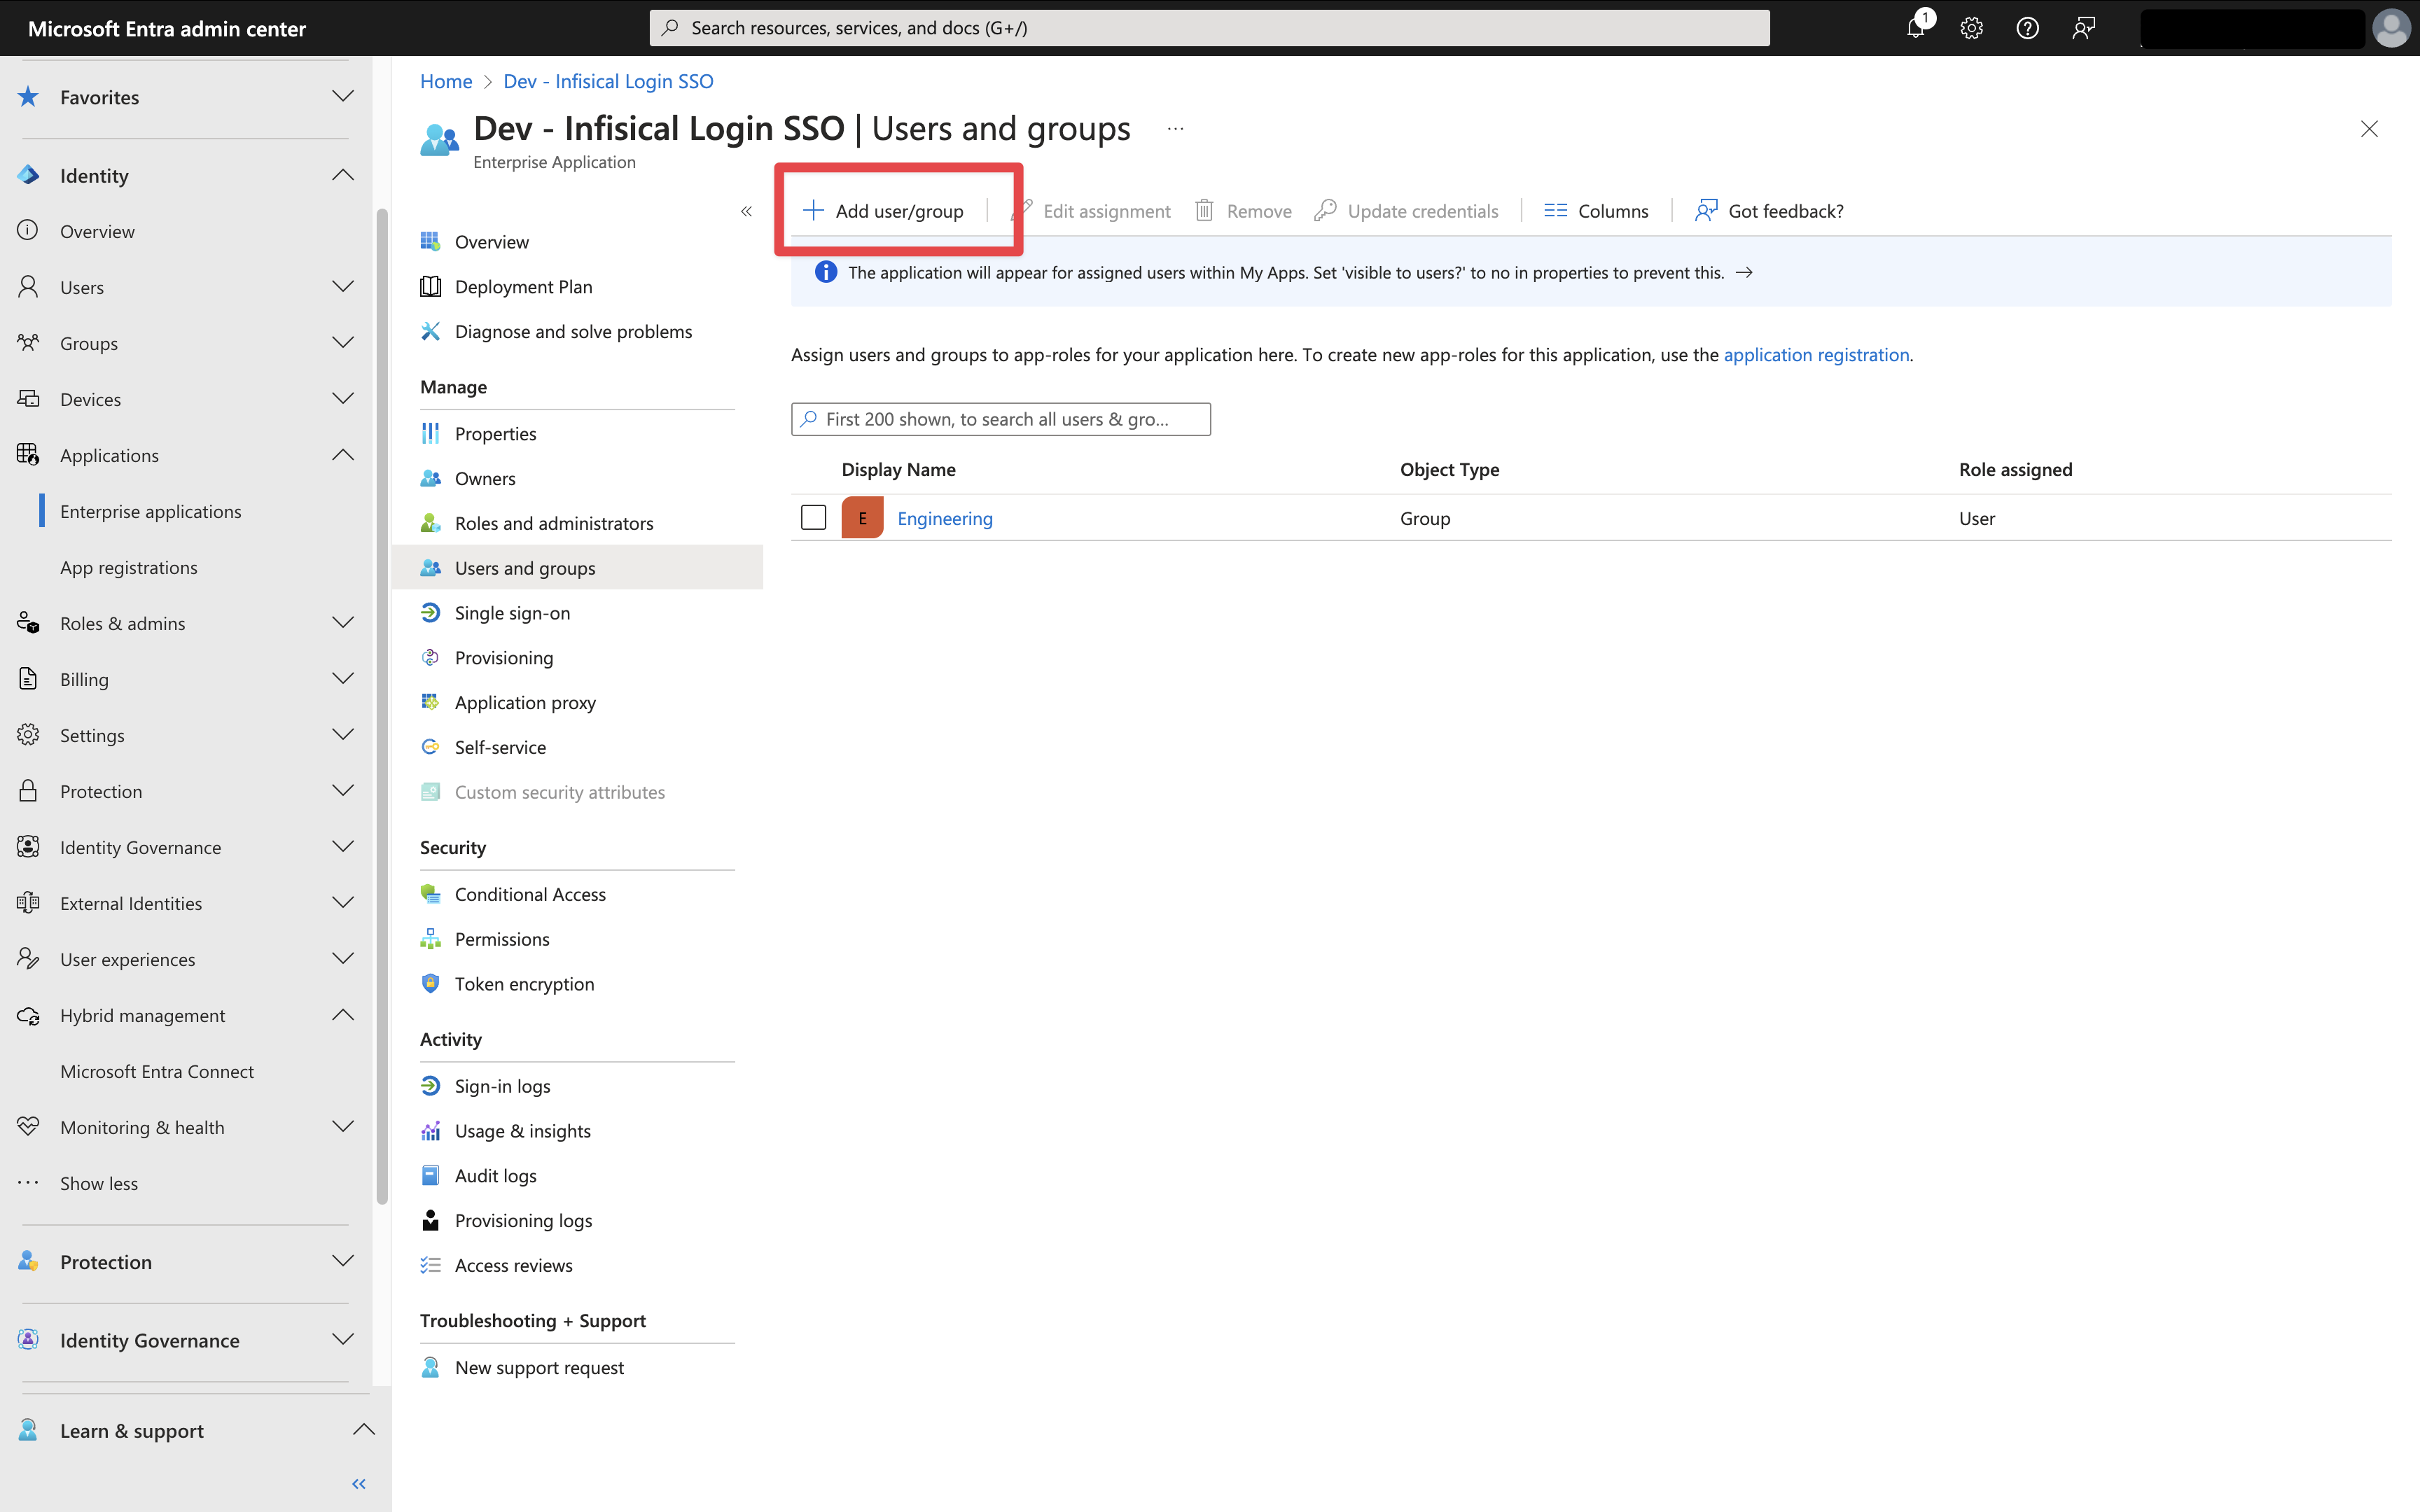
3
Configure SCIM in Azure
In Azure, head to your Enterprise Application > Provisioning > Overview and press Get started.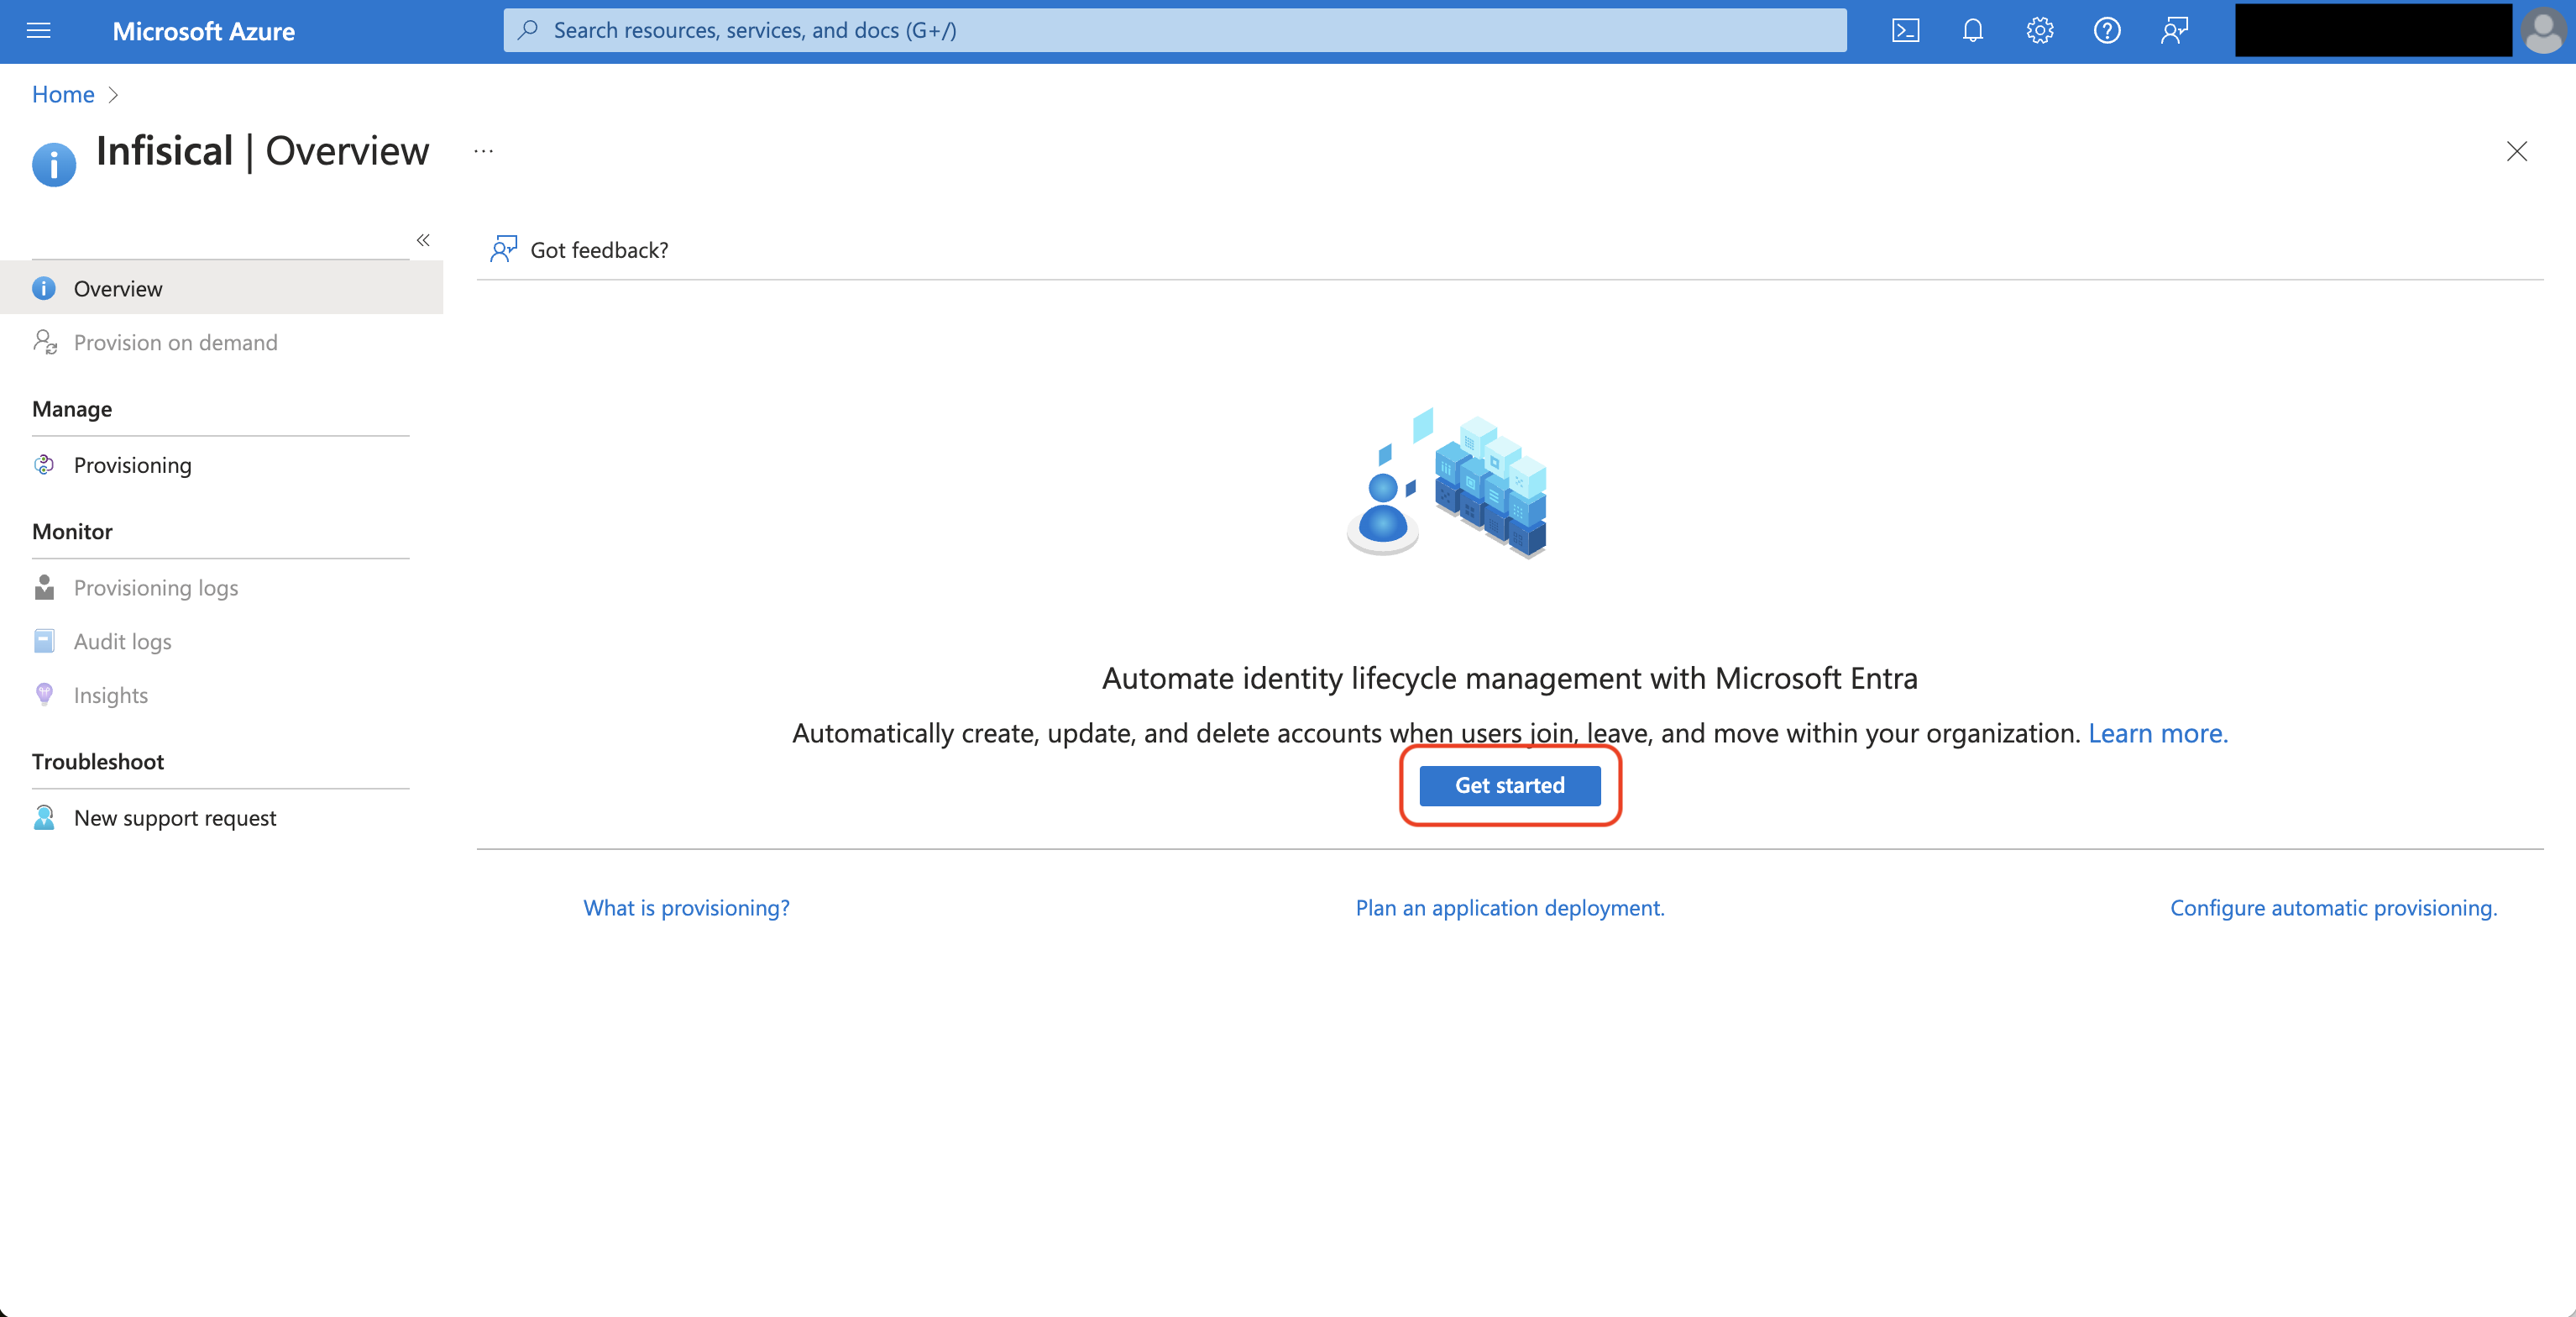 Next, set the following fields:
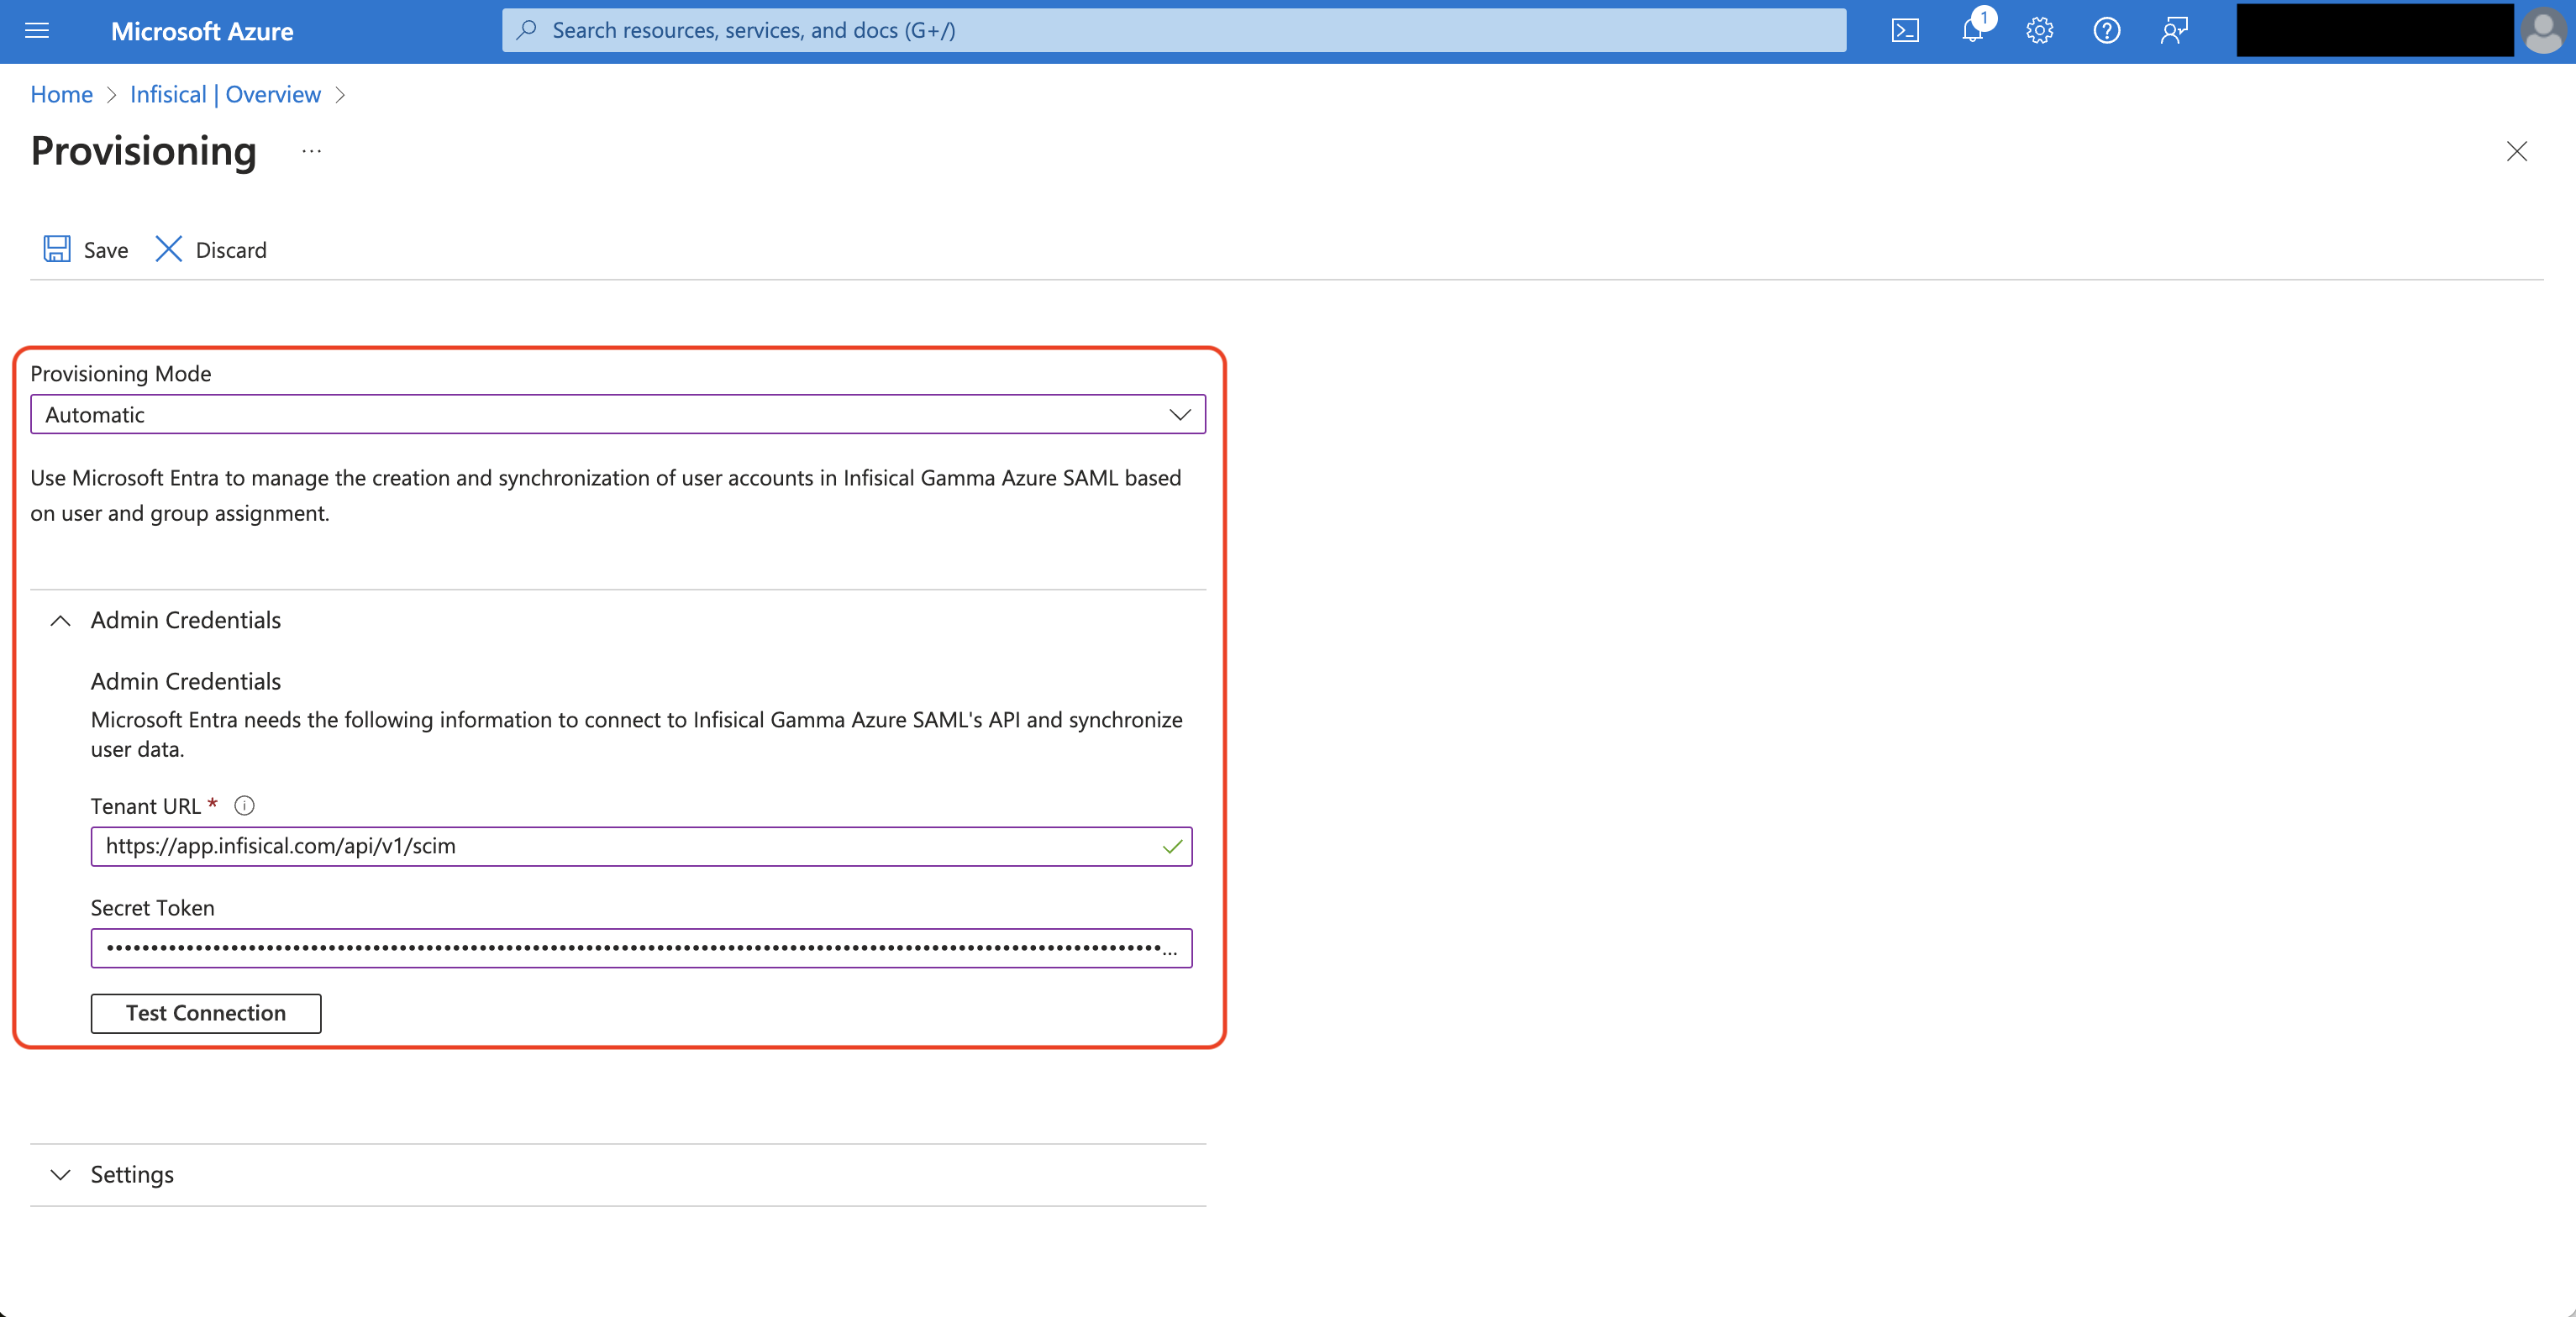 After you hit Save, select Provision Microsoft Entra ID Users under the Mappings subsection.
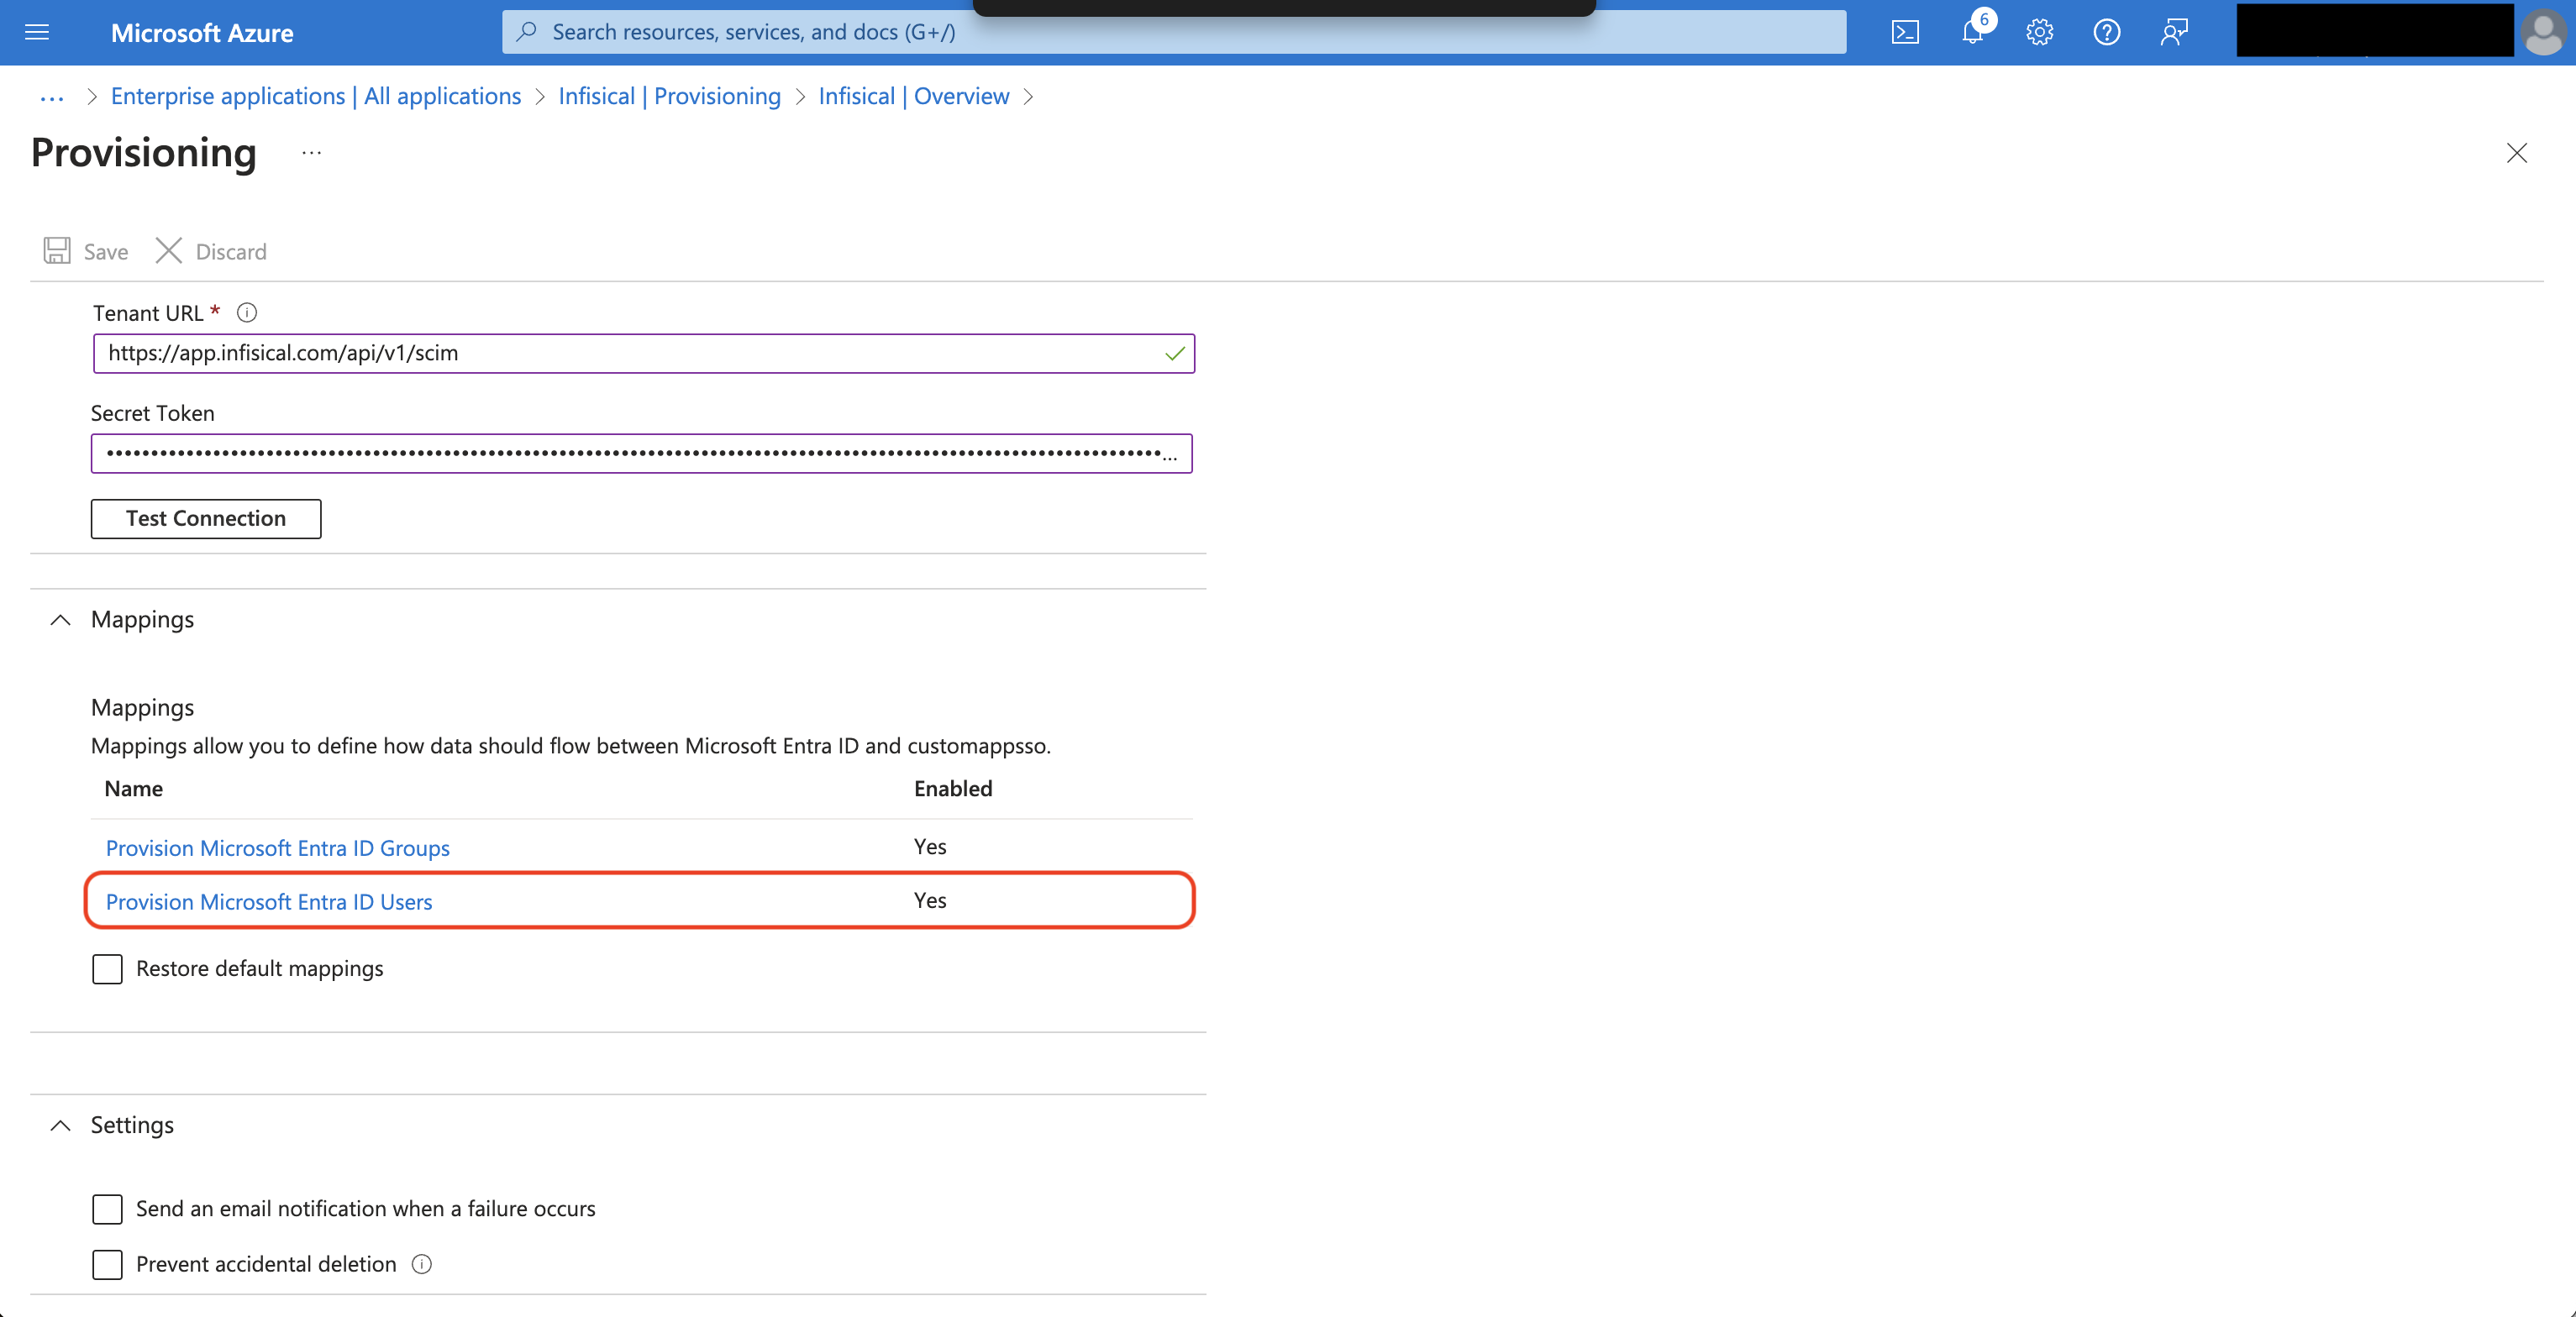 Next, adjust the mappings so you have them configured as below:
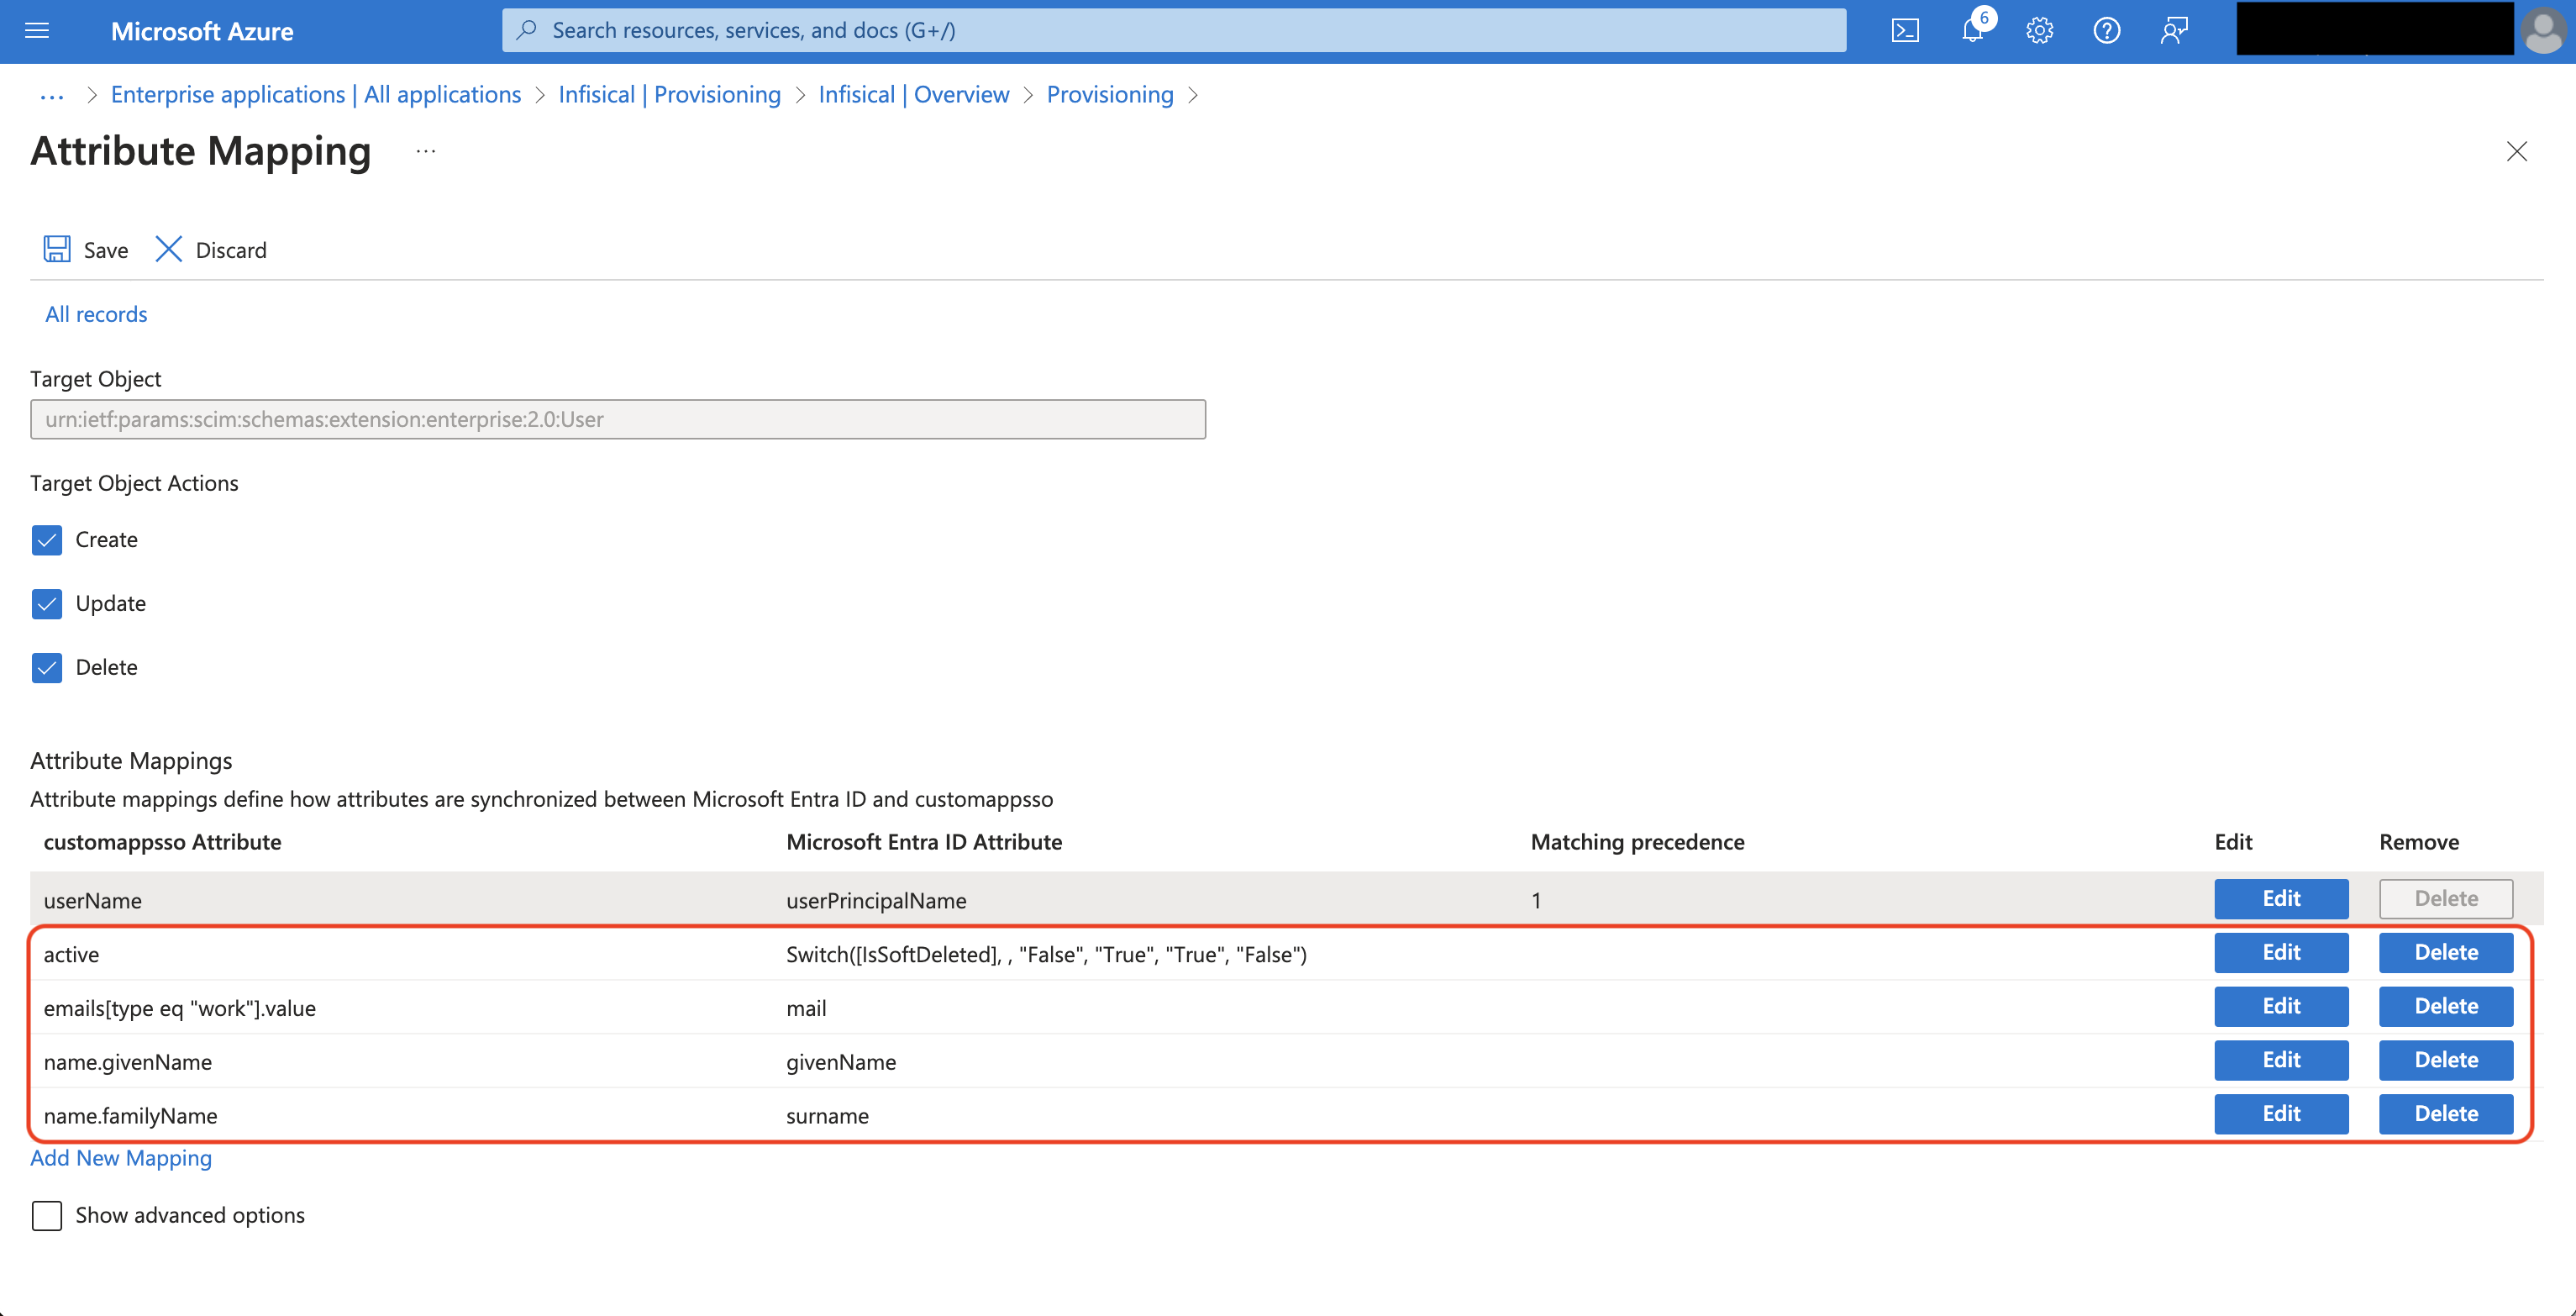 Finally, head to your Enterprise Application > Provisioning and set the Provisioning Status to On.
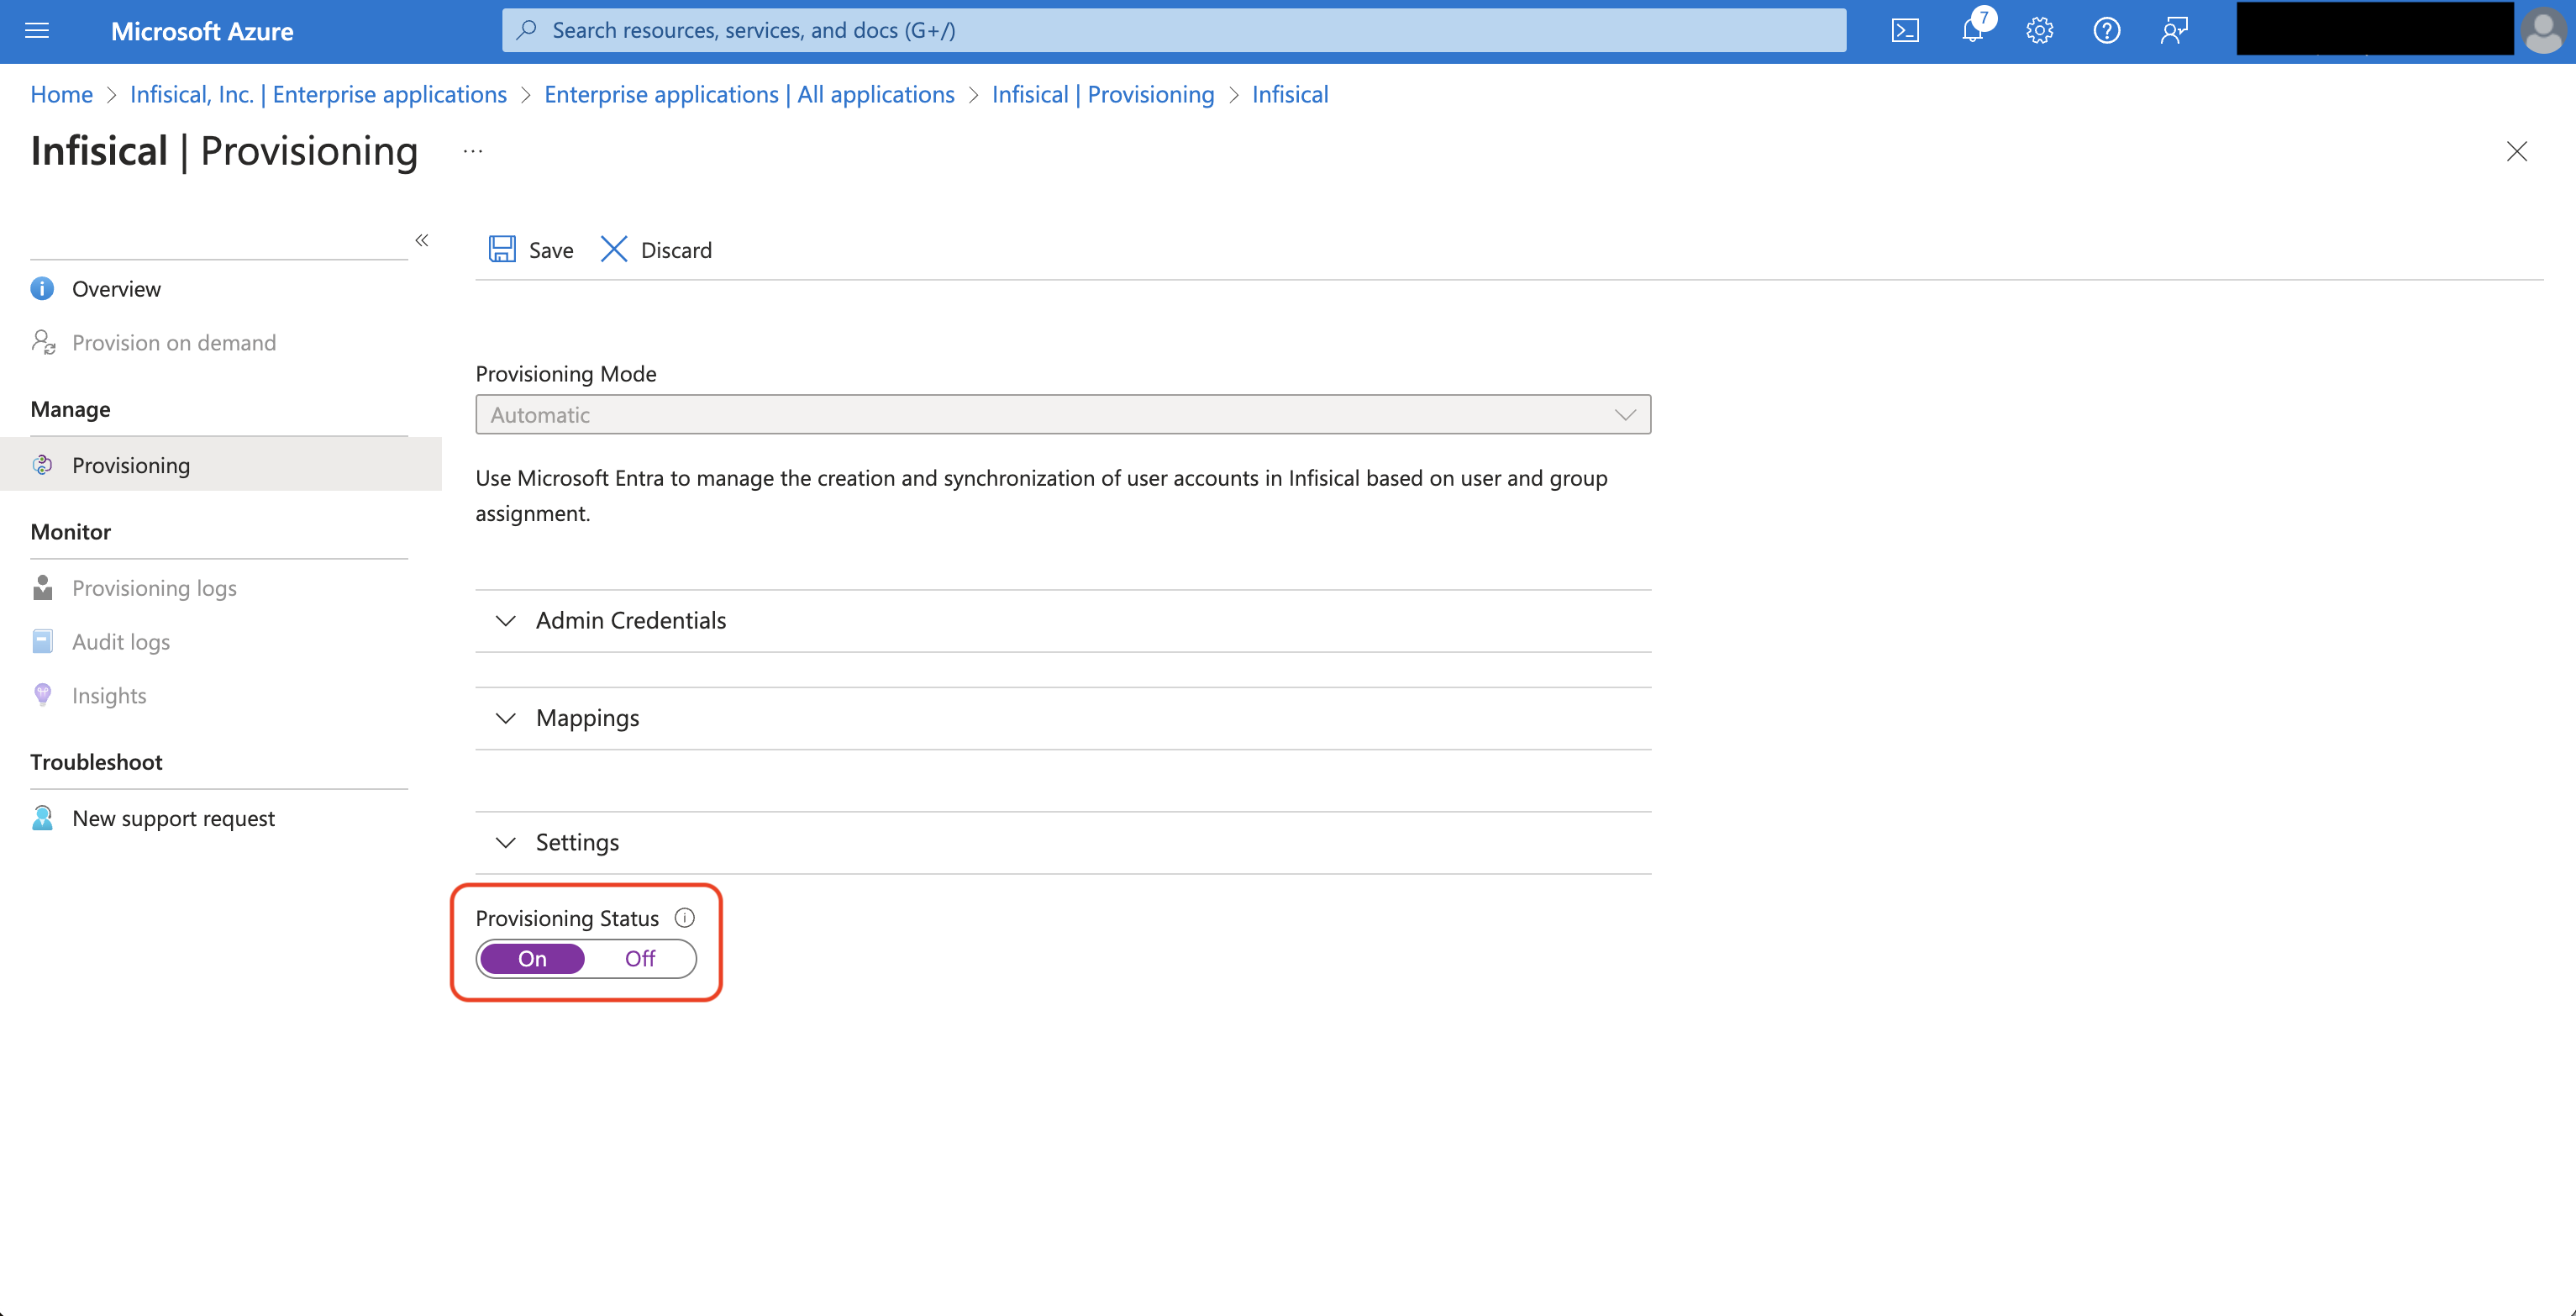 Alternatively, you can go to Overview and press Start provisioning to have Azure start provisioning/deprovisioning users to Infisical.
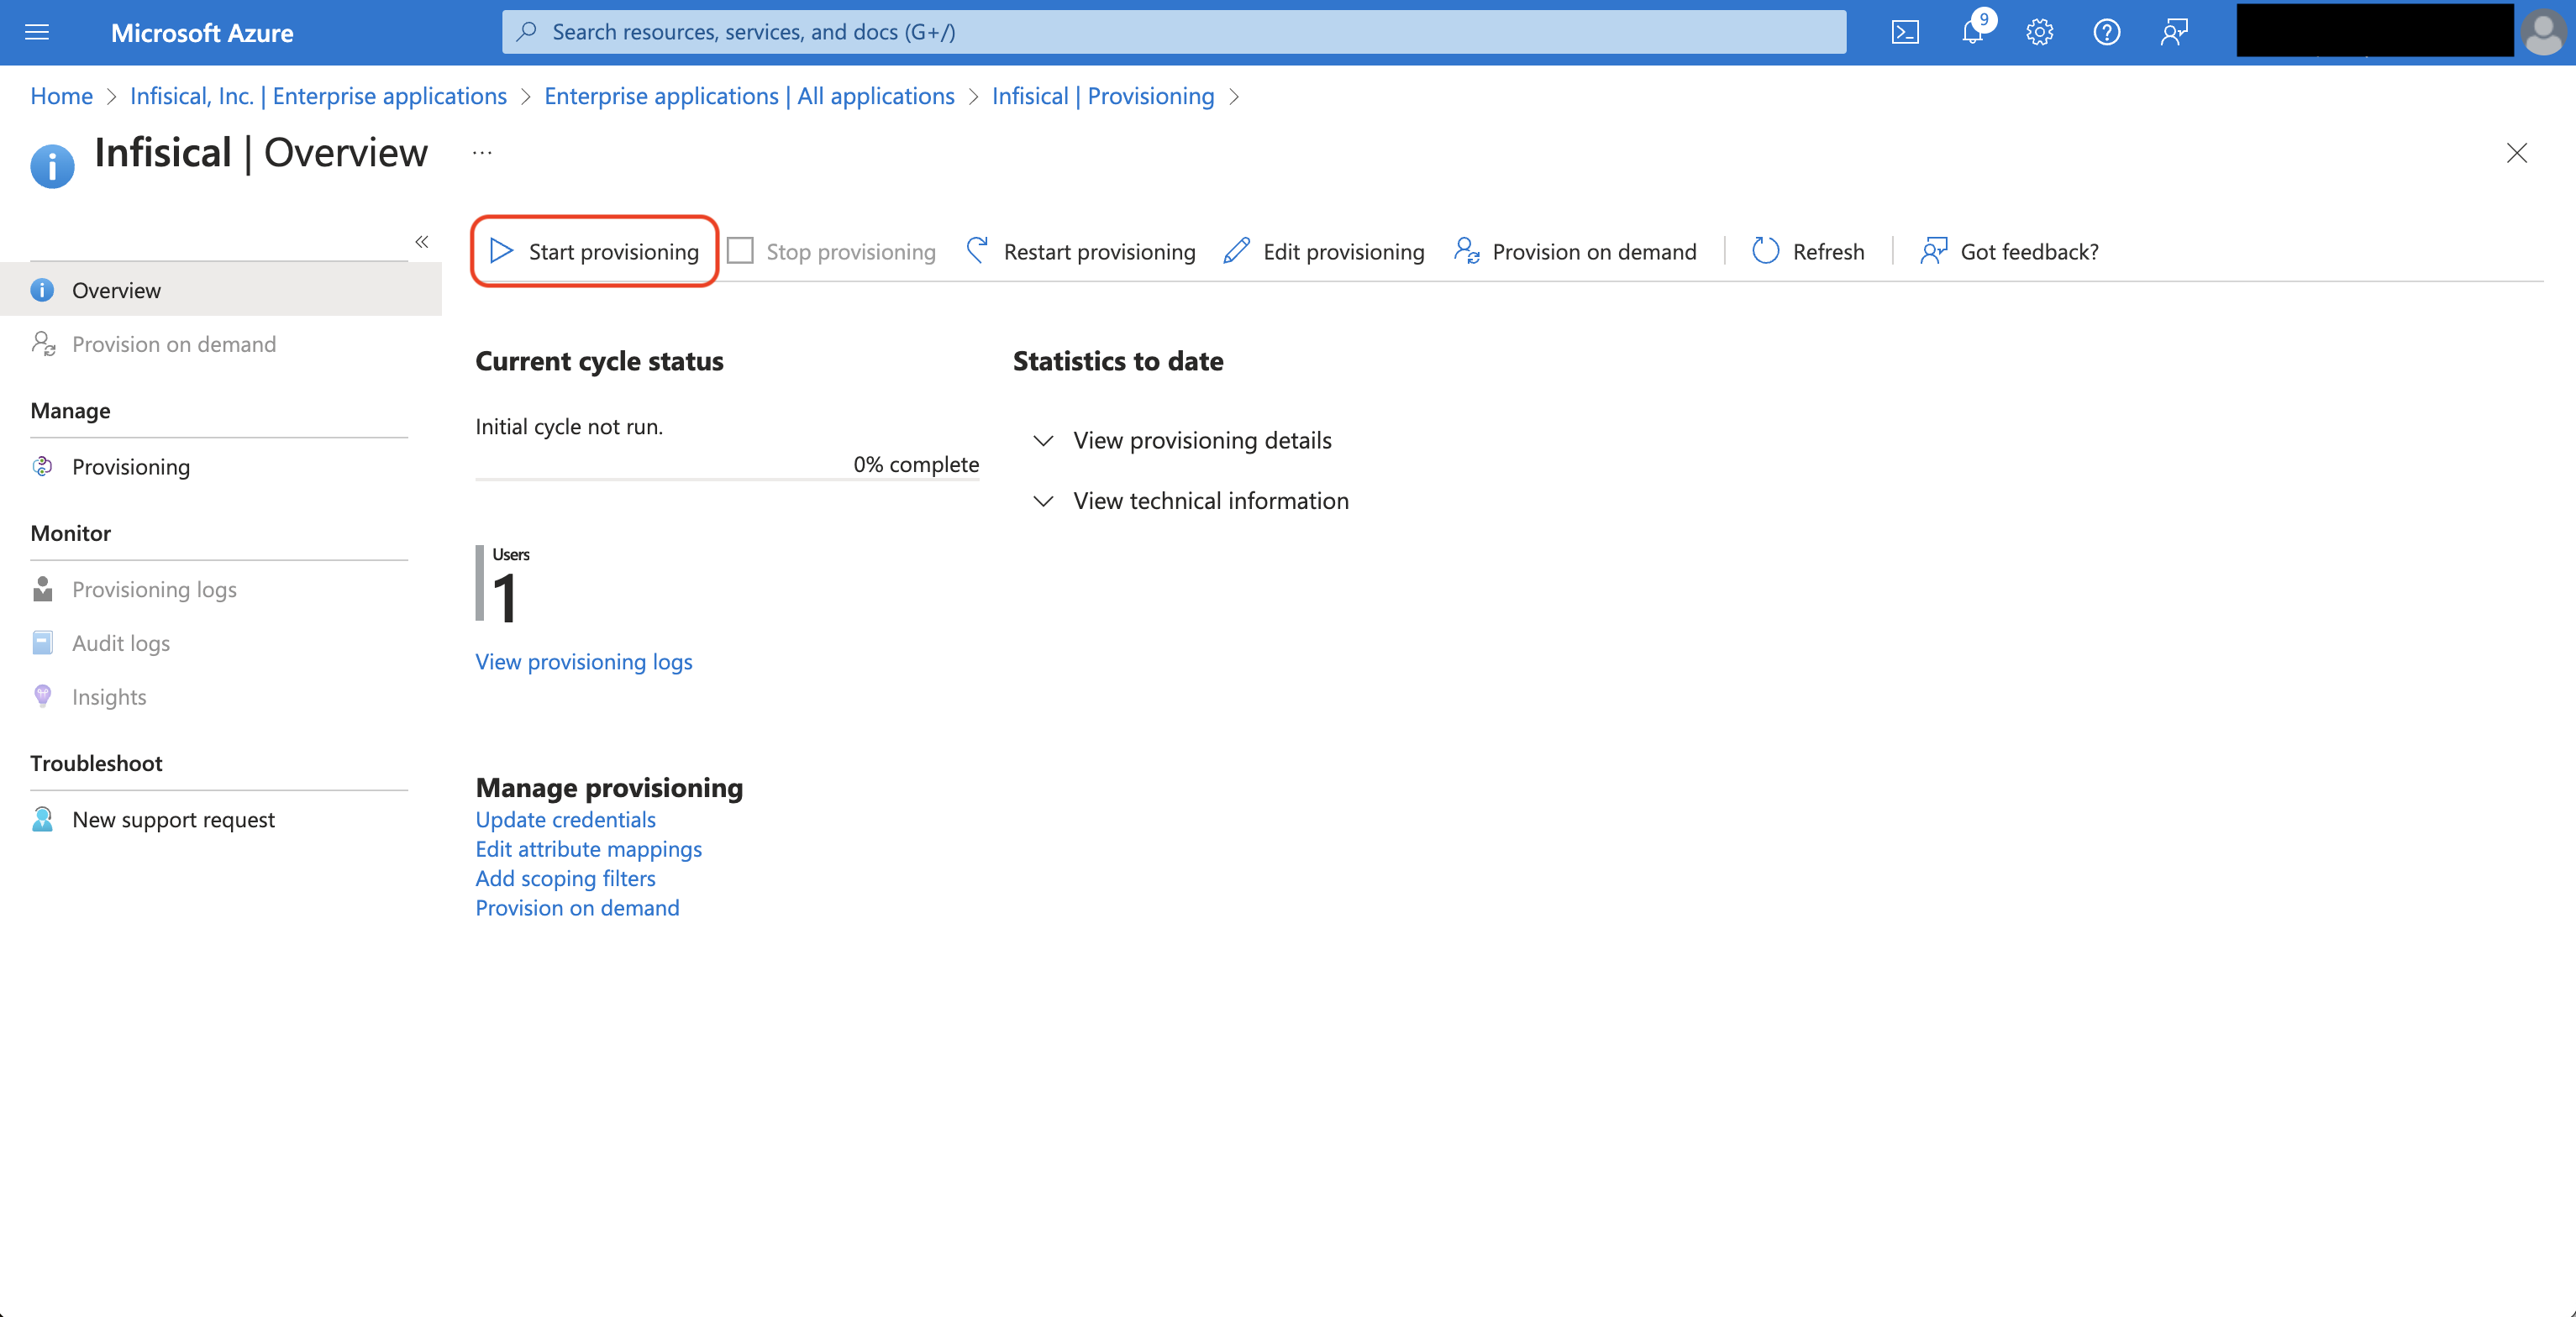 Now Azure can provision/deprovision users to/from your organization in Infisical.
Next, set the following fields:- Provisioning Mode: Select Automatic.
- Tenant URL: Input the SCIM URL from Step 1 with
?aadOptscim062020appended as a query parameter. - Secret Token: Input the New SCIM Token from Step 1.
After you hit Save, select Provision Microsoft Entra ID Users under the Mappings subsection.Next, adjust the mappings so you have them configured as below:Finally, head to your Enterprise Application > Provisioning and set the Provisioning Status to On.Alternatively, you can go to Overview and press Start provisioning to have Azure start provisioning/deprovisioning users to Infisical.Now Azure can provision/deprovision users to/from your organization in Infisical.Why do SCIM-provisioned users have to finish setting up their account?
Why do SCIM-provisioned users have to finish setting up their account?
Infisical’s SCIM implmentation accounts for retaining the end-to-end encrypted architecture of Infisical because we decouple the authentication and decryption steps in the platform.For this reason, SCIM-provisioned users are initialized but must finish setting up their account when logging in the first time by creating a master encryption/decryption key. With this implementation, IdPs and SCIM providers cannot and will not have access to the decryption key needed to decrypt your secrets.