Concept
Infisical can connect to any upstream ACME-compatible CA (e.g. Lets’s Encrypt, DigiCert, etc.) supporting the ACME protocol to issue certificates back to your end-entities. This integration uses the DNS-01 challenge method as part of the ACME domain validation challenge workflow for a requested certificate. The upstream ACME-compatible CA integration lets you connect Infisical to providers by specifying their ACME Directory URL such as:- Let’s Encrypt:
https://acme-v02.api.letsencrypt.org/directory. - DigiCert:
https://acme.digicert.com/v2/acme/directory. - Google GTS:
https://dv.acme-v02.api.pki.goog/directory. - Buypass:
https://api.buypass.com/acme/directory. - ZeroSSL:
https://acme.zerossl.com/v2/DV90. - SSL.com:
https://acme.ssl.com/sslcom-dv-rsa.
_acme-challenge.{your-domain} in your configured DNS provider (e.g. Route53, Cloudflare, DNS Made Easy, etc.); this TXT record contains the challenge token issued by the ACME-compatible CA to validate domain control for the requested certificate.
The ACME provider checks for the existence of this TXT record to verify domain control before issuing the certificate back to Infisical.
After validation completes successfully, Infisical automatically removes the TXT record from your DNS provider.
We recommend reading about ACME protocol and DNS-01 challenges for a fuller understanding of the underlying workflow.
Workflow
A typical workflow for using Infisical with an external ACME-compatible CA consists of the following steps:- Setting up your DNS provider (e.g. Route53, Cloudflare, etc.) with appropriate DNS permissions.
- Creating an App Connection in Infisical to store credentials for Infisical to connect to your DNS provider and create/remove DNS records as part of the DNS-01 challenge.
- Registering an External CA in Infisical with the ACME type and inputting required configuration including the ACME Directory URL of the upstream ACME-compatible CA and the App Connection for your DNS provider.
Guide to Connecting Infisical to an ACME-compatible CA
In the following steps, we explore how to connect Infisical to an ACME-compatible CA.Create an App Connection to your DNS provider
Before registering an ACME-compatible CA with Infisical, you need to set up an App Connection with the appropriate permissions for Infisical to perform the DNS-01 challenge with your DNS provider.If you don’t see a specific DNS provider listed below or need a dedicated one, please reach out to [email protected] and we’ll help get that enabled for you.Replace
- Route53
- Cloudflare
- DNS Made Easy
- Navigate to your Certificate Management Project > App Connections and create a new AWS connection.
- Ensure your AWS connection has the following minimum permissions for Route53 DNS validation:
YOUR_HOSTED_ZONE_ID with your actual Route53 hosted zone ID.For detailed instructions on setting up an AWS connection, see the AWS Connection documentation.Register an ACME-compatible CA
- Infisical UI
- API
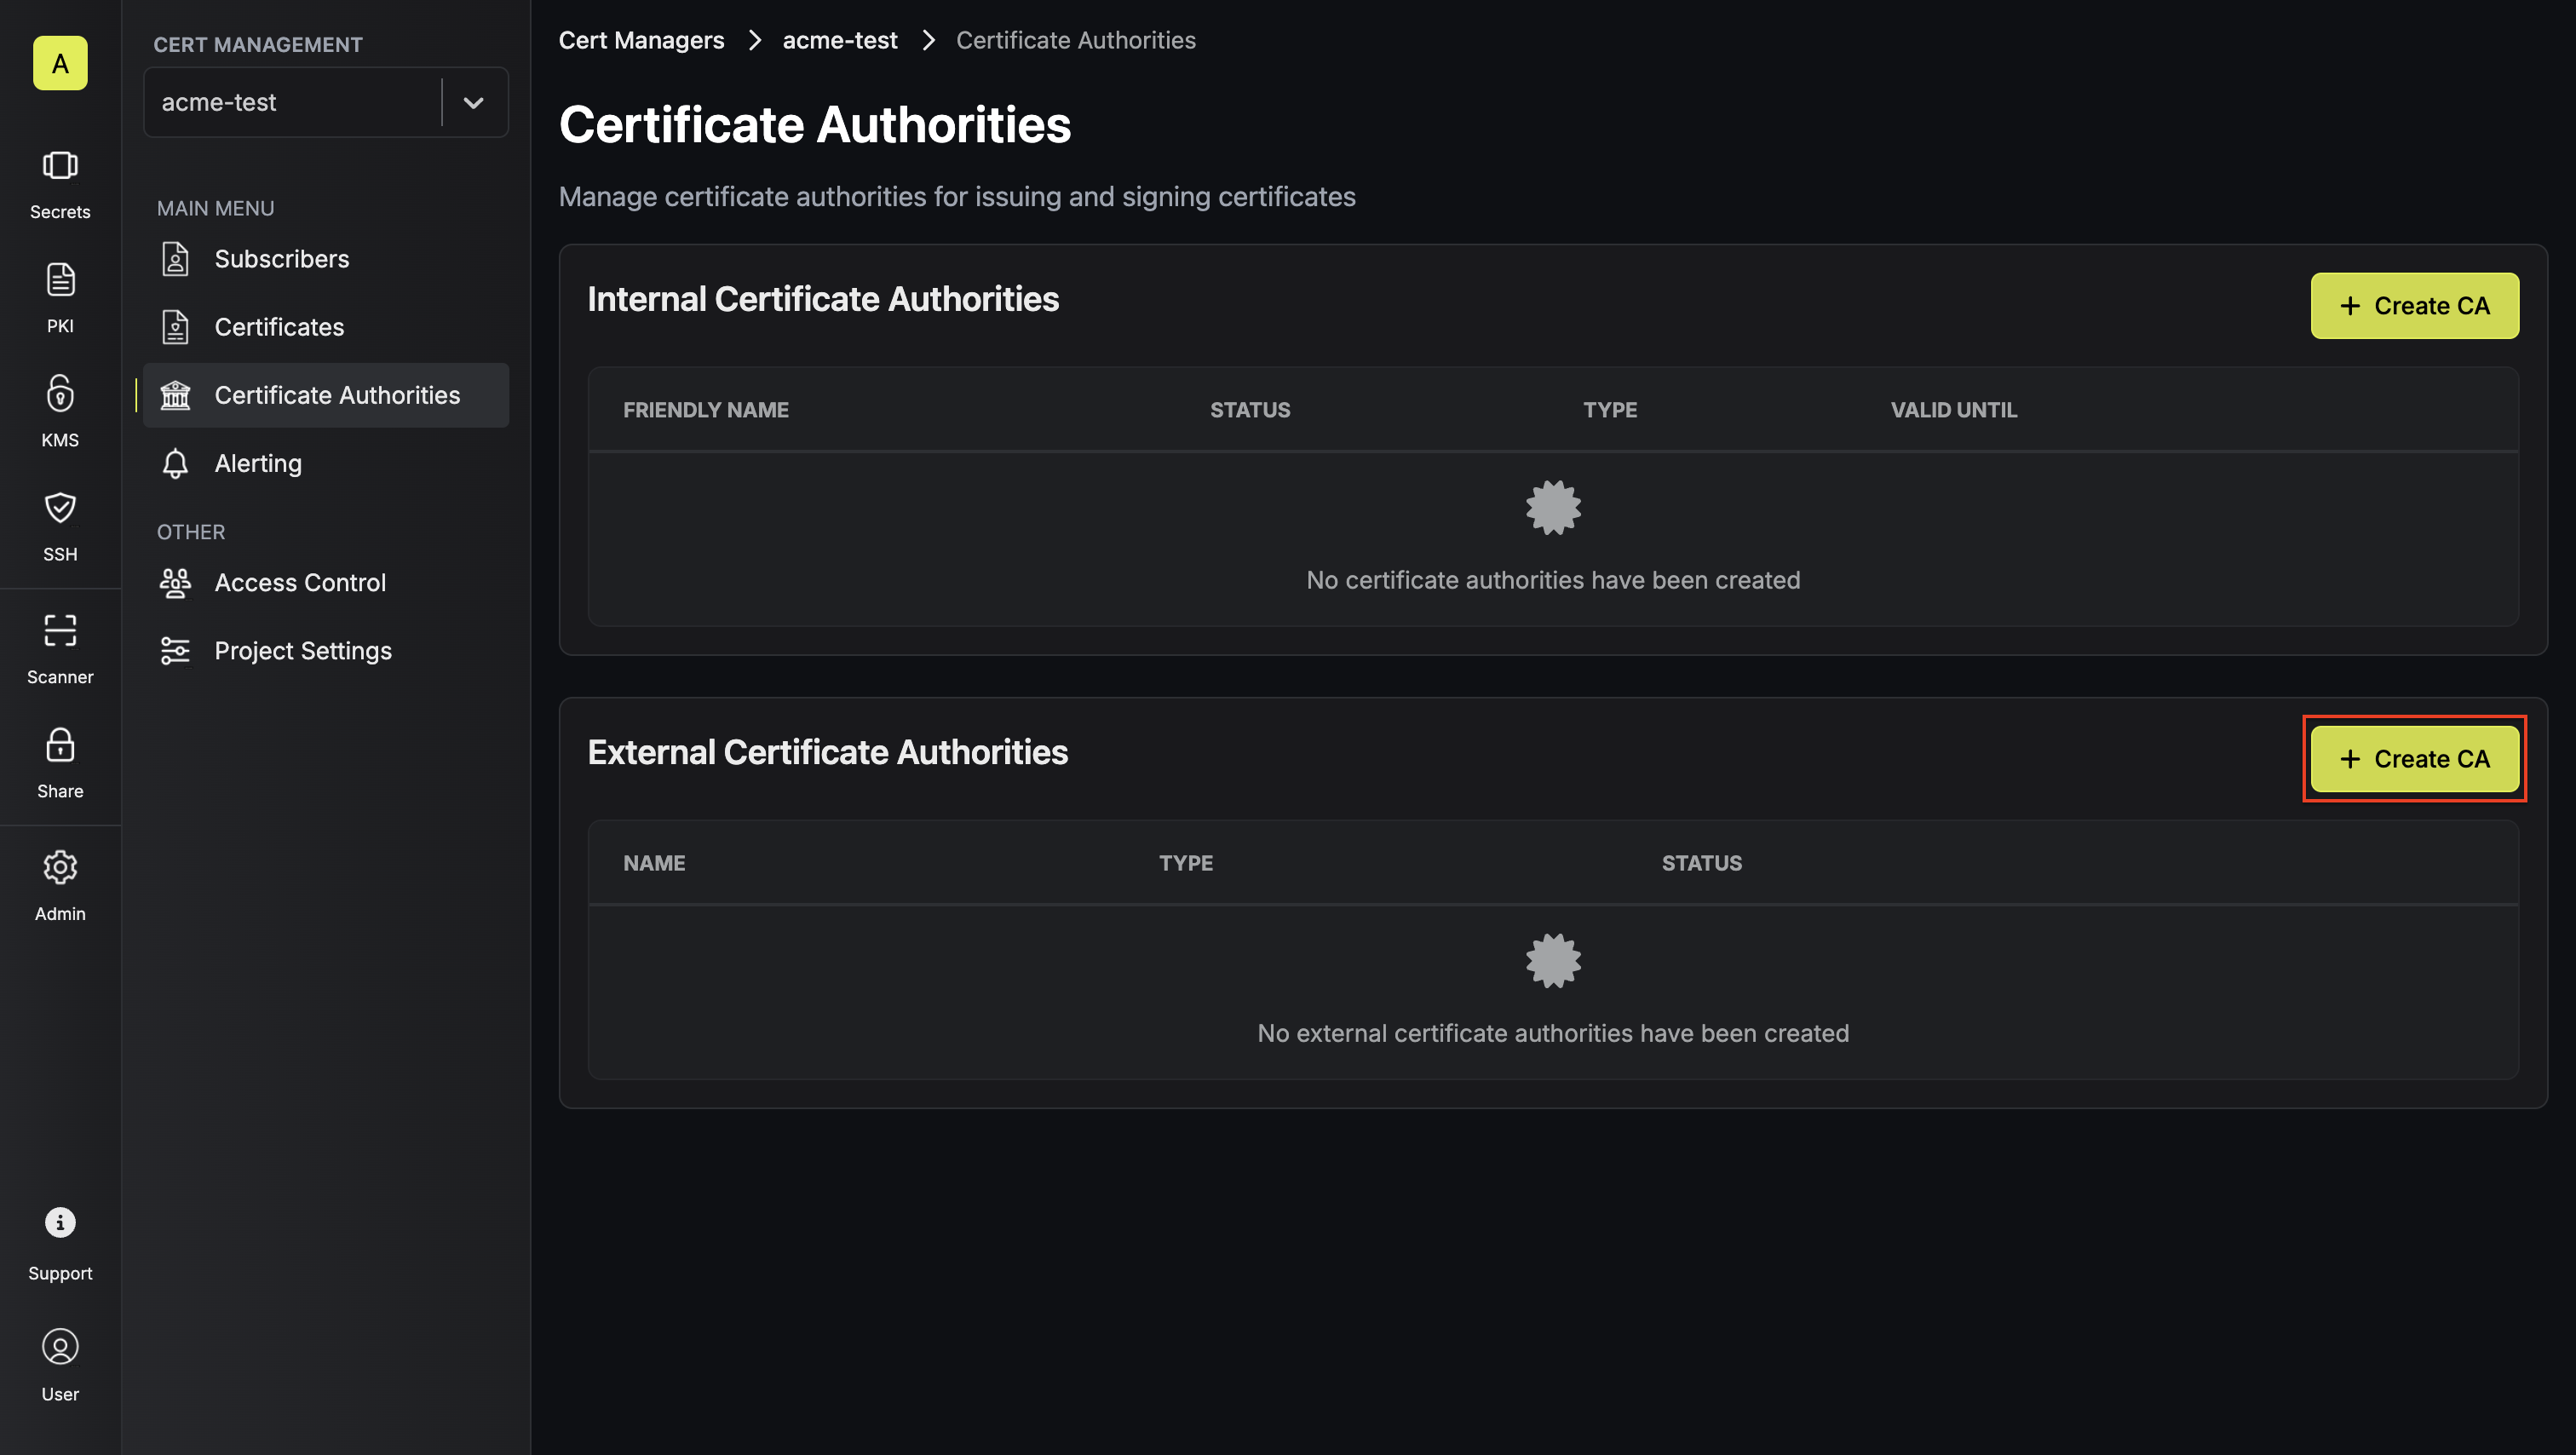
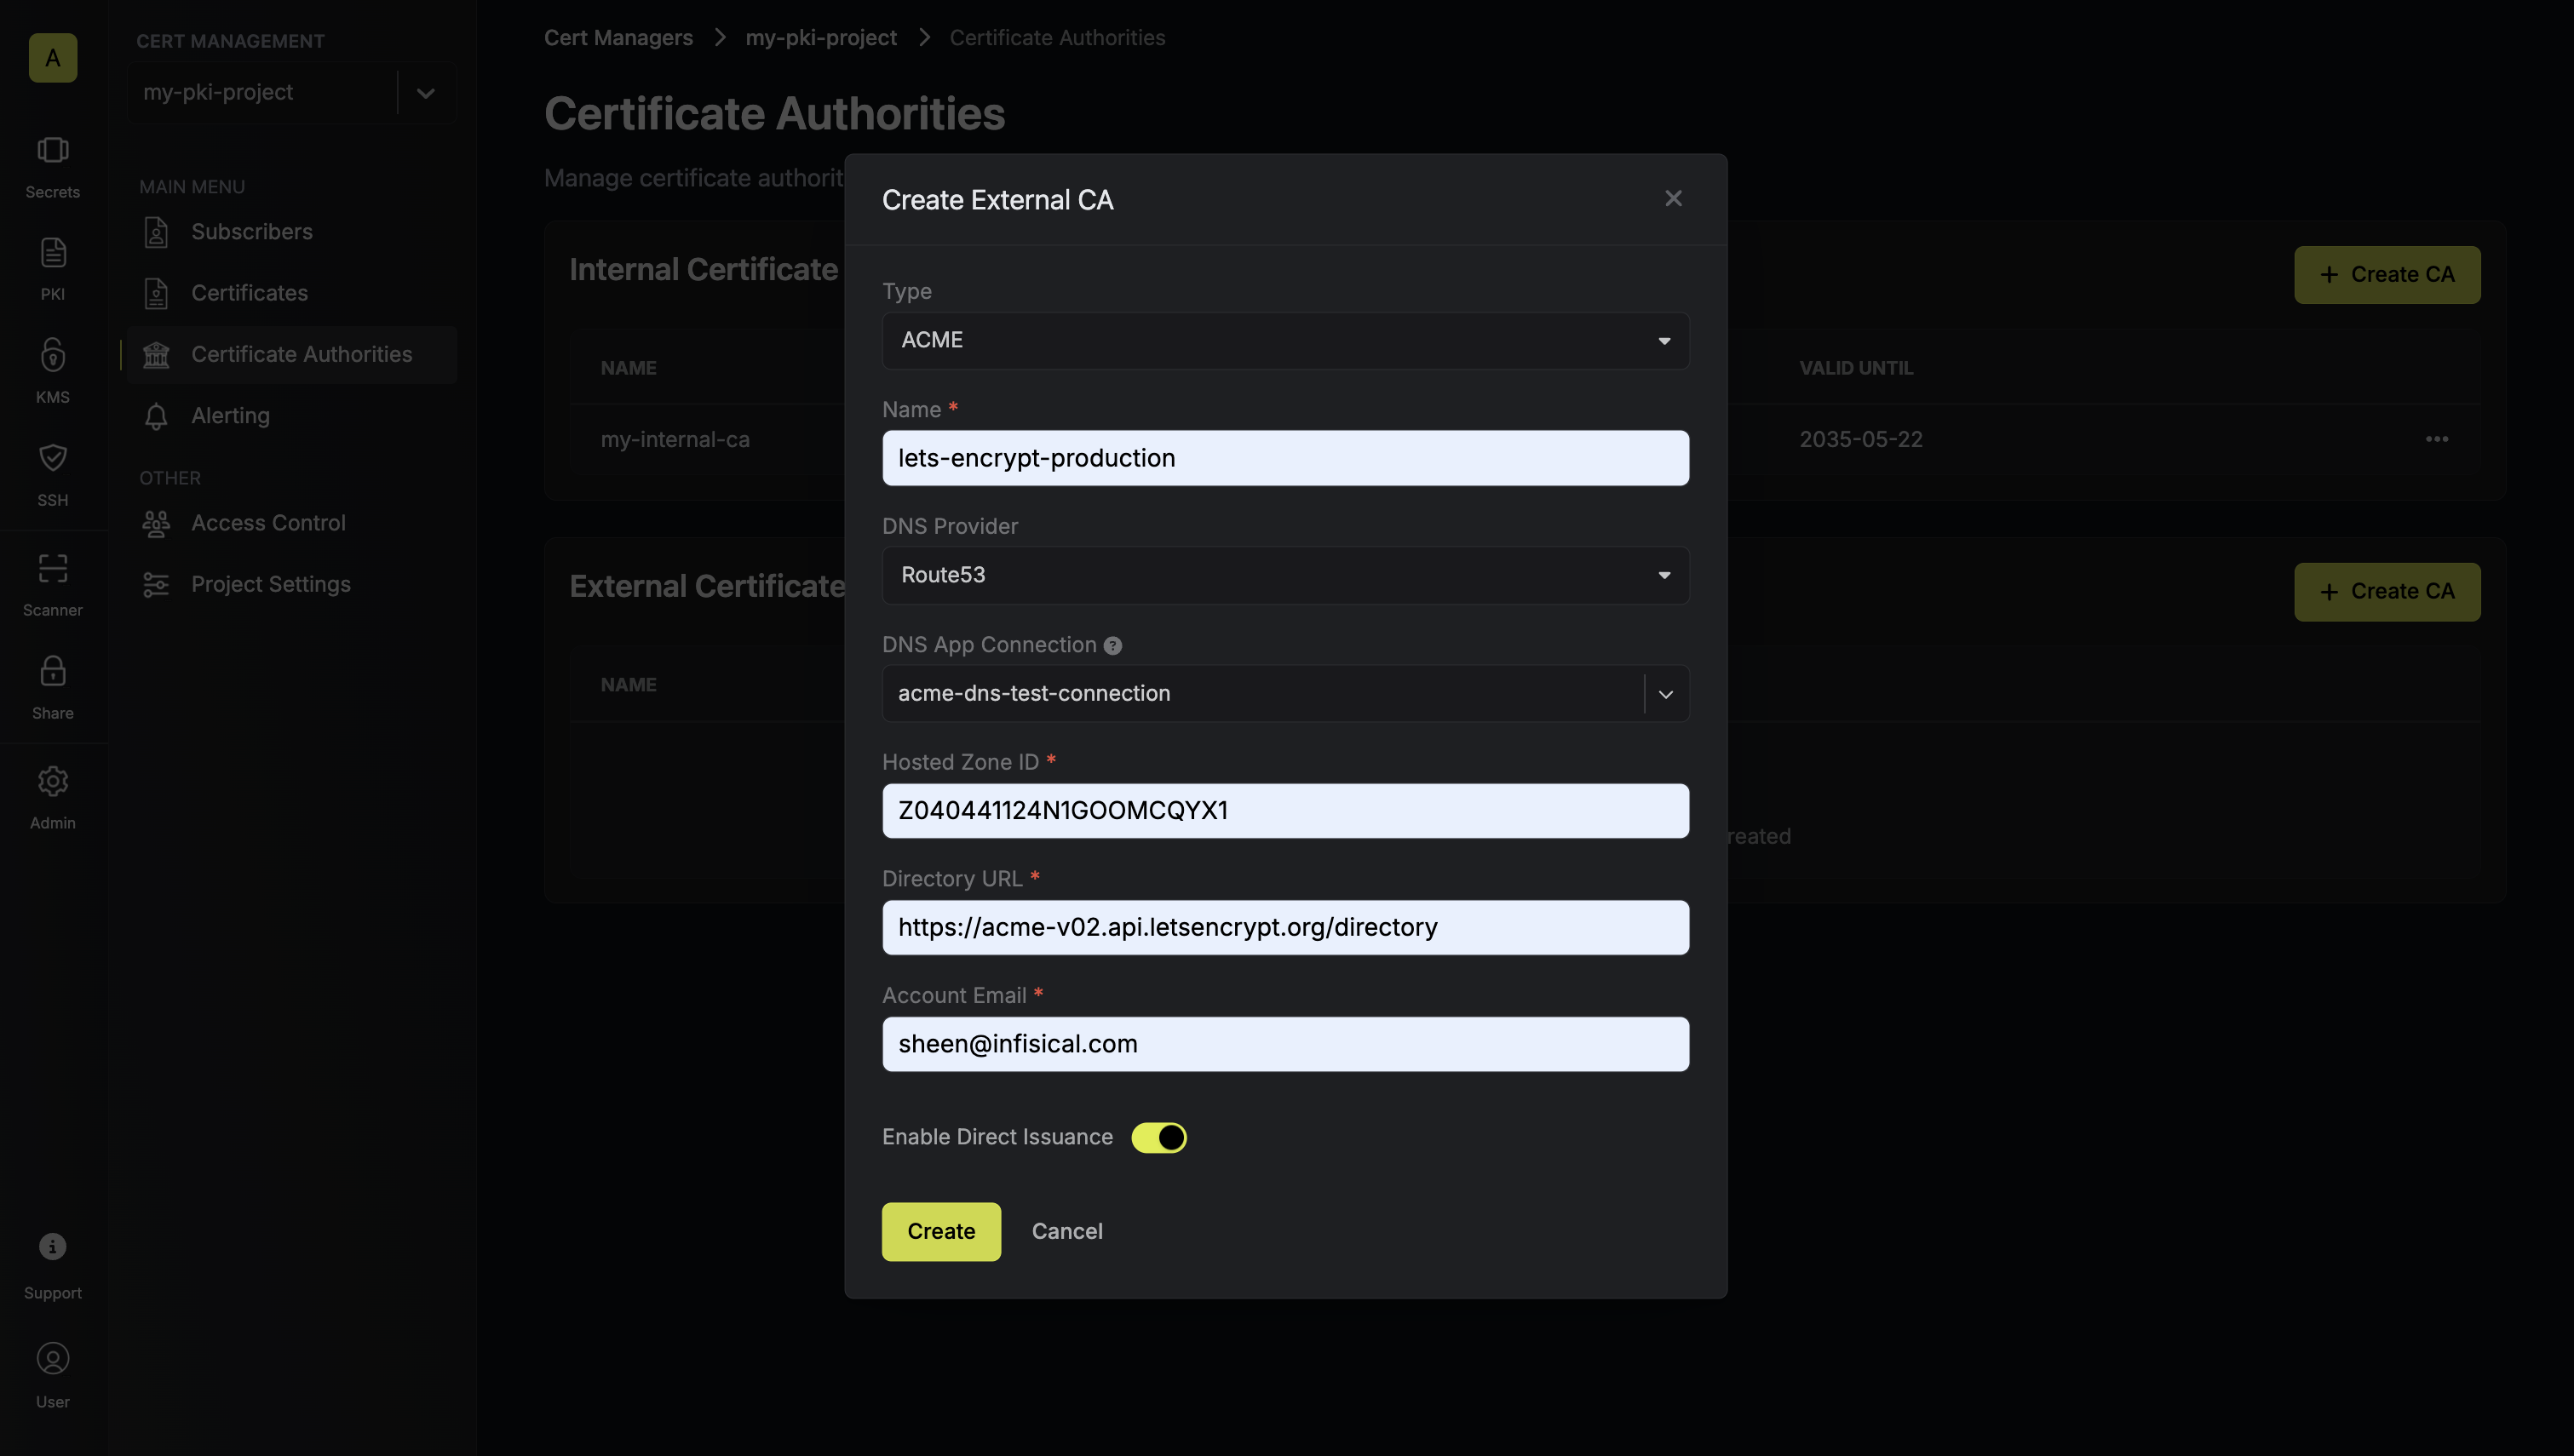
To register an ACME-compatible CA, head to your Certificate Management Project > Certificate Authorities > External Certificate Authorities and press Create CA. Here, set the CA Type to ACME and fill out details for it.
 Here’s some guidance for each field:
 Here, set the CA Type to ACME and fill out details for it.
 Here’s some guidance for each field:
- Name: A slug-friendly name for the ACME-compatible CA such as
lets-encrypt-production. - DNS App Connection: The App Connection from Step 1 used for Infisical to connect to your DNS provider and create/remove DNS records as part of the DNS-01 challenge in ACME.
- Zone / Zone ID: Enter the Zone / Zone ID for the domain(s) you’ll be requesting certificates for.
- Directory URL: Enter the ACME Directory URL for your desired upstream ACME-compatible CA such as
https://acme-v02.api.letsencrypt.org/directoryfor Let’s Encrypt. - Account Email: The email address to associate with your ACME account. This email will receive important notifications about your certificates.
- EAB Key Identifier (KID): (Optional) The Key Identifier (KID) provided by your ACME CA for External Account Binding (EAB). This is required by some ACME providers (e.g., ZeroSSL, DigiCert) to link your ACME account to an external account you’ve pre-registered with them.
- EAB HMAC Key: (Optional) The HMAC Key provided by your ACME CA for External Account Binding (EAB). This key is used in conjunction with the KID to prove ownership of the external account during ACME account registration.
FAQ
What DNS validation methods are supported?
What DNS validation methods are supported?
Currently, Infisical supports DNS-01 validation through AWS Route53 or Cloudflare. The DNS-01 challenge method is preferred for ACME integrations because it:
- Works with wildcard certificates
- Doesn’t require your servers to be publicly accessible
- Can be fully automated without manual intervention
Can I use wildcard certificates with ACME CAs?
Can I use wildcard certificates with ACME CAs?
Yes! ACME CAs like Let’s Encrypt support wildcard certificates (e.g.,
*.example.com) when using DNS-01 validation. Simply specify the wildcard domain in your subscriber configuration.Note that wildcard certificates still require DNS-01 validation - HTTP-01 validation cannot be used for wildcard certificates.How long are ACME certificates valid?
How long are ACME certificates valid?
Most ACME providers issue certificates with 90-day validity periods. This shorter validity period is designed to:
- Encourage automation of certificate management
- Reduce the impact of compromised certificates
- Ensure systems stay up-to-date with certificate management practices
Can I use multiple ACME providers?
Can I use multiple ACME providers?
Yes. You can register multiple ACME CAs in the same project.

