- KV v1 and KV v2 secrets
- Kubernetes auth method configurations (translated to Machine Identities in Infisical)
- Kubernetes secrets engine roles (translated to Dynamic Secrets in Infisical)
- Vault policies (translated to Infisical project roles)
Set Up Your Vault Connection
Before importing anything, you need to establish a secure connection between Infisical and your Vault instance. This is a one-time setup.1
Create a Vault policy
In your Vault instance, create a policy that allows Infisical to read your secrets, policies, and authentication configurations. This policy grants read-only access and doesn’t allow Infisical to modify or create resources within your Vault instance.
Save this policy in Vault with the name
View the complete policy
View the complete policy
infisical-in-platform-migration.If you’re running an open-source (OSS) version of Vault, you still need to define a rule for the namespace path. OSS Vault doesn’t support custom namespaces, but it still has a single default namespace,
root.2
Create a HashiCorp Vault App Connection in Infisical
In Infisical, create a new App Connection of type HashiCorp Vault in one of two places:
- Project > Integrations > App Connections — the connection is only visible inside that project.
- Integrations > App Connections — the connection is visible across every project in the organization.
infisical-in-platform-migration policy you created in the previous step.You can create more than one connection if you need to migrate from several Vault instances. The Vault namespace is not part of the connection; you pick it inline each time you import a resource.
Migrate Your Resources
Once your Vault connection is configured, you’ll see import options throughout Infisical wherever relevant. The sections below cover each type of resource you can migrate.Migrating KV Secrets
KV secrets are imported into a specific environment (e.g., Development, Staging, Production) within a project. If you’re coming from Vault, think of a project as similar to a KV secret engine dedicated to one application.First time? You’ll need to create a project first. A project in Infisical typically represents a single application or microservice.
- Navigate to your project and select a specific environment (e.g., Development, Production)
-
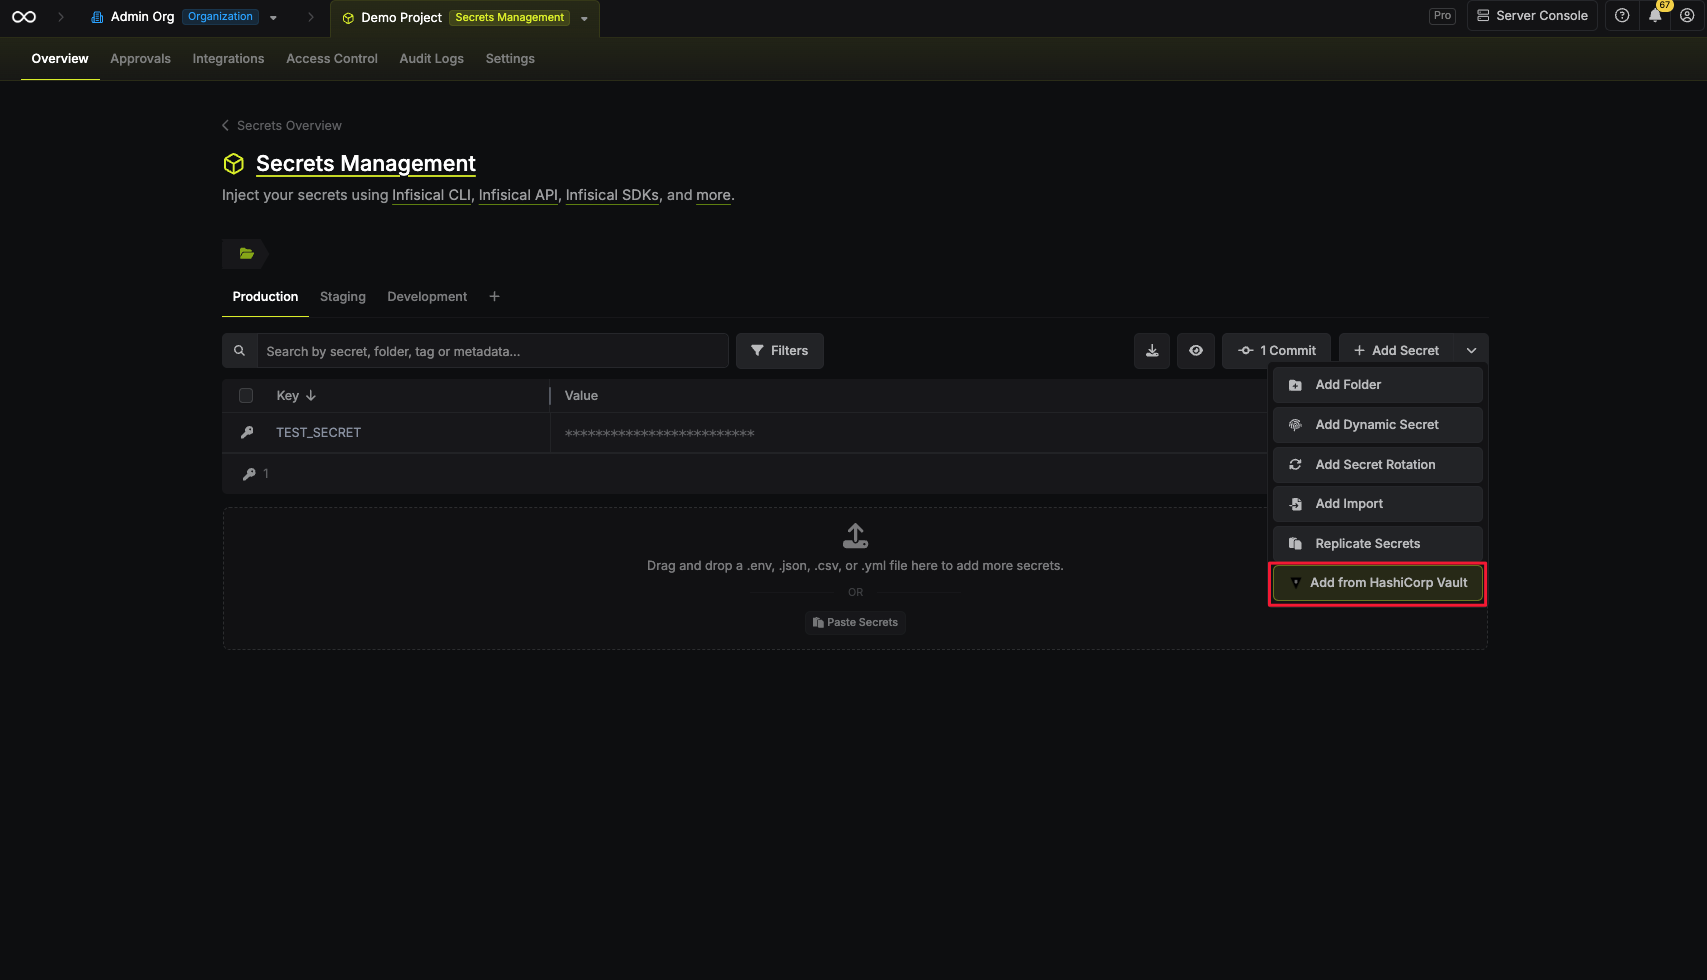
In the secrets view, click the dropdown icon (caret) next to the ”+ Add Secret” button
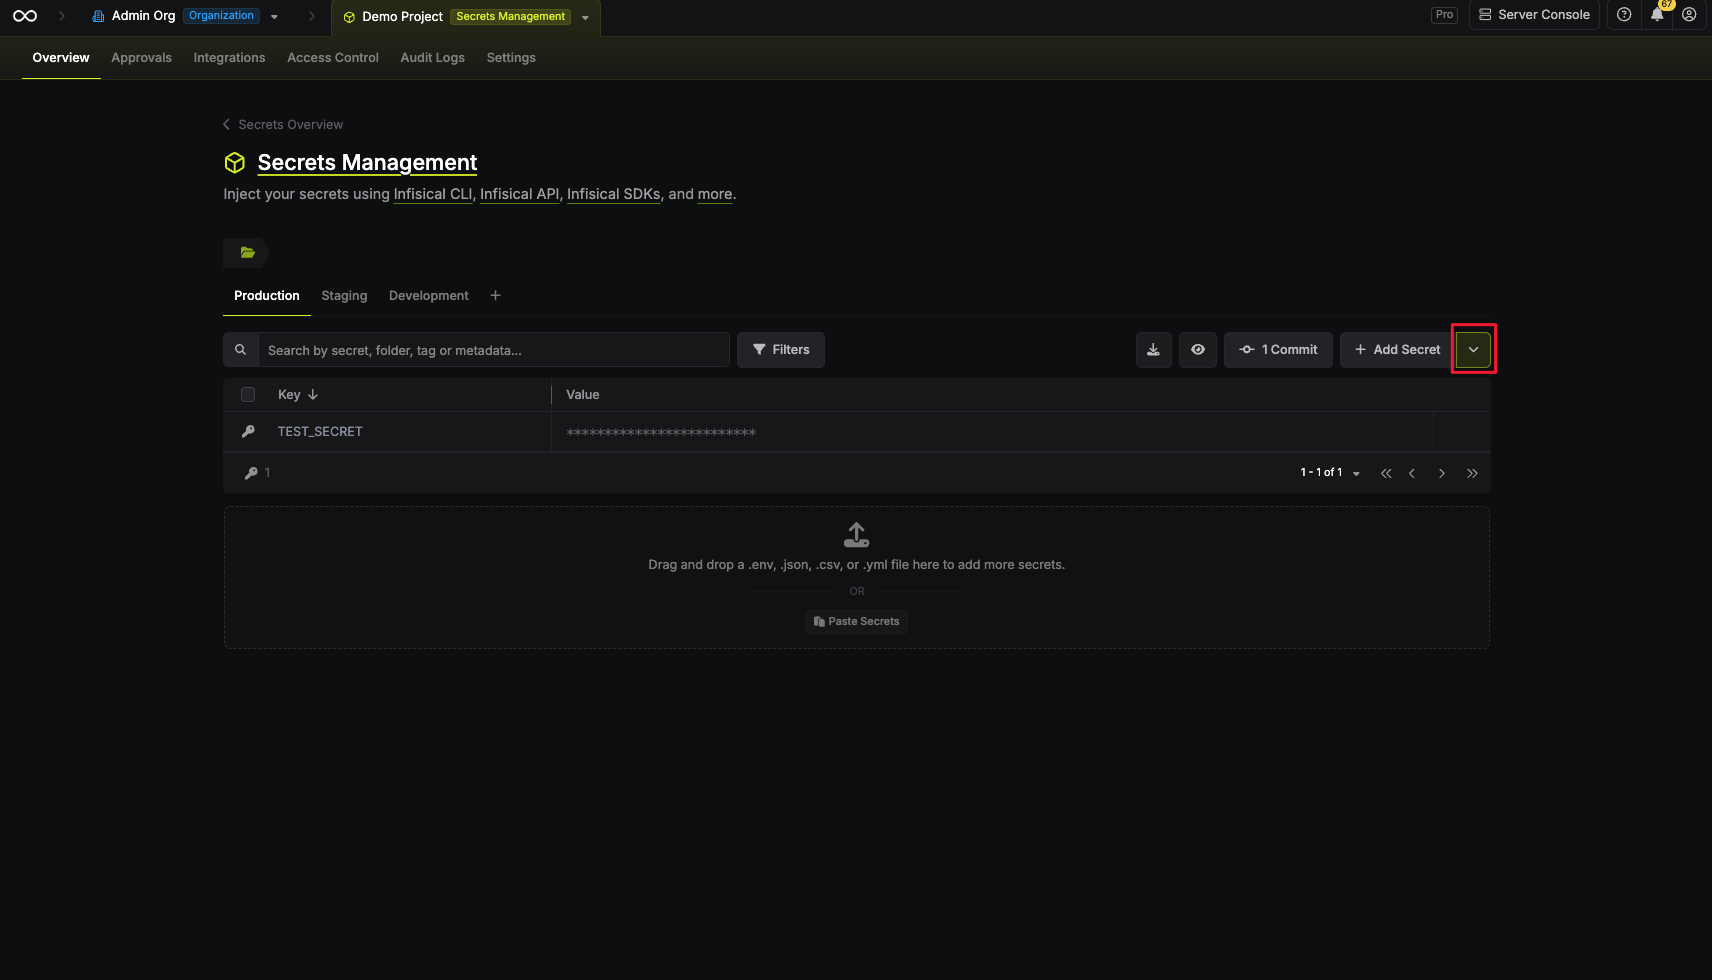
-
Select “Add from HashiCorp Vault”
-
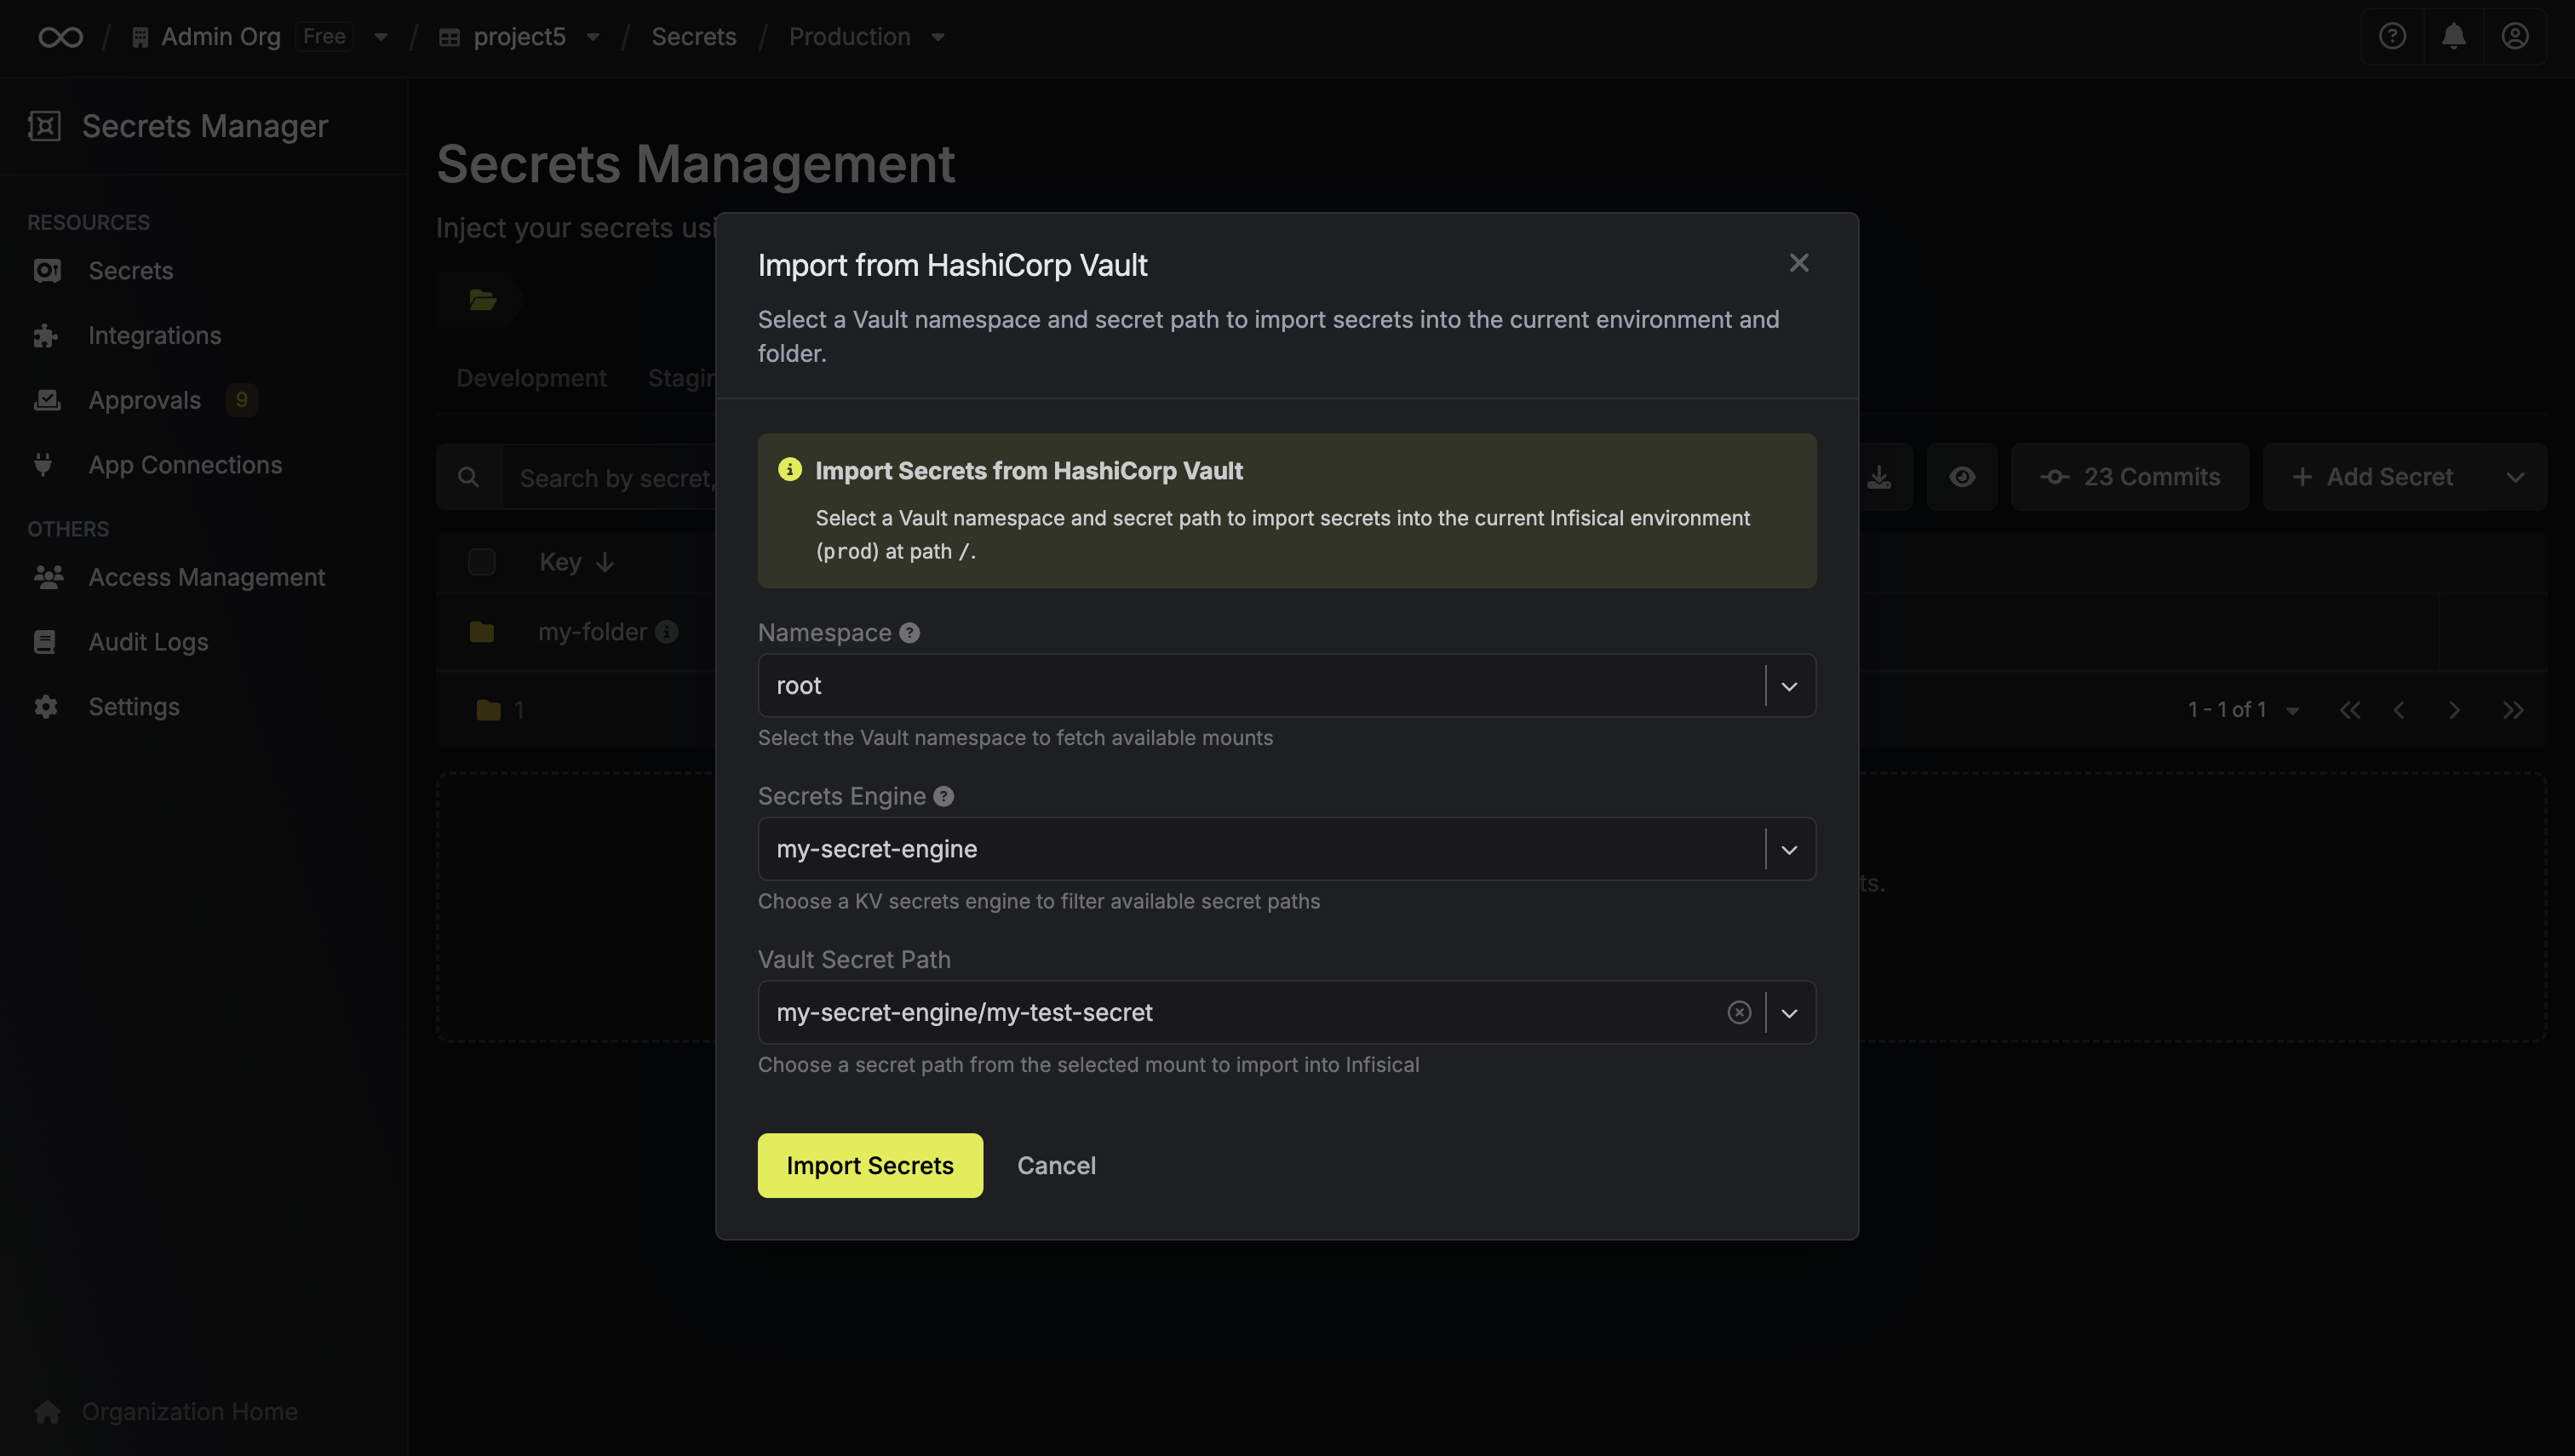
In the modal, pick the App Connection (project- or organization-scoped Vault connections both appear here), then the Vault namespace, then the Secrets Engine (KV mount), and finally one or more Vault secret paths to import (for example,
secret/app/prod). Keys are copied using their names from Vault.
If you select multiple paths and the same key name exists in more than one of them, the import aborts and no secrets are saved.
- Click “Import Secrets”
Migrating Kubernetes Auth Method
If you’re using Vault’s Kubernetes auth method to authenticate your pods, you can migrate this configuration to Infisical’s Machine Identities. In Vault, you define Kubernetes roles that specify which service accounts can authenticate. In Infisical, this maps to a Machine Identity with Kubernetes authentication enabled. To import Kubernetes auth configuration:- First, create a Machine Identity in Infisical
- Navigate to Access Control > Machine Identities and select the identity
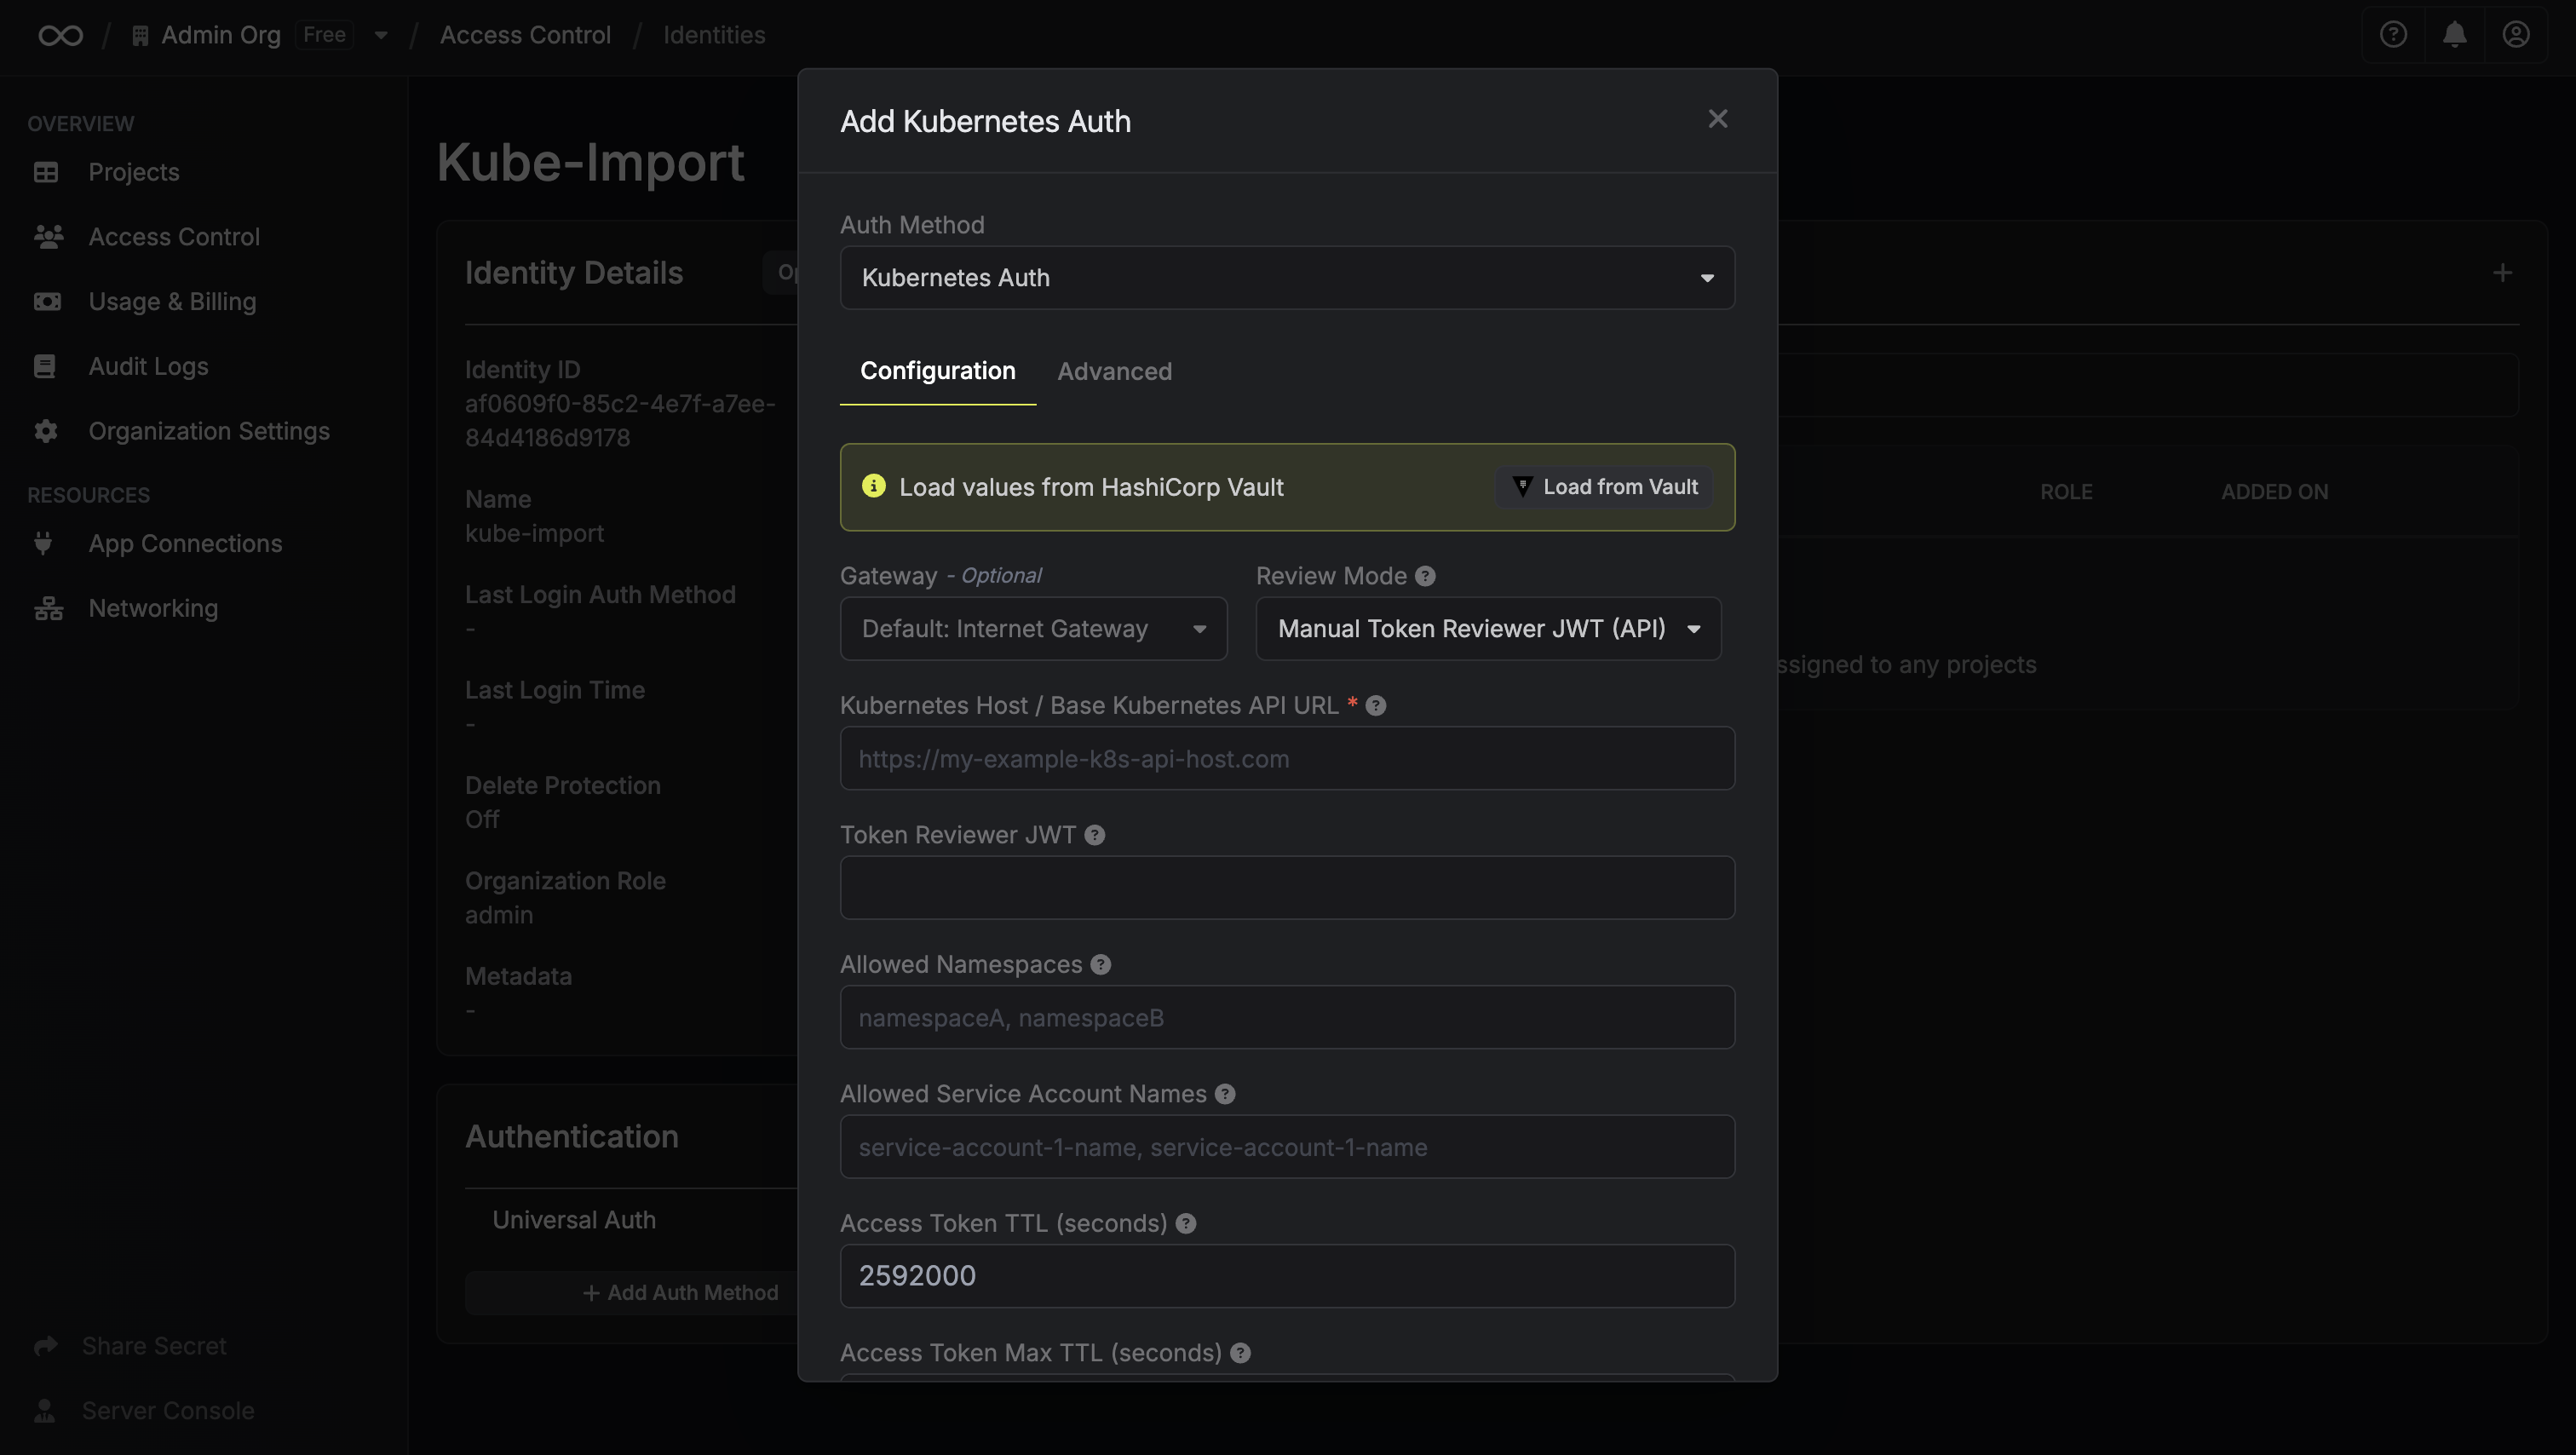
- Click “Add Authentication Method” and choose Kubernetes Auth
-
In the configuration modal, click “Load from Vault”
- In the load modal, pick the App Connection, the Vault namespace, and the Kubernetes role
-
Click “Load”
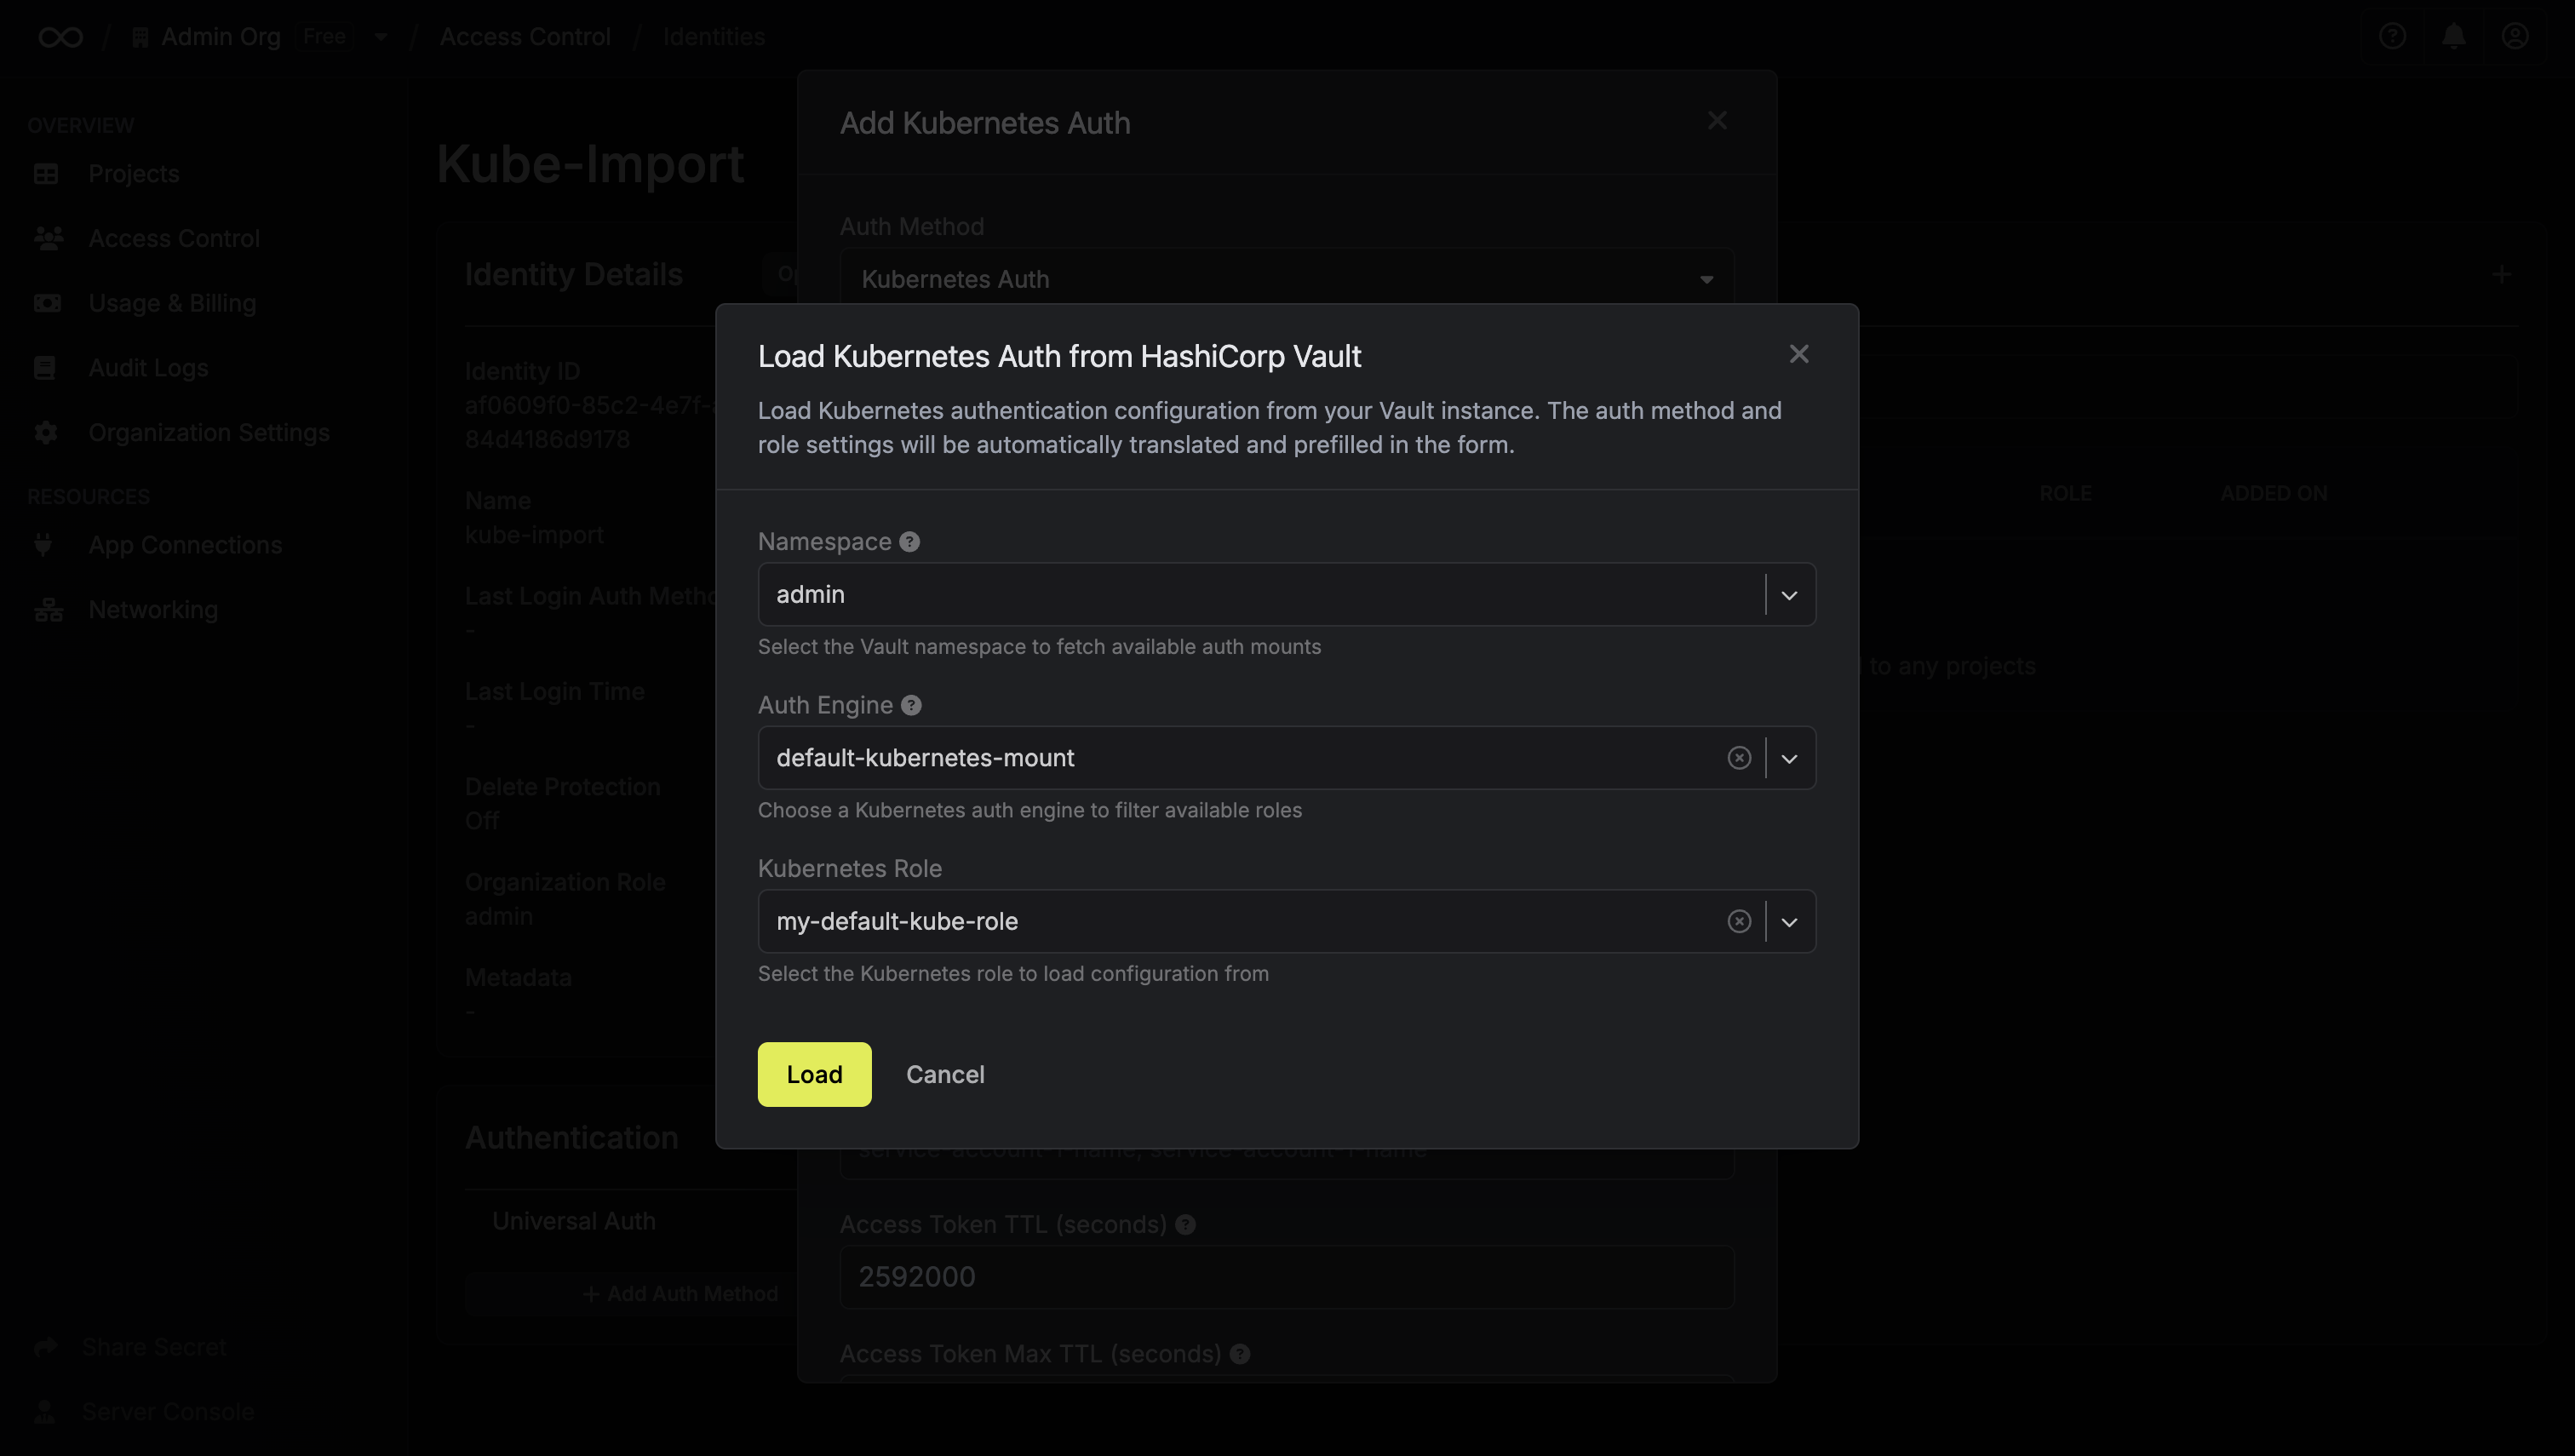
Sensitive values like service account JWTs cannot be retrieved from Vault and
must be manually provided in the form after importing the configuration.
Migrating Kubernetes Secrets Engine Roles
If you’re using Vault’s Kubernetes secrets engine to generate short-lived Kubernetes credentials, you can migrate these roles to Infisical’s Dynamic Secrets. Both platforms support generating temporary Kubernetes service account tokens or creating temporary service accounts, so the configuration is similar. To import a Kubernetes dynamic secret configuration:- Navigate to your project and select an environment
- Click ”+ Add Secret” dropdown and choose “Dynamic Secret”
- Select Kubernetes as the provider
-
Click “Load from Vault” at the top of the form
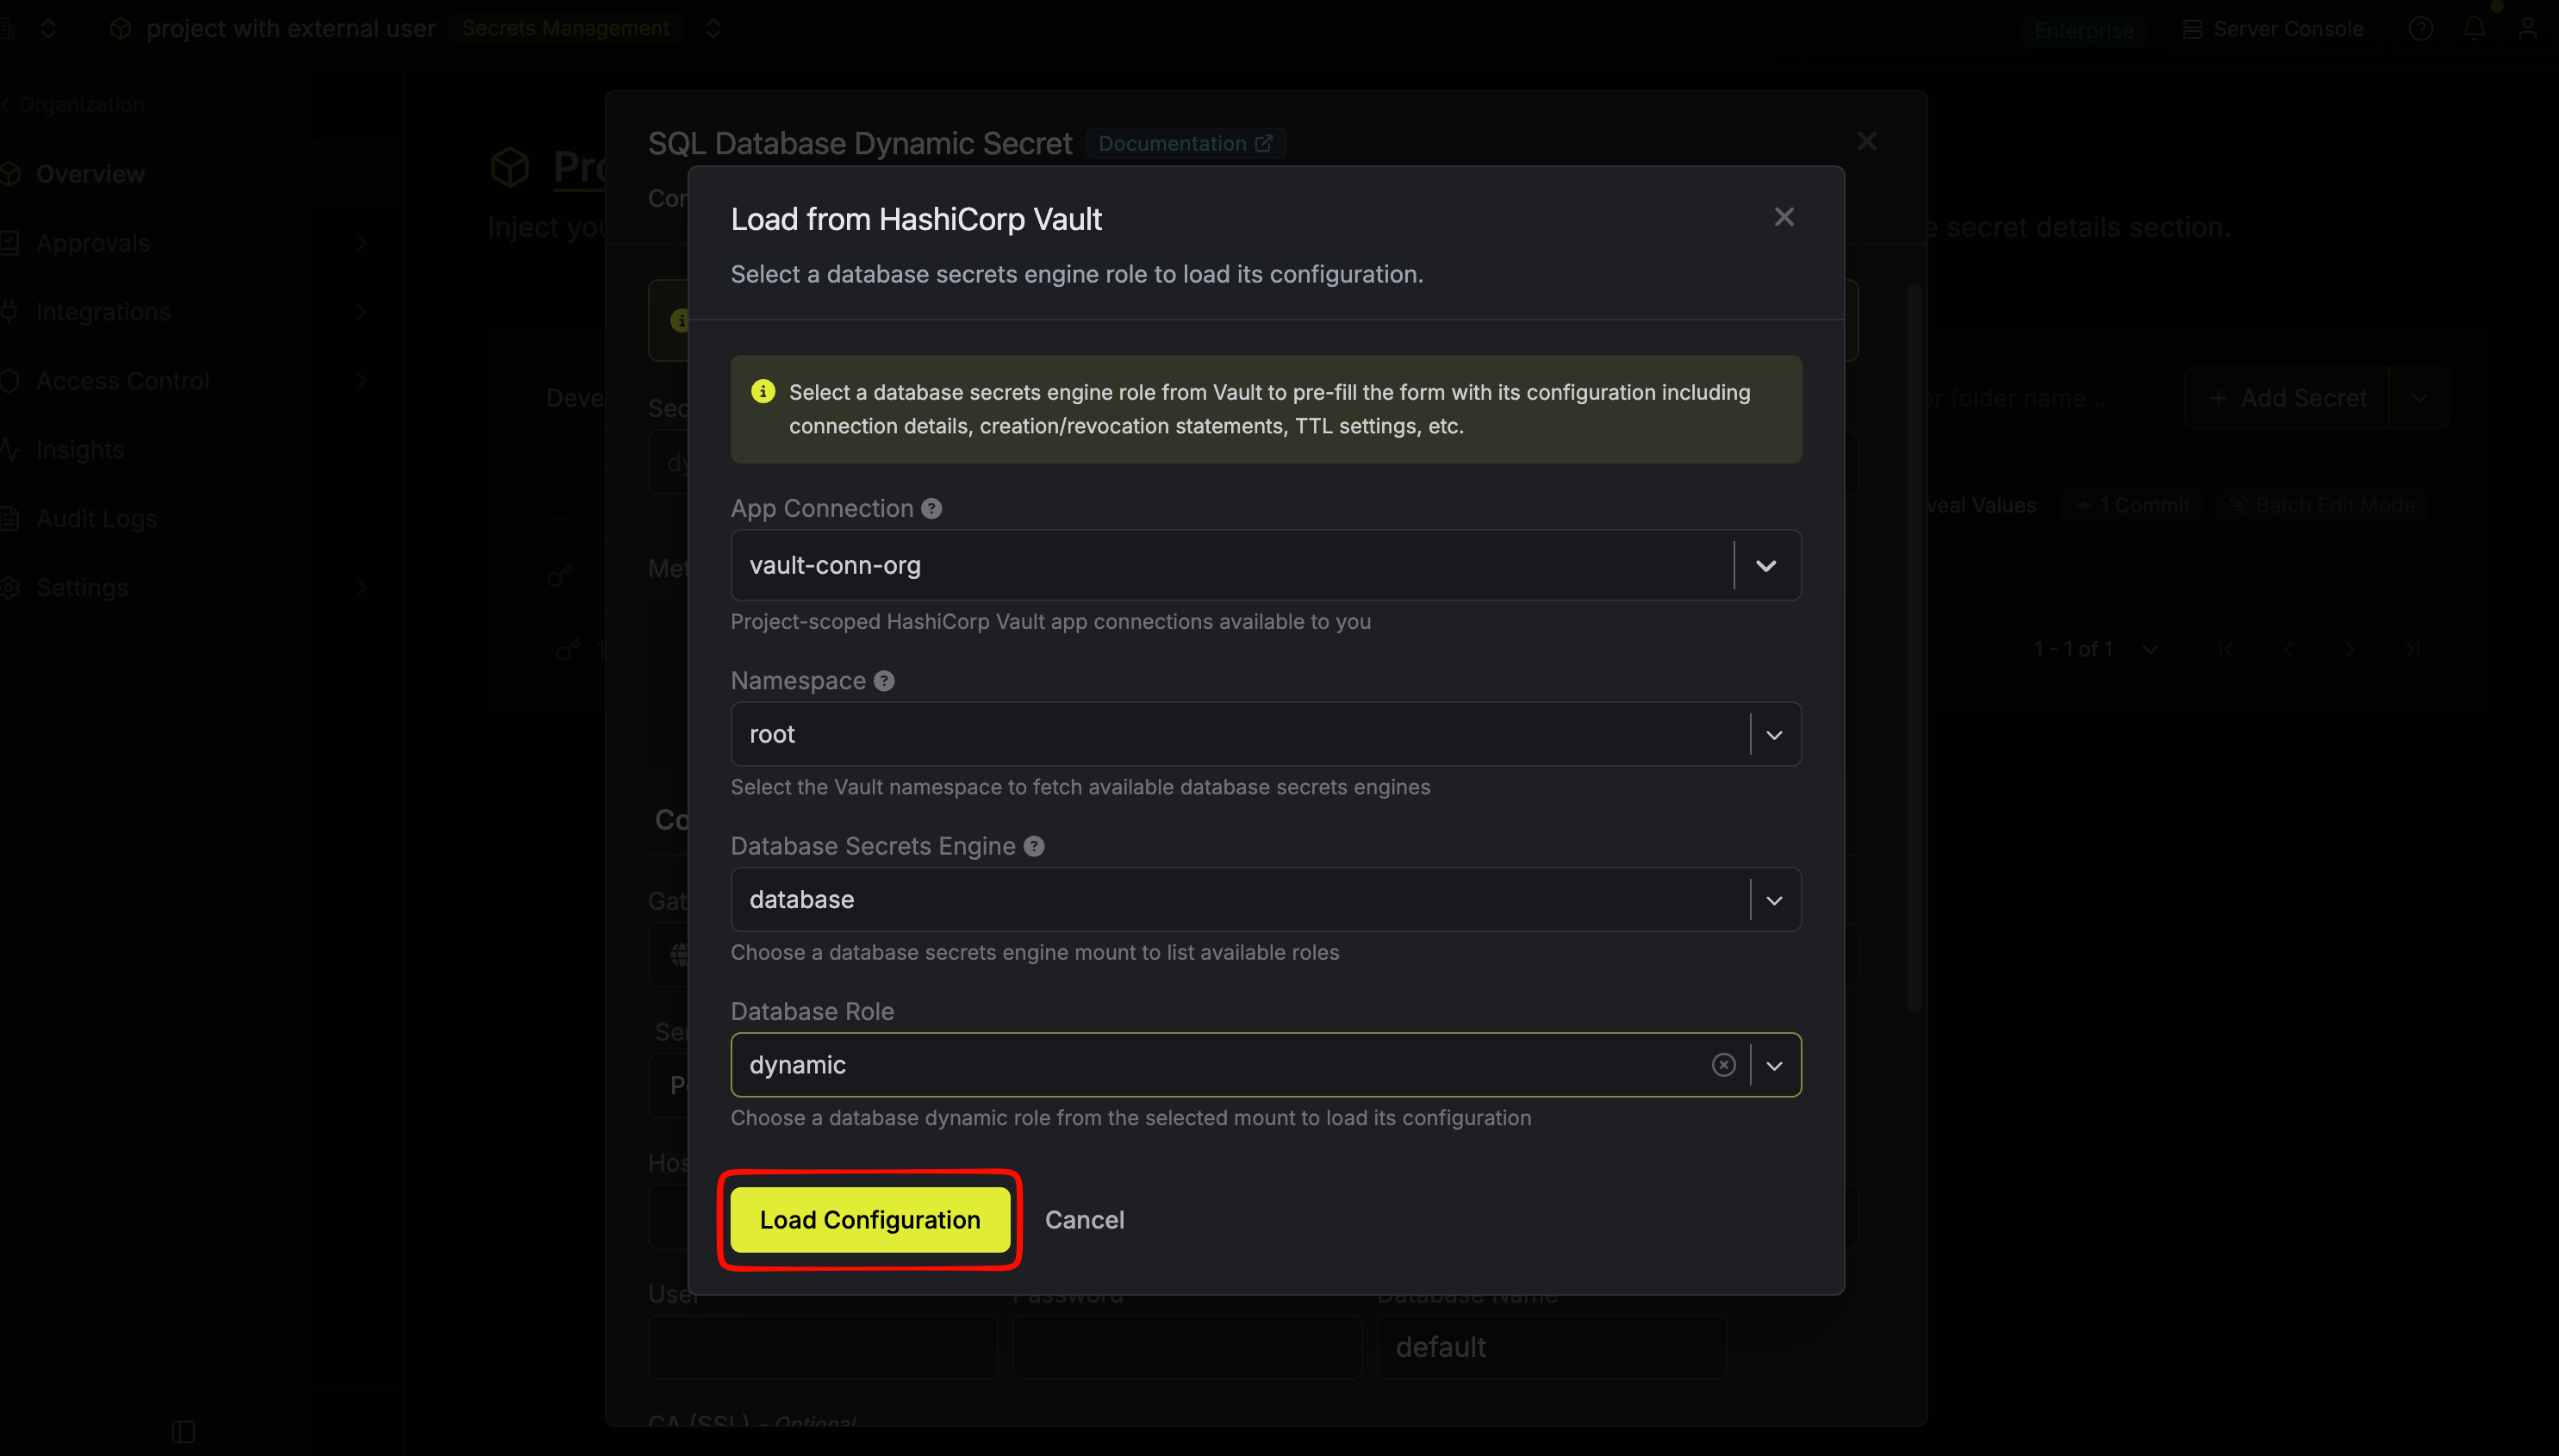
- In the load modal, pick the App Connection, the Vault namespace, the Kubernetes secrets engine mount, and the role
- Click “Load Configuration”
- Cluster URL and CA certificate
- Credential type (Static or Dynamic)
- Service account name or Kubernetes role settings
- Allowed namespaces
- Token TTL values
- Token audiences
Sensitive values like cluster tokens cannot be retrieved from Vault and must
be manually provided in the form after loading the configuration.
Migrating Vault Policies
Infisical can translate your Vault HCL policies into Infisical project roles. The table below shows how Vault capabilities map to Infisical permissions:Policy translation is best-effort and provides a starting point based on your
Vault configuration. The translated permissions should be reviewed and
adjusted as needed since Vault and Infisical have different access control
models.
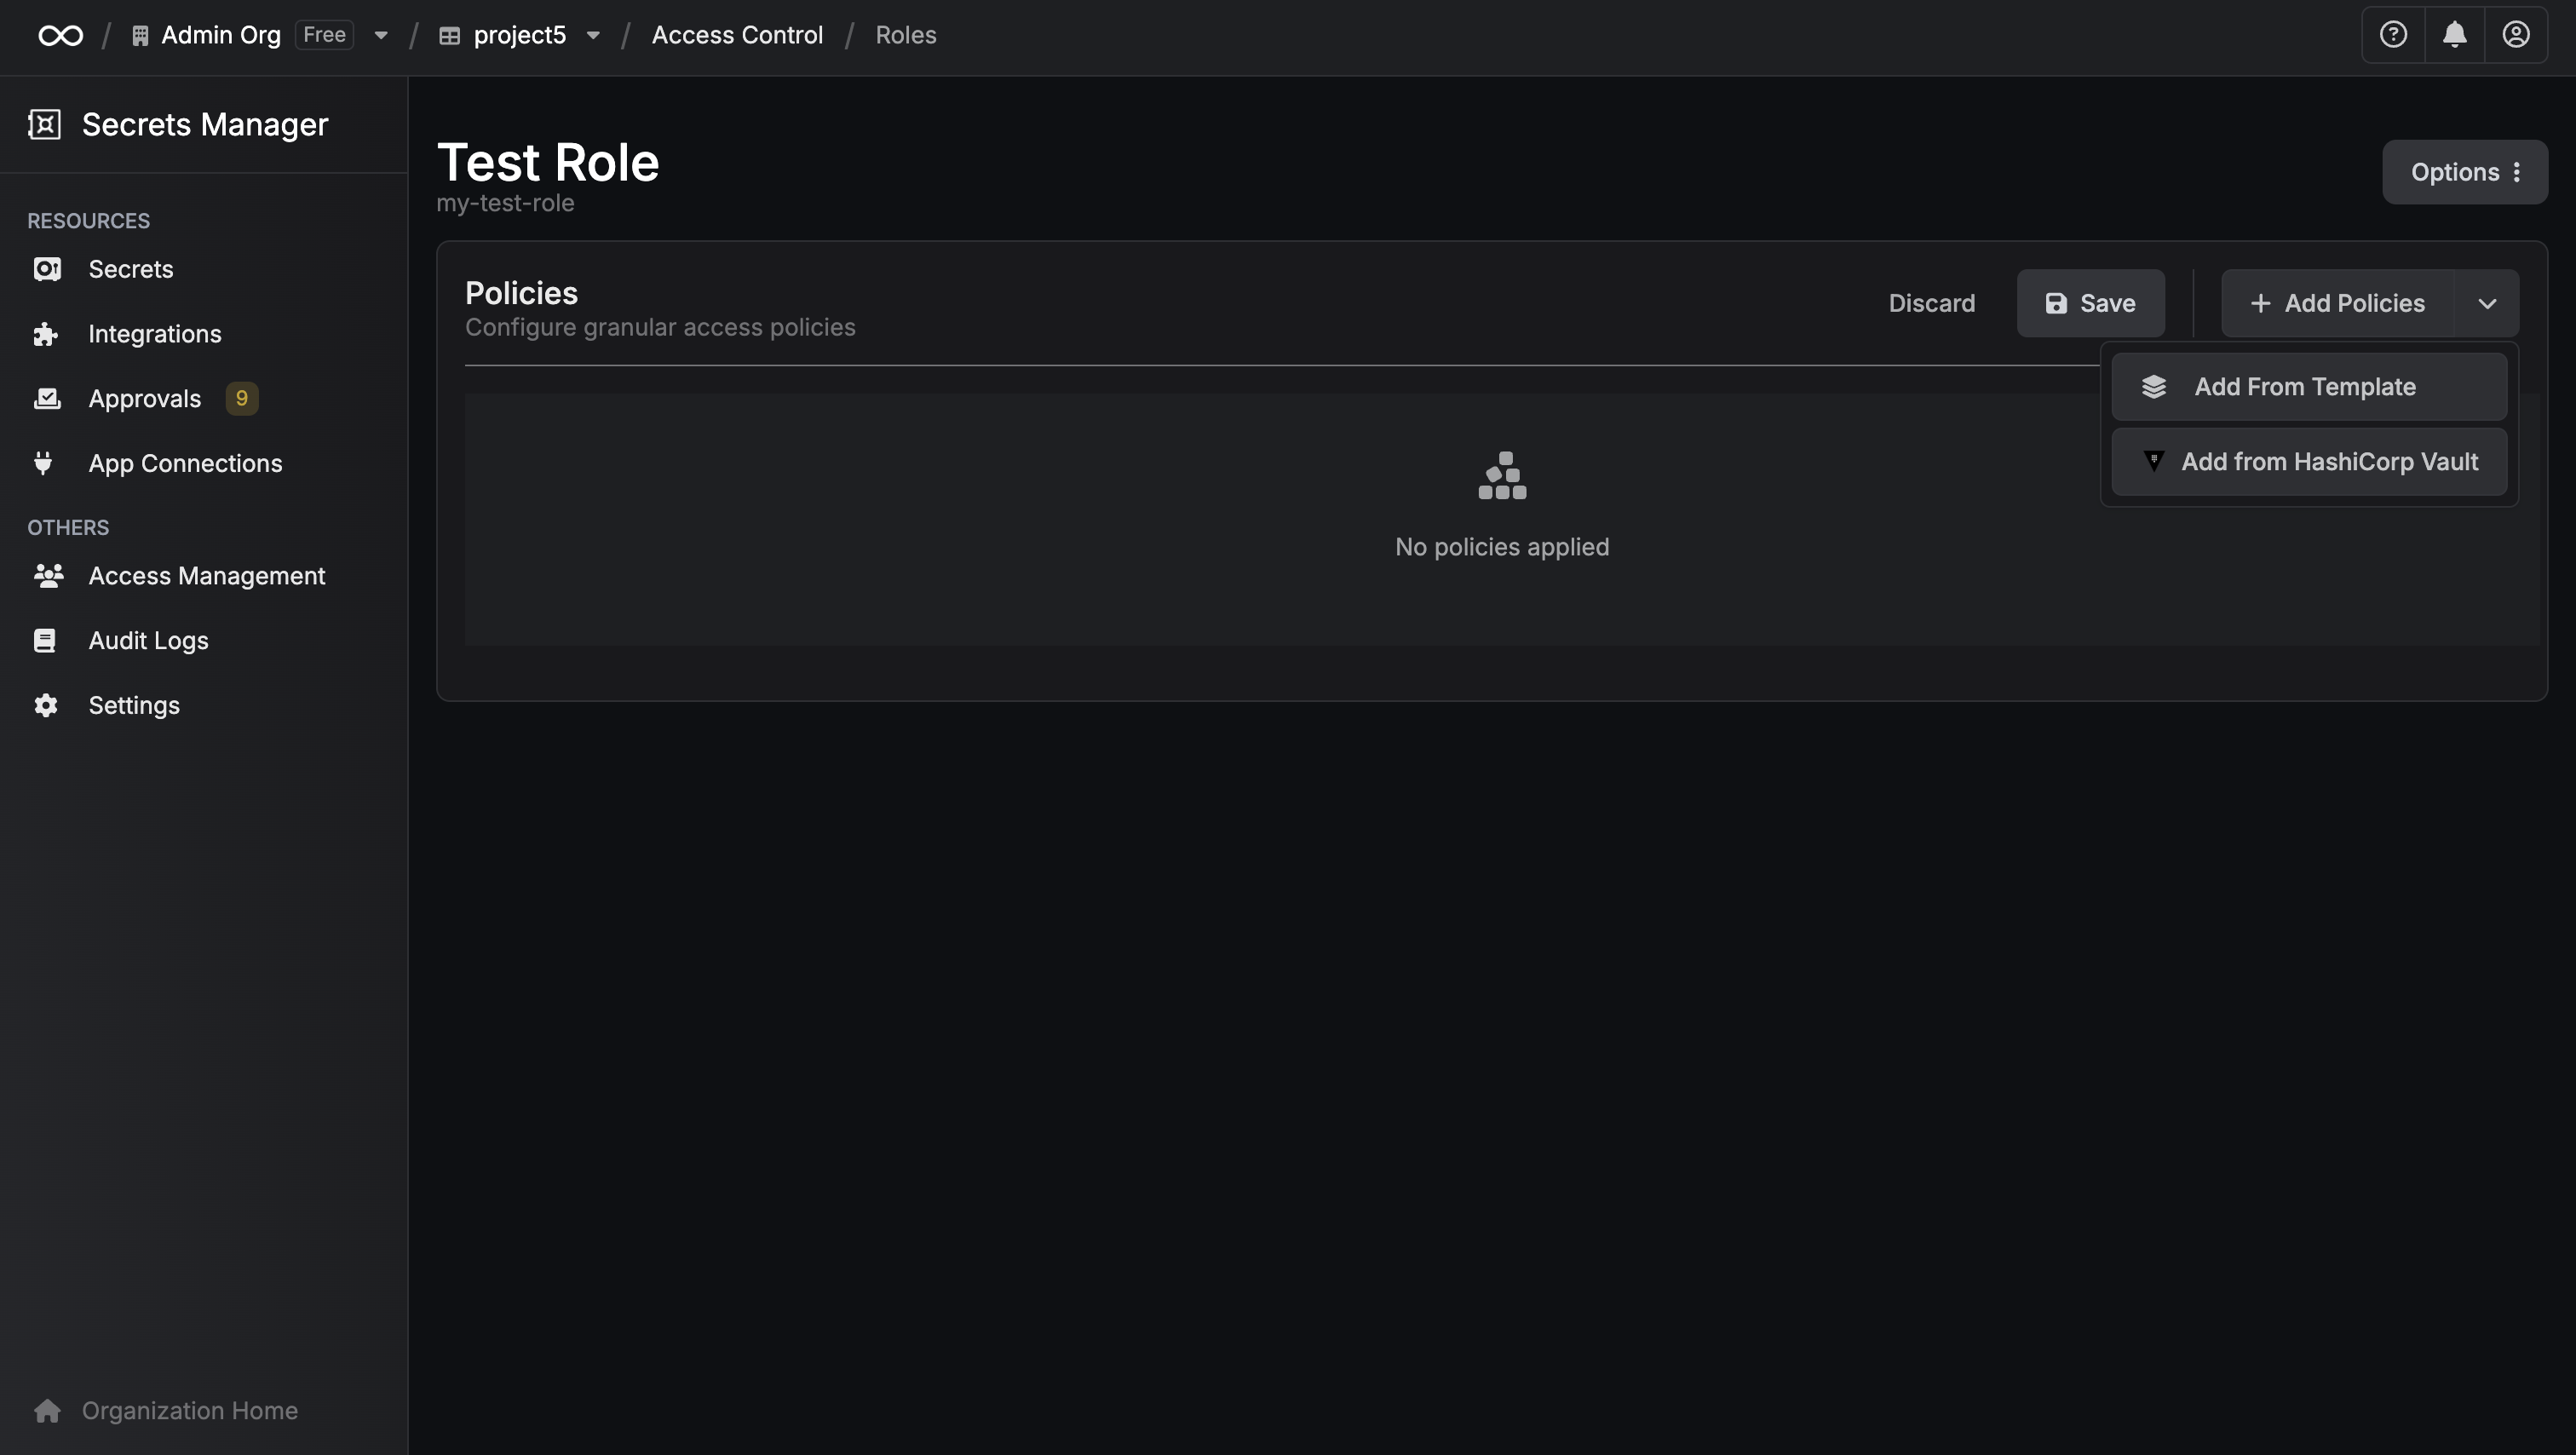
- Navigate to your project, then go to Access Control > Roles and create or edit a role
-
In the policy configuration, click “Add from HashiCorp Vault”
- In the modal, pick the App Connection and the Vault namespace
-
Either choose an existing policy from the dropdown or paste your own HCL policy
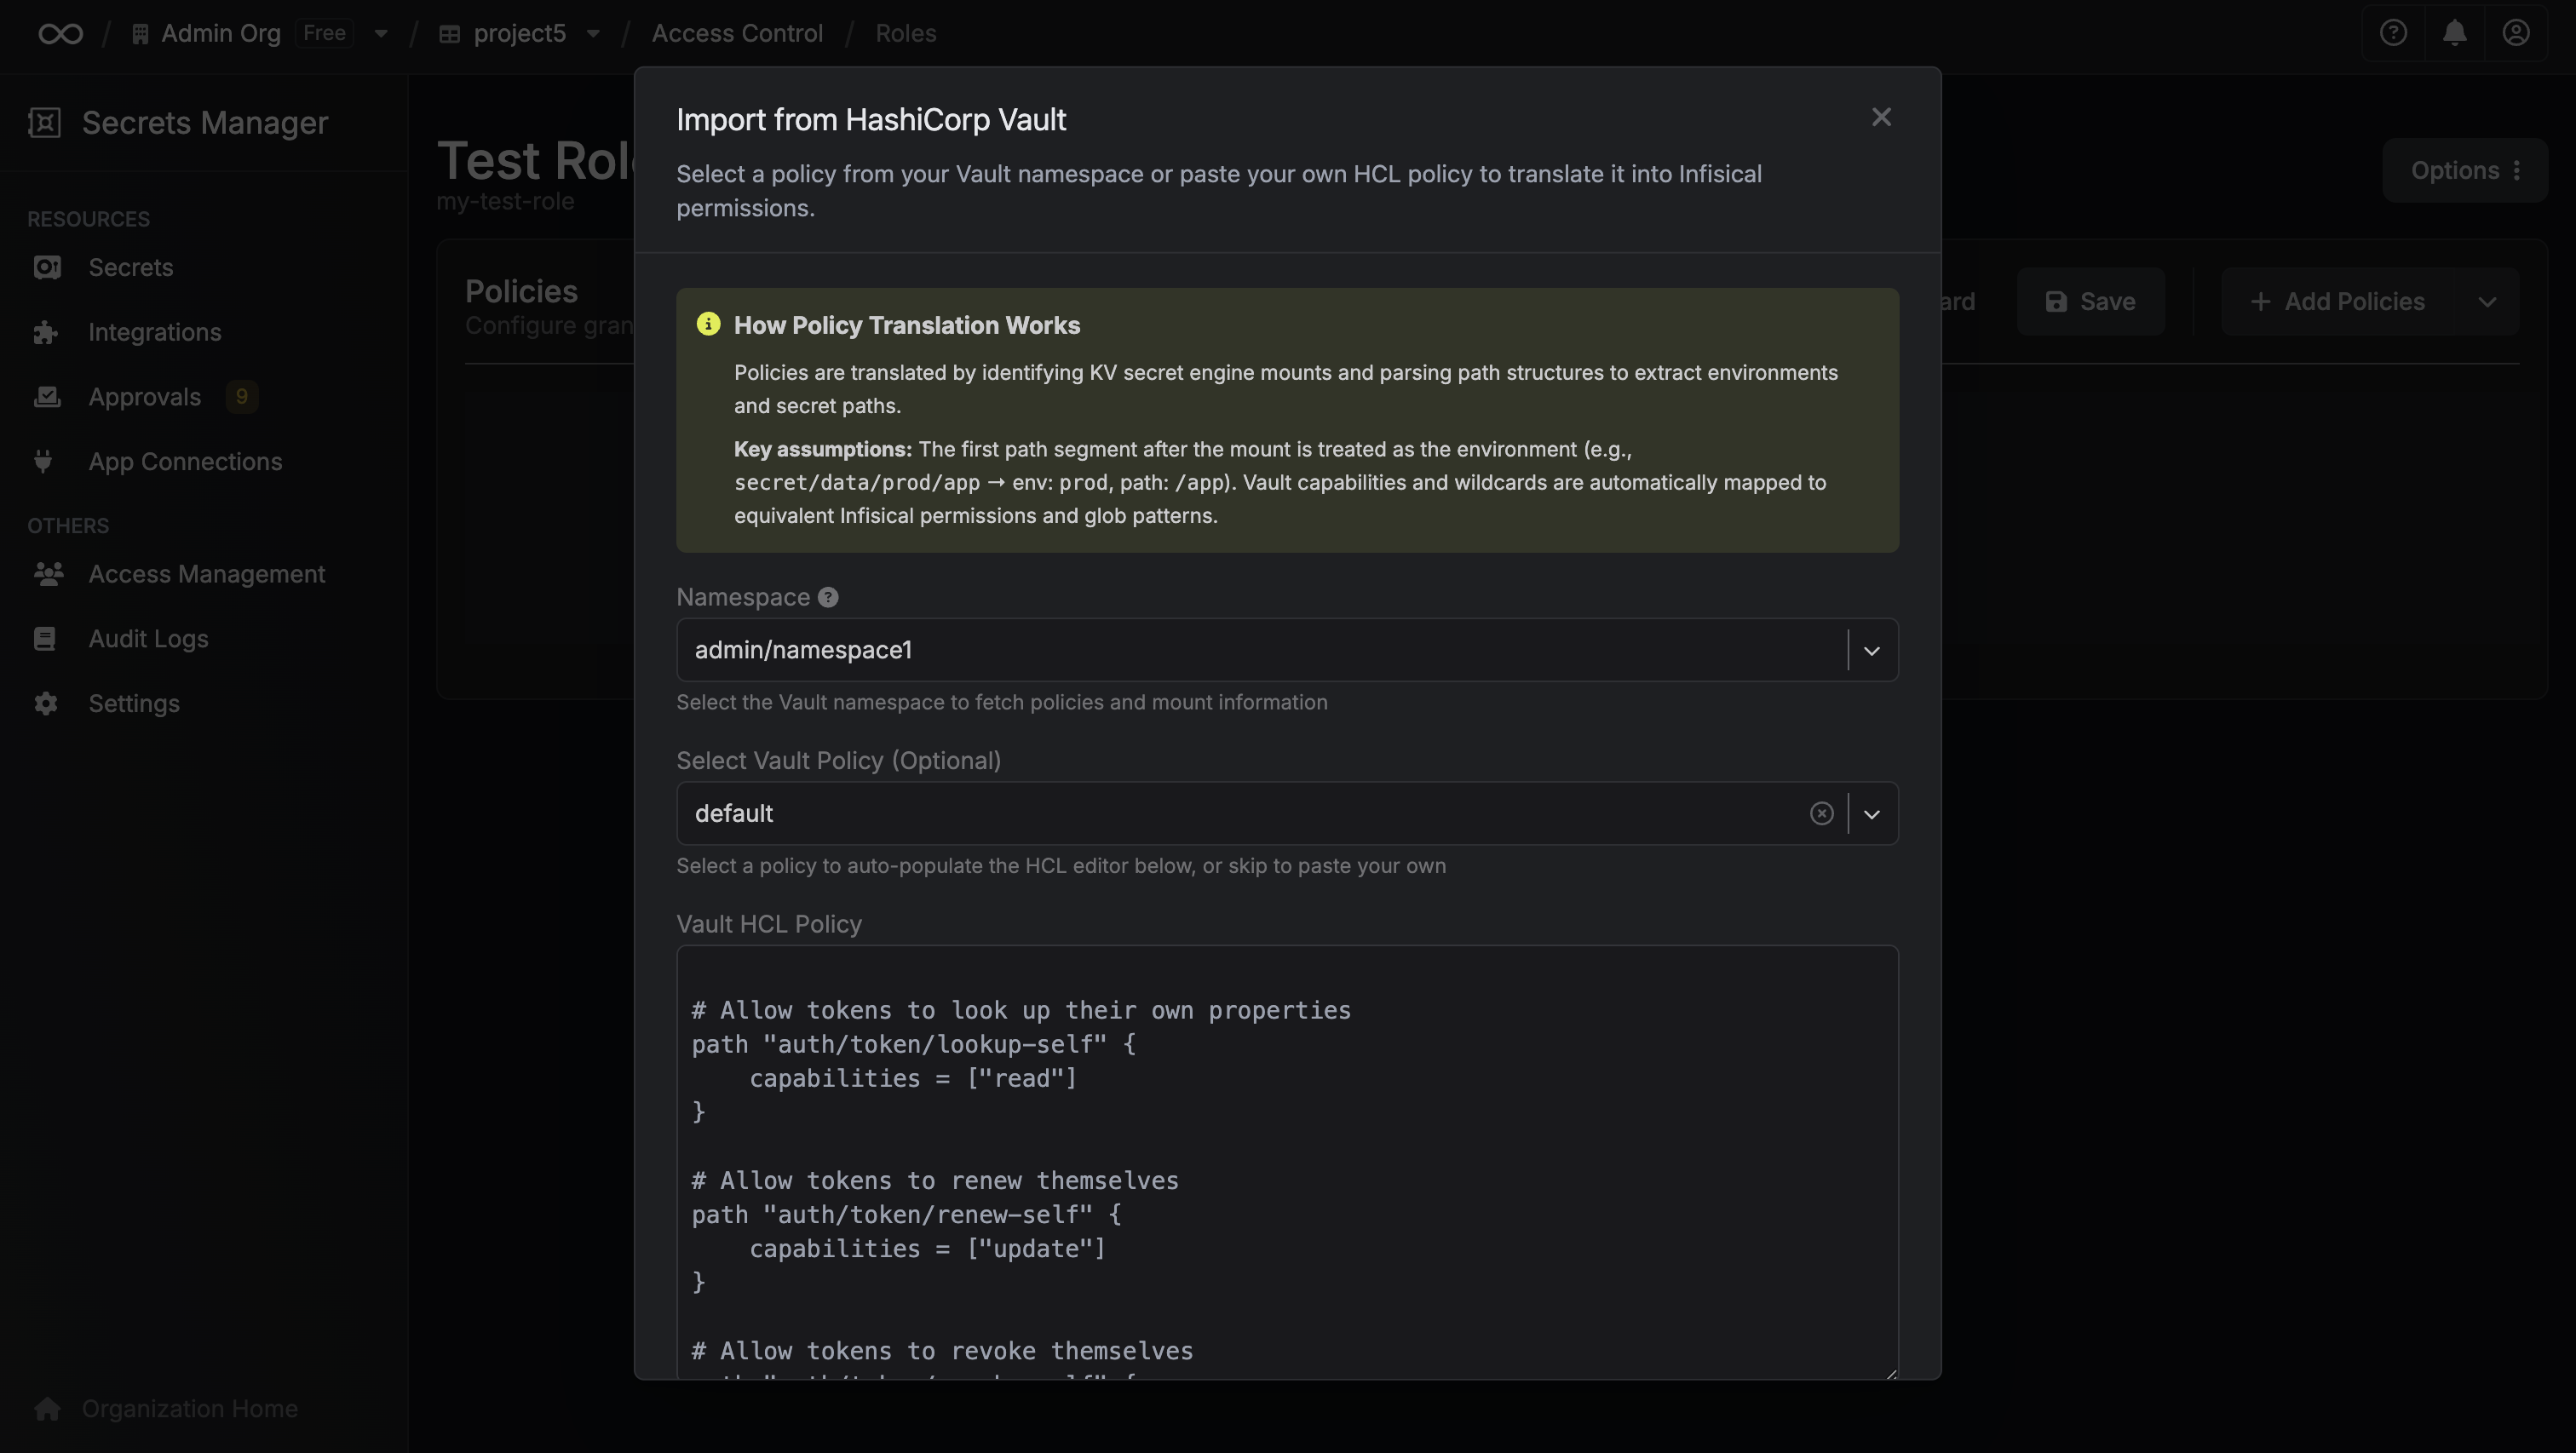
- Review the automatically translated Infisical permissions
- Make any adjustments and save
One-time Bulk Import from Vault
If you want to move an entire Vault organization into Infisical in a single shot (rather than importing resources piecemeal from inside each project) use the Bulk Data Import flow. It does not require an App Connection and is intended for initial migrations only. KV Secret Engine is the only supported resource type for bulk import; other resource types (Kubernetes auth, dynamic secrets, policies) must use the per-resource flows described above. To run a bulk import:- Navigate to Integrations and select the tab External Migrations
- Click Import and choose HCP Vault
- Fill in the import form:
- Gateway (optional) — route the import through a gateway if your Vault instance is private
- Vault URL — your Vault address (e.g.
https://vault.example.com) - Vault Namespace (optional) — leave blank for the root namespace
- Vault Access Token — a token with read access to the KV mounts you want to import
- Project Mapping — how Vault resources map onto Infisical projects:
- Key Vaults — each KV mount becomes an Infisical project. A default
Productionenvironment is created per project; secret paths become folders. - Namespaces — each Vault namespace becomes a project; each KV mount inside it becomes an environment; secret paths become folders.
- Custom Migration — available on request; contact sales to discuss tailored mappings.
- Key Vaults — each KV mount becomes an Infisical project. A default
- Submit the form. Infisical will run the import asynchronously and email you when it finishes (or if it fails). This may take up to 10 minutes.
Next Steps After Migration
Once you’ve imported your secrets and configurations, here’s how to start using them in your applications:Update Your Applications
Replace Vault client libraries with Infisical SDKs in your application code
Set Up Kubernetes Integration
Use the Infisical Kubernetes Operator to inject secrets into your pods