Rotation Type: Dual-PhaseThis rotation maintains two active credential sets with overlapping validity, ensuring zero-downtime during rotation cycles.
Prerequisites
- Create an Azure Client Secret Connection.
- Ensure your network security policies allow incoming requests from Infisical to this rotation provider, if network restrictions apply.
Create an Azure Client Secret Rotation in Infisical
-
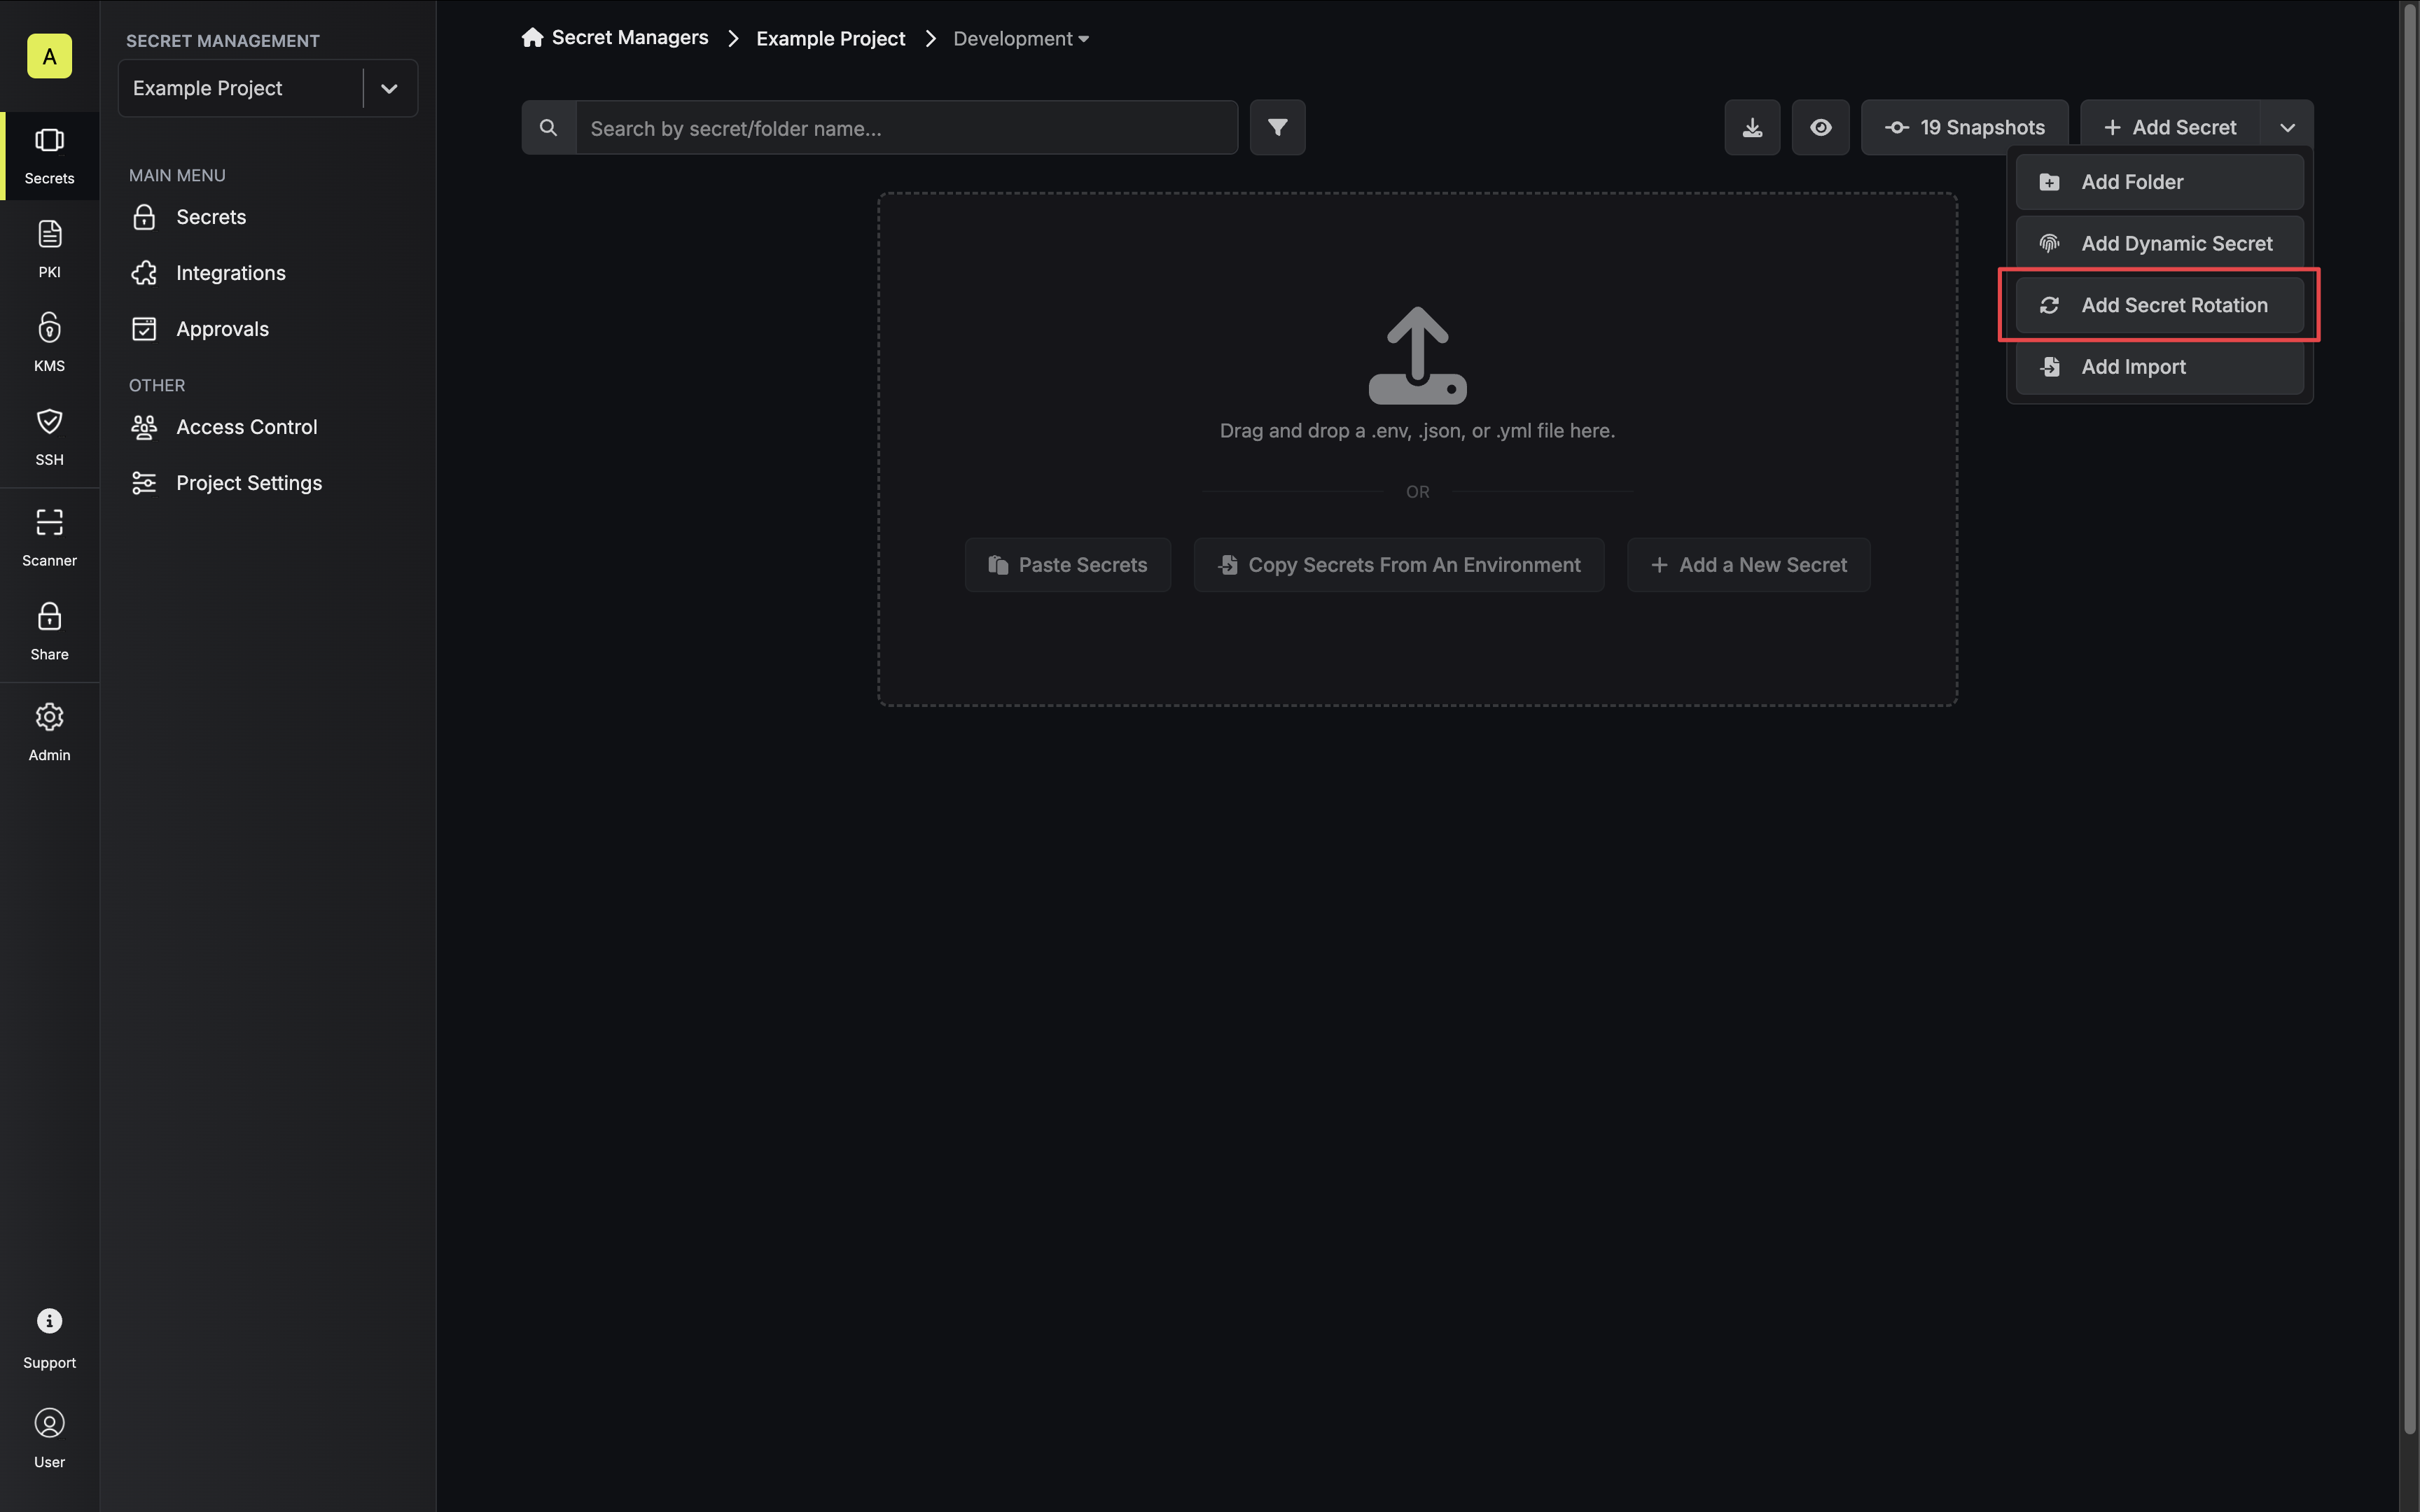
Navigate to your Secret Manager Project’s Dashboard and select Add Secret Rotation from the actions dropdown.
-
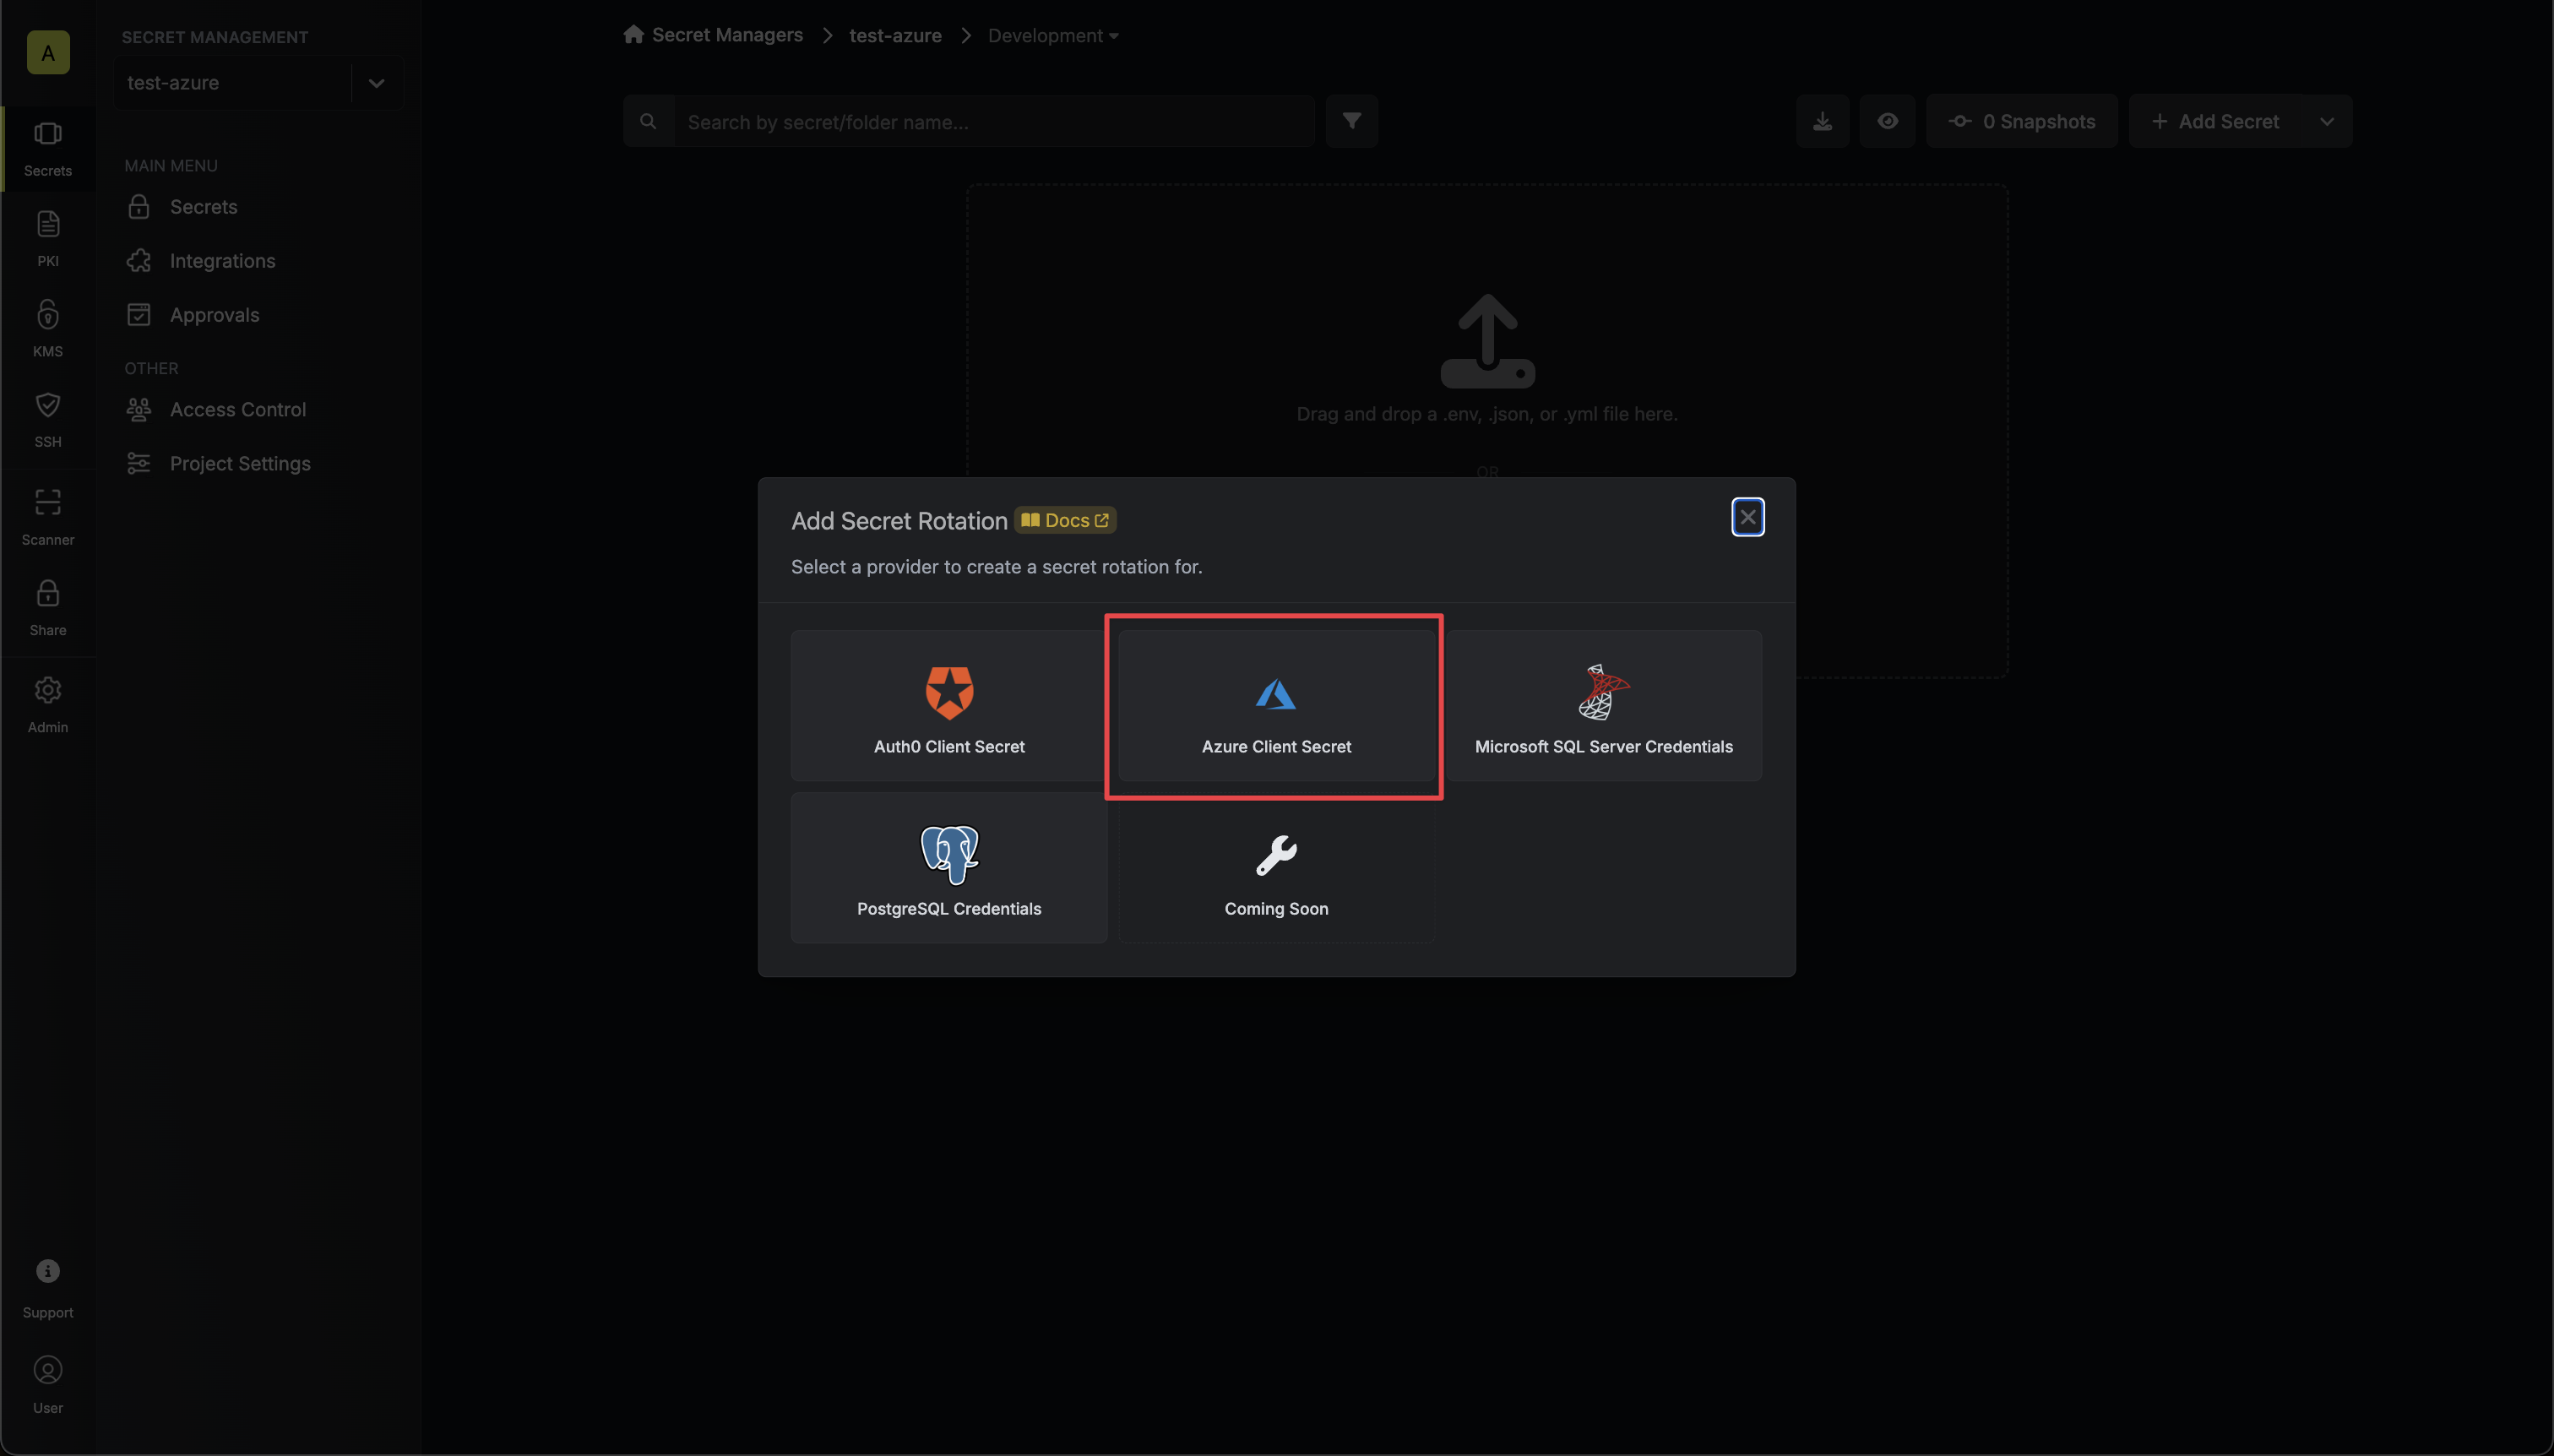
Select the Azure Client Secret option.
-
Select the Azure Connection to use and configure the rotation behavior. Then click Next.
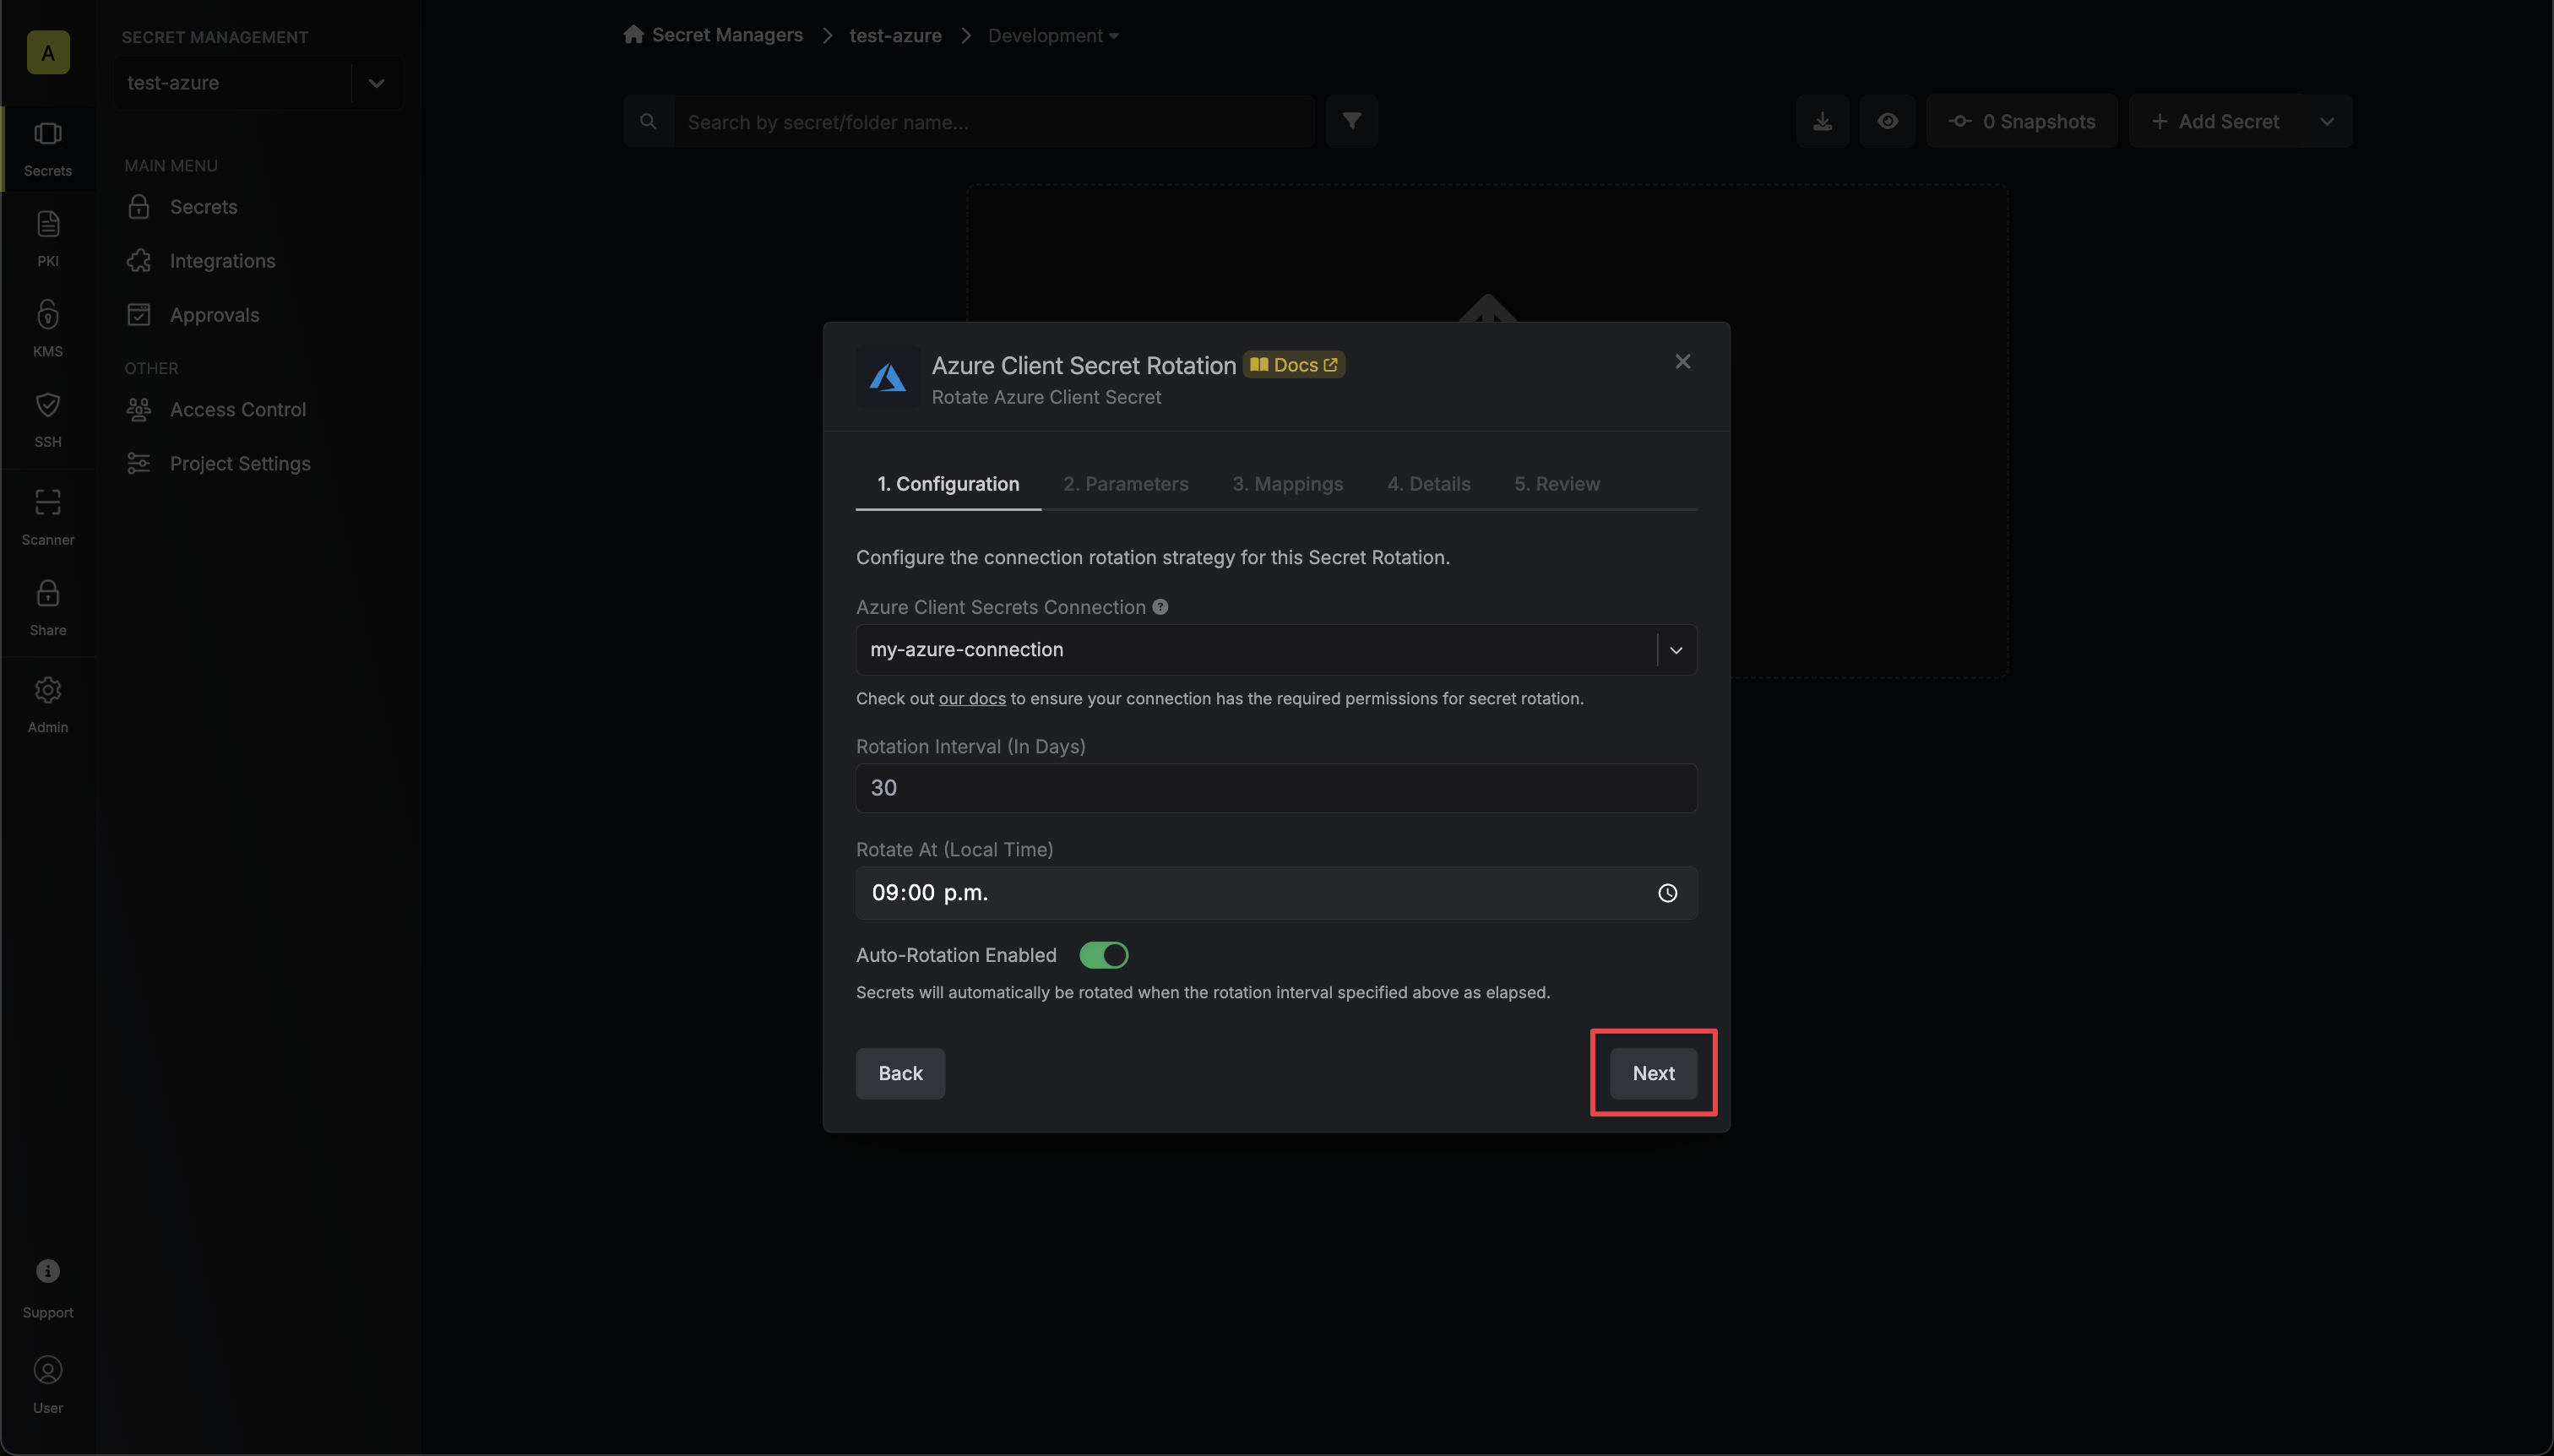
- Azure Connection - the connection that will perform the rotation of the specified application’s Client Secret.
- Rotation Interval - the interval, in days, that once elapsed will trigger a rotation.
- Rotate At - the local time of day when rotation should occur once the interval has elapsed.
- Auto-Rotation Enabled - whether secrets should automatically be rotated once the rotation interval has elapsed. Disable this option to manually rotate secrets or pause secret rotation.
-
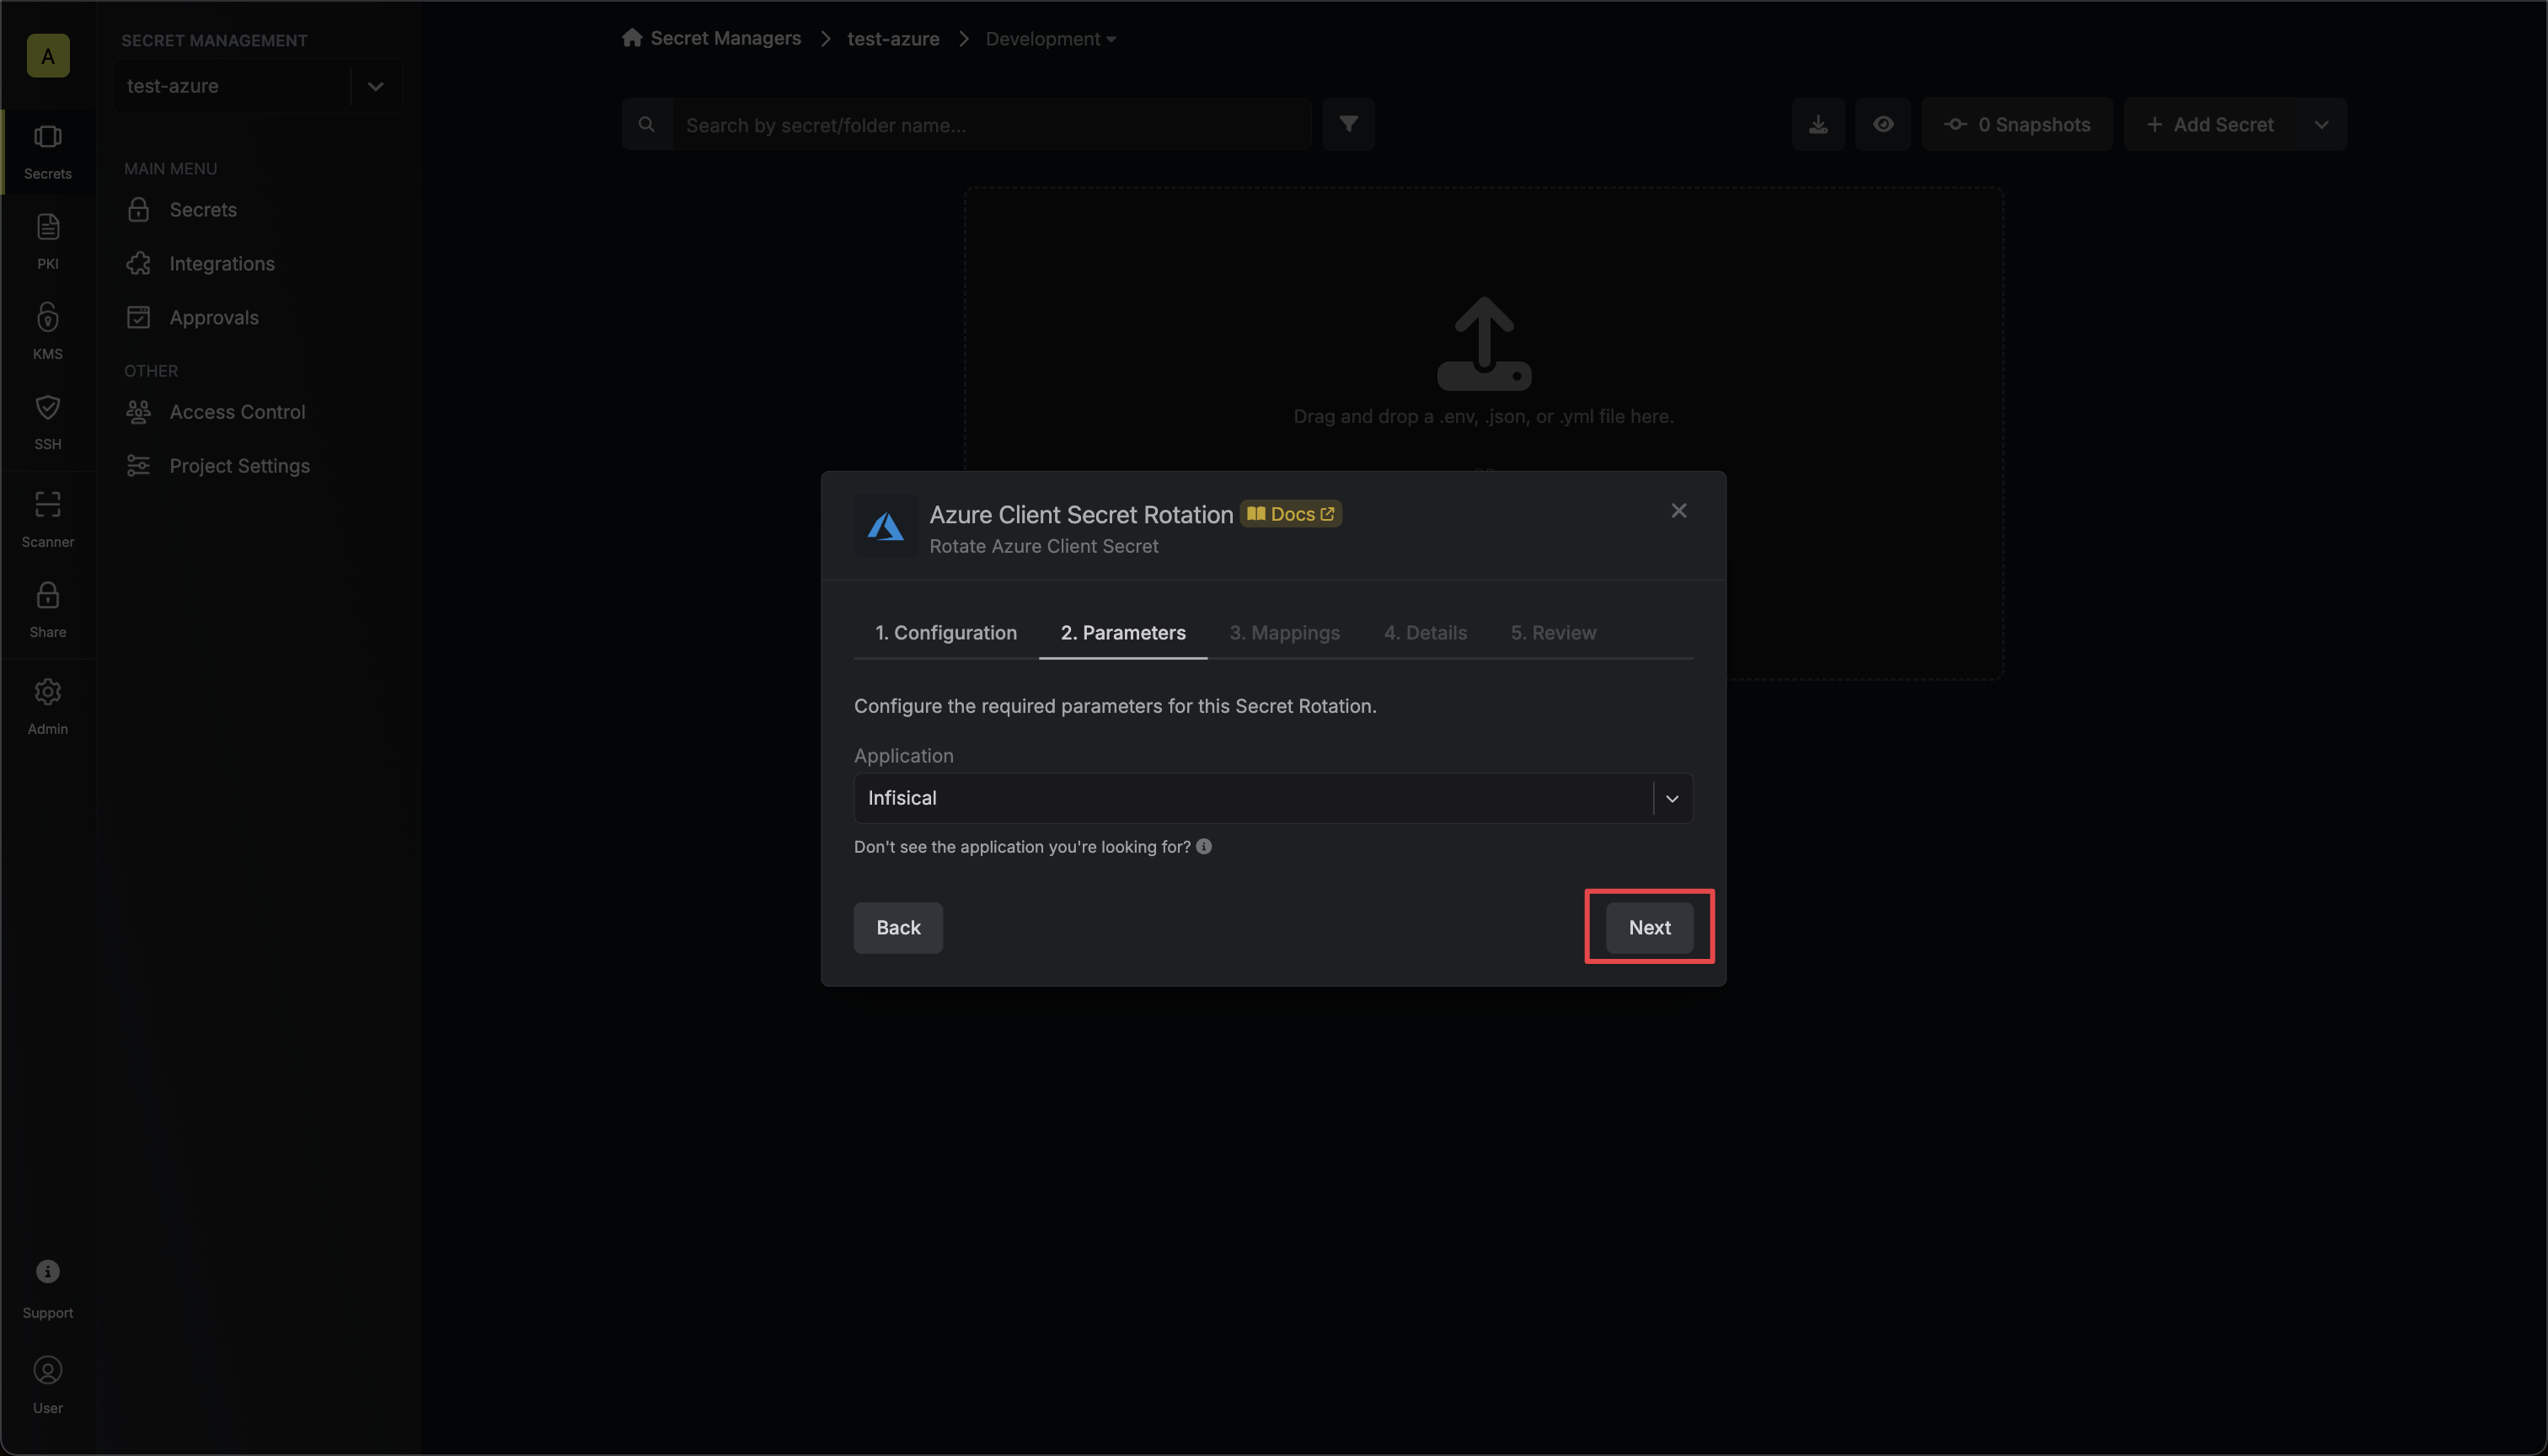
Select the Azure application whose Client Secret you want to rotate. Then click Next.
-
Specify the secret names that the client credentials should be mapped to. Then click Next.
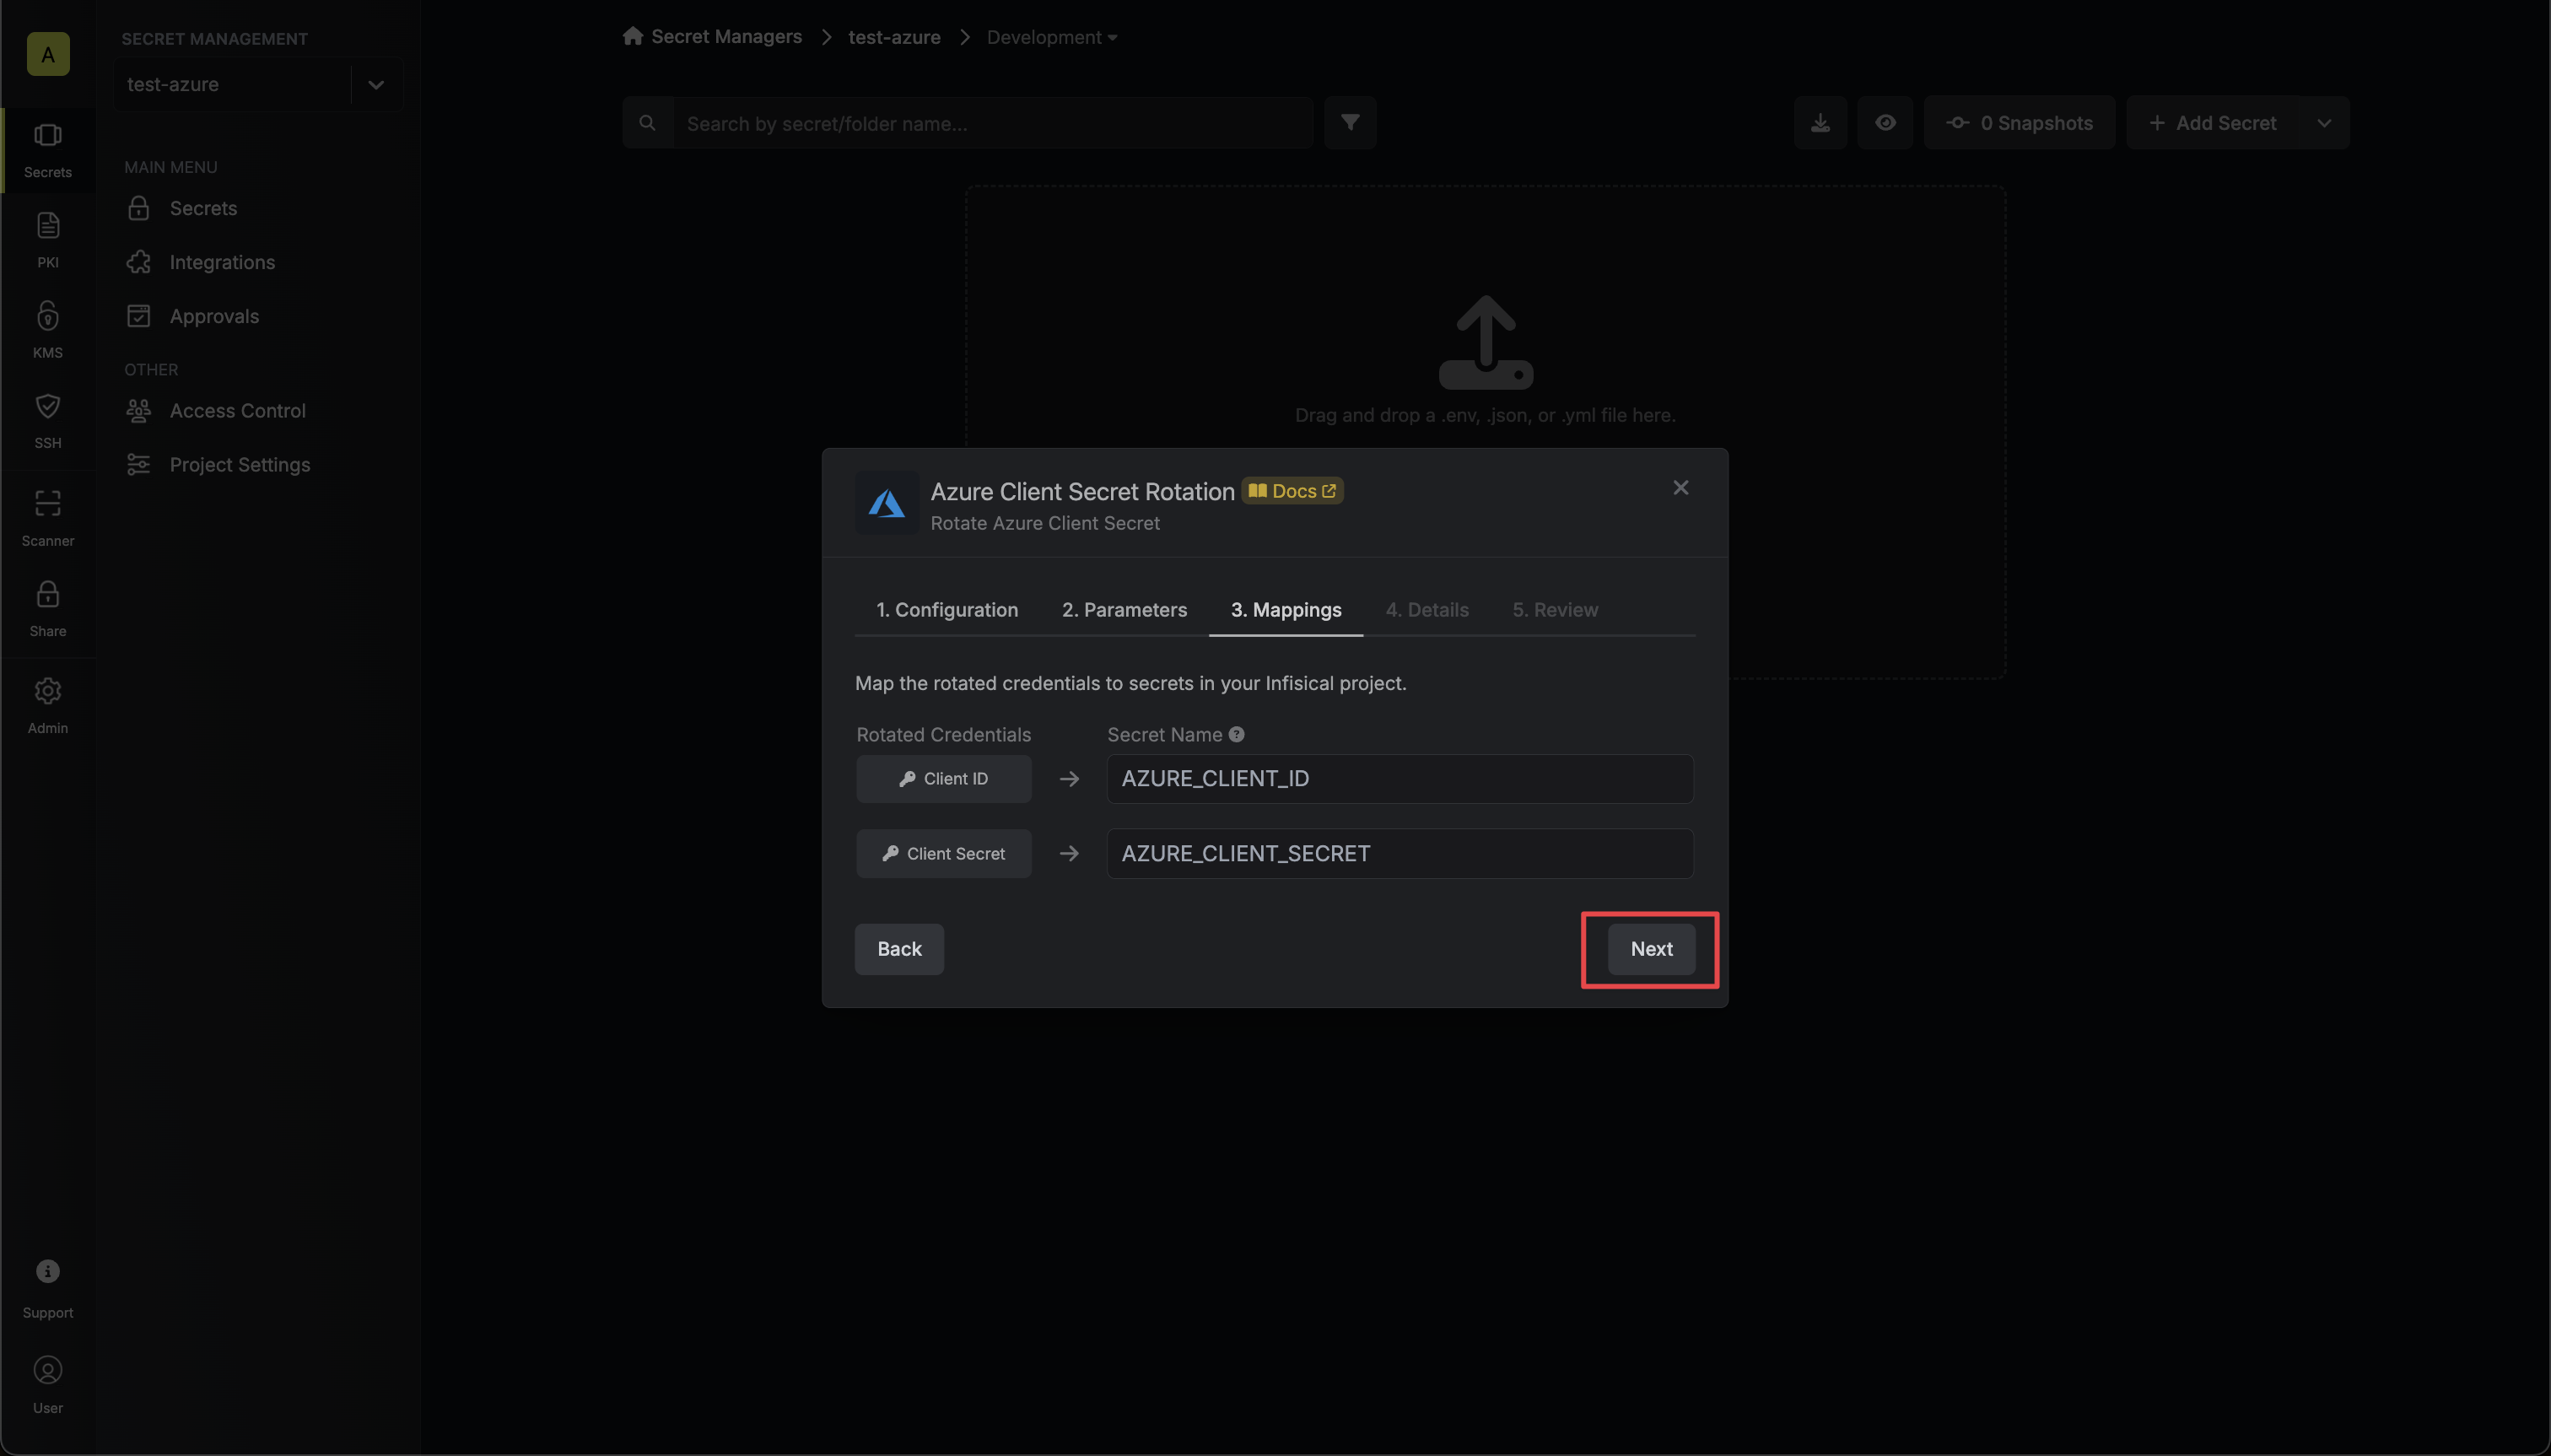
- Client ID - the name of the secret that the application Client ID will be mapped to.
- Client Secret - the name of the secret that the rotated Client Secret will be mapped to.
-
Give your rotation a name and description (optional). Then click Next.
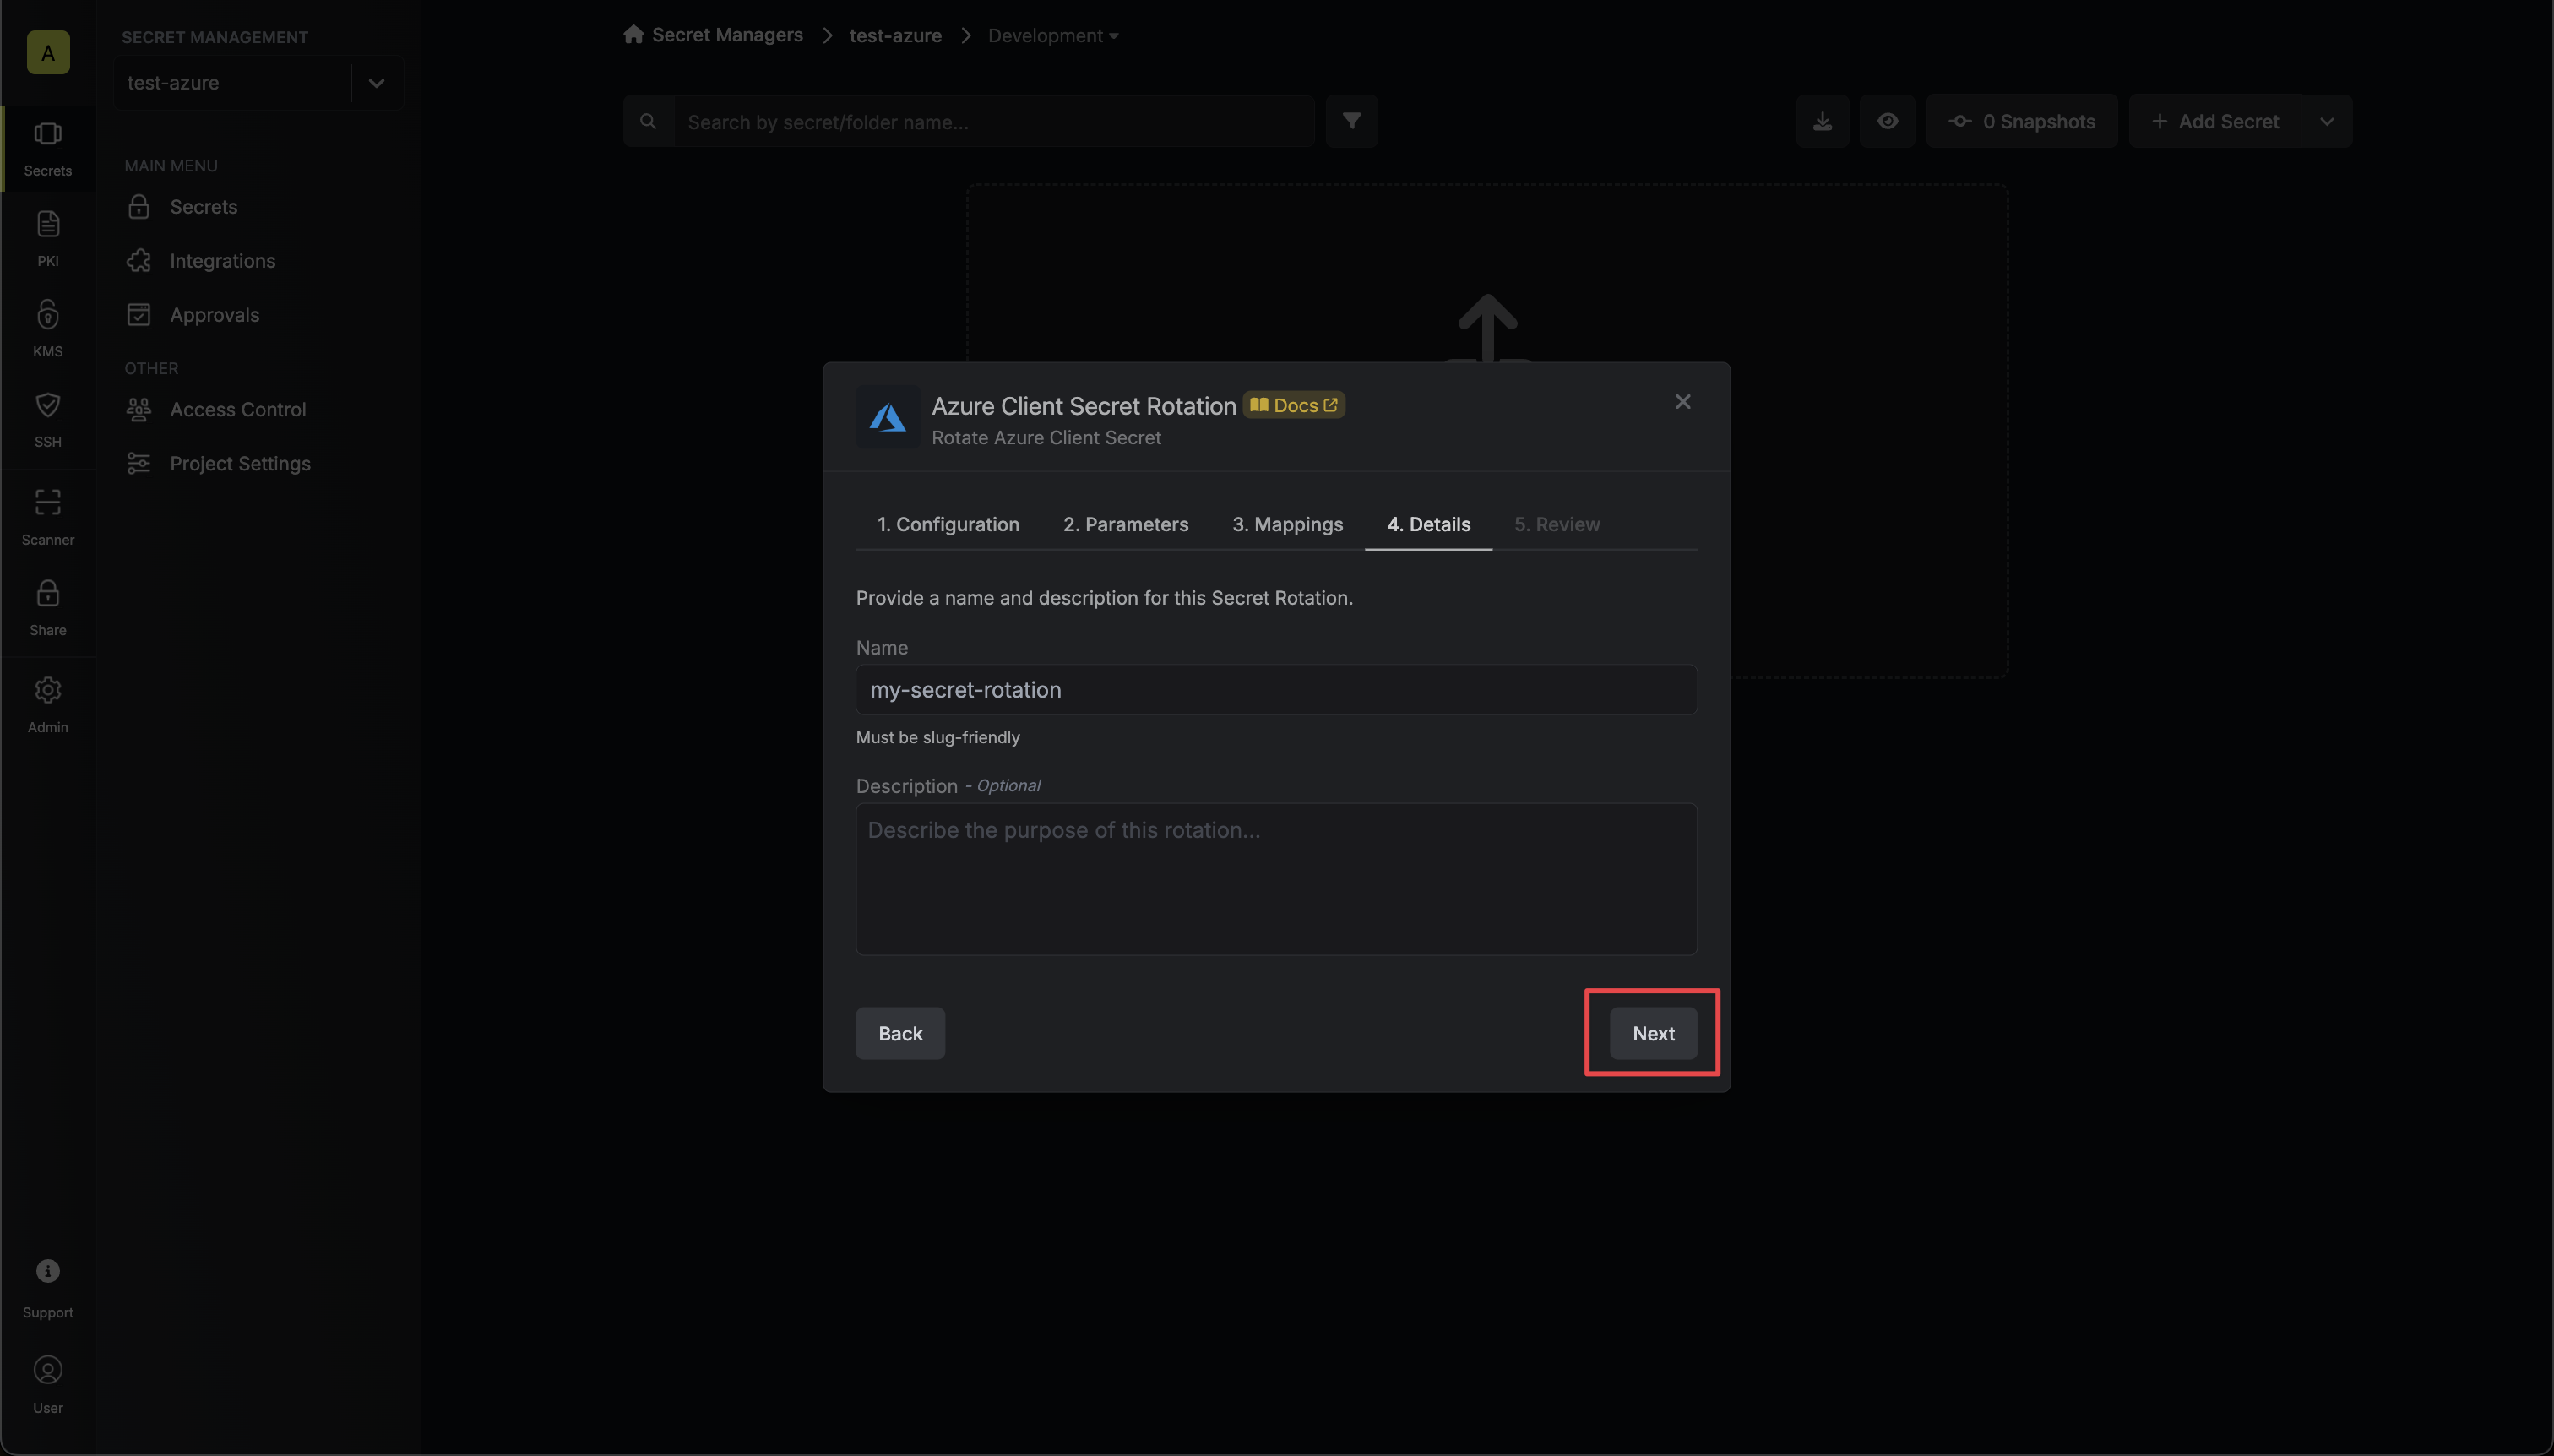
- Name - the name of the secret rotation configuration. Must be slug-friendly.
- Description (optional) - a description of this rotation configuration.
-
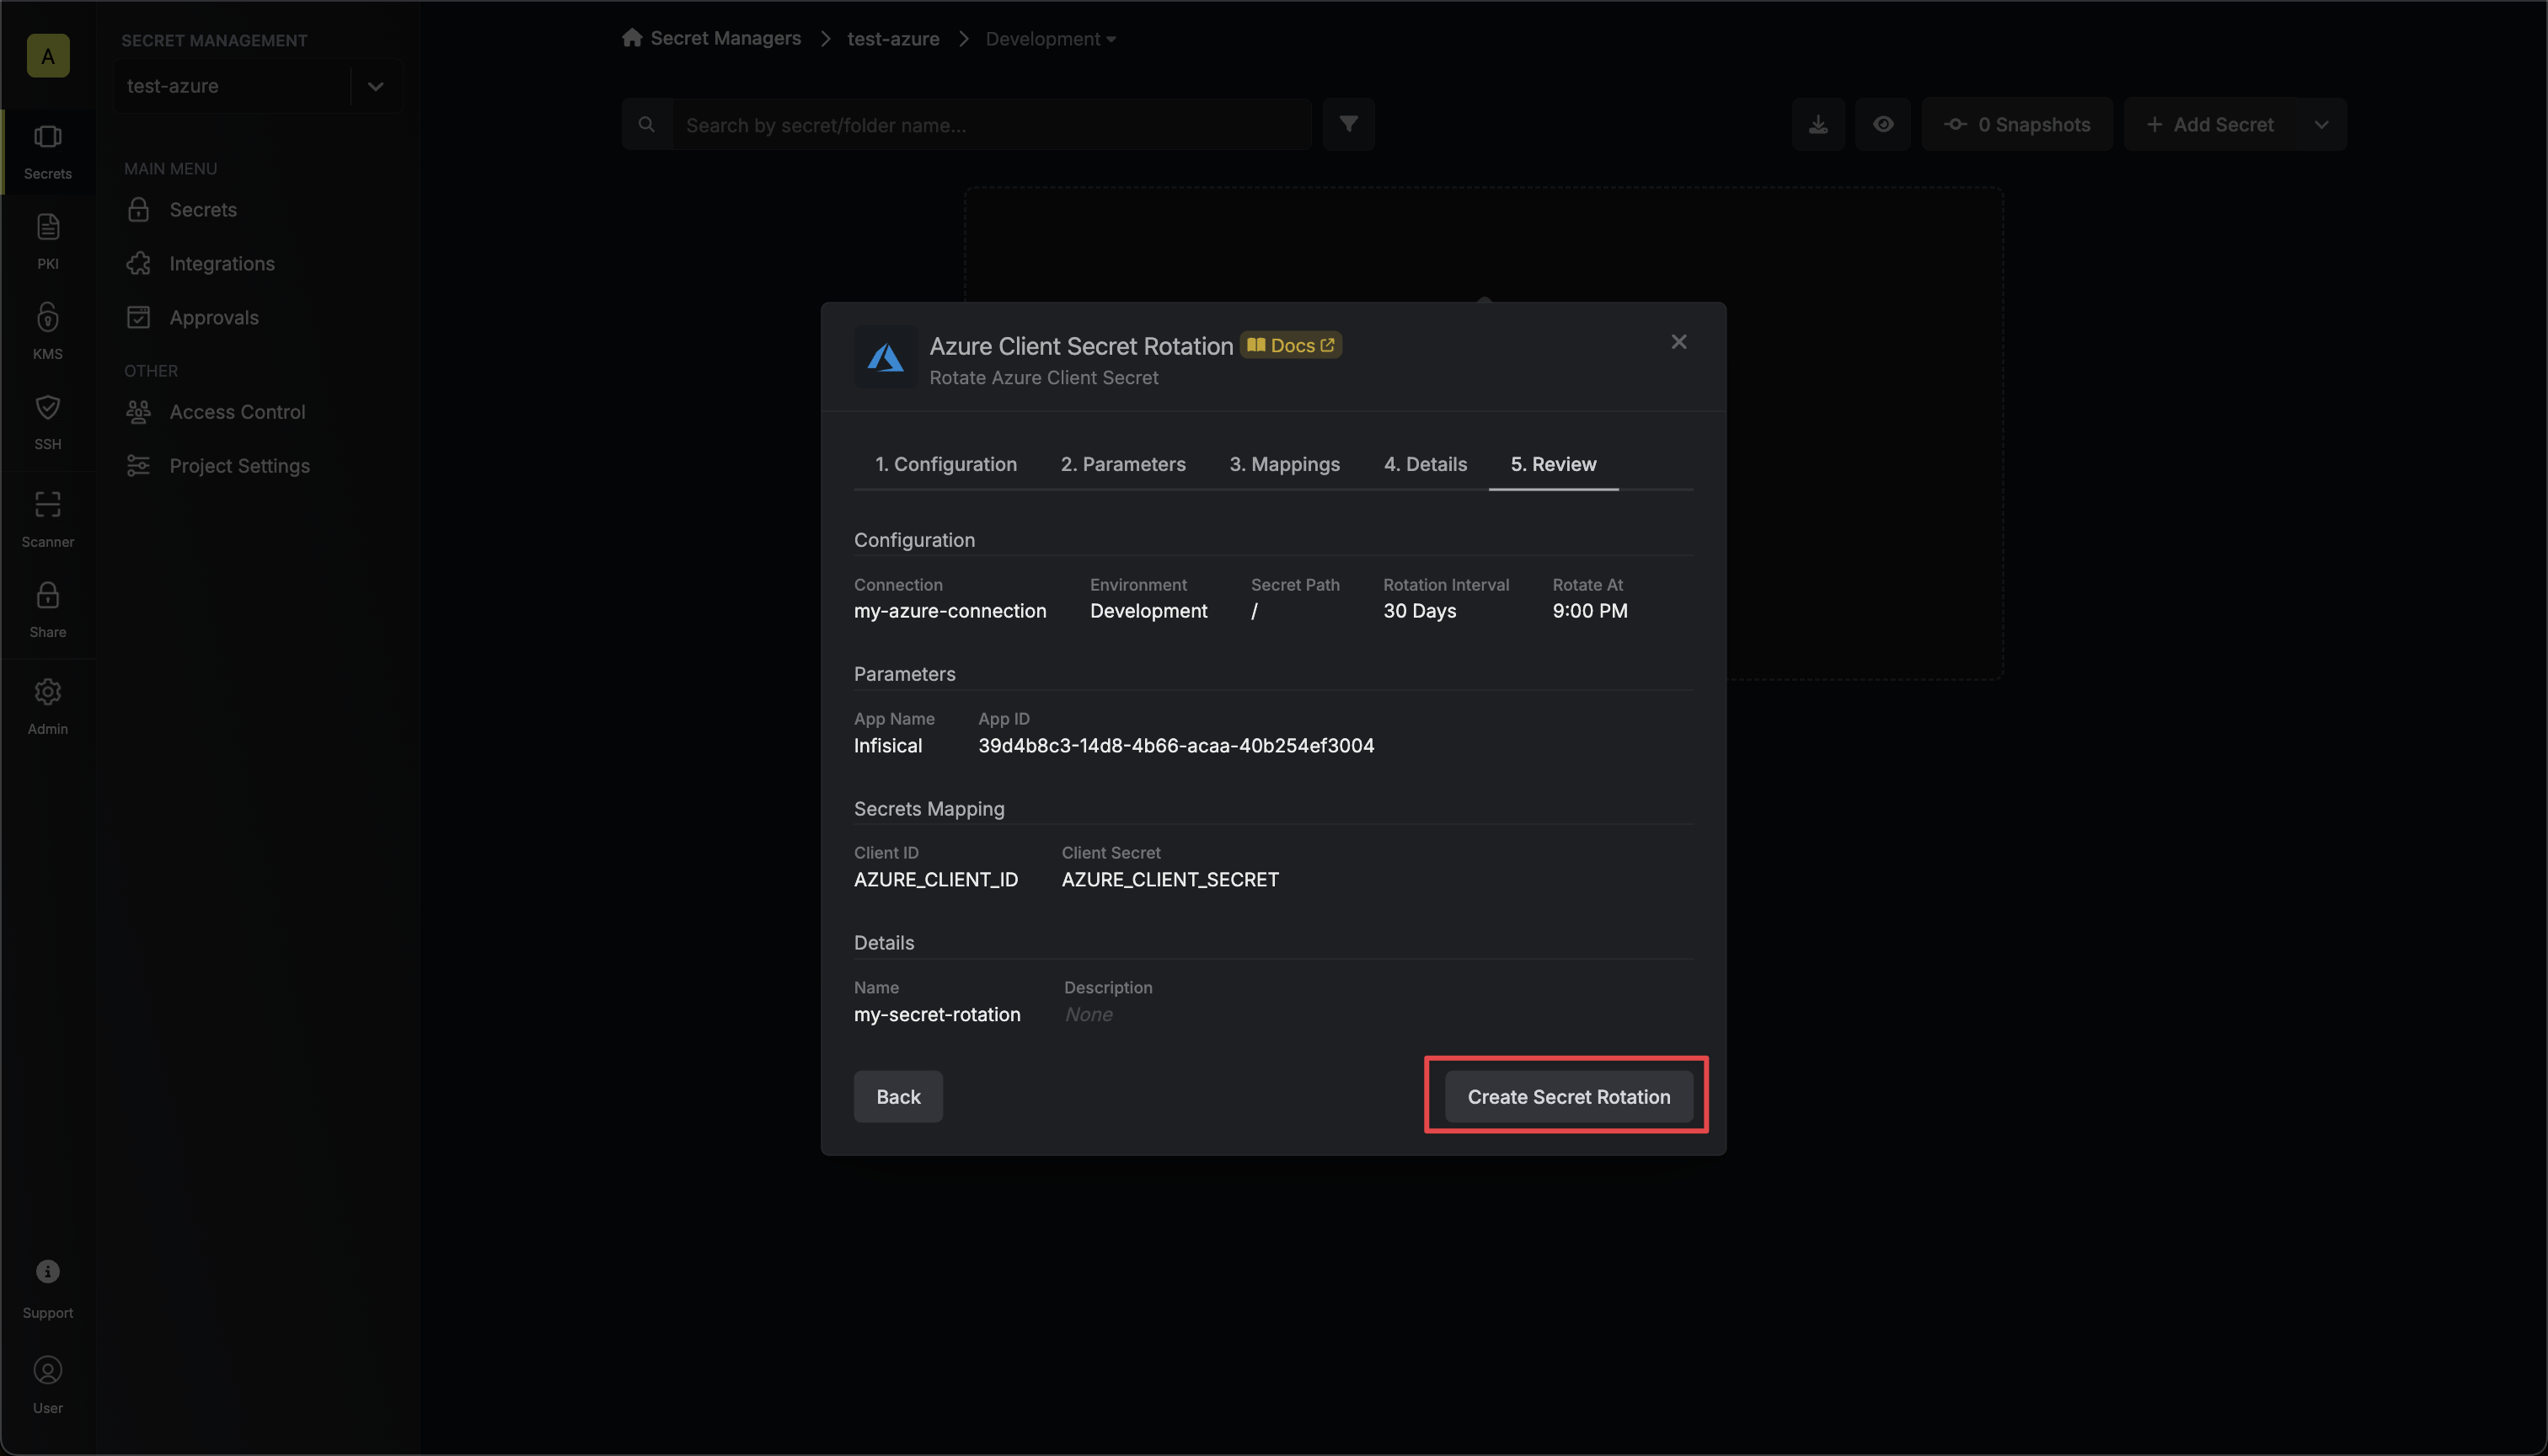
Review your configuration, then click Create Secret Rotation.
-
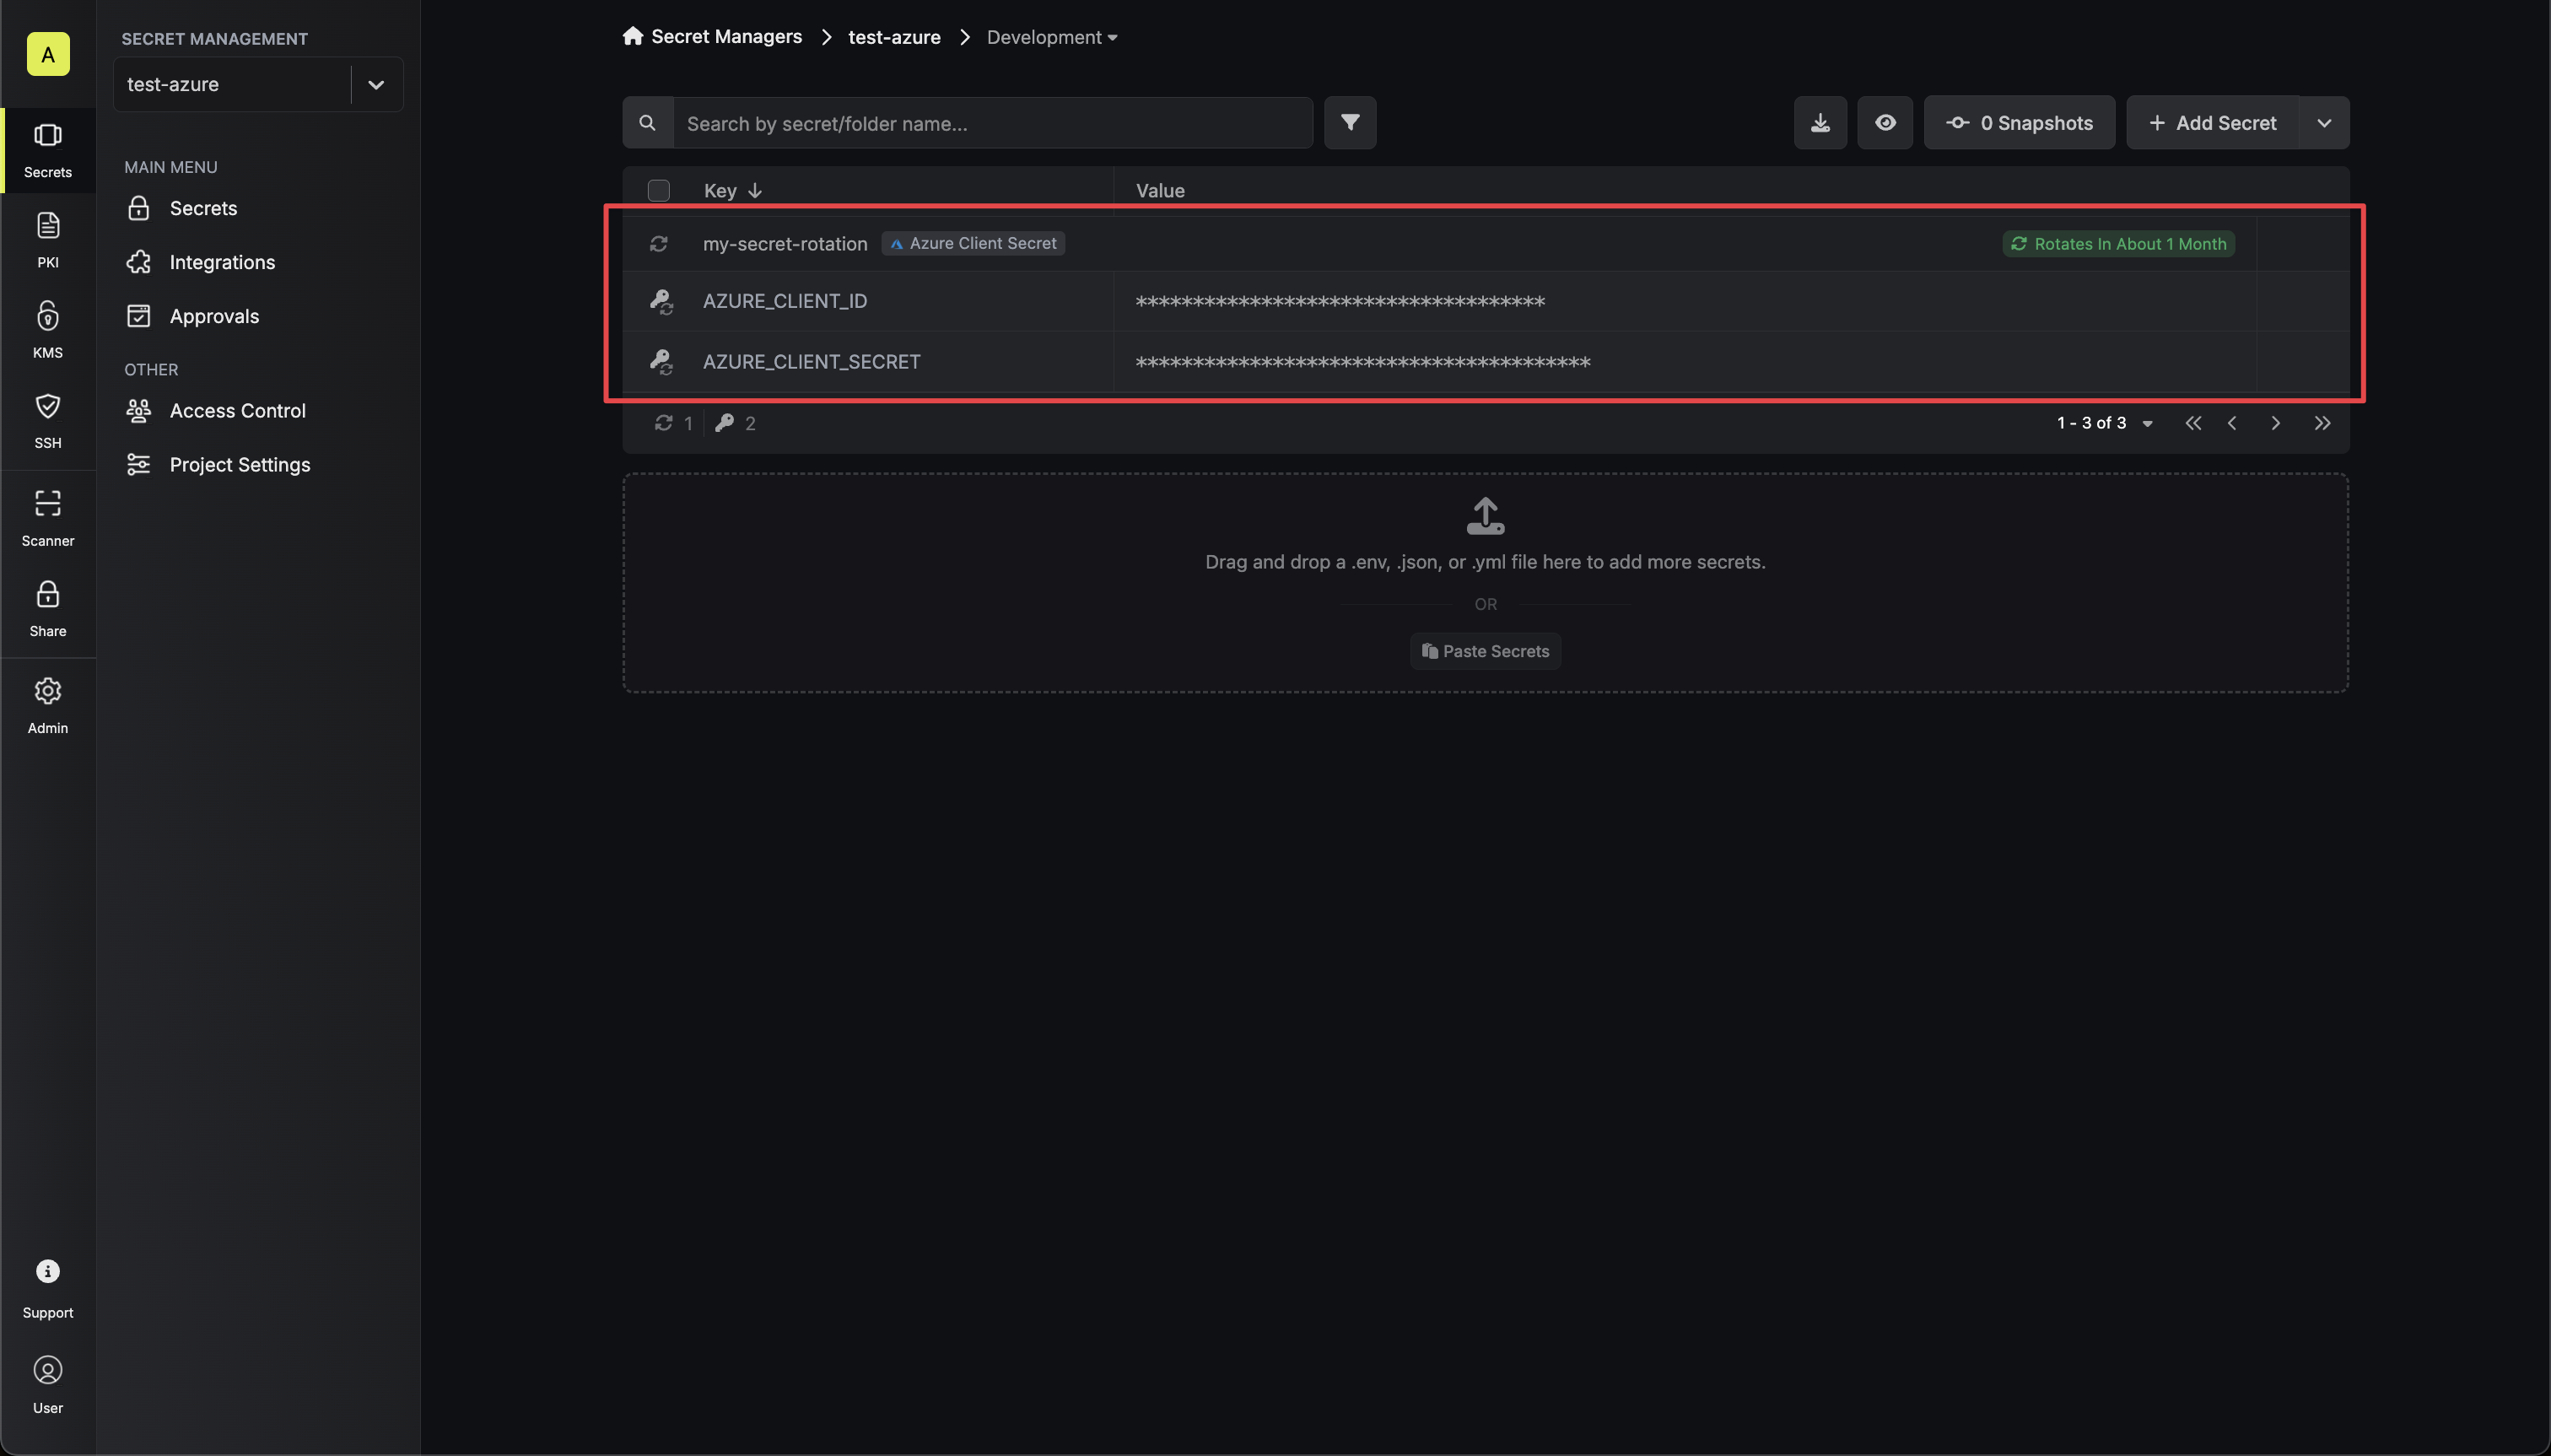
Your Azure Client Secret credentials are now available for use via the mapped secrets.
To create an Azure Client Secret Rotation, make an API request to the Create Azure
Client Secret Rotation API endpoint.You will first need the Client ID and Object ID of the Azure application you want to rotate the secret for. This can be obtained from the Applications dashboard.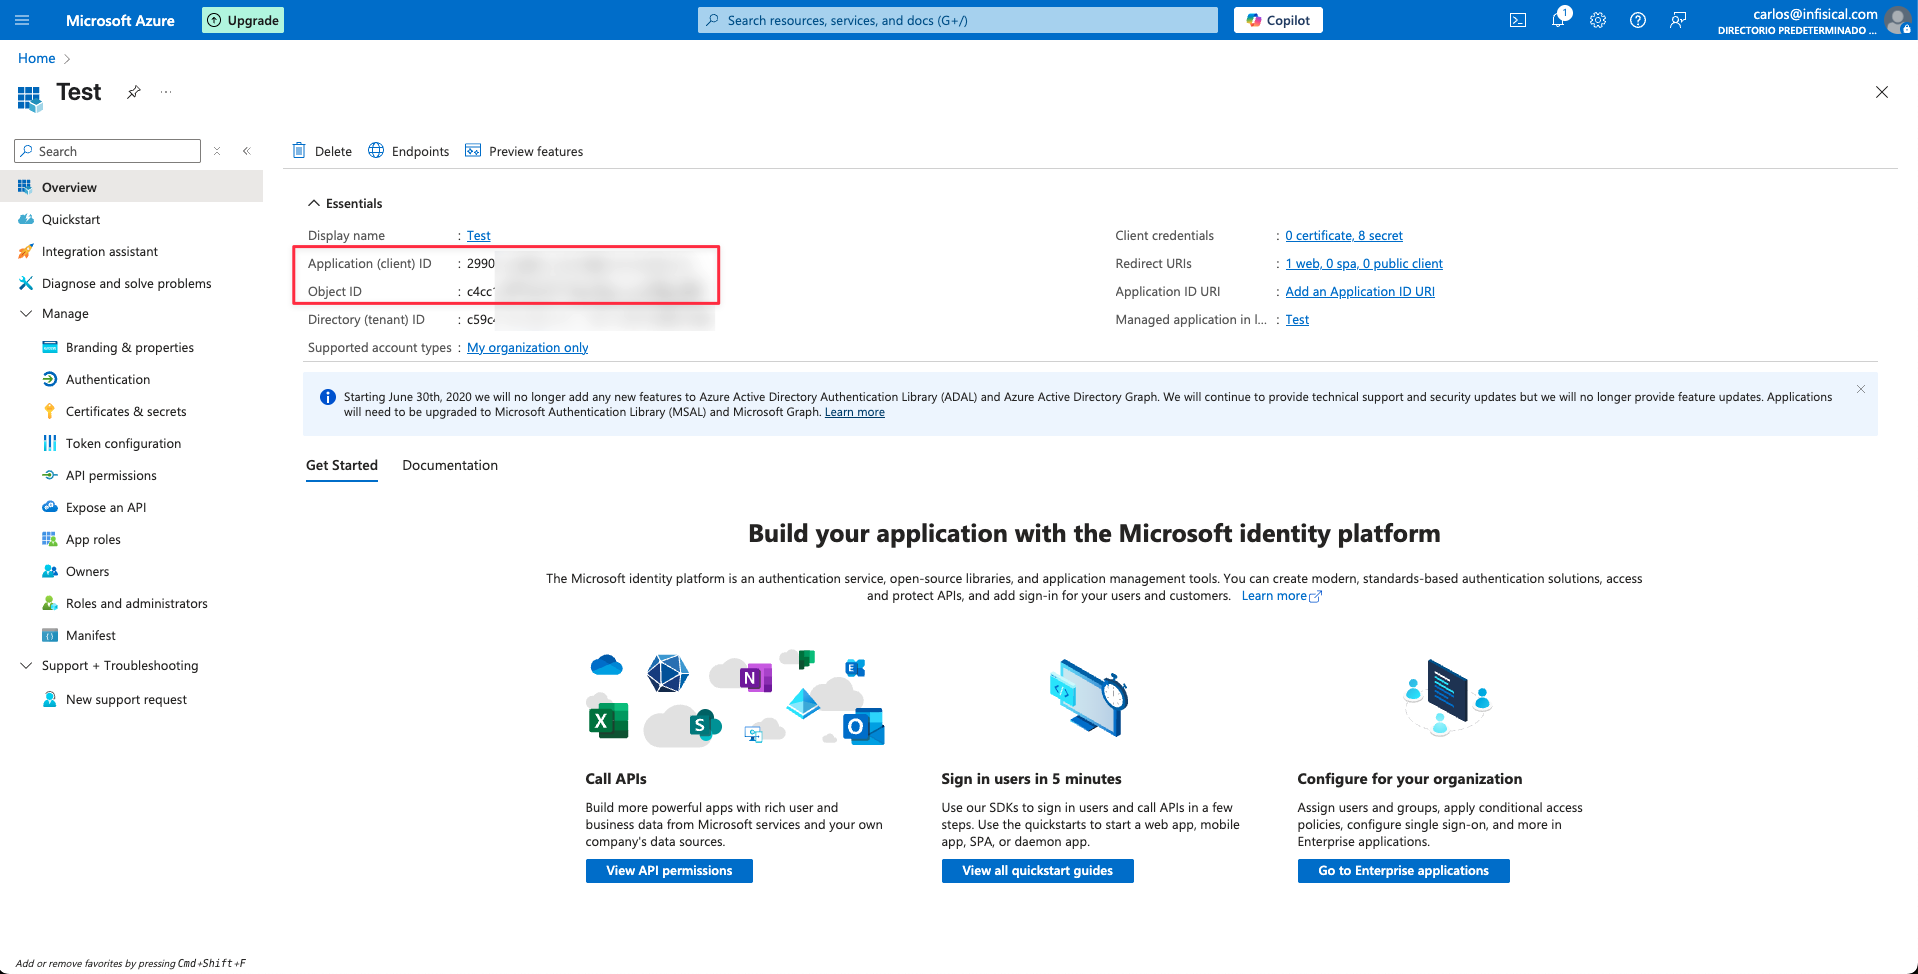
Sample request
curl --request POST \
--url https://us.infisical.com/api/v2/secret-rotations/azure-client-secret \
--header 'Content-Type: application/json' \
--data '{
    "name": "my-azure-rotation",
    "projectId": "3c90c3cc-0d44-4b50-8888-8dd25736052a",
    "description": "my client secret rotation",
    "connectionId": "3c90c3cc-0d44-4b50-8888-8dd25736052a",
    "environment": "dev",
    "secretPath": "/",
    "isAutoRotationEnabled": true,
    "rotationInterval": 30,
    "rotateAtUtc": {
        "hours": 0,
        "minutes": 0
    },
    "parameters": {
        "objectId": "...",
        "clientId": "...",
        "appName": "..."
    },
    "secretsMapping": {
        "clientId": "AZURE_CLIENT_ID",
        "clientSecret": "AZURE_CLIENT_SECRET"
    }
}'
Sample response
{
    "secretRotation": {
        "id": "3c90c3cc-0d44-4b50-8888-8dd25736052a",
        "name": "my-azure-rotation",
        "description": "my client secret rotation",
        "secretsMapping": {
            "clientId": "AZURE_CLIENT_ID",
            "clientSecret": "AZURE_CLIENT_SECRET"
        },
        "isAutoRotationEnabled": true,
        "activeIndex": 0,
        "folderId": "3c90c3cc-0d44-4b50-8888-8dd25736052a",
        "connectionId": "3c90c3cc-0d44-4b50-8888-8dd25736052a",
        "createdAt": "2023-11-07T05:31:56Z",
        "updatedAt": "2023-11-07T05:31:56Z",
        "rotationInterval": 30,
        "rotationStatus": "success",
        "lastRotationAttemptedAt": "2023-11-07T05:31:56Z",
        "lastRotatedAt": "2023-11-07T05:31:56Z",
        "lastRotationJobId": "3c90c3cc-0d44-4b50-8888-8dd25736052a",
        "nextRotationAt": "2023-11-07T05:31:56Z",
        "connection": {
            "app": "azure",
            "name": "my-azure-connection",
            "id": "3c90c3cc-0d44-4b50-8888-8dd25736052a"
        },
        "environment": {
            "slug": "dev",
            "name": "Development",
            "id": "3c90c3cc-0d44-4b50-8888-8dd25736052a"
        },
        "projectId": "3c90c3cc-0d44-4b50-8888-8dd25736052a",
        "folder": {
            "id": "3c90c3cc-0d44-4b50-8888-8dd25736052a",
            "path": "/"
        },
        "rotateAtUtc": {
            "hours": 0,
            "minutes": 0
        },
        "lastRotationMessage": null,
        "type": "azure-client-secret",
        "parameters": {
            "objectId": "...",
            "appName": "...",
            "clientId": "..."
        }
    }
}


