Rotation Type: Dual-PhaseThis rotation maintains two active credential sets with overlapping validity, ensuring zero-downtime during rotation cycles.
Prerequisites
- Create an Okta Connection.
Create an Okta Client Secret Rotation in Infisical
- Infisical UI
- API
-
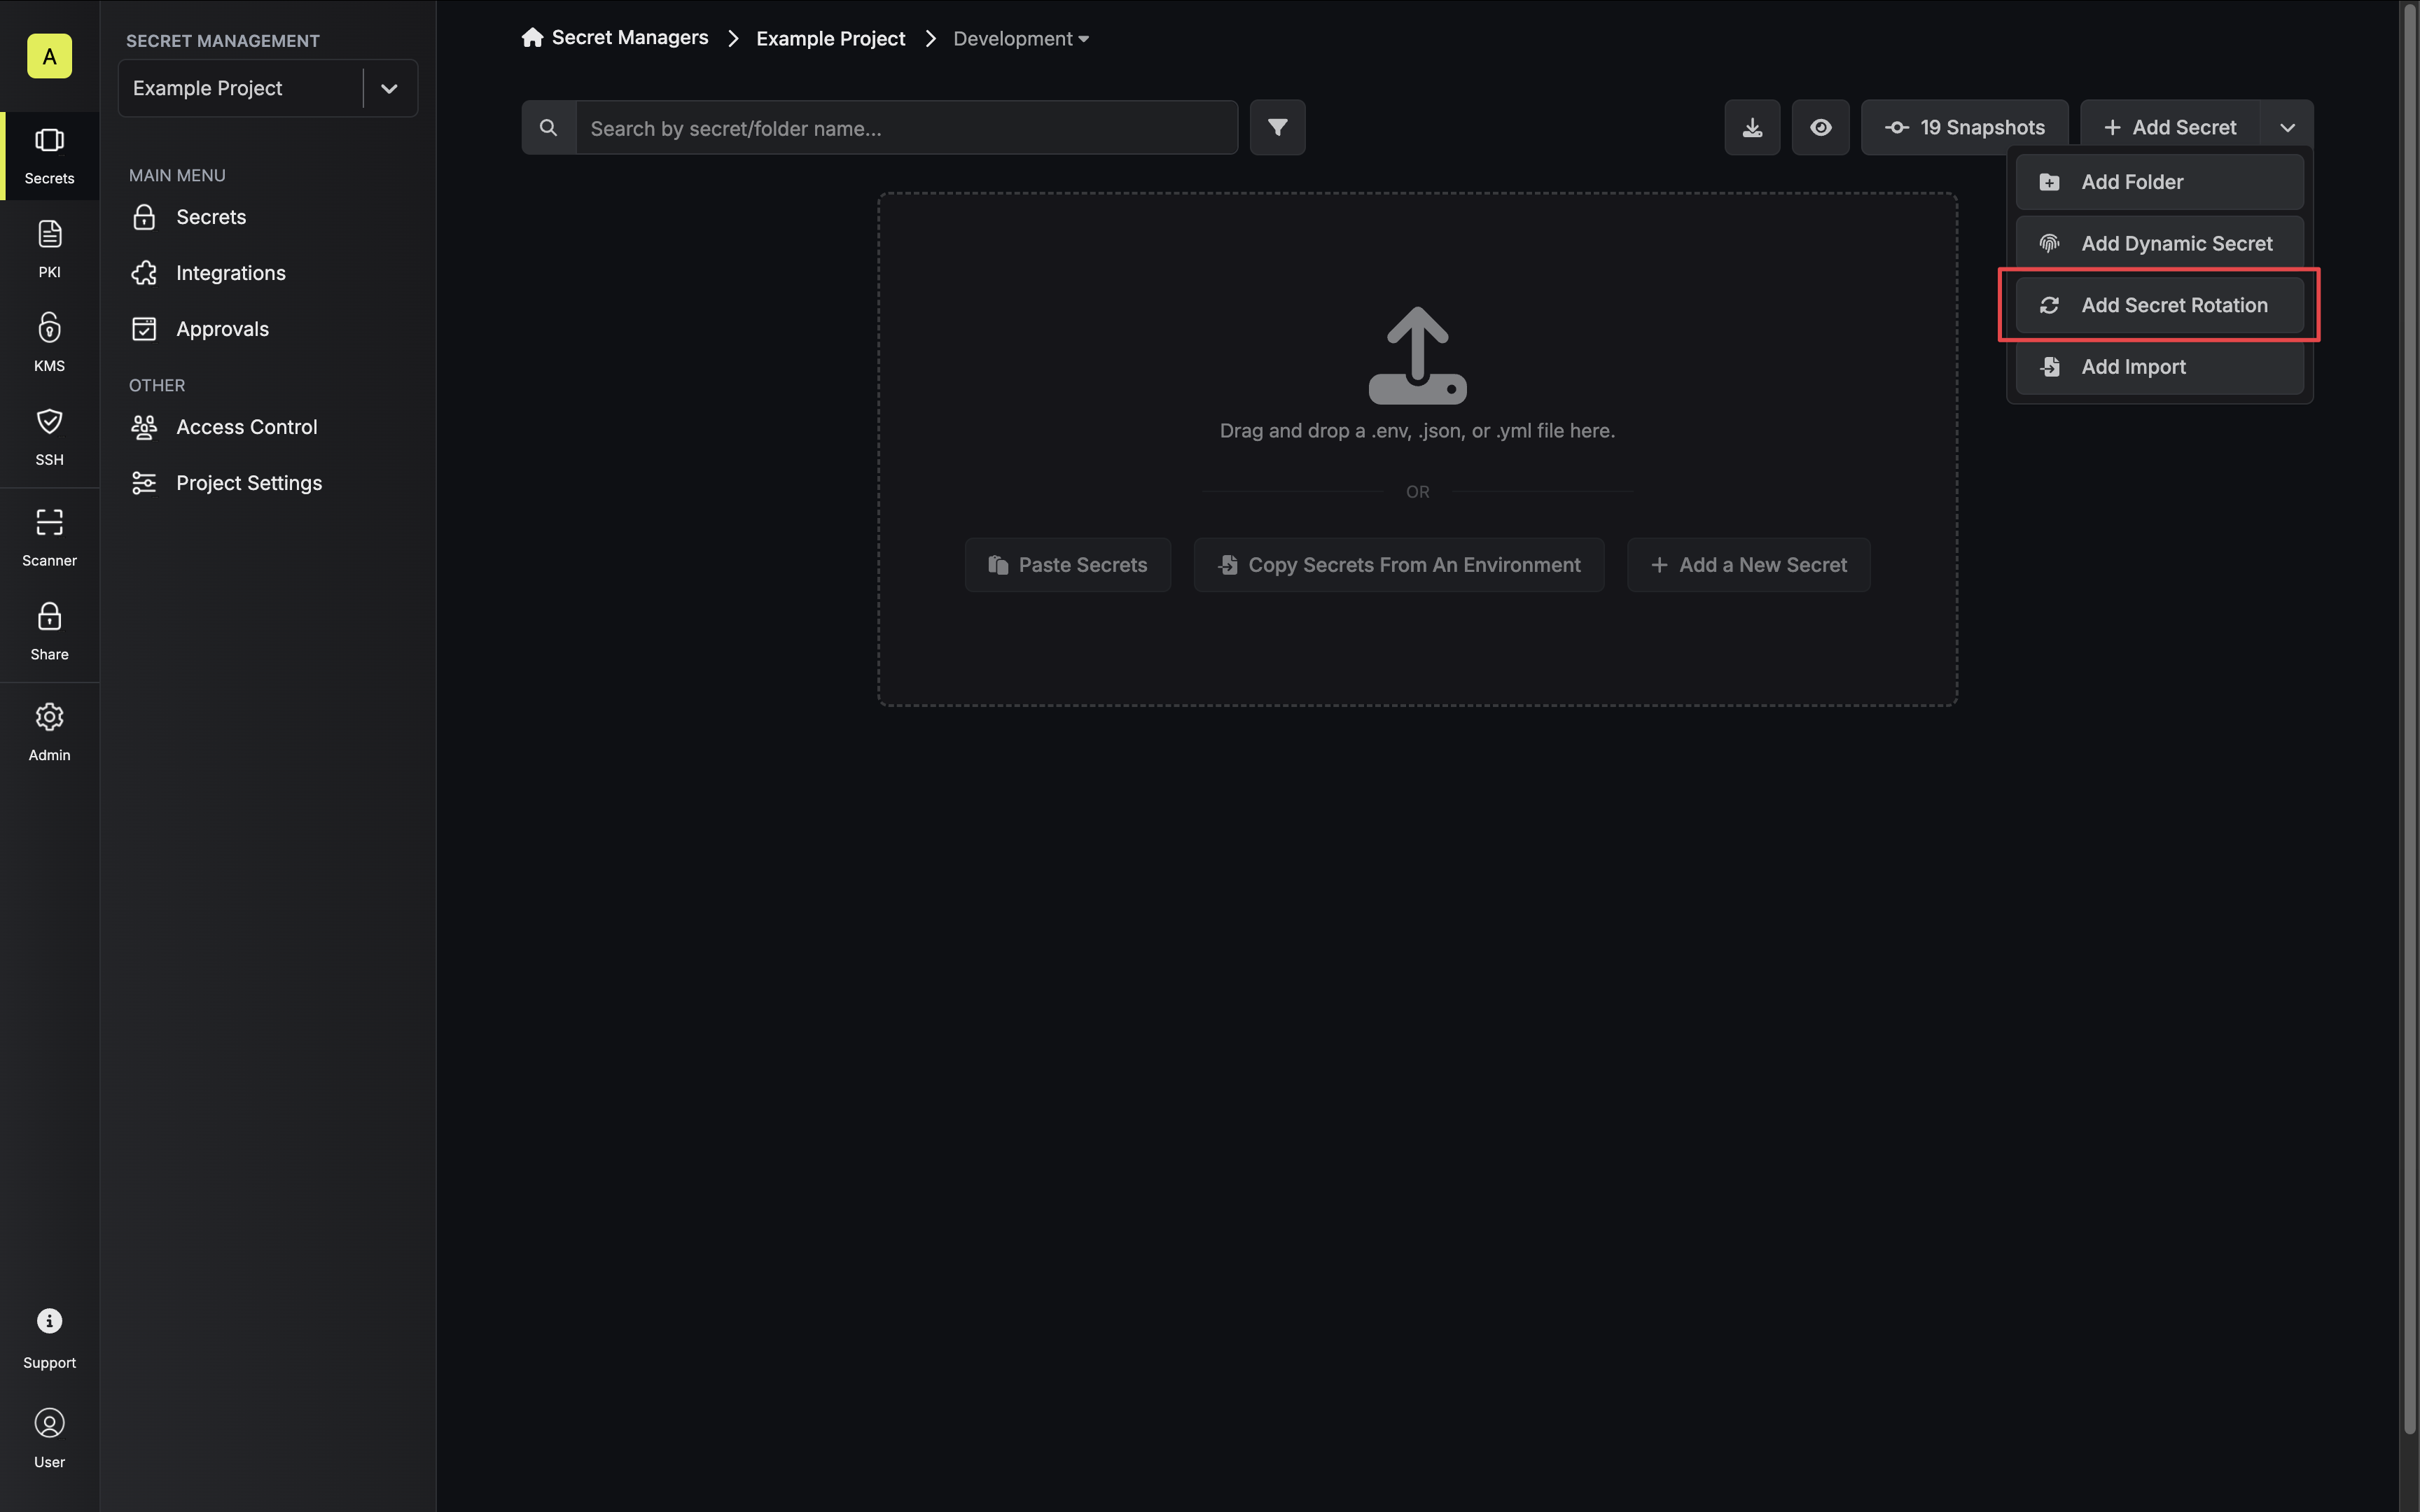
Navigate to your Secret Manager Project’s Dashboard and select Add Secret Rotation from the actions dropdown.
-
Select the Okta Client Secret option.

-
Configure the rotation behavior, then click Next.

- Okta Connection - the connection that will perform the rotation of the specified application’s Client Secret.
- Rotation Interval - the interval, in days, that once elapsed will trigger a rotation.
- Rotate At - the local time of day when rotation should occur once the interval has elapsed.
- Auto-Rotation Enabled - whether secrets should automatically be rotated once the rotation interval has elapsed. Disable this option to manually rotate secrets or pause secret rotation.
-
Select the Okta application whose Client Secret you want to rotate. Then click Next.

-
Specify the secret names that the client credentials should be mapped to. Then click Next.

- Client ID - the name of the secret that the application Client ID will be mapped to.
- Client Secret - the name of the secret that the rotated Client Secret will be mapped to.
-
Give your rotation a name and description (optional). Then click Next.

- Name - the name of the secret rotation configuration. Must be slug-friendly.
- Description (optional) - a description of this rotation configuration.
-
Review your configuration, then click Create Secret Rotation.

-
Your Okta Client Secret credentials are now available for use via the mapped secrets.

