

PingOne SCIM provisioning is a paid feature.If you’re using Infisical Cloud, then it’s available under the Enterprise Tier. If you’re self-hosting Infisical,
then you should contact [email protected] to purchase a self-hosted license to use it.
1
Create a SCIM token in Infisical
In Infisical, head to SSO & Provisioning and select the Provisioning tab. Under SCIM Provisioning,
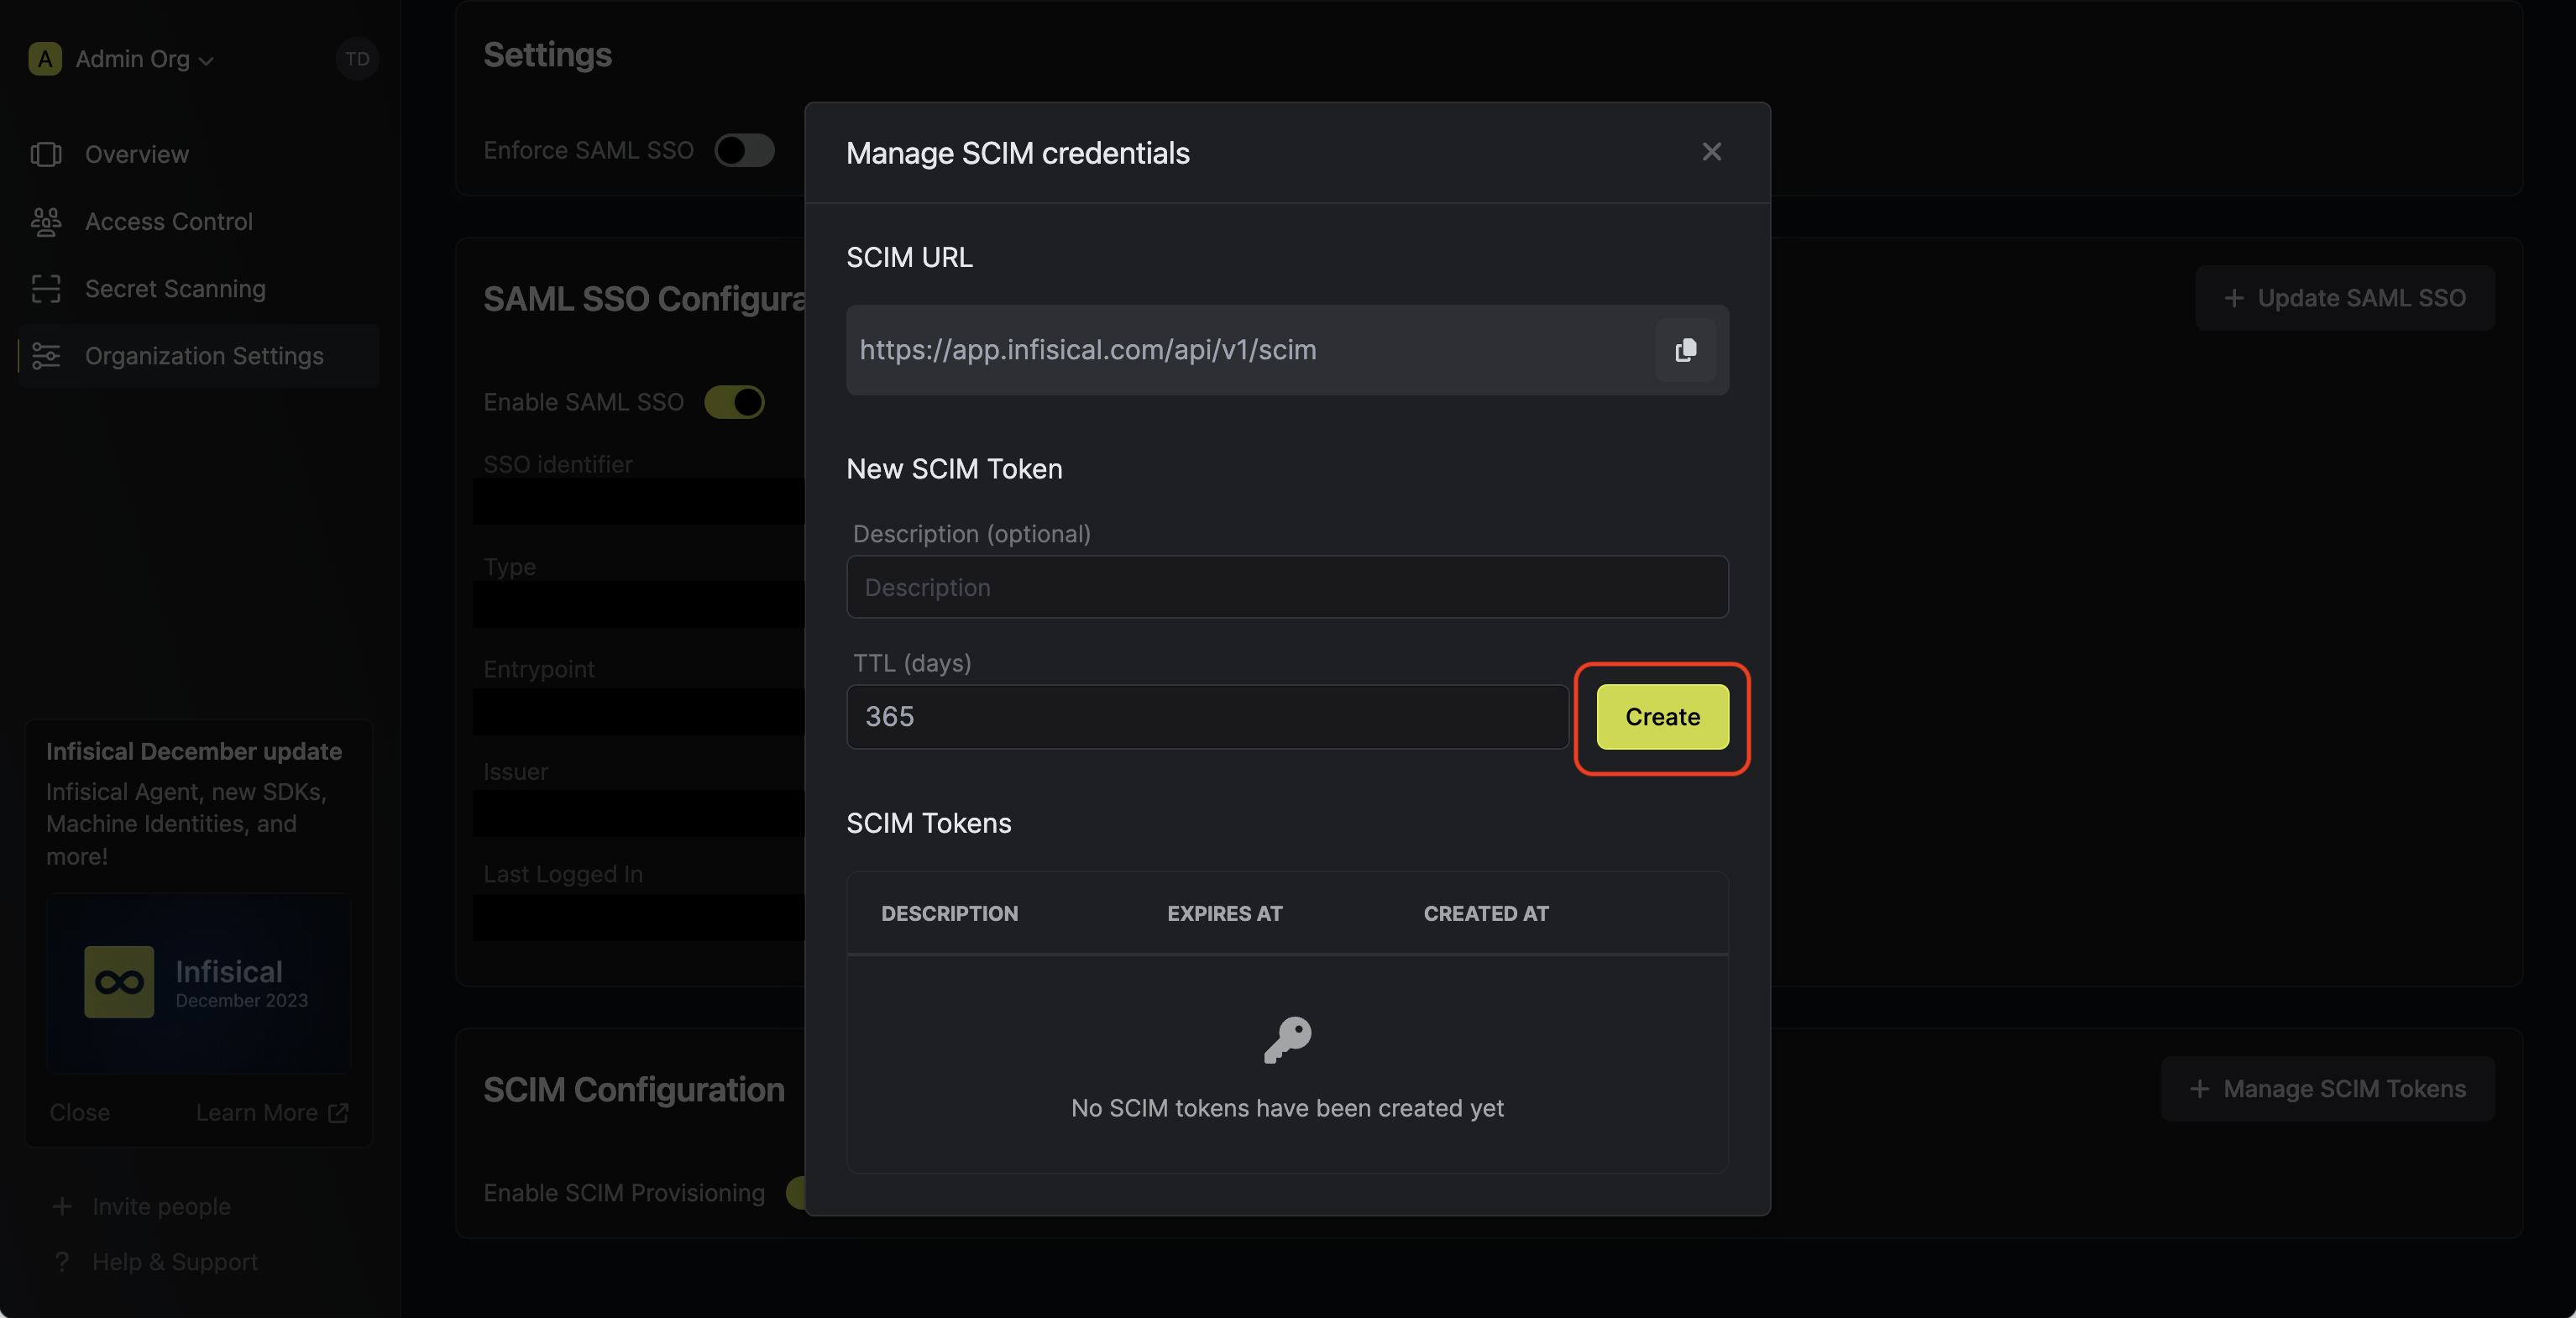
turn on the Enable SCIM toggle to allow PingOne to provision and deprovision users for your organization.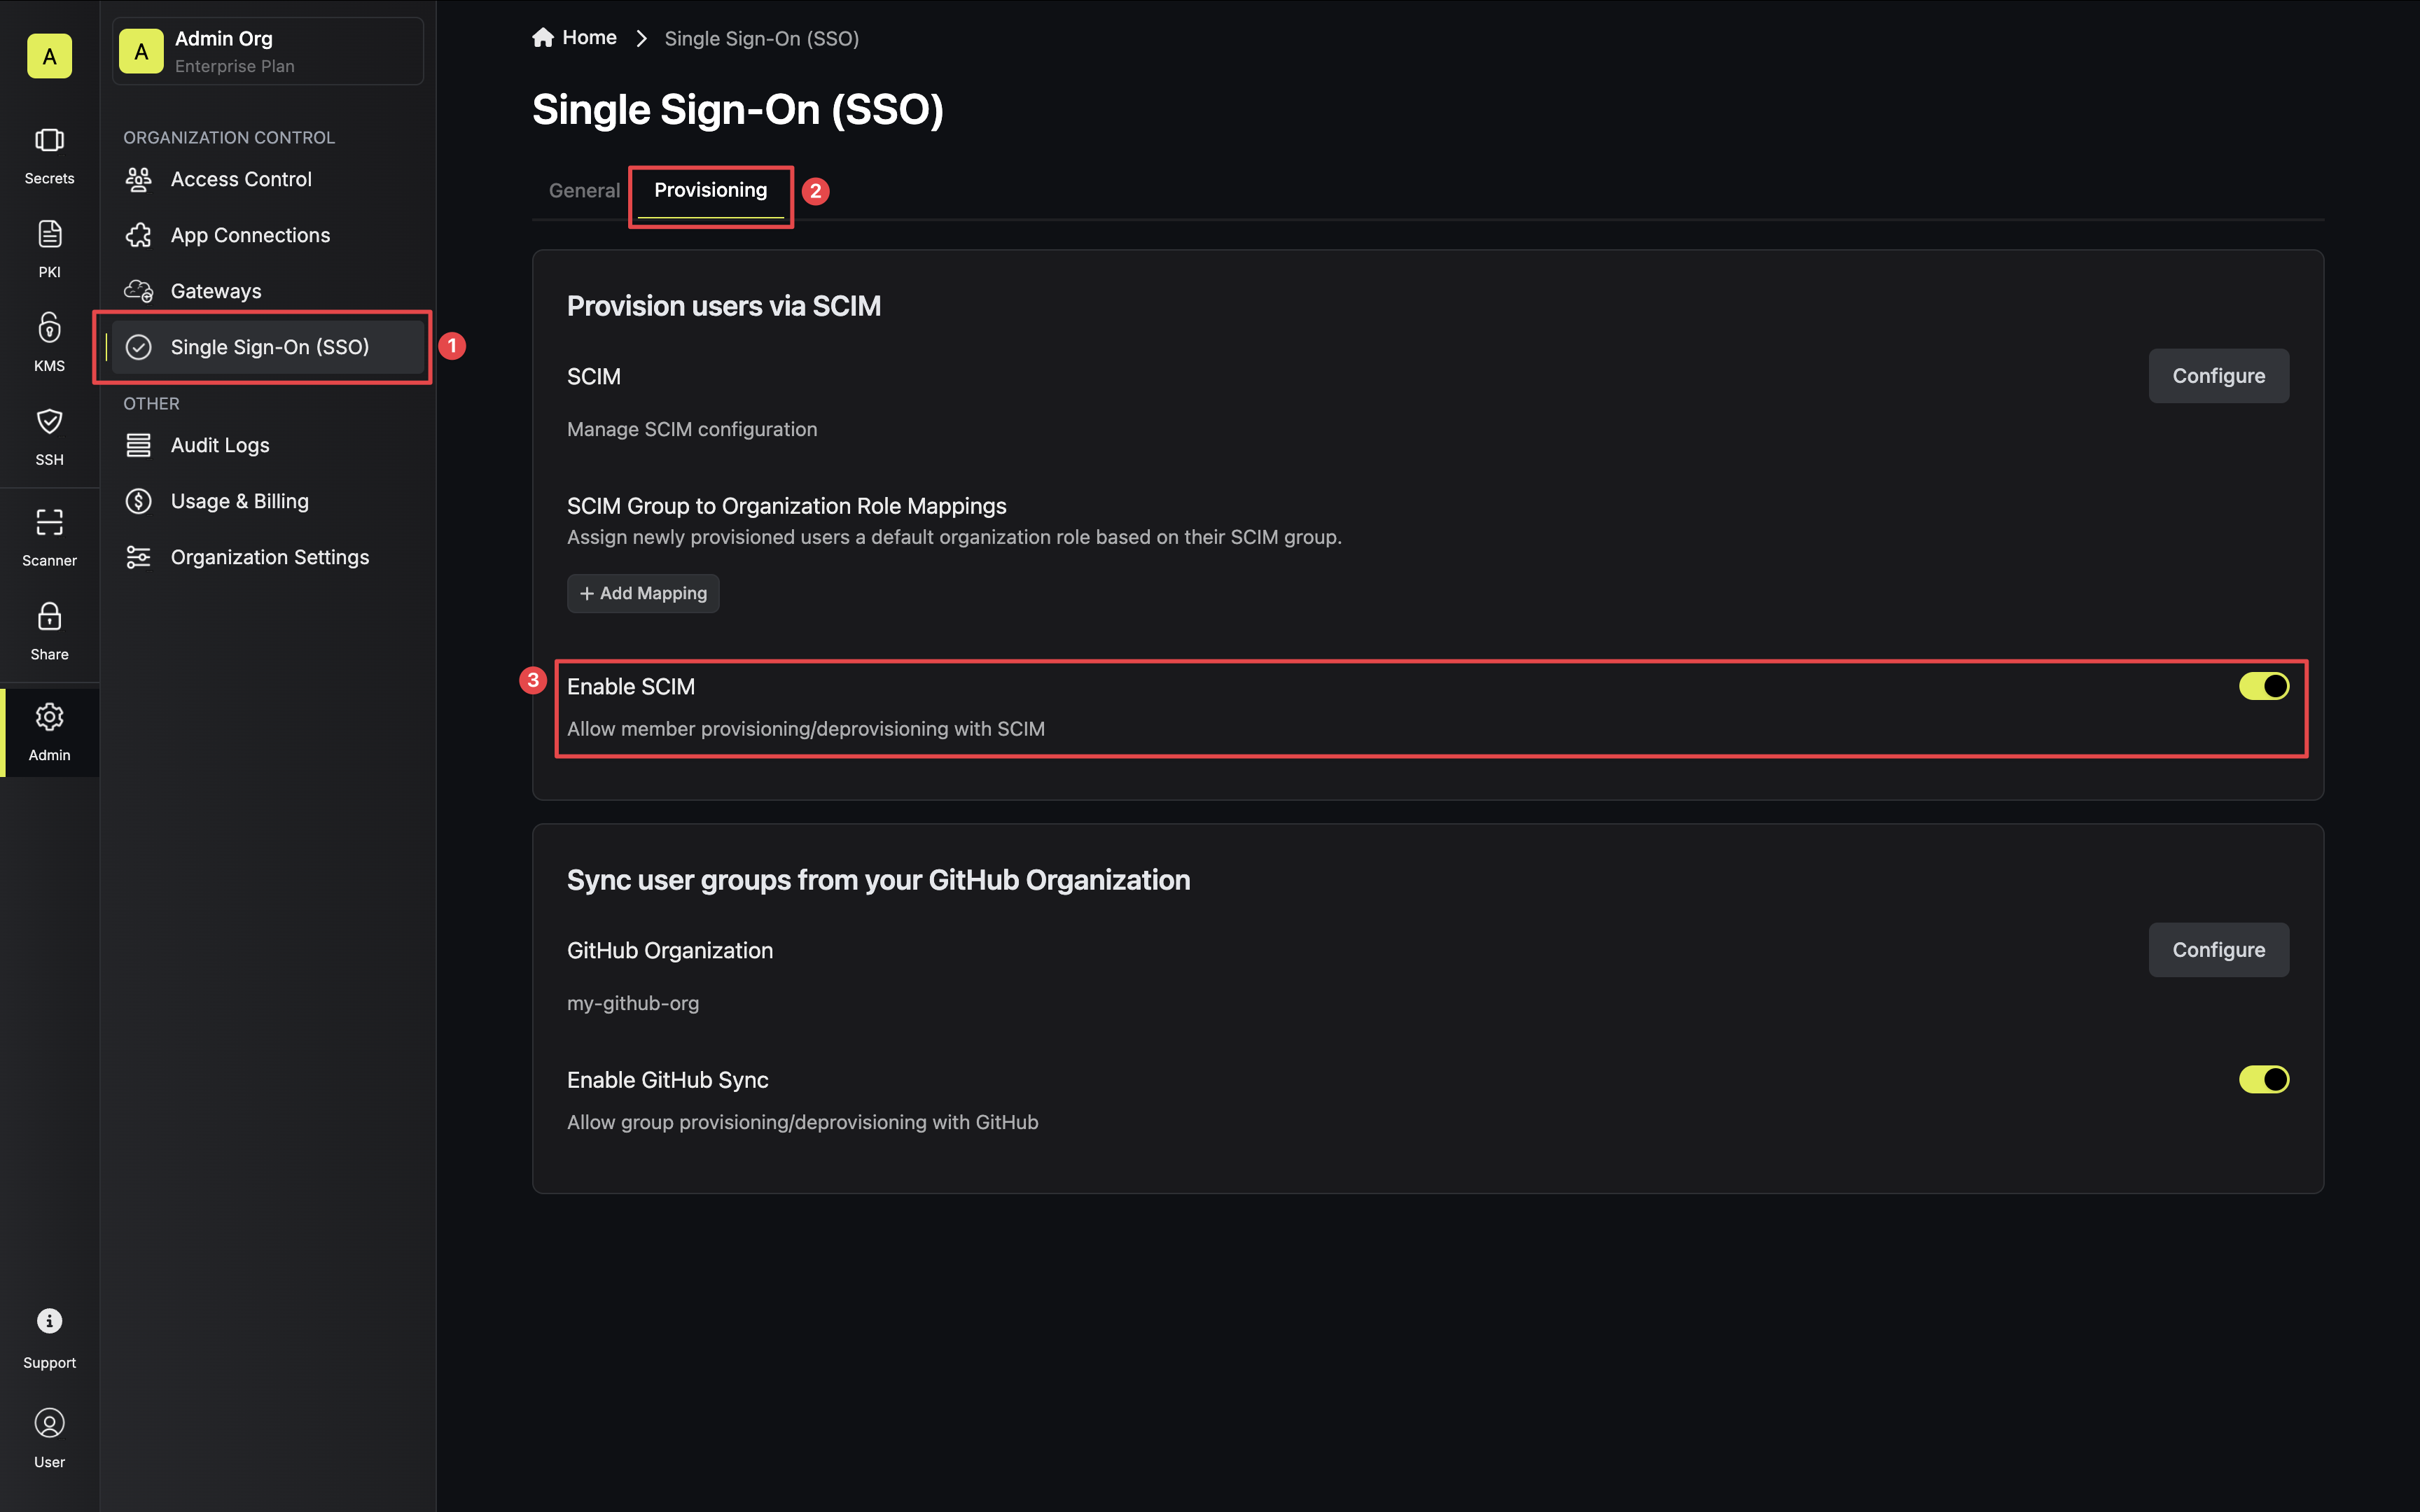 Next, select Configure on the SCIM Provisioning card, then select Create Token in the Manage SCIM Credentials modal to generate a SCIM token for PingOne.
 Next, copy the SCIM URL and New SCIM Token to use when configuring SCIM in PingOne.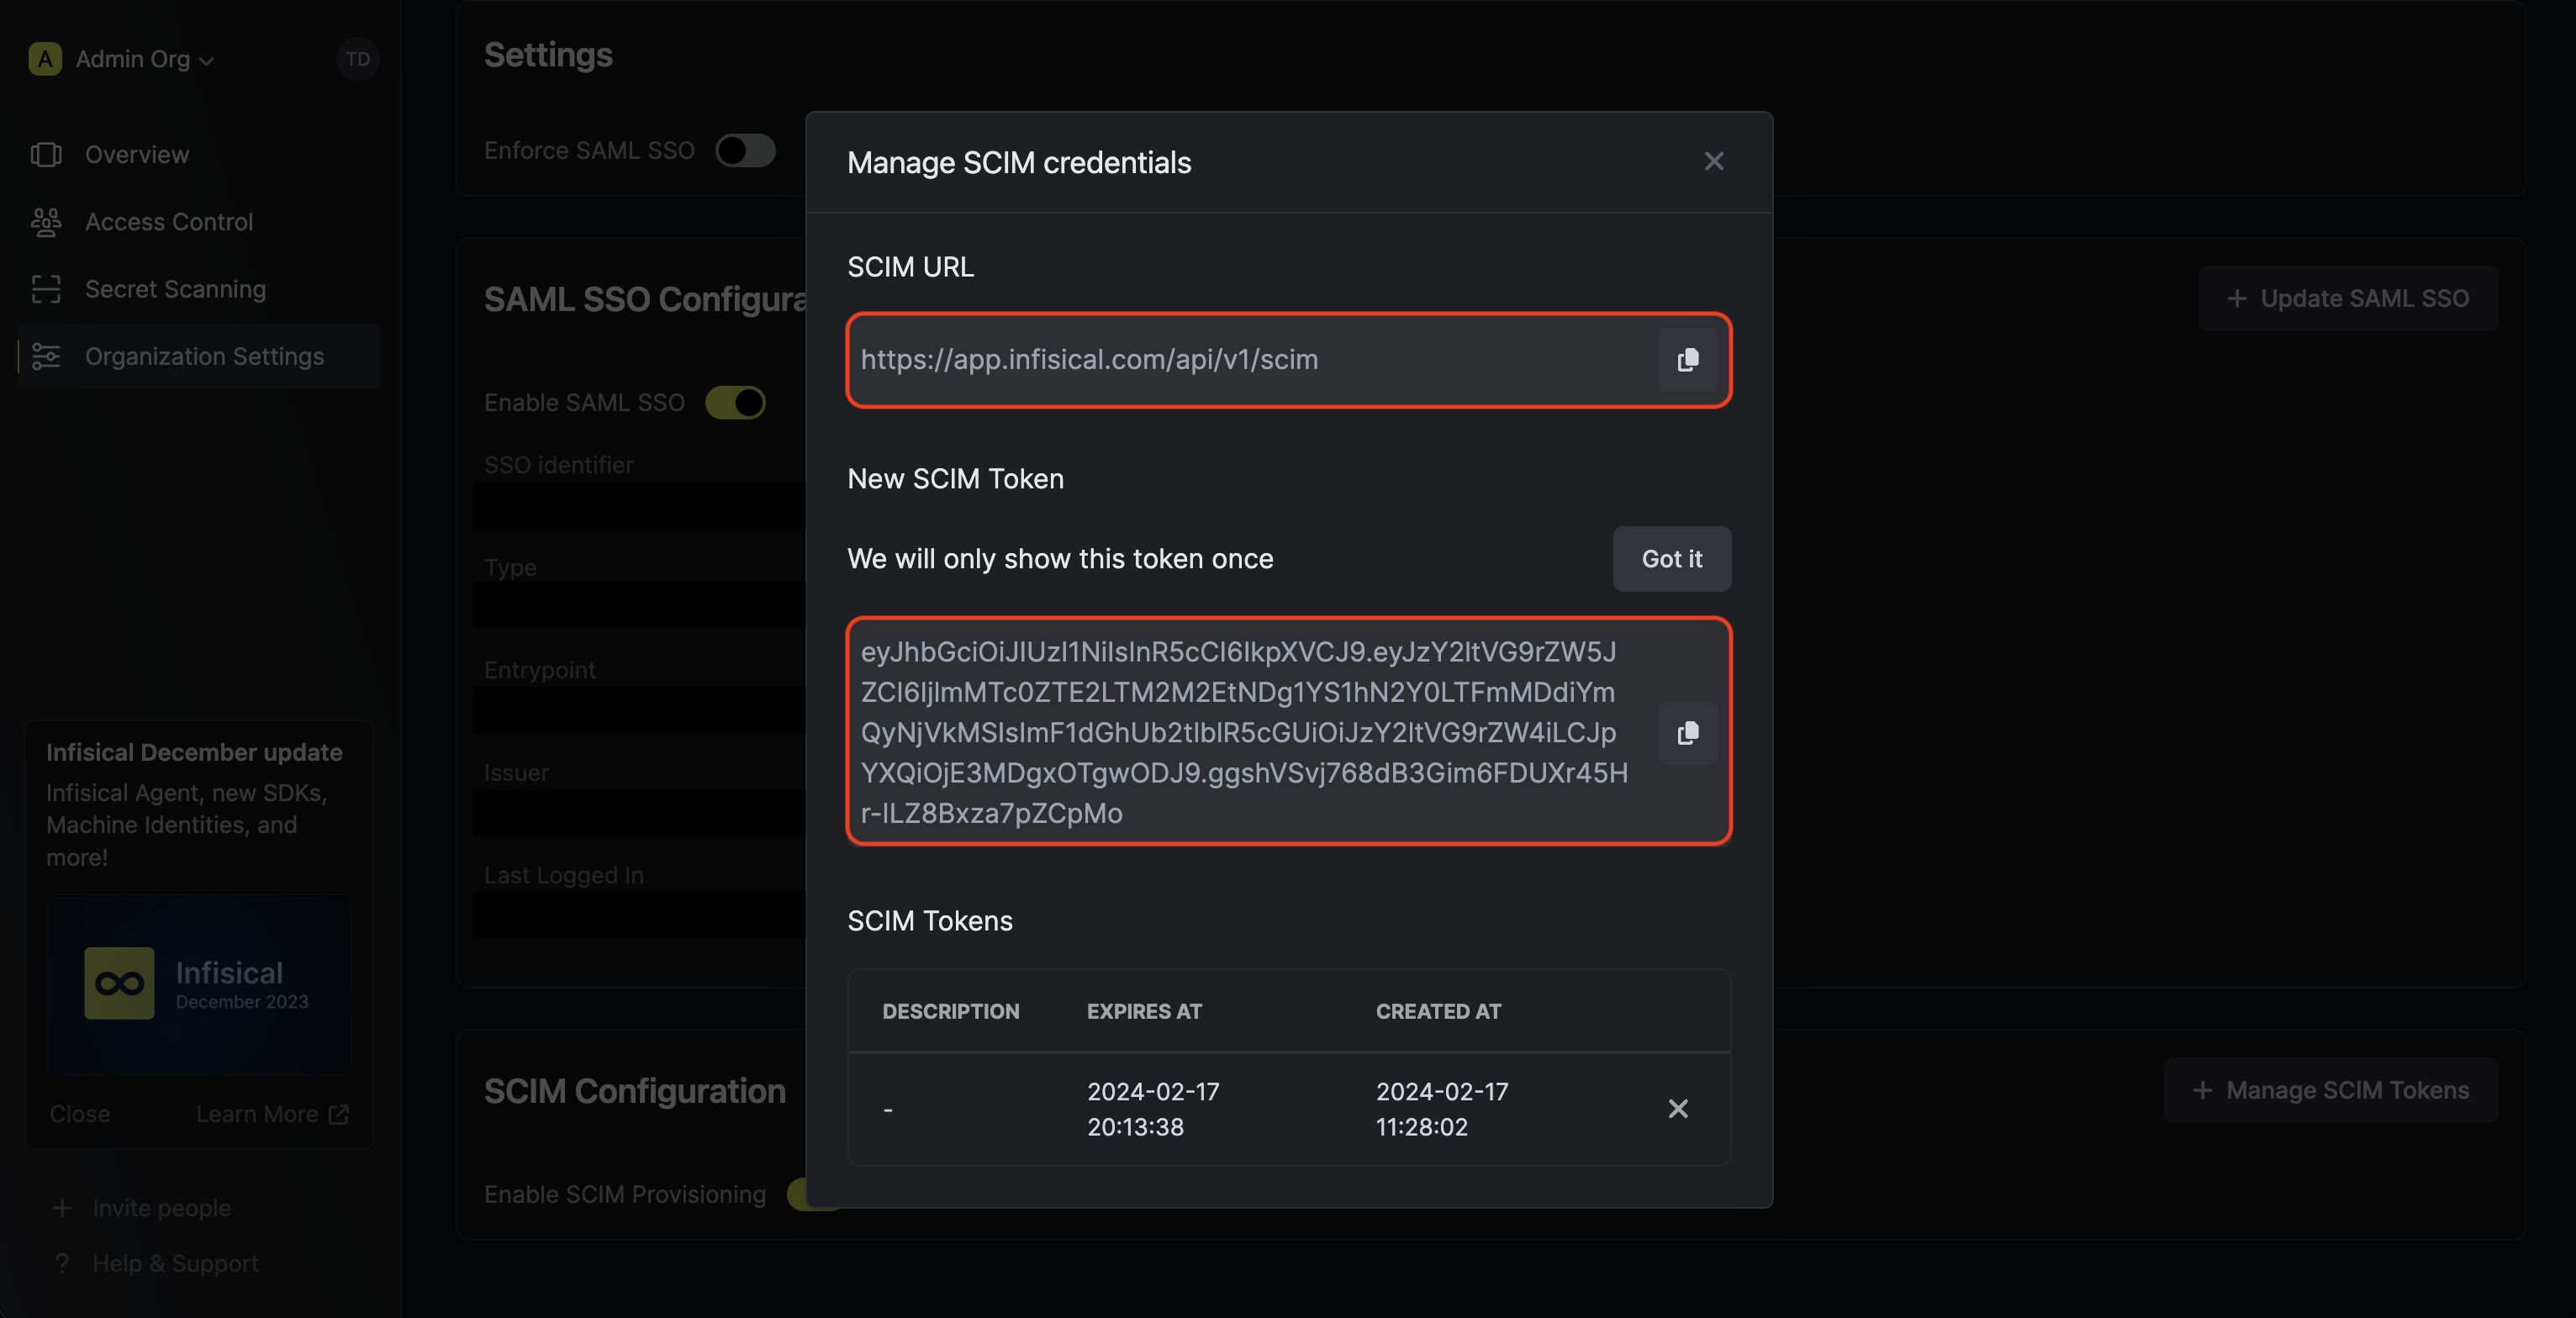
Next, select Configure on the SCIM Provisioning card, then select Create Token in the Manage SCIM Credentials modal to generate a SCIM token for PingOne.Next, copy the SCIM URL and New SCIM Token to use when configuring SCIM in PingOne.2
Add Users and Groups in PingOne
Inside your PingOne environment, navigate to Directory > Users. Add any users and/or groups to your application that you would like
to be provisioned over to Infisical.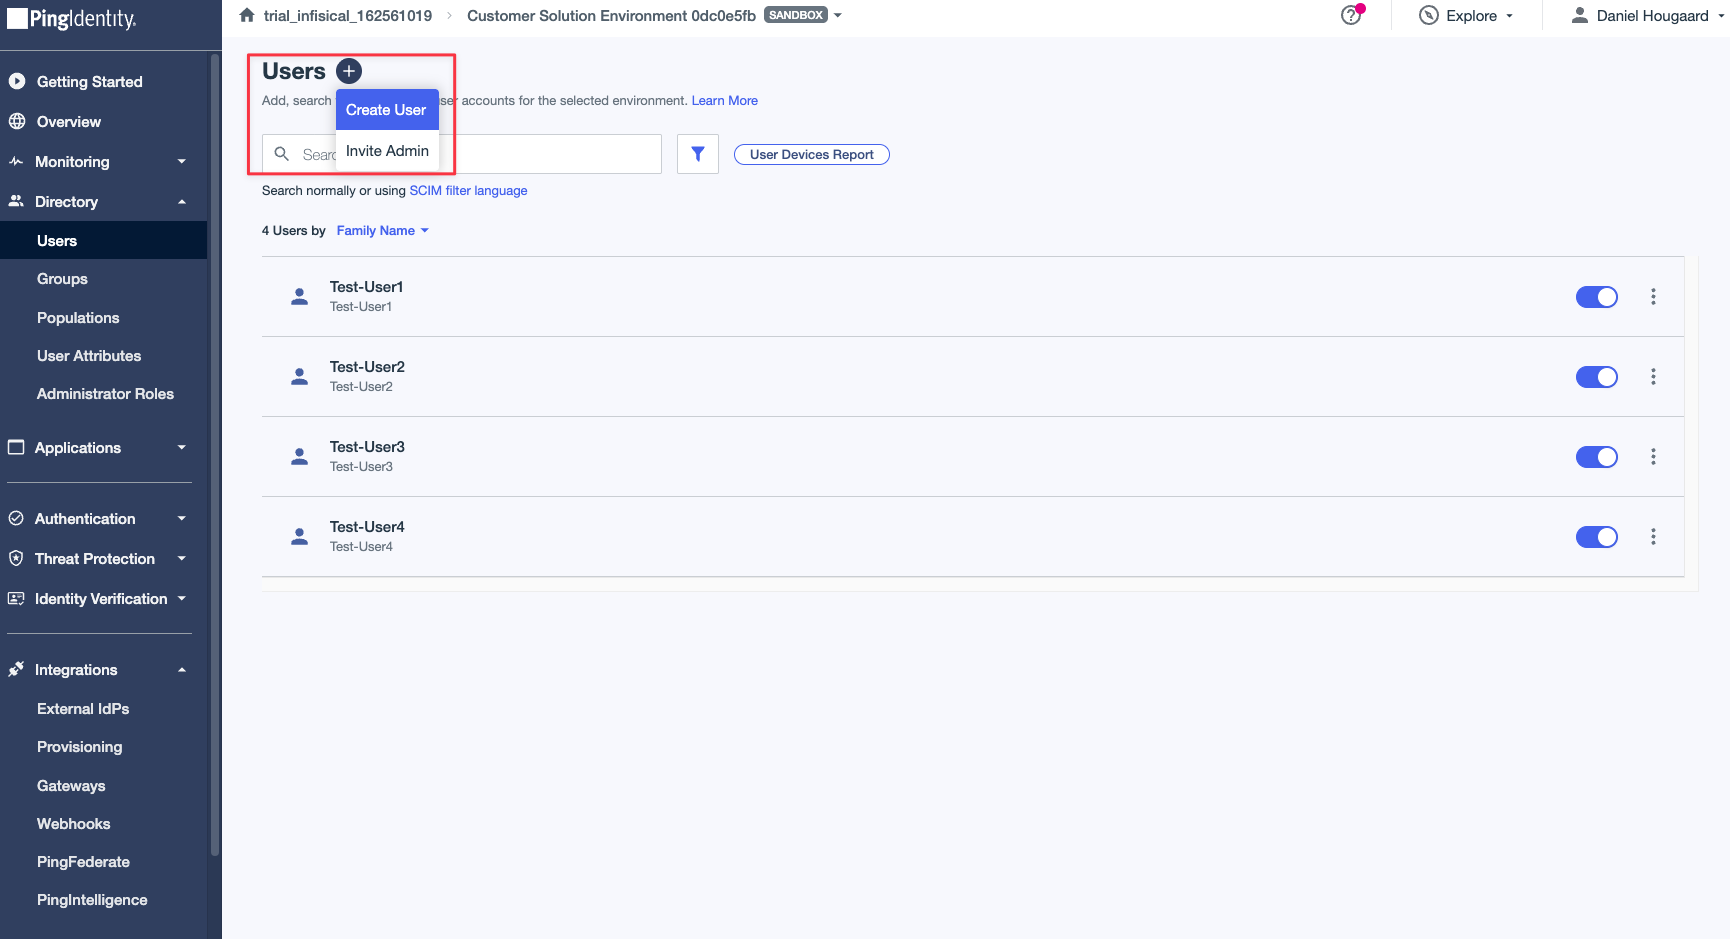
3
Configure SCIM Connection in PingOne
1. Create a new connectionIn PingOne, head to Integrations > Provisioning, and inside provisioning, press the Connections tab. Here you’ll see a plus icon to add a new connection.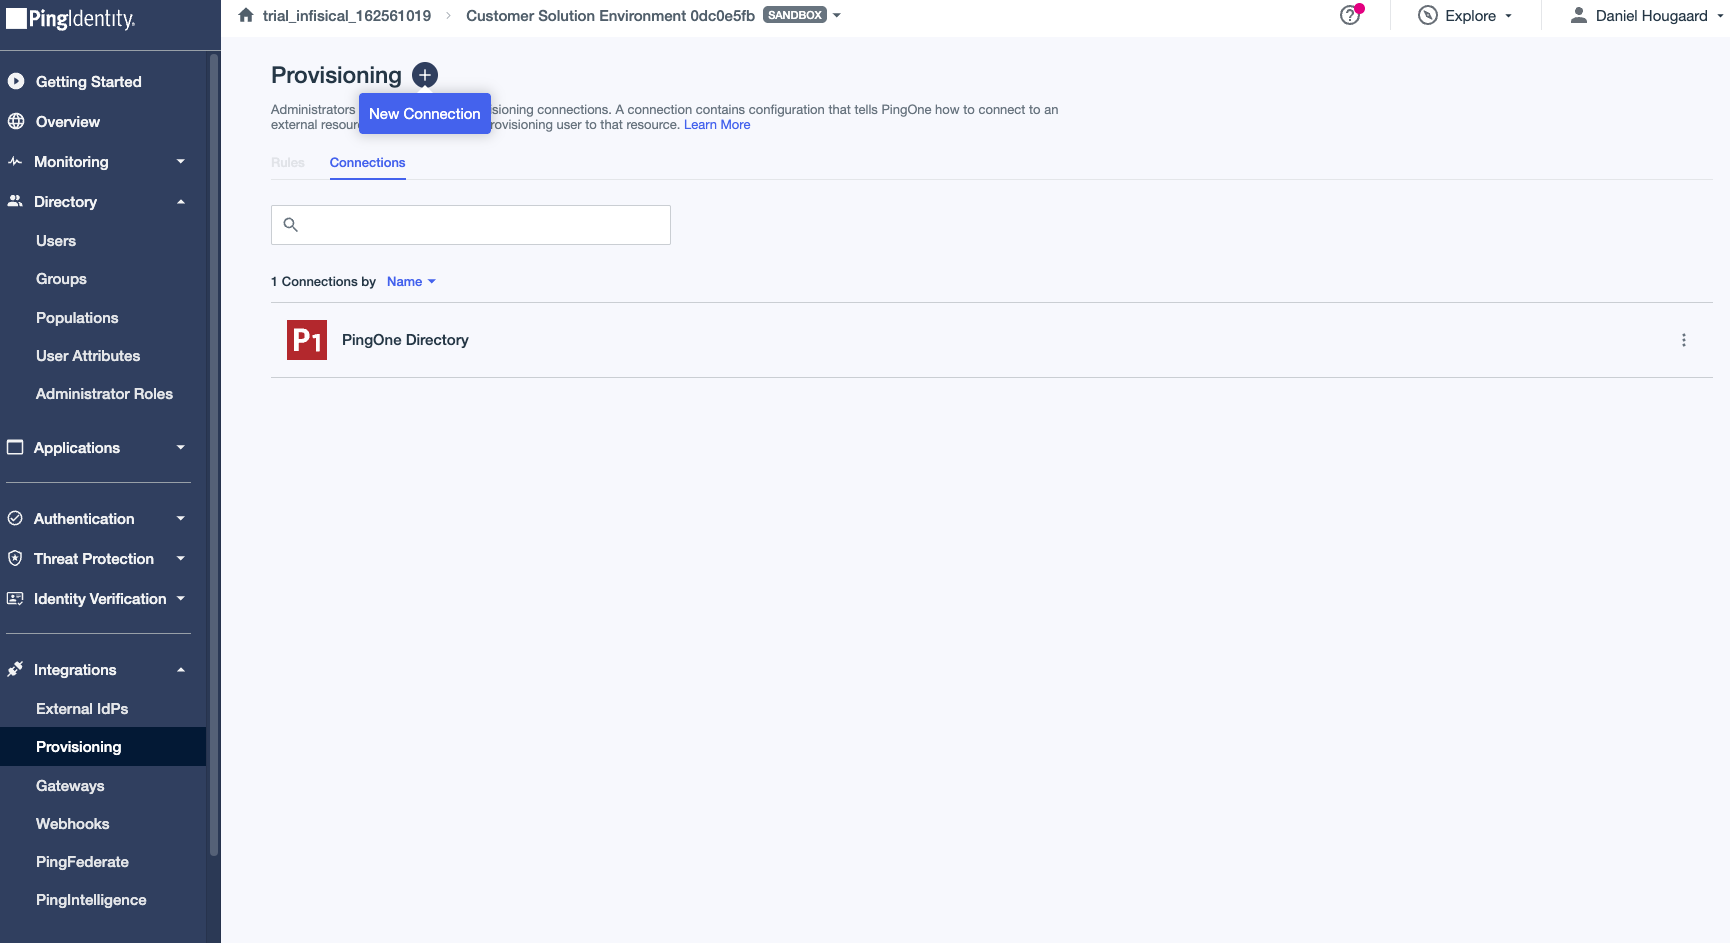
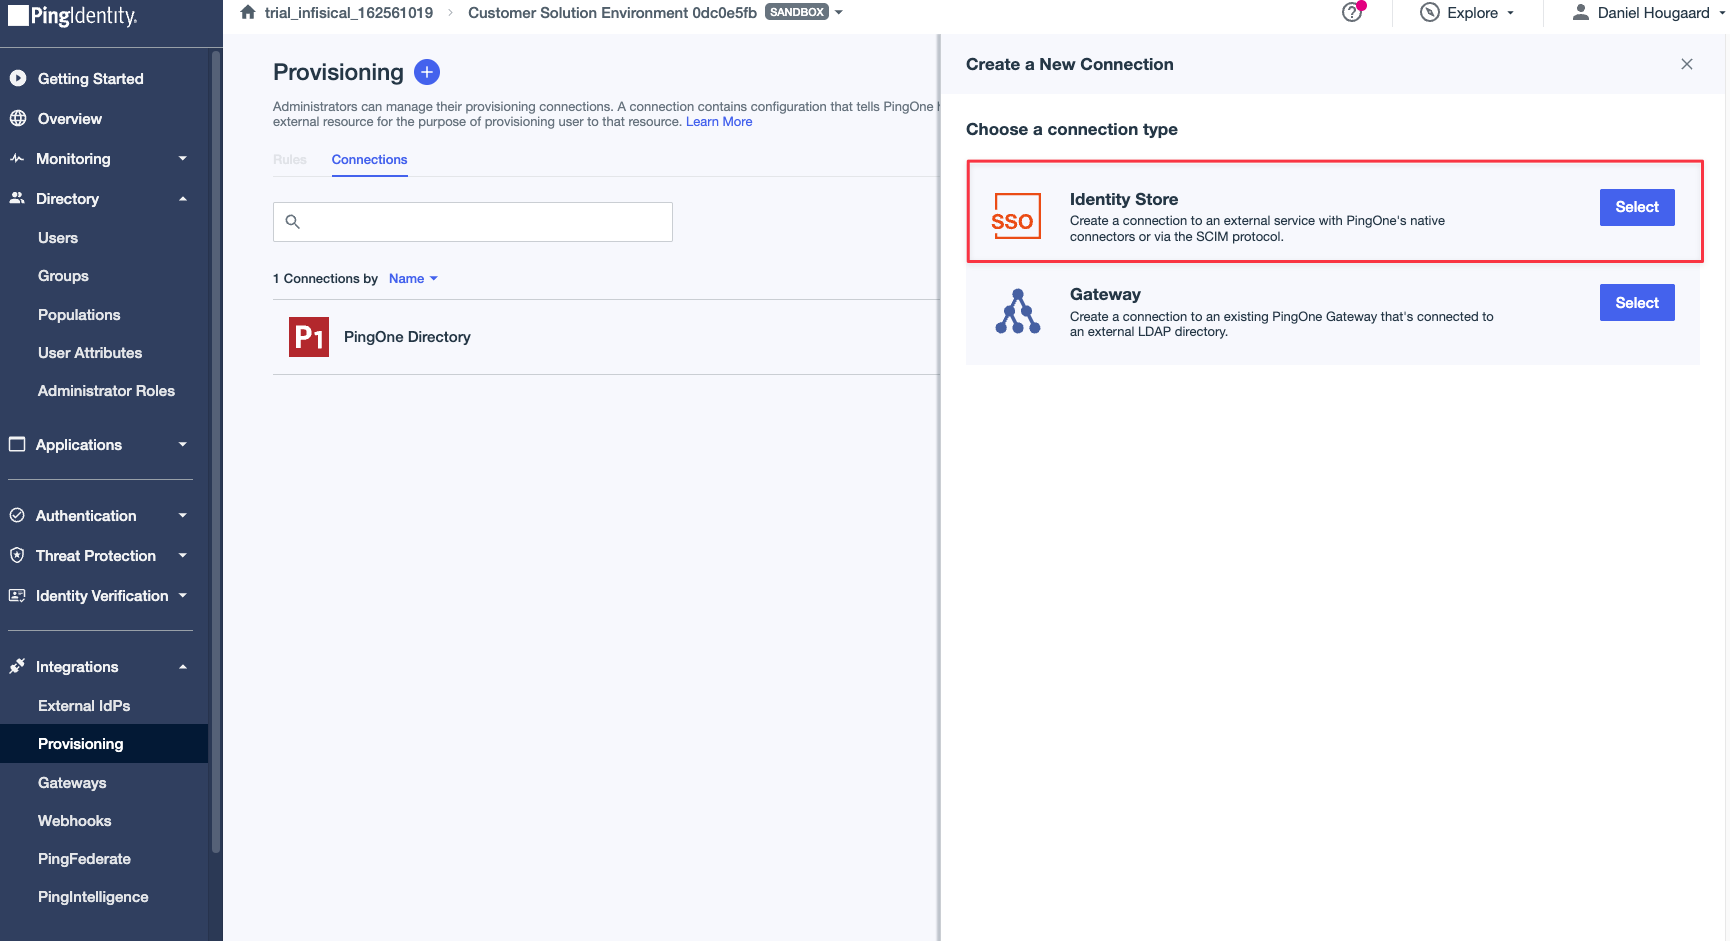 Select the “Identity Store” option.
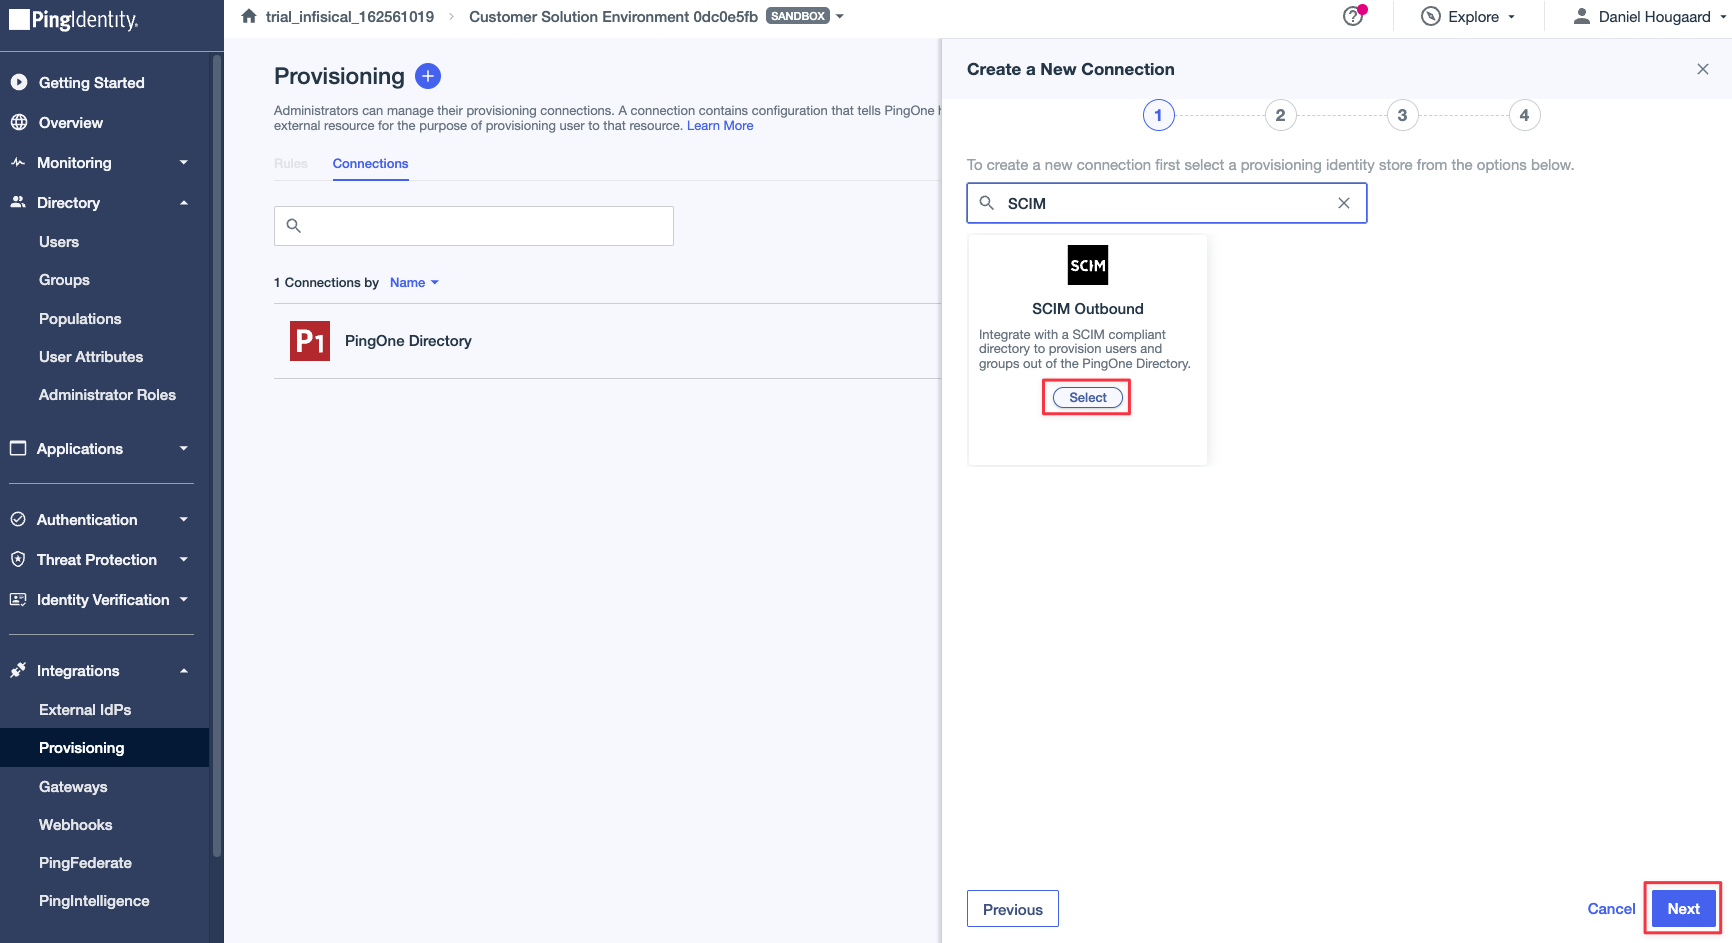 Search for the “SCIM Outbound” option to start the configuration process for SCIM. Finally, press the Next button. Give the connection a name and optionally add a description.2. Configure the connectionOnce you have selected the SCIM Outbound option, you’ll be prompted to enter the authentication details that PingOne will use to authenticate with Infisical SCIM. This is the SCIM URL and New SCIM Token from the previous step.
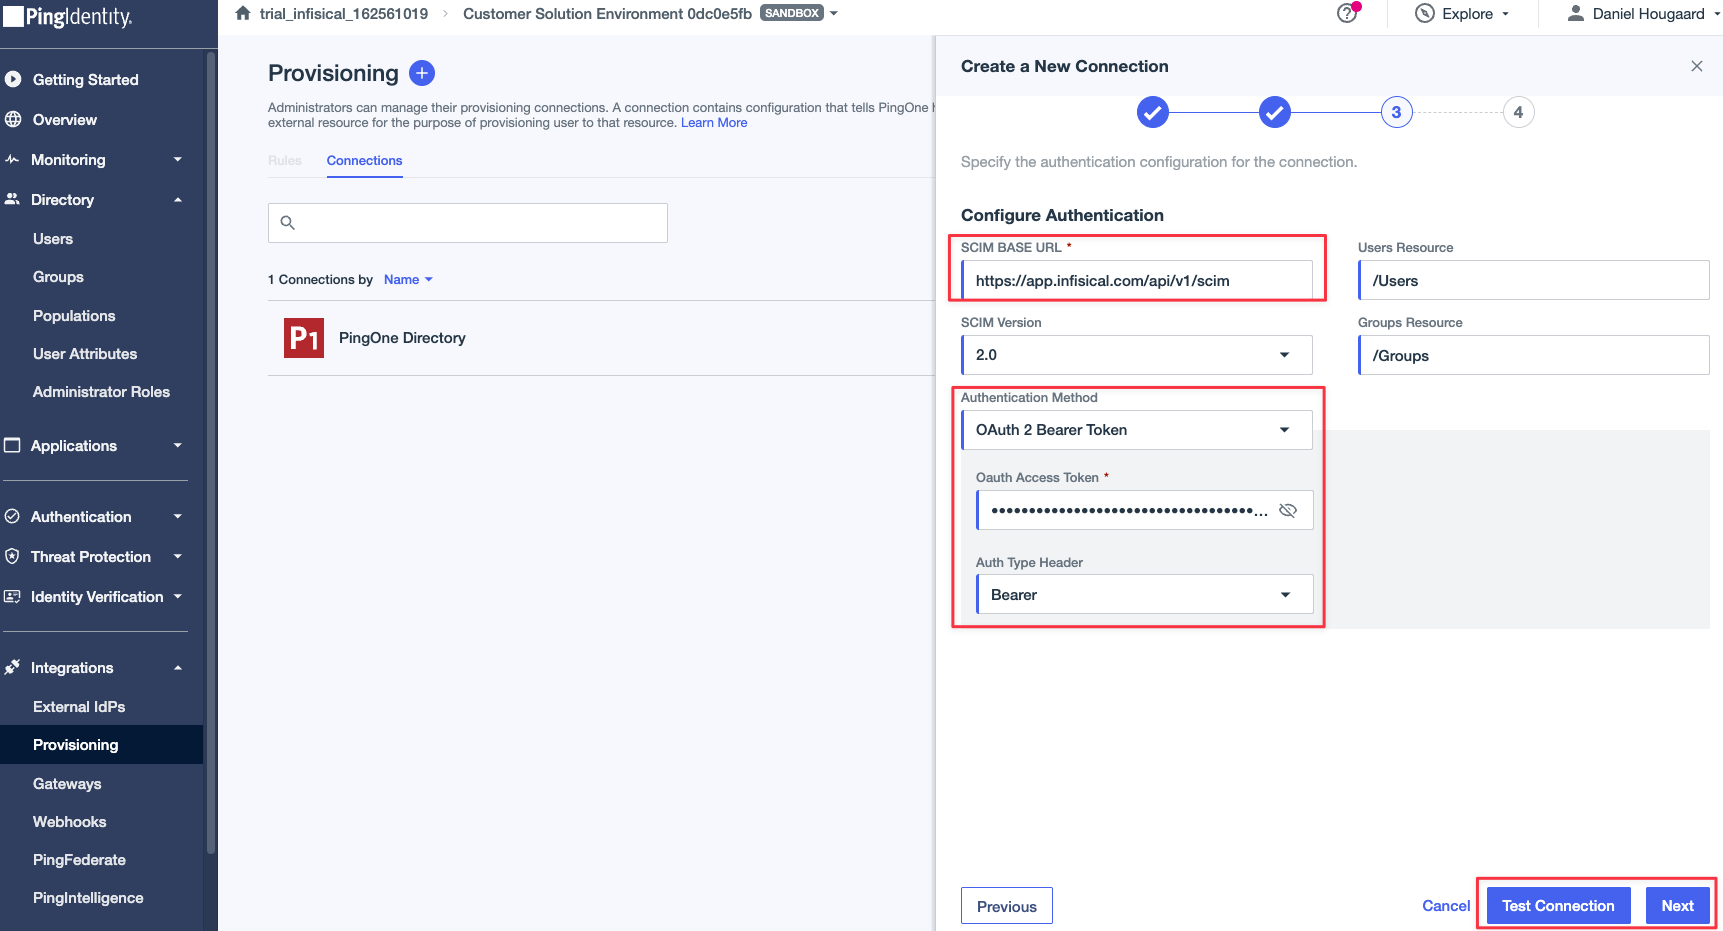 Set the following fields: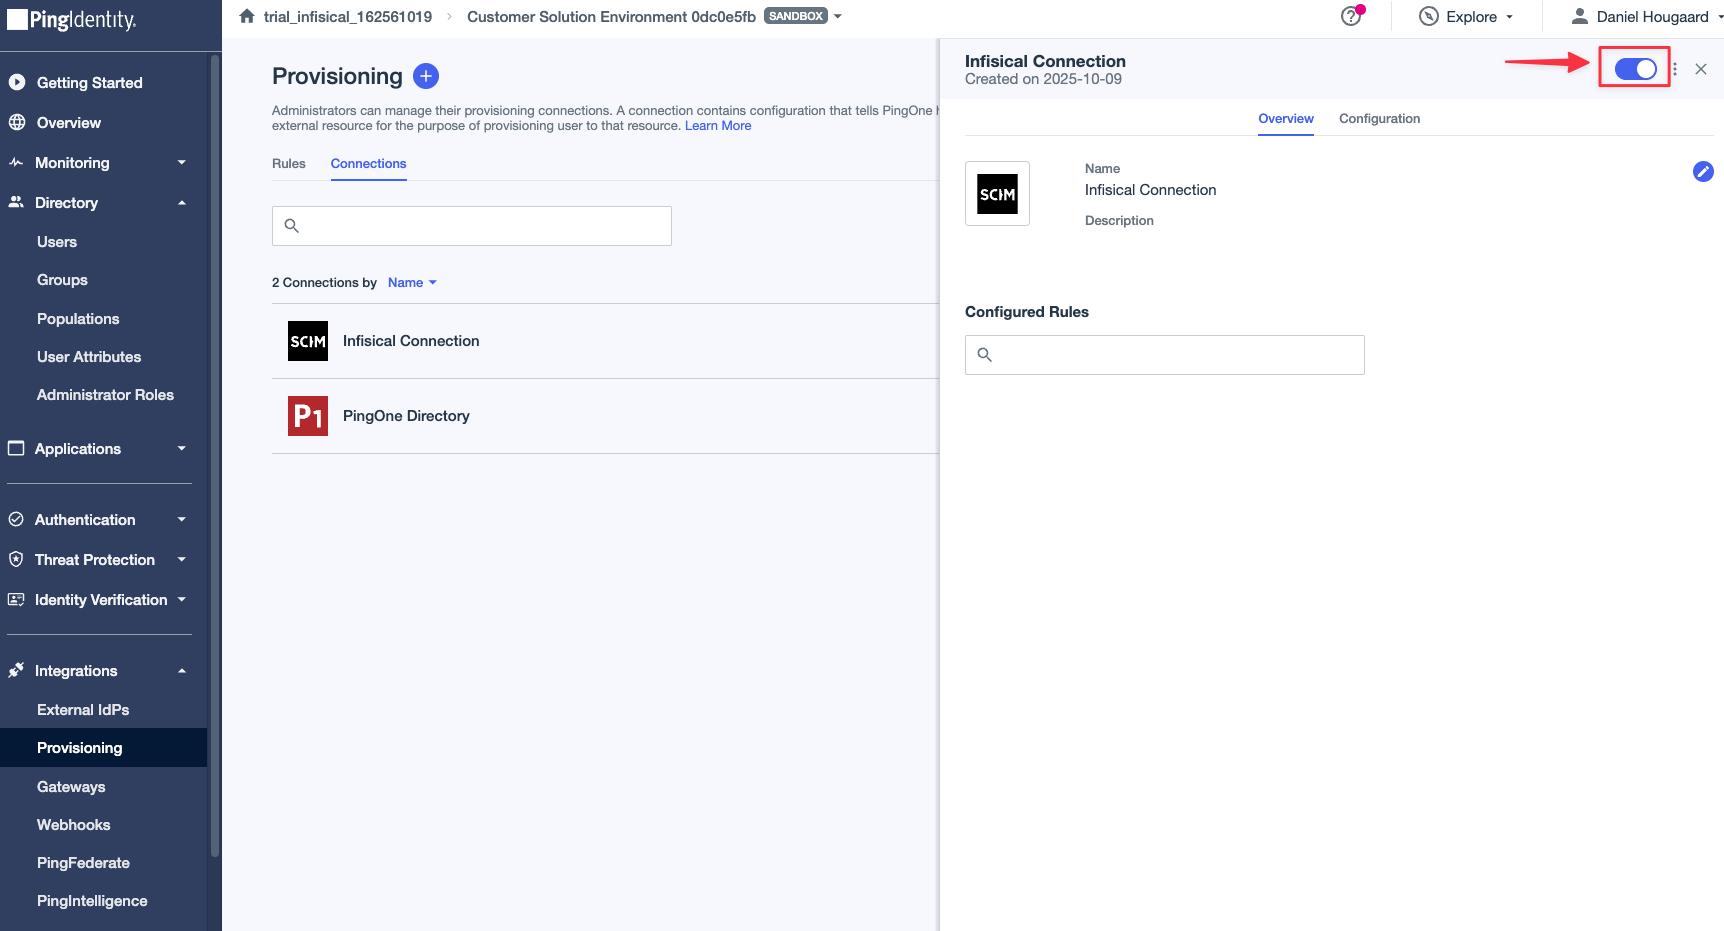
Select the “Identity Store” option.Search for the “SCIM Outbound” option to start the configuration process for SCIM. Finally, press the Next button. Give the connection a name and optionally add a description.2. Configure the connectionOnce you have selected the SCIM Outbound option, you’ll be prompted to enter the authentication details that PingOne will use to authenticate with Infisical SCIM. This is the SCIM URL and New SCIM Token from the previous step.Set the following fields:SCIM BASE URL: Input the SCIM URL from the previous step.Users Resource: Leave as default,/Users.Groups Resource: Leave as default,/Groups.SCIM Version: Leave as default,2.0.Authentication Method: SelectOAuth 2 Bearer Token.Oauth Access Token: Input the New SCIM Token from step 1.Auth Type Header: SelectBearer.
-
User Filter Expression:email.value Eq "%s". -
User Identifier:workEmail. -
Deprovision on Rule Deletion:Enabled.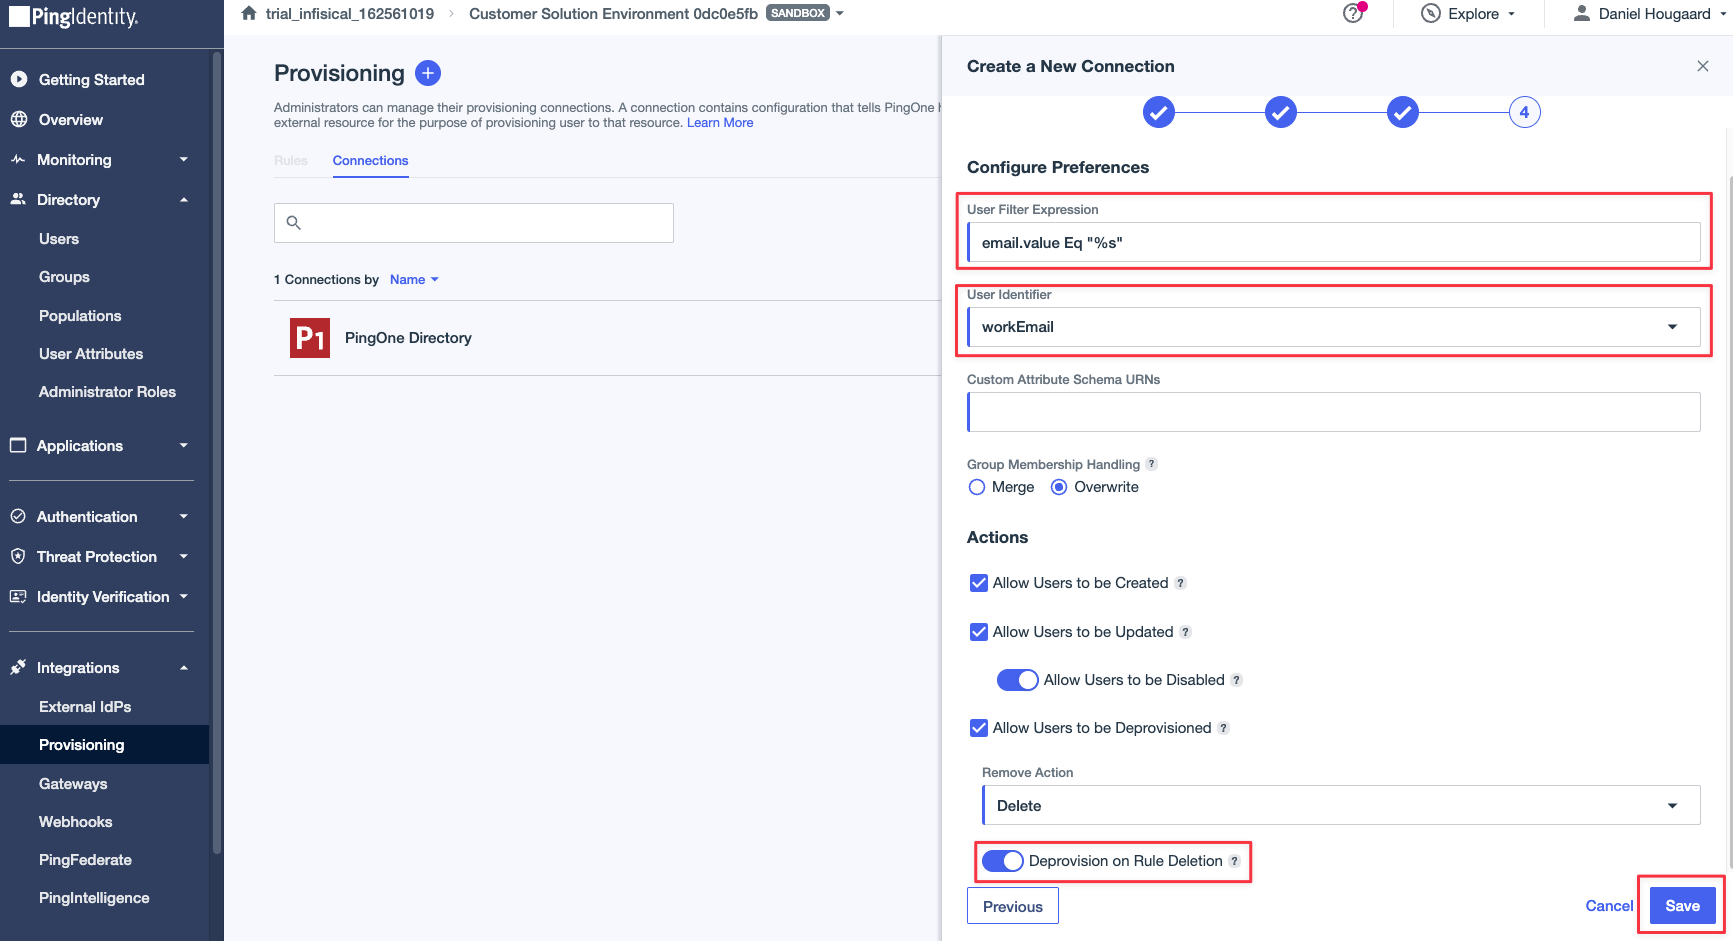
4
Configure SCIM Provisioning in PingOne
1. Create a new ruleAfter creating a connection, you can now access the “Rules” tab under the Provisioning section. Here you can configure the rules for the connection.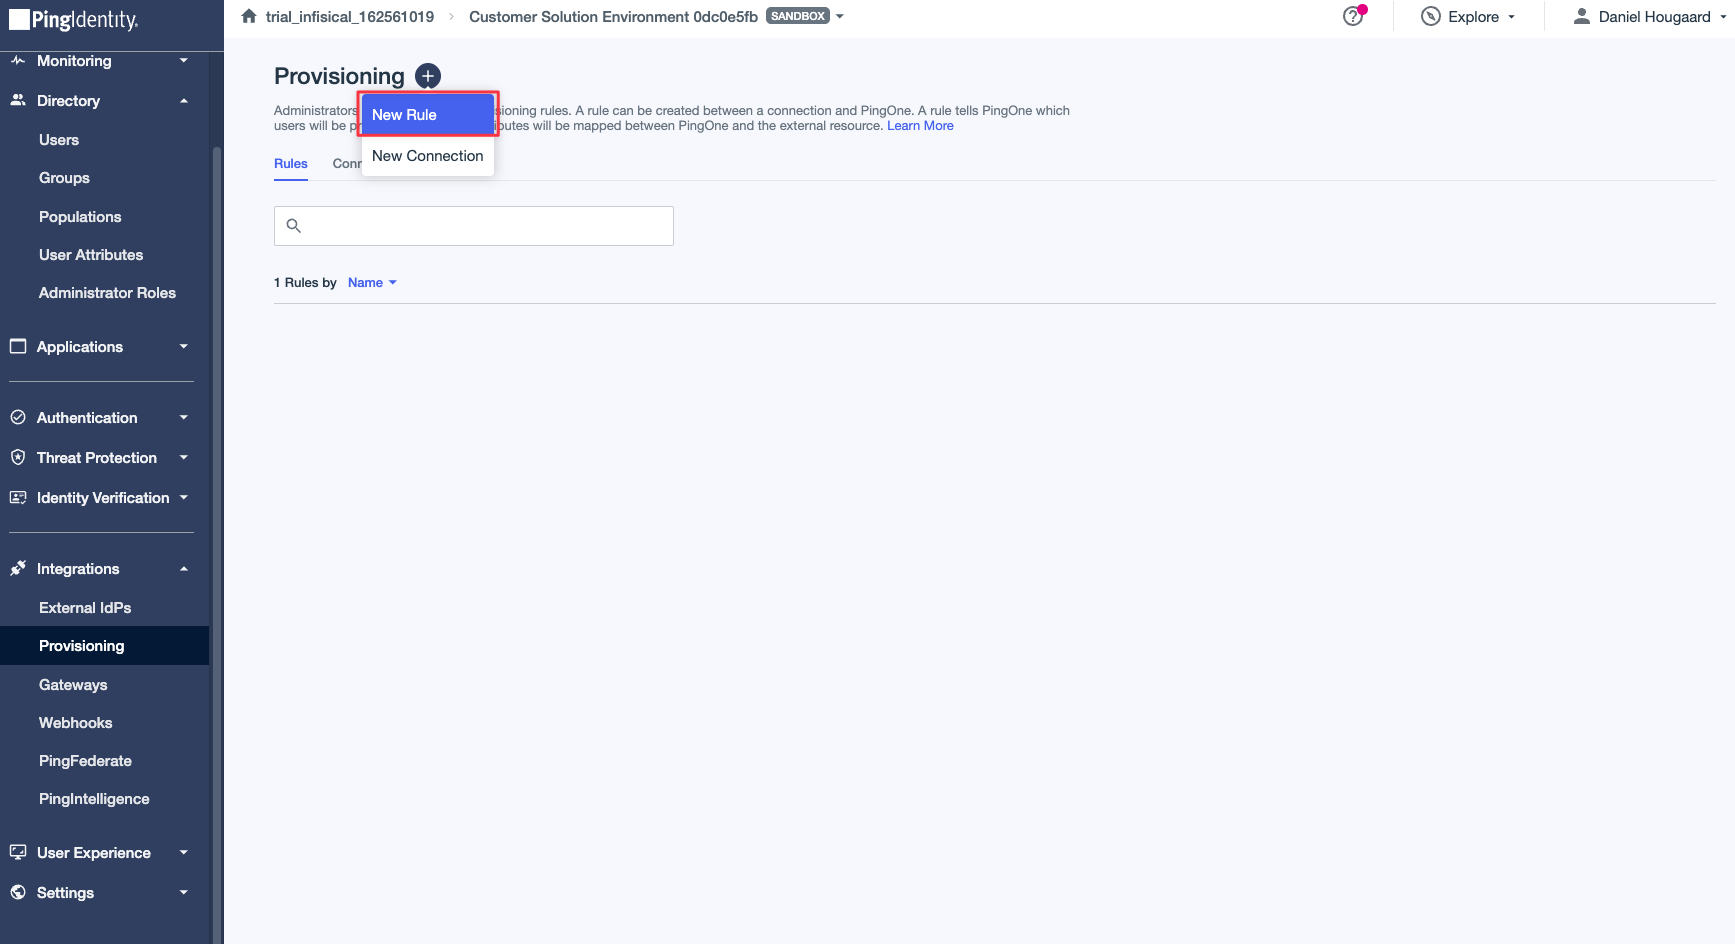
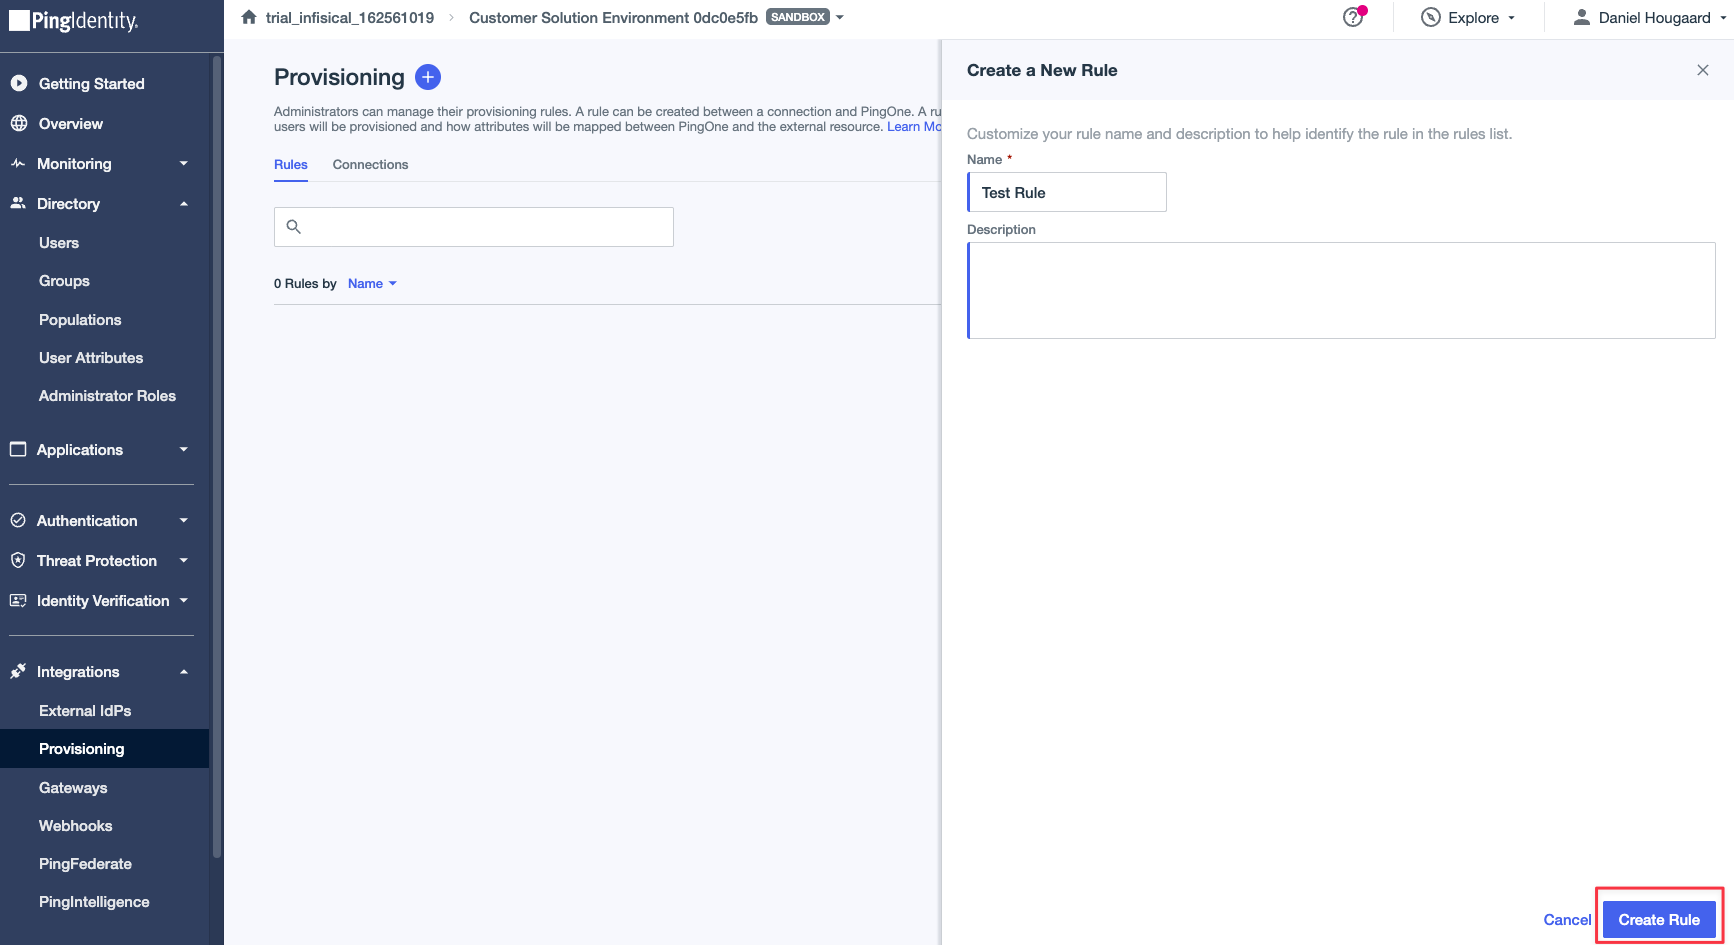 Select the “New Rule” button and choose a name for the rule, then press the “Create Rule” button.2. Configure the rule connectionOnce you have created a rule, you now need to configure the connection to use for the rule.
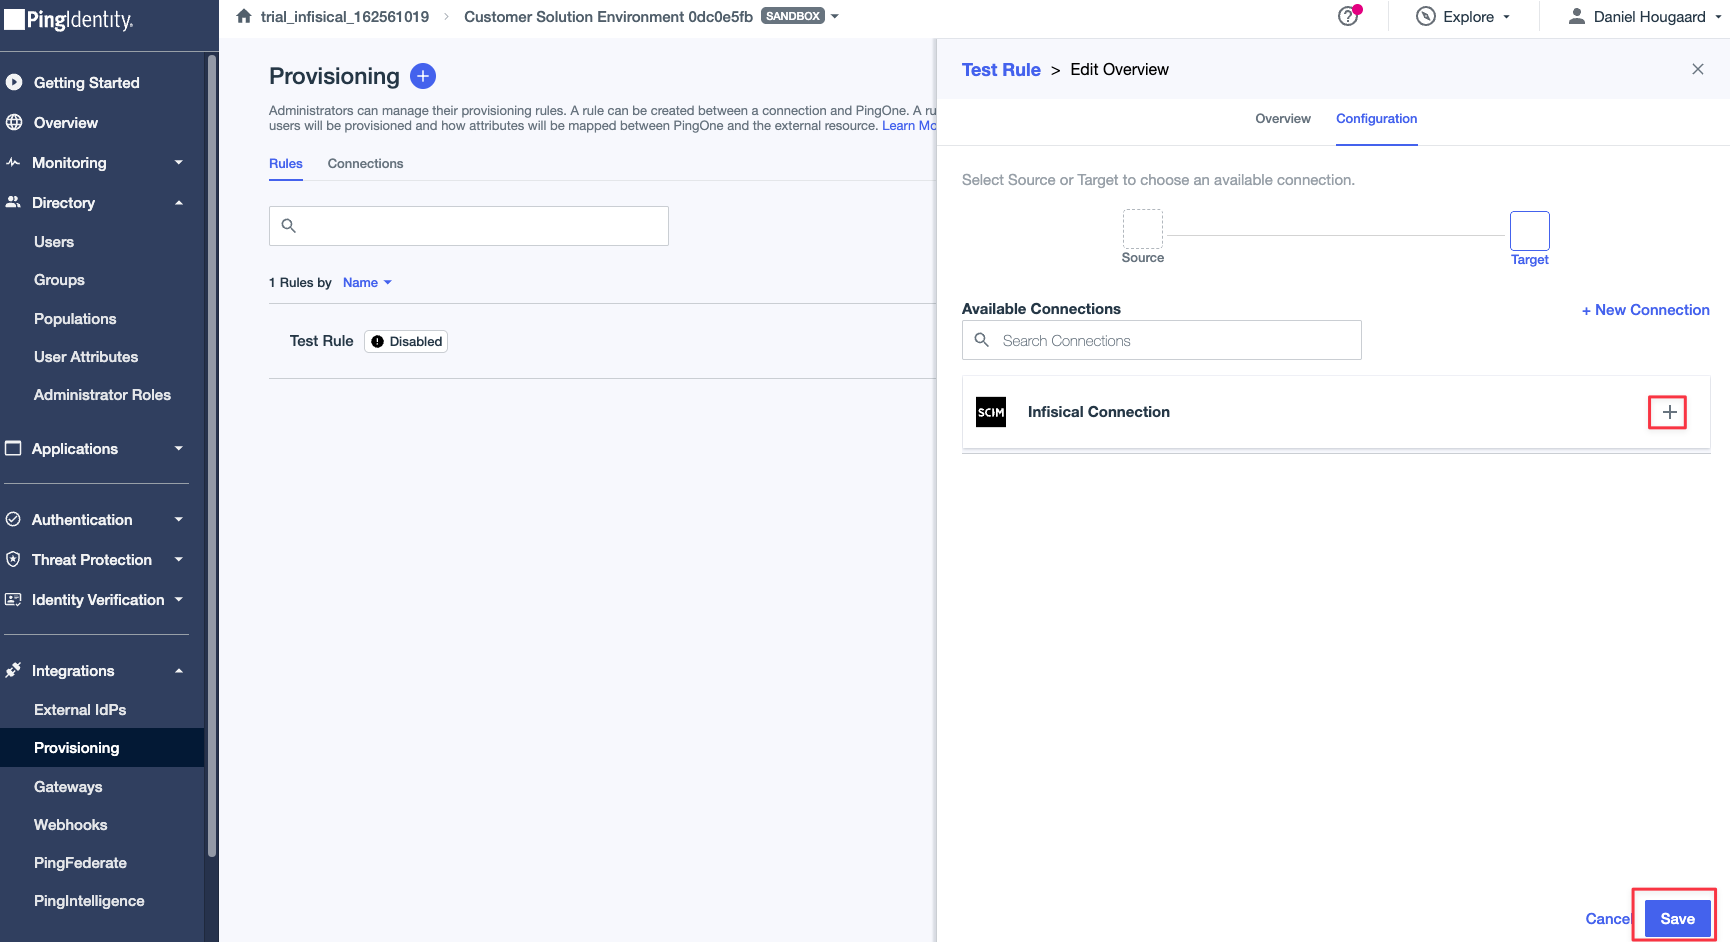 Select the connection you created in the previous step and press the “Save” button.3. Configure the rule user filter
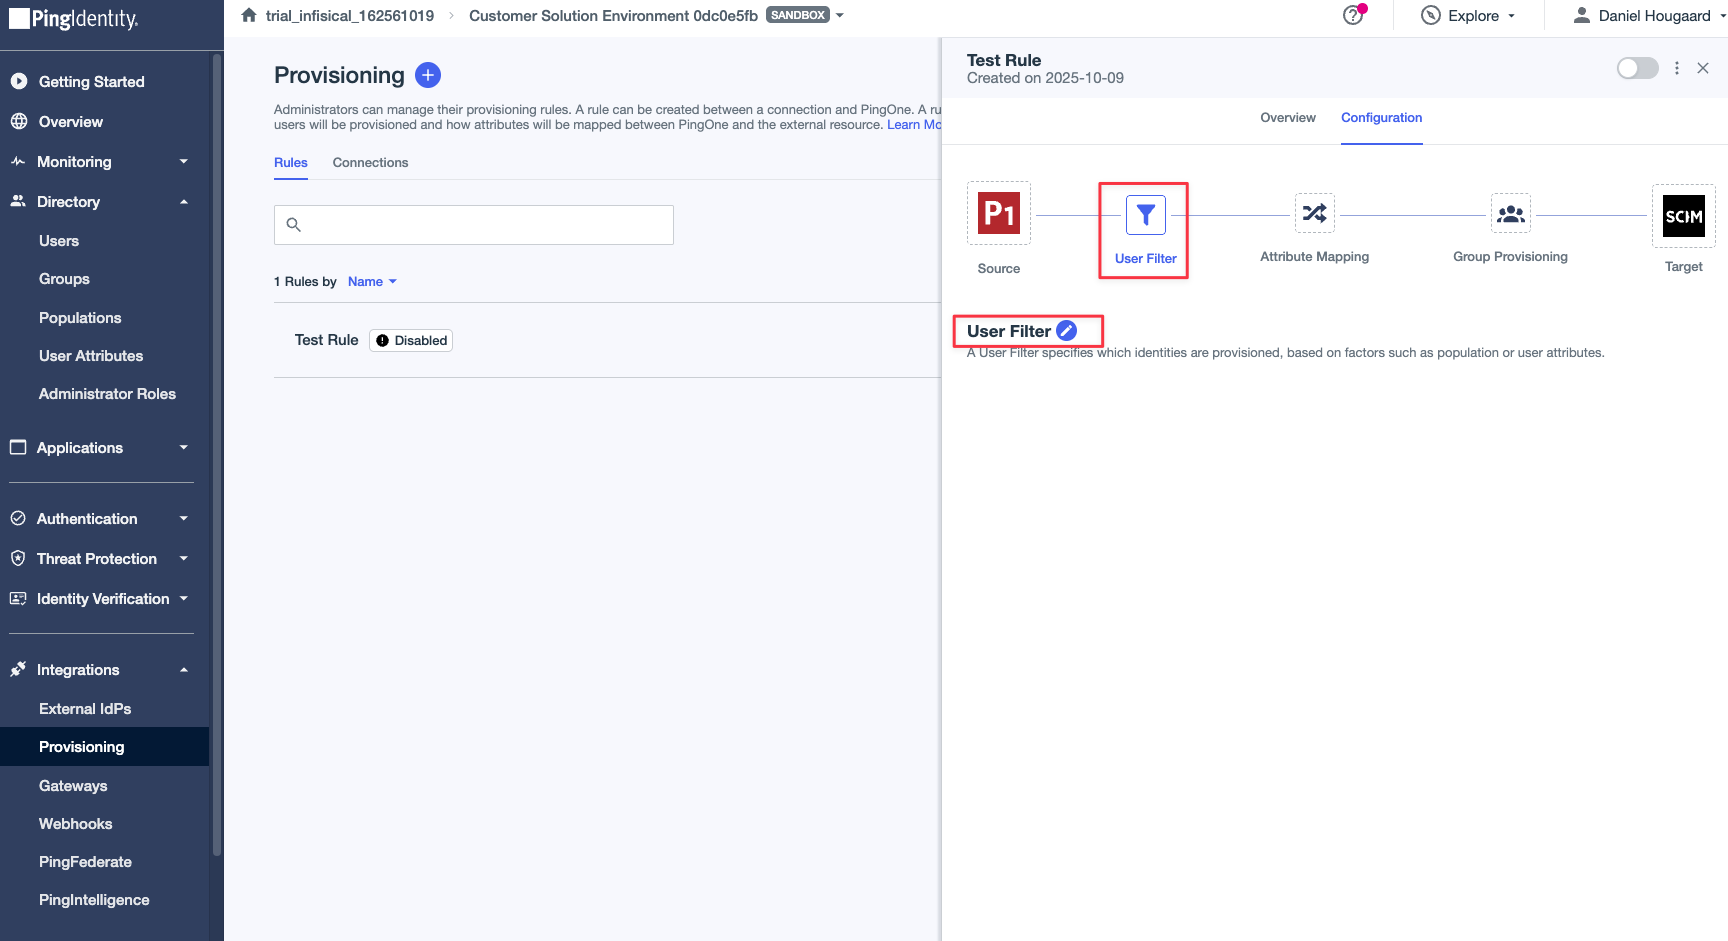 Select the Edit pencil icon to open the user filter configuration. This step dictates which users will be provisioned to Infisical.
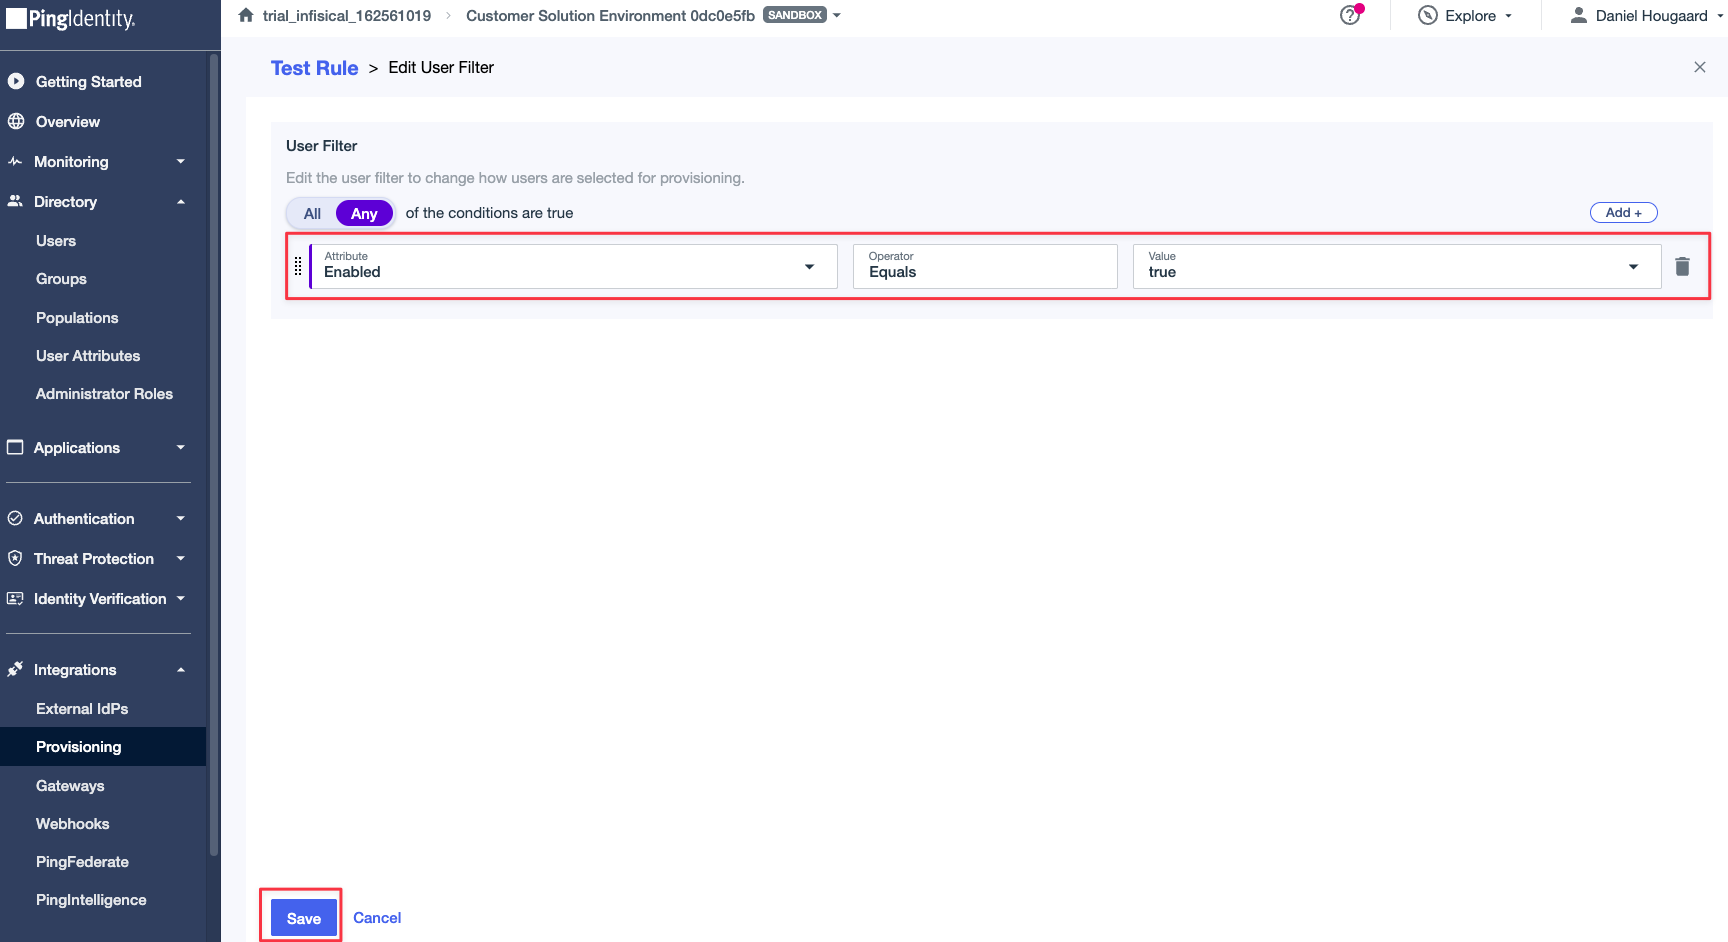 In this case, we are provisioning all users that are enabled in PingOne. Configure your user filter to match your desired users, and then press the “Save” button.4. Configure GroupsThis step is optional and only relevant if you want to provision PingOne groups to Infisical.
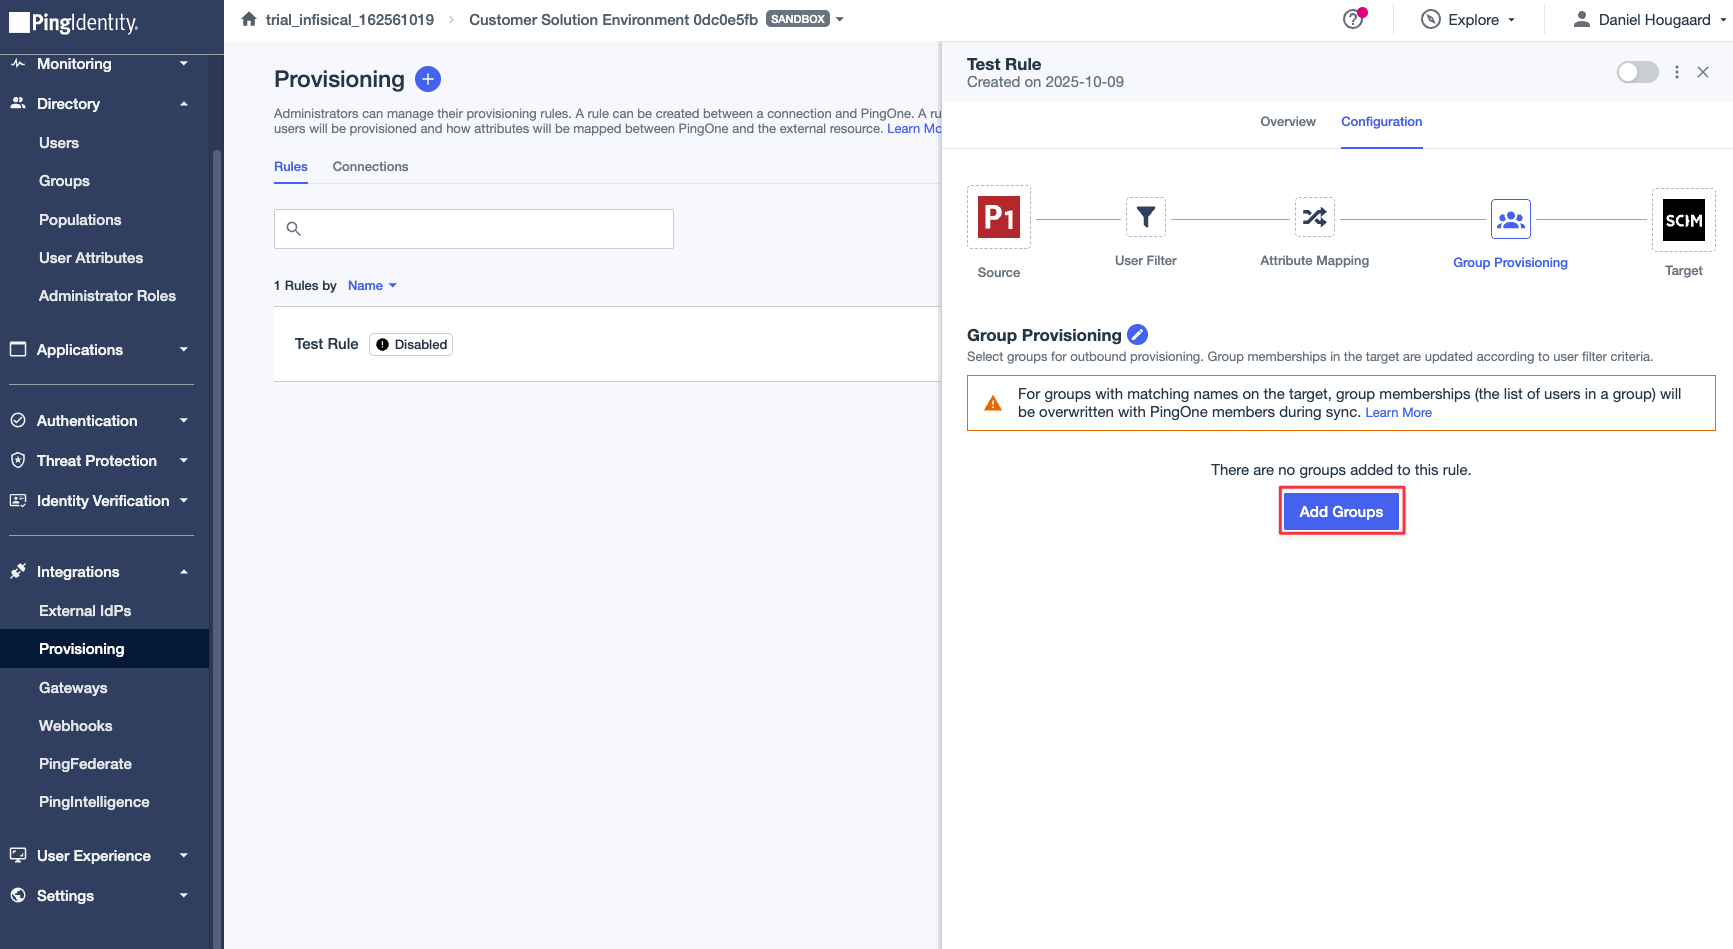 Open the “Group Provisioning” tab and press the “Add Groups” button to select which groups will be provisioned to Infisical.
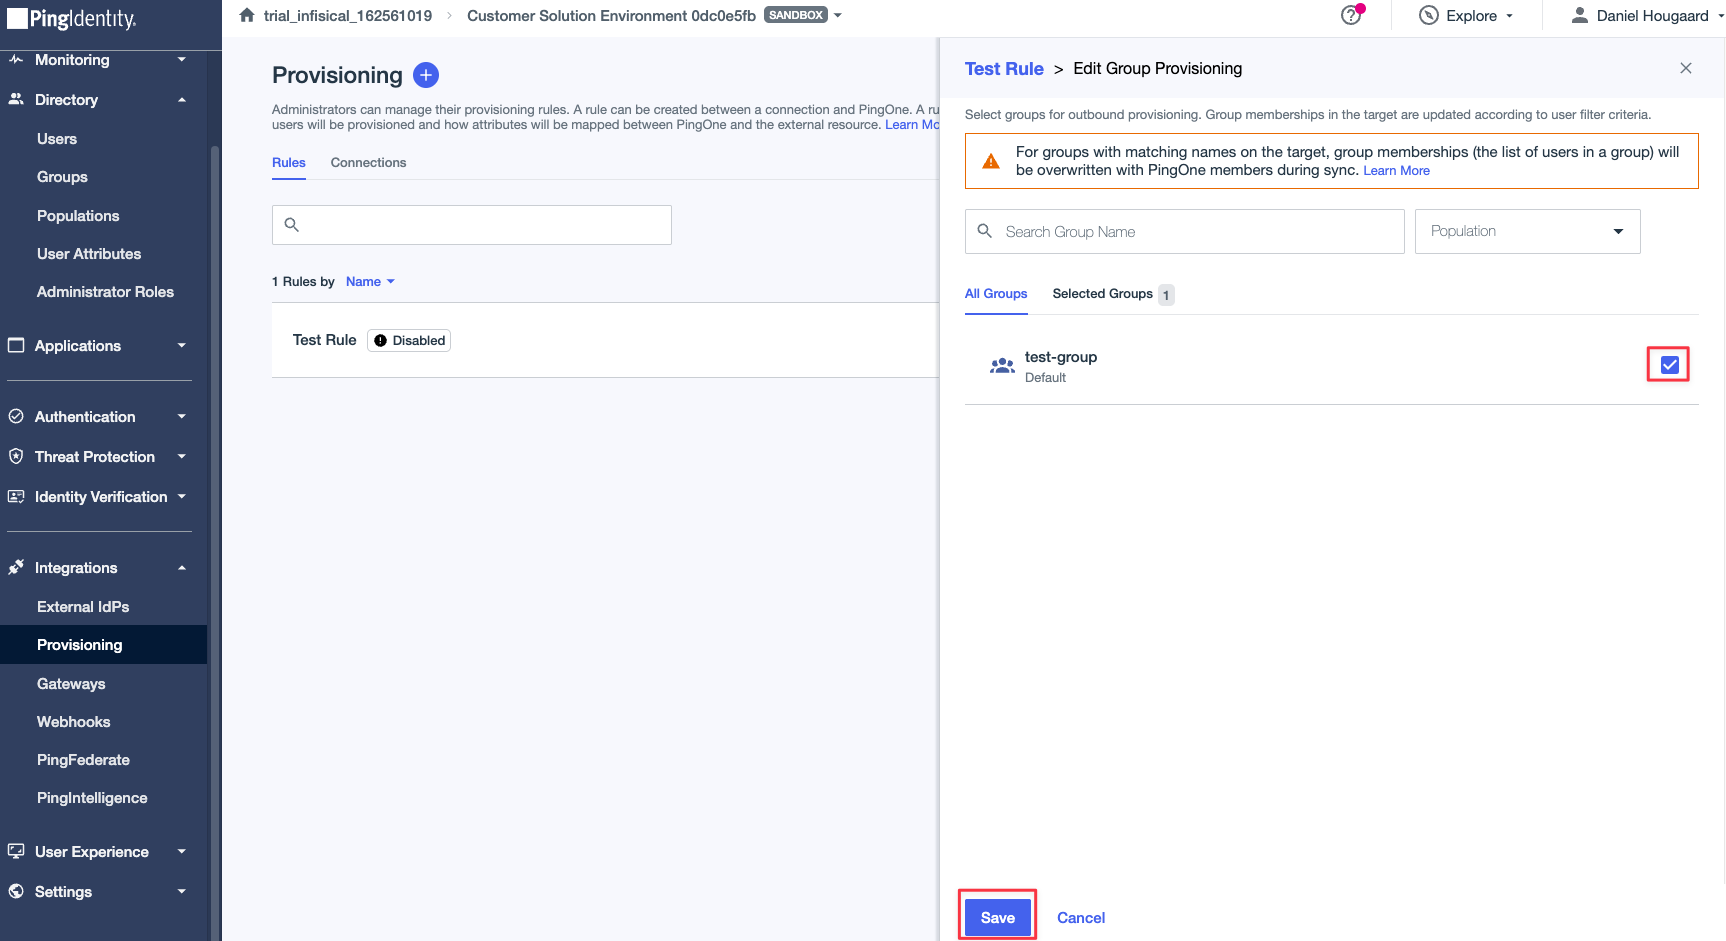 Select the groups you want to provision to Infisical and press the “Save” button.5. Enable the ruleOnce you have configured the rule, you can enable it by pressing the “Enable” toggle.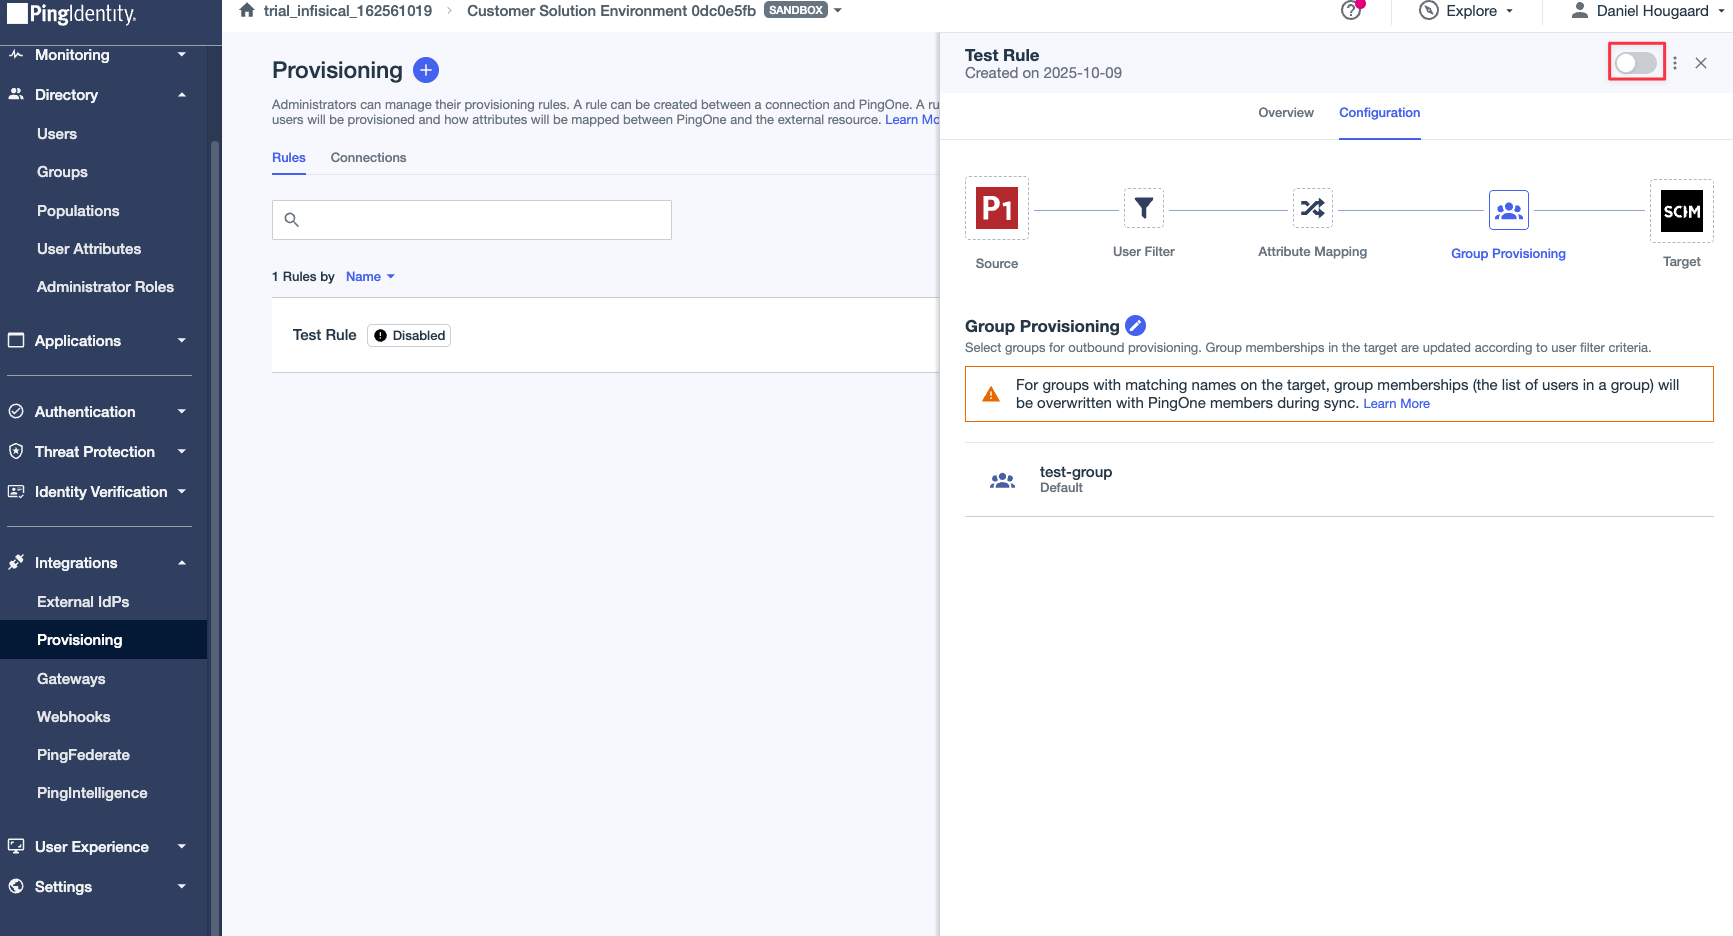
Select the “New Rule” button and choose a name for the rule, then press the “Create Rule” button.2. Configure the rule connectionOnce you have created a rule, you now need to configure the connection to use for the rule.Select the connection you created in the previous step and press the “Save” button.3. Configure the rule user filterSelect the Edit pencil icon to open the user filter configuration. This step dictates which users will be provisioned to Infisical.In this case, we are provisioning all users that are enabled in PingOne. Configure your user filter to match your desired users, and then press the “Save” button.4. Configure GroupsThis step is optional and only relevant if you want to provision PingOne groups to Infisical.Open the “Group Provisioning” tab and press the “Add Groups” button to select which groups will be provisioned to Infisical.Select the groups you want to provision to Infisical and press the “Save” button.5. Enable the ruleOnce you have configured the rule, you can enable it by pressing the “Enable” toggle.