- Created Microsoft Power App.
Integrate an Azure Function Call
First, let’s create a new Azure Function using the Azure Management Portal. Get the Function App from the Azure Marketplace. Place it in a subscription using any resource group. The name of the function is arbitrary. We’ll use .NET as a runtime stack, but you can use whatever you’re most comfortable with. The OS choice is also up to you. While Linux may look like a lightweight solution, Windows actually has more Azure Functions support. For instance, you cannot edit a Linux-based Azure Function within the Azure management portal.By using a consumption plan, we’ll only pay for the resources we use when they are requested. This is the classic “serverless” approach, where you do not pay for running servers, only for interactivity.Once the new Azure Functions instance is ready, we add a function. In this case, we can do that already from the Azure Management Portal. Use the “HTTP trigger” template and choose the “function” authorization level.The code for the first function can be as simple as:Finally, we also need to publish the Swagger (or API) definitions and enable cross-origin resource sharing (CORS). While the API definitions are rather easy to set up, the correct CORS value may be tricky. For now, we can use the wildcard option to allow all hosts.
Place it in a subscription using any resource group. The name of the function is arbitrary. We’ll use .NET as a runtime stack, but you can use whatever you’re most comfortable with. The OS choice is also up to you. While Linux may look like a lightweight solution, Windows actually has more Azure Functions support. For instance, you cannot edit a Linux-based Azure Function within the Azure management portal.By using a consumption plan, we’ll only pay for the resources we use when they are requested. This is the classic “serverless” approach, where you do not pay for running servers, only for interactivity.Once the new Azure Functions instance is ready, we add a function. In this case, we can do that already from the Azure Management Portal. Use the “HTTP trigger” template and choose the “function” authorization level.The code for the first function can be as simple as:The code above is written for the older runtime. As a result, you may need to change the runtime version to 1 for the Azure Power Apps integration to work. If we start at a newer version (for example, 3) this triggers a warning before the migration.
Create Custom Connector
Once we set all this up, it’s time to create the custom connector.You can create the custom connector via the data pane. When we use “Create from Azure Service (Preview)”, this yields a dialog similar to the following: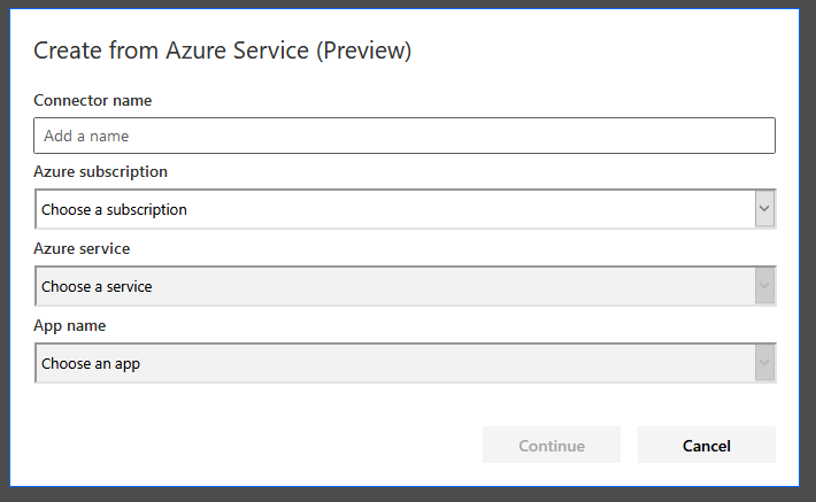 We can now fill out the fields using the information for our created function. The combination boxes are automatically filled in order. Once we select one of the reachable subscriptions (tied to the same account we’ve used to log in to create a Power App), the available services are displayed. Once we select our Azure Functions service, we select the function for retrieving the secret.
We can now fill out the fields using the information for our created function. The combination boxes are automatically filled in order. Once we select one of the reachable subscriptions (tied to the same account we’ve used to log in to create a Power App), the available services are displayed. Once we select our Azure Functions service, we select the function for retrieving the secret.Set Up Infisical in an Azure Function
You can add Infisical in an Azure Function quite easily using the Infisical SDK for .NET (or other languages). This enables the function to communicate with Infisical to obtain secrets, among other things.In short, we can simply bring all the necessary classes over and start using the Client class. Essentially, this enables us to write code like this:Knowing the URL of Infisical as well as the Client Id and Client Secret, we can now access the desired values.Now it’s time to actually use the secret within a Power App. There are two ways to request a desired target service with a secret retrieved from the function:This creates a request to the resource protected by an API key that is retrieved from Infisical.
- Call the function first, retrieve the secret, then call the target service, for example, via another custom connector with the secret as input.
- Perform the final API request within the function call — not returning a secret at all, just the response from invoking the target service.