Infisical can send PKI certificate alert notifications to a webhook URL. This guide walks through creating a webhook alert, the payload format, and how to verify webhook signatures.Documentation Index
Fetch the complete documentation index at: https://infisical.com/docs/llms.txt
Use this file to discover all available pages before exploring further.
Guide to Creating a Webhook Alert
To create an alert, head to your Certificate Management Project > Alerting and press Create Certificate Alert.
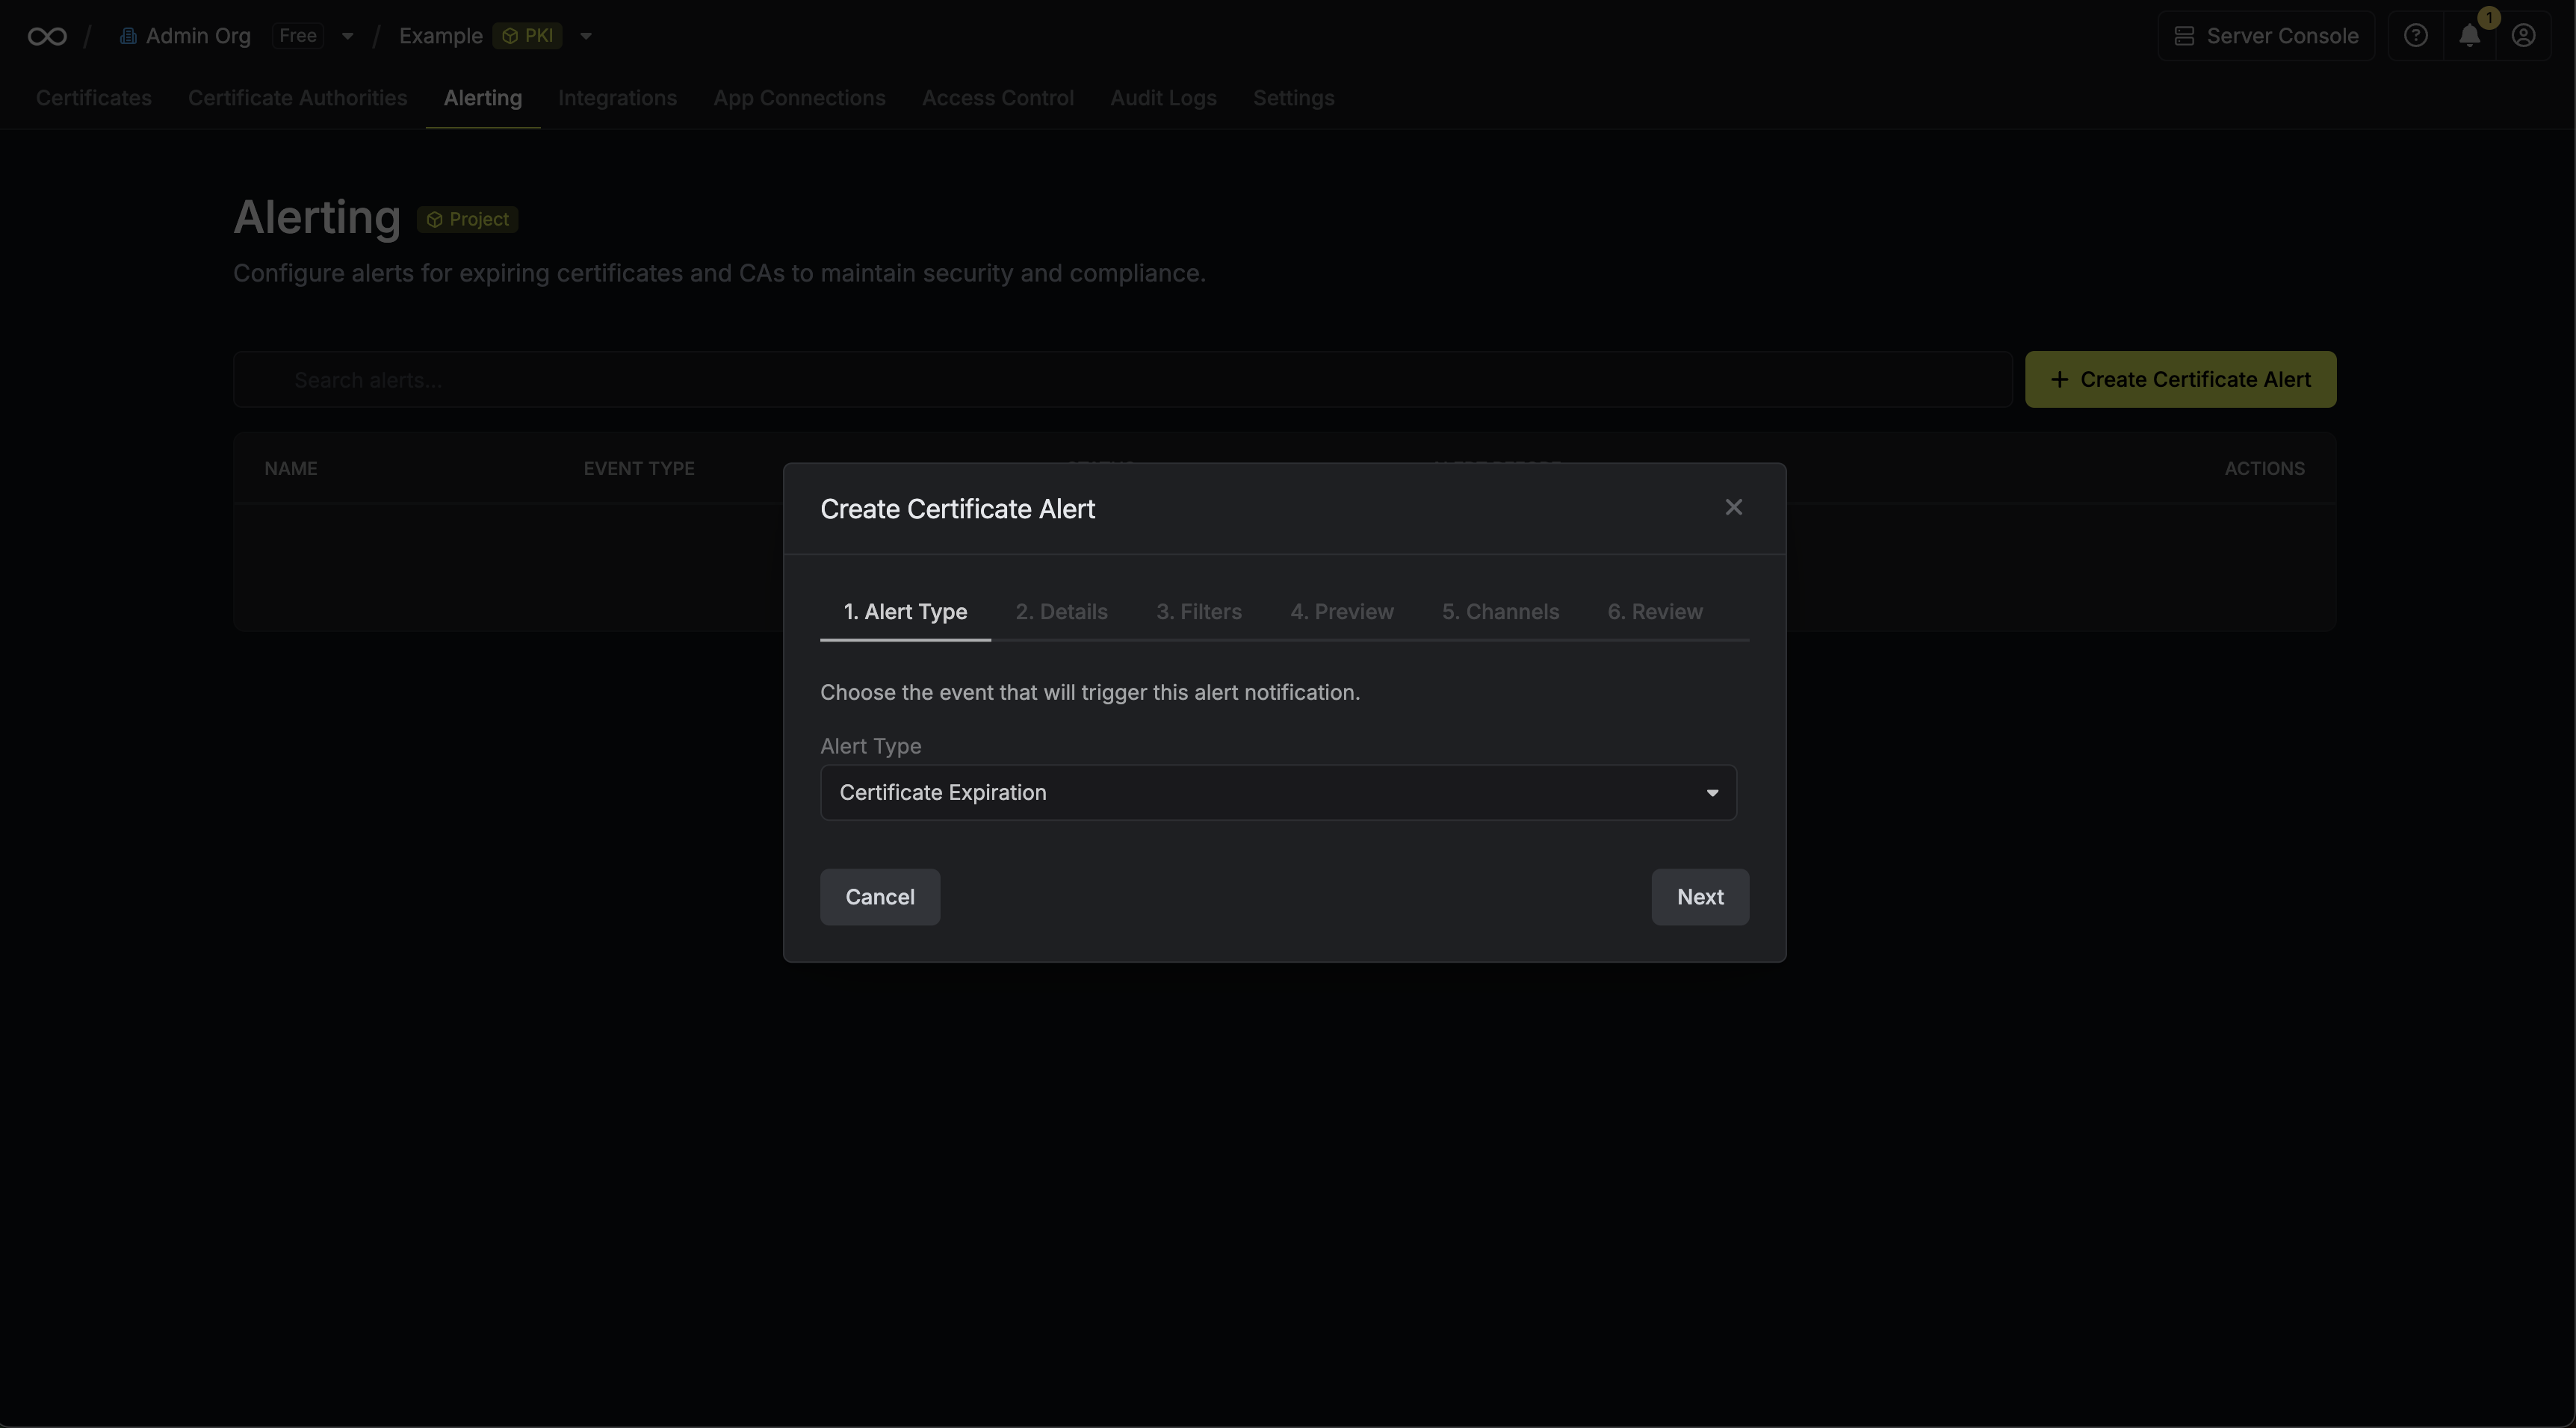 Here’s some guidance for each field in the alert configuration sequence:
- Alert Type: The type of certificate event to alert on. Options are Certificate Expiration, Certificate Issuance, Certificate Renewal, and Certificate Revocation.
- Alert Name: A slug friendly name for the alert such as
tls-expiry-alert. - Description: An optional description for the alert.
- Alert Before (Expiration alerts only): The time before certificate expiration to trigger the alert such as 30 days denoted by
30d. - Filters: A list of filters that determine which certificates the alert applies to. Each row includes a Field, Operator, and Value to match against. For example, you can filter for certificates with a common name containing
example.comby setting the field to Common Name, the operator to Contains, and the value toexample.com.

Webhook Event Types
Each alert type maps to a corresponding CloudEvents event type:| Alert Type | Event Type | Subject |
|---|---|---|
| Certificate Expiration | com.infisical.pki.certificate.expiration | certificate-expiration-alert |
| Certificate Issuance | com.infisical.pki.certificate.issuance | certificate-issuance-alert |
| Certificate Renewal | com.infisical.pki.certificate.renewal | certificate-renewal-alert |
| Certificate Revocation | com.infisical.pki.certificate.revocation | certificate-revocation-alert |
Webhook Payload Format
Webhook notifications are sent as HTTP POST requests with a CloudEvents compliant JSON payload.Expiration Alert Payload
Issuance, Renewal, and Revocation Alert Payload
These alerts are sent in real time the moment a certificate event occurs. Each notification contains a single certificate. Thetype and subject fields reflect the specific event, and alertBefore is omitted.
For revocation alerts, the certificate object also includes revokedAt and revocationReason fields.
Webhook Signature Verification
If you configure a signing secret for your webhook channel, Infisical will include anx-infisical-signature header with each request. This allows you to verify that the webhook payload originated from Infisical.
The header format is:
<timestamp>is the Unix timestamp (in milliseconds) when the signature was generatedv1indicates the signature version<signature>is the HMAC SHA256 signature of the payload
- Extract the timestamp and signature from the header
- Construct the signature payload by concatenating the timestamp, a period (
.), and the raw request body:{timestamp}.{body} - Compute an HMAC SHA256 hash using your signing secret
- Compare the computed signature with the signature from the header