This guide demonstrates how to use Infisical to issue and distribute certificates to devices managed by Jamf Pro using the SCEP enrollment method configured on a certificate profile. With this integration, Jamf Pro acts as the SCEP client on behalf of your managed devices, once a configuration profile is saved and scoped, enrolled devices automatically receive certificates issued by your Infisical Certificate Manager without any manual intervention on the device. Infisical supports both static and dynamic SCEP challenges with Jamf Pro. Dynamic challenges provide stronger security by generating a unique, one-time-use challenge password for each device enrollment.Documentation Index
Fetch the complete documentation index at: https://infisical.com/docs/llms.txt
Use this file to discover all available pages before exploring further.
Prerequisites
Before you begin, make sure you have:- A Jamf Pro instance with administrative access.
- A certificate profile configured with the SCEP enrollment method in Infisical. Refer to the SCEP enrollment guide for setup instructions.
- One or more computers or mobile devices enrolled in Jamf Pro.
- For dynamic challenges: A Machine Identity with access to the project containing the certificate profile.
Guide
Gather SCEP details from Infisical
Navigate to your certificate management project in Infisical and locate your certificate profile configured with the SCEP enrollment method.From the certificate profile, gather the following values:
- SCEP URL: The SCEP endpoint URL for your certificate profile. This takes the form
https://app.infisical.com/scep/{profile_id}/pkiclient.exe. For self-hosted instances, replaceapp.infisical.comwith your instance’s domain.
- Static Challenge
- Dynamic Challenge
- Challenge Password: The shared secret configured on the SCEP enrollment method.
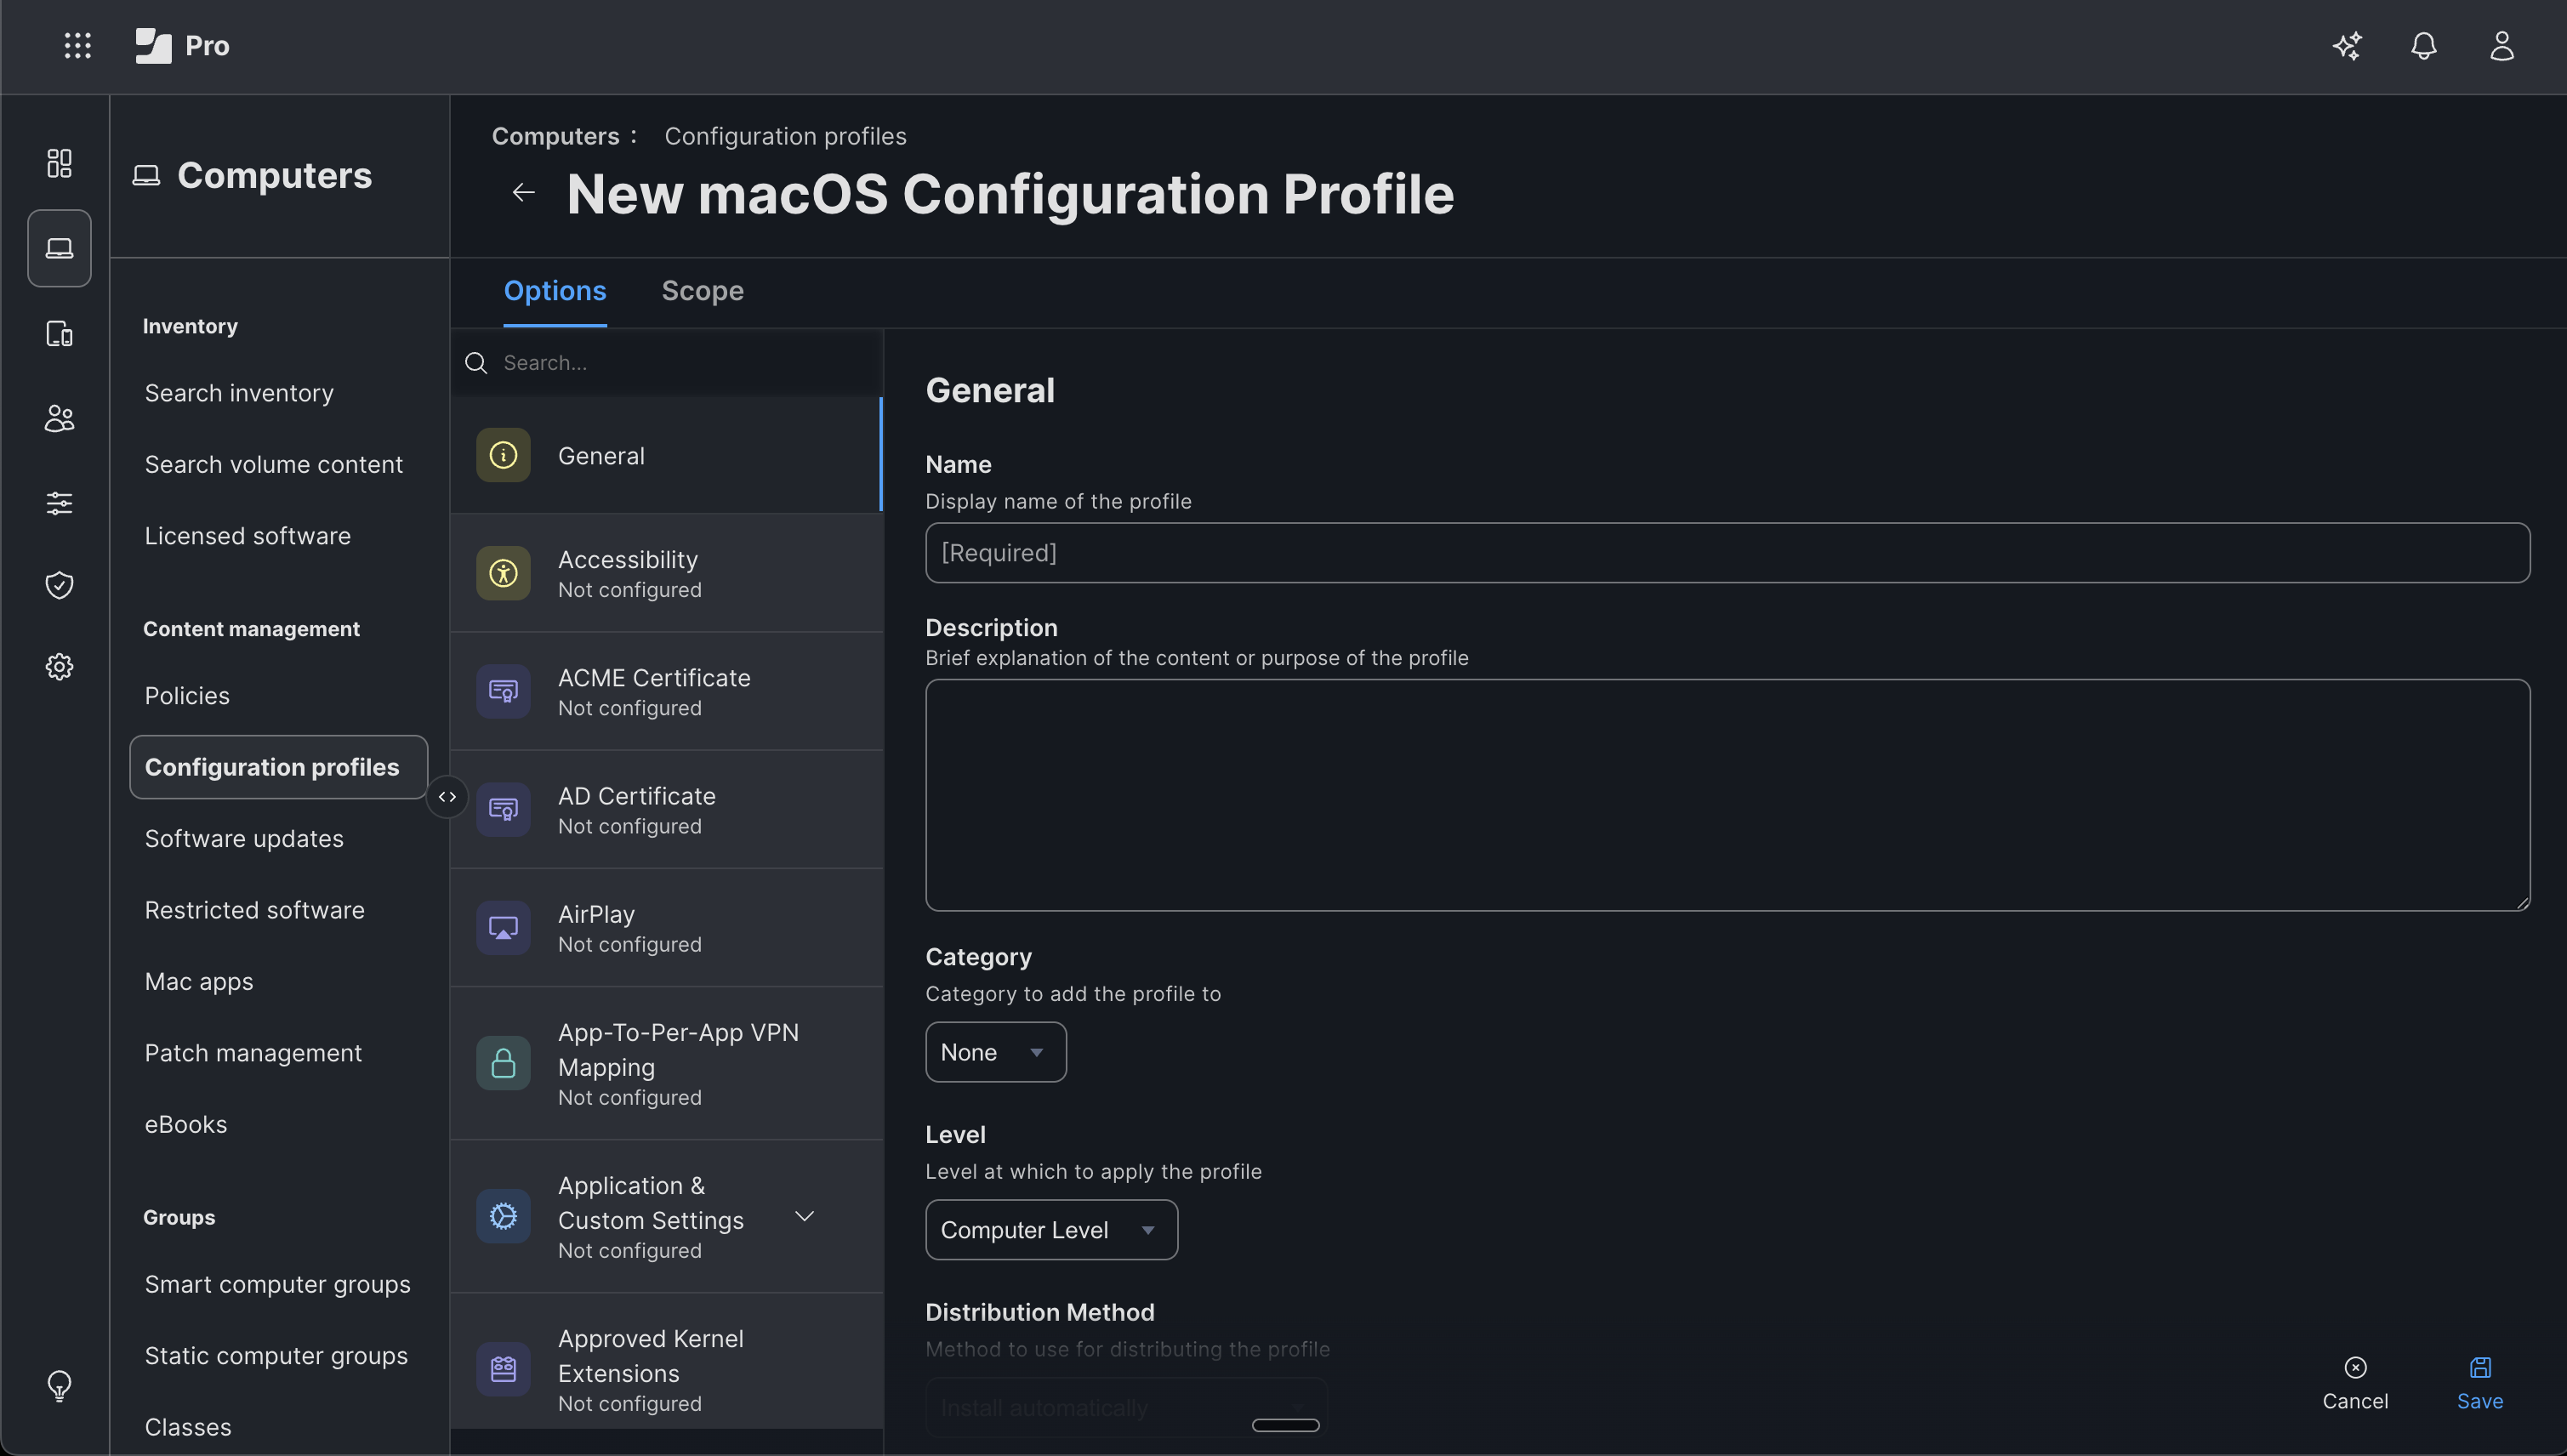
Create a configuration profile in Jamf Pro
In Jamf Pro, configuration profiles can be created for both Computers and Mobile Devices. The SCEP payload and configuration fields are identical for both. This guide walks through the Computers flow.
- In Jamf Pro, click Computers in the sidebar.
- Under Content management, click Configuration profiles.
-
Click + New to create a new macOS configuration profile.

-
In the General payload, enter a Name for the profile (e.g.,
My SCEP Configuration Profile). - Optionally, fill in the Description and Category fields.
-
Set Level to Computer Level and choose your preferred Distribution Method.
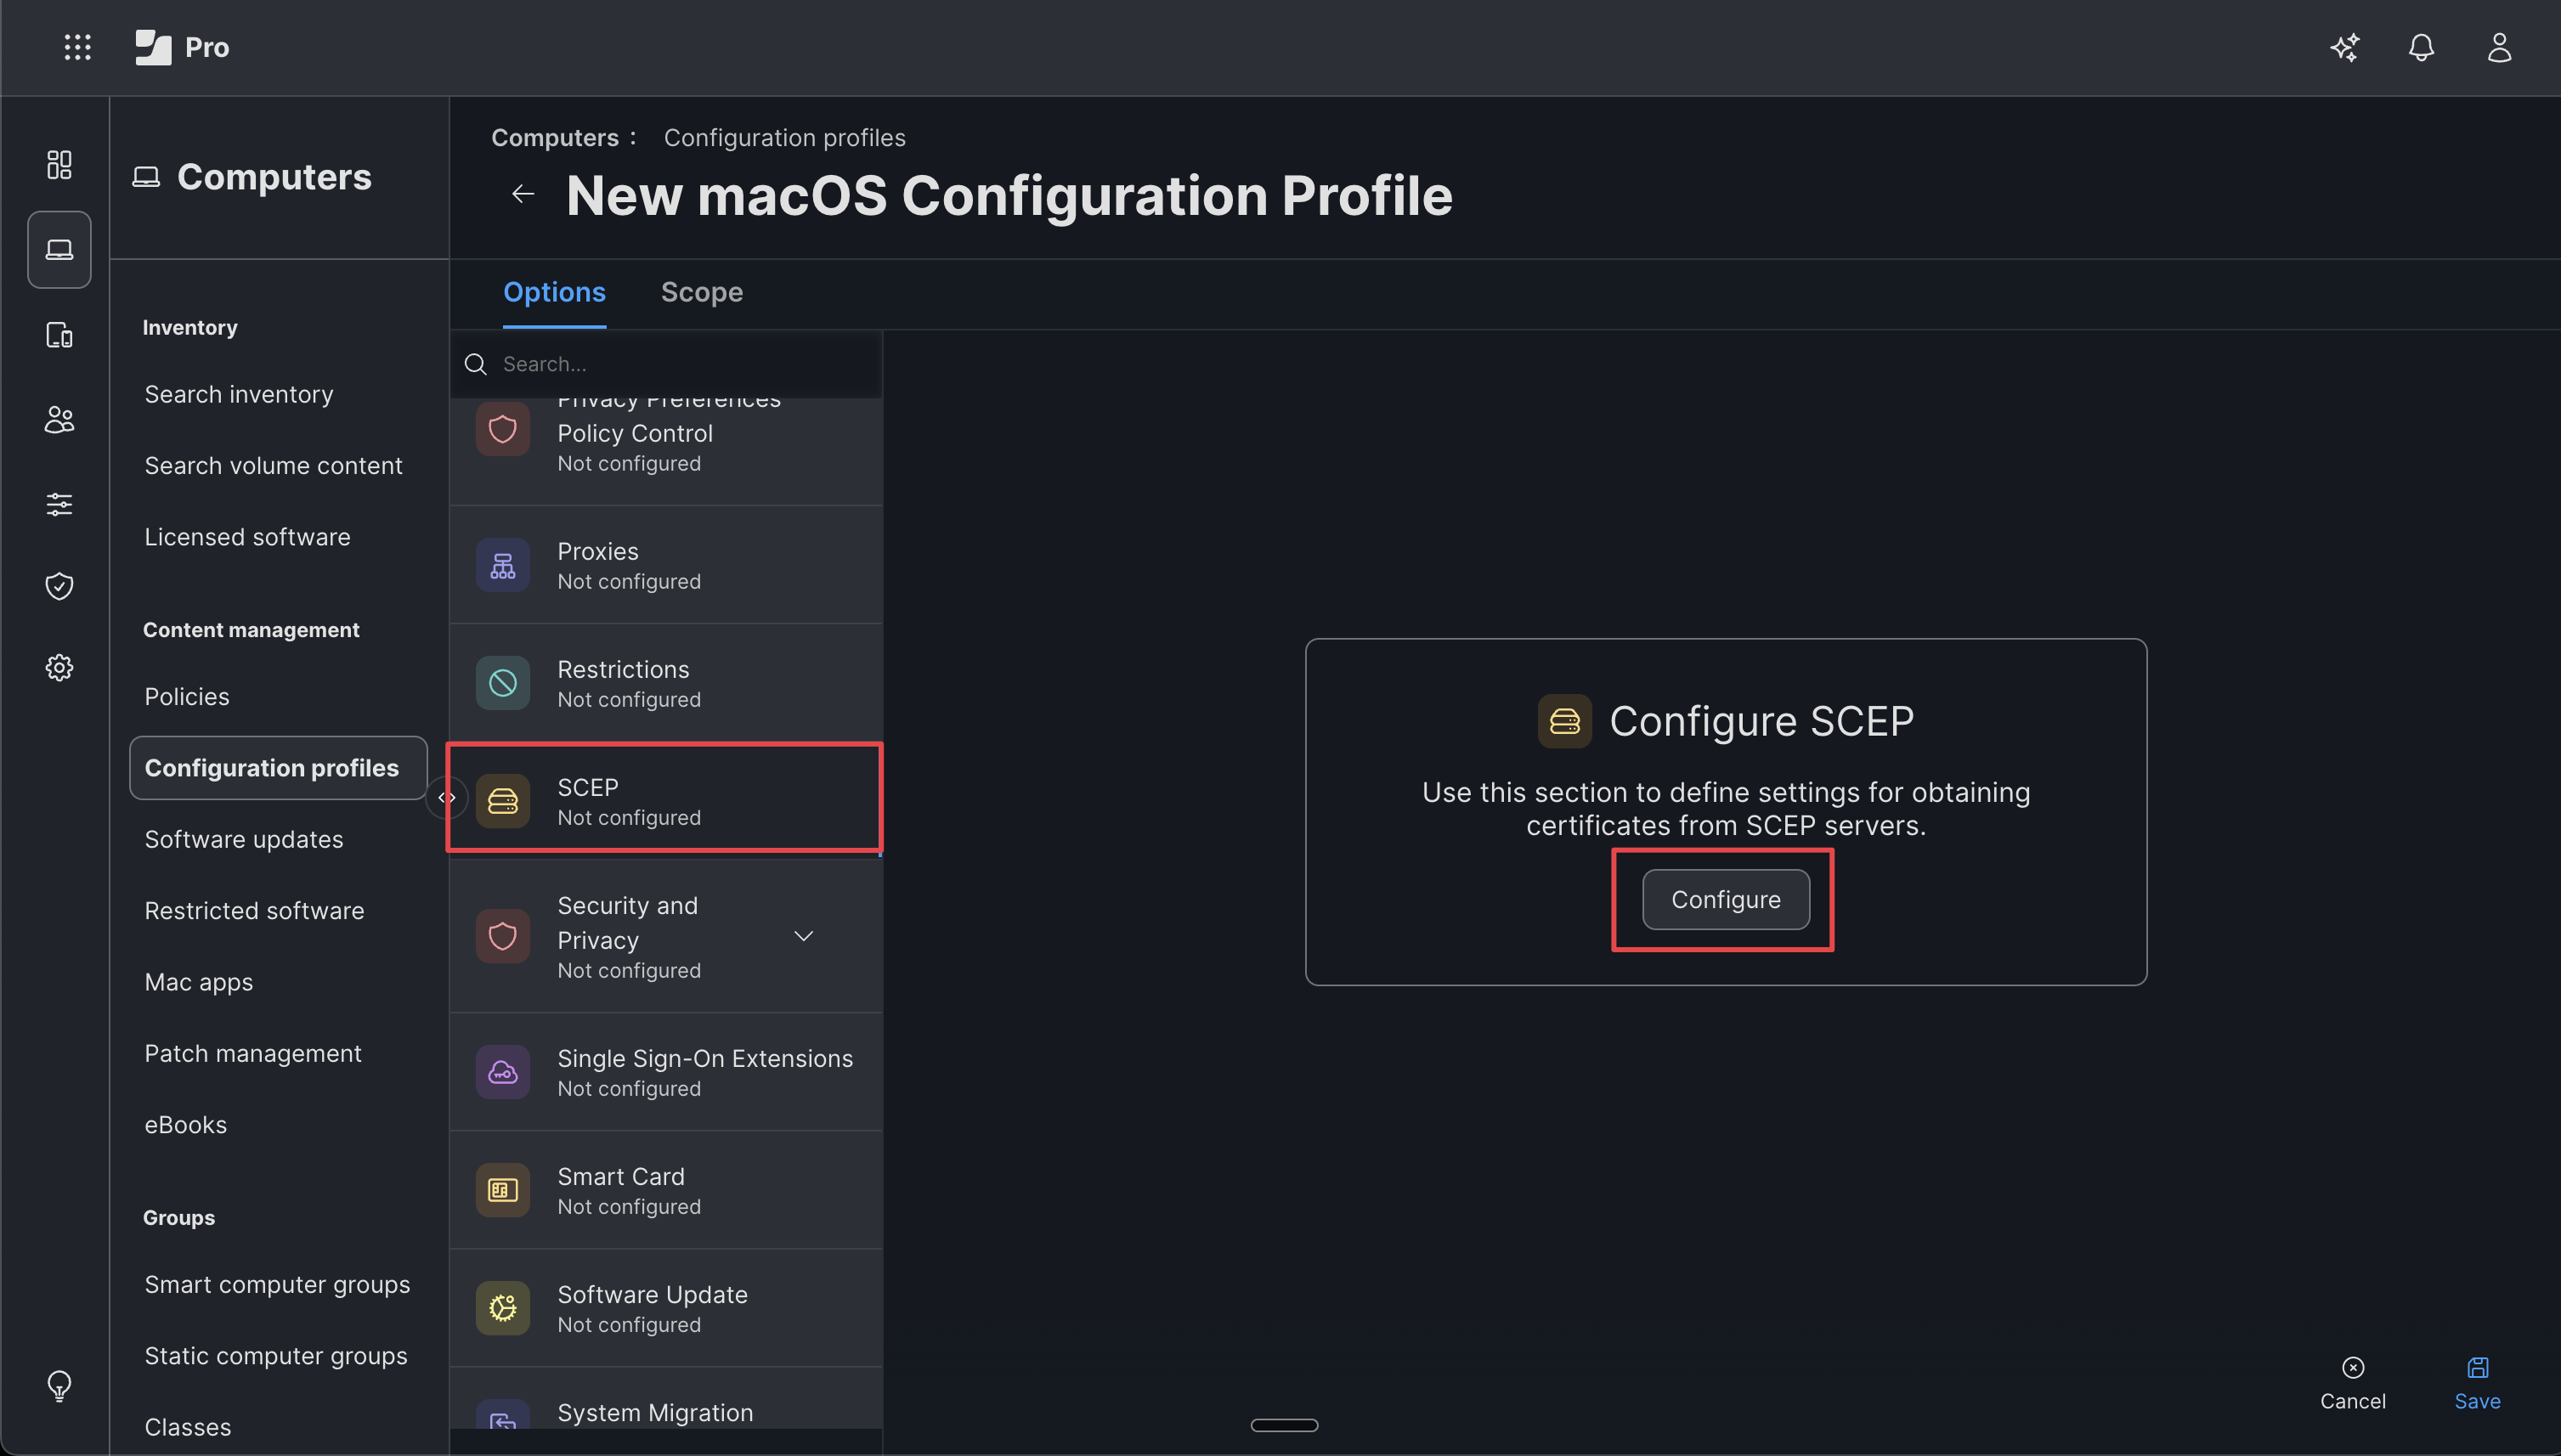
Add the SCEP payload
- In the left-hand payload list, scroll down and select SCEP.
-
Click Configure to add the SCEP payload to the profile.
Configure the SCEP payload
Fill in the SCEP payload fields using the values from your Infisical certificate profile: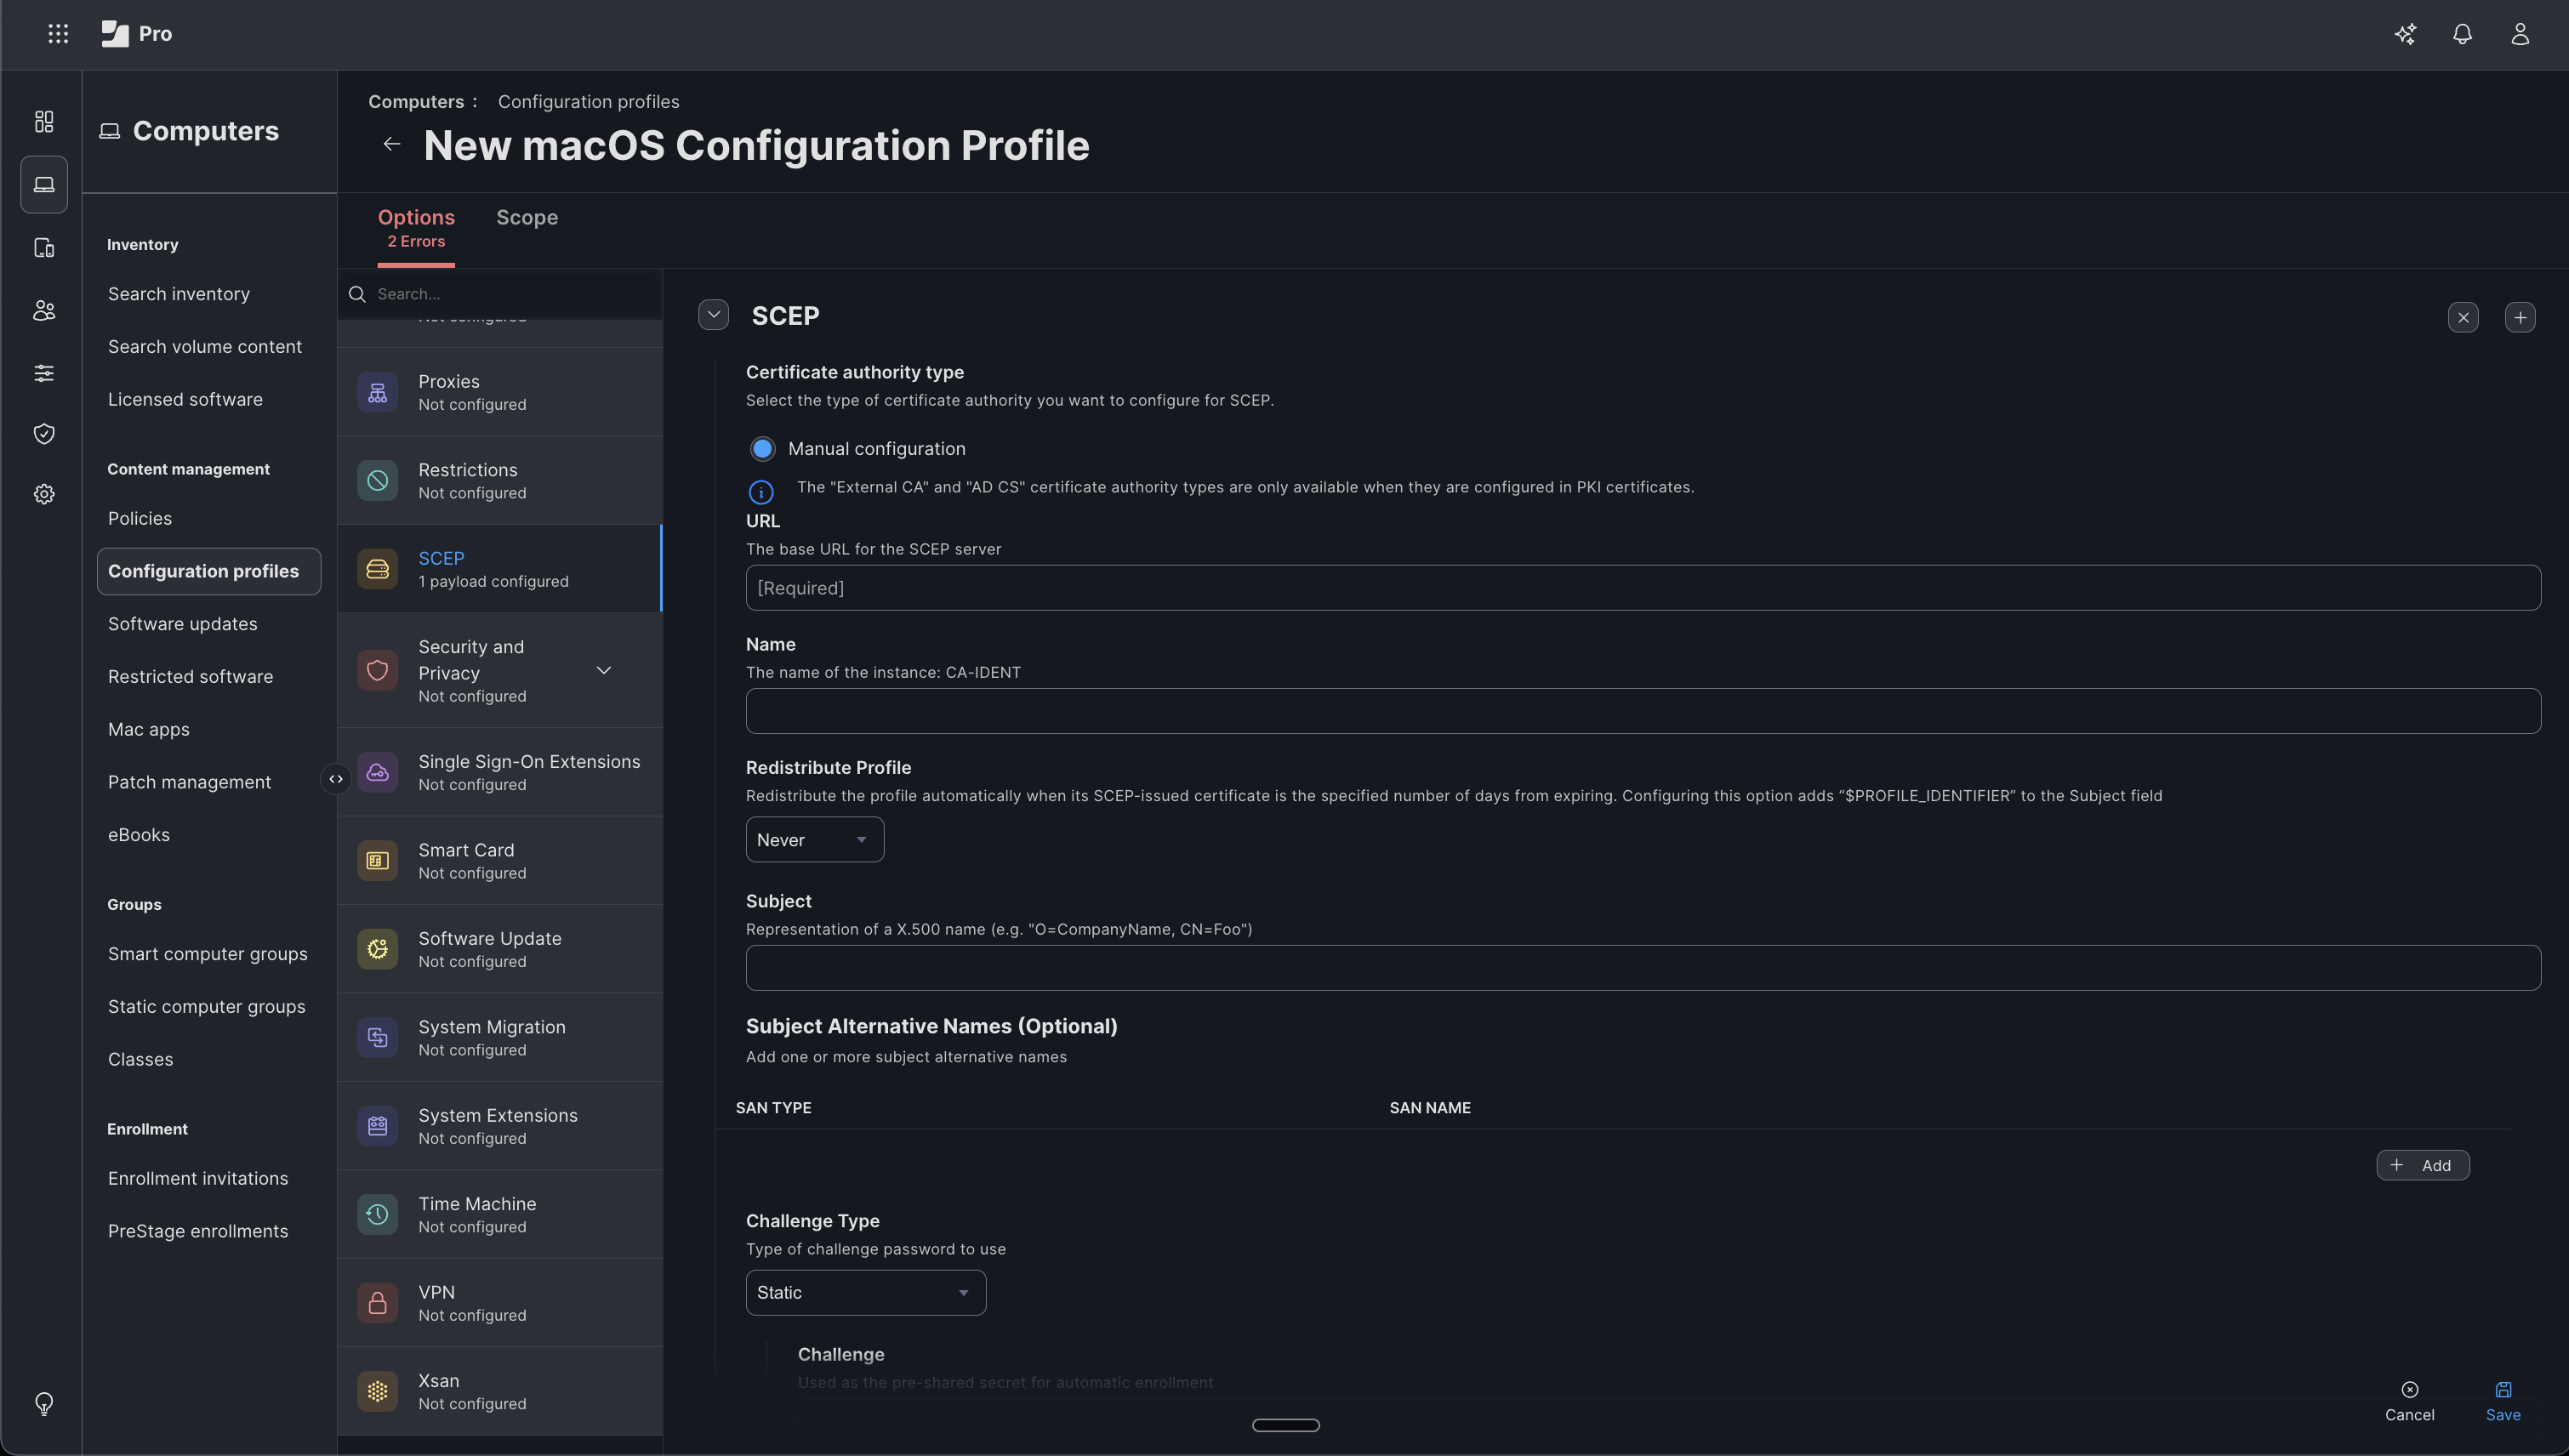 Finally, configure the remaining certificate options:
- URL: Enter your Infisical SCEP endpoint URL (e.g.,
https://app.infisical.com/scep/{profile_id}/pkiclient.exe). - Name: Enter a descriptive name for the SCEP instance (e.g.,
CA-IDENT). This value is used internally by the device to identify the SCEP configuration. - Subject: Enter the distinguished name for the certificate in X.500 format (e.g.,
O=CompanyName, CN=Foo). Adjust the subject components to match your organization’s naming convention. - Subject Alternative Names (Optional): Add any SANs if required by your certificate policy.
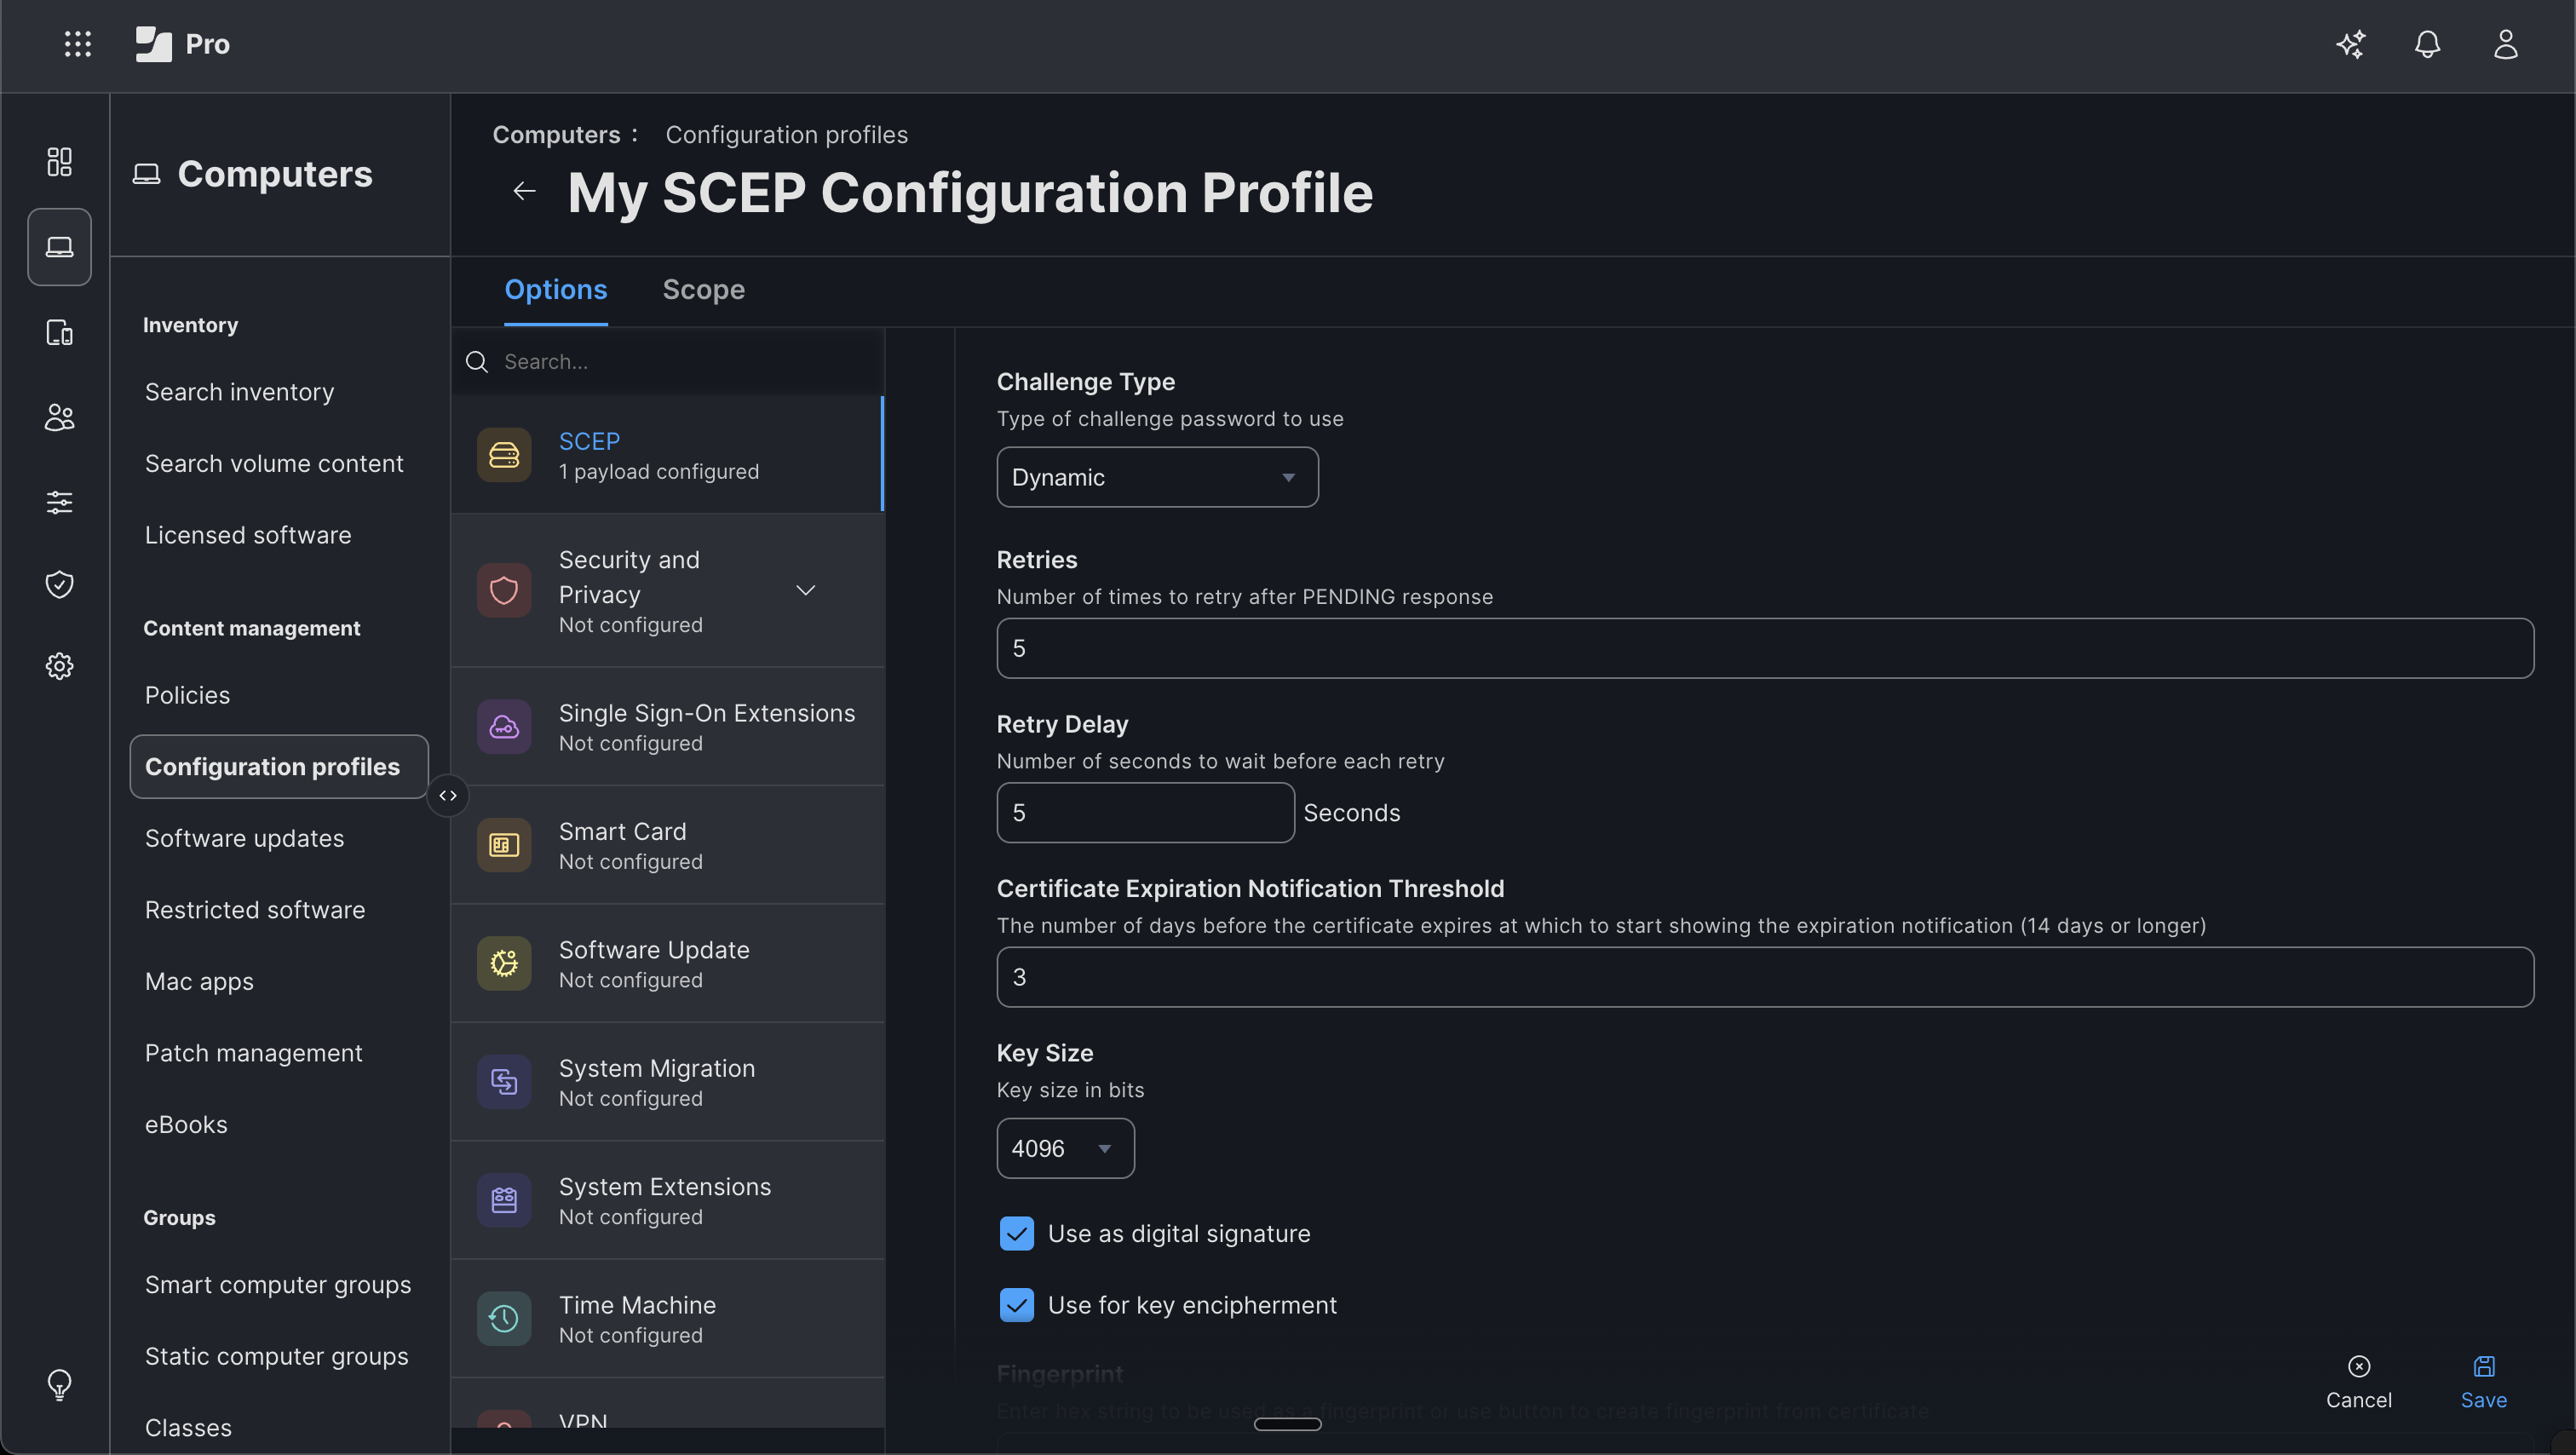
- Static Challenge
- Dynamic Challenge
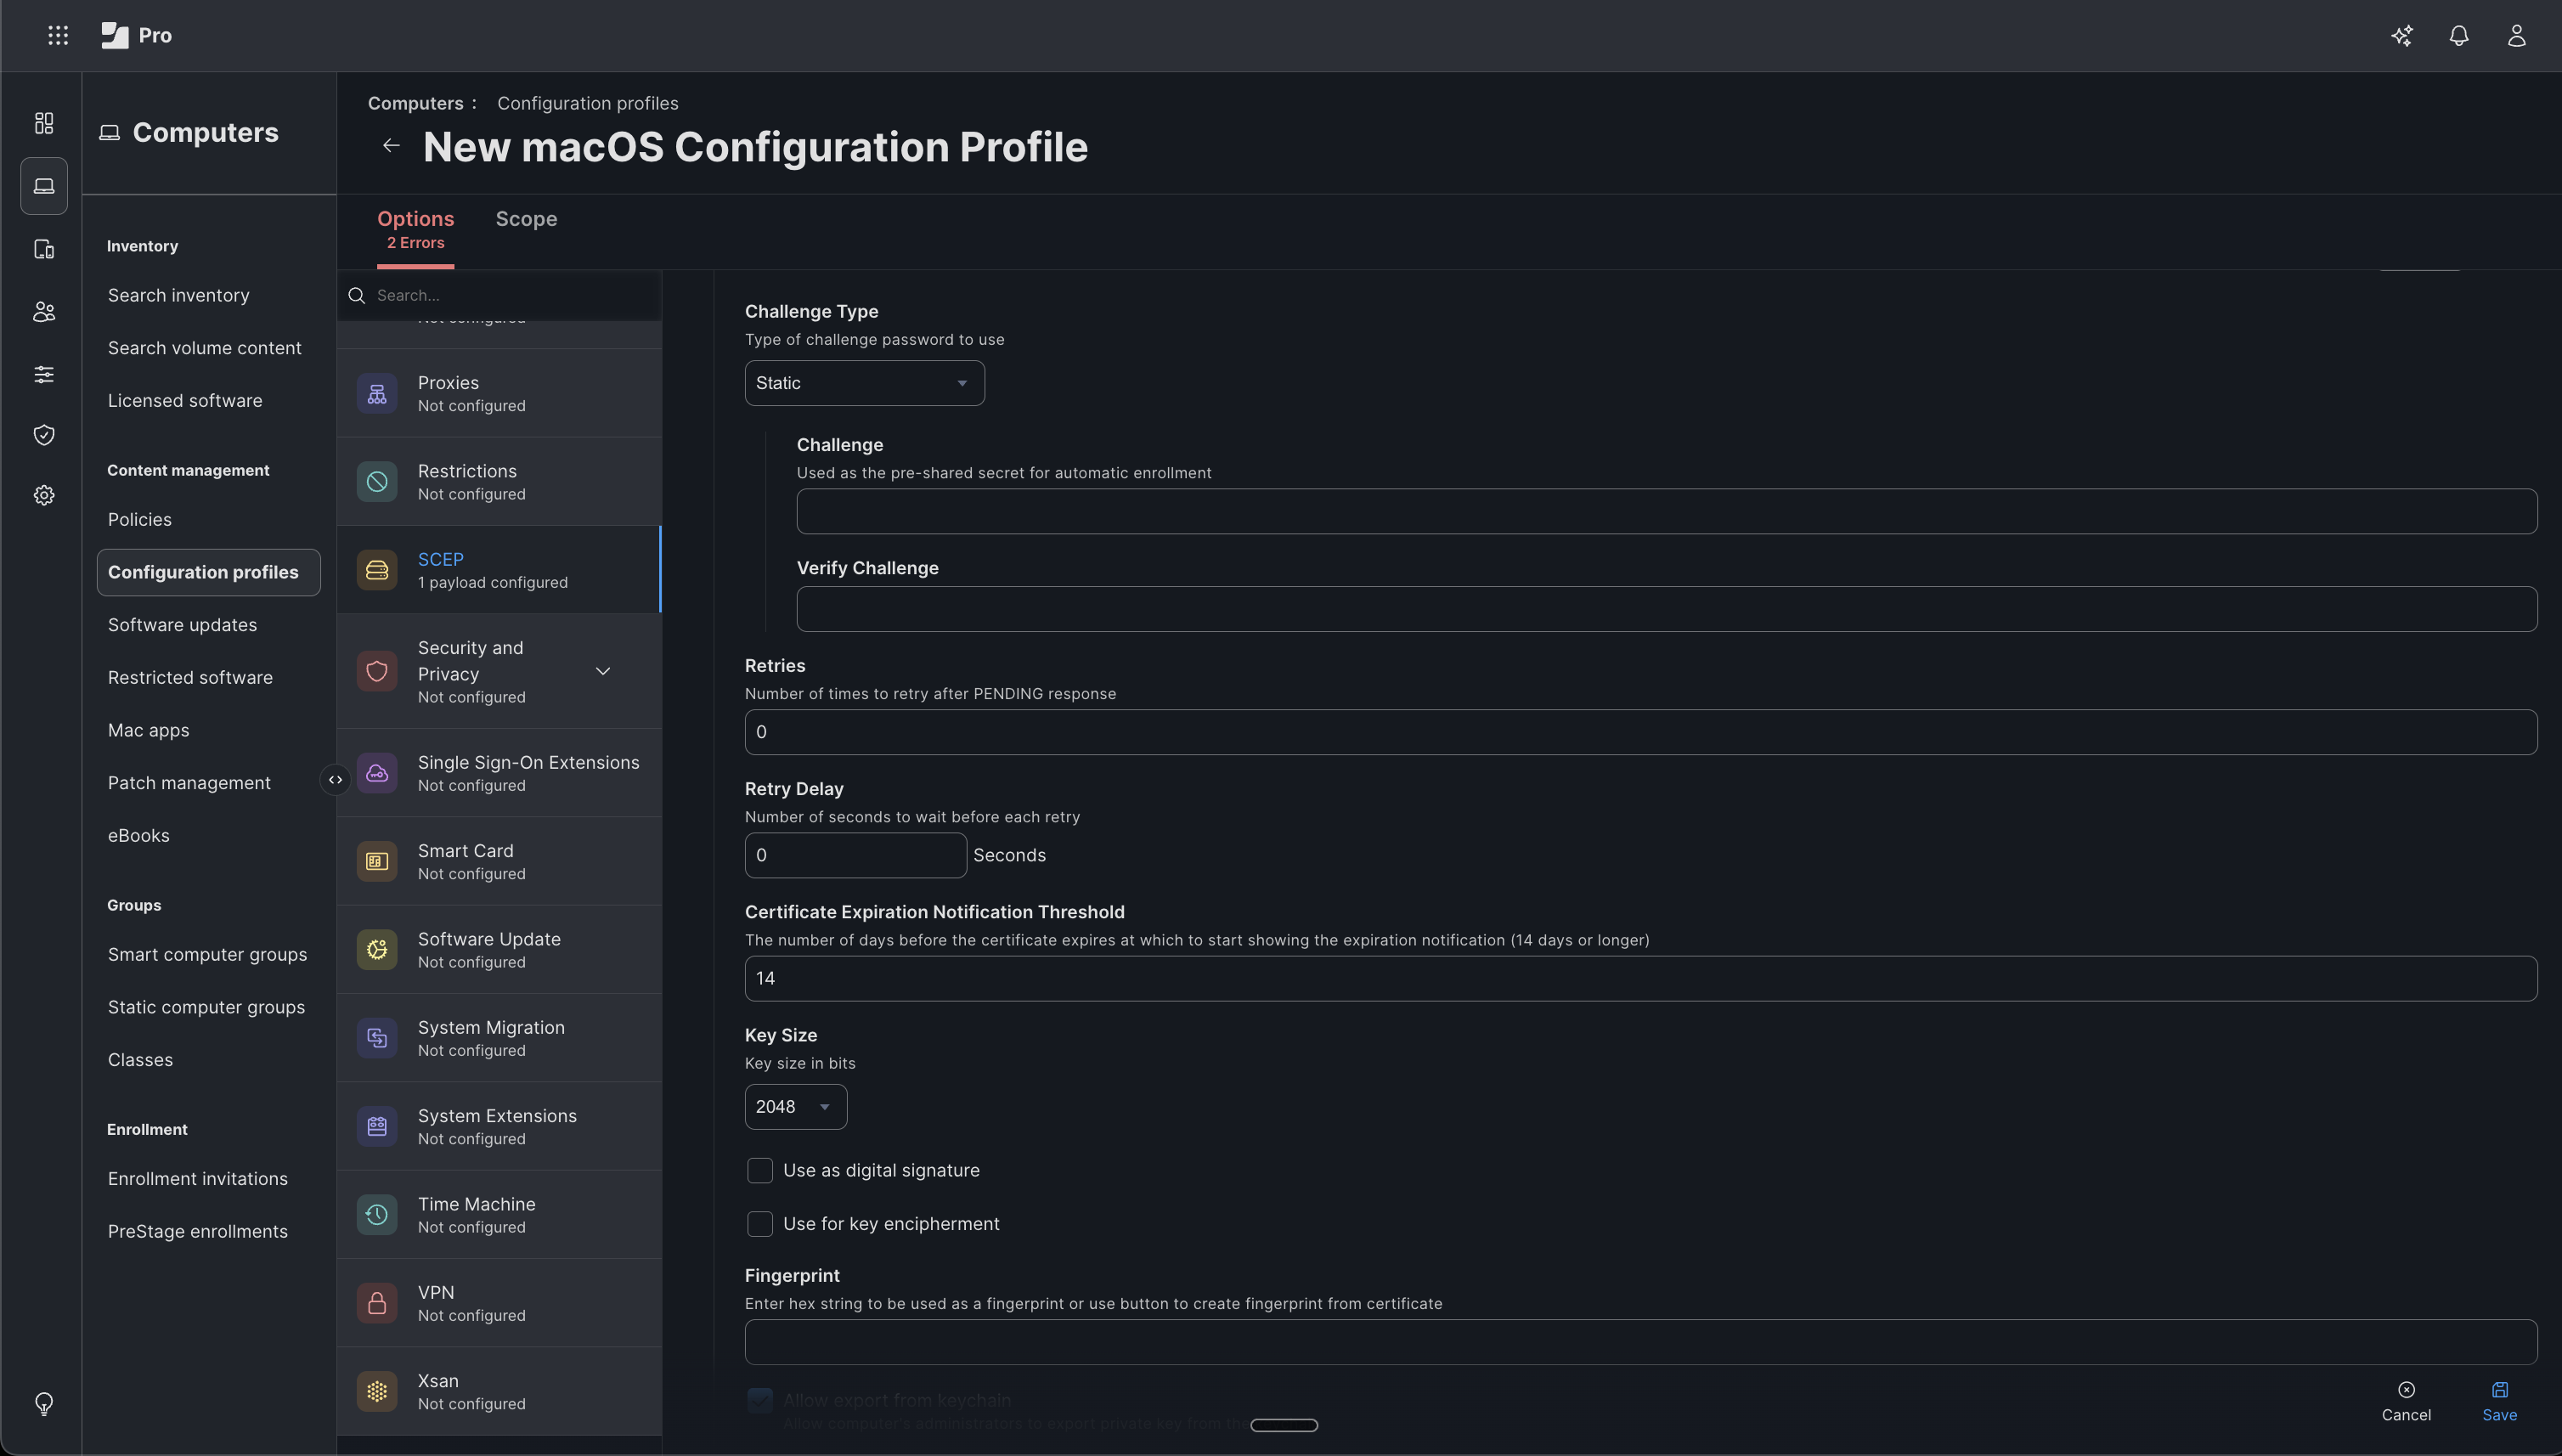
- Challenge Type: Select Static from the dropdown.
- Challenge: Enter the Challenge Password from your Infisical certificate profile.
-
Verify Challenge: Re-enter the challenge password to confirm.
-
Retries: Number of times the device will retry after receiving a PENDING response from the SCEP server. The default of
0is typically sufficient. - Retry Delay: Number of seconds to wait between each retry attempt.
-
Certificate Expiration Notification Threshold: The number of days before certificate expiration at which to display a notification (e.g.,
14). - Key Size: Select the key size in bits. Use 2048 or higher.
- Use as digital signature: Enable if the certificate will be used for signing operations.
- Use for key encipherment: Enable if the certificate will be used for encryption.
- Allow export from keychain: Enable to allow computer administrators to export the private key from the keychain.
-
Allow all apps access: Enable to allow all applications to access the certificate in the keychain.
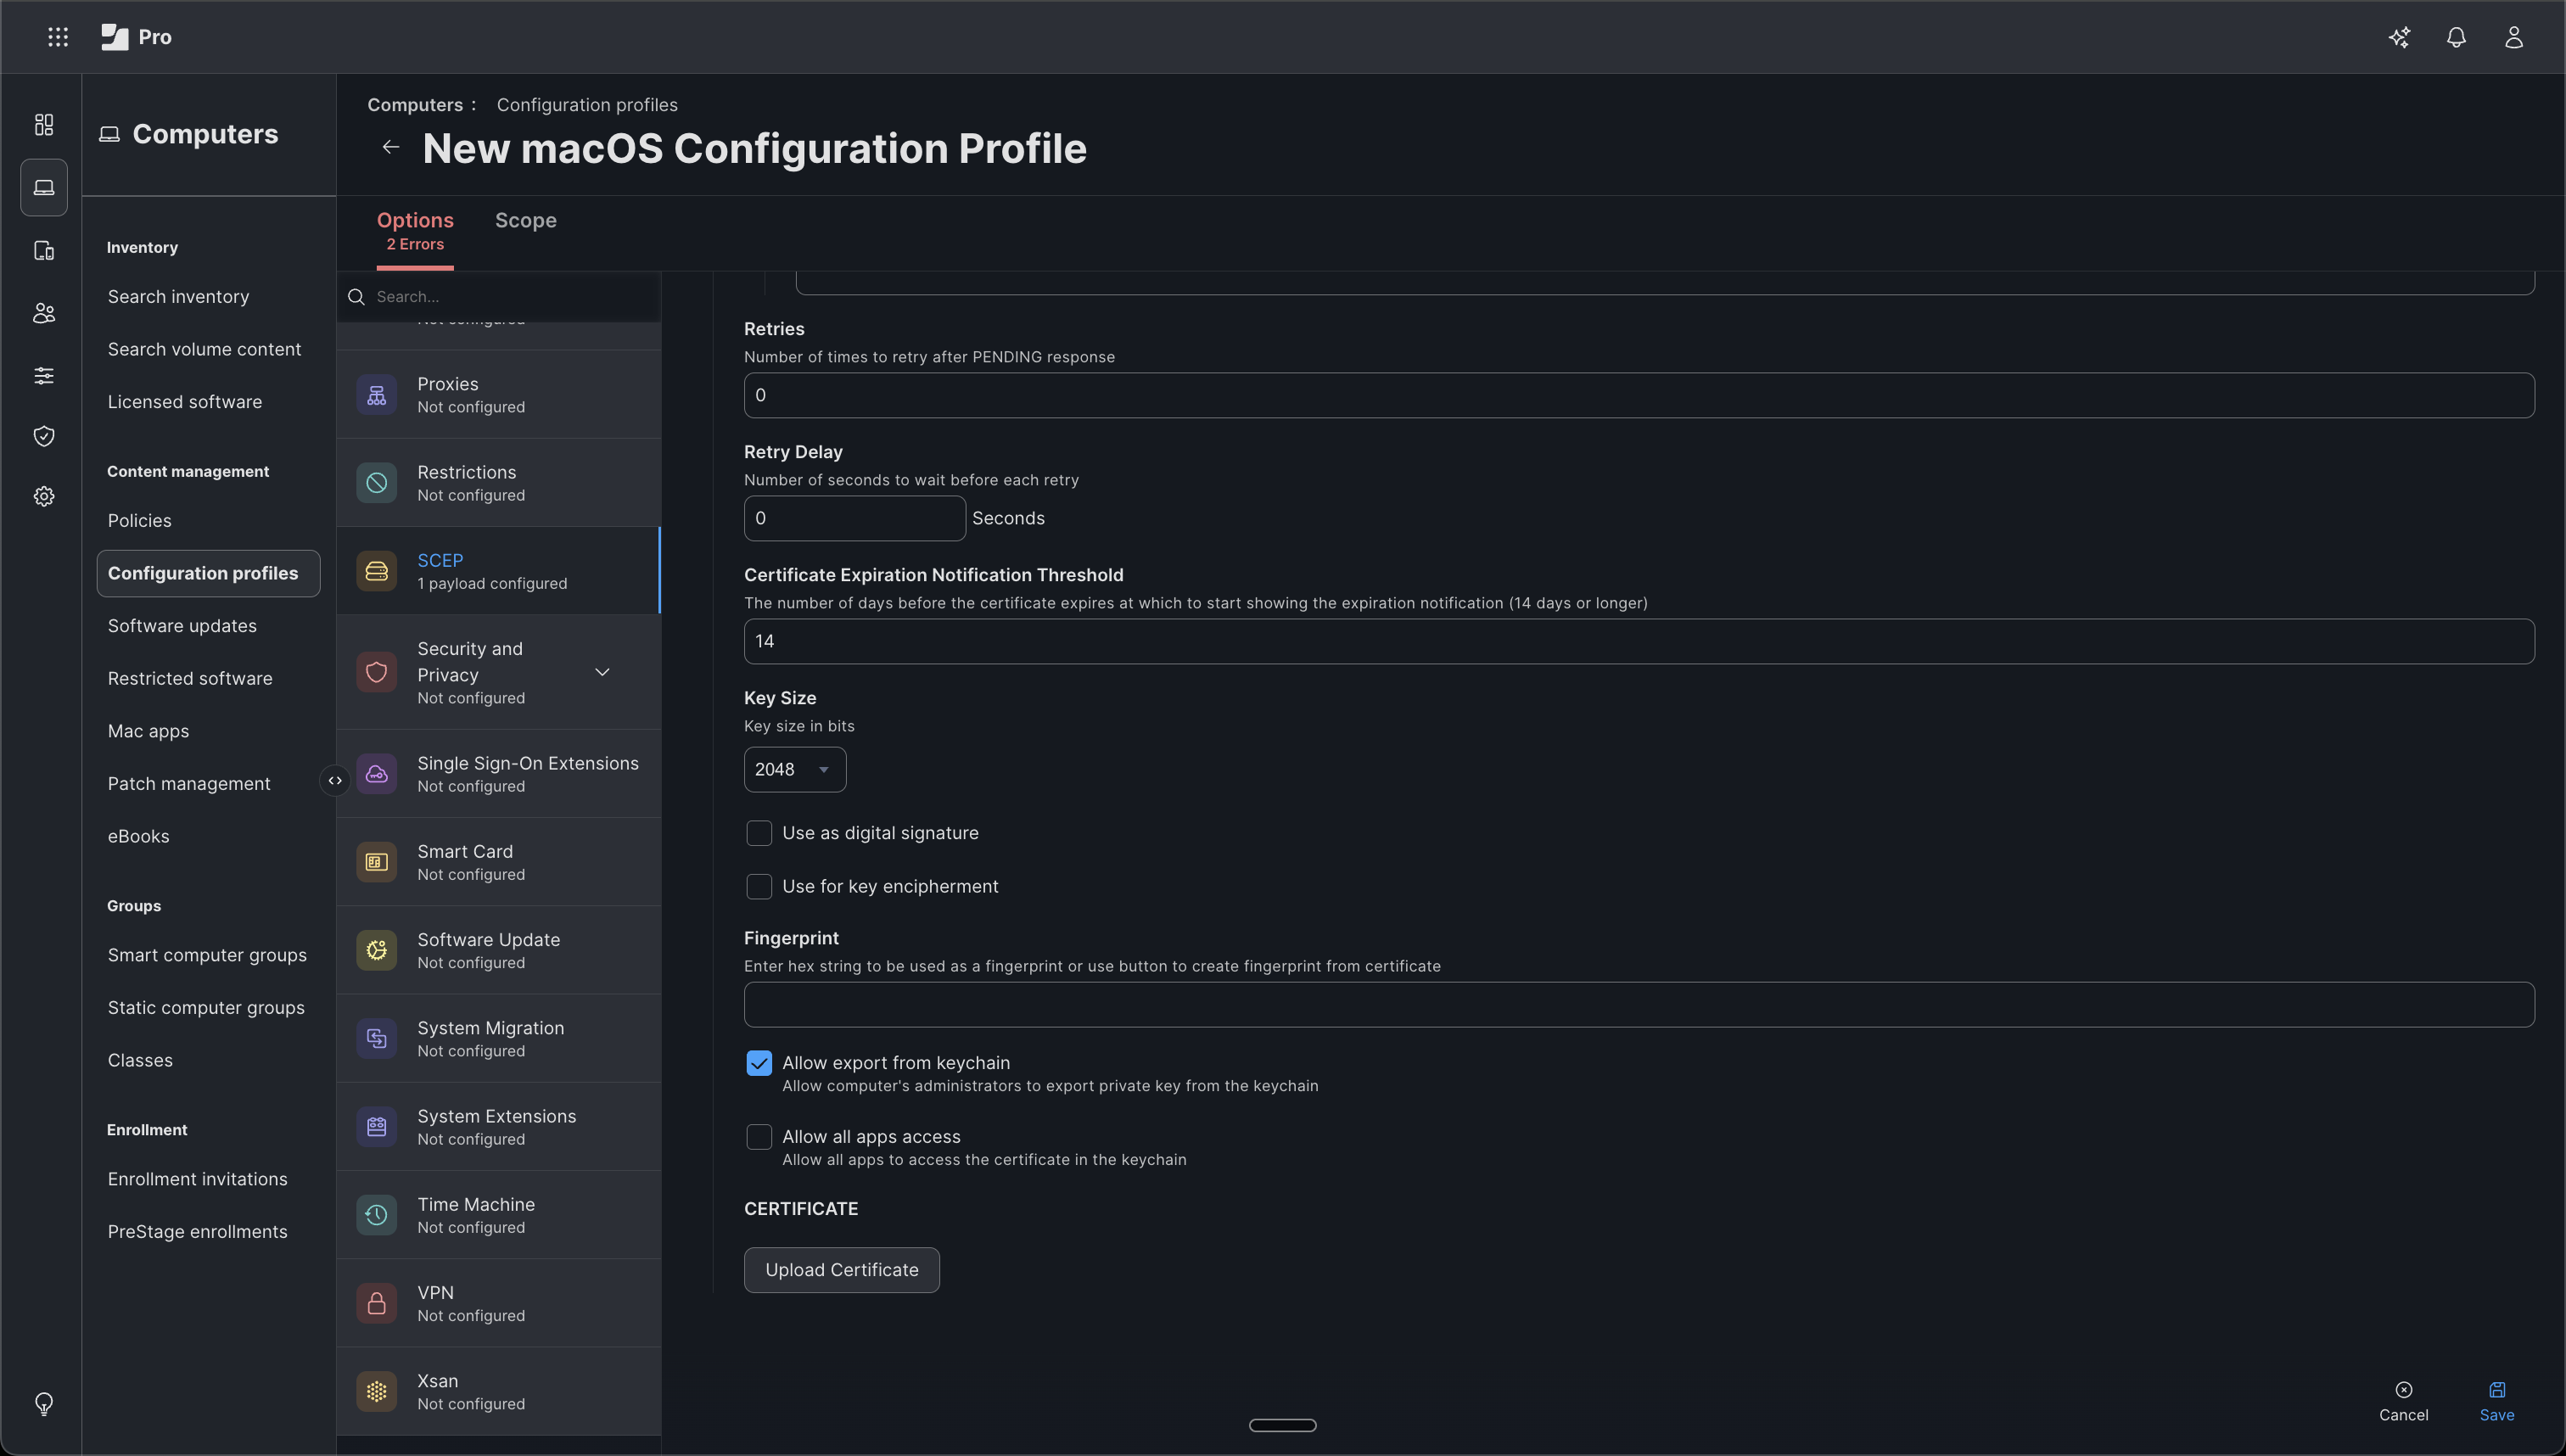
If your certificate profile uses a private or non-publicly trusted CA, upload the CA certificate using the Upload Certificate option at the bottom of the SCEP payload. This ensures macOS trusts the issuing CA, without it, the device may reject the SCEP-issued certificate as untrusted.
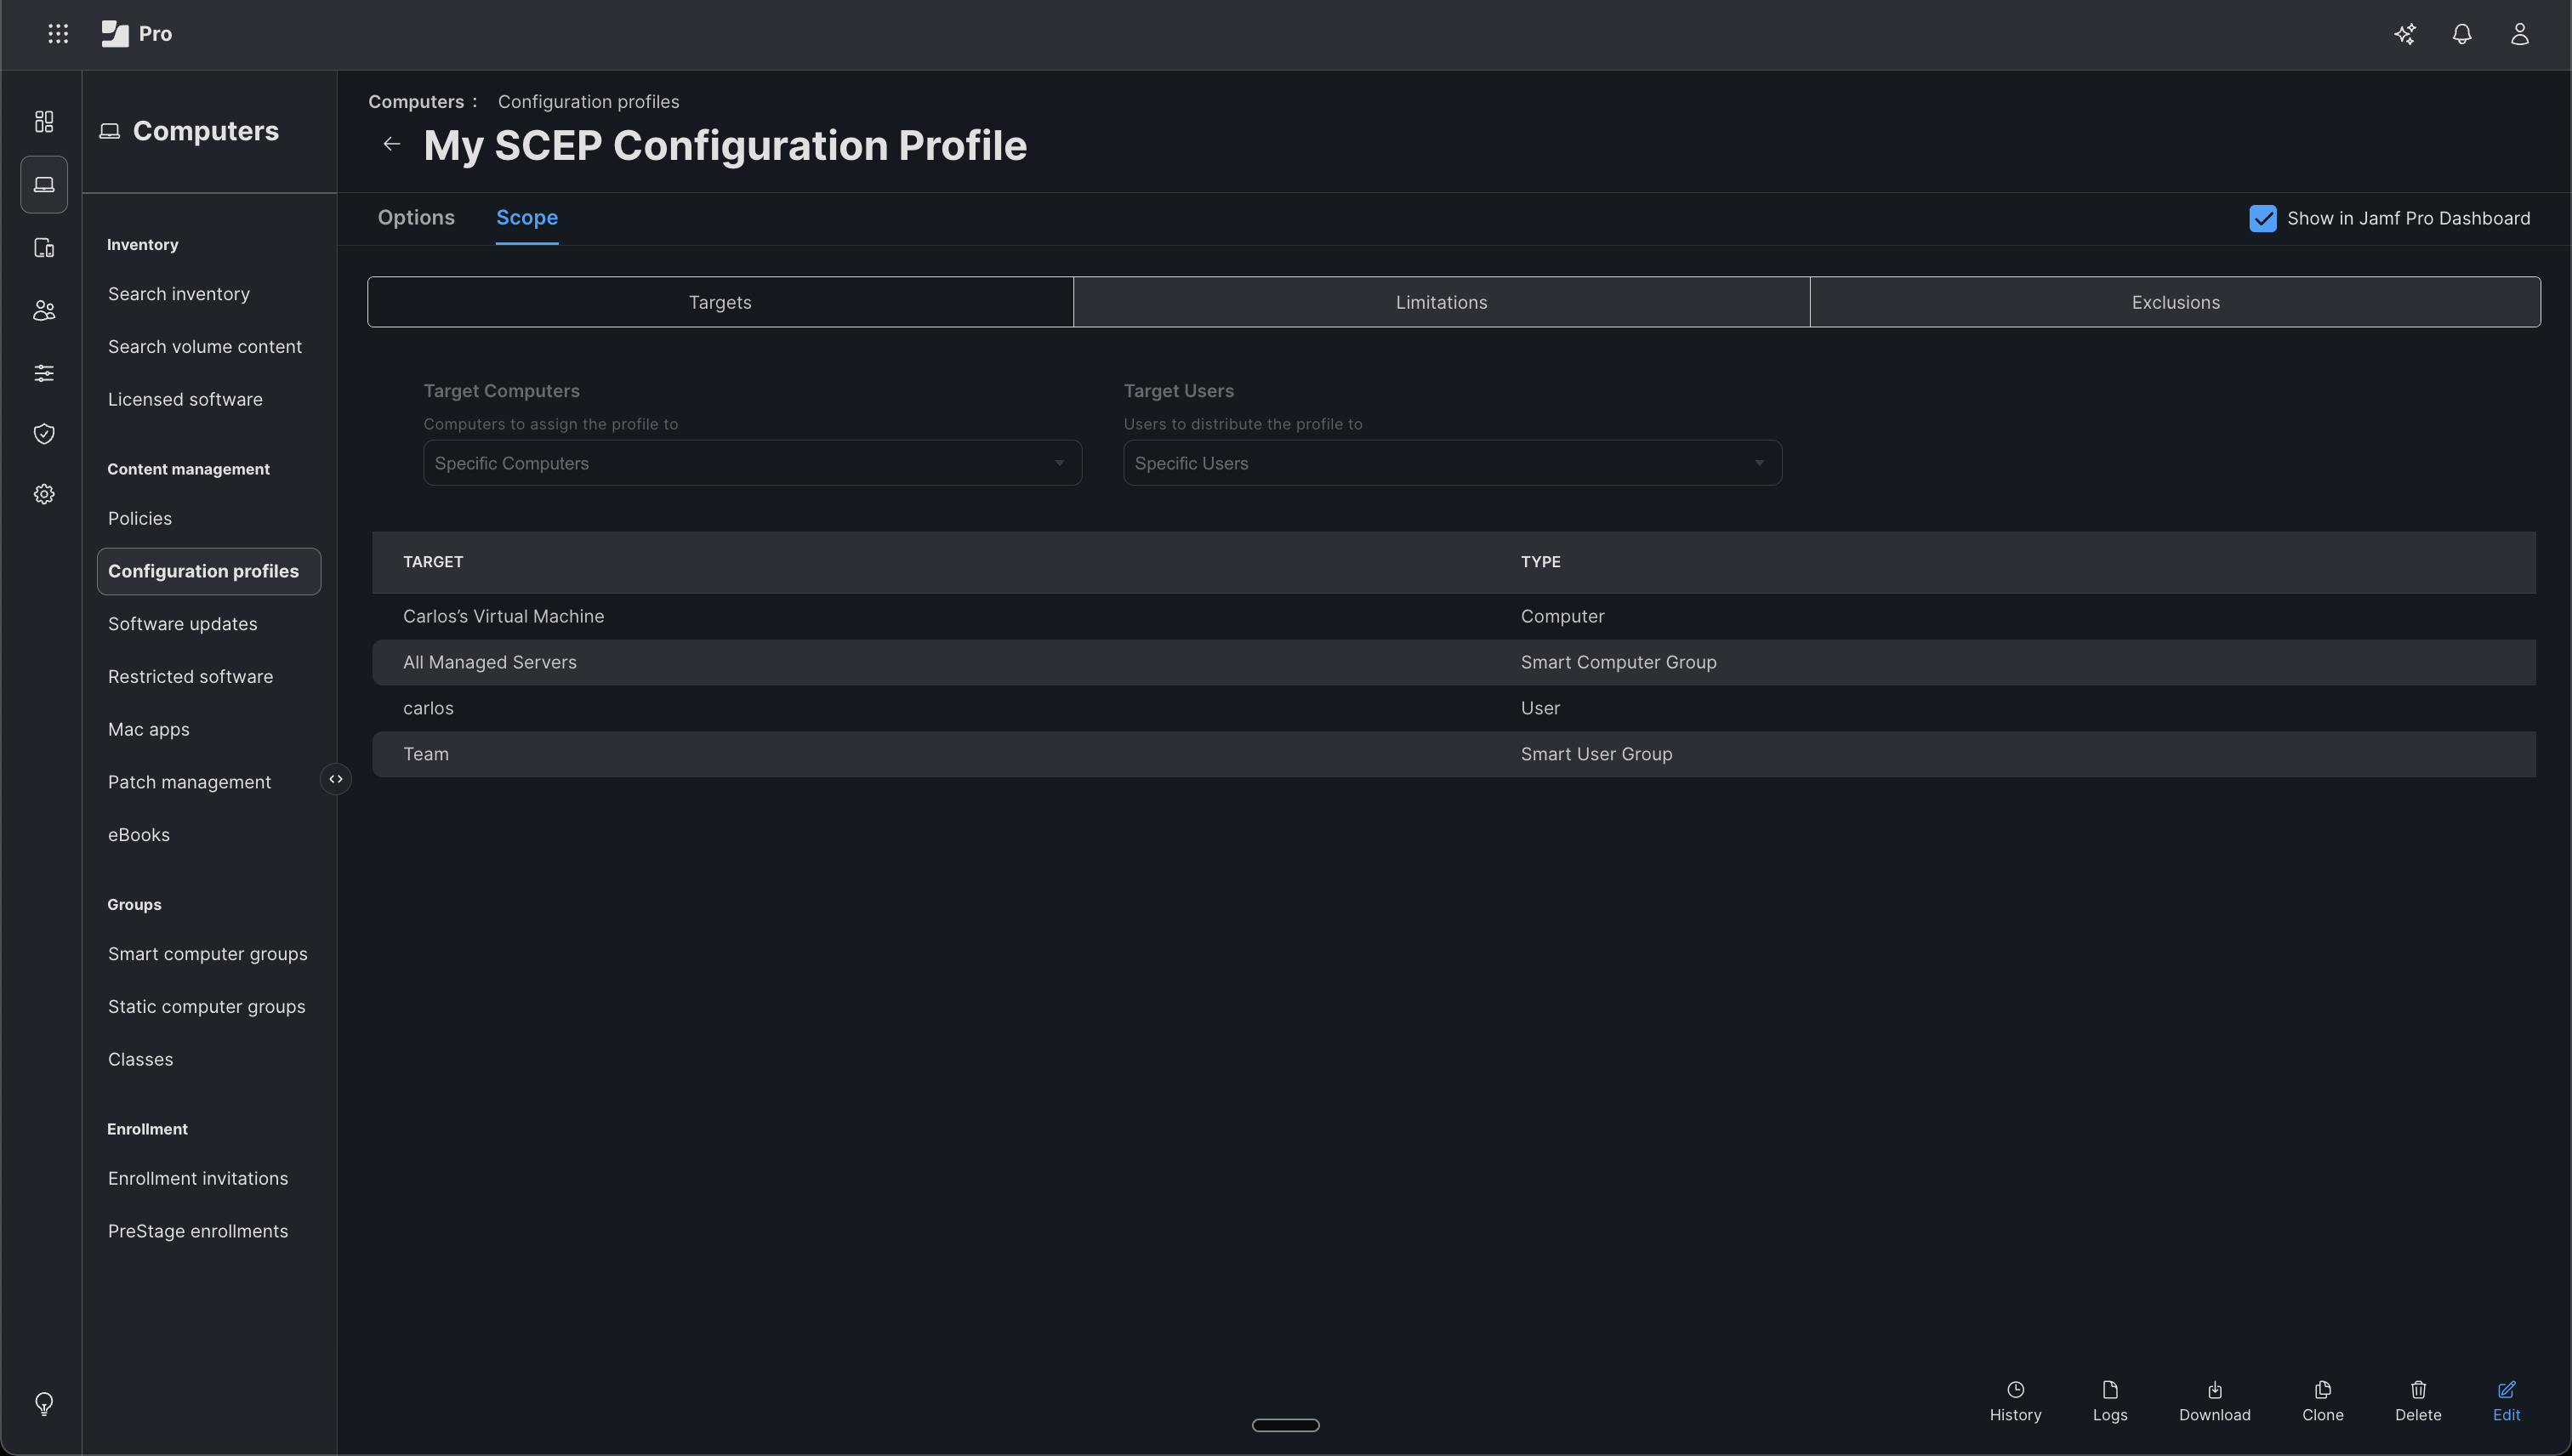
Define the scope
- Click the Scope tab at the top of the profile.
- Under Target Computers, choose whether to assign the profile to All Computers, Specific Computers, or a Smart/Static Computer Group.
- Under Target Users, choose the users who should receive the profile.
-
Optionally, configure Limitations and Exclusions to refine which devices receive the profile.
Save and distribute
Click Save to create the configuration profile. Jamf Pro will automatically distribute the profile to all devices within the defined scope.Each targeted device will contact Infisical’s SCEP server, authenticate using the challenge password, and receive a certificate issued by your Infisical Certificate Manager, all without manual intervention on the device.
Verify certificate installation
On a targeted macOS device, open System Settings > Privacy & Security > Profiles to confirm the configuration profile has been installed.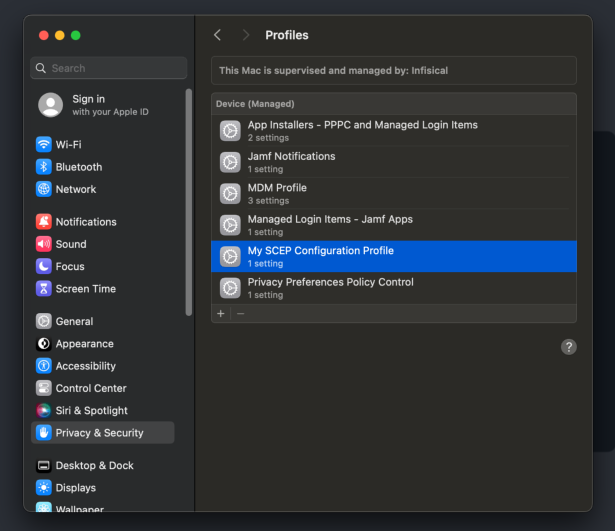 Click on the profile to view its details, including the SCEP enrollment settings, the issued certificate, and its expiration date.
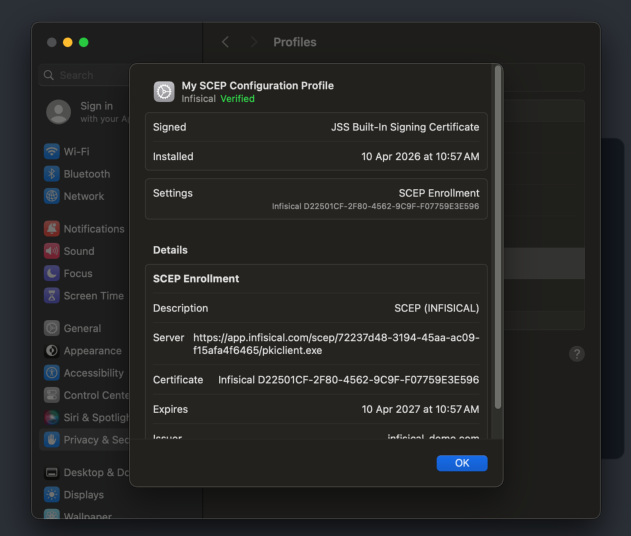 You can also verify the certificate was issued by checking the Certificates section in your Infisical certificate management project, the certificate enrolled via Jamf Pro will appear in the list under the corresponding certificate profile.
Click on the profile to view its details, including the SCEP enrollment settings, the issued certificate, and its expiration date.You can also verify the certificate was issued by checking the Certificates section in your Infisical certificate management project, the certificate enrolled via Jamf Pro will appear in the list under the corresponding certificate profile.