How It Works
Unlike database or SSH resources that require a Gateway for network connectivity, AWS Console access works differently. Infisical uses AWS STS (Security Token Service) to assume roles on your behalf and generates temporary federated sign-in URLs.Key Concepts
- Resource Role: An IAM role in your AWS account that trusts Infisical. This is the “bridge” role that Infisical assumes first.
- Target Role: The IAM role that end users will actually use in the AWS Console. The Resource Role assumes this role on behalf of the user.
- Role Chaining: Infisical uses AWS role chaining - it first assumes the Resource Role, then uses those credentials to assume the Target Role. This provides an additional layer of security and audit capability.
- External ID: A unique identifier (your Infisical Project ID) used in the trust policy to prevent confused deputy attacks.
Session Behavior
Session Duration
The session duration is set when creating the account and applies to all access requests. You can specify the duration using human-readable formats like15m, 30m, or 1h. Due to AWS role chaining limitations:
- Minimum: 15 minutes (
15m) - Maximum: 1 hour (
1h)
Session Tracking
Infisical tracks:- When the session was created
- Who accessed which role
- When the session expires
Important: AWS Console sessions cannot be terminated early. Once a federated URL is generated, the session remains valid until the configured duration expires. However, you can revoke active sessions by modifying the role’s trust policy.
CloudTrail Integration
All actions performed in the AWS Console are logged in AWS CloudTrail. The session is identified by theRoleSessionName, which includes the user’s email address for attribution:
Prerequisites
Before configuring AWS Console access in Infisical PAM, you need to set up two IAM roles in your AWS account:- Resource Role - Trusted by Infisical, can assume target roles
- Target Role(s) - The actual roles users will use in the console
No Gateway Required: Unlike database or SSH resources, AWS Console access does not require an Infisical Gateway. Infisical communicates directly with AWS APIs.
Create the PAM Resource
The PAM Resource represents the connection between Infisical and your AWS account. It contains the Resource Role that Infisical will assume.1
Create the Resource Role Permissions Policy
First, create an IAM policy that allows the Resource Role to assume your target roles. For simplicity, you can use a wildcard to allow assuming any role in your account: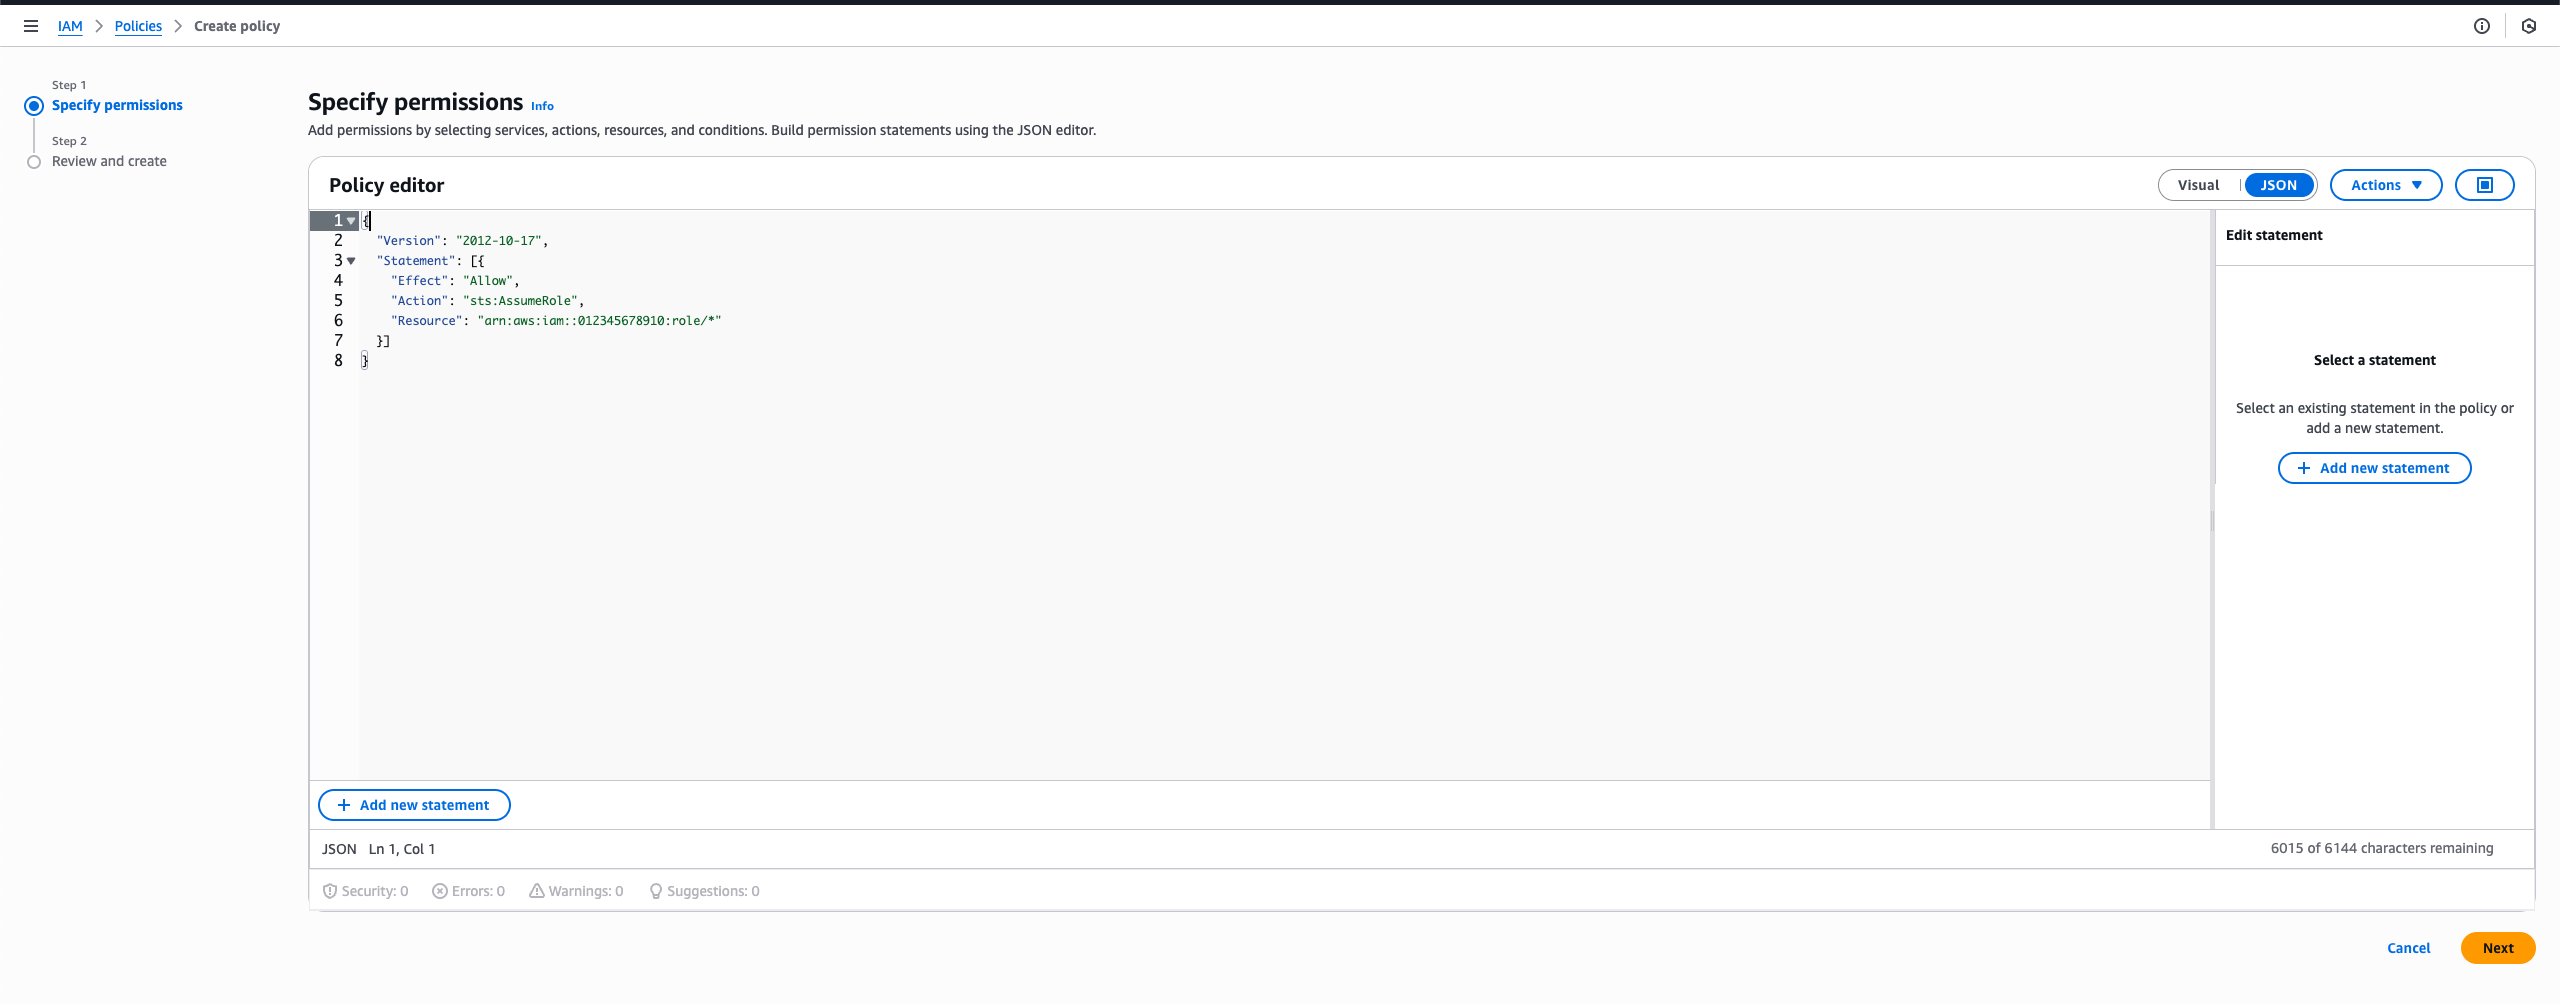
For more granular control: If you want to restrict which roles the Resource Role can assume, replace the wildcard (
/*) with a more specific pattern. For example:arn:aws:iam::<YOUR_ACCOUNT_ID>:role/pam-*to only allow roles with thepam-prefixarn:aws:iam::<YOUR_ACCOUNT_ID>:role/infisical-*to only allow roles with theinfisical-prefix
2
Create the Resource Role with Trust Policy
Create an IAM role (e.g., 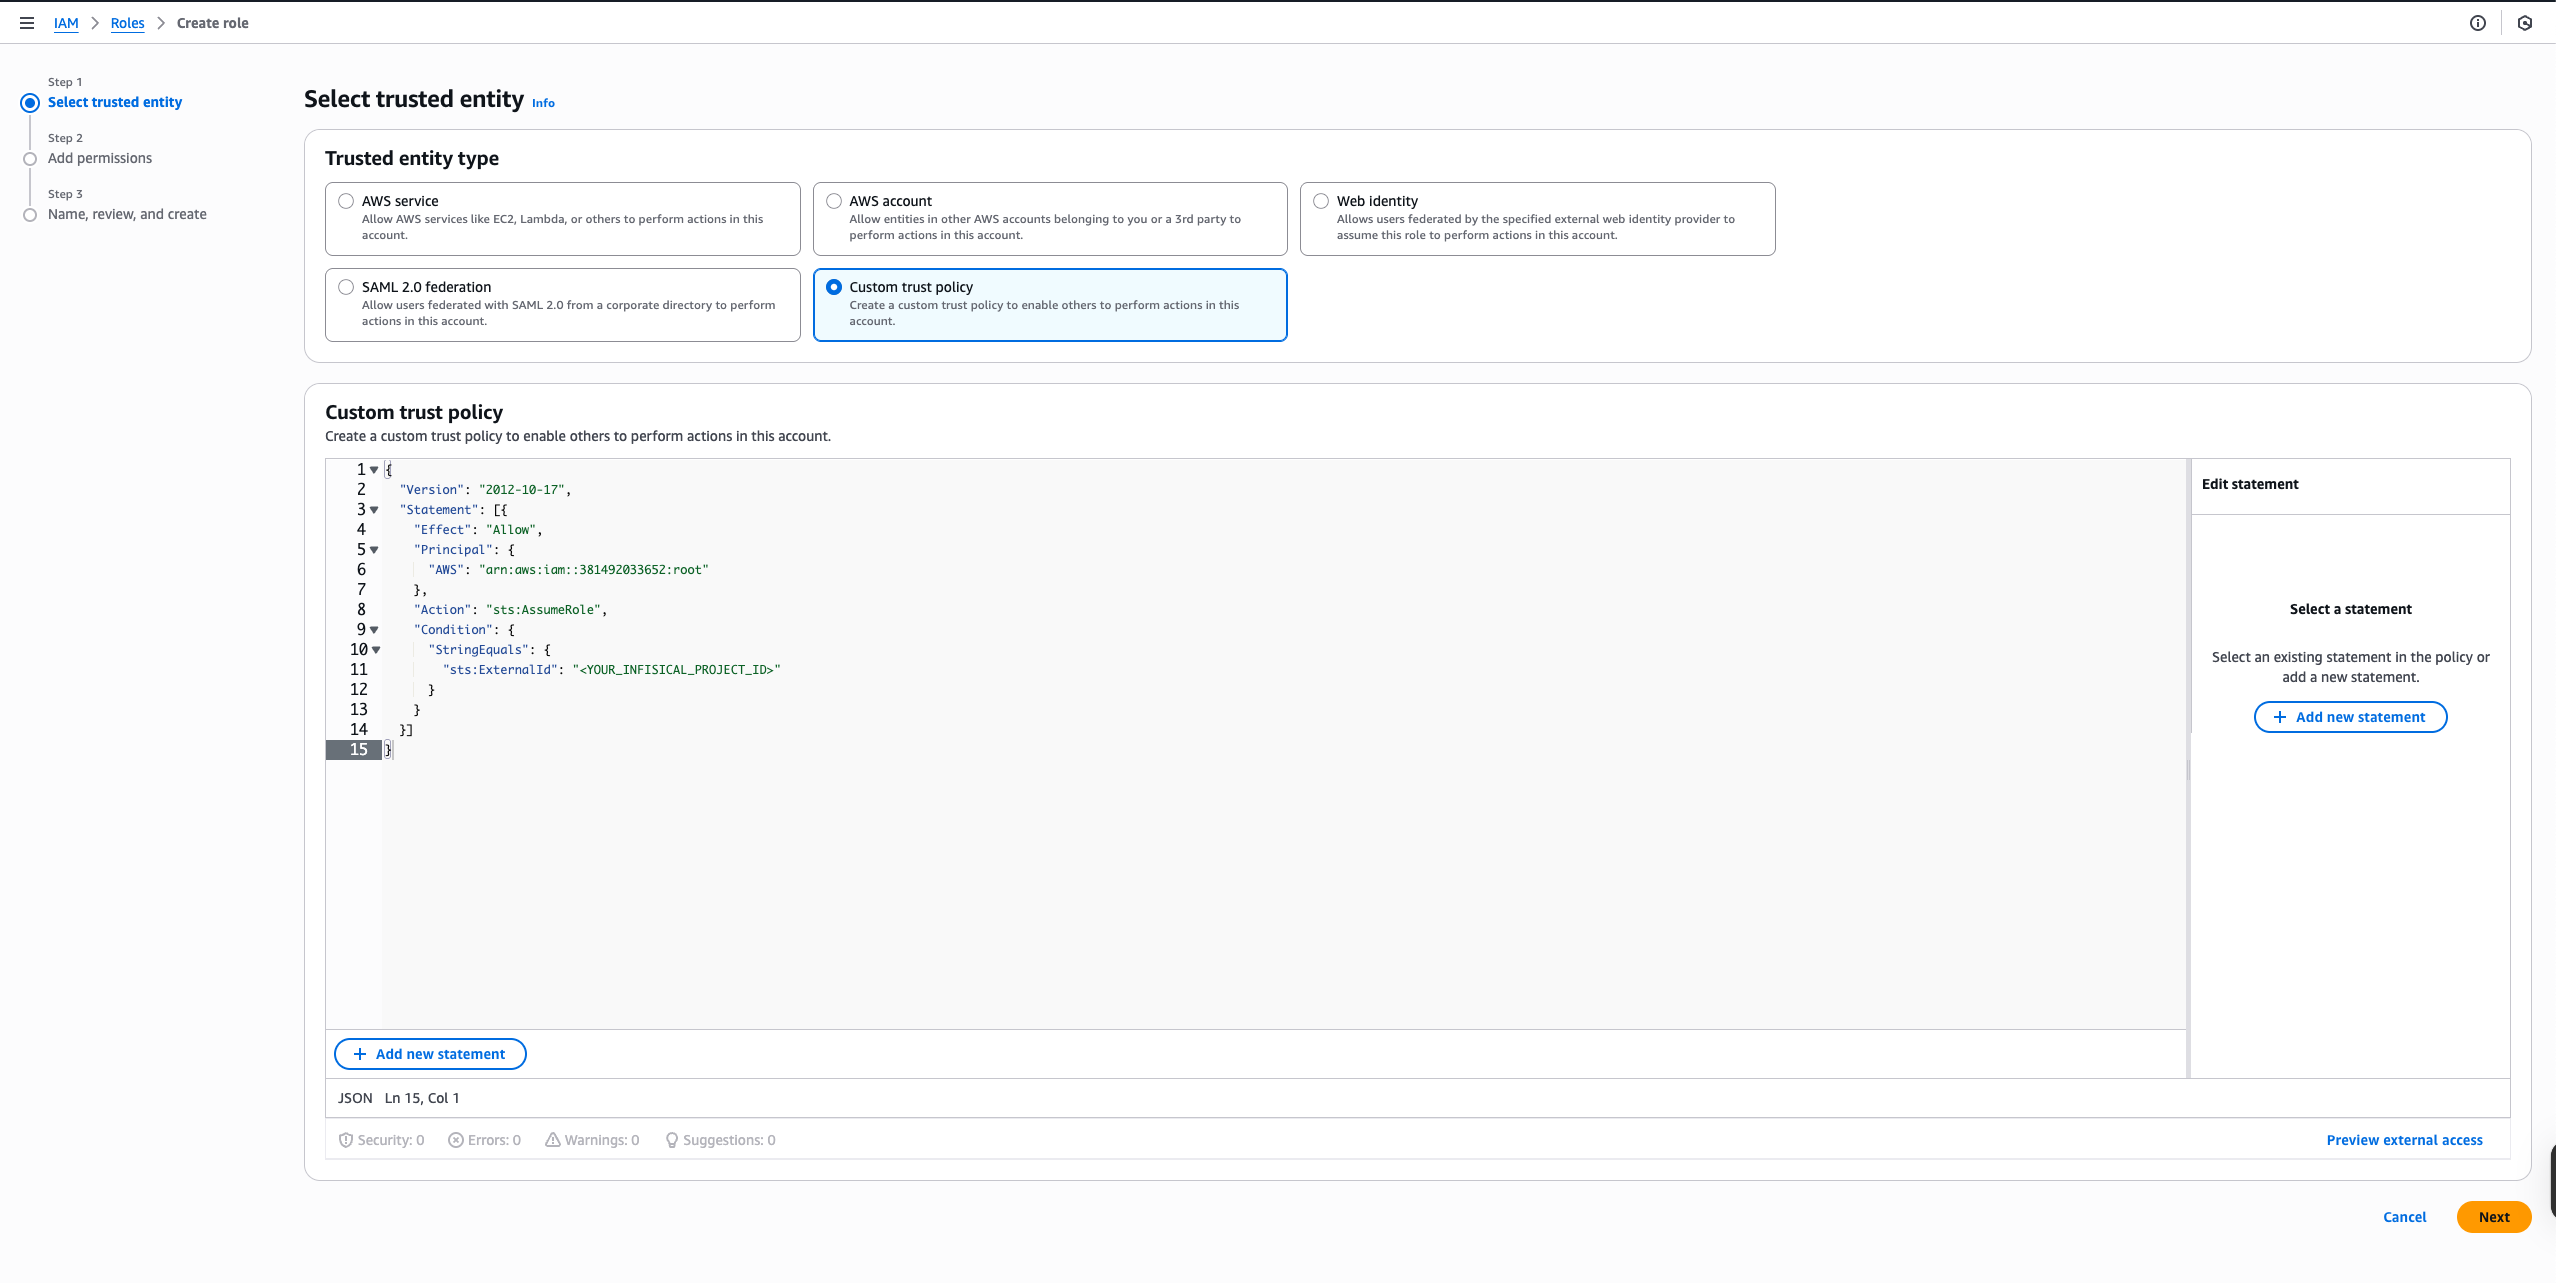
 Infisical AWS Account IDs:
InfisicalResourceRole) with:- The permissions policy from the previous step attached
- The following trust policy:
Infisical AWS Account IDs:| Region | Account ID |
|---|---|
| US | 381492033652 |
| EU | 345594589636 |
For Dedicated Instances: Your AWS account ID differs from the ones listed above. Please contact Infisical support to obtain your dedicated AWS account ID.
For Self-Hosted Instances: Use the AWS account ID where your Infisical instance is deployed. This is the account that hosts your Infisical infrastructure and will be assuming the Resource Role.
3
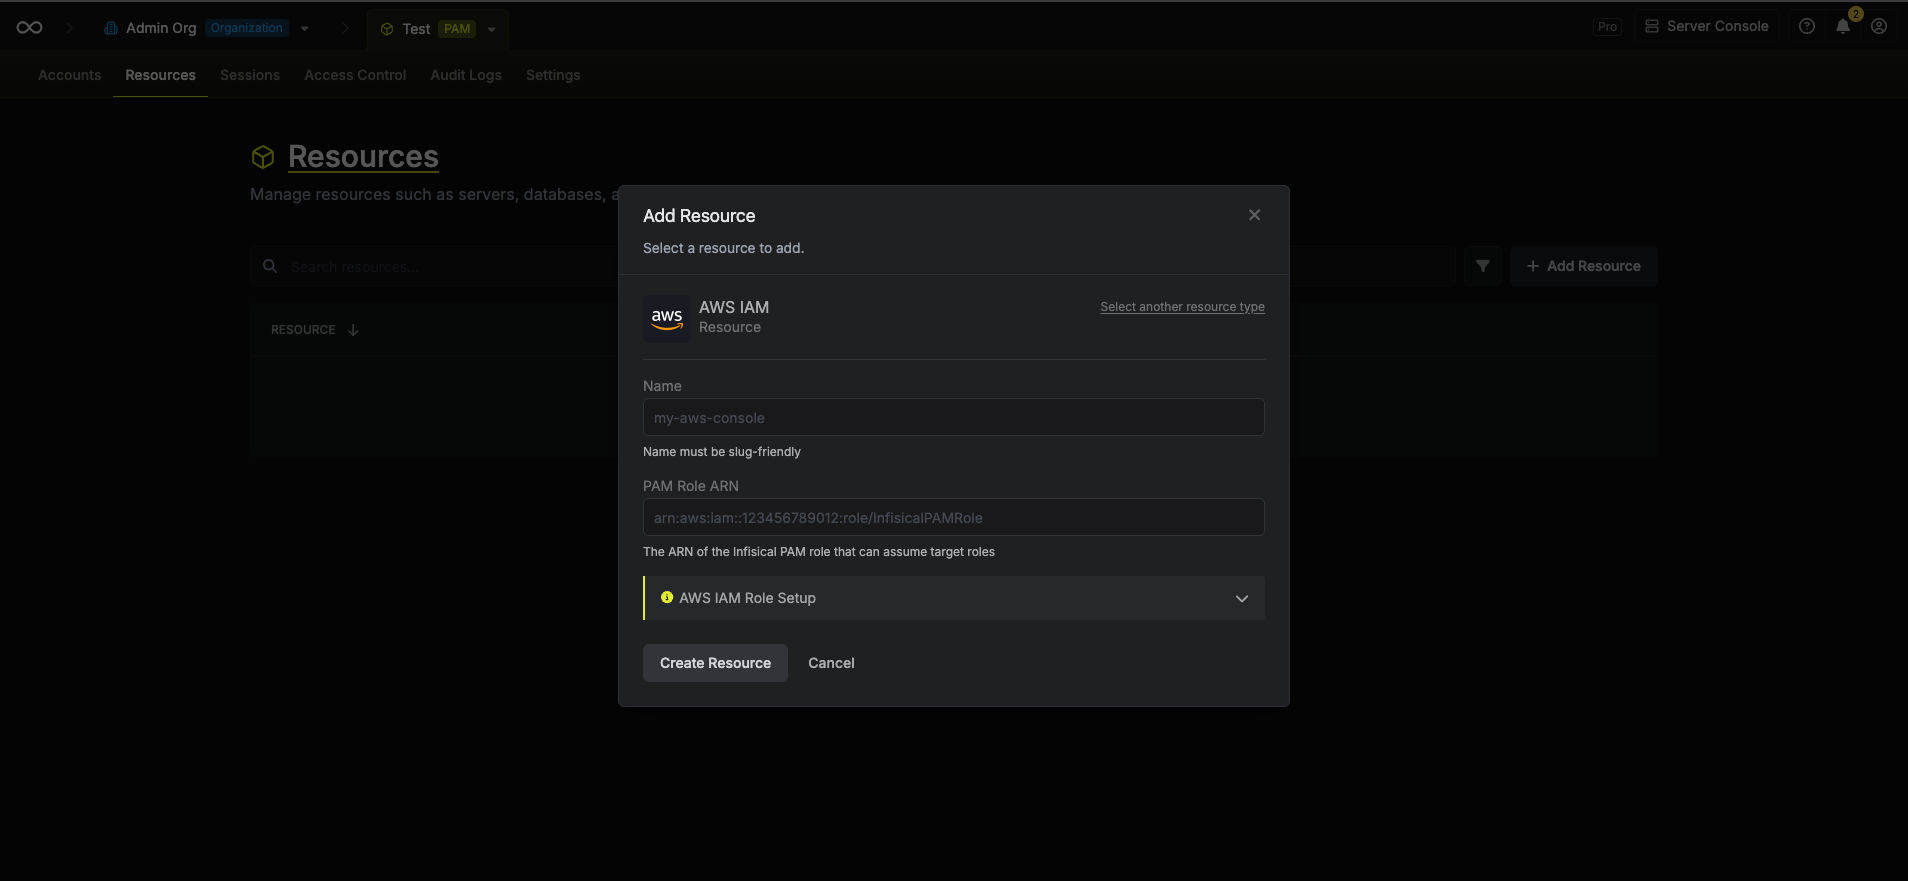
Create the Resource in Infisical
- Navigate to your PAM project and go to the Resources tab
- Click Add Resource and select AWS IAM
-
Enter a name for the resource (e.g.,
production-aws) -
Enter the Resource Role ARN - the ARN of the role you created in the previous step
- The trust policy has the correct Infisical AWS account ID
- The External ID matches your project ID
- The role ARN is correct
Create PAM Accounts
A PAM Account represents a specific Target Role that users can request access to. You can create multiple accounts per resource, each pointing to a different target role with different permission levels.1
Create the Target Role Trust Policy
Each target role needs a trust policy that allows your Resource Role to assume it: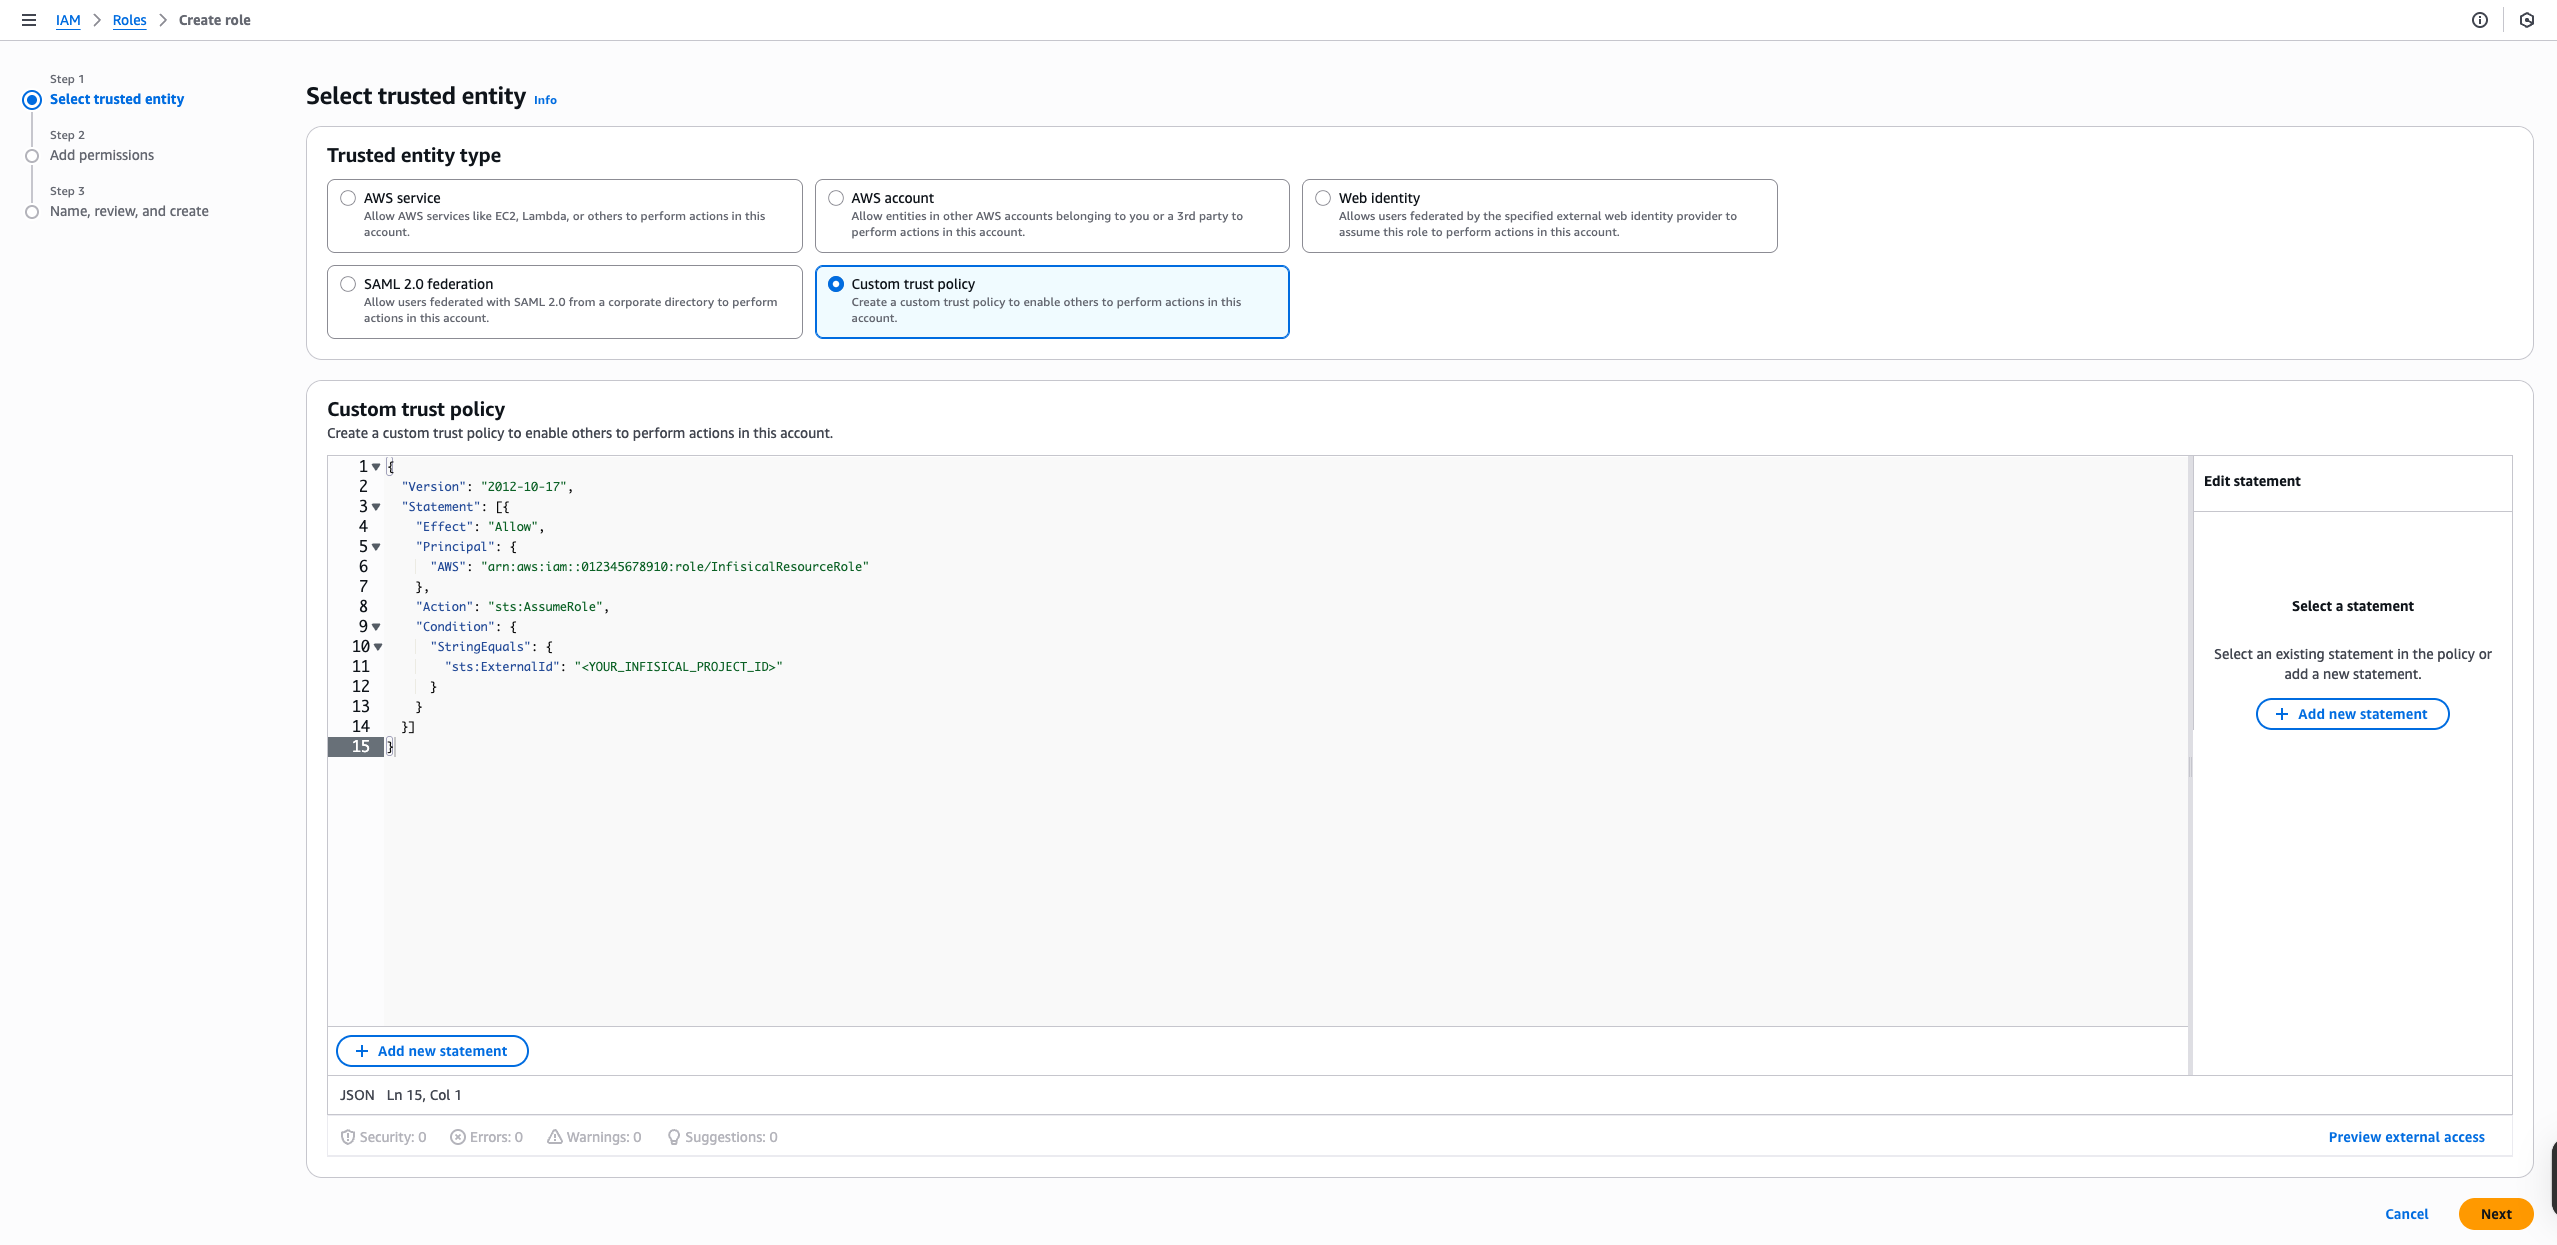
2
Create the Account in Infisical
- Navigate to the Accounts tab in your PAM project
- Click Add Account and select the AWS IAM resource you created
-
Fill in the account details:
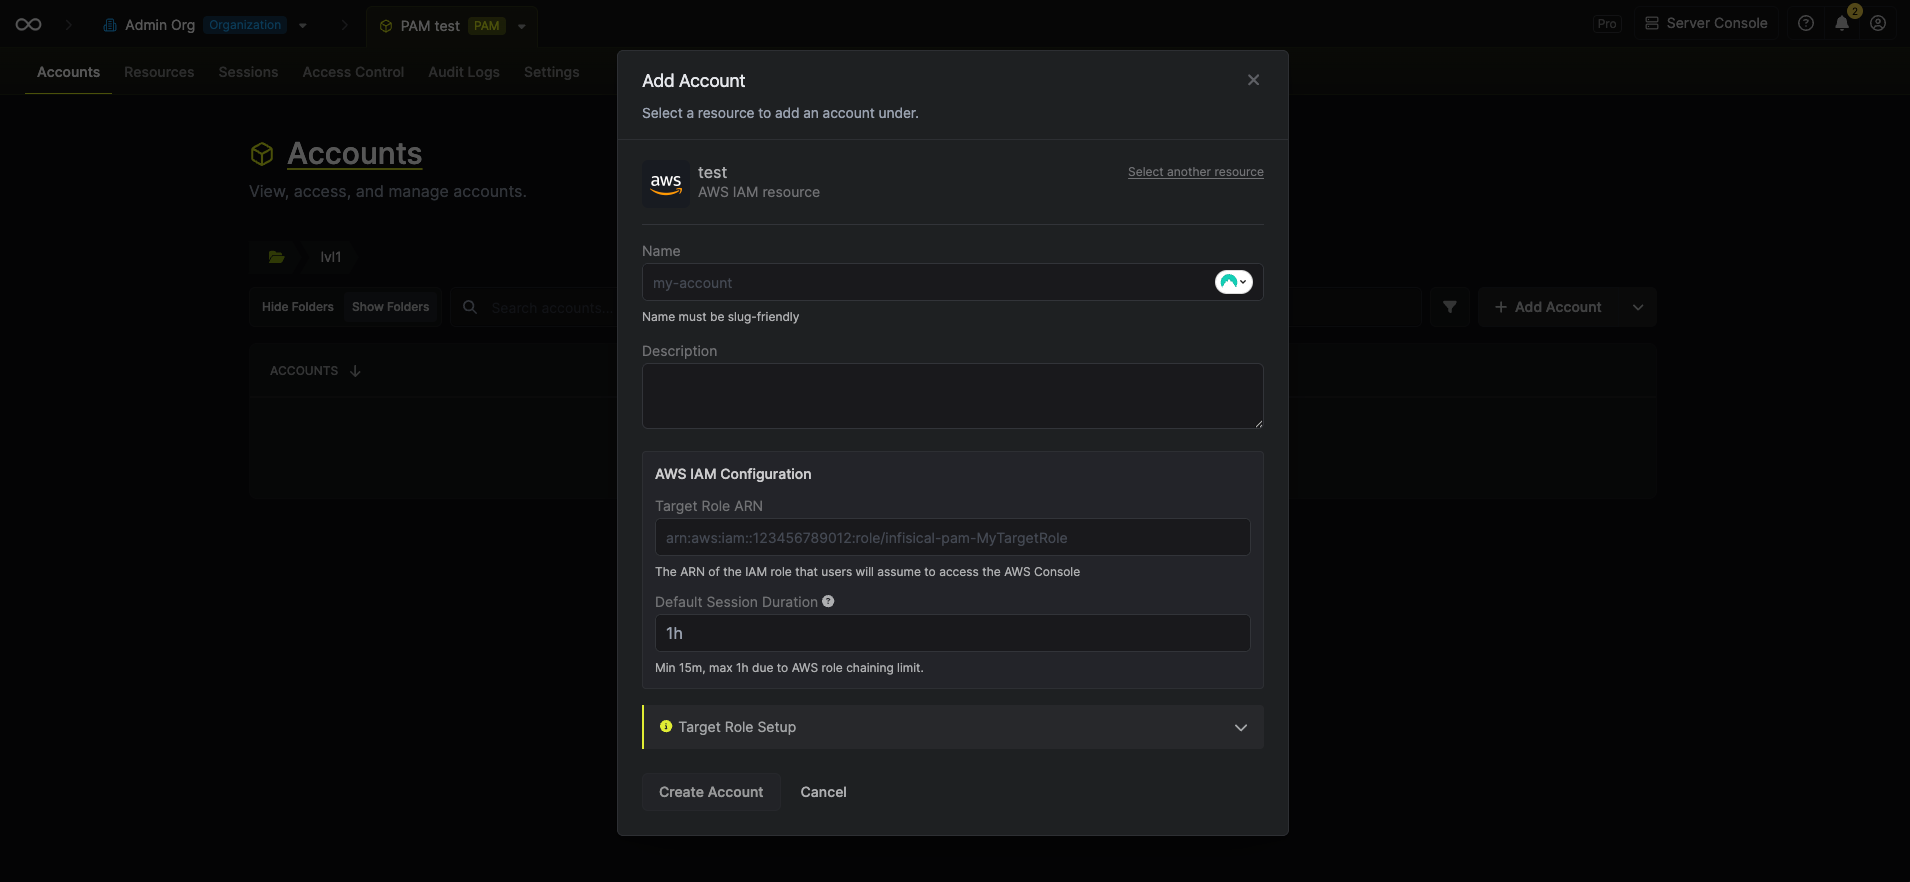
A friendly name for this account (e.g.,
readonly, admin, developer)Optional description of what this account is used for
The ARN of the IAM role users will assume (e.g.,
arn:aws:iam::123456789012:role/pam-readonly)Session duration using human-readable format (e.g.,
15m, 30m, 1h). Minimum 15 minutes, maximum 1 hour.Access the AWS Console
Once your resource and accounts are configured, users can request access through Infisical: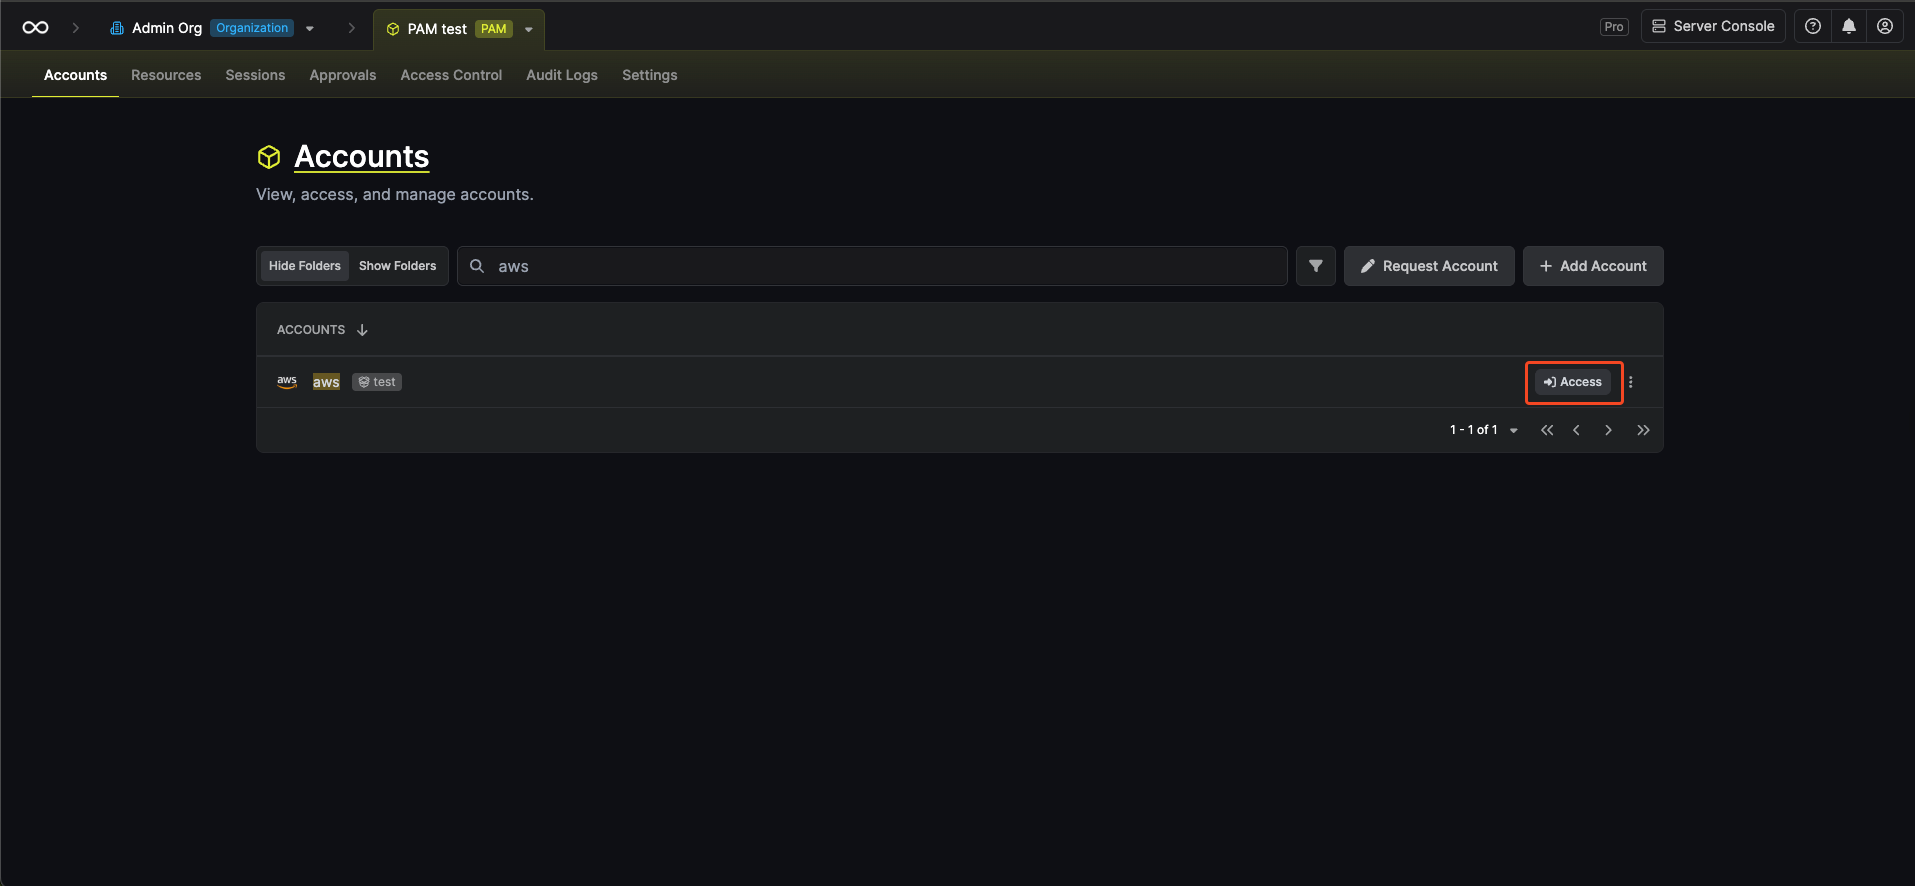
1
Navigate to Accounts
Go to the Accounts tab in your PAM project.
2
Find the Account
Find the AWS Console account you want to access.
3
Request Access
Click the Access button.Infisical will:
- Assume the Resource Role using your project’s External ID
- Assume the Target Role using role chaining
- Generate a federated sign-in URL
- Open the AWS Console in a new browser tab