Introducing Machine Identities

Introduction
Traditionally, Infisical offered two methods to authenticate with its REST API that is via Service Token or API Key. The former was designed for machines to manage secrets in Infisical and therefore was scoped to projects, environments, and path(s) within them. Meanwhile, the latter was meant for developers to access the platform as themselves with full programmatic access to the API in case they wanted to perform any additional automations.
While both authentication methods served their use-cases well, they also had many shortcomings:
- In order to automate both organization-level and project-level resources, you often needed to use both Service Tokens and API Keys in tandem.
- To access secrets across multiple projects, you needed to create multiple service tokens, one for each project.
- Both API Keys and Service Tokens were designed as static credentials with little security configuration used to access the API.
Seeing room for improvement, the team reimagined how authentication with the API should work. Today, we're announcing a more complete machine authentication method: Identities. With identities, you can apply the same permission system used for users but to provision your machines granular access to the full REST API.
What are identities?
At its core, an identity is an entity that you can create in an Infisical organization to represent a workload or application that requires access to the Infisical API. Once created, an entity can be added to projects
The concept is similar to that of an IAM user in AWS or a service account in GCP.
Identities improve upon the user experience and security foundation that was built for users. With identities, you get the same role-based permission system that spans the fuller REST API; this means that you can create and assign a role, containing granular permissions to both organization-level and project-level resources, to an identity. You also get a revised authentication system where each identity is given its own authentication credential set that can be used to perform a login operation to obtain a short-lived access token needed to access the API: a Client ID and Client Secret - This is termed Universal Authentication (UA).
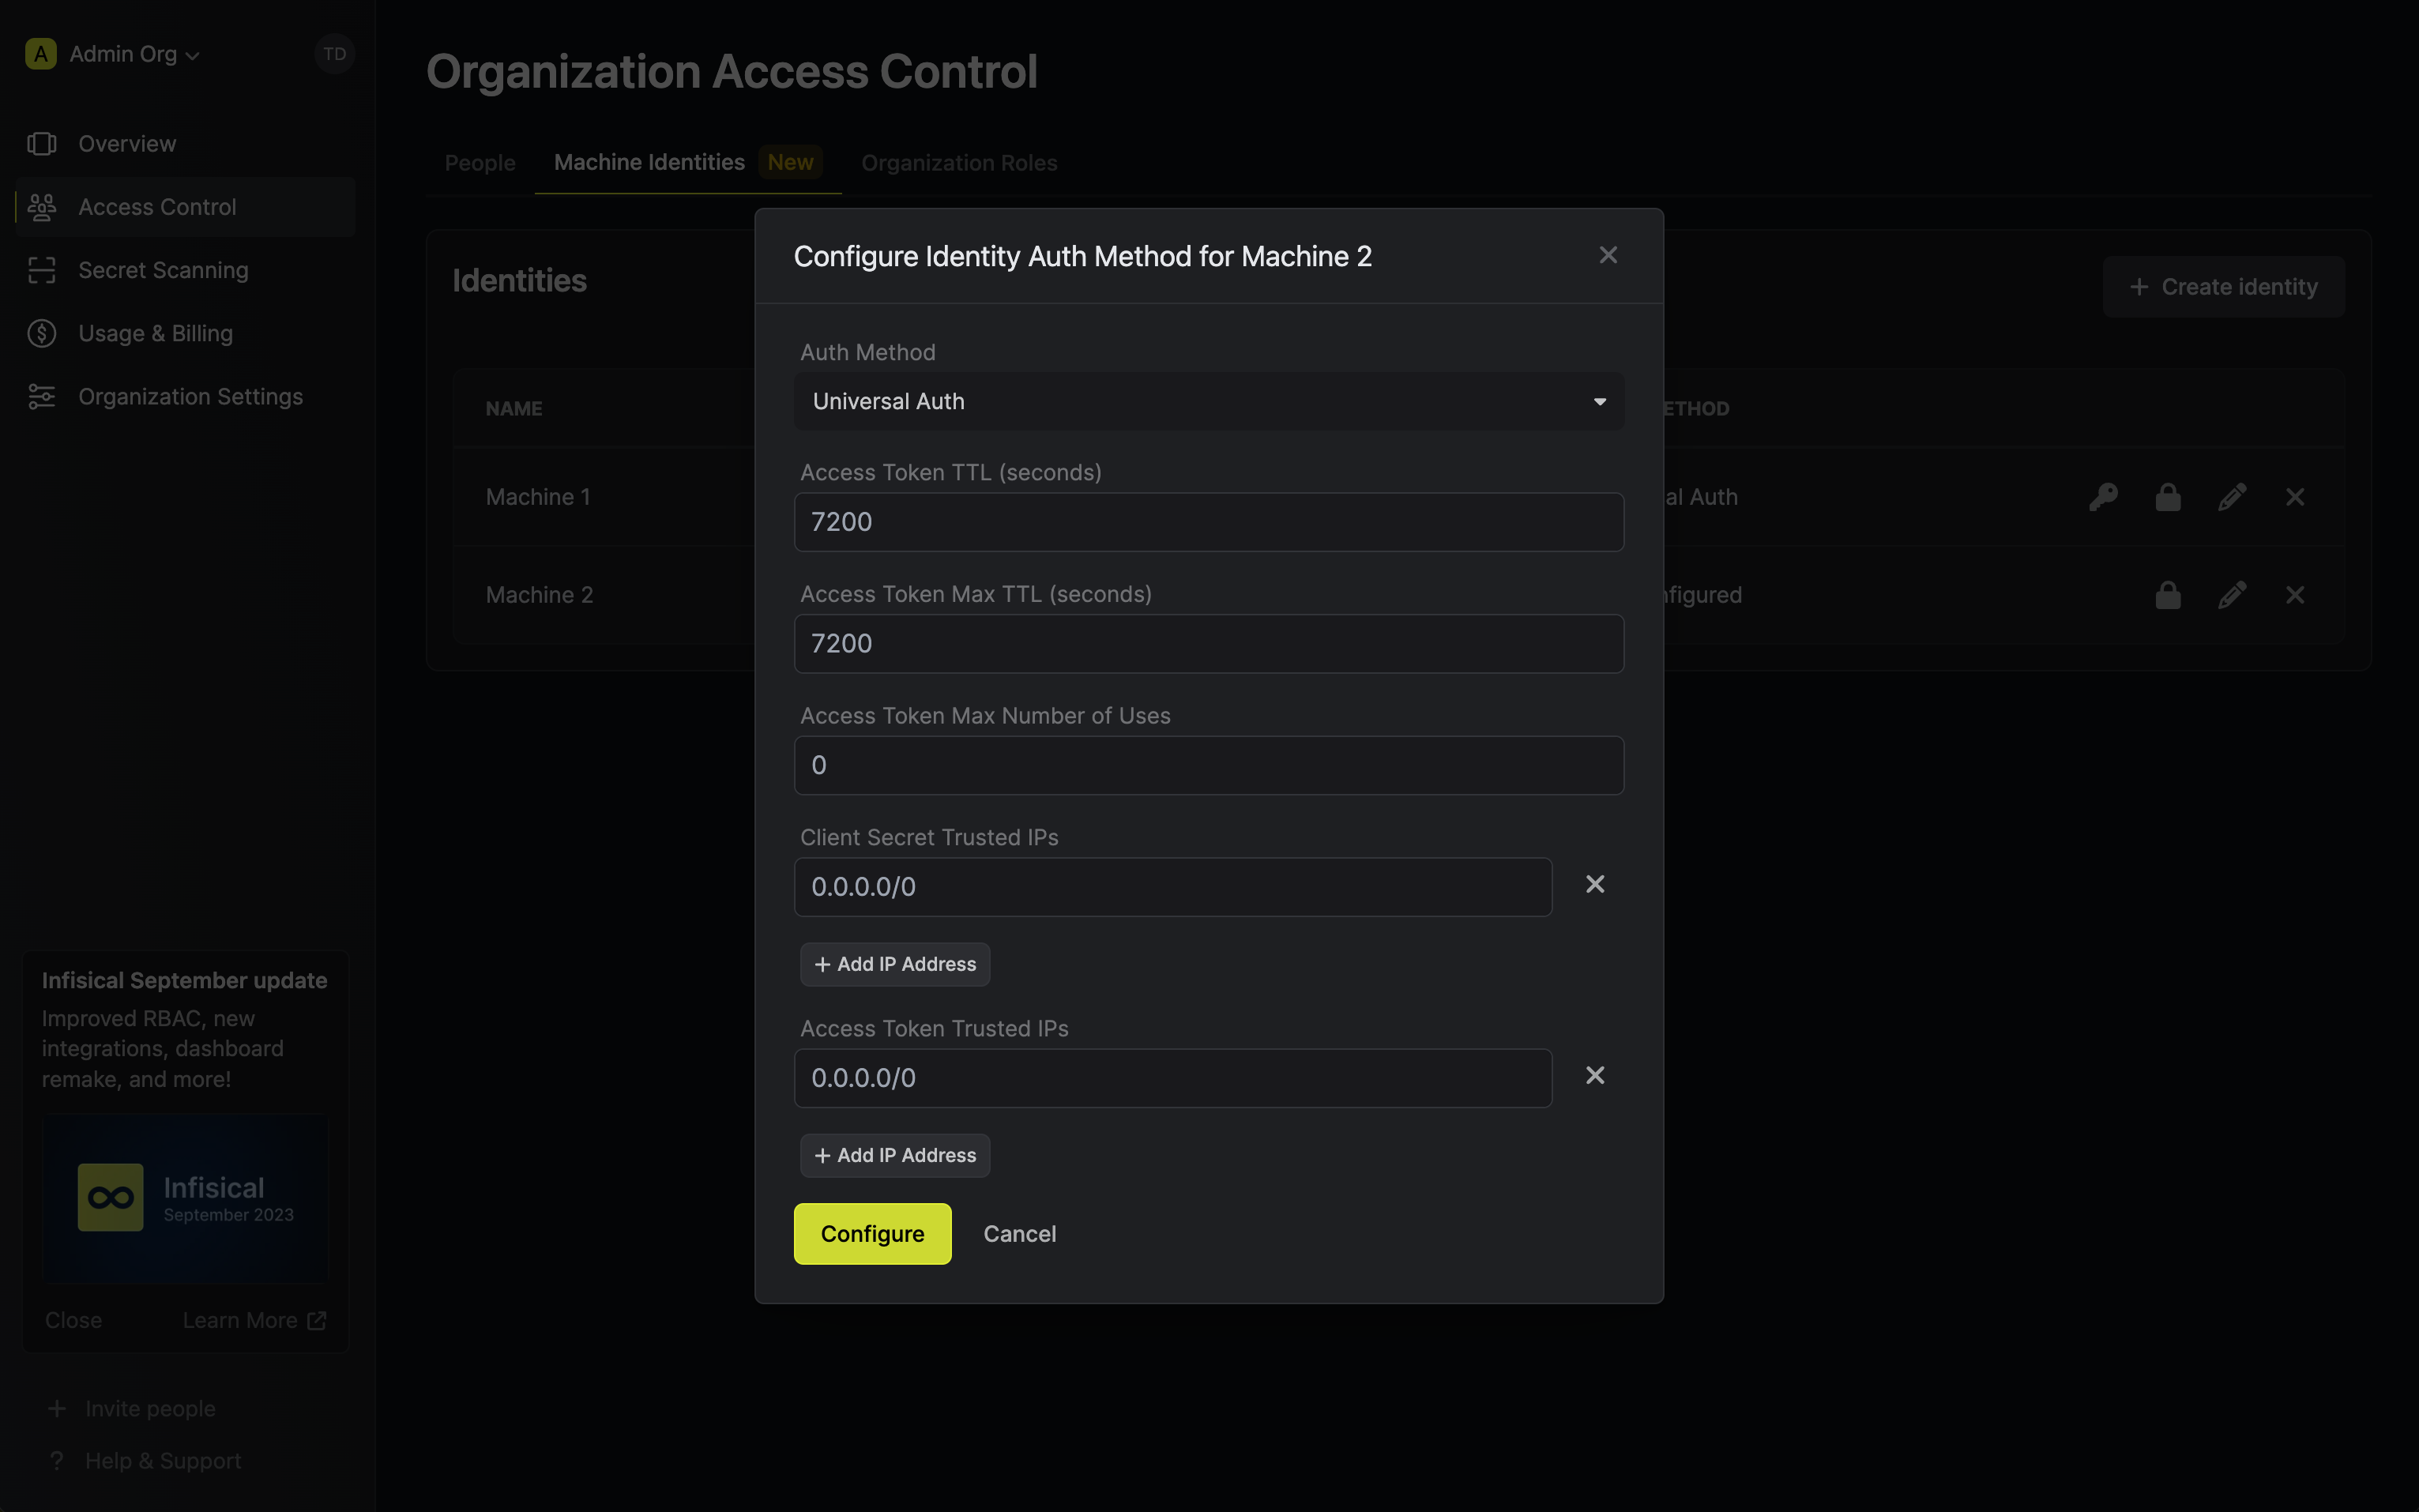
Beyond these properties, identities introduces a slew of new security configuration for you to tighten your secret management workflows on a as-needed basis: restrictions on the number of times that the credential pair can be used, TTLs for both credential pairs and access tokens, and token-bound IP allowlisting for specific IPs or CIDR ranges.
Overall, identities offer a reimagined user experience and robust security workflow configuration for interfacing with the API. With that, you're strongly encouraged to switch from using Service Tokens and API Keys to identities.
How can I get started with identities?
Using identities to manage your secrets involves four steps: creating an identity, creating a client secret for it, adding it to a project, and using it to access the API. In this section, we go over how to create an identity and use it to authenticate with the API.
Creating an identity
To get started with identities, head to Organization Settings > Access Control > Machine Identities and press Create identity.
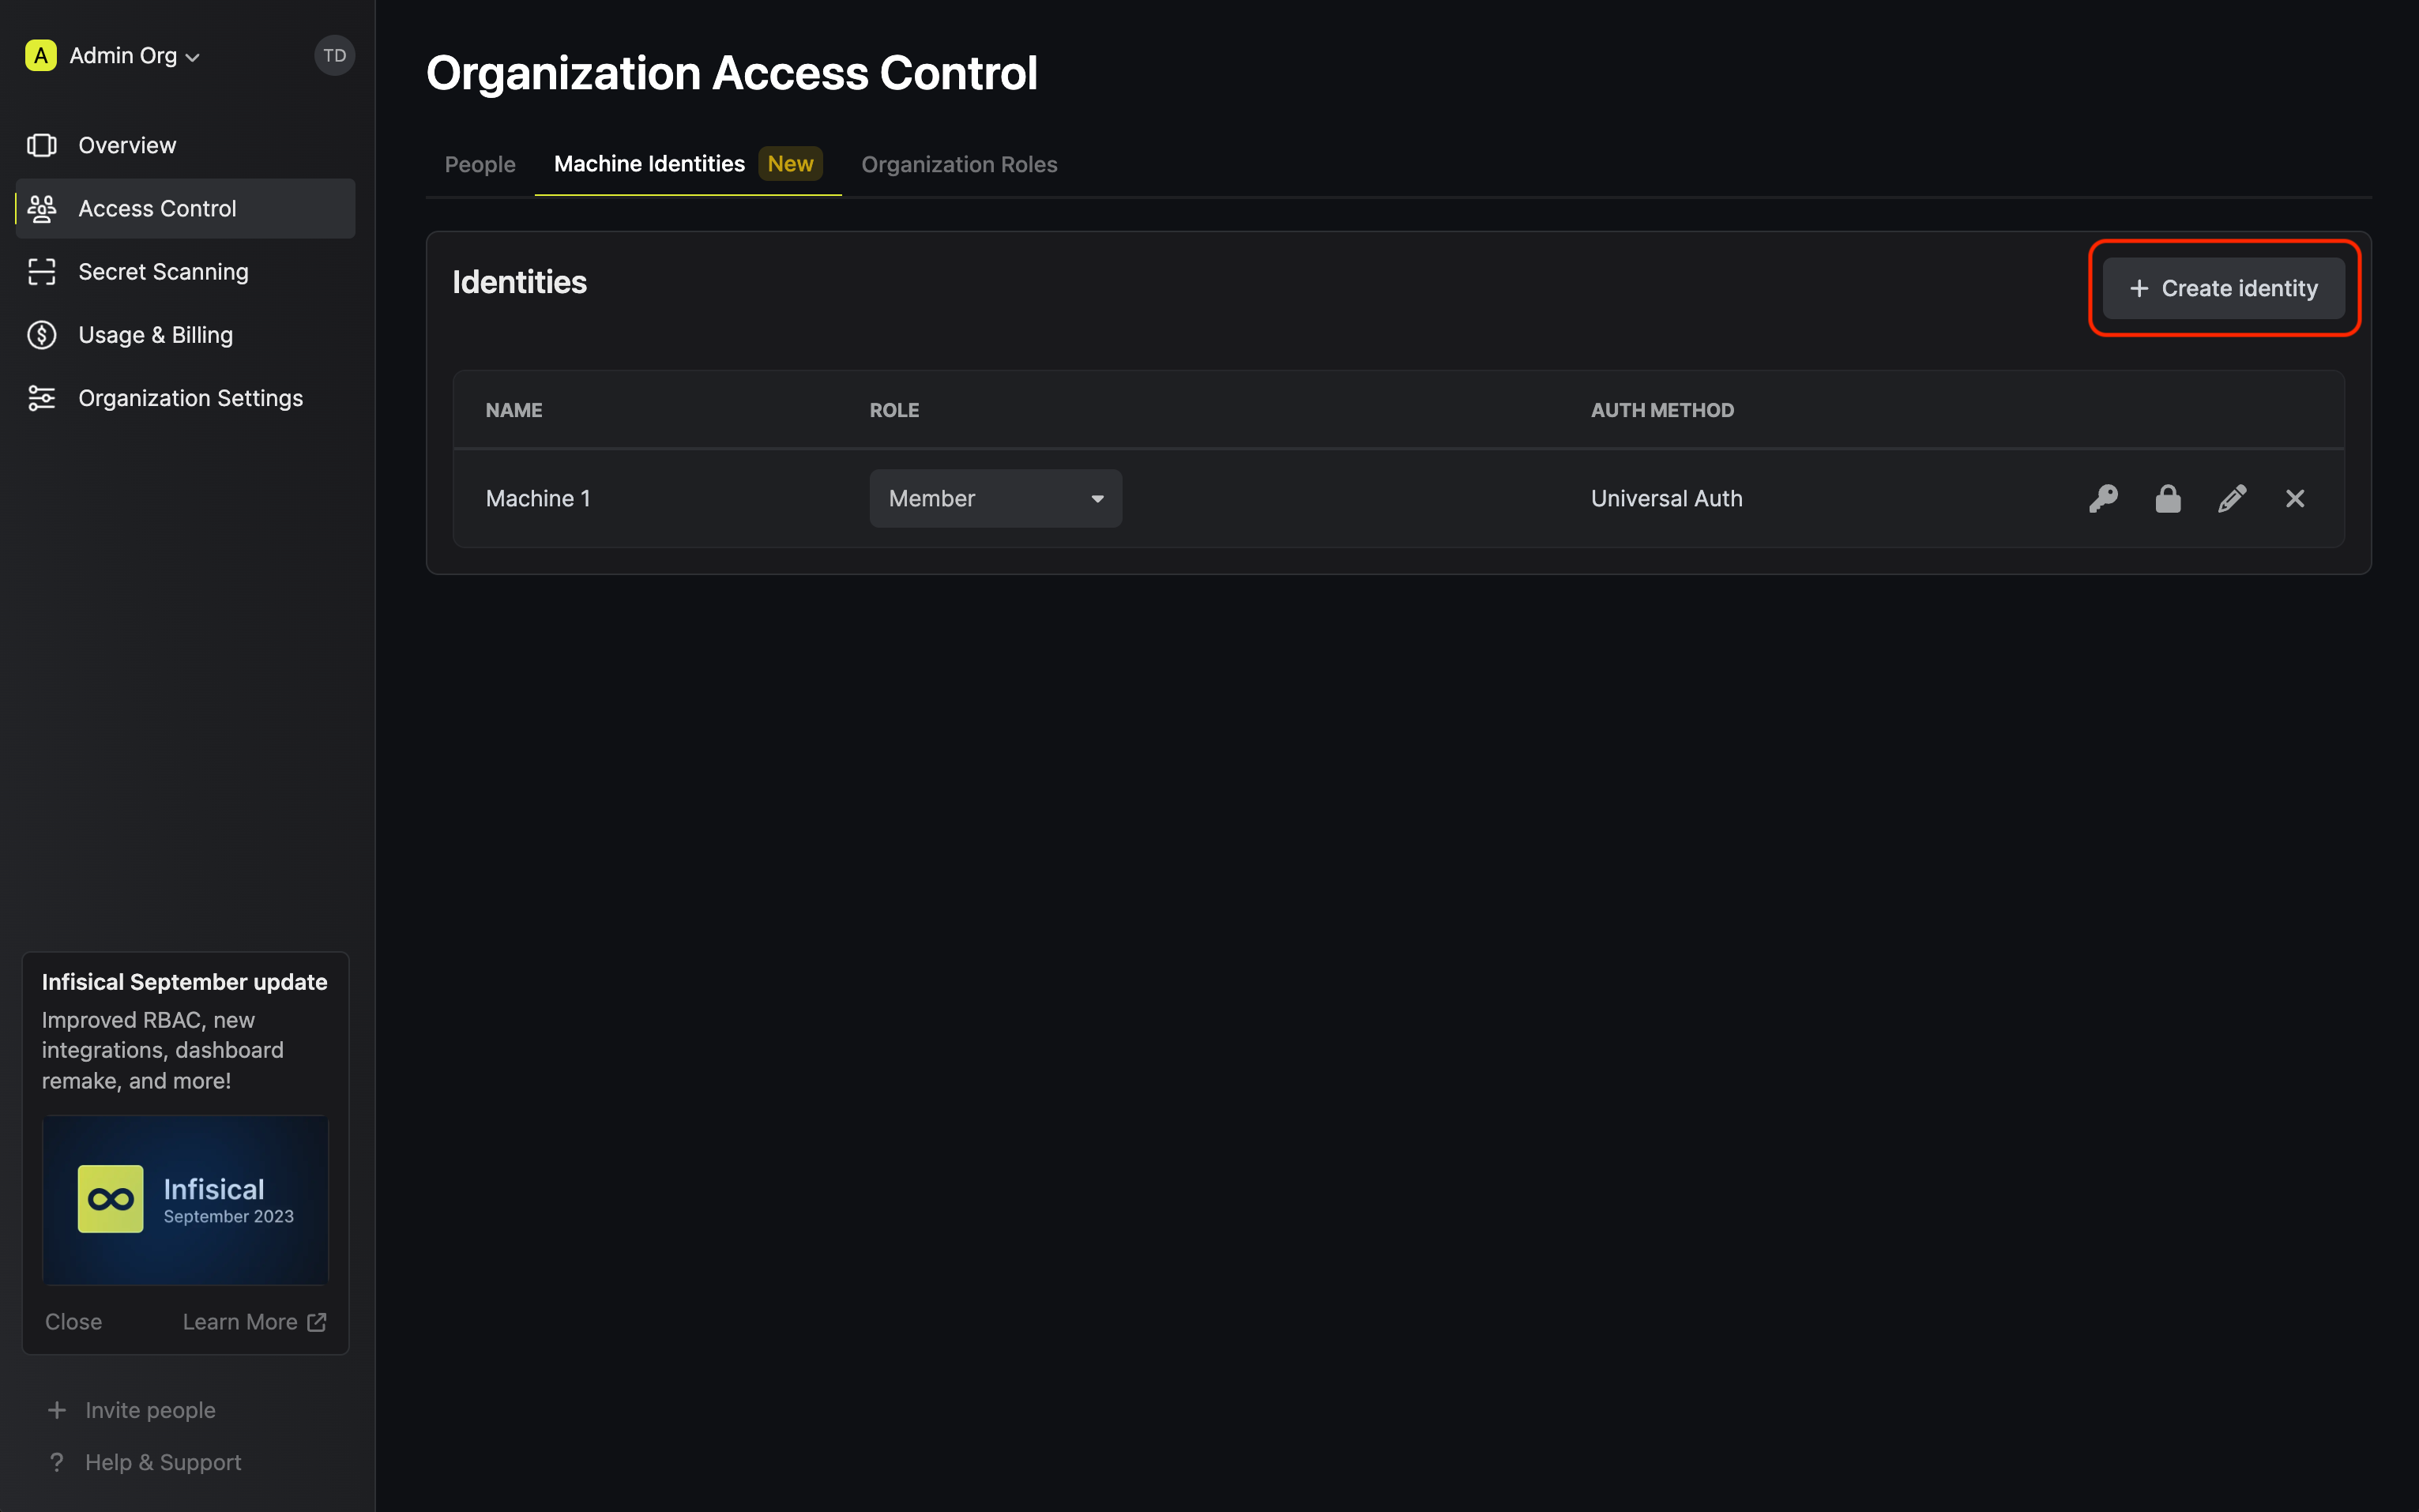
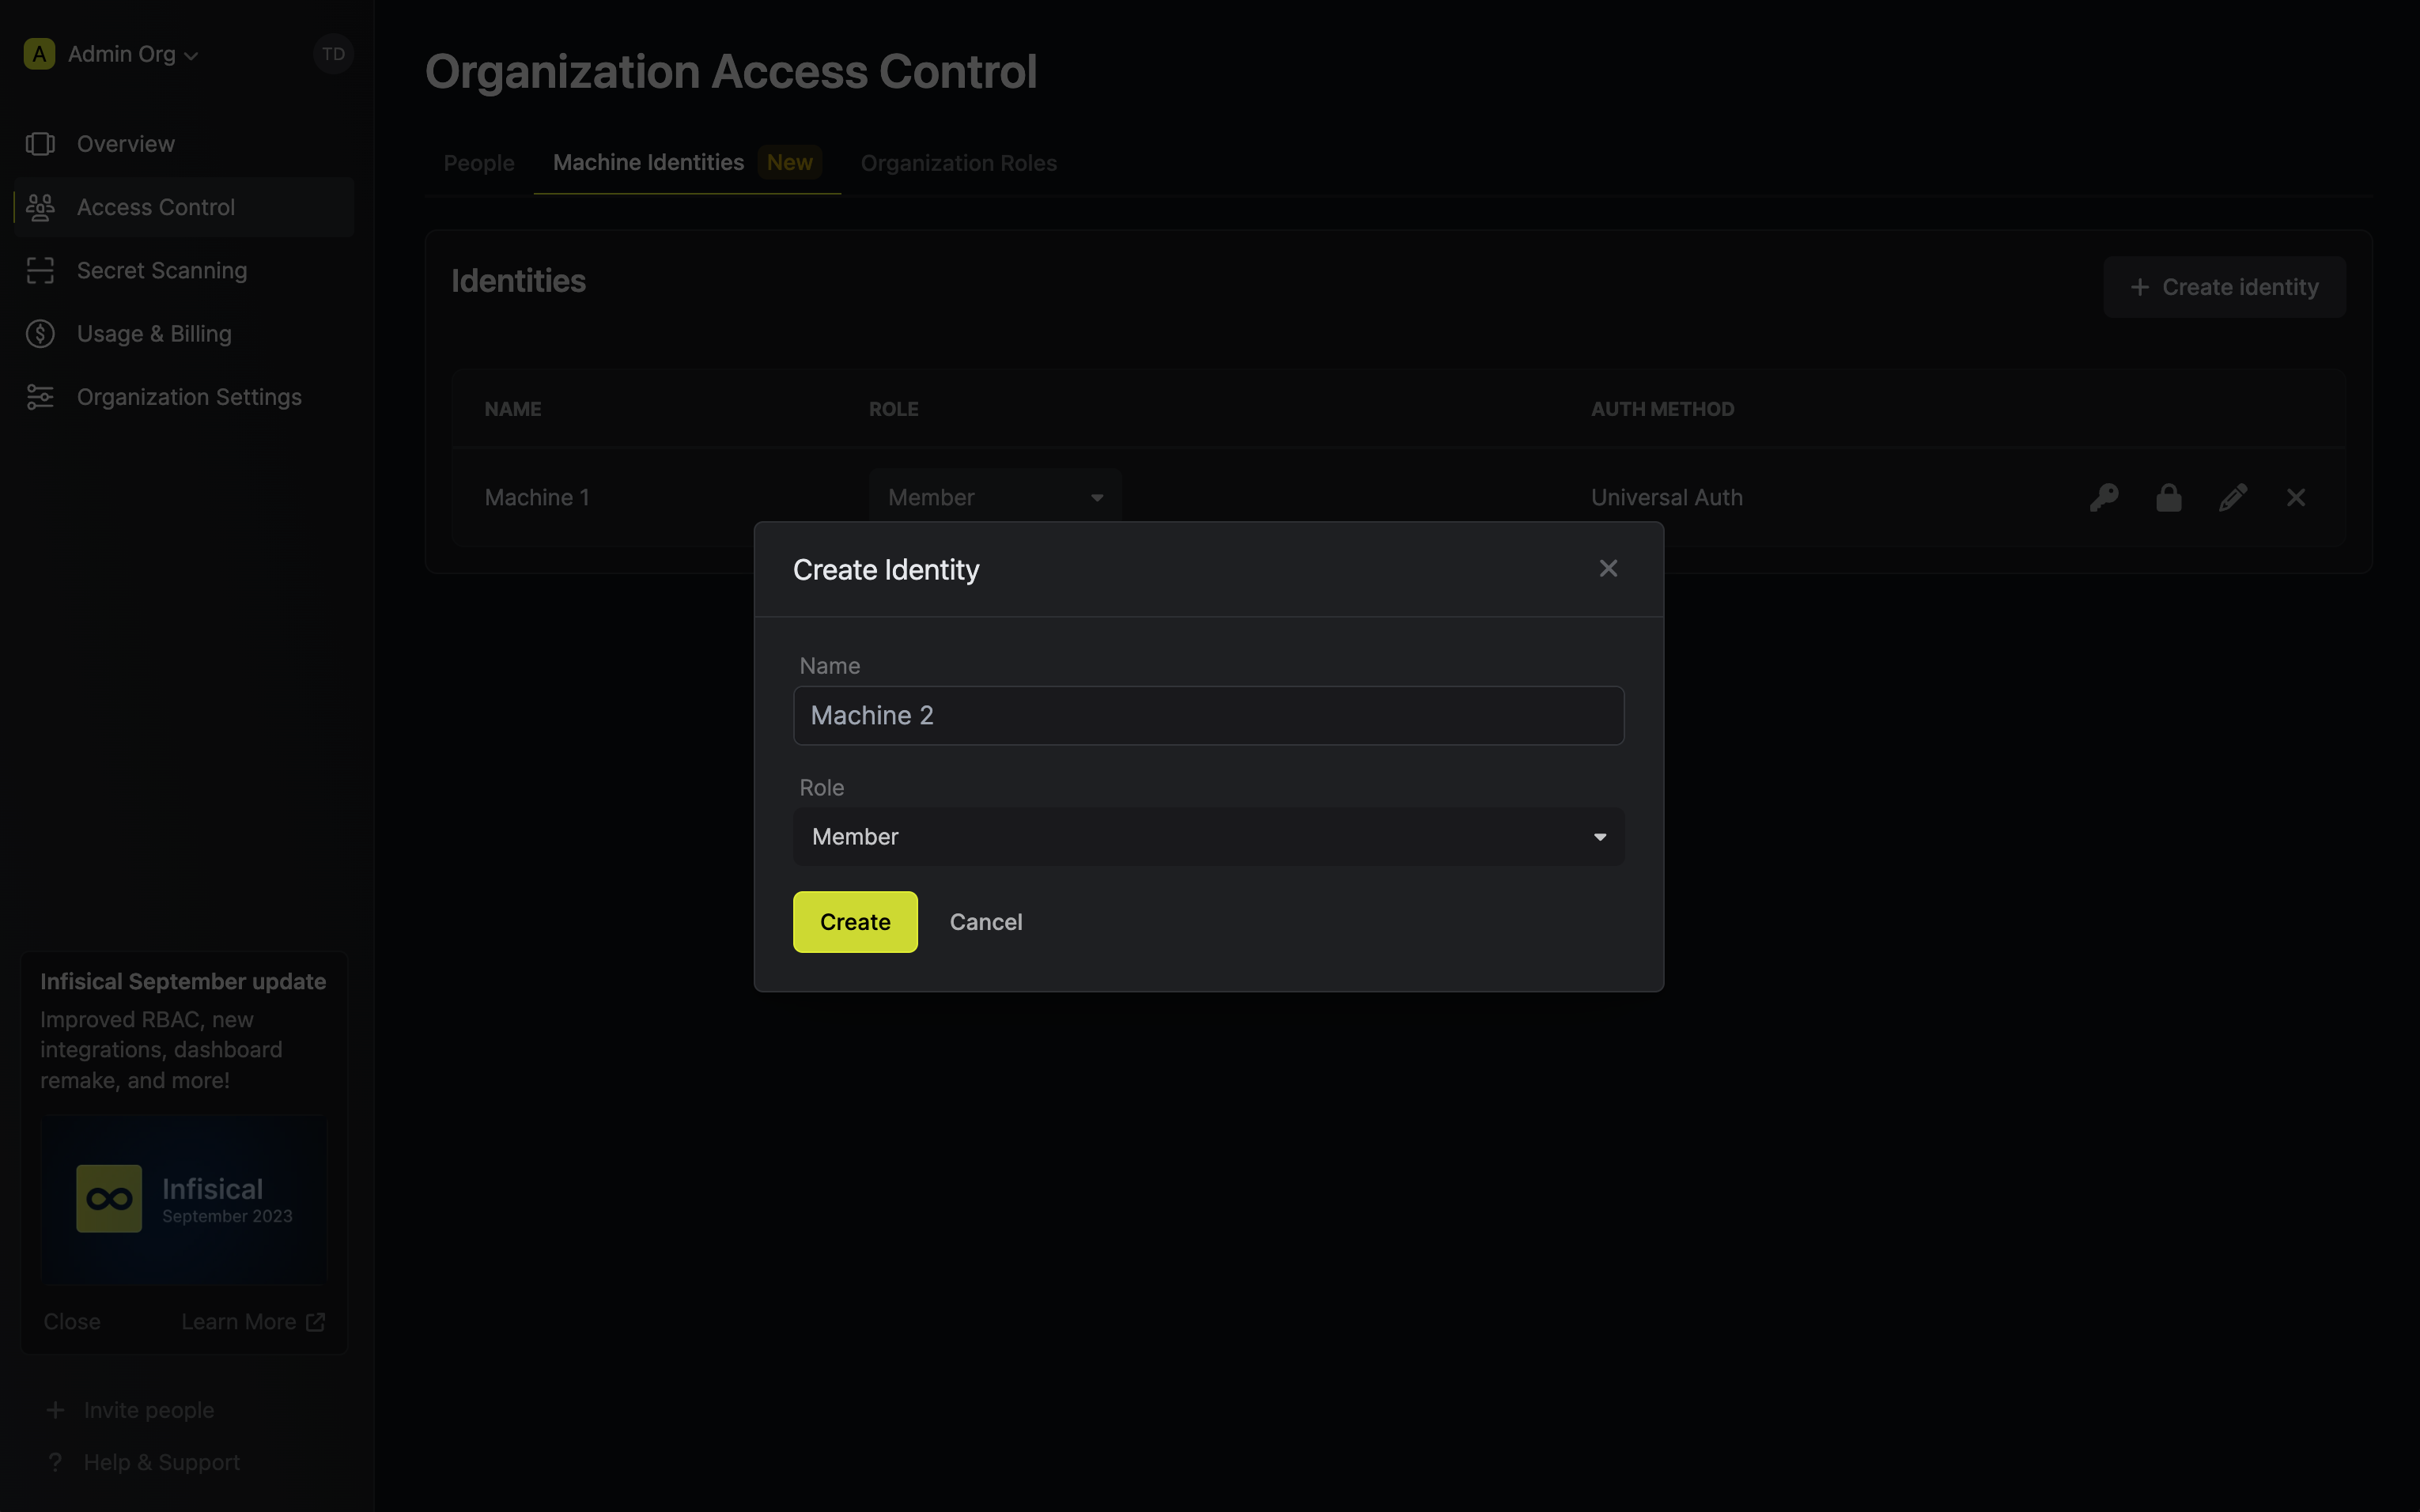
When creating an identity, you specify an organization-level role for it to assume; you can configure roles in Organization Settings > Access Control > Organization Roles.
Once you've created an identity, you'll be prompted to configure the Universal Auth authentication method for it.
Creating a Client Secret
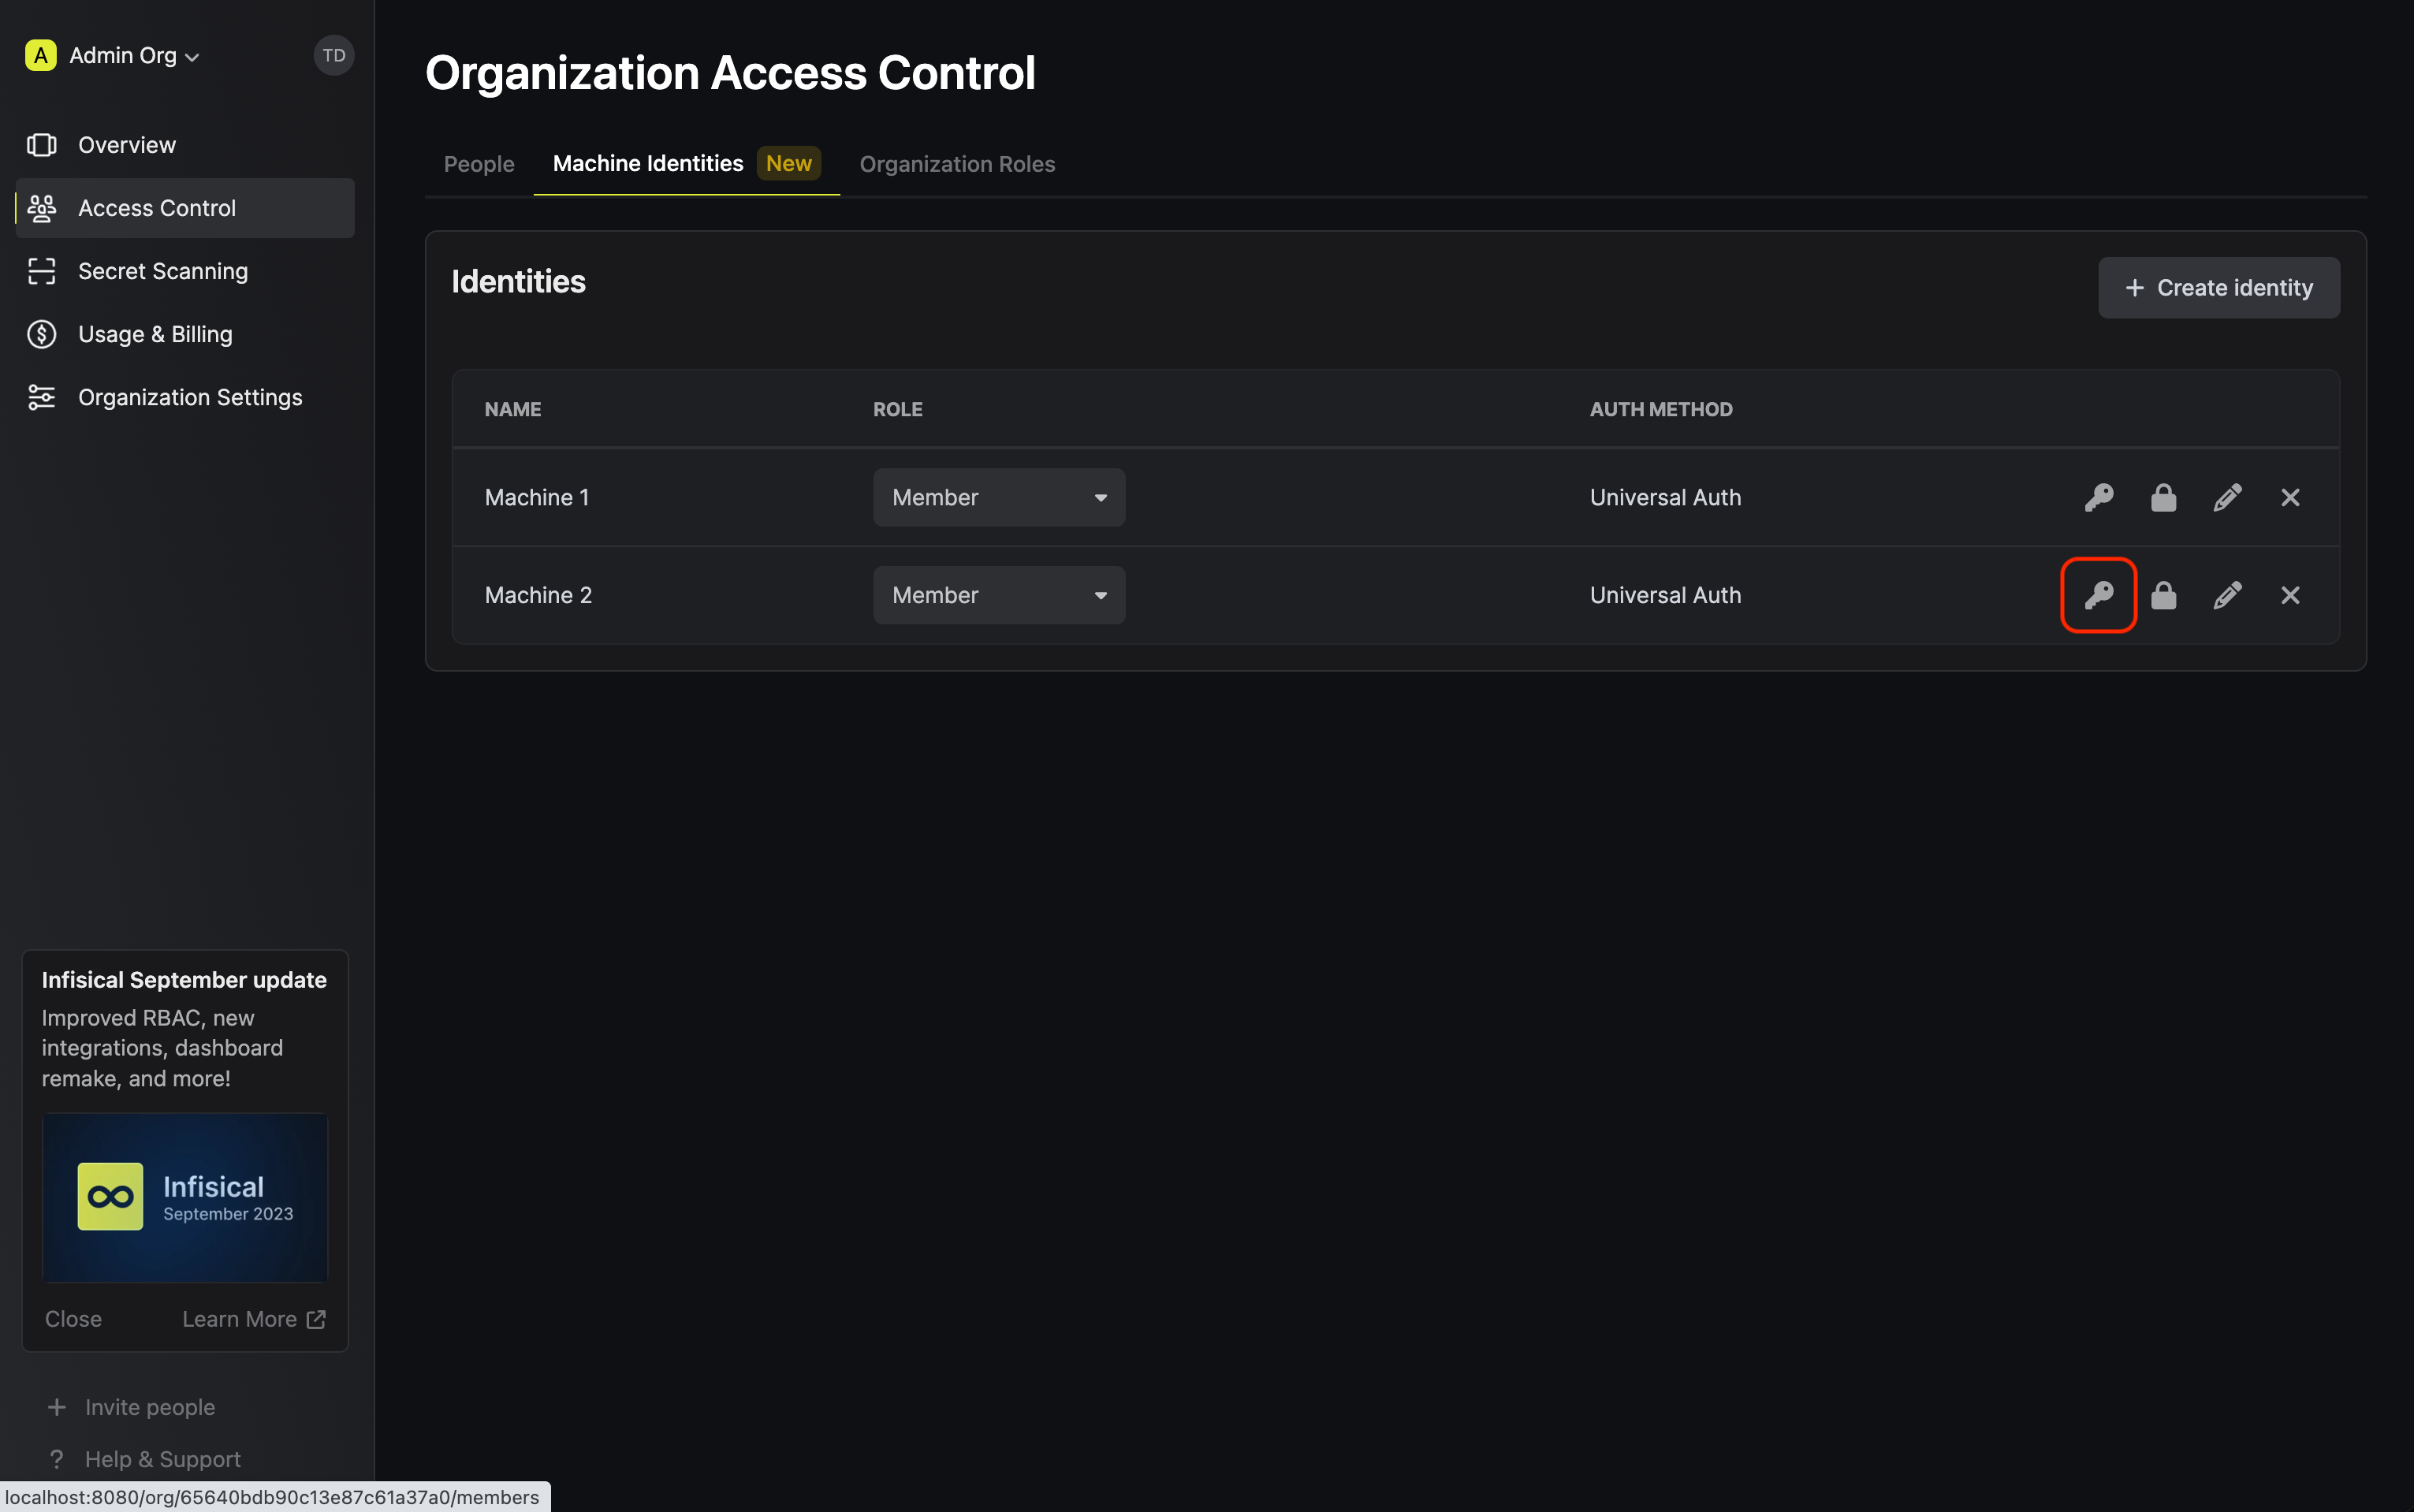
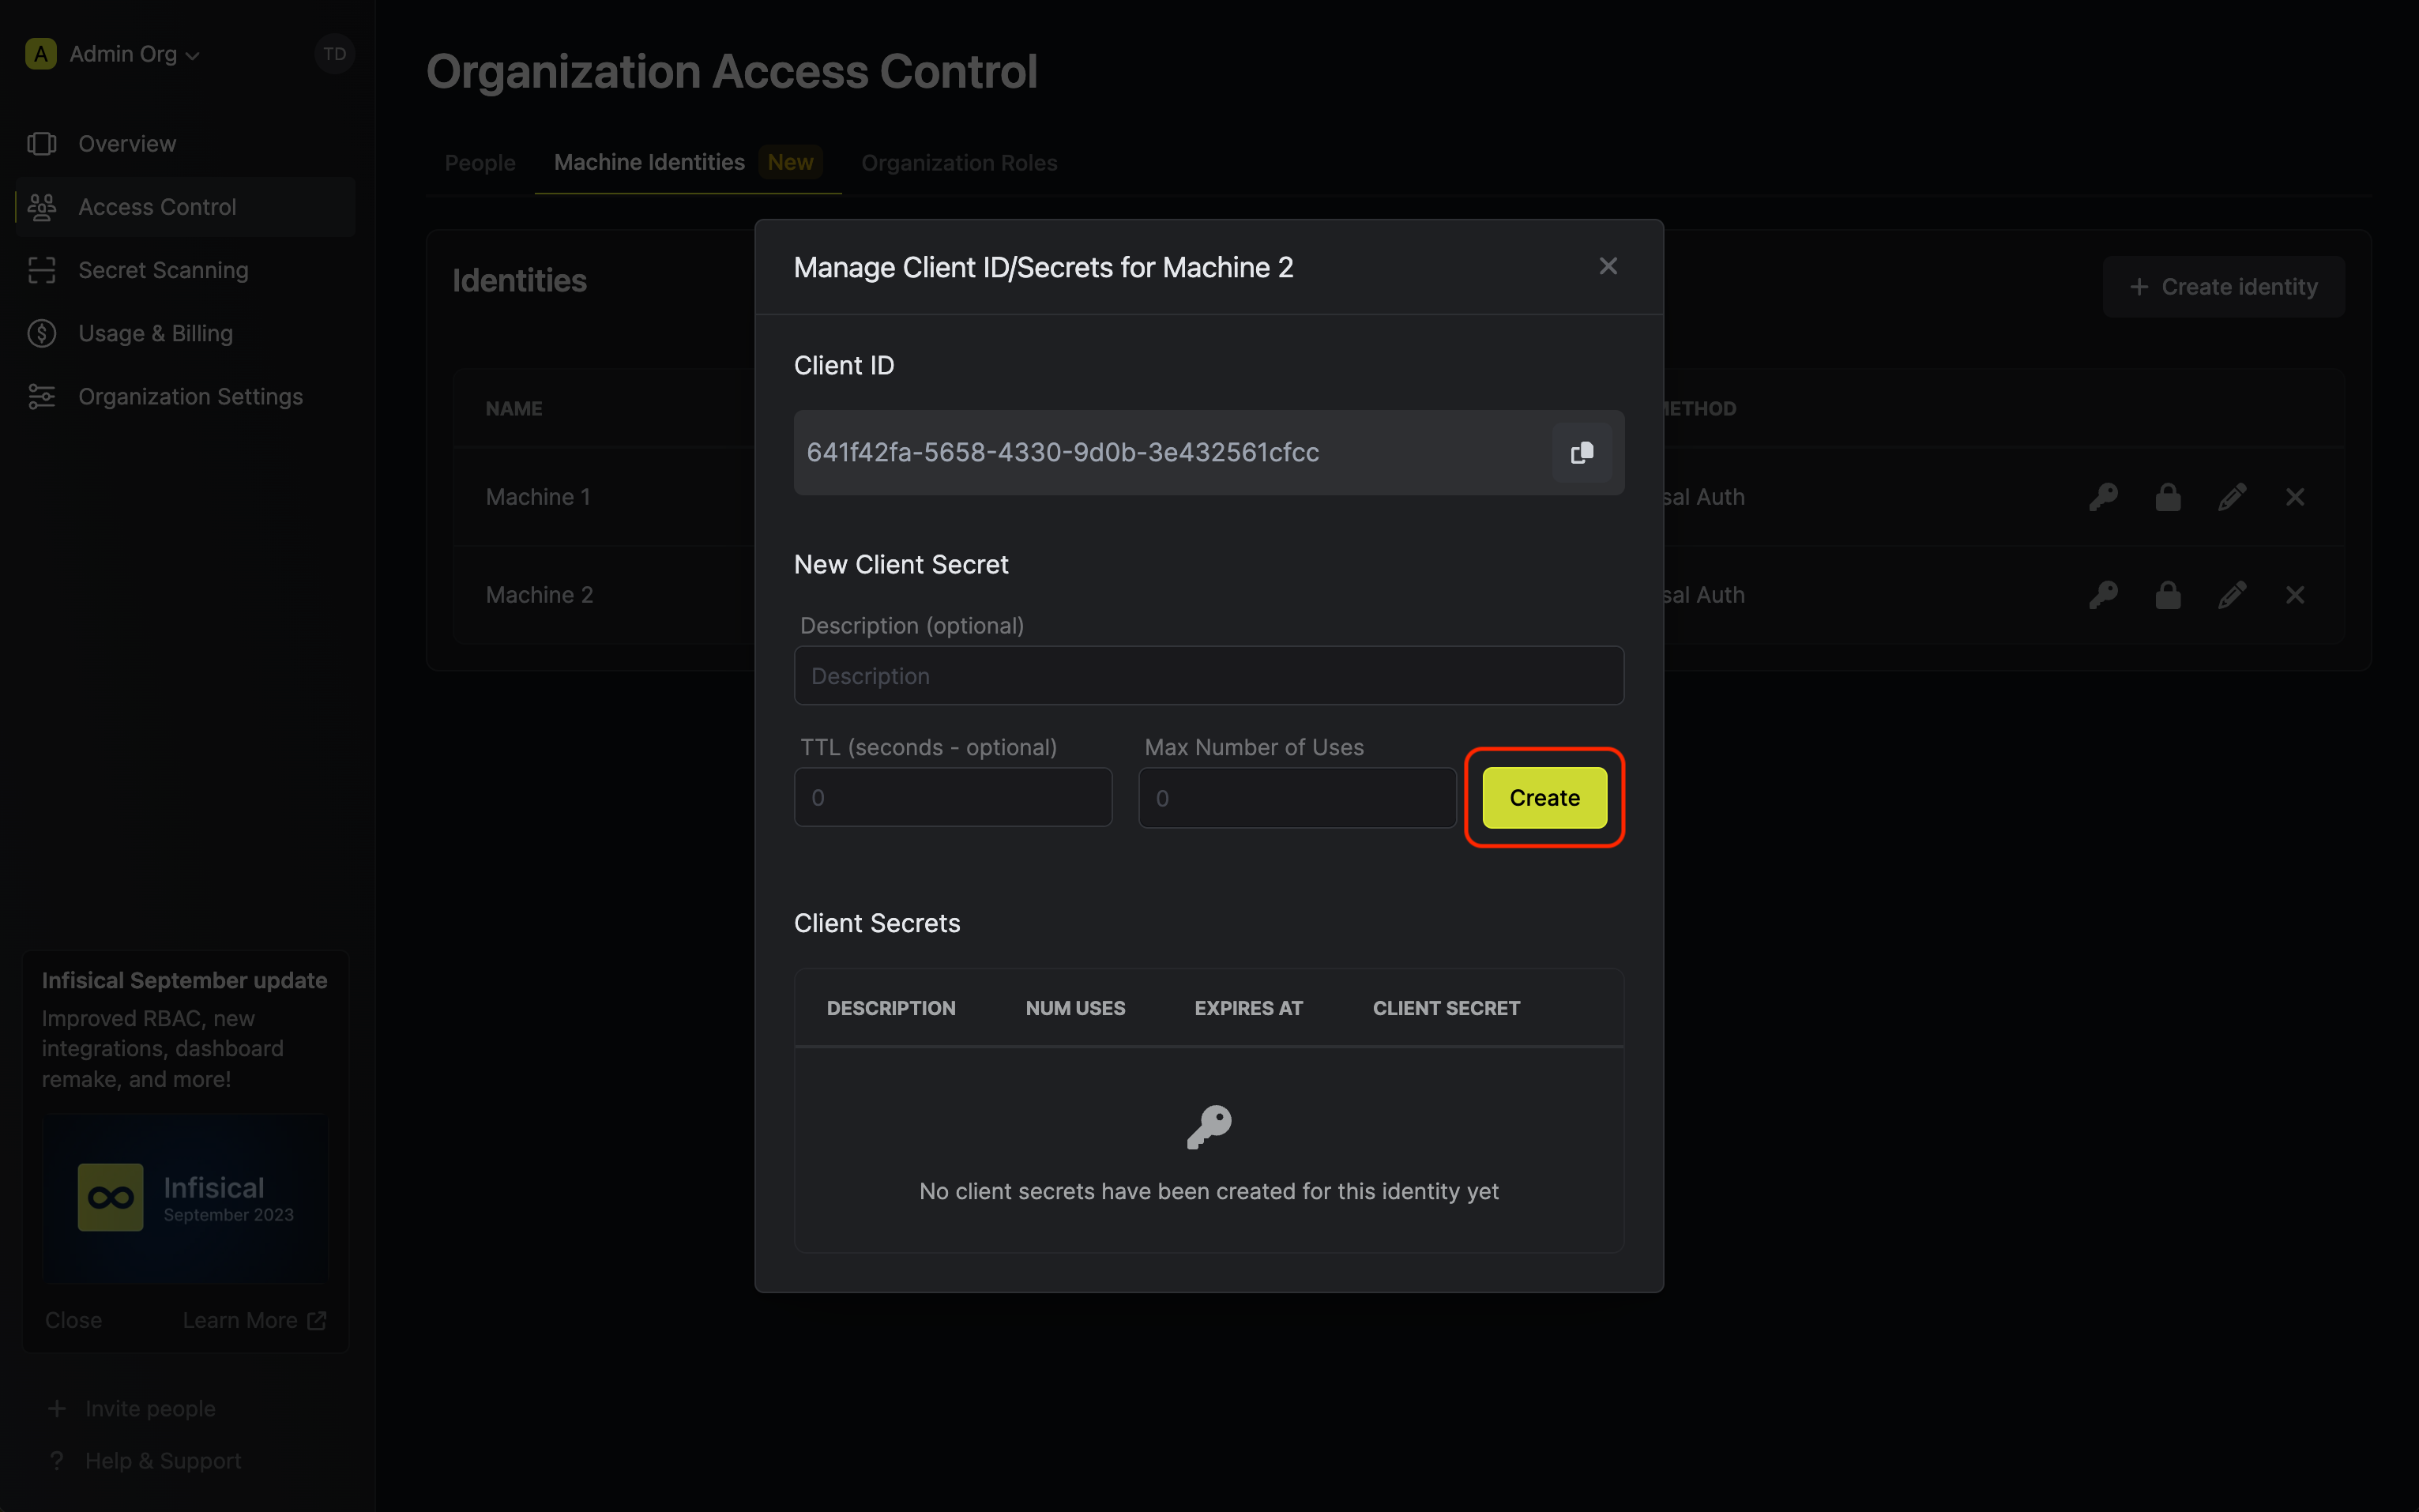
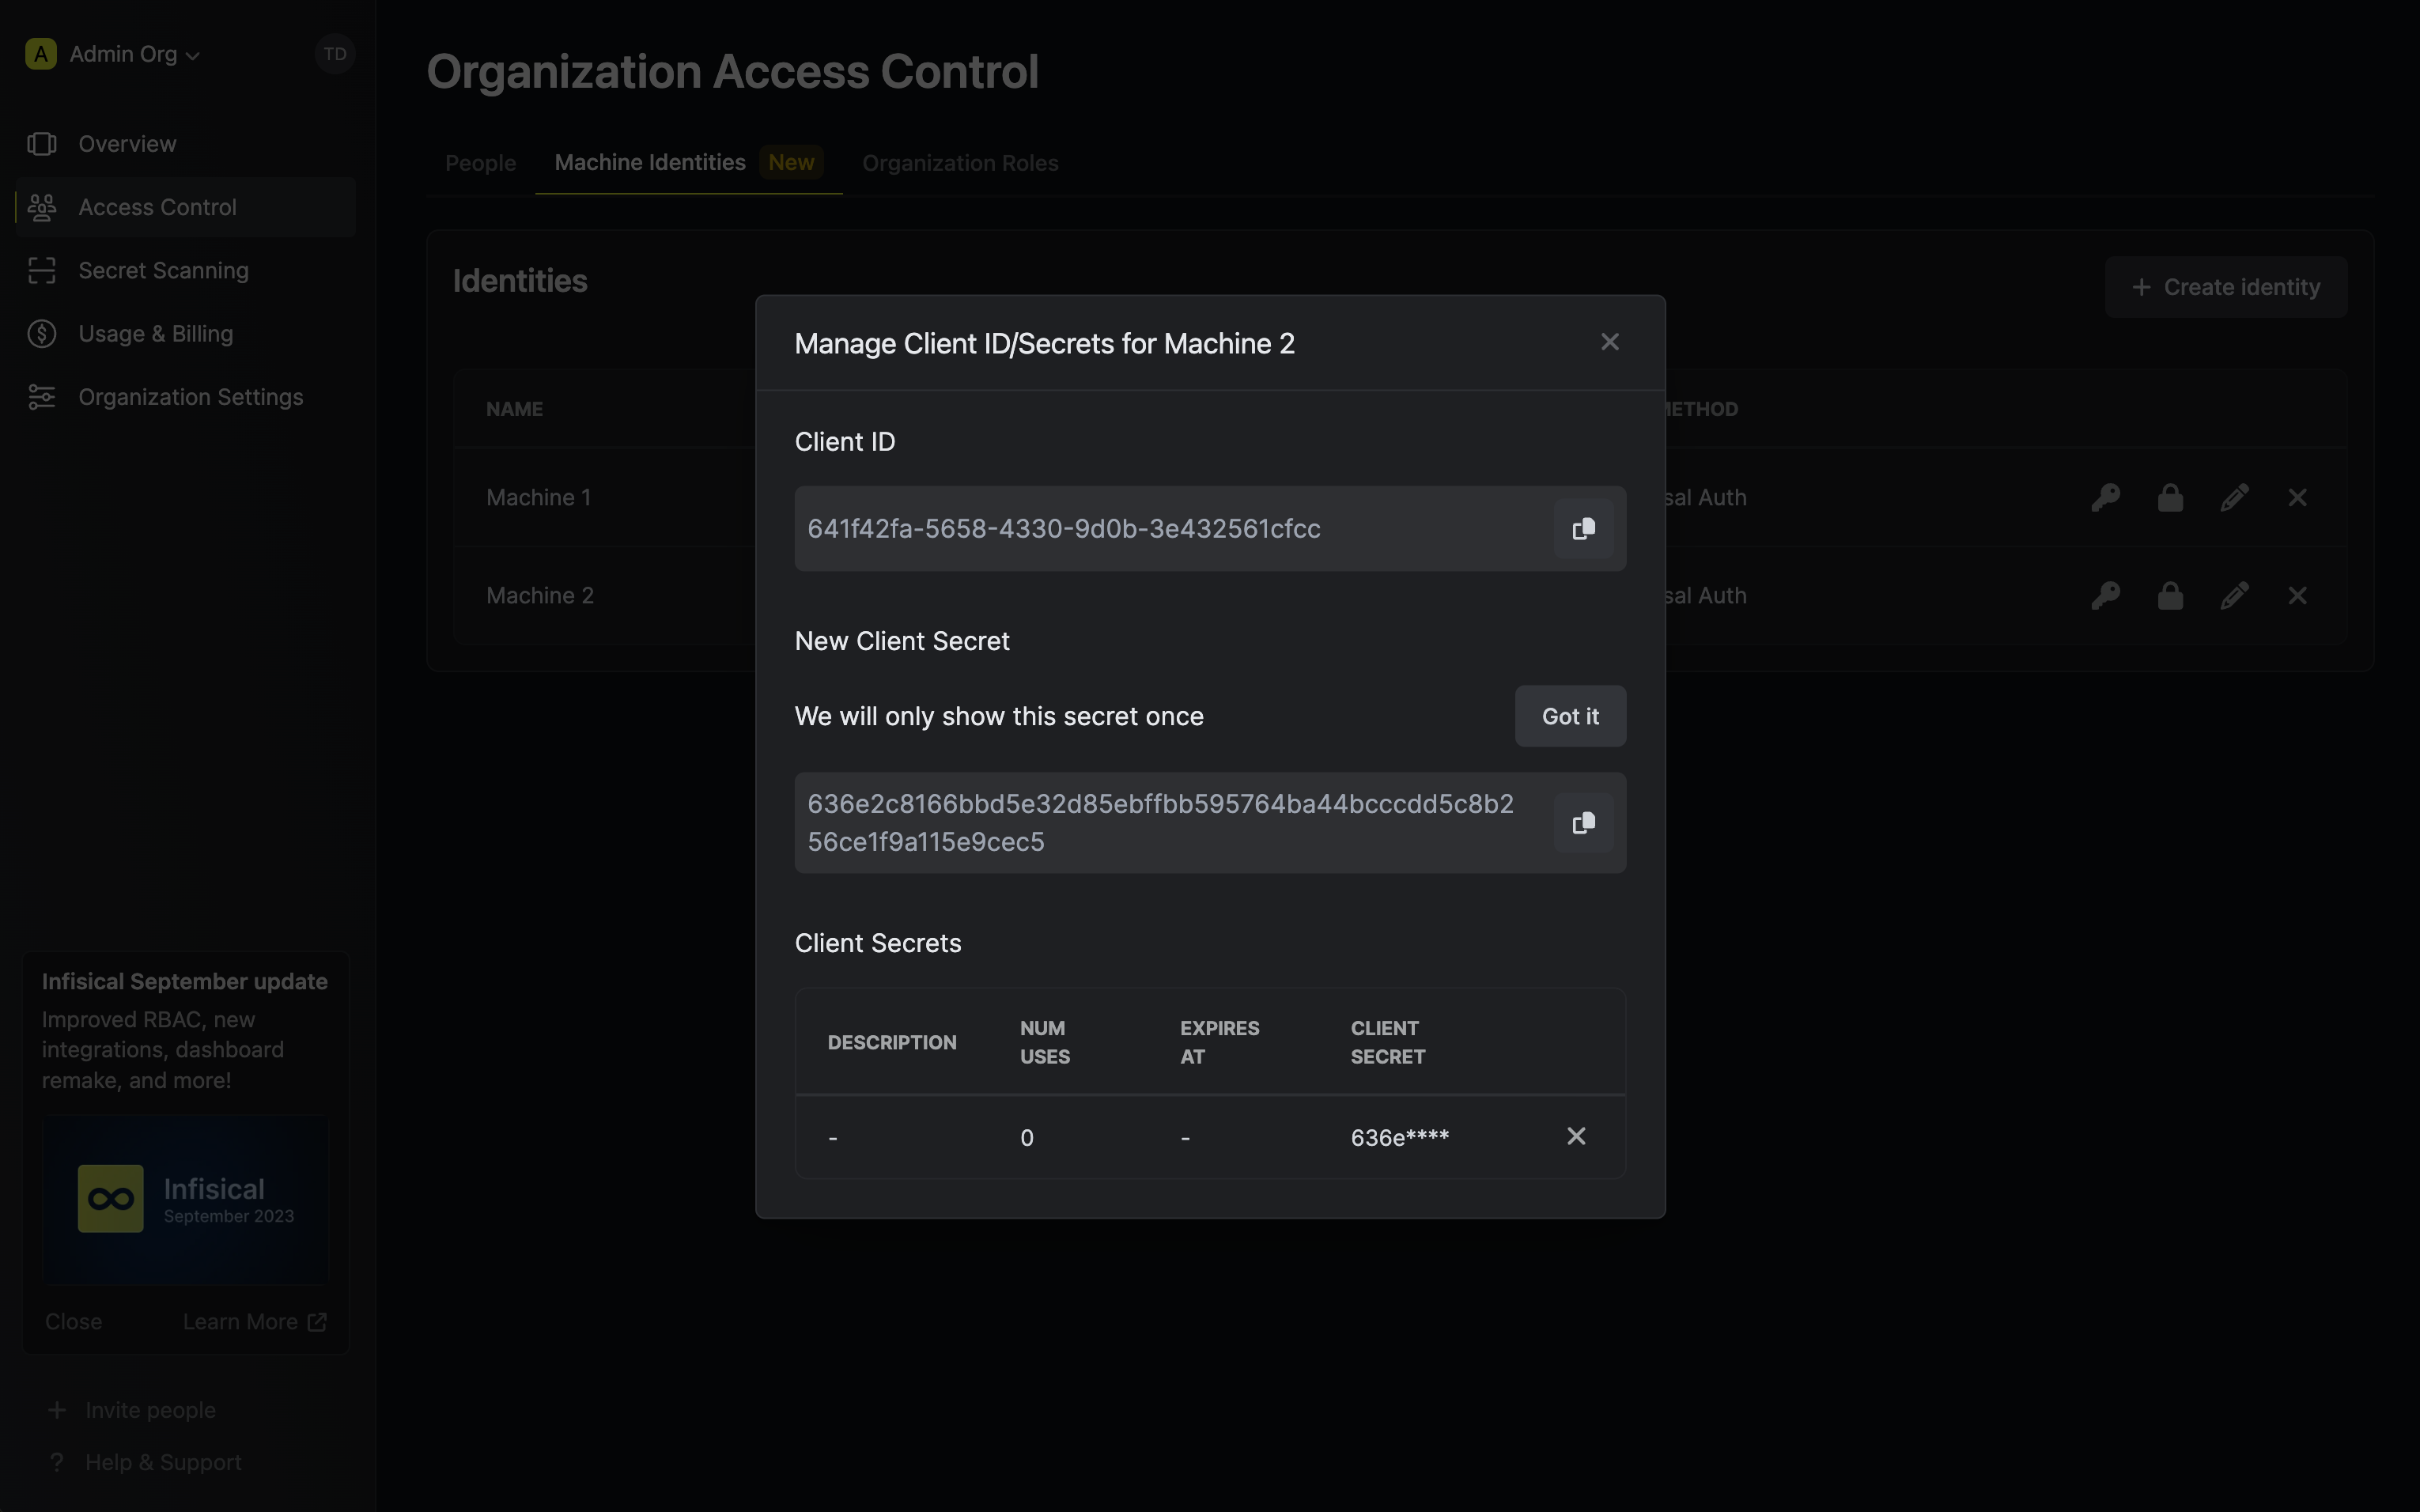
In order to use the identity, you'll need the non-sensitive Client ID of the identity and a Client Secret for it; you can think of these credentials akin to a username and password used to authenticate with the Infisical API. With that, press on the key icon on the identity to generate a Client Secret for it.
Adding an identity to a project
To enable the identity to access project-level resources such as secrets within a specific project, you should add it to that project.
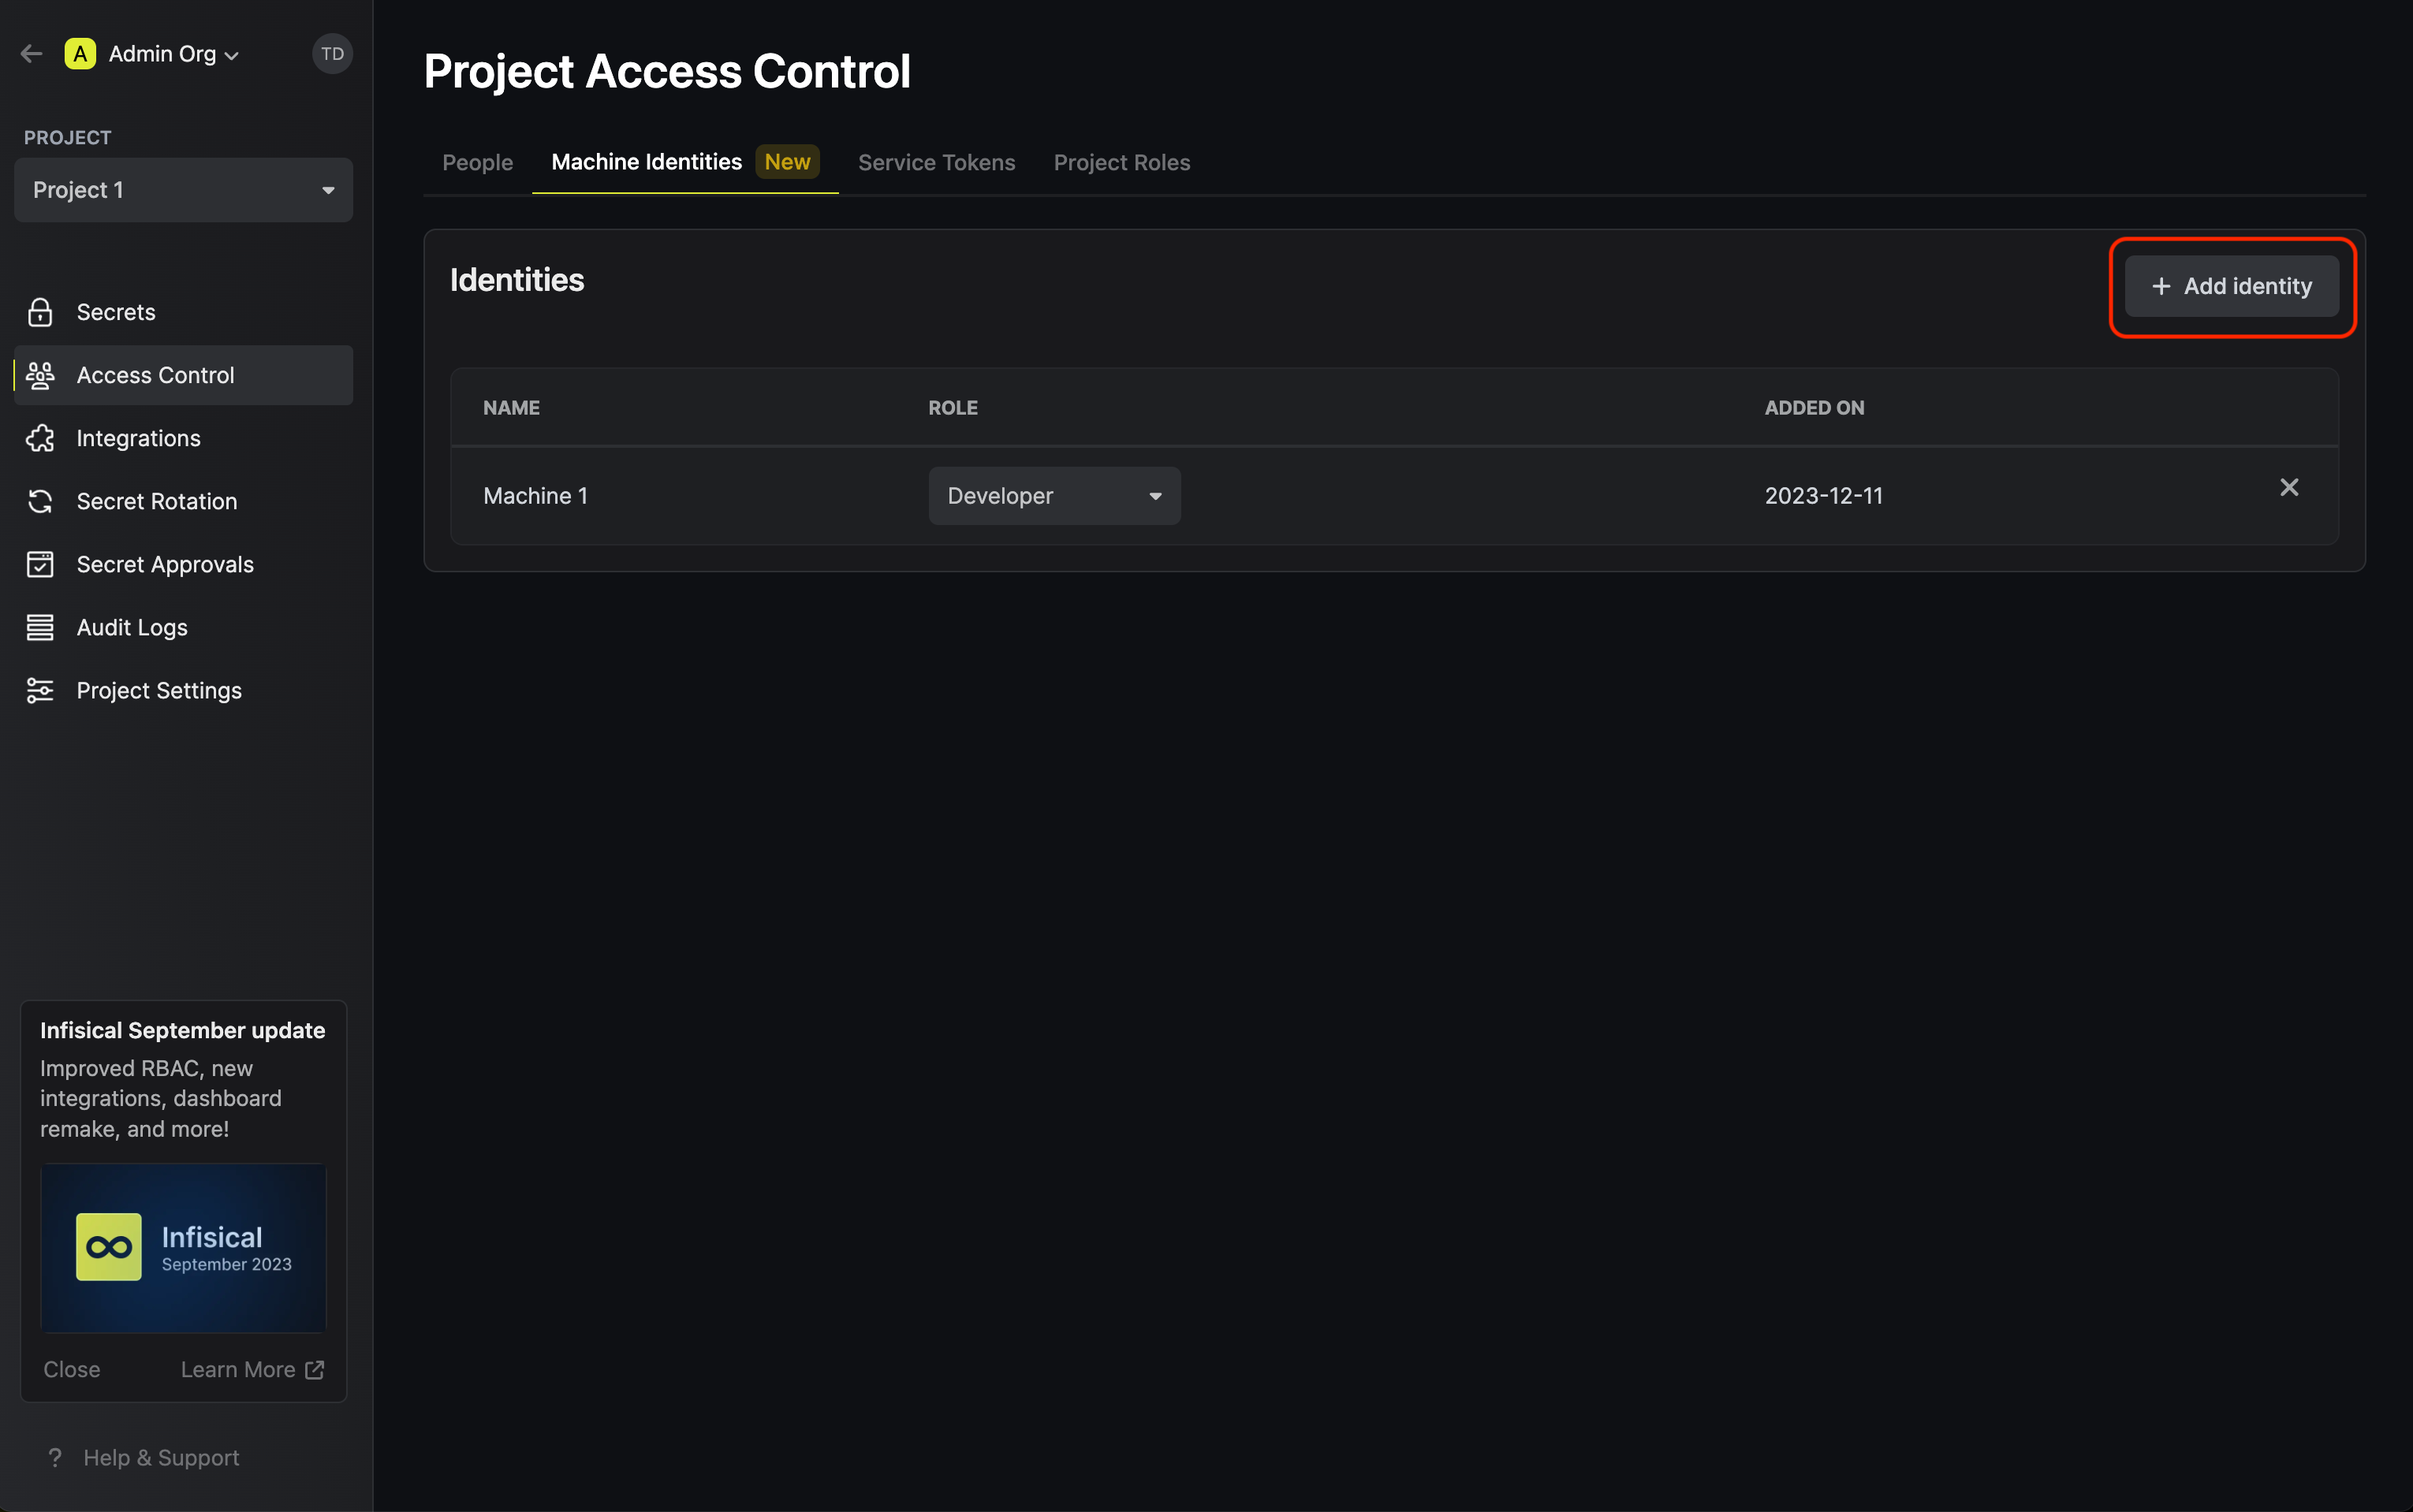
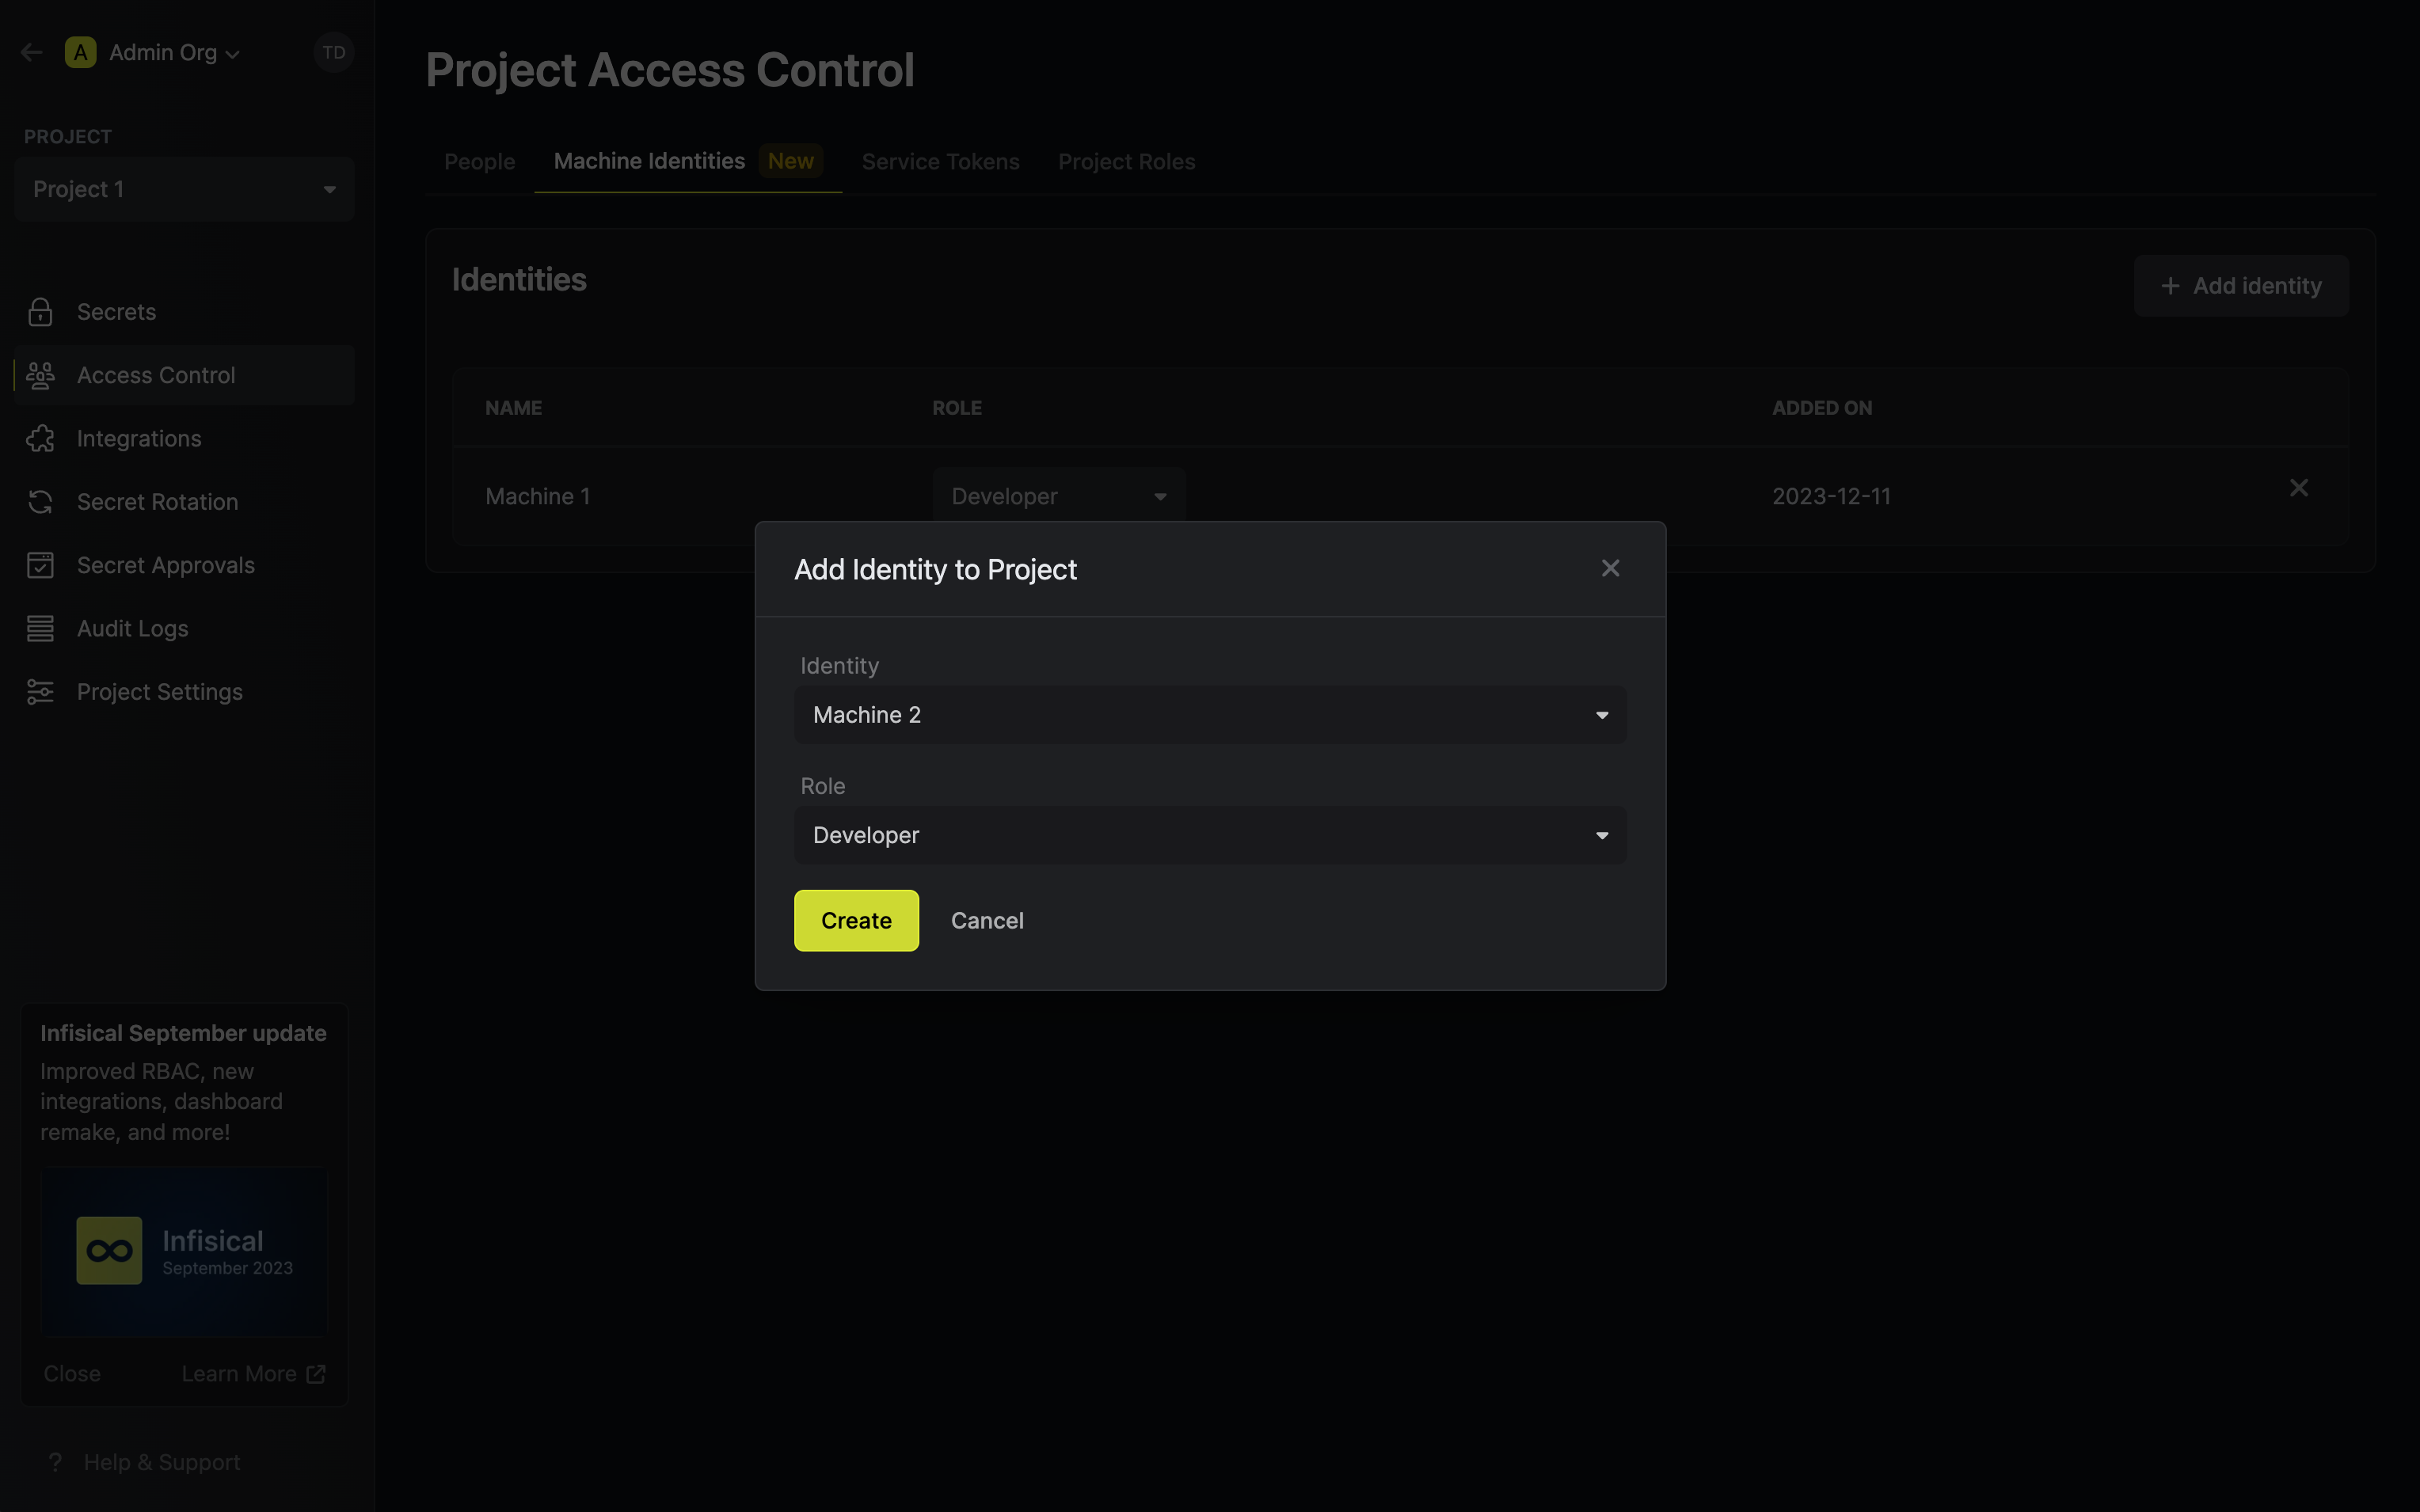
To do this, head over to the project you want to add the identity to and go to Project Settings > Access Control > Machine Identities and press Add identity.
Next, select the identity you want to add to the project and the project level role you want to allow it to assume. The project role assigned will determine what project level resources this identity can have access to.
Accessing the Infisical API with the identity
Finally, to access the Infisical API as the identity, you should first perform a login operation that is to exchange the Client ID and Client Secret of the identity for an access token by making a request to the /api/v1/auth/universal-auth/login endpoint.
Sample request:
curl --location --request POST 'https://app.infisical.com/api/v1/auth/universal-auth/login' \
  --header 'Content-Type: application/x-www-form-urlencoded' \
  --data-urlencode 'clientSecret=...' \
  --data-urlencode 'clientId=...'
Sample response:
{
  "accessToken": "...",
  "expiresIn": 7200,
  "accessTokenMaxTTL": 7200
  "tokenType": "Bearer"
}
Tada! You can now use the access token to authenticate with the Infisical API and manage your secrets. Note that once the access token expires, you'll have to perform the login operation once again to obtain a new access token to access the API.
Wrapping up
In this announcement, we went over identities, a new machine-based authentication method with a revised user experience and robust security configuration. With identities, you can tap into the full power of the Infisical API and better streamline your secret management workflow.
Onward and upward!
Infisical - The open source secret management platform
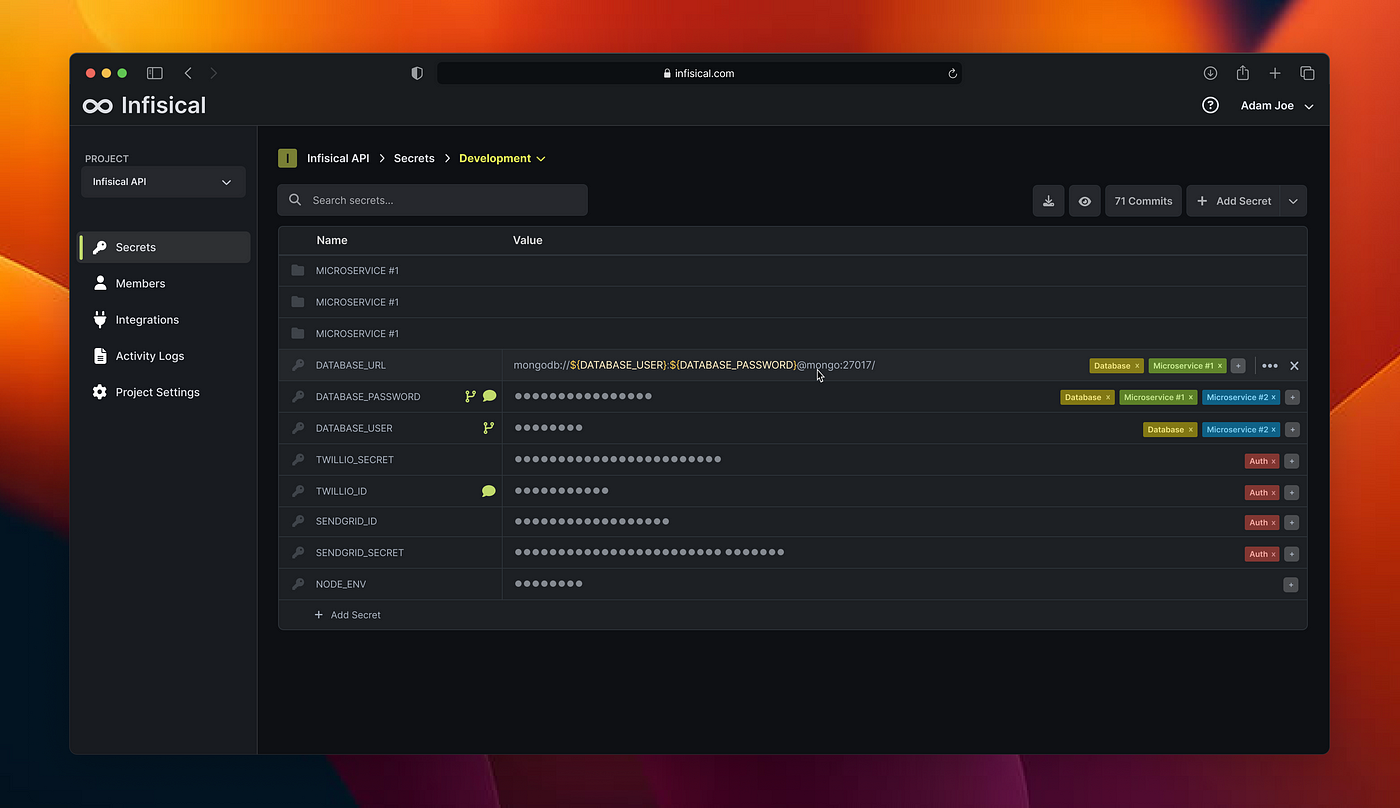
Infisical helps thousands of teams and organizations store and sync secrets across their team and infrastructure.