- Blog post • 11 min read
Self-Hosting Infisical: A Guide to Securing Your Homelab's Secrets
- Published on

In 2025, the magic of “the cloud” seems to be waning. Companies increasingly see the benefits of self-hosting or taking a hybrid approach. Individuals care about self-hosting too. I'm one of many who've chosen to self-host personal services like photo storage and household management in an effort to keep private data away from companies with poor privacy records.
But whether you're running applications in the cloud or maintaining your own homelab, one challenge persists: managing secrets securely.
In this blog post, I'll explain why a dedicated secret manager is something you need to have in your toolbox. Then, I'll walk you through setting up Infisical, a powerful open-source secrets manager, to protect your backup credentials and keep your backups safe from malware!
I don’t need a secrets manager
First things first. If you’ve never used a secret manager before, you're probably thinking: "Sure, it's 'more secure' (whatever that means), but it sounds like a lot of extra work." I get it—that was my first reaction too.
This blog post will show you (I hope) not only is it simpler than you might think, but the benefits are immediate and substantial. Probably the biggest of them all is having all your secrets in one secure location. That means no more losing an API key and having to regenerate it. It also means no SSH’ing into every server you own to find the one that had the private key you were looking for. "But hold on," you might be thinking, "isn't putting all my secrets in one place dangerous?"
Actually, no—quite the opposite. When properly secured, a centralized secret manager is far safer than the alternative: having credentials scattered across servers in plain text files (a security nightmare known as secrets sprawl).
One of the most powerful features of secret managers is "just-in-time" access. This means secrets are only available to systems at the exact moment they're needed, then immediately locked away again. This sounds complicated and difficult to pull off, but I'll show you just how straightforward it is to implement.
As far as what you can use a secret manager for, the possibilities are endless. A secret manager can secure everything from TLS certificates and API keys to passwords and SSH keys. You can even use it to:
- Auto-rotate credentials regularly
- Manage SSH key access across your infrastructure
- Manage certificate lifecycles automatically
While we won't dive deep into all these capabilities today, we'll focus on one critical use case that demonstrates the power of secrets management: protecting your backup keys. After all, what could be more important than securing the keys to your precious digital hoard?
Use Case: Protecting Your Backup Credentials
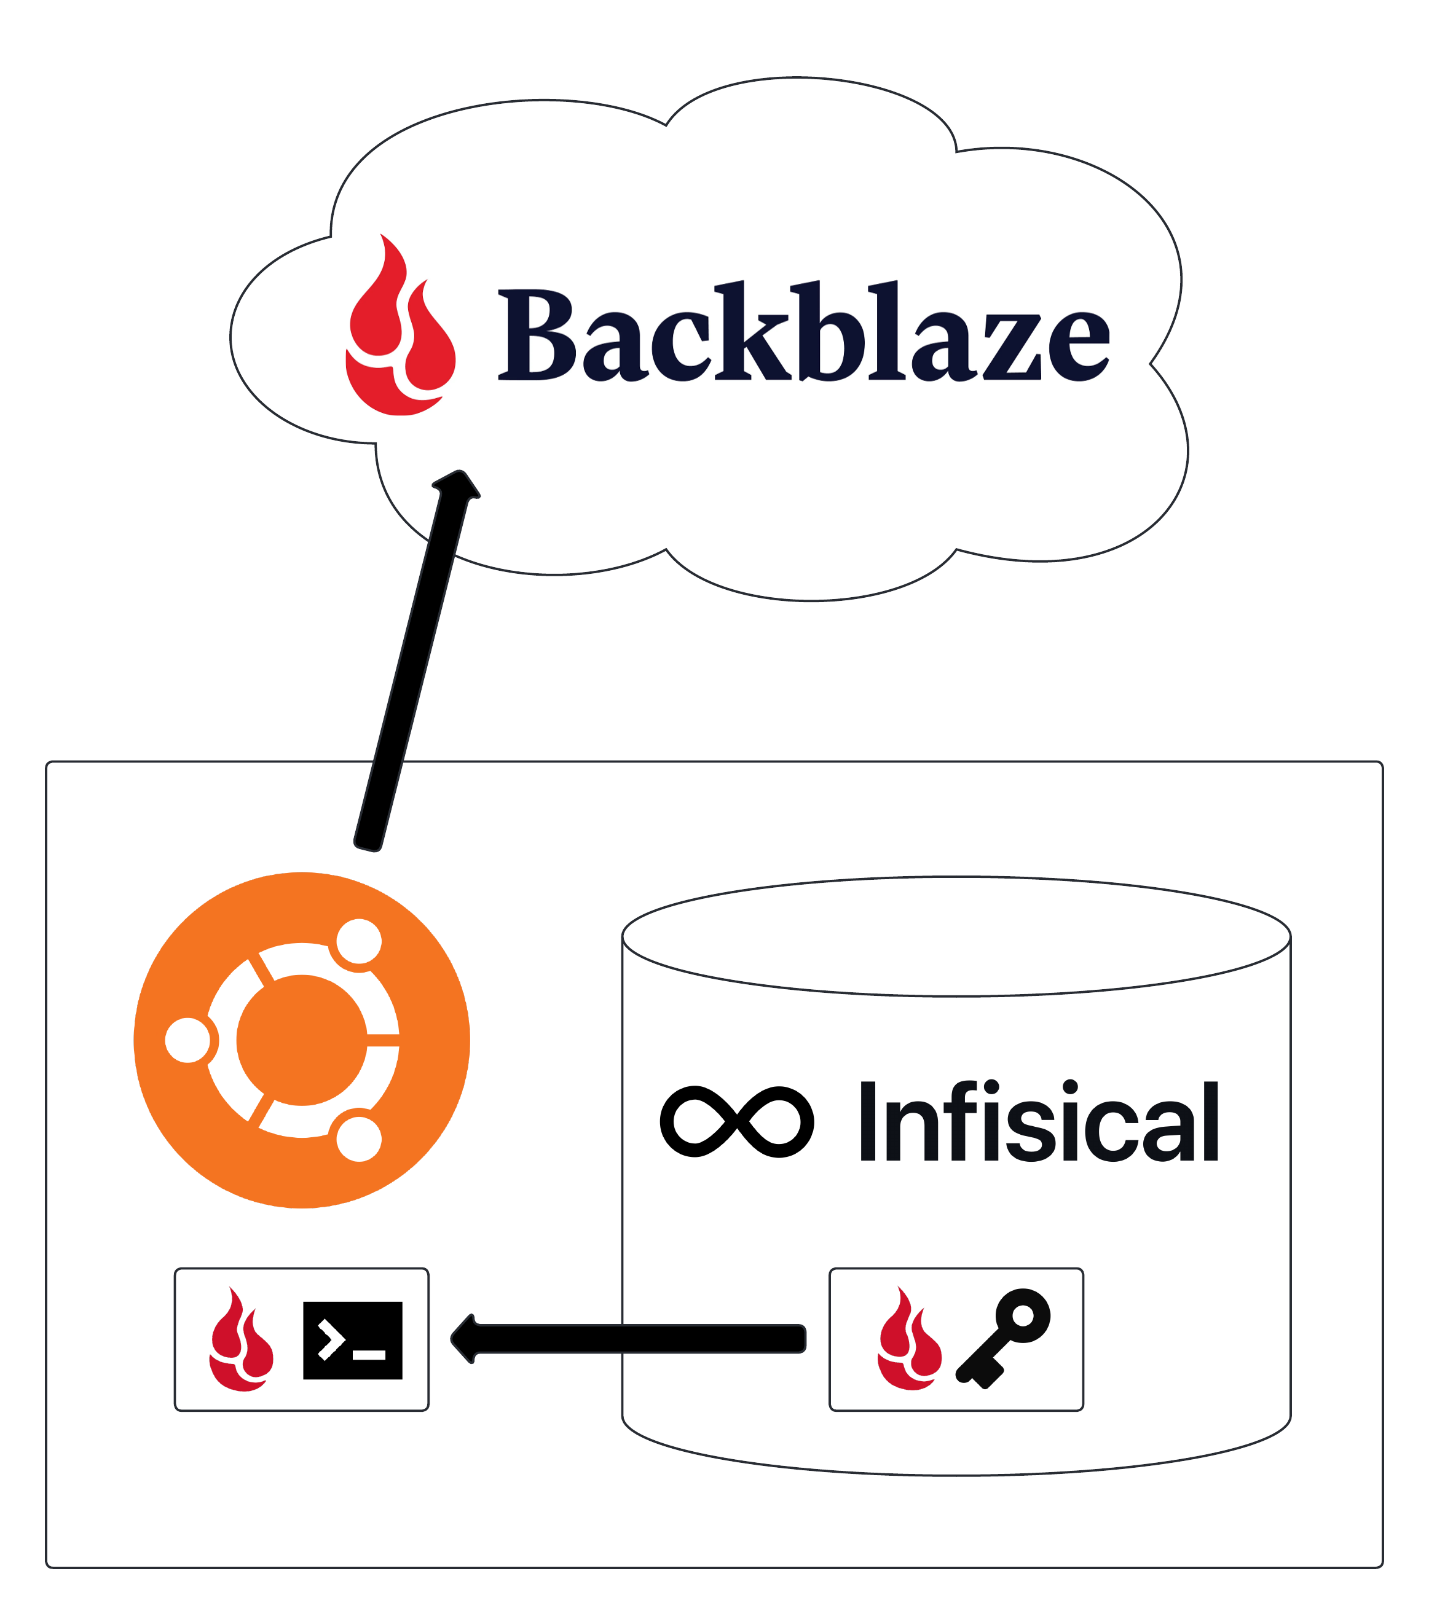
In my homelab, I use Backblaze to store my backups. I can use the Backblaze B2 CLI to create a bucket and upload files, but I don’t want the keys for my backups to be sitting on disk in case the server gets compromised. This is a problem that my self-hosted secret manager, Infisical, can solve. Our full walkthrough is going to explain how to:
- deploy and configure Infisical on an Ubuntu server
- add a Backblaze B2 application key to Infisical’s secret manager
- backup the newly created Infisical server using just-in-time secret injection
Here is a basic diagram of what the process will look like:
Now that we know the gameplan, let’s get into the tutorial!
1. Deploying Infisical with Docker Compose
There are many ways to deploy Infisical, but for this example, I am going to stick to Docker Compose due to its simplicity and popularity in home labs. If you’re not familiar with Docker Compose, don’t worry! This section will contain all the code and commands you need to run. Just copy-and-paste as you follow along.
To start out our deployment, let’s create the docker-compose.yml file:
services:
  nginx:
    container_name: nginx
    image: nginx:latest
    restart: unless-stopped
    ports:
      - 443:443
    volumes:
      - ./nginx/nginx.conf:/etc/nginx/conf.d/default.conf
      - ./nginx/certs:/etc/nginx/certs
    networks:
      - infisical

  backend:
    container_name: infisical-backend
    image: infisical/infisical:latest-postgres
    restart: unless-stopped
    depends_on:
      db:
        condition: service_healthy
      redis:
        condition: service_started
      db-migration:
        condition: service_completed_successfully
    pull_policy: always
    env_file: .env
    environment:
      - NODE_ENV=production
    ports:
      - 80:8080
    networks:
      - infisical

  redis:
    container_name: infisical-redis
    image: redis
    restart: unless-stopped
    env_file: .env
    environment:
      - ALLOW_EMPTY_PASSWORD=yes
    volumes:
      - ./volumes/redis:/data
    networks:
      - infisical

  db:
    container_name: infisical-db
    image: postgres:14-alpine
    restart: unless-stopped
    env_file: .env
    volumes:
      - ./volumes/postgres:/var/lib/postgresql/data
    networks:
      - infisical
    healthcheck:
      test: "pg_isready --username=${POSTGRES_USER} && psql --username=${POSTGRES_USER} --list"
      interval: 5s
      timeout: 10s
      retries: 10
  db-migration:
    container_name: infisical-db-migration
    depends_on:
      db:
        condition: service_healthy
    image: infisical/infisical:latest-postgres
    env_file: .env
    command: npm run migration:latest
    pull_policy: always
    networks:
      - infisical

networks:
  infisical:
In the compose file, we have 5 services within an internal Docker network:
- nginx: an HTTPS reverse proxy to expose our Infisical’s web interface
- backend: the actual Infisical server
- redis: a cache server to speed up operations
- db: the Postgres database for Infisical
- db-migration: the container that runs database migrations after upgrading Infisical
Now that the compose file is ready, we have to set up the Nginx configuration files and the environment variables. For Nginx, create a file at ./nginx/nginx.conf with the following content:
server {
    listen 443 ssl;
    ssl_certificate /etc/nginx/certs/cert.pem;
    ssl_certificate_key /etc/nginx/certs/key.pem;
    location / {
        proxy_pass http://infisical-backend:8080;
    }
}
Next, run the following commands to create a self-signed TLS certificate that Nginx will use. Make sure to replace “infisical.lan” with the name of the host you are deploying Infisical to:
$ mkdir -p ./nginx/certs

$ openssl req -subj '/CN=infisical.lan' -addext "subjectAltName = DNS:infisical.lan" -x509 -newkey rsa:4096 -nodes -keyout nginx/certs/key.pem -out nginx/certs/cert.pem -days 99999
We are almost ready to start Infisical! The last thing we have to do is set up a valid environment file for our docker compose project to use when deploying the stack. Create a file in the local directory called .env and fill out the variables below. Again, make sure to replace “infisical.lan” with the name of the host you are deploying Infisical to:
# Website URL
SITE_URL=https://infisical.lan

# Keys
# Required key for platform encryption/decryption ops
# GENERATE YOUR OWN KEY WITH `openssl rand -hex 16`
ENCRYPTION_KEY=

# JWT
# Required secrets to sign JWT tokens
# GENERATE YOUR OWN KEY WITH `openssl rand -base64 32`
AUTH_SECRET=

# Postgres
POSTGRES_PASSWORD='set-your-own-password-here`
POSTGRES_USER=infisical
POSTGRES_DB=infisical
# Do not change the next line
DB_CONNECTION_URI=postgres://${POSTGRES_USER}:${POSTGRES_PASSWORD}@db:5432/${POSTGRES_DB}

# Redis
# Do not change the next line
REDIS_URL=redis://redis:6379
Once your .envfile is created, you are ready to deploy Infisical! Run the following command to bring it up:
$ docker compose up -d
2. Configuring Infisical
Once Docker Compose finishes deploying Infisical, you can browse to it at the address you specified in your configuration! You will get a TLS error the first time you load the page because of the self-signed Nginx certificate. Click through the warning to get to the setup screen:
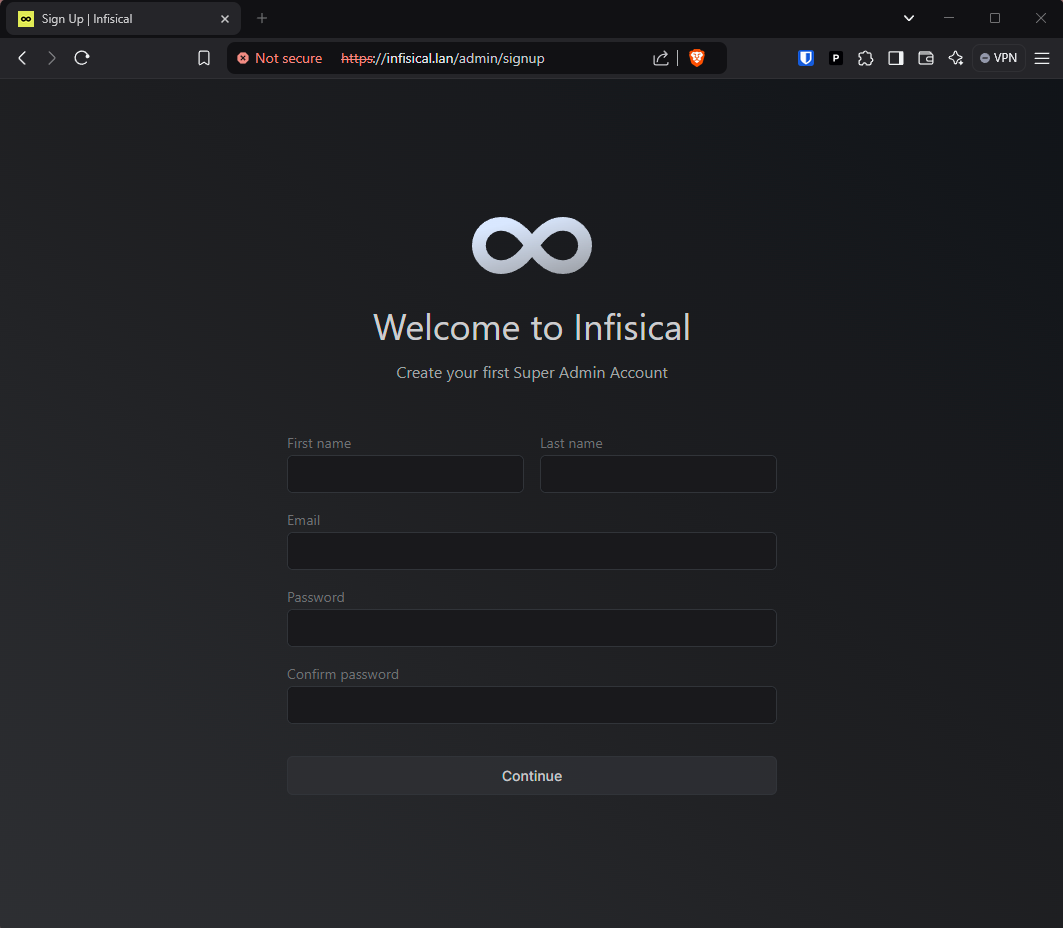
Fill out the form to create your initial admin account. On the next page, download the Emergency Kit PDF, optionally print it out, and save it in a safe place. The emergency kit is the only way to regain access to your data in Infisical if you are locked out of your admin account.
Once set up, you are brought to the server settings. The only change we will make initially is to disable user signups. Feel free to read the Infisical documentation and explore the settings more later.
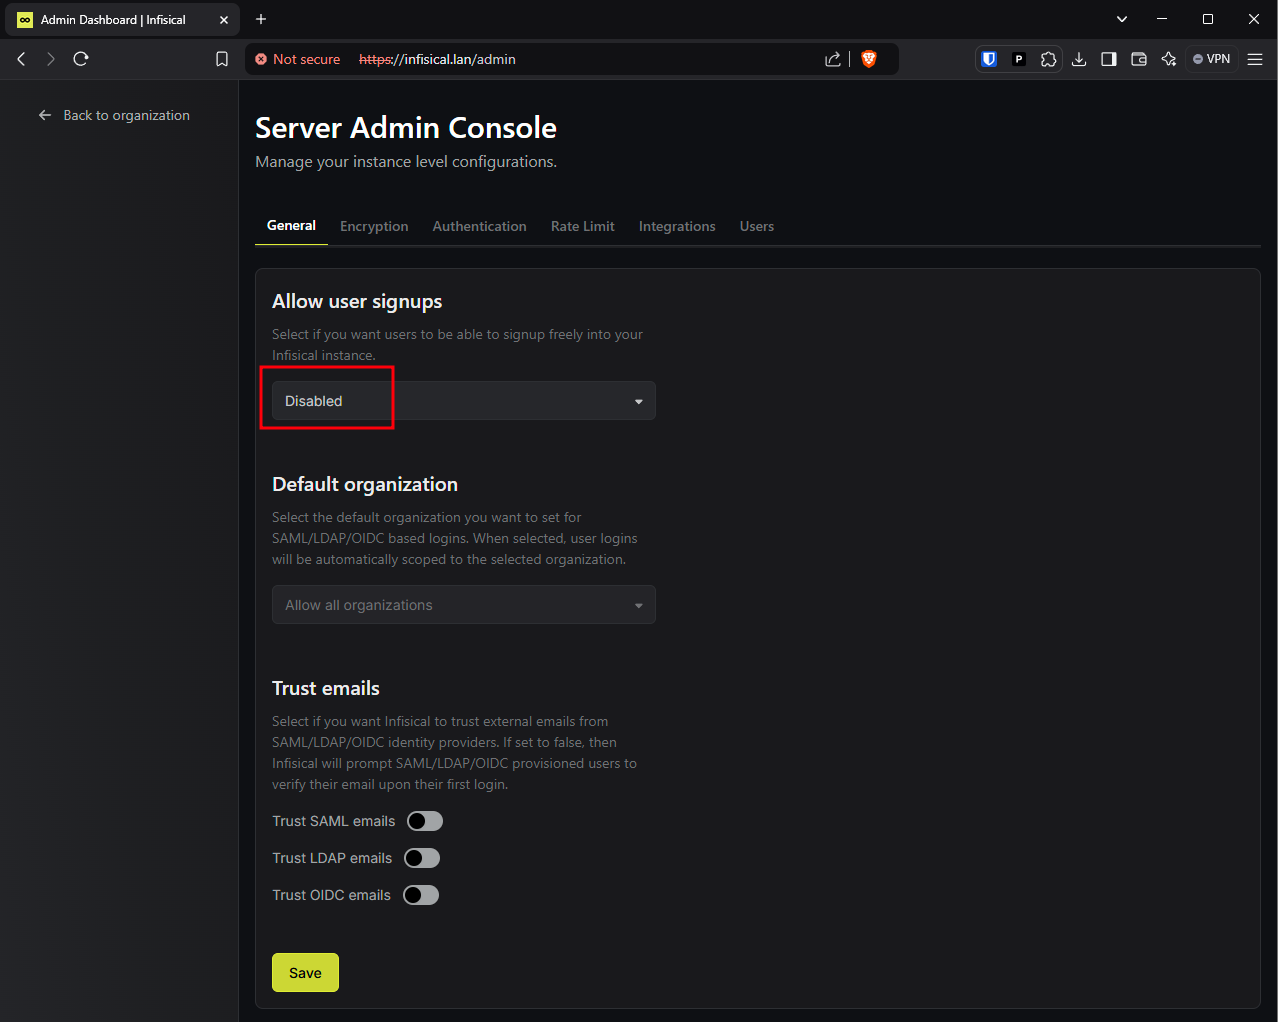
Make sure to click the “Save” button at the bottom after changing the signup setting, and then click “Back to organization” in the top left corner.
3. Using Infisical to Inject Secrets Just-in-Time
Now that Infisical is set up, let’s get to the good stuff and see what it’s like to use a secret manager! As a reminder, we want to use Backblaze to store the backups for our newly-created Infisical server. We can use the Backblaze B2 CLI to create a bucket and upload files, but we don’t want to save our B2 credentials to the server. To protect our backup keys, we will use Infisical to inject the B2 credentials into our B2 CLI command the instant it’s run.
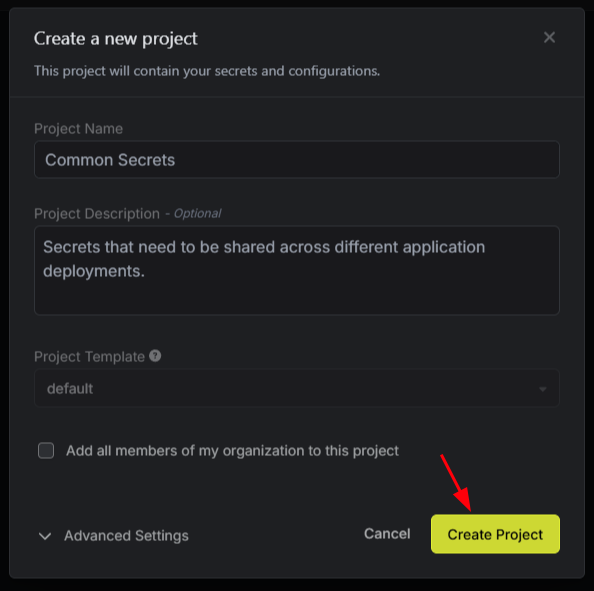
Before we can add secrets to Infisical, we need to create a Project. A Project in Infisical is basically a folder that groups all the secrets for a “project” or application that you are deploying. Click the “Add New Project” button in the top right corner to create a new project.

Give your project the name “Common Secrets” and optionally a description, and then click the “Create Project” button.
Once the project is created, you will be redirected to the Secrets page inside the new project.
For the next step, we’ll need a Backblaze B2 application key with at least writeBuckets and writeFiles permissions. Once you have the application key ID and the key secret, add them to the Infisical project’s secrets with the “Add Secret” button in the top right corner.

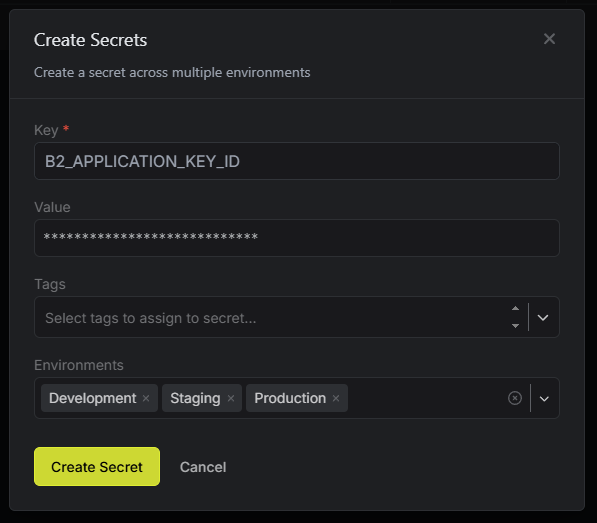
Name the first secret B2_APPLICATION_KEY_ID with no spaces and paste the value of the key ID. The tags aren’t something that are relevant for this example, so skip those. We can customize how many environments we have in our project, but for now, we will just select all of the default environments. Click “Create Secret” once everything is filled out.
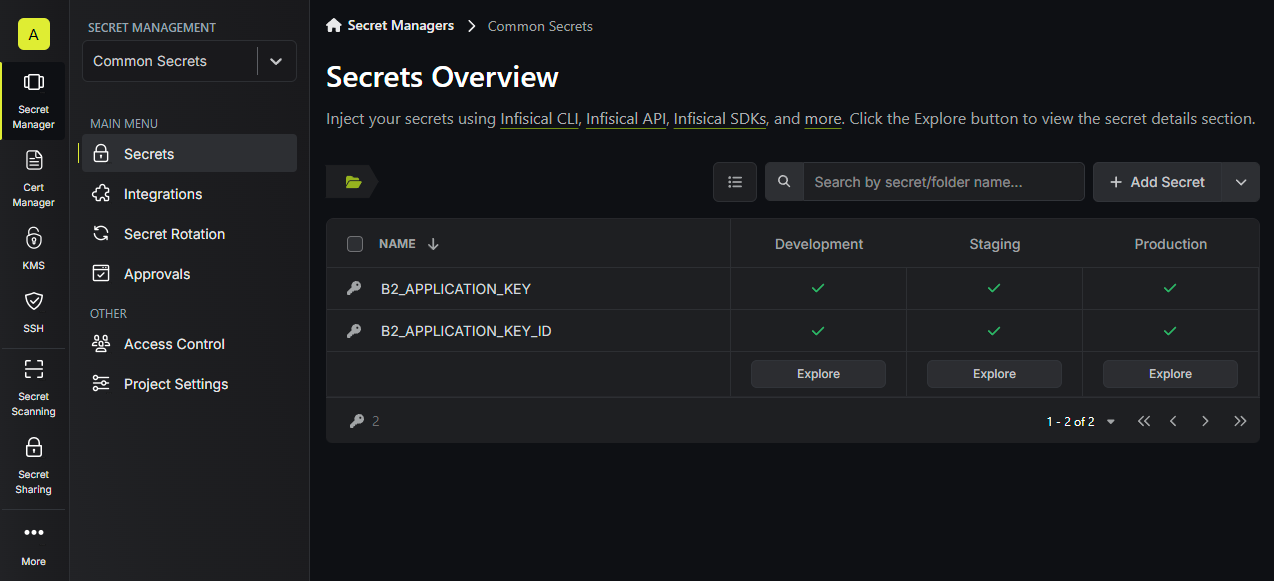
After creating the application key ID, repeat the previous steps and create a secret for the B2_APPLICATION_KEY value.
Next, we will return to the shell on the server that we set up Infisical on. Make sure that you have the B2 CLI and the Infisical CLI installed before moving on. Log into the Infisical CLI with the command below:
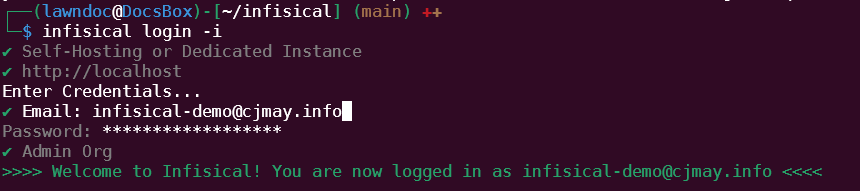
$ infisical login -i
In the CLI program that launches, choose “Self-Hosting or Dedicated Instance” and set the Domain to “http://localhost”. Enter the credentials you made when you set up Infisical, and log into the Admin Org.
Now that we are logged into Infisical, we need to run “infisical init” to access our B2 application key. In the interactive prompt that follows, choose “Admin Org” and the “Common Secrets” project.

Now, we can use the infisical run command to access the B2 application key that we set up, inject the secrets into our environment variables, and use them with the B2 CLI just-in-time.
Our backup process will be to create a B2 bucket, add the current directory to a zip archive, and upload the archive to the newly created bucket. In the following command, replace the abc123 part in the bucket name with something unique (B2 bucket names must be globally unique).
$ infisical run --command ‘b2 bucket create infisical-backup-abc123 allPrivate’

$ zip -r infisical-backup.zip .
$ infisical run --command ‘b2 file upload infisical-backup-abc123 infisical-backup.zip infisical-backup.zip’
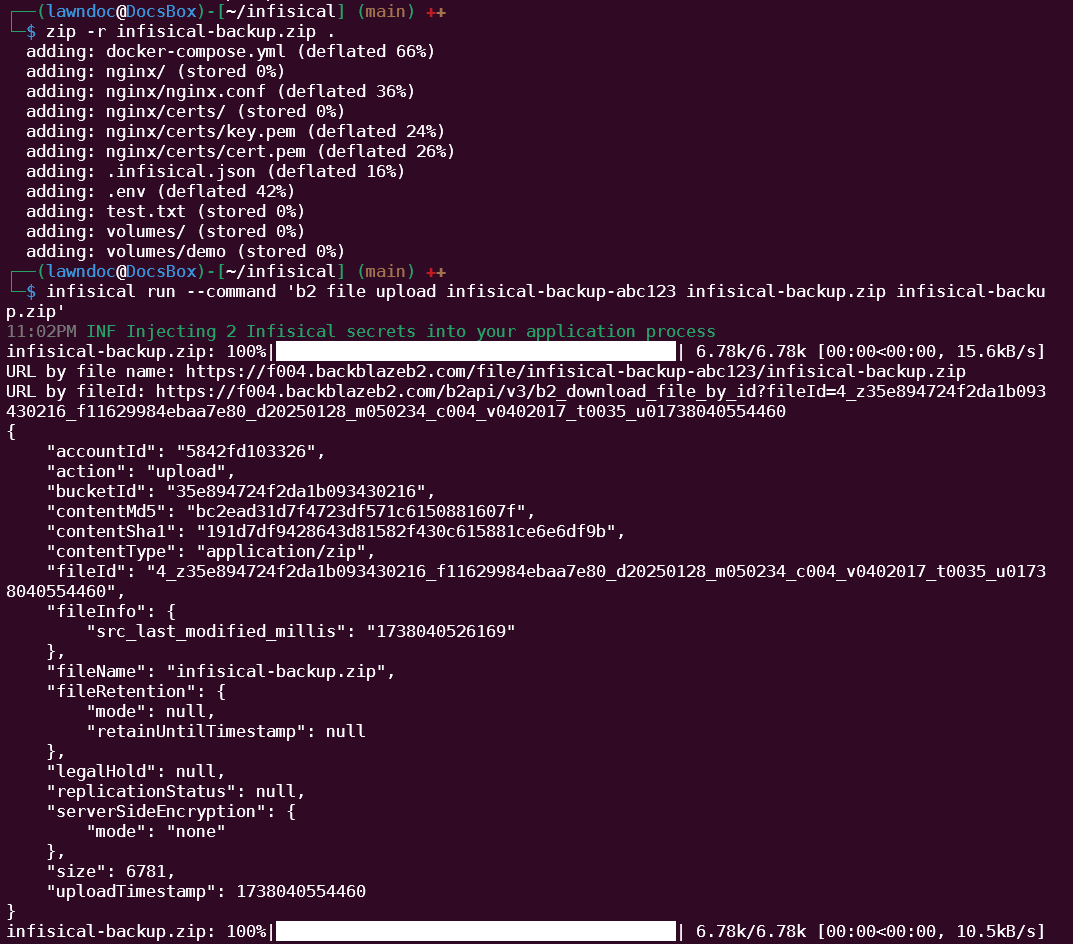
And now our Infisical server is backed up! The last thing we should do is log out of the Infisical CLI so there’s no way to access the B2 application key from the Infisical host while we aren’t using it.
$ infisical reset
Conclusion
Hopefully from this example of protecting backup keys, you can see the value in using a secret manager. The best part of this setup is that we can use the B2 app key we stored in Infisical on other machines just by logging into the Infisical CLI. So the process is easy, repeatable, and our backup credentials are safe. You can even automate the process using OIDC to authenticate to Infisical from GitHub Actions. That’s beyond the scope of this blog post, though.
There are so many other features of Infisical that apply to use cases beyond backup keys. I encourage you to use what you learned in this guide as a starting point and explore more ways that self-hosting the Infisical server can help your secret management and security.