> ## Documentation Index
> Fetch the complete documentation index at: https://infisical.com/docs/llms.txt
> Use this file to discover all available pages before exploring further.
# Windows Server with win-acme
> Issue TLS certificates for Windows Server using ACME enrollment with win-acme.
Set up automatic TLS certificates for your [Windows Server](https://www.microsoft.com/en-us/windows-server) using Infisical and [win-acme](https://www.win-acme.com/). Win-acme offers excellent integration with IIS and Windows Certificate Store.
This guide assumes you have an Application with [ACME enrollment](/documentation/platform/pki/applications/enrollment-methods/acme) configured.
## Prerequisites
* A Windows Server instance with administrative access
* An Application in Infisical with [ACME enrollment](/documentation/platform/pki/applications/enrollment-methods/acme) configured
* Network connectivity from your Windows Server to Infisical
## Guide
In your Application, go to the **Settings** tab and find the **Certificate Profiles** section. Click **Configure** on the profile with ACME enrollment, then click **Reveal ACME EAB** to view the credentials:
| Credential | Purpose |
| ---------------------------- | --------------------------------------------------- |
| **ACME Directory URL** | The URL win-acme uses to communicate with Infisical |
| **EAB Key Identifier (KID)** | Identifies your ACME account |
| **EAB Secret** | Authenticates your ACME client |
Keep your EAB credentials secure. They authenticate your ACME client with Infisical and are unique to each enrollment.
Install win-acme on your Windows Server using one of the following methods.
1. Visit the [win-acme releases page](https://github.com/win-acme/win-acme/releases).
2. Download the latest stable release ZIP file.
3. Extract the contents to a folder (e.g., `C:\win-acme`).
4. Open Command Prompt or PowerShell as Administrator.
5. Navigate to the win-acme folder.
```powershell theme={"dark"}
cd C:\win-acme
```
If you have [.NET Core](https://dotnet.microsoft.com/en-us/download) installed, you can install win-acme as a global tool:
```powershell theme={"dark"}
dotnet tool install win-acme --global
```
This makes the `wacs` command available system-wide.
Run the following win-acme command to request a certificate from Infisical:
```powershell theme={"dark"}
wacs.exe --target manual --host example.infisical.com --baseuri "https://your-infisical-instance.com/api/v1/cert-manager/acme/applications/{application-id}/profiles/{profile-id}/directory" --eab-key-identifier "your-eab-key-identifier" --eab-key "your-eab-secret" --validation selfhosting --store pemfiles --pemfilespath "C:\certificates" --verbose
```
For guidance on each parameter:
* `--target manual`: Specifies manual target configuration for domain specification.
* `--host`: The domain name for which the certificate is being requested.
* `--baseuri`: The Infisical ACME directory URL from Step 1. This instructs win-acme to communicate with Infisical's ACME server instead of other ACME providers.
* `--eab-key-identifier`: Your External Account Binding (EAB) Key Identifier from Step 1.
* `--eab-key`: The EAB secret associated with the KID from Step 1.
* `--validation selfhosting`: Uses self-hosting validation method to solve the [HTTP-01](https://letsencrypt.org/docs/challenge-types/#http-01-challenge) challenge.
* `--store pemfiles`: Stores certificates as PEM files in a specified directory.
* `--pemfilespath`: Directory where certificates will be saved on your Windows Server.
* `--verbose`: Enables detailed logging for troubleshooting and monitoring the certificate request process.
The win-acme command generates a private key on your server, creates a Certificate Signing Request (CSR) using that key, and sends the CSR to Infisical for certificate issuance. Win-acme stores the private key and resulting leaf certificate and full certificate chain in the specified directory path.
Replace the placeholder values with your actual configuration:
* `example.infisical.com`: Your actual domain name
* `https://your-infisical-instance.com/api/v1/cert-manager/acme/applications/{application-id}/profiles/{profile-id}/directory`: Your Infisical ACME endpoint from Step 1
* `your-eab-key-identifier` and `your-eab-secret`: Your External Account Binding credentials from Step 1
* `C:\certificates`: Your desired certificate storage location
Win-acme supports various certificate storage options beyond PEM files. Here are common alternatives for different deployment scenarios:
Store certificates directly in the [Windows Certificate Store](https://docs.microsoft.com/en-us/windows-hardware/drivers/install/certificate-stores) for integration with IIS and other Windows services:
```powershell theme={"dark"}
wacs.exe --target manual --host example.infisical.com --baseuri "https://your-infisical-instance.com/api/v1/cert-manager/acme/applications/{application-id}/profiles/{profile-id}/directory" --eab-key-identifier "your-eab-key-identifier" --eab-key "your-eab-secret" --validation selfhosting --store certificatestore --verbose
```
Generate [PFX files](https://learn.microsoft.com/en-us/windows-server/administration/windows-commands/certutil) with password protection for easy deployment across Windows environments:
```powershell theme={"dark"}
wacs.exe --target manual --host example.infisical.com --baseuri "https://your-infisical-instance.com/api/v1/cert-manager/acme/applications/{application-id}/profiles/{profile-id}/directory" --eab-key-identifier "your-eab-key-identifier" --eab-key "your-eab-secret" --validation selfhosting --store pfxfile --pfxfilepath "C:\certificates" --pfxpassword "your-secure-password" --verbose
```
For IIS Central SSL store integration in high-scale environments:
```powershell theme={"dark"}
wacs.exe --target manual --host example.infisical.com --baseuri "https://your-infisical-instance.com/api/v1/cert-manager/acme/applications/{application-id}/profiles/{profile-id}/directory" --eab-key-identifier "your-eab-key-identifier" --eab-key "your-eab-secret" --validation selfhosting --store centralssl --centralsslstore "C:\CentralSSL" --verbose
```
Win-acme can automatically create a [Windows Scheduled Task](https://docs.microsoft.com/en-us/windows/win32/taskschd/about-the-task-scheduler) for certificate renewal. Because win-acme stores the ACME server URL and EAB credentials from your initial request, renewal will automatically use the same Infisical ACME configuration—no additional settings are required.
**Option 1: Enable during initial certificate request**
Include the `--setuptaskscheduler` parameter in your initial command to automatically create the renewal task:
```powershell theme={"dark"}
wacs.exe --target manual --host example.infisical.com --baseuri "https://your-infisical-instance.com/api/v1/cert-manager/acme/applications/{application-id}/profiles/{profile-id}/directory" --eab-key-identifier "your-eab-key-identifier" --eab-key "your-eab-secret" --validation selfhosting --store pemfiles --pemfilespath "C:\certificates" --setuptaskscheduler --verbose
```
**Option 2: Test manual renewal**
You can test the renewal process manually before setting up automation to ensure the configuration works correctly:
```powershell theme={"dark"}
wacs.exe --renew --force --verbose
```
This command simulates the full renewal process and verifies that win-acme can successfully contact Infisical and renew your certificate using the stored configuration.
**Option 3: Verify scheduled task creation**
Check that the scheduled task was created successfully:
```powershell theme={"dark"}
Get-ScheduledTask -TaskName "*win-acme*"
```
The automatic renewal task will:
* Run under the SYSTEM account for elevated privileges.
* Check certificates daily for renewal eligibility.
* Automatically renew certificates that are within the renewal threshold (typically 30 days before expiration).
* Log renewal activities to Windows Event Viewer and win-acme log files for monitoring and troubleshooting.
Win-acme stores renewal configurations automatically in its settings directory, so once a certificate is created, the renewal process will use the same parameters (ACME endpoint, EAB credentials, storage options) for future renewals. The renewal threshold can be adjusted in the win-acme configuration files if needed.
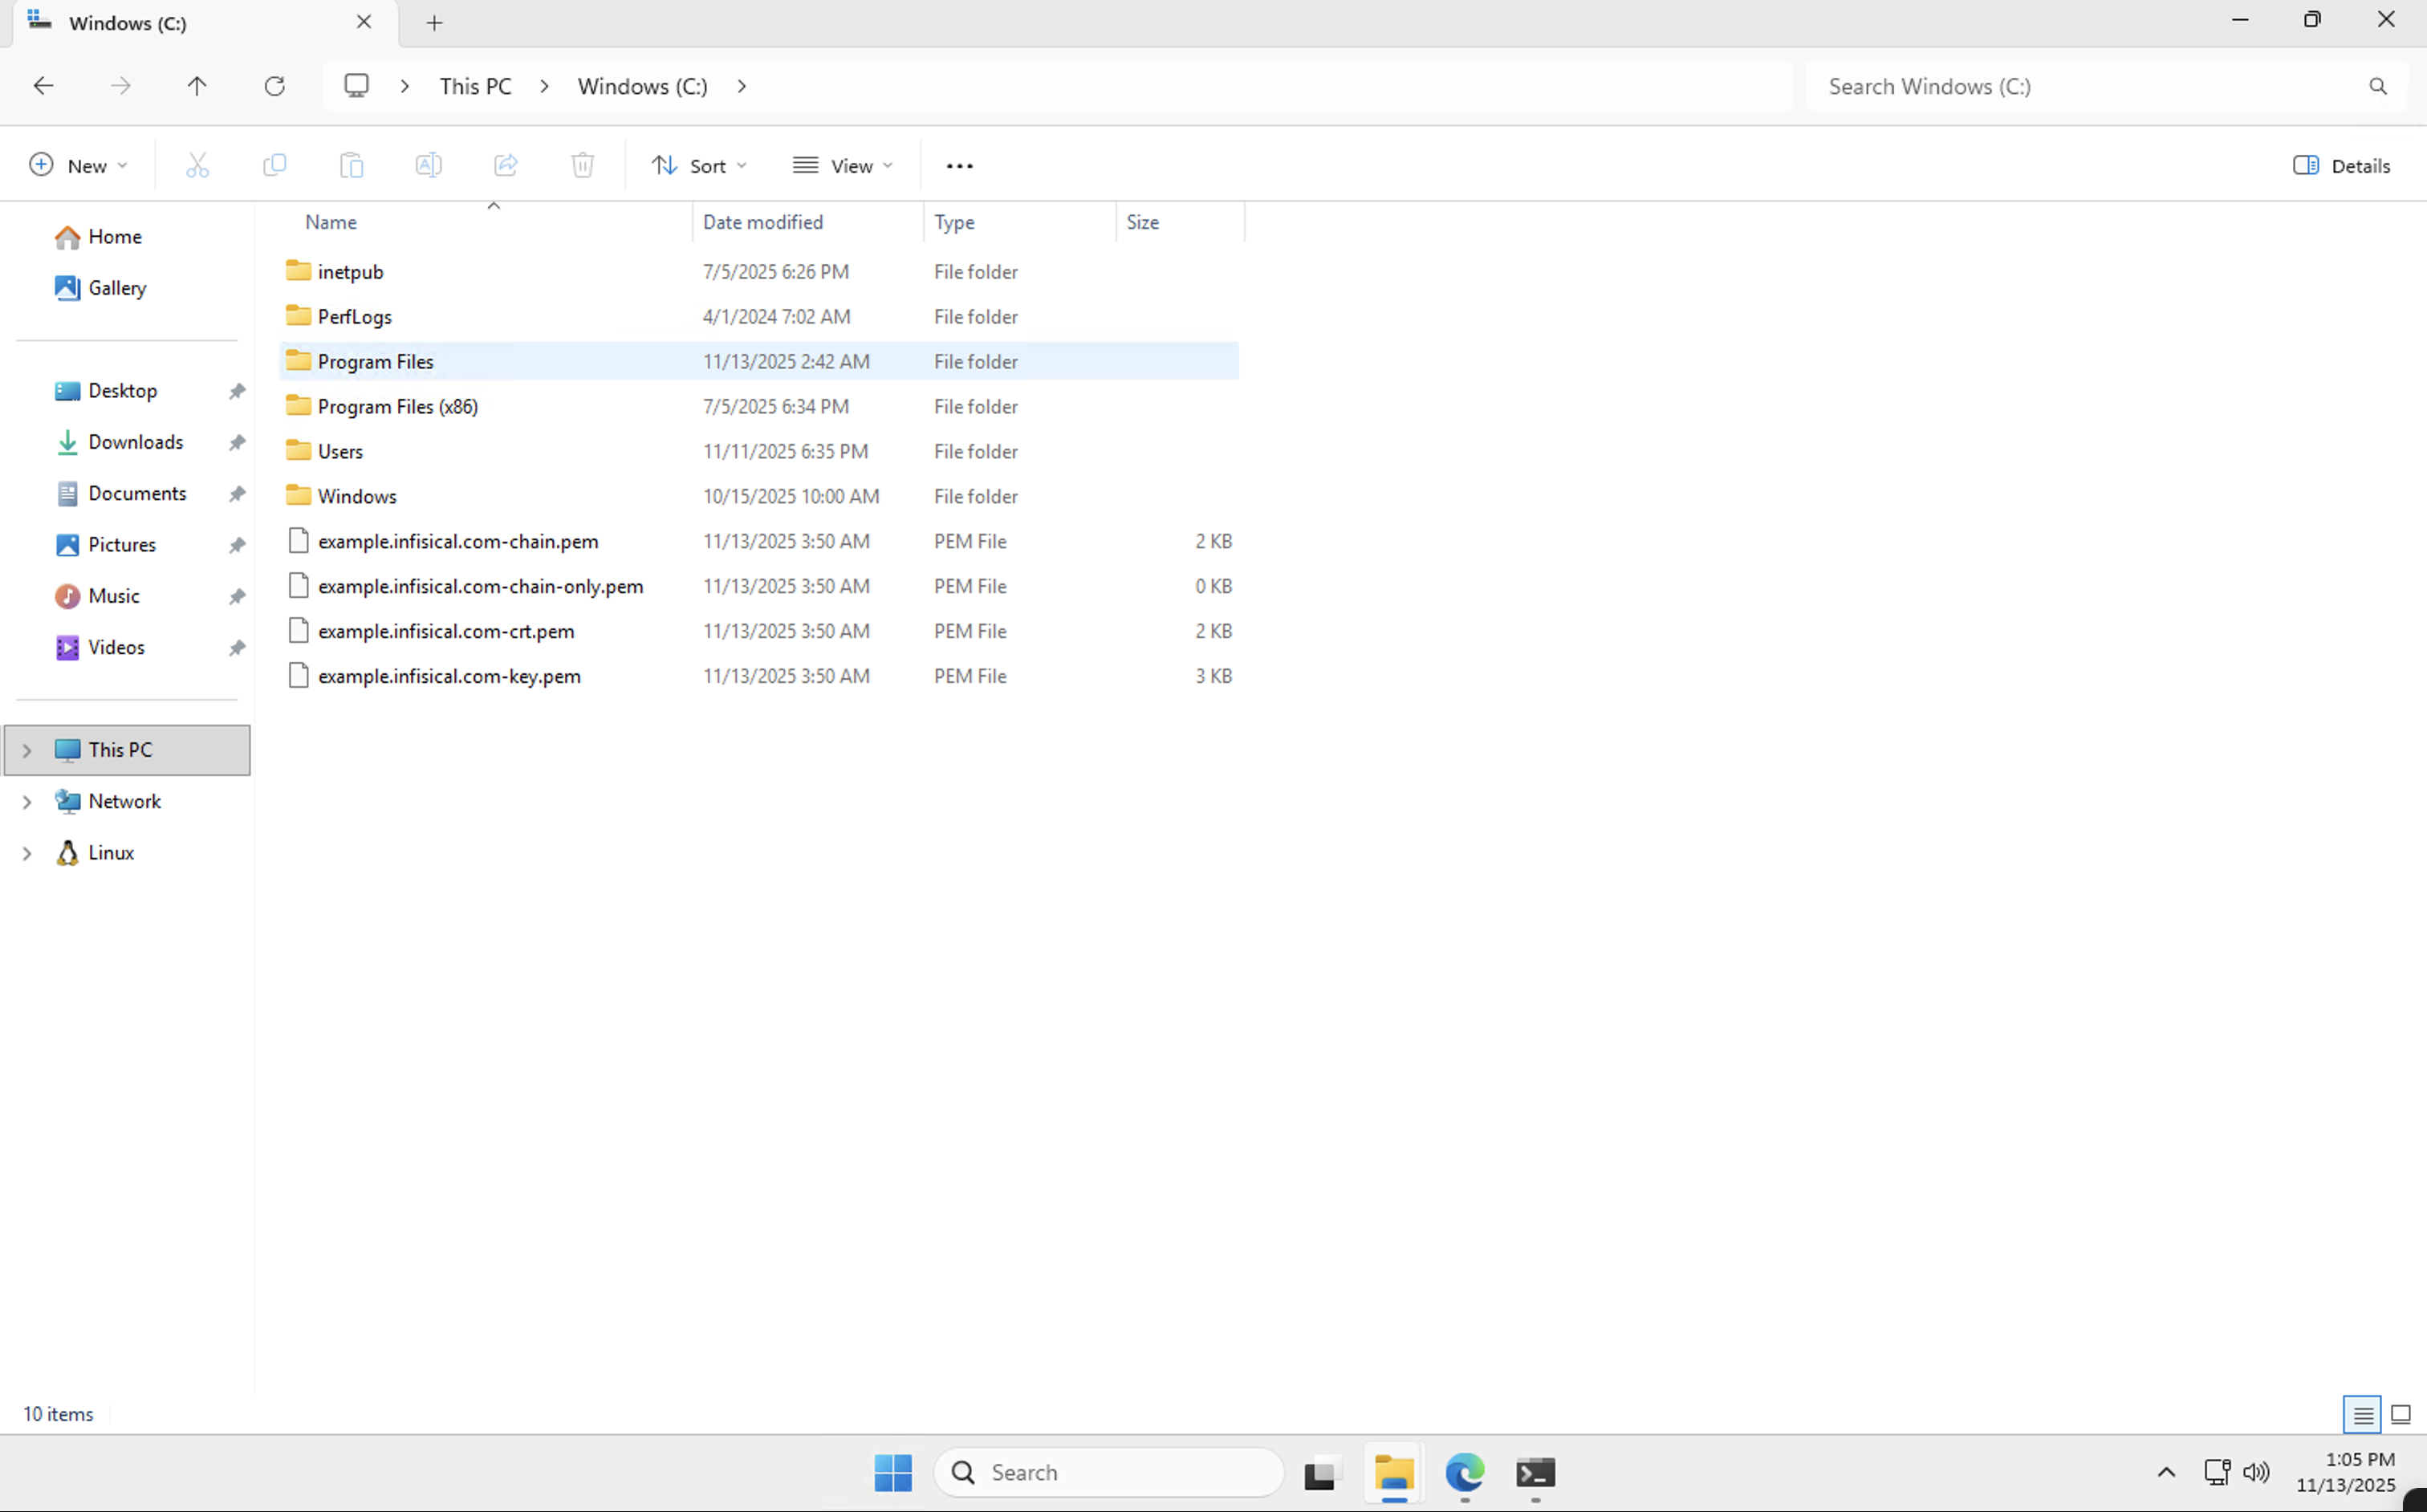
After successful certificate issuance, verify that the certificate files have been created correctly based on your chosen storage method.
Check your specified PEM files directory to ensure all certificate components are present:
```powershell theme={"dark"}
Get-ChildItem "C:\certificates" -Filter "*.pem"
```
You should see files like:
* `example.infisical.com-crt.pem` (certificate)
* `example.infisical.com-key.pem` (private key)
* `example.infisical.com-chain.pem` (complete certificate chain)
* `example.infisical.com-chain-only.pem` (only certificate chain)
 If you used the certificate store option, check that the certificate was properly installed using PowerShell:
```powershell theme={"dark"}
Get-ChildItem -Path Cert:\LocalMachine\My | Where-Object {$_.Subject -like "*example.infisical.com*"}
```
The certificate should appear in the [Local Computer Personal certificate store](https://docs.microsoft.com/en-us/dotnet/framework/wcf/feature-details/working-with-certificates#certificate-stores), making it available for use with IIS, other Windows services, and applications that integrate with the Windows Certificate Store.
## What's Next?
Set up ACME for Linux web servers.
Push certificates to cloud destinations.
Get notified when certificates are about to expire.
Learn more about ACME enrollment configuration.
If you used the certificate store option, check that the certificate was properly installed using PowerShell:
```powershell theme={"dark"}
Get-ChildItem -Path Cert:\LocalMachine\My | Where-Object {$_.Subject -like "*example.infisical.com*"}
```
The certificate should appear in the [Local Computer Personal certificate store](https://docs.microsoft.com/en-us/dotnet/framework/wcf/feature-details/working-with-certificates#certificate-stores), making it available for use with IIS, other Windows services, and applications that integrate with the Windows Certificate Store.
## What's Next?
Set up ACME for Linux web servers.
Push certificates to cloud destinations.
Get notified when certificates are about to expire.
Learn more about ACME enrollment configuration.