> ## Documentation Index
> Fetch the complete documentation index at: https://infisical.com/docs/llms.txt
> Use this file to discover all available pages before exploring further.
# Standalone proxy quickstart
> Run an Agent Proxy on a host of its own and launch agents behind it.
A standalone proxy runs as a long-lived process on a machine of its own, and your agents run elsewhere. Each agent is launched so that its outbound requests route through the proxy, which applies the real credentials on the way out and leaves everything else untouched. This is the setup for agents that run unattended, and for one proxy shared across a team.
The agent is on a different host from the proxy, so it has no access at all to the process holding the real credentials. The two authenticate as **two separate machine identities with opposite access**: the proxy can read your secrets, the agent never can. That split is the security model, and it is why this page creates two identities rather than one.
```text theme={"dark"}
agent host proxy host
+--------------+ +--------------+ +----------------+
| your agent |--->| proxy |-------->| api.github.com |
+--------------+ +--------------+ +----------------+
```
By the end of this page an agent on one host makes authenticated GitHub calls through a proxy on another, with a token it never sees.
## Before you begin
* [Set up credentials](/docs/documentation/platform/agent-proxy/quickstart/credentials) finished, so you have a `GITHUB_PAT` secret and a `github` proxied service in `/coding-agent`.
* **Two hosts in the same private network**, one for the proxy and one for the agent, with the agent host able to reach the proxy on port `17322`.
* The [Infisical CLI](/docs/cli/overview) installed on both hosts.
* Optional: [GitHub's `gh` CLI](https://cli.github.com/), used for the check at the end. A `curl` fallback is provided, so this is not required.
## 1. Create the proxy identity
**This identity reads the secrets.** In your project, go to **Access Control → Machine Identities** and click **Add Machine Identity to Project → Create New**. Name it `agent-proxy`, leave the **Role** as **No Access**, select the **Agent Proxy Policies** template under **Additional Privileges**, and create it.
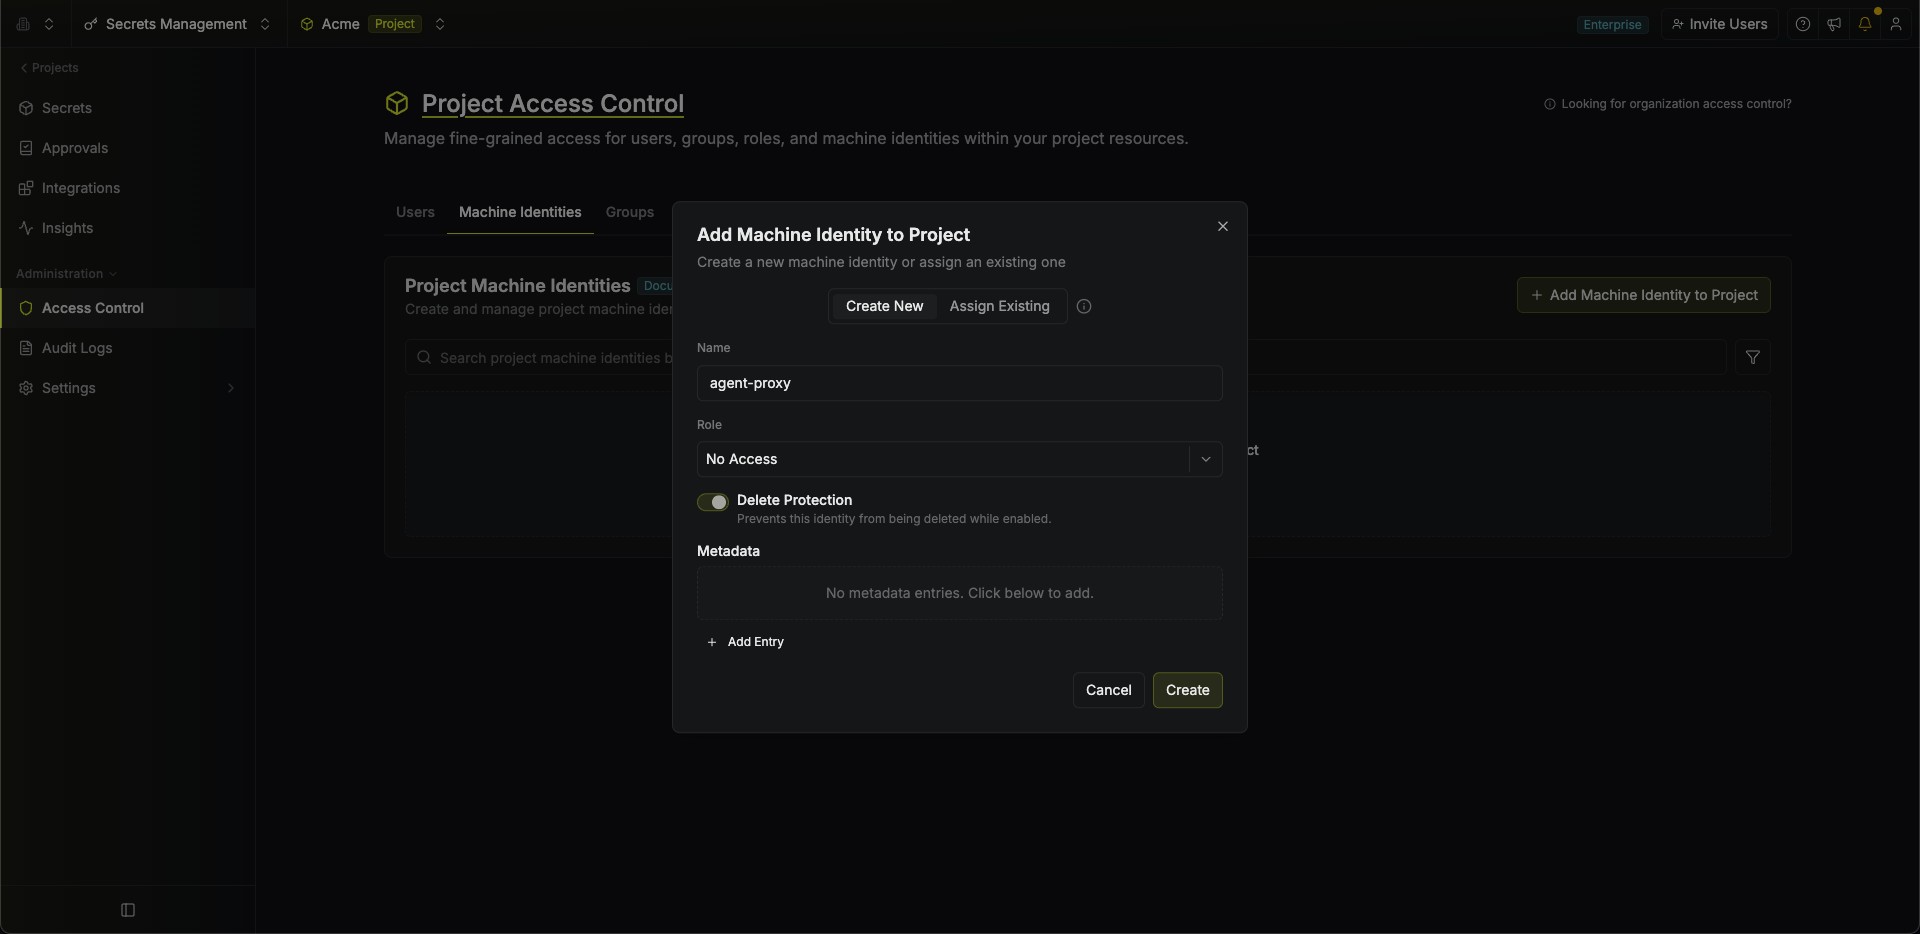 The template grants exactly what a proxy needs: read access to secret values, leases for dynamic secrets, and usage reporting. That is the identity's entire access, which is why its **Role** stays **No Access**. For production, scope the same permissions to specific environments and paths: see [Permissions](/docs/documentation/platform/agent-proxy/standalone-agent-proxy#permissions).
Now open the identity and go to its [Universal Auth](/docs/documentation/platform/identities/universal-auth) authentication method.
The template grants exactly what a proxy needs: read access to secret values, leases for dynamic secrets, and usage reporting. That is the identity's entire access, which is why its **Role** stays **No Access**. For production, scope the same permissions to specific environments and paths: see [Permissions](/docs/documentation/platform/agent-proxy/standalone-agent-proxy#permissions).
Now open the identity and go to its [Universal Auth](/docs/documentation/platform/identities/universal-auth) authentication method.
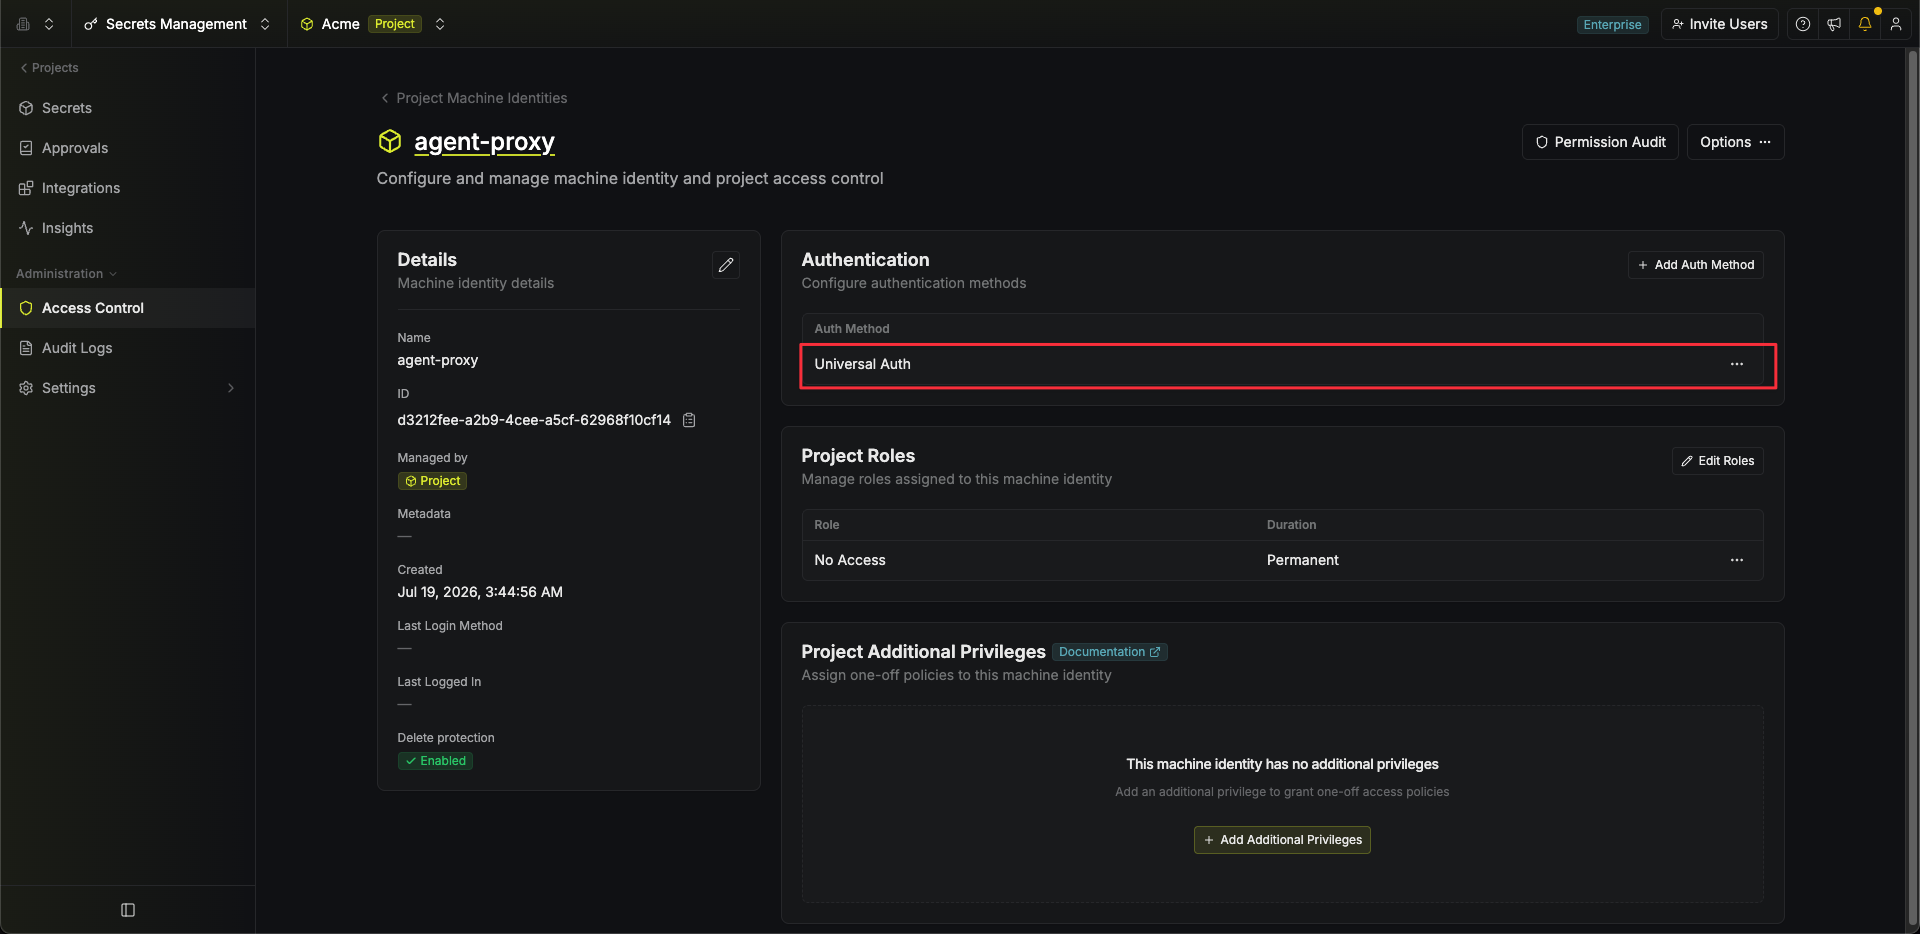 Click **Add Client Secret**.
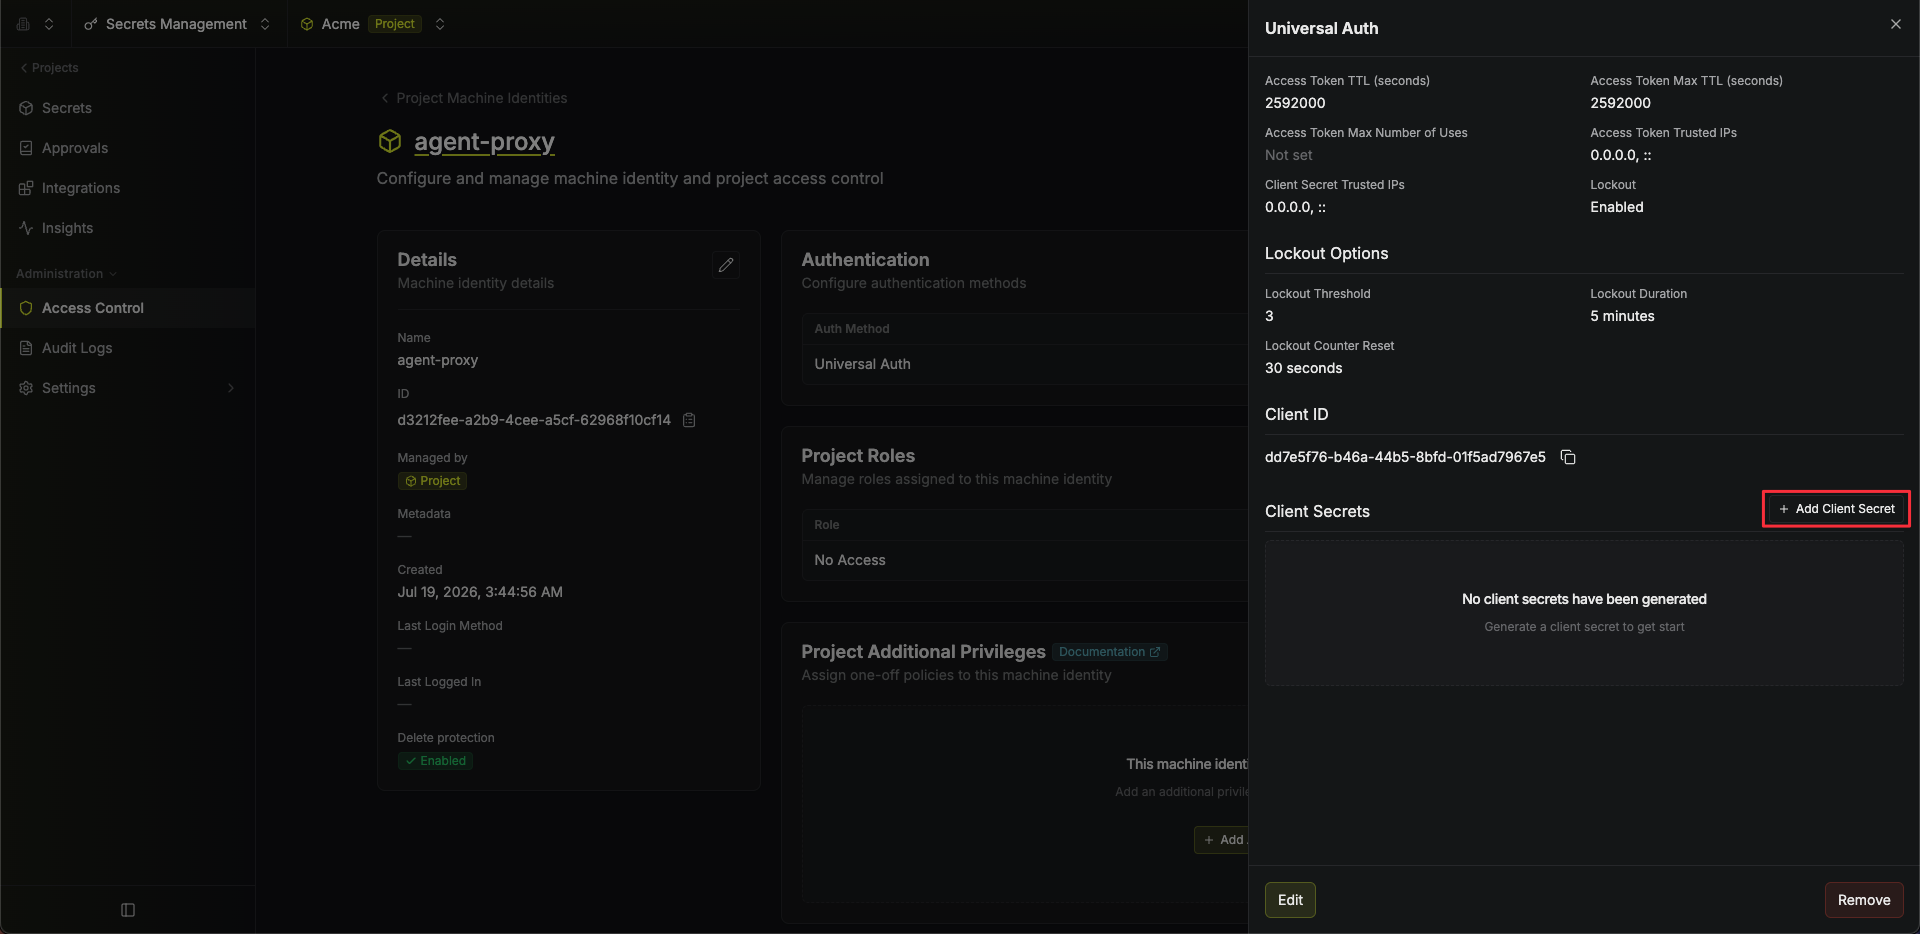 Save the **Client ID** and the **Client Secret**. You will pass both to the proxy in a moment.
## 2. Create the agent identity
**This identity routes traffic but reads no secrets.** Create a second identity the same way, named `agent`, again with **Role** as **No Access**, this time selecting the **Agent Policies** template.
Save the **Client ID** and the **Client Secret**. You will pass both to the proxy in a moment.
## 2. Create the agent identity
**This identity routes traffic but reads no secrets.** Create a second identity the same way, named `agent`, again with **Role** as **No Access**, this time selecting the **Agent Policies** template.
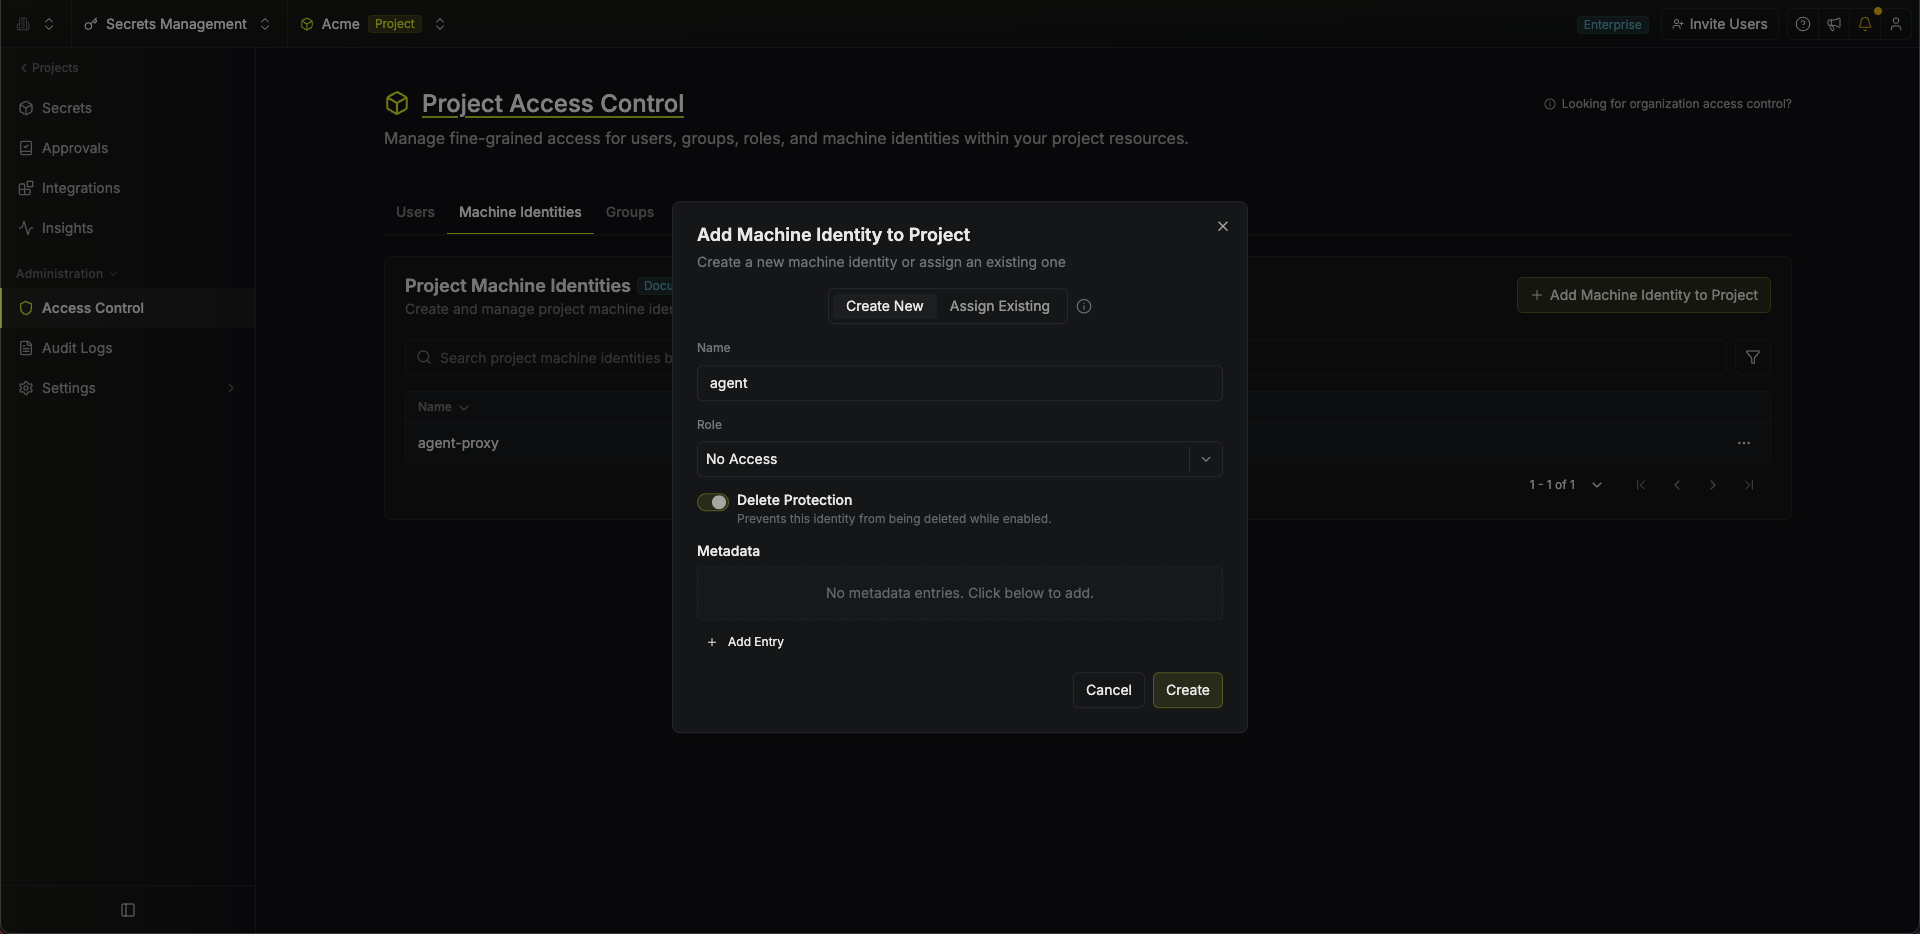 This template grants one permission, `Proxy` on proxied services: route traffic and have credentials applied, with no ability to read a secret.
Add a **Client Secret** under Universal Auth exactly as before, and save this identity's **Client ID** and **Client Secret** too. You now have four values, two per identity.
Keep the two pairs apart: the proxy's credentials belong only on the proxy host, the agent's only on the agent host. Putting the proxy's on an agent machine would let that machine read your secrets directly, which is what this setup exists to prevent.
## 3. Start the proxy on its own host
On the proxy machine, authenticate as the proxy identity from step 1 and start it. It listens on port `17322`:
```bash theme={"dark"}
export INFISICAL_UNIVERSAL_AUTH_CLIENT_ID=
export INFISICAL_UNIVERSAL_AUTH_CLIENT_SECRET=
# export INFISICAL_DOMAIN=https://eu.infisical.com # EU Cloud, or your self-hosted URL
infisical secrets agent-proxy start
```
Leave it running and note this host's address; the next step points the agent at it.
Fine for trying it out, but this dies with your terminal. [Deployment](/docs/documentation/platform/agent-proxy/standalone-agent-proxy#deployment) covers systemd, Docker, and PaaS.
## 4. Launch your agent on its host
On the agent machine, authenticate as the agent identity from step 2, point it at the proxy, and scope it to the folder holding your secret and proxied service:
```bash theme={"dark"}
export INFISICAL_UNIVERSAL_AUTH_CLIENT_ID=
export INFISICAL_UNIVERSAL_AUTH_CLIENT_SECRET=
# export INFISICAL_DOMAIN=https://eu.infisical.com # EU Cloud, or your self-hosted URL
export INFISICAL_PROJECT_ID=
export INFISICAL_ENVIRONMENT=dev
export INFISICAL_SECRET_PATH=/coding-agent
export INFISICAL_AGENT_PROXY_ADDRESS=:17322
infisical secrets agent-proxy connect -- claude
```
Everything after `--` is the agent's own command. It starts as if you had launched it directly, finds `GITHUB_TOKEN` set to the fake `ghp_…` placeholder, and uses it like a normal token; the proxy swaps in the real value on calls to `api.github.com`.
## 5. Verify it works
Each check below makes the same `GET /user` call to `api.github.com`, and the client only ever sends the fake `ghp_…` placeholder. As the request passes through the proxy, on its own host, the placeholder is swapped for the real value of your `GITHUB_PAT`, so GitHub returns your account profile even though the real token never reached the client. That is the whole point: real authenticated work without the caller ever holding the credential.
The agent you just launched is already brokering. In its session, send:
> Run `gh api user` and show me the output.
[GitHub's `gh` CLI](https://cli.github.com/) reads `GITHUB_TOKEN` from the environment on its own, so the agent needs no token wiring: it runs the command and GitHub answers with your profile. Requires `gh` on the agent host.
Not driving an interactive agent? Run the check directly, in the shell where you set the variables above:
```bash theme={"dark"}
infisical secrets agent-proxy connect -- gh api user
```
The proxy logs the request as `brokered`.
No `gh`? Any HTTP client works the same way:
```bash theme={"dark"}
infisical secrets agent-proxy connect -- \
sh -c 'curl -sS https://api.github.com/user -H "Authorization: Bearer $GITHUB_TOKEN"'
```
Getting a `401`? The credential was not applied and the placeholder went out unchanged. Confirm the agent identity has `Proxy` on the service and the proxy identity has `Read Value` on `GITHUB_PAT`. A `407` or `403` from the proxy itself means the agent's token was missing, invalid, or revoked.
For more depth, the [Standalone Agent Proxy](/docs/documentation/platform/agent-proxy/standalone-agent-proxy) reference covers deployment, network placement, high availability, and how each agent is authorized on every request.
For agents that live as long as your terminal session, follow the [Local Proxy](/docs/documentation/platform/agent-proxy/quickstart/local-proxy) quickstart instead.
This template grants one permission, `Proxy` on proxied services: route traffic and have credentials applied, with no ability to read a secret.
Add a **Client Secret** under Universal Auth exactly as before, and save this identity's **Client ID** and **Client Secret** too. You now have four values, two per identity.
Keep the two pairs apart: the proxy's credentials belong only on the proxy host, the agent's only on the agent host. Putting the proxy's on an agent machine would let that machine read your secrets directly, which is what this setup exists to prevent.
## 3. Start the proxy on its own host
On the proxy machine, authenticate as the proxy identity from step 1 and start it. It listens on port `17322`:
```bash theme={"dark"}
export INFISICAL_UNIVERSAL_AUTH_CLIENT_ID=
export INFISICAL_UNIVERSAL_AUTH_CLIENT_SECRET=
# export INFISICAL_DOMAIN=https://eu.infisical.com # EU Cloud, or your self-hosted URL
infisical secrets agent-proxy start
```
Leave it running and note this host's address; the next step points the agent at it.
Fine for trying it out, but this dies with your terminal. [Deployment](/docs/documentation/platform/agent-proxy/standalone-agent-proxy#deployment) covers systemd, Docker, and PaaS.
## 4. Launch your agent on its host
On the agent machine, authenticate as the agent identity from step 2, point it at the proxy, and scope it to the folder holding your secret and proxied service:
```bash theme={"dark"}
export INFISICAL_UNIVERSAL_AUTH_CLIENT_ID=
export INFISICAL_UNIVERSAL_AUTH_CLIENT_SECRET=
# export INFISICAL_DOMAIN=https://eu.infisical.com # EU Cloud, or your self-hosted URL
export INFISICAL_PROJECT_ID=
export INFISICAL_ENVIRONMENT=dev
export INFISICAL_SECRET_PATH=/coding-agent
export INFISICAL_AGENT_PROXY_ADDRESS=:17322
infisical secrets agent-proxy connect -- claude
```
Everything after `--` is the agent's own command. It starts as if you had launched it directly, finds `GITHUB_TOKEN` set to the fake `ghp_…` placeholder, and uses it like a normal token; the proxy swaps in the real value on calls to `api.github.com`.
## 5. Verify it works
Each check below makes the same `GET /user` call to `api.github.com`, and the client only ever sends the fake `ghp_…` placeholder. As the request passes through the proxy, on its own host, the placeholder is swapped for the real value of your `GITHUB_PAT`, so GitHub returns your account profile even though the real token never reached the client. That is the whole point: real authenticated work without the caller ever holding the credential.
The agent you just launched is already brokering. In its session, send:
> Run `gh api user` and show me the output.
[GitHub's `gh` CLI](https://cli.github.com/) reads `GITHUB_TOKEN` from the environment on its own, so the agent needs no token wiring: it runs the command and GitHub answers with your profile. Requires `gh` on the agent host.
Not driving an interactive agent? Run the check directly, in the shell where you set the variables above:
```bash theme={"dark"}
infisical secrets agent-proxy connect -- gh api user
```
The proxy logs the request as `brokered`.
No `gh`? Any HTTP client works the same way:
```bash theme={"dark"}
infisical secrets agent-proxy connect -- \
sh -c 'curl -sS https://api.github.com/user -H "Authorization: Bearer $GITHUB_TOKEN"'
```
Getting a `401`? The credential was not applied and the placeholder went out unchanged. Confirm the agent identity has `Proxy` on the service and the proxy identity has `Read Value` on `GITHUB_PAT`. A `407` or `403` from the proxy itself means the agent's token was missing, invalid, or revoked.
For more depth, the [Standalone Agent Proxy](/docs/documentation/platform/agent-proxy/standalone-agent-proxy) reference covers deployment, network placement, high availability, and how each agent is authorized on every request.
For agents that live as long as your terminal session, follow the [Local Proxy](/docs/documentation/platform/agent-proxy/quickstart/local-proxy) quickstart instead.